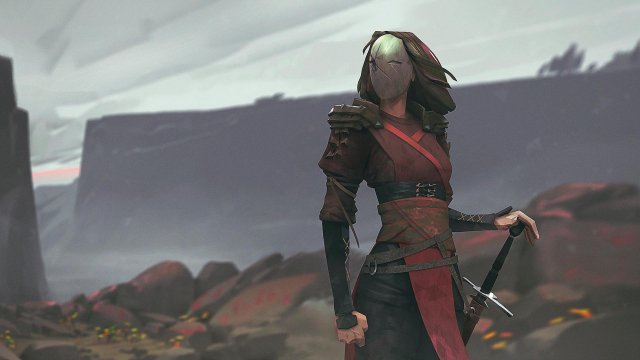
The basics of Absolver from leveling, locations, fighting tips, classes and loot. This Guide may contain some spoilers, but Absolver is not story-based and there aren’t major plot twists or anything like that so I think this guide is pretty standard stuff.
Other Absolver Guides:
- Where to Find Jinn Mesca?
- Join School Failed?
- Pyramid Locations.
What Fighting Style Should I Pick?
All credit goes to Gonzalos!
The easiest way to choose what fighting style you should pick is to imagine it’s you: what kind of fighter you would be. Do you prefer parrying, taking the hits or avoiding them altogether? Of course, once you’ve gained enough experience and joined schools you can essentially learn every style, but for the majority of the game you will be stuck with the style you chose at the beginning. So it’s an important decision.
Forsaken
Forsaken is all about parrying attacks and having hard counters for your opponent. Forsaken is good against those bots who love to spam you with kicks. It may take some time getting used to as you have to have precised timing to have a sucessful parry. From what I’ve seen, bots who parry are not that difficult, as after they parry they will go for a hard strike (like the jumping elbow strike) which is easily avoidable. Although I’m unsure of what players would do – and I doubt it would be like this.
Kahlt
Personally, my least favourite class. Kahlt has a boxing-ish feel as you absorb the hits and hit back faster and harder. This style is good for countering hard hitters, but not so good for fast attacks (which a lot of npcs will have). Timing isn’t of much an issue as the other styles as the game is more forgiving with the absorbs. Absorbing is also good for regaining lost stamina, but don’t attempt to spam it as you will go down quickly. Patience is key for Kahlt.
Windfall
My main class, Windfall is about avoiding your opponent’s attacks. At first, I struggled with this style as dodging attacks with a mouse is way more difficult than it is with a controller (I recommend the controller). Once you’ve got the know-how of how to dodge, you then have to master timing, and with Windfall, you will have to memorise a lot of moves and their timing; how slow or fast an attack will hit you and what direction you need to move to sucessfully dodge their attack. Don’t attempt to spam the dodge feature either as you will be easily defeated.
Stagger
I will not say much on stagger, or how to unlock it (as it’s part of the challenge); however, stagger is fast and difficult to predict. Npcs with Stagger will give you a tough time if you’re unaware of the form.
How to Fight in Absolver
Your first instinct may be to spam your opponent until you’re out of stamina so you can run away, come back and repeat the process. This may work at first, but coming onto later enemies and bosses, as well as multiple opponents, this will not work. First, you must realise the strength and weaknesses of your class as well as the timing of your attacks. I recommend you spend your first hour or two in the first area of the game (Central Harbour for me), and fight as many npcs as you can so you can learn new abilities, as well as mastering your own. Learning new fighting moves is essential to building a fluent combat deck.
Tips on how to Build a Combat Deck
Variety, power and flow. These are the key components of building a combat deck that works for you. Here are some tips on how to make a combat deck:
- Go through the moves you have unlocked and look at the essentials: Timing of the attack, the damage of the attack and what position you finish in.
- Don’t make a predictable deck; decks that have the same moves (for example, punch, jab hook) although useful for the first time, are easily identifiable when used in succession. Mix it up with your deck.
- Variety. Like the last point, mix it up attack from multiple different angles. Right, Left, Above, Below. Don’t go for three right strikes, as your opponent will recognise it and move out of the way in no time.
- Kicks and punches won’t always work together; having a low kick into a high kick into a regular kick is far too slow and won’t catch your opponent by surprise. Start with a fast strike first to make your combo all the more unpredictable.
- Have your deck flow through itself to have the maximum amount of damage output. Don’t just stick with the same combo, repeating itself over and over. Have your deck flow from one combo to another, until it does a full circle – enough to make your opponent confused on what attack you’re going to do next.
Making use of Abilities
There are a few different abilities in Absolver, but my personal favourites are the two easiest to get: Shockwave and Healing. Shockwave is my favourite as it has a wide variety of uses: gaining distance, stopping combos, moving opponents, stopping yourself from being surrounded and pushing enemies off of cliffs, bridges etc.
Ensure you use your abilities wisely in a fight as running out of shards can you leave you vulnerable to big combos with no ‘out’. Stopping an enemy from releasing a big combo can be the difference between winning or losing. Have timing on your combos as well, as healing just as your opponent is about to strike is a big mistake. Combo Abilities together (push them away with Shockwave, and Heal straight after so you won’t get hit immediately). There are many more abilities you can work into your fighting style, just make sure you know when to use them and what they do.
Weapons
Weapons (especially swords) are unpredictable, can be hard to counter and do a lot of damage if used correctly. Like before, making a combat deck for your weapons is complicated as you are going to want a good flow with enough damage to take down your opponent. Swords have more reach and War Gloves are more closed quarters. Be careful as weapons can break and be dropped, allowing your opponent to use them against you. Some npcs wil spawn with weapons / spawn weapons in the middle of a fight so it’s helpful to learn from these enemies before facing other players.
Armour and Weight
Armour and Weight are big factors that greatly affect your ability to fight and your speed. The amount of armour and weight you have varies on your class: Heavier armour is good for Kahlt; Medium / Occasionaly Heavy for Forsaken; and Medium / Light for Windfall. The amount of armour you wear will dictate how many hits you can take before going down; you may assume that having a load of amour on so that you’re invincible is a good thing, but it’s not (not all of the time). Your speed will be greatly reduced from this, making slow attacks even slower and fast attacks medium speed – as well as your movement speed taking a big hit. Although this improves your survivability, it won’t do much for your offensive capabilities.
Selecting the correct armour for your class and playstyle is very important. Make sure you have a decent balance between your defensive and offensive capabilities. Being a tank will be good in 1v1s, but terrible against multiple opponents. There is also no point in having a lot of armour on when your opponent can see your attacks coming from a distance, and are able to avoid it with ease. The armour with the best blunt and cut defense, although seem appealing, tend to be the heavest types of armour. So find your balance.
The Environment
When going into a fight, it is also important to be aware of the Environment you’re in. Specifically in two areas of the map, there will be a lot of places to fall off and die instantly. This can be a great frustration and use to you. The use of abilities will help you exploit the environment to your advantage. Being able to push your enemies off of a bridge will earn you easy experience points. This can also help when you’re in a tight spot as a full-health enemy can be taken care of with a swift manoeuvre. Just make sure that if you fight an enemy off a bridge, that you don’t follow them. (I have done this too many times).
Enemies (NPCs)
NPCS are the easiest way to gain xp, knowledge and moves before going out and fighting other players. There isn’t a great variety of actual NPCS, but they have unique fighting patterns that may catch you off-guard. From what I’ve seen there are 4 different types of enemy NPCS: Prospects, Fallen Prospects, Marked Ones and Bosses.
Prospects
Prospects are the standard enemy NPC which you will encounter everywhere. They are the easiest NPC to beat and won’t provide much challenge unless they gang up on you.
Fallen Prospects
Fallen Prospects are difficult to explain as they can range from easy to hard difficulty. Fallen Prospects are usually identified by wearing a black mask – if you see a group of them then I don’t recommend you trying to take them all on. Fighting a single Fallen Prospect can offer little to some challenge, but two or more will be a struggle unless you know what you’re doing. Ocasionally, Fallen Prospects will spawn in clusters (the max I’ve seen is about 5 in once place, next to a Marked One – which was extremely frustrating). I’m unsure of how Fallen Prospects work (I though it was players who had died there, but I’m not exactly certain). As you progress, you will find more Fallen Prospects than any other character. Ironically, some Fallen Prospects have given me a harder time than some of the Marked Ones.
Marked Ones
Marked ones are required to be beating before moving onto the final stage of Absolver. Marked ones offer a variety of challenges, depending on who you face. There are six Marked Ones in total and you may run into the first one by surprise (I know I did) and lose extremely fast. Depending on the spawning of the enemies, Marked Ones may or may not be accompanied by Prospects / Fallen Prospects. The amount of enemies that are accompanying the Marked Ones can make fighting them impossible. After defeating a Marked One, you will gain a new ability that you can chose to use or save for a different playstyle later on.
Bosses
There are 3 bosses in Absolver: Kuretz, Kinlor / Calgar and Risryn and they each range in difficulty. Bosses are different from every other enemy as they have a unique cutscene before their fight.
- Kuretz –
Kuretz is quite an easy boss fight as the gimmick is having a bunch of Prospects fight along side him; however, these are weaker than usual and only take 2-3 hits to kill (these prospects spawn continuously and only stop once you’ve gotten Kuretz to a certain health).
There isn’t anything too interesting about Kuretz and the only difficulty you may have with him is getting to him behind the 3-5 prospects infront of him. Shockwave will do you wonders in this fight. - Kinlor / Calgar –
Kinlor and Calgar is the second boss (in my playthrough) you face and is more difficult than Kuretz. Although there isn’t a great amount of Prospects to fight, there are two of them and they both have a decent health bar and will try to surround you. Your best bet is to keep your distance and try not to get surrounded. Bait them into hitting each other whilst avoiding them both attacking you simultaneously.
Kinlor and Calgar are a tough fight if you’re unprepared, and it’s easy for them to knock you into a corner and spam you until you die. Shockwave and any Debuff abilites are recommened. - Risryn –
Risryn is the ‘final boss’ of Absolver and prepare for a fight. She has the largest health bar (from what I’ve seen) out of all the NPC enemies. She has various styles and will spawn a sword two different times throughout the fight. It can be said that Risryn has ‘stages’, these stages are:
- Stage 1: Standard style;
- Stage 2: Spawns a sword;
- Stage 3: Removes sword and changes style (or at least her combos);
- Stage 4: Spawns a sword again with different combos;
- Stage 5: Despawns sword and again changes combos.
Risryn’s ‘stages’ will change varying on her health and spamming her won’t work as she can parry and dodge (and absorb to my memory but I’m not sure). Shockwave is good to stop some of her more ridiculous combos. Healing is also good in this match as once you’ve gained some distance, heal and then attack to regain as much health as possible (I got from half health to full health by doing this). Don’t attempt to use abilites like earthquake or gravity as they don’t seem as effective. This boss took me about 5 times to beat, so prepare for a tough fight.
After you defeat Risryn, you will become an Absolver and receive the Absolver coat: marking you as an experienced player as well as providing some good defence (and it looks pretty cool).


Be the first to comment