
This guide will teach you everything you need to know about the crafting skills in Skyrim with a special focus on how to level all of them to 100 in the least grindy ways available and then combine their strengths to create game breakingly strong equipment without relying on any exploits or cheats! Expect to find the secret methods to create armor sets that grant you unlimited spell casting and daggers that will kill dragons with just one hit!
Almost anything is possible for the master craftsman in Skyrim!
Contents
Foreword
Most who have played Skyrim a decent amount of time have been there, you start the game, make a character, almost get your head chopped off before you run through the tutorial, go to Rriverwood, loot the blacksmith’s home, go to the trader and get the golden claw quest, run through bleak falls barrow, run to Whiterun to talk to the… ‘Hey isn’t that a smithing station right next to the town gate?’ and before you know it you’re making boatloads of Iron Daggers to level your smithing up to level 100 so you can make that dank Dragonbone Armor and many of us do actually succeed, we get to that fabled level 100 and make that Dragonbone Armor, then we turn off our games satisfied, go to sleep knowing that the next day we can go to Skyrim and finally play the game instead of craft grinding, but then tomorrow never comes, and you think ‘Oh well, at least my character is ready to go now, I’ll just load my save next time I wanna play’ then 4 months later ‘Old save? Hmm… nah I wanna make a new sweet lookin character!’ and the cycle repeats itself once more.
For me it happened so damn many times that at one point I decided ‘SMITHING!’ and I finally talked to that damn Jarl, played some of that game, but I couldn’t keep my eyes off that forge in Whiterun for very long, it continuously taunted me to make something with it.
And so, I decided to see if there wasn’t some way to level that Smithing skill a bit quicker, and this time without any massive grinding. There was also the neglected but exciting Enchanting skill, and finally the Alchemy skill I’ve always been too lazy to use, but I began to wonder if perhaps there was something to alchemy after all.
Going many journeys down that path I finally figured out what I think are the nicest ways to level all 3 skills with the least amount of grinding and most amount of playing the god damn game! and to my most immense surprise, I ended up discovering that for the best results I should end with Smithing, not start with it :O
Now I have my own favorite way to go through all the skills sequentially, but some people might not like them as much as I do therefore for each skill I’ve added at least one alternative method which may be more to your personal tastes.
Outline
The Summary section near the bottom meant as a TL;DR for people who are already experienced players (e.g. have 200 or 300 hours clocked in the game already and have at least once leveled each crafting skill to 100 before) and for people who have already followed the guide once and just want a quick recap. If you’re one of these people, feel free to skip to that part unless you happen to enjoy detailed explanations.
If you are a beginner, don’t skimp on anything. I highly recommend that you first read the Getting Started and Enchanting sections. These hold all the information you need to begin and after reading them you should play the game some before you read the rest, unless you just happen to enjoy reading (then by all means, read it all at once!). The idea is that you open the guide again whenever you have any questions, or when you just want to know what comes next.
I also suggest you glance at the Alchemy section before you start playing, if you don’t particularly like creating potions there’s a method outlined there which allows you to get to level 75 or 90 without creating a single potion through NPC trainers (it’ll cost you, but if you want to do this then you want to do it right from the start since you can only train a skill 5 times per player level)
I also added a starter tips section near the bottom of the guide for convenience (how to get early money and whatnot)
Then there are the Resource sections, lots of useful information for each skill, things like a list over which souls fit into what soul gem, where to find enchantments, useful potion recipes, where to find ore and ingots for smithing, just tons of useful stuff which will probably be good to have on hand even for experienced players. (Sure helps me!)
Always remember when following this guide that you play the game the way you want, doing the quest lines you want, going the places you want. The guide just has guidelines to help you level all your crafting skills along the way, you should always be focused on the gameplay, quests, sights and butterflies while you play for maximum enjoyment! Don’t get too caught up in the need to get your crafting skills to 100 too much because it may drain the fun out of the game for you to do so. (This is especially important while you are leveling Enchanting first) So basically, even if the guide expects you to start leveling smithing at smithing level 15, there’s nothing wrong with it if you’ve smithed a little and are actually already at level 50 smithing when you get that far in the guide, no harm and no foul, you’ll just have to know that the number of materials you need to craft may be a bit lower now that you’re already halfway there.
The Rewards
Before we start, let me tell you why you would want this no matter what your gameplay style is.
Here are some of the item sets that I have created after mastering the 3 crafting skills no exploits or mods were needed for this, this is all done via basic game mechanics! (Armor ratings are not always the highest they could be, in other words this is just a taste):
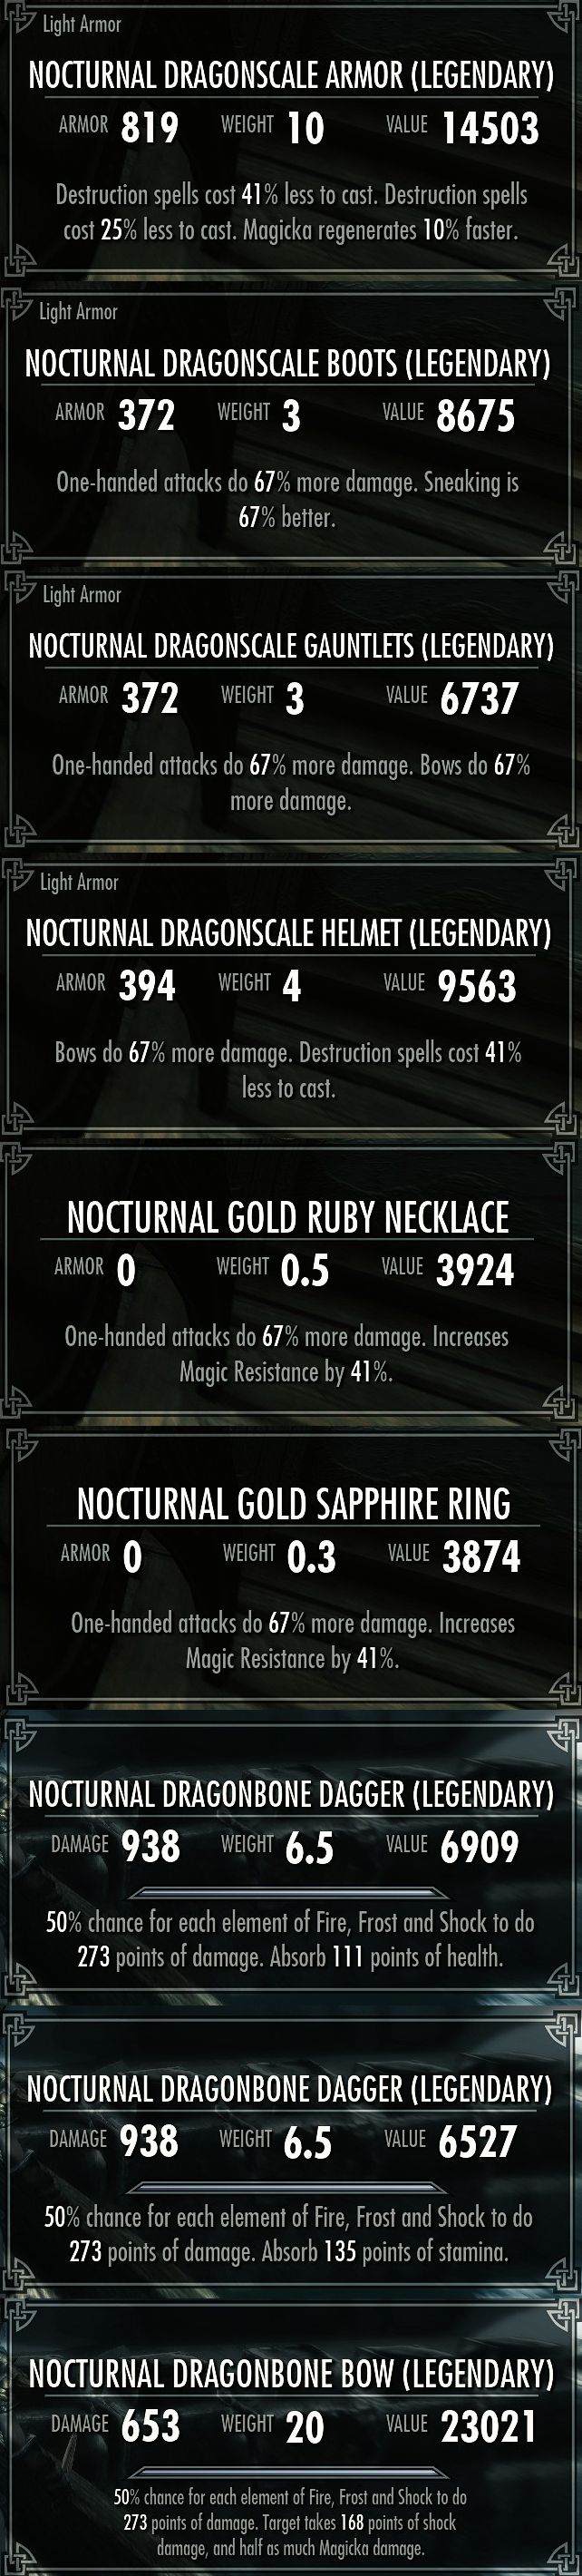
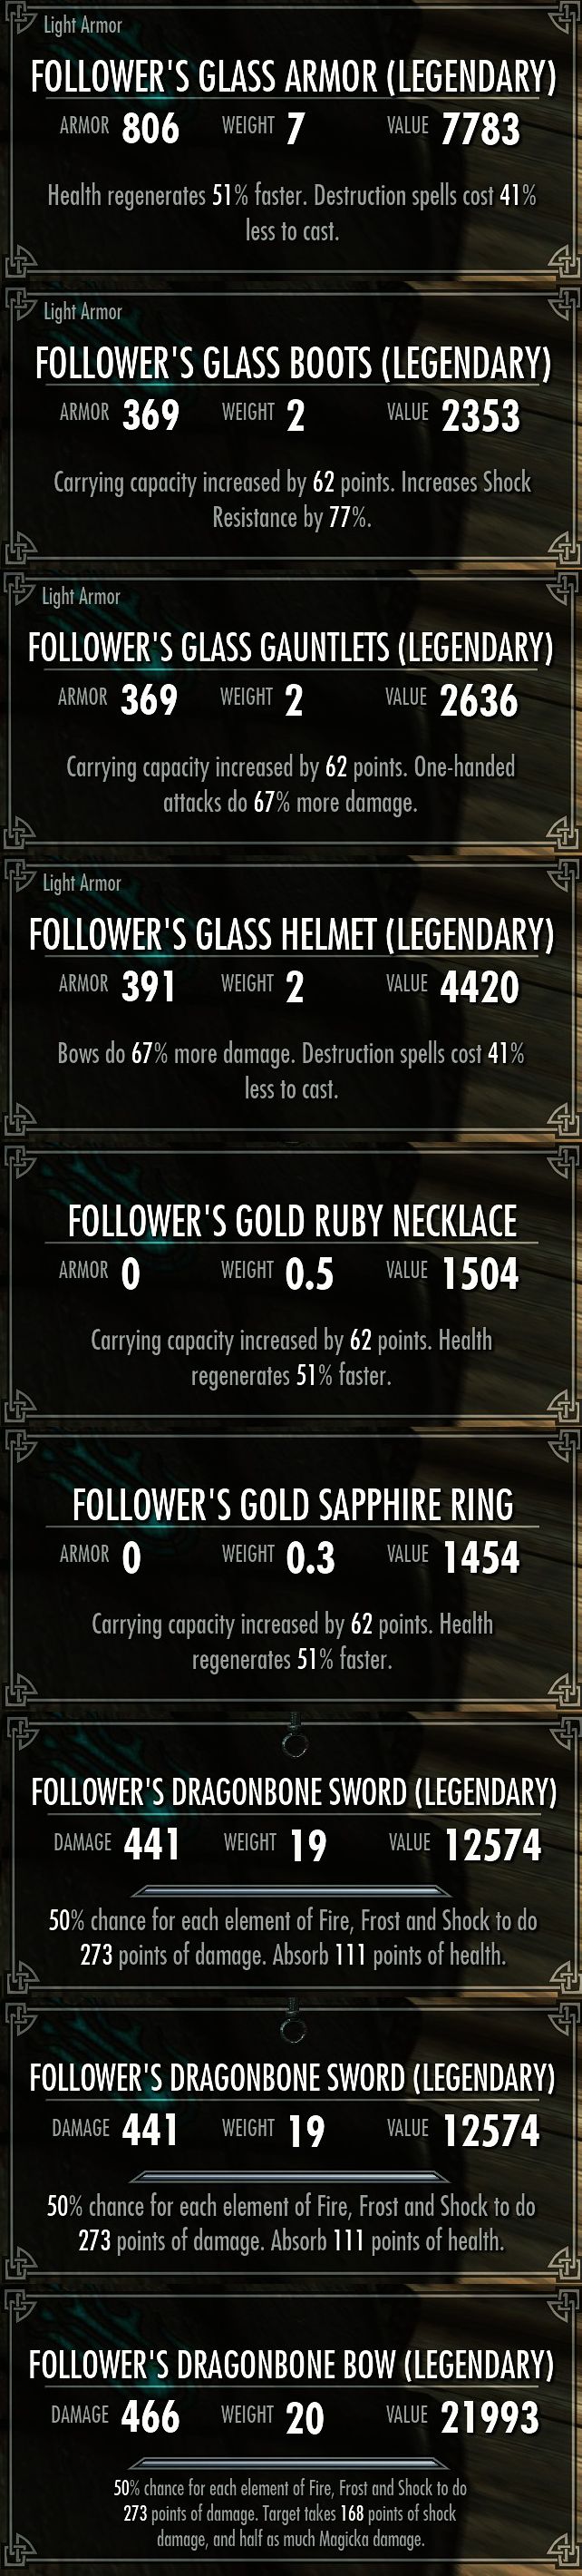
The Nocturnal set is the one I’m currently using, grants unlimited destruction magic (and thus weapon charges as well) and dual wielding daggers offers the fastest attack speeds in the game, couple that with the damage of these daggers, not many things can survive more than one hit. The Follower set is an ideal set for a follower, carry weight and health regen are nice to have on followers.


The Enchanter set is set up to have unlimited destruction and conjuration casting for unlimited weapon charges, the Assassin gear is aimed at stealth play where you’re basically undetectable while sneaking, and then it has a dagger for that 15x Sneak Attack damage perk and a War Axe in case things get hairy, the bow can be used for long distance assassinations as well.
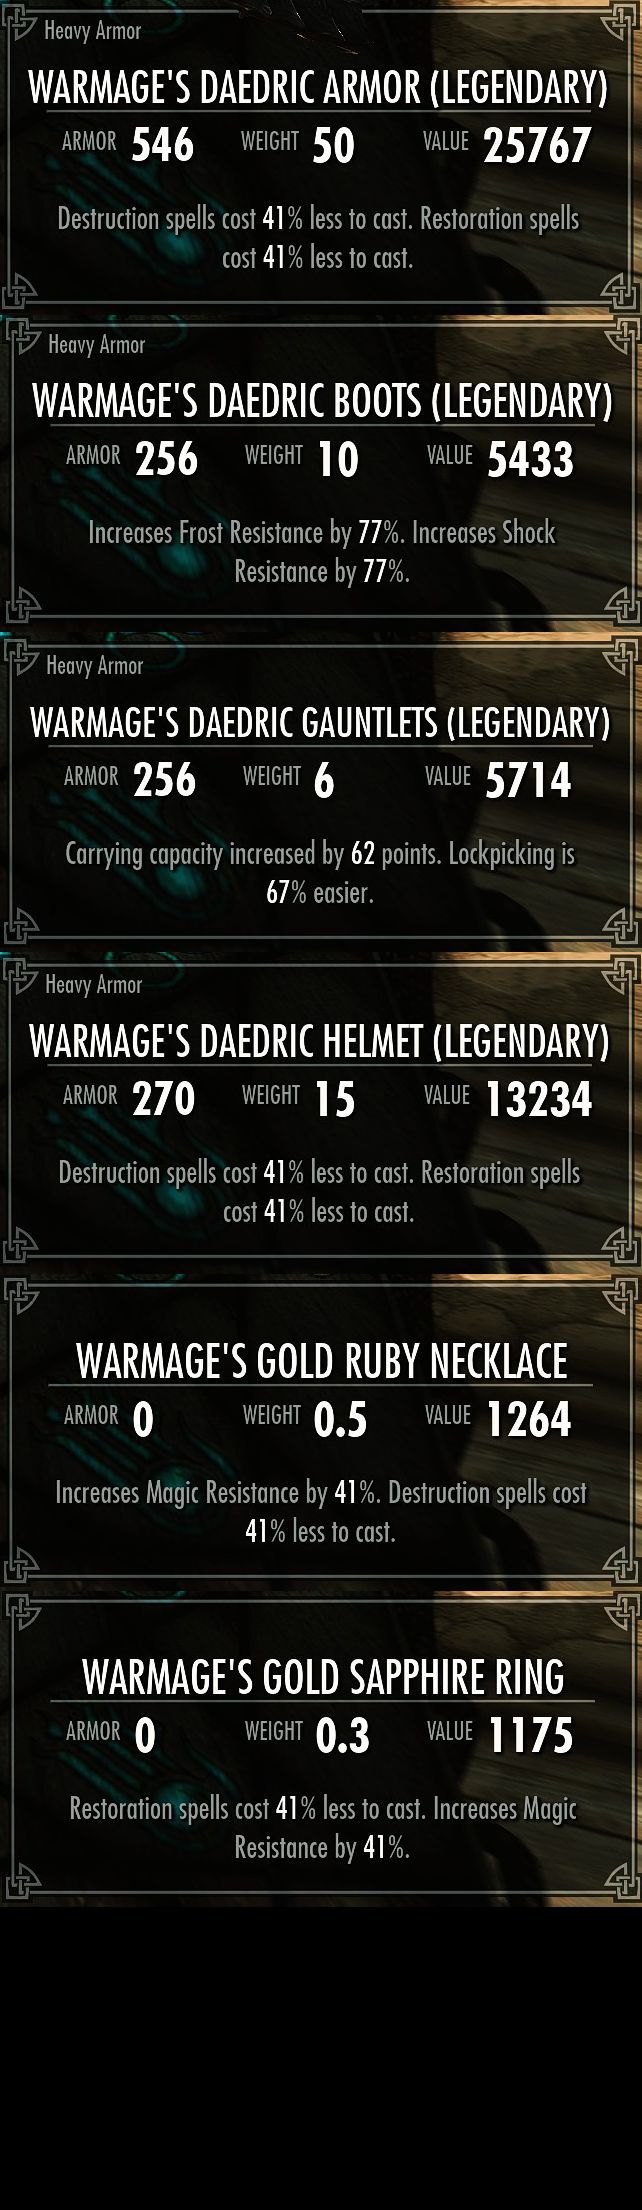

The Warmage set provides unlimited destruction and restoration spell casting and high levels of spell damage protection. You can cast all your high level destruction spells without restraint and if you ever get hurt, even just a little, heals are free to cast too. Meanwhile with the Guardian set I was playing with the idea of trying to create an armor set as protective as I possibly could. Looks great for vampire extermination because of it’s 85% disease resist (resistance cap).
As the above examples show, after following this guide you will be so brutally overpowered that even on Legendary difficulty it will feel like you’re playing on Novice. The only reason you can actually thinkably die is because the game has a protection cap on armor and magic resistance (explained in the enchanter’s resource and blacksmith’s resource sections) and because 3x damage from enemies is quite serious business, especially when you only do 1/4 of your maximum damage.
Now then, lets get down to business!
Getting Started
The way I like to start the game is to follow the main quest to Riverwood, take the quest from the general goods merchant, finish that, then keep following the main quest to Whiterun.
First you’re gonna want to talk to Farengar in Whiterun so that you can buy from him the Soul Trap spell. Also continue the main quest up until the point where you kill your first dragon to get access to the player home in Whiterun.
Then you’re gonna want to set up a base of operations, I recommend buying Breezehome in Whiterun, if you can’t afford it just yet just play the game normally until you’ve got enough dough.
Base of Operations
While any player home will do for our purposes, I’m gonna list my 3 favorite options.
What you need a base of operations for is mostly for storing crafting items that you’re saving up for later use as well as any other items you need to unload and don’t want to sell.
I also highly recommend getting a follower to use as a pack mule on your travels. Lydia is as good a choice as any.
1. Breezehome
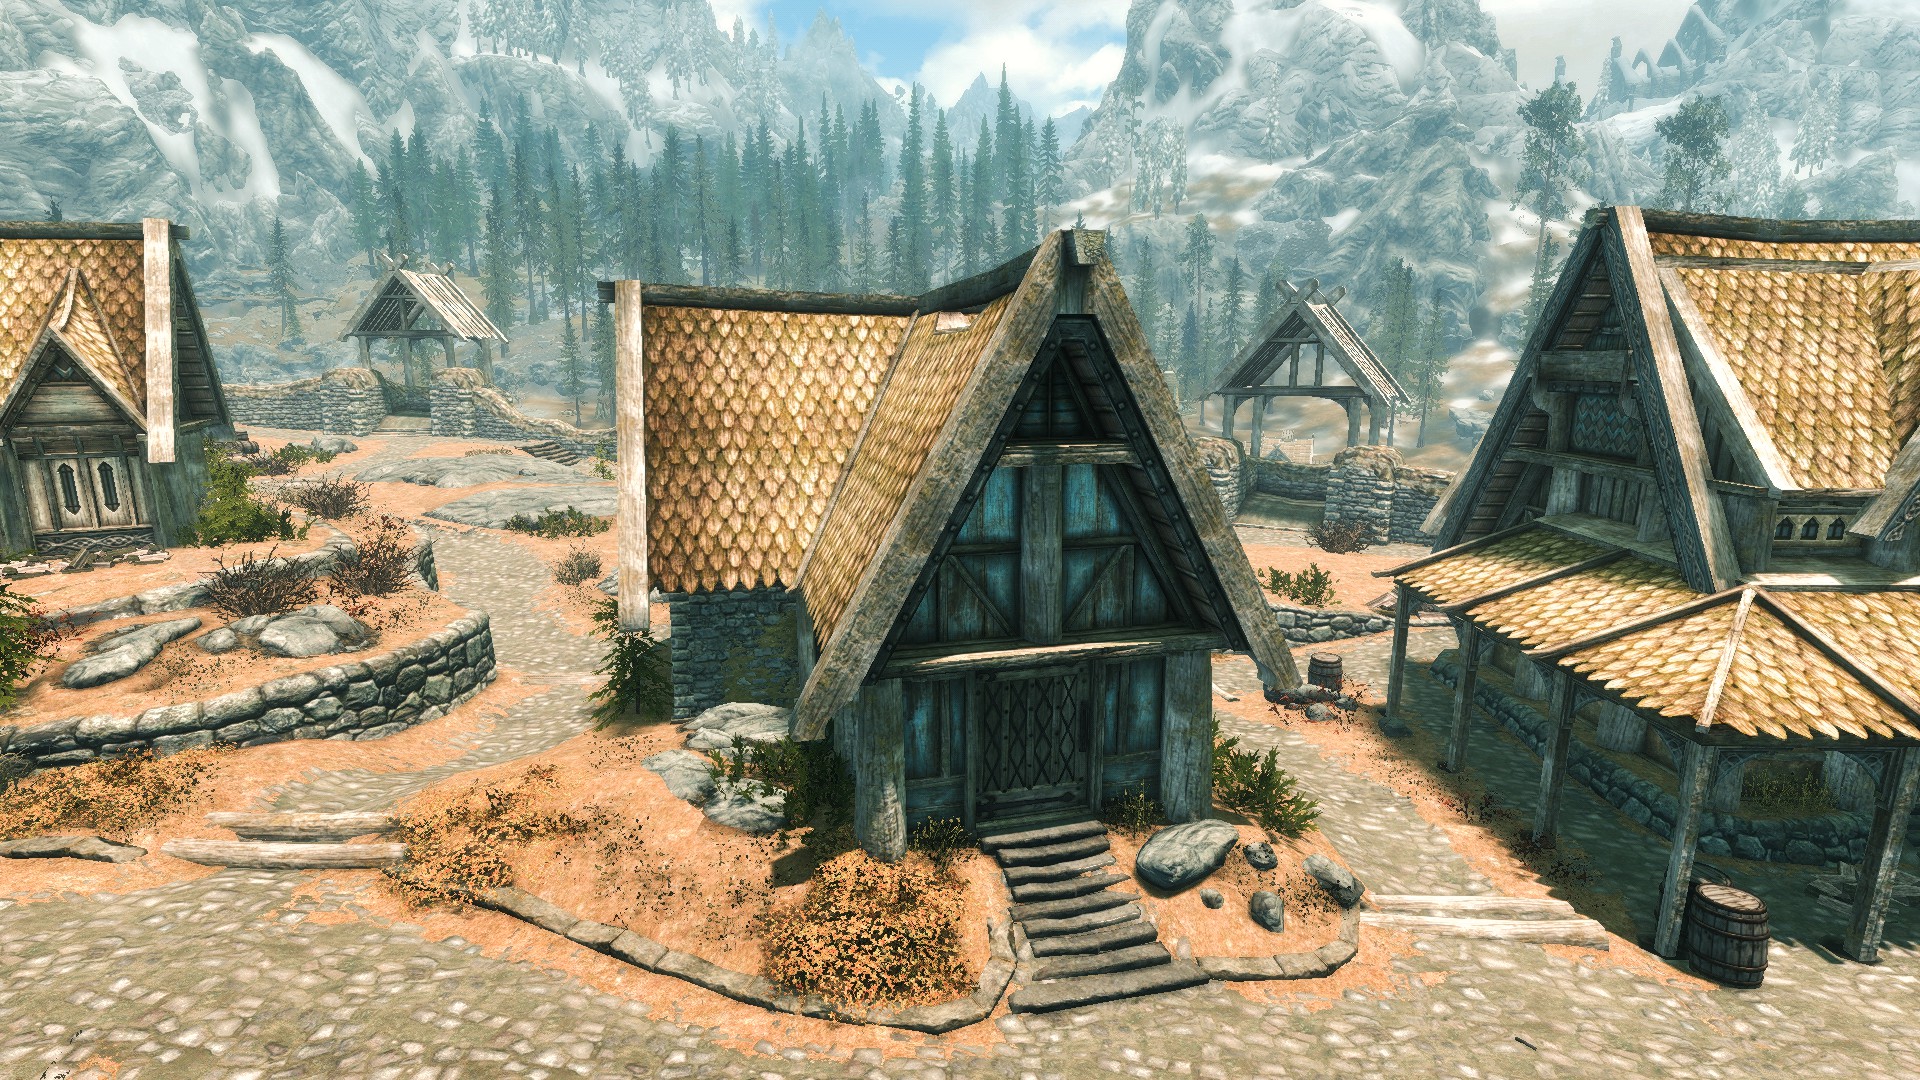
I recommend Breezehome because it’s the easiest player home to get early in the game (after you kill the dragon near Whiterun, it will be available for purchase for 5000g), it’s right next to a blacksmithing station and within easy sprinting distance of an alchemy shop although admittedly the Arcane Enchanter is a bit of a walk, it never bothered me. The house can be upgraded to have an Alchemy Lab inside.
Points of interest are marked on the map below.
There’s a fast travel point outside Dragonsreach you can use if you’re ever feeling too lazy to run there for the arcane enchanter. I always just sprint personally, but the option is there.
Tip: A viable alternative to Breezehome would be Honeyside in Riften, but it lacks access to a smelter which is quite the disadvantage. It does however have both an alchemy lab and an enchanter in the basement.
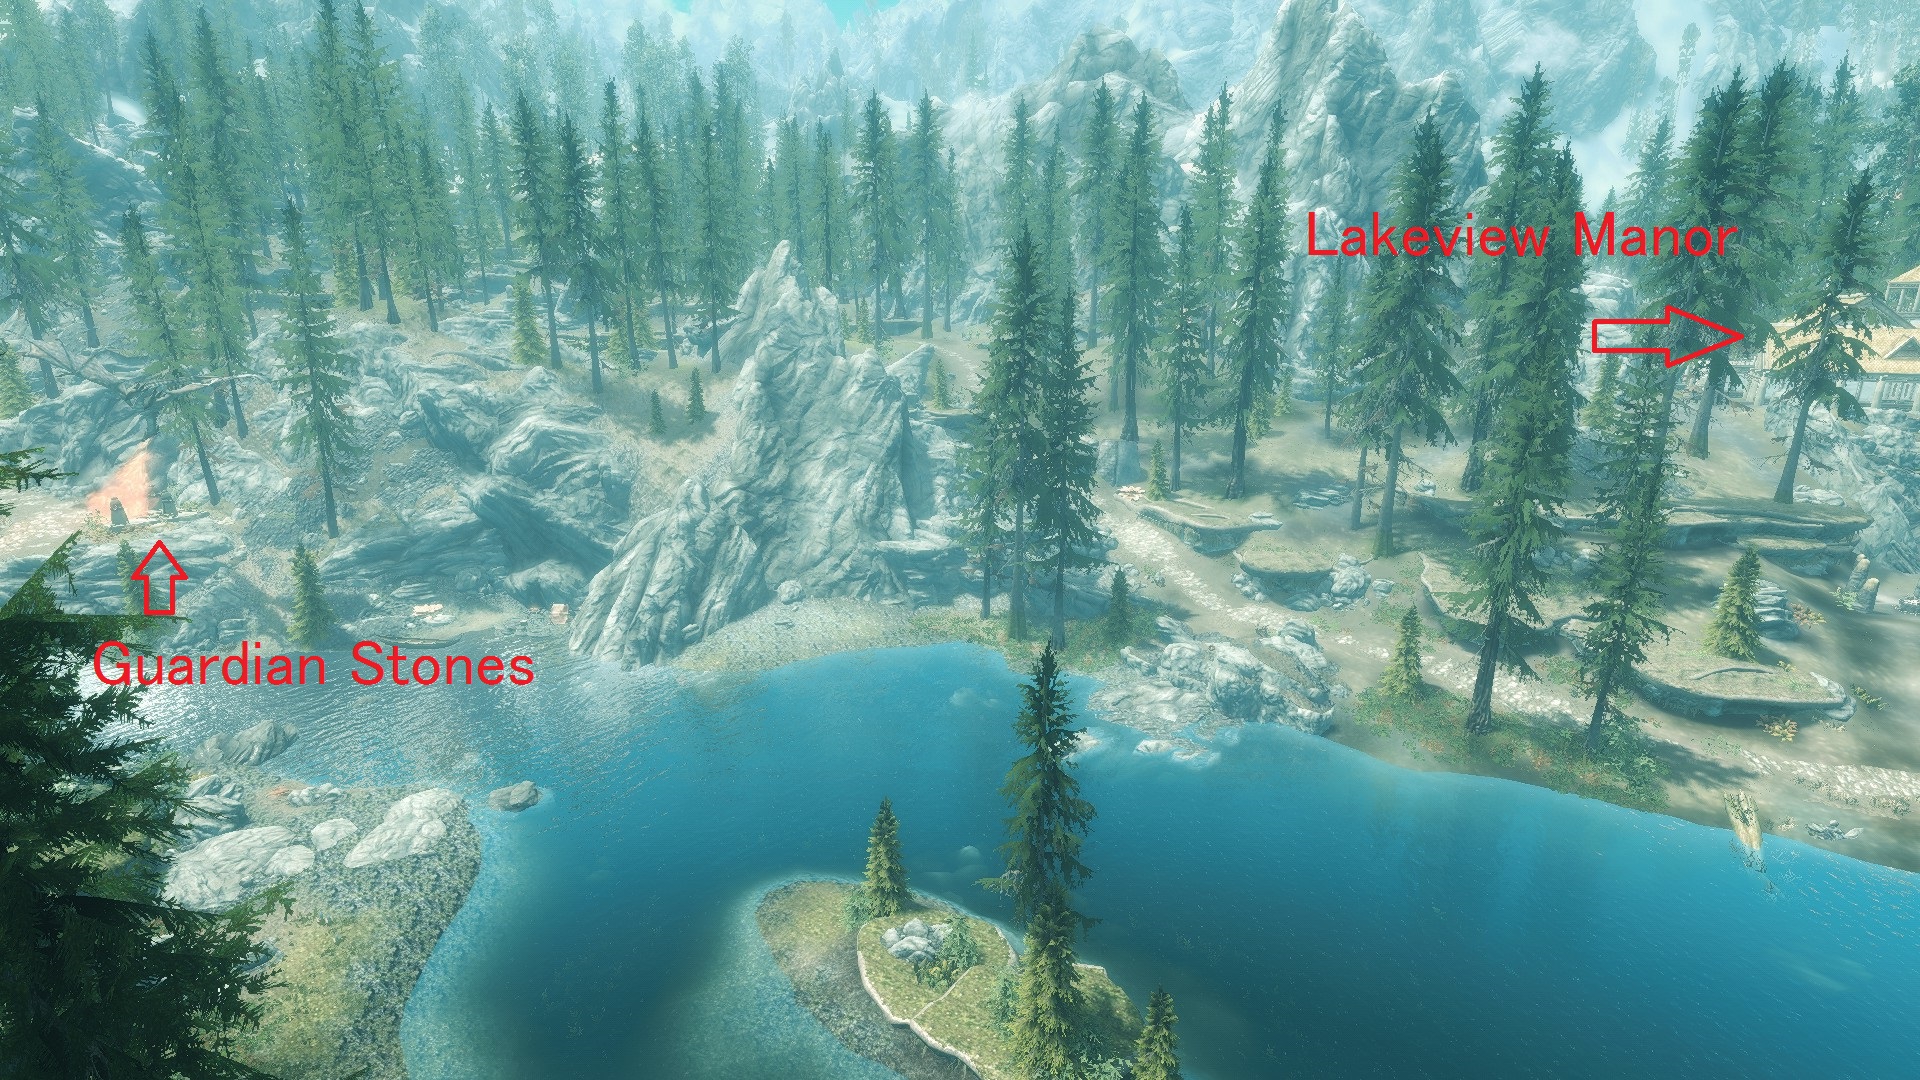
2. Hearthfire
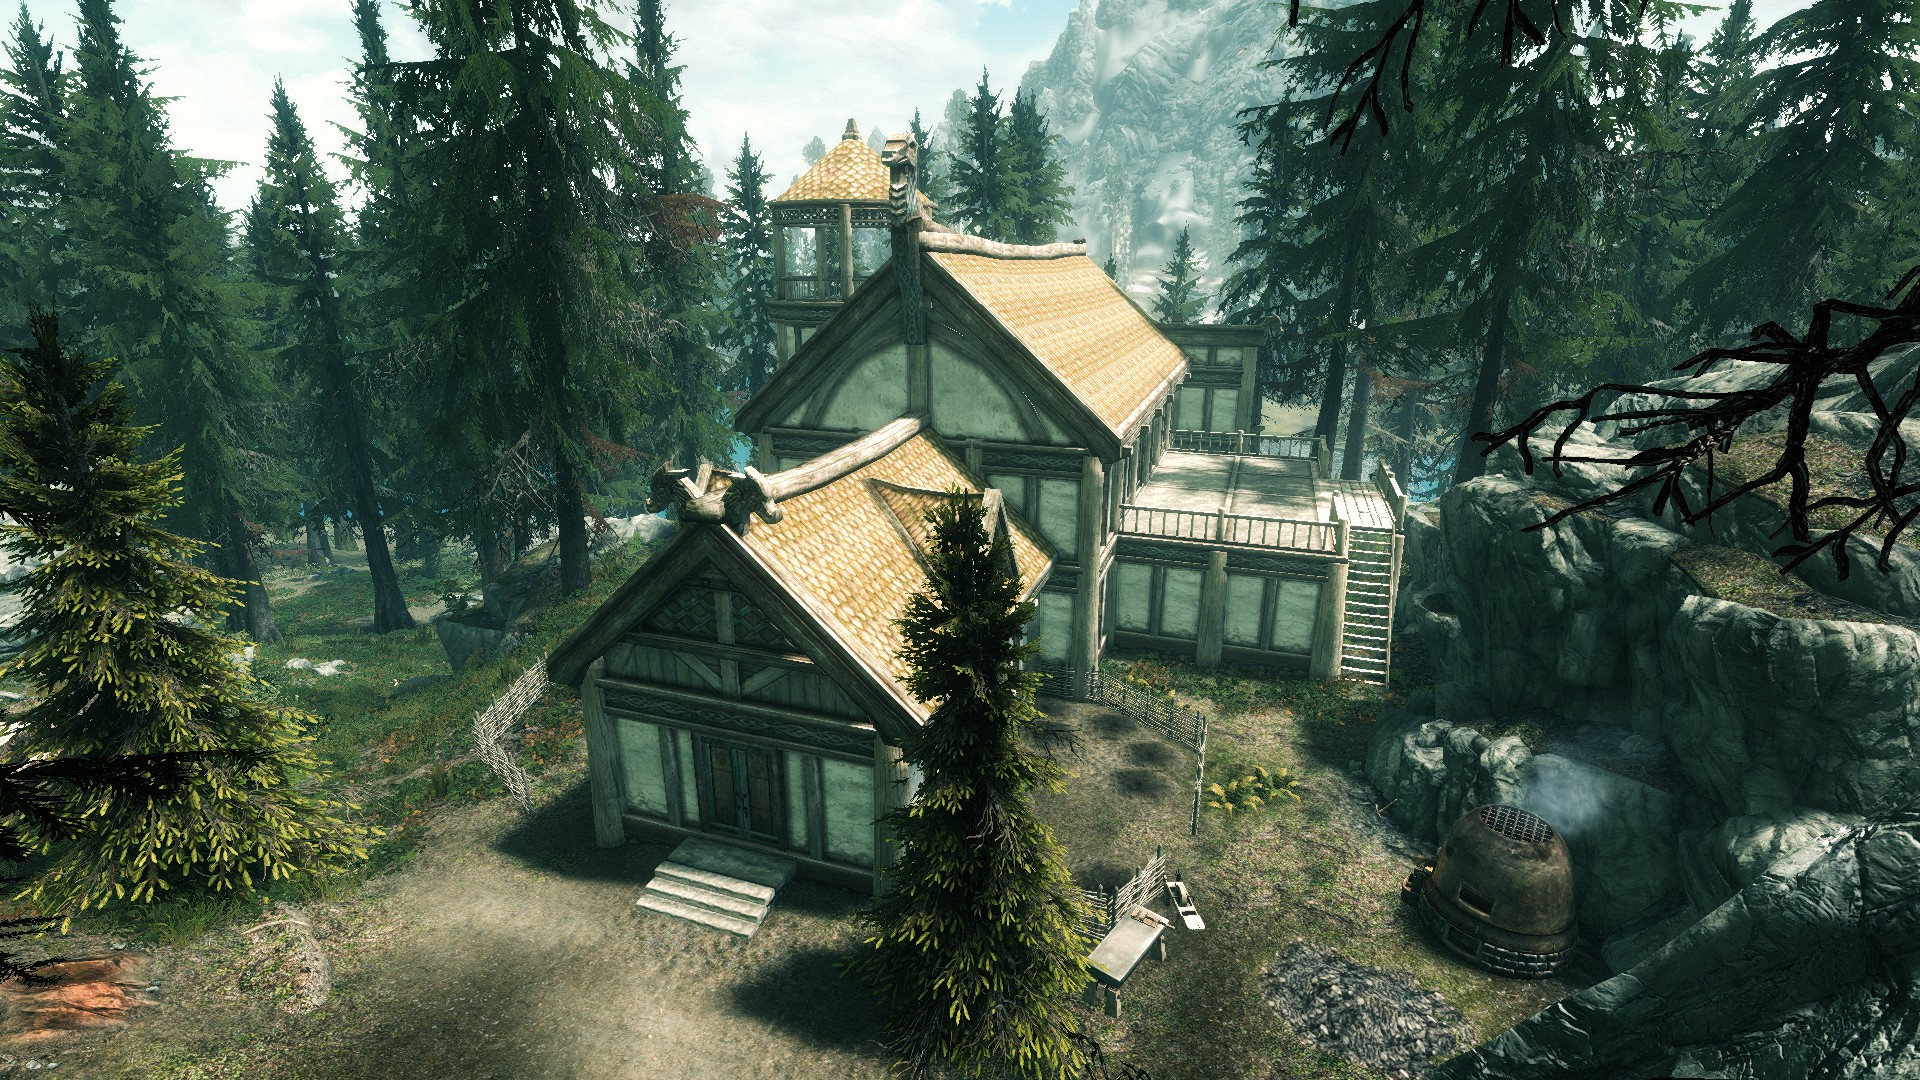
To get a hearthfire home you have to do quests for the Jarl that owns the land you want to buy, there are three plots available, the easiest one to get is the one you get from Falkreath, you just need to kill some bandits for the Jarl and that’s it. I recommend this Hearthfire home because it’s very close to the Guardian Stones which is very convenient.
Buying the plot of land only costs 5000 gold and it will come with some building materials in a chest which can be used to build a small house, however for this to be a viable base of operations you have to keep building until you have a main hall and a cellar this will cost some extra materials.
Building a complete hearthfire home is expensive, and requires a lot of resources, time and effort, but building a hearthfire home with only the basic crafting stations should not be too difficult to arrange even early in the game. You can build an enchanter and alchemy lab in the main hall and a blacksmithing station in the cellar.
These are the material costs (after building the small house) to build the main hall, cellar and crafting stations and bed only:
- 25 Iron Ingots (Building Materials)
- 1 Corundum Ingot
- 63 Sawn Logs
- 2 Straws
- 4 Leather Strips
- 98 Quarry Stone
- 22 Clay
- 2 Glass
- 1 Quicksilver Ingot
- 1 Gold Ingot
- 1 Refined Moonstone
- 1 (Filled) Grand Soul Gem
3. Severin Manor
This player home is exceptionally good, and doesn’t cost a dime, it’s only disadvantage, being on Solstheim, is that you can’t fast travel to the Guardian Stones from there. In return however you can open your Black Book there at any time which is a fair trade-off I’d say.
To get this house you have to go to Solstheim and get the blacksmith’s pickaxe, help the guy who stole the pickaxe, help the guard captain with his ash spawn problem, and then you get a quest from the guard captain which awards you with this house. The house comes fully decorated and equipped with all crafting stations in the basement. It also comes with heaps of crafting materials and soul gems (although you can just sneak into the house and steal them all instead of getting the house if that’s all you’re after).
Maximum Experience Gain
You’re going to want to maximize your experience gain while you are leveling the crafting skills, and you want to do this everytime before you do a task which can level a skill. To do this you need to do two things.
Activate the guardian stone that boosts your exp gain by 20% in the skill in question
- Enchanting: Mage Stone
- Alchemy: Thief Stone
- Smithing: Warrior Stone
Sleep in a bed for an exp bonus buff
- Any Bed: Rested (5% Exp)
- Player Owned Bed: Well Rested (10% Exp)
- Married Player’s Home Bed: Lover’s Comfort (15% Exp)
Tip: You can rent a bed in an Inn for the Well Rested bonus.
Warning: If you’re a werewolf you can not get the rested bonuses.
The above are the basics of maximizing exp gain, you will get a total of 30% bonus exp by doing this (35% if you are married) however there is a certain trick we are going to use to get this bonus up to 45%(50%).
Throughout the guide I will assume that you are using the Well Rested bonus as this is what I do, I don’t bother with getting married just for an extra 5% exp bonus, but of course you’re welcome to do so.
There’s another standing stone in the game that provides +15% exp bonus to all skills, The Lover stone (east of Markarth). However it’s got a major disadvantage and that is that you cannot get the rested bonuses while this stone is active. However there’s a trick to activate all these bonuses at once.
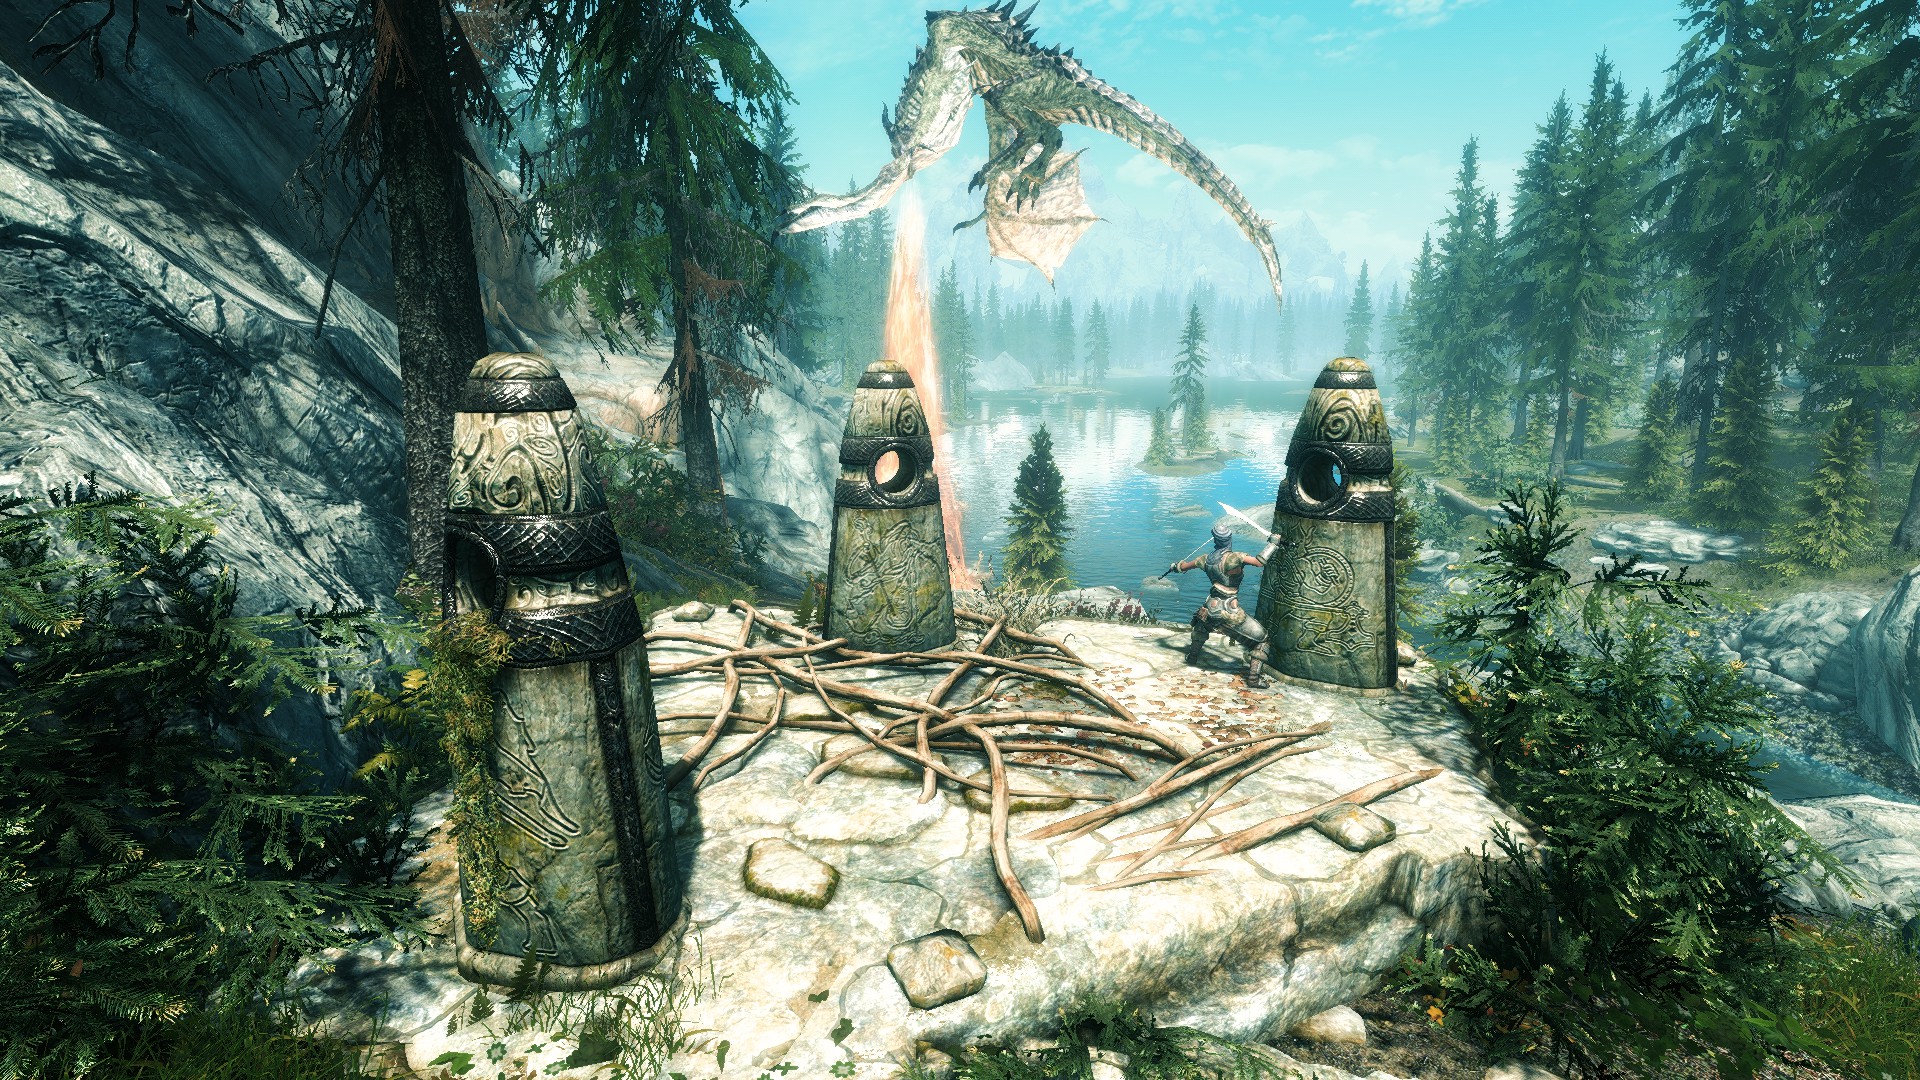
The Aetherial Crown
There’s a quest in the game called “Lost To The Ages” which is started either by reading a book called The Aetherium Wars or by going through the ruins of Arkngthamz. One of the available rewards for this quests is the Aetherial Crown. Equip this crown, activate The Lover stone, then activate another stone (like the mage stone) and the crown will store the Lover Stone’s effect and give it to you whenever it is equipped. After this, unequip the crown, sleep in a bed, re-equip the crown and voila you have 45% exp bonus.
Tip: While the crown is unequipped you can change standing stone effects as much as you want, it will store the last effect you stored in it unless you change stones while the crown is equipped.
Until you have the crown, simply use the mage stone and the well rested bonus to maximize your exp gain while enchanting.
Now it’s time to get to the main subject.
The Basic Rules
Just by sticking with all the below ‘rules’ while playing the game any way you want otherwise, you will be all set to level Alchemy and Smithing when the time comes.
As you play you want to gather the following items to use for leveling the skills:
- All alchemical ingredients you can find
- All iron ore and ingots
- All dwarven metal ingots and all dwemer metal that can be smelted to ingots
- All soul gems.
You want to use the soul trap spell you bought from farengar to fill all these soul gems at every opportunity. Alternatively you can get (or create) a weapon with the soul trap enchantment.
You want to save these items for later use (Do not use any of them for leveling):
- Filled Grand & Black Soul Gems
- Fortify Enchanting Potion Ingredients
- Fortify Smithing Potion Ingredients
Always enchant all your loot before you sell it if you’ve got the souls (This is your primary method to level enchanting, so remember to maximize your exp gain every time before you enchant).
Enchanting
Essential Quests
Unearthed (The quest starts outside Kolbjorn Barrow in Solstheim and rewards you with Ahzidal’s armor set).
Essential Items
- Enchanter’s Elixir (There’s another one in Soul Cairn (Dawnguard); these only exist as leveled loot, and they require you to be level 30 or higher to show)
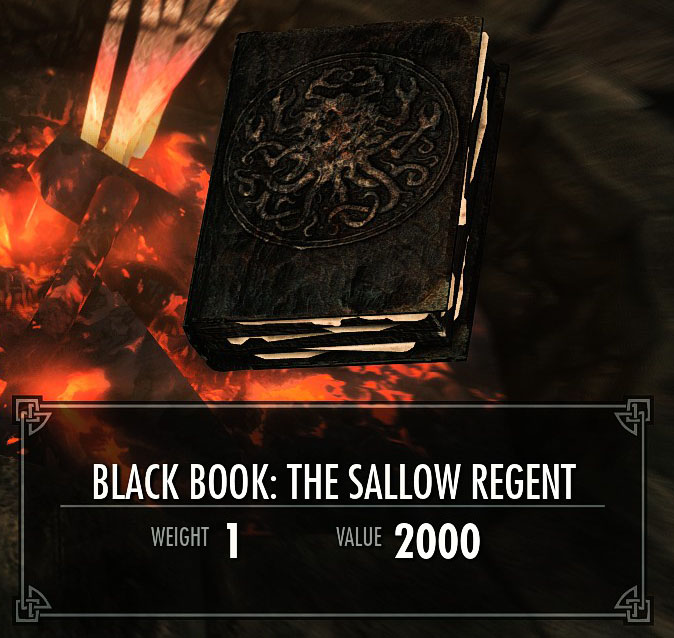
- Black Book: The Sallow Regent (For Seeker of Sorcery effect, you will find this in (northwest) Solstheim’s White Ridge Barrow)
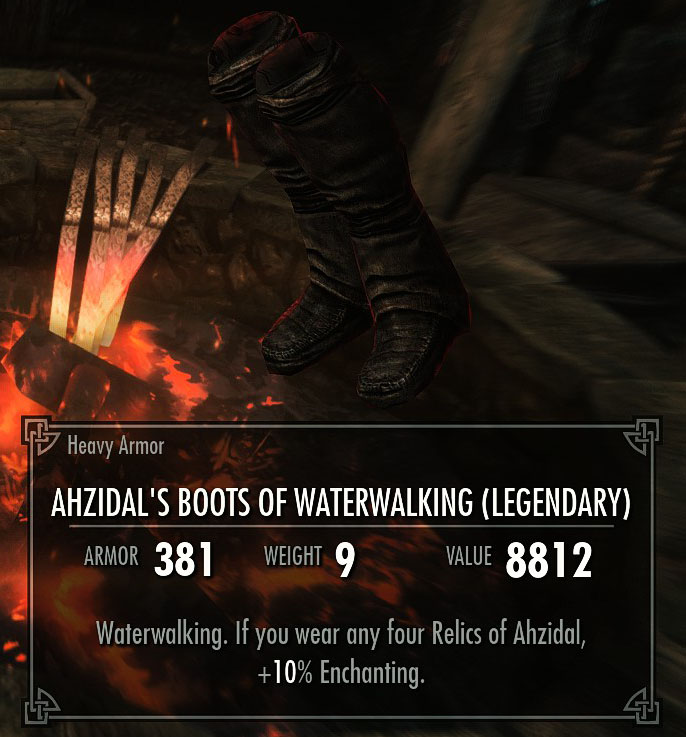
- Ahzidal’s Boots of Waterwalking (And any other 3 pieces of Ahzidal’s armor set)
By the time you reach lvl 100 you want to have all of these items. Combined they will give you a one-time +45% fortify enchanting boost which we will use wisely (to make the Crafting Armor set).
Recommended Quests
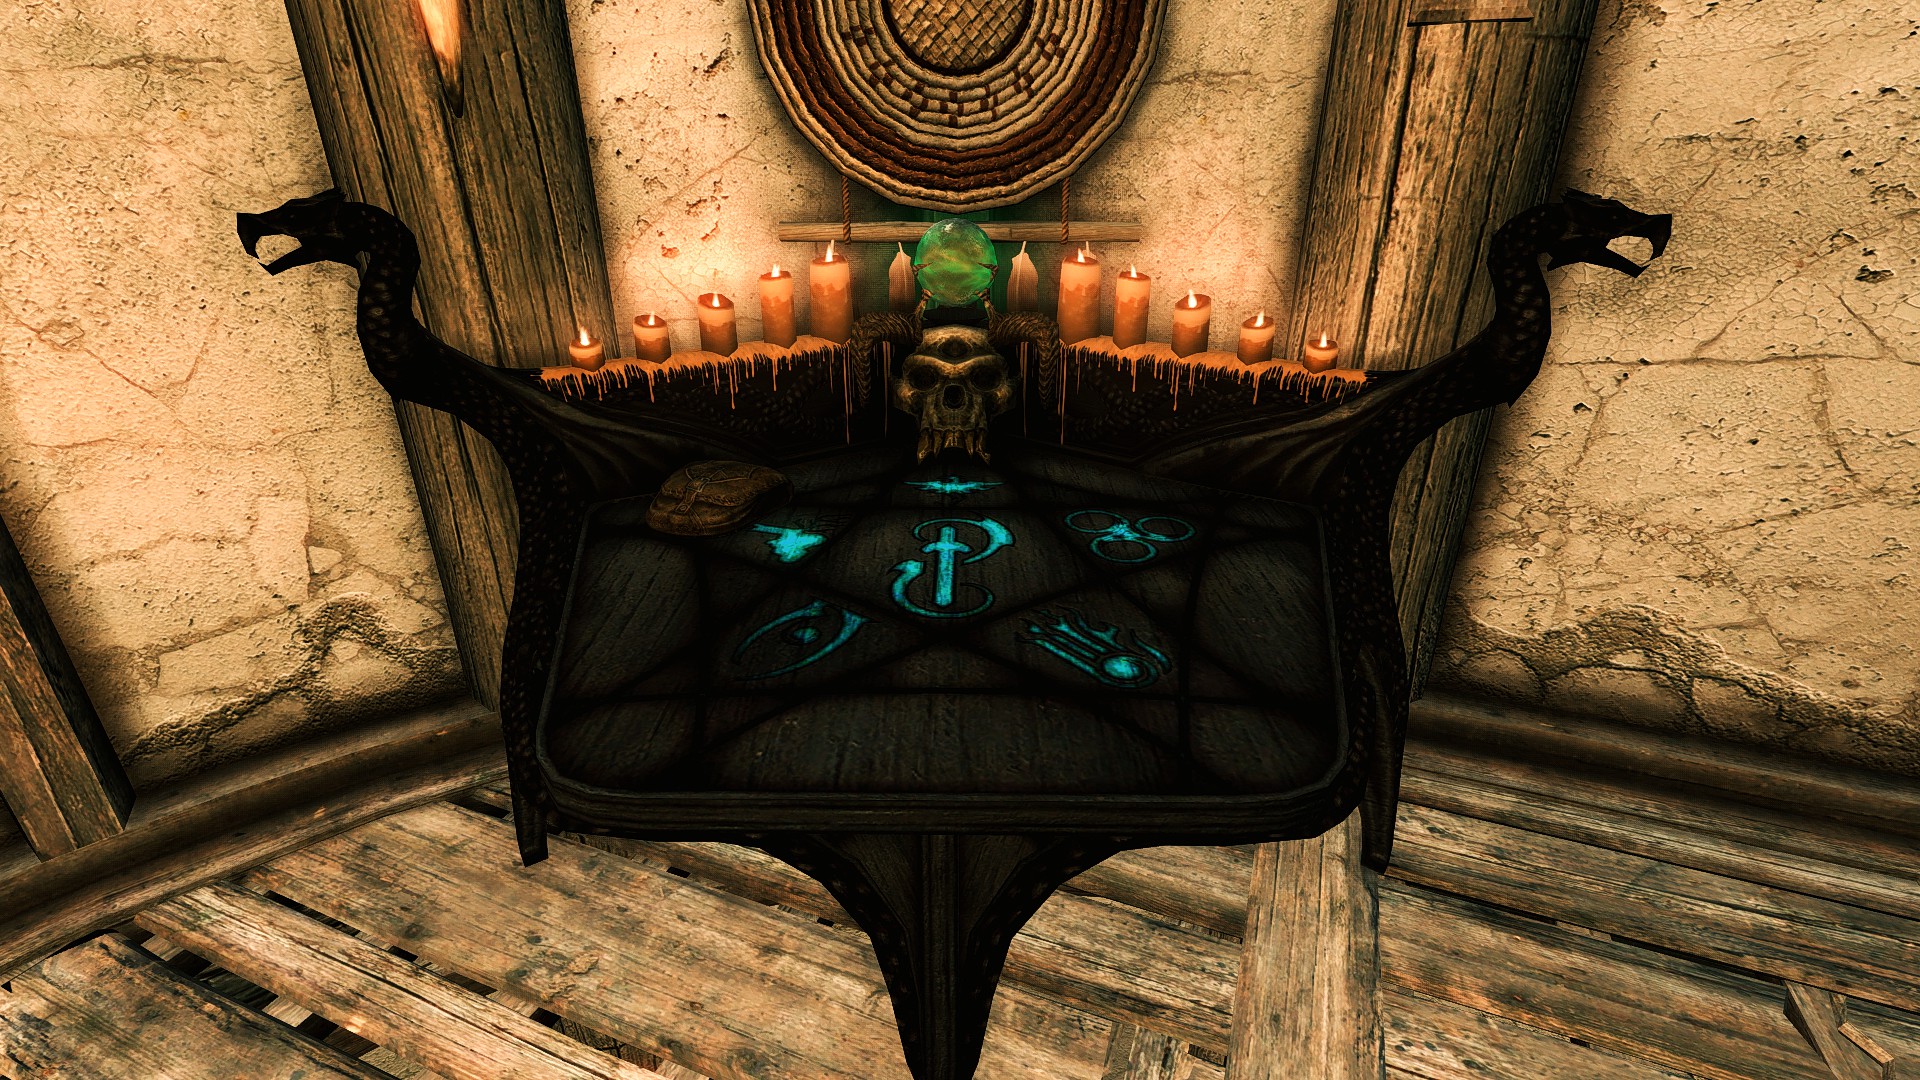
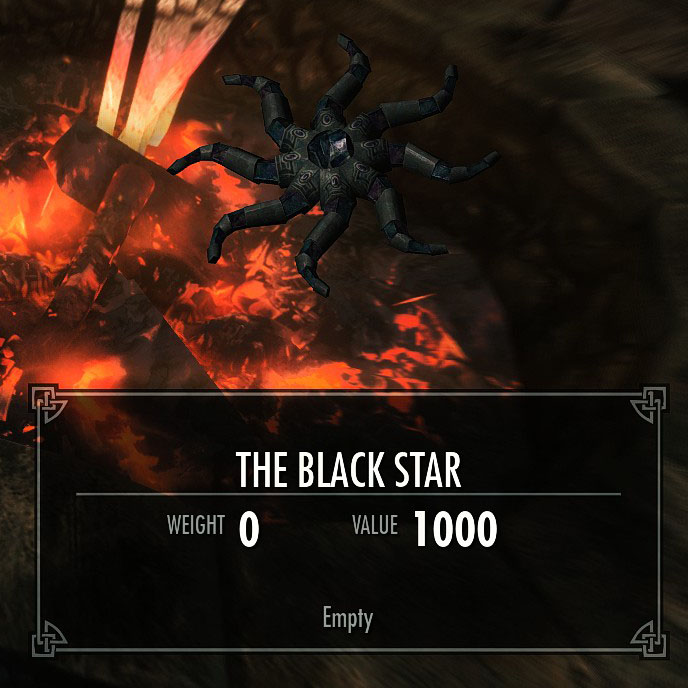
- The Black Star (Gives Azuras Star or The Black Star as a reward, I recommend going the black star route since black souls are easier to find than grand souls. This is a refillable grand or black soul gem depending on which route you go)
- Elder Knowledge (This quest leads you to Blackreach which has a few things you’re going to want)
- Lost to the ages (For the Aetherial Crown as explained above)
Optional Quests
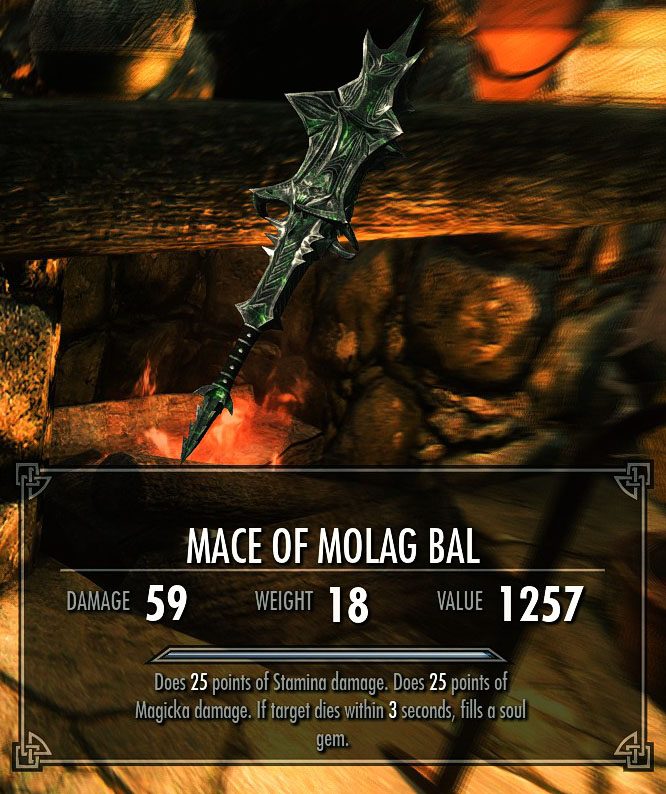
- The House of Horrors (Markarth, awards Mace of Molag Bal, which has a soul trap enchantment which you may want)
- Pantea’s Flute (Speak to Pantea in the Bard’s College of Solitude, grants +1 enchanting skill)
Mechanics
- Disenchanting items yields (usually a lot of) experience based on the power of the enchantment. Each enchantment can only be learned once.
- Enchanting items will always give you the same amount of experience no matter what enchantment, what size soul you use or what the value of the item is (e.g. a petty soul gem on an iron dagger is gonna give you the same exp as a grand soul on a dragonbone greatsword)
- Using soul gems to recharge enchanted weapons grants enchanting experience based on the size of the soul used (it doesn’t matter how much charge is actually gained, just the size of the soul)
As explained in the getting started section above, you’re gonna need first to get your hands on the Soul Trap spell to fill any empty soul gems you pick up, this is a must have unless you happen to get your hands on a weapon with the soul trap enchantment.
You need to also make sure as you go that you hoard any filled grand or black soul gems you find and make very sure that you never waste a grand soul gem on anything less than a grand soul because these things are not a very common item. You will not be using the grand soul gems for leveling at all, you will be using them to reap the benefits after you’ve maxed your enchanting skill (i.e. to make your ultimate weapon and armor enchantments) and until that time comes I suggest saving them up (if you want grand souls for enchanting, use The Black Star), however anything else than black or grand soul gems is free game, this means it’s not that big of a deal if you say put a petty soul in a greater soul-gem and up until the point where you’ve reached 100 enchanting you can use any of them for anything you want. The more you use the faster you level.
Tip: Greater Soul Gems are a great option for enchanting items you intend to wear or give to your followers while you’re still leveling Enchanting.
If you’re ever having problems with finding soul gems, keep on with the main quest until you reach Blackreach, bring a pickaxe there and you can mine soul gems from the geode veins which can yield anything from petty to grand and black soul gems (you want to be at least level 18 to get Grand/Black soul gems from here though). As any other ore vein they will respawn after roughly thirty in-game days.
If it ever comes down to it, just buy soul gems from vendors who sell them (Farengar is one of them), it’s money well spent, especially the cheaper gems (like already filled petty soul gems, really good bang for buck leveling wise)
Method
First off you’re gonna have to remember to maximize your experience gain every time before you enchant as explained in the ‘Getting Started’ section.
Now here’s what you’re gonna do.
- Grab every enchanted item with an enchantment that you have not yet learned and disenchant it at an Arcane Enchanter (this grants exp and teaches you the enchantment)
- Grab every single soul gem you see, even if that means stealing them.
- Grab all unenchanted jewelry (such as circlets, rings and necklaces) but don’t steal those (unless you’re with the thieves guild and you can fence them)
- Grab all gems, silver and gold ore/ingots that you can find and smith jewelry out of them, since jewelry is typically high value, this will also kick up your smithing level a little, which is good.
- Fill your soul gems at every opportunity, if the soul trap spell feels like it’s getting cumbersome (e.g. you’re not a mage), try to find a soul trap weapon to use instead.
- Grab any valuable weapons and apparel you come across for the purpose of enchanting and selling them. Prioritize items that have a good weight to value ratio, if an item is lightweight, even if it is not valuable you may want to pick it up just for the sake of enchanting it if you have a lot of gems.
- Maximize exp gain and enchant all your unenchanted items before you sell them.
Besides the essential/recommended ones, what quests you do and which dungeons you go to is of no significance here (I recommend Dwemer ruins because soul gems tend to be a common drop on the machines you encounter in there), in a nutshell you just want all the soul gems and souls you can get your hands on, and all the unenchanted items you can carry so you can enchant them and thus increase their sale value, then sell them, cus capitalism!
And you just want to keep doing this until your enchanting skill hits level 100 all the while preparing to level Smithing and Alchemy at a later point by gathering ingredients for these crafts. This may sound like it’s going to take a while to level Enchanting but for the first 55 (15-70) levels you will get on average one level per enchantment with maximized exp gain.
Take special note of the essential items list, gather them on your journeys while working towards enchanting lvl 100.
Oneshot Method
If you want to level enchanting from 15 to 100 in one session (like the other skills), this is how you do it.
- Gather 205 Filled Soul Gems of any type
- Collect or Craft 205 Unenchanted Apparel/Weapons (Leather Bracers)
- Maximize Exp Gain (Assumed 45% bonus)
- Enchant all 205 items in one session. (You may want to use autohotkey here!!)
There will be a point of diminishing returns around level ~70 (71 enchantments get you to level 69, 150 enchantments get you to level 90)
The Fastest Grinding Way
As I said in my foreword section, I’m also going to share the fastest grinding methods for leveling the skills in question. Although I already taugh you how to do this, I’m gonna spell it out just so no one misses it and gets mad.
For enchanting, the very fastest way to level is as follows:
- Get The Black Star of Azura
- Get The Mace of Molag Bal
- Kill a human/elf enemy (like bandits) with the mace to fill the black star
- Recharge the mace with the black star (this is how you get exp)
- Repeat for every human/elf enemy you kill until level 100
Enchanter’s Resource
Tips
- If you fill a soul gem with the wrong soul, drop it and pick it up again to clear it.
- You can mine soul gems in Blackreach.
- All weapon enchantments are destruction based except Fear which is Illusion, Banish and Soul Trap (Fiery too) are Conjuration and Turn Undead is Restoration.
- Destruction perks for added damage to specific spell types will amp up the power of weapon enchantments of the same type as well, the perks will all stack for the Chaos Damage enchantment (op asf). (Exploit?: Will also increase the power of your extra enchantment)
- Enchanting your armor to give you 100% spell cost reduction in destruction magic will also give destruction enchantments and staffs infinite charges.
- Fortify destruction potions will increase destruction enchantment damage while they last.
- A space before your item’s name will sort it at the top of your item list, a lowercase first letter will sort it at the bottom of your item list
- All apparel enchantments class as restoration, thus fortify restoration amplifies their power, necromage also amplifies their power further if the player is a Vampire (these are both ‘fixed’ by the unofficial patch, mods can revert these changes (links in mod section))
- Shield of Solitude has a more powerful resist magic enchantment that you can disenchant (USSEP ‘fixes’ this as well, I made a mod to revert this change (links in mod section))
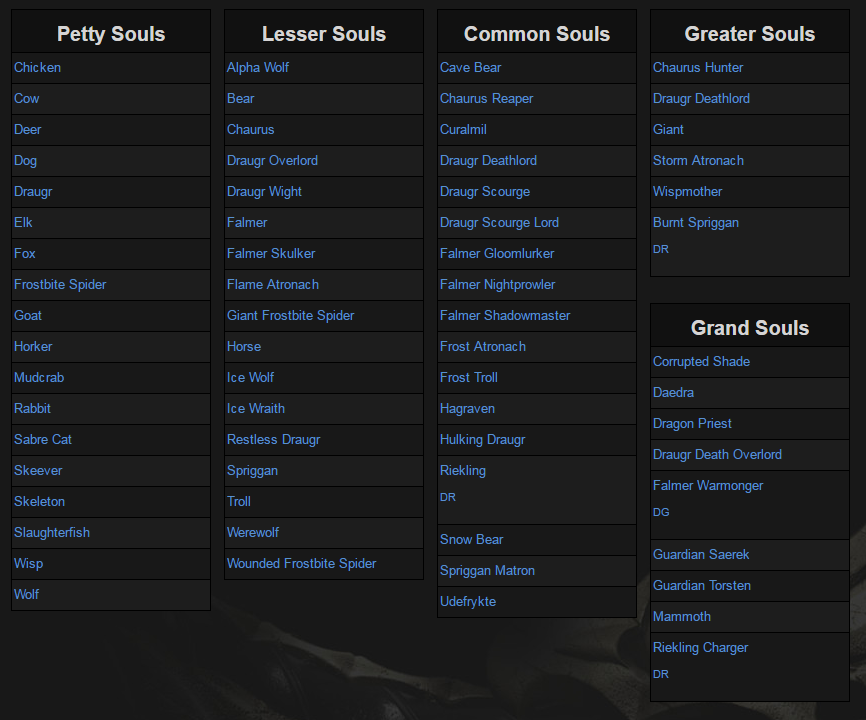
Soul Sizes
Apparel Enchantments and where to get them
Leveled Only it means that the only way to get the item is to find it as randomized loot or buying it from merchants. All apparel enchantments can be found this way, my favorite store to look for apparel enchantments is The Radiant Raiment in Solitude. All the fortify spell class, magicka and magicka regen enchantments will commonly drop from mage opponents if you’re looking for them. The others tend to be a bit harder to find.
- Fortify Alchemy: Ring of Pure Mixtures (Go to The Mortar and Pestle in Dawnstar, talk to Frida for a quest to recover the ring for her, recover the ring, finish the quest, then pickpocket it from her inventory and disenchant)
- Fortify Smithing: Silver-Blood Family Ring
- Fortify Carry Weight: Leather Boots of Hauling (Found in Sinderion’s Field Laboratory in Blackreach)
- Fortify Alteration: Leveled Only
- Fortify Alteration & Magicka Regen: Leveled Only
- Fortify Archery: Shrouded Cowl (Part of the standard Dark Brotherhood outfit, can be found in the Dark Brotherhood sanctuary and on Dark Brotherhood assassin corpses)
- Fortify Barter: Leveled Only (There are unique items with this enchantment but none of them can be disenchanted, probably because this is a necklace-only enchantment and none of these items are necklaces)
- Fortify Block: Leveled Only
- Fortify Conjuration: Leveled Only
- Fortify Conjuration and Magicka Regen: Leveled Only
- Fortify Destruction: Leveled Only
- Fortify Destruction and Magicka Regen: Leveled Only
- Fortify Healing Rate: Leveled Only (Super useful for followers)
- Fortify Health: Leveled Only
- Fortify Heavy Armor: Leveled Only
- Fortify Illusion: Leveled Only
- Fortify Illusion and Magicka Regen: Leveled Only
- Fortify Light Armor: Leveled Only
- Fortify Lockpicking: Leveled Only
- Fortify Magicka: Novice Hood, Adept Hood, Apprentice Hood, Mage Hood
- Fortify Magicka Regen: Leveled Only
- Fortify One-Handed: Leveled Only
- Fortify Pickpocket: Leveled Only
- Fortify Restoration: Leveled Only (Commonly sold by Colette in the mages college)
- Fortify Restoration and Magicka Regen: Leveled Only (Sold by the same person as above)
- Fortify Sneak: Leveled Only
- Fortify Stamina: Leveled Only
- Fortify Stamina Regen: Leveled Only
- Fortify Two-Handed: Ironhand Gauntlets (On Hajvarr Iron-Hand in the cave at White River Watch)
- Fortify Unarmed: Gloves of the Pugilist (Found as loot in The Ratway of Riften)
- Muffle: Leveled Boots (One way to get these is if you finish all of the Thieve’s Guild’s City Influence Quest lines a counter at Vanryth Gatharian’s shop stall in the Ragged Flagon will have a pair of boots with a random enchantment on the counter. Save the game outside the ragged flagon’s entrance, then go in and look for the boots, if it has the wrong enchantment, load the save and try again)
- Resist Disease: Leveled Only
- Resist Fire: Leveled Only
- Resist Frost: Leveled Only
- Resist Magic: Shield of Solitude (Finish The Wolf Queen Awakened quest)
- Resist Poison: Leveled Only
- Resist Shock: Leveled Only
- Water Breathing: Leveled Only
Weapon Enchantments and where to get them
Most of the weapon enchantments can be found as leveled items from Blacksmiths or as loot, I will specify the ones who are different.
- Absorb Health: Found as Loot in Labyrinthian (Do Mage’s College quest line to get in)
- Absorb Magicka: Same as above
- Absorb Stamina: Same as above
- Banish: Leveled Only
- Chaos Damage: Champion’s Cudgel (Solstheim, Fort Frostmoth) and as Leveled Nordic and Stalhrim Weapons Only
- Fear: Leveled Only
- Fiery Soul Trap: Steel Battleaxe of Fiery Souls (Ironbind Barrow, Coming of Age quest)
- Fire Damage: Leveled Only
- Frost Damage: Leveled Only
- Huntsman’s Prowess: Poacher’s Axe (Found on a Bandit in Halted Stream Camp) (Not leveled)
- Magicka Damage: Leveled Only
- Notched Pickaxe: Notched Pickaxe (On the very top of the throat of the world) (Not leveled) (This can be used to put Fortify Smithing on weapons)
- Paralyze: Leveled Only
- Shock Damage: Leveled Only
- Silent Moons Enchant: Lunar Weapons (Silent Moons Camp near Whiterun) (Not leveled)
- Soul Trap: Leveled Only
- Stamina Damage: Leveled Only
- Turn Undead: Leveled Only
Spell Damage Reduction Cap
Spell Damage Reduction is capped at 85% per enchantment type. So with the ‘Resist Magic’ enchantment alone you can have a maximum of 85% spell damage reduction. However all the other resist spells have the same 85% cap so if you combine 85% ‘Resist Magic’ with 85% Resist ‘Fire’ ‘Frost’ ‘Shock’ and ‘Poison’ you will have a total of 97.75% overall spell damage reduction.
Crafting Armor
When you have reached level 100 enchanting and you have all the essential items named for enchanting earlier, you’re going to want to create a crafting armor set.
This involves creating a set of items with Fortify Alchemy and Fortify Smithing bonuses, for this you want to use grand/black soul gems and you want to use the Enchanter’s Elixir I mentioned before to boost your enchanting level as high as you possibly can at this time.
Essential Perks
- Enchanter (5)
- Insightful Enchanter
- Extra Effect
Essential Items
- Enchanter’s Elixir (if you are already level 100 alchemy, you can make a fortify enchanting potion instead)
- Black Book: The Sallow Regent (For Seeker of Sorcery and Seeker of Shadows)
- Ahzidal’s Boots of Waterwalking (Wear this and 3 other Ahzidal armor set pieces for +10 enchanting bonus)
- 5 Filled Grand or Black Soul Gems
- Any Unenchanted Helmet, Armor, Gauntlets, Necklace and Ring of your choosing (You do not need boots, but carrying capacity boots might be nice to have)
Enchanter’s Elixirs last 60 seconds, you need to enchant 5 items (6 if you include boots), one elixir should be enough for all the items but you need to work as fast as you can since you’ve got <12 seconds per item (<10 seconds if you also enchant the boots)
Method
- Make sure you have Seeker of Sorcery active
- Get the Soul Gems and unenchanted items
- Get in front of an Arcane Enchanter
- Put on Ahzidal’s Armor set (Boots + any other 3 items from the set)
- Save the game
- Practice enchanting all the items with the desired enchantments to memorize the order of the items and enchantments (this is because you are going to be working with limited time)
– Fortify Smithing: Armor, Gauntlets, Ring, Necklace
– Fortify Alchemy: Helmet, Gauntlets, Ring, Necklace
– All remaining enchantment slots can be filled with whatever enchantment you like, the above are the only ones you need. You do not need boots, but are free to enchant them too if you wish.
- Load the save
- Drink the elixir and then enchant all the items as fast as you can just as you practiced.
- Make sure all the enchantments are of the correct magnitude (strength)
Tip: To make sure that Ahzidal’s Armor set is giving you the desired enchanting bonus, open either the arcane enchanter or your skill menu to see your enchanting level, the level should be 110 if you’ve got the set on, 100 if you’ve got it off or have too many pieces on.
Your first result should look something like this:
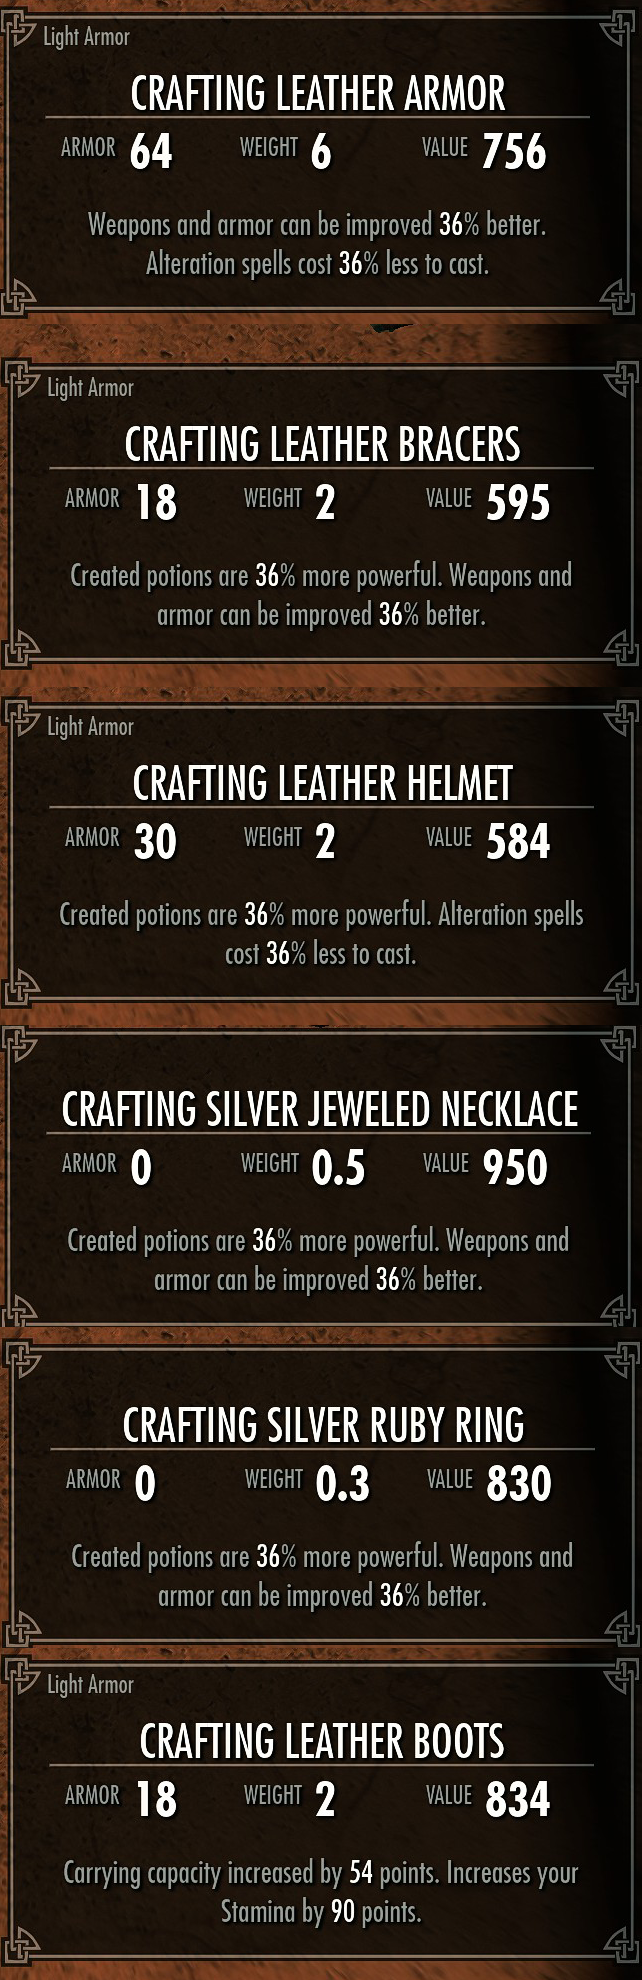
For a total of 144% smithing and alchemy bonuses! :O
Notes:
- I took Fortify Alteration in case I want to use the Transmute spell
- I took Fortify Carry Weight on the boots because crafting materials are heavy stuff
- I took Fortify Stamina so I can sprint longer with these items on
- I was able to enchant and rename all the items with just one elixir, but you don’t have to worry about renaming the items since this is only your first crafting armor set, not your final one. On your final set you can have up to 30 seconds per item instead of 60 seconds for the whole set.
- If you want you can always scour Skyrim for another Enchanter’s Elixir so you can have 120 seconds to do this.
The items don’t actually have to be armor, you can for example instead of helmet armor and gauntlets use circlet, robes and gloves, but I like armor, and I have the perk which makes worn armor weightless. The only real benefit of clothes instead of armor is the lower weight, but I always leave my set on a mannequin in my Hearthfire home’s basement when I’m not using it, it’s all up to you what you choose.
After making this set, you will wear it while leveling your Alchemy skill it is vital to maximizing your potential experience as will be explained in the Alchemy section.
After getting Alchemy to 100
- Find or craft another set of unenchanted armor, ring and necklace.
- Grab fortify enchanting ingredients from your base of operations, you have 30 seconds per potion, decide how many potions you need for one armor set and then take enough ingredients to make that potion (I only need 2 but I like to have 3 just to be sure). Do not make the potion yet.
- Go to Solstheim and enable the Seeker of Shadows effect from the Black Book: Sallow Regent
- Go to an alchemy lab in Solstheim (the nearest one is in front of the blacksmith) and create the amount of “Fortify Enchanting” potions you think you’ll need for one armor set.
- After making the potions enable the Seeker of Sorcery effect again
- Get to an Arcane Enchanter
- Put on Ahzidal’s Armor Set
- Save the game, practice and load just like before.
- Enchant your second armor set with your fortify enchanting potions.
Repeat the above step one more time to create your final set of crafting armor, it will look something like this:

For a total of 164% smithing and alchemy bonuses! (Elven Armor is a good choice cus it’s the lightest armor)
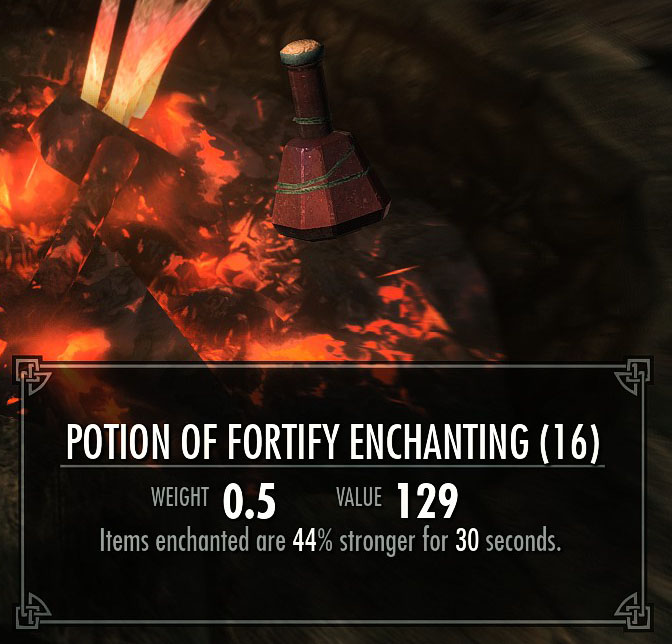
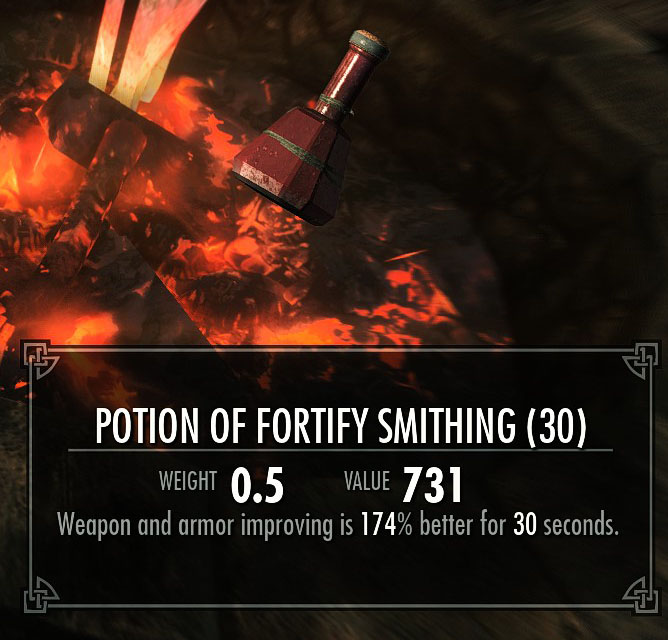
After you’ve made the final set, I suggest you go back to Solstheim with all your fortify enchanting and smithing ingredients, get the Seeker of Shadows effect and use up all the ingredients to make the potions since this is as high as you’re ever going to get without using exploits. Your fortify smithing poitions will cap at 174% and your fortify enchanting potions at 44%. At the time I last did this I had enough ingredients to make roughly 50 of each potion.
You will then be using some of these fortify smithing potions shortly afterwards to (finally) level your smithing skill to 100 insanely fast.
I would also like to mention two things before I end this section.
As explained in the enchanting section, all apparel enchantments count as restoration effects. If the player is a vampire with the ‘Necromage’ perk in the restoration tree at the time these armors are made, these stats will be slightly higher. (The numbers on the gear will be 46%, the fortify enchanting potions will be 49% and the fortify smithing potions will be at 187%) the unofficial patch however patches this out of the game, but if you’re using the patch, it can be re-enabled with a mod (see the mod section). I personally do not use this.
There is a glitch in the game where you can sometimes wear a circlet underneath certain helmets, this would allow for an extra item with the fortify enchanting bonus to further boost these stats. The unofficial patch also fixes this however.
Alchemy
So then, now that we have our first crafting armor set, it’s time for Alchemy!
Essential Items
- Black Book: Sallow Regent (For Seeker of Shadows effect)
Recommended Quests
- Return to Your Roots (Blackreach) (Grants Sinderion’s Serendipity which gives you a 25% chance to create two potions instead of one when doing alchemy)
Mechanics
- The higher the value of the potion crafted, the more exp you gain.
- Eating raw ingredients to learn new effects grants some exp.
- Each ingredient has 4 effects, mixing ingredients at an alchemy lab yields a potion if 2 ingredients have one effect in common.
- You can mix a maximum of 3 ingredients per potion.
Alchemy is the most profitable crafting skill to level, leveling through the recommended means, you can expect to make anywhere between 100,000 and 150,000 gold in profits.
Leveling alchemy is all about making high value potions which is why it is so important to have the Crafting Armor set I explained how to make above. It will more than double the strength of your potions and massively increase their value. The Seeker of Shadows effect will further increase your potions’ strength by 10%.
The basic premise for leveling alchemy is that you just run around gathering all alchemical ingredients you find on your journeys, pick every flower, every butterfly, every mushroom, all the salt piles and all the bone meals and literally every other alchemical ingredient in the game until it comes time to level it up. Remember to check all the barrels and all the sacks, they commonly contain alchemical ingredients.
I recommend that everytime your character levels up you should find an alchemy trainer (Arcadia) and buy another 5 levels of alchemy. This will maximize your odds of getting to level 100 in just one go. This is why I recommend leveling Alchemy in Arcadia’s shop in Whiterun.
I also want to point out a key difference between the methods of leveling alchemy and the other two. Since alchemy level earned is influenced directly by potion value, you’re going to need to pick certain perks in the alchemy perk tree in order to increase their strength. You’re also going to need these perks eventually anyways for when you are making your fortify enchanting and smithing potions, since they’re vital to you anyways don’t feel any guilt over picking these perks, they are going to serve you very, very well (unlike the Dwarven Smithing perk we get for smithing, useless for light armor).
Get these perks as soon as you can:
- Alchemist (5 points total)
- Physician
- Benefactor
- (Optional) Poisoner (This perk will only help you level up faster unless you intend to use poisoned weapons)
Also remember to maximize your exp gain by taking the thief stone and sleeping in a bed no aetherial crown (explained later in this section).
These are the essential ingredients which you should store in a container separate from your other ingredients to avoid using them for leveling. There is a list of recipes for leveling in the alchemist’s resource section.
Essential Ingredients
Fortify Enchanting Ingredients
- Spriggan Sap
- Hagraven Claw
- Snowberries (You can pick these in the wilds, snowy regions tend to have a lot of them, so just pick all the ones you see)
- Chaurus Hunter Antennae
- Spawn Ash (Found in Solstheim)
- Blue Buttefly Wing
- Ancestor Moth Wing
Fortify Smithing Ingredients
- Spriggan Sap
- Blisterwort (Very common alchemy merchant item)
- Sabre Cat Tooth (Warning: This item is in high demand for hearthfire homes, so you may wanna save them for that)
- Glowing Mushroom (Grows on walls in various caves)
The Method
- Activate the thief stone and get the well rested bonus
- Activate seeker of shadows in Black Book:Sallow Regent (+10% alchemy bonus)
- Equip your crafting gear
- Take all the non-essential ingredients you’ve gathered and walk to Arcadia’s Cauldron or an alchemy lab.
- If in Arcadia’s Cauldron, buy 5 levels from her now, and then another 5 everytime your character levels up until you are at level 75 alchemy and can’t buy more levels.
- Make potions starting with the best leveling potions list in the alchemy resource section and moving your way down that list into the best leveling effects, keep going until you run out of ingredients or reach level 100.
While the chances of this are slim at best, in the event that the ingredients you’ve gathered at this point are not enough to float you all the way to level 100, run around and kill all the giants you find to get their toes and gather ingredients required to make any of the potions that use Giant’s Toes listed in the Alchemist’s Resource section below, then make these potions until you hit level 100, it shouldn’t take long.
Aetherial Crown or Crafting Helmet?
I have the Aetherial Crown with the lover stone effect for +15% experience, do I wear that or do I wear the Crafting Helmet I created? I encountered this dilemma and I decided to simply test it, I saved the game and tested one item, loaded and tested the other to see which would make my XP bar rise higher by crafting the same potion, these were my results.

So the answer is: Wear the Crafting Helmet! The Aetherial Crown is still important for leveling Enchanting and Smithing.
Alternative Method
If you’re too lazy to loot all the ingredients you come across in skyrim, then do this instead.
- Starting at level 1 (or as soon as you can get to whiterun at least) buy 5 alchemy levels from Arcadia
- (Optional) Pickpocket Arcadia to get your gold back
- Repeat the above every single time your character levels up until alchemy is at level 75.
- Either have enough ingredients (especially giants toes) to get to level 100 from here on hand or…
- Join the Dark Brotherhood to gain access to Babette
- Just like with Arcadia, have Babette train you by 5 levels every level (3 times) until you are level 90
- Use The Giant’s Toes and Wheat you’ve gathered to level up to level 100 or 93 and…
- Read the 5 alchemy skillbooks and do the 2 alchemy skill raising quests (Inge Six Fingers in Bards College and Lami in Morthal have the quests).
Recommended Book Locations:
- Anise’s Cabin: Song of the Alchemists (Alt: Bard’s College)
- Evergreen Grove: Mannimarco, King of Worms
- Alchemist Camp above Evergreen Grove: De Rerum Dirennis (Alt: Sinderion’s Field Lab)
- Arcadia’s Cauldron: Herbalist’s Guide to Skyrim
- New Gnisis Cornerclub: A Game at Dinner
The Exploit Way
The grinding method to level Alchemy is pretty much just to buy out a shopkeepers ingredient stock, save, kill him, load, buy again and so on then make all the potions you can until you’re done. This just takes very long so I can’t say I recommend it. The exploit way however (if using unofficial patch you need a mod linked in the mod section) is quite fast.
- Get level 50 Enchanting or Alchemy and the associated Perks for either.
- Get fortify alchemy enchantment and enchant an armor set (the stronger the better) with it and equip it.
- Create a fortify restoration potion
- Drink the potion
- Unequip and re-equip your gear
- Make another fortify restoration potion (it will be stronger)
- Repeat until you think you have a strong enough fortify restoration potion
- Now create a super strong fortify enchanting potion
- Make another fortify alchemy armor set (something like +6000%)
- If you’re not at level 100 yet, make potions until you are. (Will be very few potions)
Alchemist’s Resource
Tips
- You can level alchemy all the way up to level 75 by asking Arcadia in Whiterun to train you, you can pickpocket your gold back after she trains you.
- If you join The Dark Brotherhood, Babette can train you to alchemy level 90. She can however not be pickpocketed.
- Giants Toes add extra value to potions they are used in.
- Always try to make 3 ingredient combo potions while leveling, the extra ingredient pushes up the value of your potion and thus your exp gain.
- Certain ingredients can only be purchased from vendors after you get the “Merchant” perk in speech.
- You can find massive amounts of Wheat at the various farms spread throughout Skyrim.
Best Recipes for Leveling
- Highest Value Potion
- Garlic
- Salmon Roe
- Nordic Barnacle
- Giants Toe Potions
- Giant’s Toe+
- Bear Claws+
- Hanging Moss
- Wheat+
- Creep Cluster
- Scaly Pholiota
- Wisp Wrappings
- Bear Claws+
- Giant’s Toe+
- Other High Value Potions
- Chaurus Eggs+
- Vampire Dust+
- Garlic
- Luna Moth Wing
- Vampire Dust+
-
- Luna Moth Wing+
- Namira’s Rot
- Luna Moth Wing+
- Chaurus Eggs+
-
- Dwarven Oil+
- Deathbell
- Salt Pile
- Dwarven Oil+
-
- Creep Cluster+
- Scaly Pholiota
- Mora Tapinella
- Creep Cluster+
- The Five Effect Potion
- Bear Claws
- Eye of Sabre Cat
- Hanging Moss
Best Effects for Leveling
I’ve excluded any ingredients that are used for Fortify Enchanting or Smithing from the below list so that they don’t accidentally get used for leveling. The effects are sorted by value (e.g. paralysis is the best effect).
Effects
- Paralysis
- Briar Heart
- Canis Root
- Gleamblossom
- Human Flesh
- Imp Stool
- Netch Jelly
- Swamp Fungal Pod
- Damage Magicka Regen
- Bear Claws
- Blue Mountain Flower
- Burnt Spriggan Wood
- Chicken’s Egg
- Glow Dust
- Hanging Moss
- Hawk’s Egg
- Human Heart
- Jarrin Root
- Nightshade
- Spider Egg
- Invisibility
- Ash Creep Cluster
- Chaurus Eggs
- Crimson Nirnroot
- Ice Wraith Teeth
- Luna Moth Wing
- Nirnroot
- Vampire Dust
- Slow
- Burnt Spriggan Wood
- Deathbell
- Large Antlers
- Poison Bloom
- River Betty
- Salt Pile
- Trama Root
- Fortify Carry Weight
- Creep Cluster
- Giant’s Toe
- Hawk Beak
- Netch Jelly
- Poison Bloom
- River Betty
- Scaly Pholiota
- Trama Root
- Wisp Wrappings
- Regenerate Health
- Emperor Parasol Moss
- Garlic
- Gleamblossom
- Juniper Berries
- Luna Moth Wing
- Namira’s Rot
- Nordic Barnacle
- Vampire Dust
- Regenerate Magicka
- Dwarven Oil
- Fire Salts
- Garlic
- Jazbay Grapes
- Moon Sugar
- Salmon Roe
- Salt Pile
- Taproot
- Regenerate Stamina
- Bee
- Fly Amanita
- Mora Tapinella
- Scaly Pholiota
Useful Potions
Ingredients marked with * are essential to fortify smithing or enchanting.The % I sometimes add means that the ingredient adds or substracts a percentage to or from the magnitude/strength of the effect.
Potions
- Resist Fire, Frost and Shock
- Fly Amanita
- Hawk Beak
- Snowberries*
- Resist Magic
- Bleeding Crown
- Chicken’s Egg
- Crimson Nirnroot
- Felsaad Tern Feathers
- Gleamblossom
- Hagraven Claw*
- Hawk’s Egg
- Lavender
- Nirnroot
- Tundra Cotton
- Void Salts
- Wisp Wrappings
- Resist Poison
- Charred Skeever Hide
- Falmer Ear
- Garlic
- Grass Pod
- Mudcrab Chitin
- Slaughterfish Egg
- Troll Fat
- Yellow Mountain FlowerDG
- Beehive Husk (-50%)
- Thistle Branch (-25%)
- Water Breathing
- Salmon Roe
- Chicken’s Egg
- Hawk’s Egg
- Histcarp
- Nordic Barnacle
- Fortify Restoration
- Abecean Longfin
- Cyrodilic Spadetail
- Salt Pile
- Small Antlers
- Small Pearl
- Yellow Mountain Flower
- Fortify Destruction
- Ash Creep Cluster
- Beehive Husk
- Glow Dust
- Glowing Mushroom*
- Wisp Wrappings
- Ectoplasm (-20%)
- Nightshade (-20%)
- Fortify Illusion
- Dwarven Oil
- Mora Tapinella
- Scaly Pholiota
- Taproot
- Dragon’s Tongue
- Fortify Alteration
- Burnt Spriggan Wood
- Grass Pod
- River Betty
- Spriggan Sap*
- Fortify Conjuration
- Ancestor Moth Wing*
- Berit’s Ashes
- Blue Butterfly Wing*
- Blue Mountain Flower
- Bone Meal
- Chaurus Hunter Antennae*
- Frost Salts
- Hagraven Feathers
- Lavender
- Fortify One-Handed
- Bear Claws
- Canis Root
- Hanging Moss
- Hawk Feathers
- Rock Warbler Egg
- Small Pearl
- Fortify Two-Handed
- Dragon’s Tongue
- Emperor Parasol Moss
- Fly Amanita
- Troll Fat
- Fortify Marksman
- Canis Root
- Elves Ear
- Juniper Berries
- Spider Egg
- Fortify Heavy Armor
- Ice Wraith Teeth
- Sabre Cat Tooth*
- Slaughterfish Scales
- Thistle Branch
- White Cap
- Fortify Light Armor
- Ash Hopper Jelly
- Beehive Husk
- Felsaad Tern Feathers
- Hawk Feathers
- Honeycomb
- Luna Moth Wing
- Skeever Tail
- Fortify Sneak
- Abecean Longfin
- Ashen Grass Pod
- Frost Mirriam
- Hawk Feathers
- Human Flesh
- Powdered Mammoth Tusk
- Purple Mountain Flower
- Beehive Husk
- Fortify Block
- Bleeding Crown
- Boar Tusk
- Pearl
- Slaughterfish Scales
- Tundra Cotton
- Briar Heart (-50%)
- Honeycomb (-50%)
- Fortify Pickpocket
- Blue Dartwing
- Nordic Barnacle
- Orange Dartwing
- Slaughterfish Egg
- Fortify Lockpicking
- Ashen Grass Pod
- Falmer Ear
- Namira’s Rot
- Pine Thrush Egg
- Spider Egg
- Fortify Barter
- Butterfly Wing
- Dragon’s Tongue
- Hagraven Claw*
- Tundra Cotton
- Restore Health
- Ash Hopper Jelly
- Blisterwort* (-40%)
- Blue Dartwing
- Blue Mountain Flower
- Butterfly Wing
- Charred Skeever Hide
- Daedra Heart
- Eye of Sabre Cat
- Felsaad Tern Feathers
- Imp Stool (-40%)
- Rock Warbler Egg
- Swamp Fungal Pod
- Wheat
- Restore Magicka
- Briar Heart
- Creep Cluster
- Dwarven Oil
- Ectoplasm
- Elves Ear
- Fire Salts
- Frost Salts
- Giant Lichen
- Grass Pod
- Human Flesh
- Moon Sugar
- Mora Tapinella
- Pearl
- Red Mountain Flower
- Taproot
- Vampire Dust
- White Cap
- Restore Stamina
- Bear Claws (-20%)
- Bee
- Charred Skeever Hide
- Eye of Sabre Cat
- Hawk Beak
- Histcarp
- Honeycomb
- Large Antlers
- Mudcrab Chitin
- Netch Jelly (+100%)
- Orange Dartwing
- Pearl
- Pine Thrush Egg
- Powdered Mammoth Tusk
- Purple Mountain Flower
- Sabre Cat Tooth*
- Salmon Roe (-60%)
- Silverside Perch
- Small Pearl
- Torchbug Thorax
- Wisp Wrappings
- Cure Disease
- Felsaad Tern Feathers
- Mudcrab Chitin
- Vampire Dust
- Charred Skeever Hide
- Hawk Feathers
Smithing
So smithing… leveling smithing is so ridiculously easy compared to the other two, and now that you have the crafting armor set and fortify smithing potions… Outrageously fast too. We also get one major benefit from the crafting armor and smithing potions and that is that you can make any armor in the game reach the armor rating cap, in other words if you like how leather armor looks you can make it just as protective as daedric armor in practice!
Essential Items
- The (Final) Crafting Armor
- Aetherial Crown
- 4 Fortify Smithing 174% Potions (You only really need 2 though, 4 is for slow hands)
Recommended Items
- Black Book: Sallow Regent (For Seeker of Might effect)
Optional Quests
- Unfathomable Depths (For Ancient Knowledge effect (+15% smithing skill leveling speed, the guide assumes that you do not have this).
Mechanics
- Skill gain is dependent on the value of the item crafted.
- Skill gain on workbench and grindstone is dependent on the strength of the improvement made.
The below assumes you are going from level 15 to 100 in one shot. I imagine this will not be the case for you but this is simply meant to give you a rough idea of how much material you need so you don’t start leveling when you’re short on materials (As if you’ll be short on materials after playing long enough to level the other two to 100! You probably have enough material to do this 3 times over or you just haven’t been visiting enough dwemer ruins!)
Required Materials
- 156 Iron Ingots (125 if you start at level 20 smithing).
- 93 Leather Strips.
- 189 Dwarven metal Ingots.
This is a small list of materials I expect you to have way before you have reached level 100 Enchanting or Alchemy. I mean just compare it to the legacy ones (bottom of section)! Once you have all the required things to maximize your exp gain and these materials it’ll take 2-3 minutes to max out your smithing skill.
To gather the Iron ingots, everytime you stop by in a town you should go to the blacksmith and buy all his iron ingots and ore, you then want to store these materials in some cozy little container in your base of operations.
To gather Dwarven metal ingots, everytime you go into a dwemer ruin, scour the place for all it’s smeltable metal items.
These items are:
- Bent Dwemer scrap metal
- Large Dwemer plate metal
- Small Dwemer plate metal
- Solid Dwemer metal
- Large Dwemer strut
- Large decorative Dwemer strut
Those last 3 are SUPER heavy (solid dwemer metal weighs 25 for example) so you are going to need to bring a follower with you to use as a pack mule!
And that’s really it. It shouldn’t take you very long to get all the materials (you’ll probably have them all way before you reach level 100 enchanting/alchemy easily)
Dwemer Ruins happen to contain entire metric tons of Dwemer Metals just lying around up for grabs. There was so much of it in Mzulft(Mage’s College Quest) I had to go a few trips to pick it all up! it got me just over 470 ingots! Lost to the ages is bound to net you at least 200 more ingots, and these are just 2 quests, assuming you’re diligent in picking up the metal! So as you can see there’s really no shortage of dwemer metals in Skyrim.
Leather can be made on Tanning Racks from looted animal pelts.
Method
- Gather all the required ingredients and items
- Go to Solstheim and activate Seeker of Might
- Maximize your exp gain as described in the Getting Started section (+45% exp assumed)
- Craft 93 Iron Daggers (For lvl 15-30, 62 Daggers for 20-30)
- Get the Dwarven Smithing Perk
- Craft 63 Dwarven Bows
- Drink a fortify smithing potion
- Improve half of the bows
- Drink another potion and improve the other half (if you’ve got slow hands you can improve 1/4 of the bows at a time an drink potions between)
- Sell the bows for massive profit$
And that’s it, you’re at level 100 Smithing!
If you intend to build a Hearthfire house, you’re going to want to use your iron ingots on that first instead of making daggers’n’bows. Building a complete house is gonna cost A LOT of iron ingots to make nails, hinges, locks and iron fittings and creating all that stuff can raise your smithing level quite a bit, this may be a better use of iron ingots than making iron daggers, although you’re going to need a hell of a lot more of these ingots for going this route so you really only want to do this if you wanted that house to begin with, dwarven bows are still the most effective way to level past 30, but this is a 2 birds with 1 stone solution. It probably won’t get you all the way to smithing 100 but it’ll probably get you up to like 70 or 80 and then you can finish up with the bows. Now I say this… but personally I normally build the hearthfire home after I’ve maxed all my crafting skills anyways.
Even if you only want to be able to smith Daedric Armor (lvl 90 smithing) which is the strongest armor in the game, you still want smithing 100 so that you can improve that armor by 10% more than you could at 90 smithing and also just for completeness’ sake. If you do want to make Daedric Armor, make sure to hoard any Daedra Hearts you find, they are few and far between (but you can find loads of them in Soul Cairn while playing through the Dawnguard quest line if you’re getting desperate). Ebony ingots which are also relatively rare aren’t as hard to come by.
Make sure to also hoard any dragonbone and dragon scales you can find, the bones are needed for the strongest weapons in the game and the scales to make the strongest light armor in the game, even if you might not be a light armor character, you might want to make some of this stuff for your follower, it’s also easier to make this (material wise) than Daedric armor so you can also give your follower the dragonbone armor if it’s a heavy armor companion.
Now that you have level 100 smithing, it’s time for you to figure out which armor you think looks best on your character and just roll with it!
Legacy Method
In the first iteration of this guide I didn’t even know about the Aetherial Crown and I was still experimenting, so if you are leveling Smithing before Enchanting and Alchemy, this is what I recommend doing (assumes 30% exp bonus from Warrior Stone and Well Rested):
- Gather 591 Iron Ingots
- Gather 940 Dwarven Metal Ingots
- Gather 121 Leather Straps
- Craft 121 Iron Daggers
- Get The Dwemer Smithing Perk
- Craft 470 Dwarven Bows
Alternative method:
- Gather 121 Iron Ingots
- Gather 121 Leather Strips
- Gather 778 Dwarven Ingots
- Gather 778 Firewood (yeah, ouch)
- Make 121 Iron Daggers
- Get the Dwarven Smithing perk
- Make 18672 Dwarven Arrows (that’s 24 per ingot, 778 ingots)
These are methods I actually used once, and I’ve managed to gather all these resources while leveling Enchanting and Alchemy before, so it’s a viable approach for those who might want to skip one of the other two skills. The Dwarven Bow method is the most popular method to grind smithing levels these days.
Alternative Method
For those who do not like any of the methods I’ve named to level Smithing there’s a last alternative, I’ve never done it so I won’t go into as much detail, but what you need to do is go to the Halted Stream Camp, get the Transmute spell, mine/buy all the iron ore, transmute it all to gold and silver and make jewelry from it. (Nice way to use stolen gems as well). This method is ideal to level enchanting and smithing side by side, enchanting all the jewelry you make before you sell it. It will also level your alteration skill.
Blacksmith’s Resource
Special Armors and their Perks
- Bonemold Armor (Heavy): Steel Smithing
- Chitin Armor (Light): Elven Smithing
- Steel Plate Armor (Heavy): Advanced Armors
- Nordic Carved Armor (Heavy) and Weapons: Advanced Armors
- Stalhrim Armor (Heavy or Light) and Weapons: Ebony Smithing
All ore and ingots can be bought from blacksmiths in towns, if there isn’t enough available via mining you simply have to buy them.
Neutral Materials
- Leather and Leather Strips: Kill animals, loot their furs or pelts and convert to leather and leather strips on a tanning rack.
- Iron Ore and Ingots: Since you need potentially massive amounts of them, the best way to get them is to simply buy them from blacksmiths in towns at every opportunity for later use so that you have them when you need them. The best spot to mine it is the Halted Stream Camp, there are also a couple veins in Fort Fellhammer and Embershard Mine.
- Corundum Ore and Ingots: The best way to get this ore/ingot just as with Iron is to buy it, but it can also be mined in Blackreach.
- Silver Ore and Ingots: The best way to get both of these is to get the Transmute spell available in the Halted Stream Camp and mine/buy iron ore, you can then convert the iron ore to silver ore, and the silver ore to gold ore. (Unlimited Alteration spellcasting is gonna be very good to have here).
- Gold Ore and Ingots: There is a gold mine called Kolskeggr Mine which contains 18 gold ore veins and more loose ore and ingots. (You can get 55 gold ore here), Silver ore can also be transmuted to gold with the transmute spell as explained before.
- Netch Leather: This item is dropped by Netches which can be found on Solstheim. It is also sold by the blacksmith on Solstheim.
- Stalhrim: Stalhrim is an ultra rare mineral that can only be mined with an ancient nord pickaxe. It can only be found on Solstheim, the best source is called Stalhrim Source, it’s located northwest of White Ridge Barrow and contains around 30 pieces of stalhrim. Gyldenhul and Kolbjorn Barrow as well as Northshore Landing all contain 6 mineable pieces too. Stalhrim replenishes like any other ore wein after ~30 days.
Heavy Armor Materials
- Steel Ingots: Steel ingots are made by smelting Iron and Corundum ore, I’d say that the best way to get Steel ingots is buy them.
- Dwarven Metal Ingots: The best way to get these is to scour dwemer ruins for smeltable metal (list of which metals are smeltable in the above smithing section).
- Orichalcum Ore and Ingots: This can be mined in Bliegulch Mine(~27), Dushnikh Mine(~21) and Mor Khazgur Mine(~21).
- Ebony Ore and Ingots: This can be mined in Gloombound Mine(~48) and Raven Rock(~27)
- Daedra Heart: This item is extremely rare, the easiest access to it is Alchemy merchants who sometimes sell it, the best sources for daedra hearts is Soul Cairn (Dawnguard Quest Line) and Shrine of Mehrunes Dagon.
- Bone Meal: Loot from Draugr and Skeletons, also sold in alchemy shops.
Light Armor Materials
- Moonstone Ore and Refined Moonstone: Best way to get is to buy, but you can mine 7 of them in Mzulft (Requires Mage’s College Quest to get in) and 5 in Soljund’s Sinkhole (+3 loose ore +2 ingots as well)
- Malachite Ore and Refined Malachite: You can find 7 ore veins in Steamscorch Mine, 7 ores in Labyrinthian (Mages College Quest Required), and 2 ore veins on the top of the throat of the world next to the Notched Pickaxe.
- Quicksilver Ore and Ingots: It’s best to buy them, but you can mine around 15 in Quicksilver Mine (Dawnstar).
- Chitin Plate: Sold by Blacksmiths and dropped by Ash Hoppers on Solstheim.
Starter Tips
Here are some tips for early game success.
Getting your first 5000 Gold
So you run through the start of the game, kill your first dragon, and find yourself with only 1000-2000 gold in your pockets, not enough to buy yourself a base of operations (if you intend to get Breezehome or Hearthfire that is) and you’re a bit lost on what to do for money, I mean sure you could make potions or as the guide previously recommends, enchant items for money, but this takes a short while if you’re aiming for 5000 gold. Odds are you’ll have filled your inventory dozens of times before you get there and you’re getting tired of being so encumbered all the time.
If this happens to you then there’s a surefire method to make over 5000 gold very early in the game. First you need to make your way to the Halted Stream Camp directly north of Whiterun. Find a pickaxe (there should be a few on-site) and mine all the iron in there and just loot the place, killing all the bandits. You will find a spellbook on a table in the main chamber called Transmute Mineral Ore, learn this Alteration spell and once you’ve milked the place of all Iron Ore, make your way back to the Whiterun stables. (Optionally if you have enough cash, stop by the smith in Whiterun and buy all his and her Iron Ore (not ingot, just ore))
Now you want to start converting the ore to gold, to do so cast the spell, the spell will turn one orre into silver, cast the spell again and it will turn the silver ore to gold, so you essentially have to cast the spell twice per ore. Now I assume that this early in the game you don’t exactly have a lot of magicka or skill points invested in Alteration so to make your life easier, once you run out of magicka after casting the spell once or twice, press T and wait for 1 hour to replenish your magicka, then cast the spell again and keep going like this until you’ve turned all the ore to gold.
Anyhow while you’re converting the ore you want to hire a carriage (at Whiterun stables) to Markarth, once there run over to the southwest, over the lake/bridge there should be a few houses (Left Hand Mine) and a few people talking together, one of them is named Pavo Attius, you want to talk to this Pavo and he will give you a quest to clear out the nearby Kolskeggr Mine.
Take this quest and just keep converting all that iron ore to gold until you run out of ore along your way (for me I didn’t finish converting the ore until I had already finished this quest)
Pro Tip: On the way to Kolskeggr Mine you will see a map marker for The Lover Stone, since we use this stone for the Aetherial Crown, you may want to take this opportunity to run up to it so you can fast travel to it later.
Clear out Kolskeggr Mine and mine all the gold in there as well, then run back to Pavo, by the end of this you should have well over 100 gold ore. Speak to Pavo and finish the quest to get a bit of gold, now talk to him again and he will offer to buy all your gold ore, he buys the ore at face value (50 per ore) so 100 gold ore (you’re basically guaranteed to have more than this) will net you 5000 gold!
And now you can easily afford your first player home!
Finding Materials For Hearthfire
So as explained in the Getting Started section, you will need a couple of materials to complete your hearthfire home. Most of these are super easy to get. You get Quarried Stone and Clay on-site (there’s always a deposit of those things right next to the house, and a pickaxe to mine them), then you get glass and straw from general goods merchants (such as Belethor, I also recommend stocking up on goat horns for candles) and iron/moonstone/corundum ingots from the same merchants or blacksmiths. Then there’s saw logs, you need to go to any Lumber Mill (there’s one in Falkreath) and talk to the person who owns it, they will sell you 20 logs for 200 gold (so to get the 63 logs needed you’ll need to buy 4 times for 800 gold)
The gold you probably want to get by mining it from kolskeggr mine (as explained in the above getting your first 5000 gold bit)
Now there are basically two materials you may have difficulty finding, these things are a quicksilver ingot and a grand soul gem for the enchanters table and alchemy lab.
The quicksilver you’ll find in Quicksilver Mine in Dawnstar.
The only guaranteed Grand Soul Gem I know about in the game is in a display case in the Archmage’s Quarters in the College of Winterhold.
To get in there you basically need to go to the college, finish the first quest in the main quest line (go through the Sarthaal ruins) and then you’re told to go see the archmage which grants you access to his quarters and thus the ability to steal this Grand Soul Gem.
Pro Tip: If you’re a mage also steal the Arch Mage’s robes, this is one of the best items in the base game for a mage to wear… Until you can make better ones 😉
This is a good alternative to buying the gem at 1200-1500g which is a bit steep for someone fresh out of the tutorial. The soul gem has to be pre-filled (i.e. it can not be a grand soul gem that you got empty and then filled yourself) so these are pretty much your only two options for getting this gem.
Picking Arcadia’s Pockets
So you’ve decided that you want to level Alchemy via training and you don’t wanna lose any money doing it so you’re just gonna steal it all back.
You train all your skill, crouch, open the pickpocket menu on arcadia and what do you know, 0% chance to succeed in getting your gold back :O
There’s a trick to this. You’re probably gonna need to level your pickpocketing a little first, to do this pick Arcadias (or other people’s) pockets of various items with a high chance of success to get a higher level at picking pockets, you need to do this until you can pickpocket 200-300 gold easily (because that’s what the initial training will cost)
Warning: If you have had Arcadia train you before she may be holding some money in her inventory beforehand. If this is the case you’re gonna have to train your pickpocket skill and put perk points in it until you can steal it all.
After you have done that you need to level only one skill level at a time before you pickpocket (or two depending on pickpocket skill level), the pickpocket success is based on item value, and while 1000g may have 0% success, 300g will have a decent chance of success.
If you don’t really want to specialize in pickpocketing then you’re gonna have to play through the Dragonborn expansion (Solstheim’s main quest line) to get the ability to “respec” at the cost of one dragon soul per perk tree wiped.
Summary
This section is meant to summarize the methods I suggest you use. It may seem a bit long for a summary but remember I’m describing how to level all 3 crafting skills, not just one of them.
The order in which I suggest you level the skills is as follows:
- Enchanting.
- Alchemy.
- Smithing.
There’s no ‘rule’ against using all these skills as they were intended in-game, if you have a sword you’ll be using for a while, improve it, maybe even enchant it. You can even make a fortify smithing potion so that you can improve it even further, and some poison for good measure. Just make sure to save enough fortify enchanting and smithing ingredients for the end game.
Essential Quests
- Lost to the Ages (Arkngthamz) (Get Aetherial Crown reward).
- Unearthed (Solstheim) (Get Ahzidal armor set).
Recommended Quests
- The Black Star (Shrine of Azura) (I recommend going The Black Star route rather than Azura’s Star route).
- Return to Your Roots (Blackreach, Sinderion’s Field Laboratory) (Grants Sinderion’s Serendipity which gives you a 25% chance to create two potions instead of one when doing alchemy).
Starting off
Get yourself a base of operations where you can stash collected items (Breezehome).
As you play you want to gather the following items to use for leveling the skills:
- All alchemical ingredients you can find.
- All iron ore and ingots.
- All dwarven metal ingots and all dwemer metal that can be smelted to ingots.
- All soul gems.
You want to use the soul trap spell to fill all these soul gems at every opportunity. Alternatively you can get (or create) a weapon with the soul trap enchantment.
You want to save these items for later use (Do not use any of them for leveling, these are gonna be used last):
- Filled Grand & Black Soul Gems.
- Fortify Enchanting Potion Ingredients.
- Fortify Smithing Potion Ingredients.
Get the Aetherial Crown so you can have 45% or 50% exp boost. (Read the Getting Started section if you don’t know what I’m talking about).
Enchanting
Between your quests and dungeon runs, whenever you’re in town.
- Activate the Mage Stone, Sleep in a Bed (inn if you’re homeless) and if available, equip the Aetherial Crown for the Lover Stone effect for a total of 45% bonus exp.
- Disenchant all enchanted loot you’ve found and haven’t yet learned
- Enchant all your unenchanted loot, buy soul gems if you have to to finish the job.
- Sell the loot after enchanting
- Buy all Iron Ore and Ingots from the town’s Blacksmith and stash in your base of operations.
Gather these items
- Black Book: Sallow Regent (nordic ruin on the northwestern side of the island on top of a mountain) for the Seeker of Sorcery effect (+10% enchanting power)
- Ahzidal’s Armor Set (Unearthed quest) for Ahzidal’s enchanting bonus (wearing the boots + any other 3 parts of the armor set will give you +10 to your enchanting skill)
- Once you are level 30+ go to Treva’s Watch or Soul Cairn for an Enchanter’s Elixir.
Get these perks
- Enchanter (5)
- Insightful Enchanter
- Extra Effect
Once you’ve reached enchanting level 100, make your first Crafting Armor (read the Crafting Armor section).
Alchemy
- Equip your crafting armor, Get the Seeker of Shadows effect Activate the Thief stone and sleep in a bed. (No Aetherial Crown)
- Go to Arcadia’s Cauldron
- Buy 5 alchemy levels from Arcadia now, and again everytime your character levels up to ensure your success in getting all the way to level 100
- Craft potions listed in the Alchemist’s Resource section, try to aim for 3 ingredient potions when possible.
- If you did not get to Level 100 refer to the Alchemy section of this guide for information on what you can do next.
- Once you’ve reached alchemy level 100, make another Crafting Armor (read the Crafting Armor section)
- Now make your third and Final Crafting Armor.
Smithing
- Equip the final Crafting Armor, get Seeker of Might effect and get at least 2 Fortify Smithing 174% potions. (read Crafting Armor section)
- Maximize your exp gain (assumed 45%, wear Aetherial Crown)
- Gather These Items (156 Iron Ingots + 93 Leather Strips + 189 Dwarven Metal Ingots)
- Craft 93 Iron Daggers (Get to level 30)
- Get the Dwarven Smithing Perk.
- Make 63 Dwarven Bows
- Drink Fortify smithing potion
- Improve 33 Dwarven Bows
- Drink the other Fortify Smithing Potion
- Improve 30 Dwarven Bows (Get to level 100)

Be the first to comment