Basics
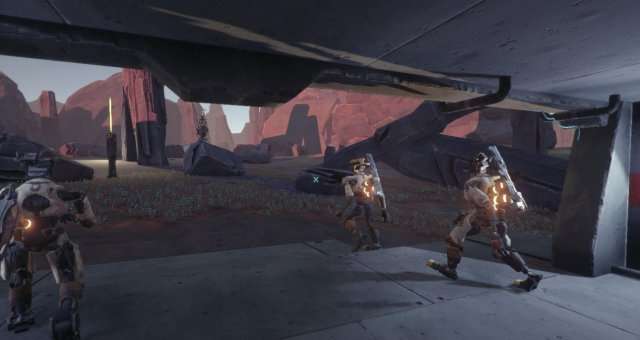
While surveyor bots are not your allies, they are crucial allies. They hate everybody you do and can even operate independent of you. They can come running to your aid if they hear gunfire, and have the same equipment as you. Supporting them by taking bunkers is worth your time, since such structures increase the number of allies in the field. Any number of fights have had their tables turned by sudden reinforcements from a nearby barracks.
Similarly, barracks troop deployment is limited if the surveyors already have many patrols in the field, so if a fight goes on too long then the guards will respawn, and few raiding parties have the power to sustain an assault against that many defenders.
Try not to shoot the surveyor bots. They run away and don’t help you again, though they’ll be lost in a skrimish befroe you see them more. Don’t stress out about friendly fire in the long term, though, since everything with a gun is expendalbe, yourself included.
I personally recommend taking along nano-healing, since it’s crazy effective when other robots feel the effect even if you only heal a little bit.
On behavior, robots with railguns stay a distance away, robots with the heavy beam weapons discharge into a single foe until he’s dead or they’re out of ammo, and assault rifle robots are a mixture of the two.
Similarly, robots have AOE effects, though I’ve only seen nano-healing and damage pulse modules in use. They make a loud steaming noise while they charge up, as they are not activated instantly like the player’s.
On the side, cover is different here on Tolva. Rocks are rarely the right height to shoot over, but they are large enough to do tricky flanking around it.
Opposition
The two factions opposing you are the badits and zealots. They are virtually indistinguishable mechanics-wise as far as I can tell except that they shoot at each other. For them and their bases, you can expect mostly the same as surveyors but against you instead of with you.
Now we note how one deals with shields: Some say that you simply put rounds into the owner until the shield breaks, soem say that you hide until it runs out of charge. My method was to target each enemy indivdually for a few shots so that they all popped their shield when they were out of range, since the AI doesn’t turn off their shields manually. When they got within range, my allies have full shields left while the enemy has around half. Shields are a pain to deal with, but with the right firepower or strategy they are minimised.
Note also that enemies can drop heavy gun emplacements from orbit. It’s not common, but those things can take off a lot of your group’s health pretty quick. Luckily you know what they are before they unfold, though your alliies don’t, so shoot all of your bullets into it before it starts to shoot back.
Also, you will occasionally come under fire from enemy scouting bricks. Bear in mind while dismantling them that they come in pairs, and often fall from space instead of coming across you in normal patrols.
As for the sentries, just pour damage into them while using healing AOE. There’s not much else to do
Finally, enemies can (and will) take your hard-fought troop spawnpoint. Rush in quickly and they might not have reinforced.
Leadership
Once you get the SQ-UID Phreaker series of weapons, you can recruit robots. Every phreaker has a maximum recruitment lmit of one higher than their mark #, and you cannot recruit robots of a higher rank than yourself.
Recruited robots are much more definitively allied to you than the surveyors. They follow you around, and by holding right click and left clicking on ground you can order them to move to said location.
The railgun AI supports you from afar, while the heavy beam AI tanks damage while dealing it out at close range. Assault rifle AI are mid-range, supporting other, closer AI.
One must work a bit more with their squad than with a random patrol. They might be your only company that doesn’t draw from your reactor, and your only support as well. Bear in mind the weapons summary from earlier and support your troops. You’re tough and know how to manuever, you can take some damage.
In fact, you are the best robot on the field. You understand your weapon’s capabilities better than the short-lived AI ever will, know how to aim better than they do even if you don’t snap on to the target, can see opponens from more than a fly’s leg away, can use binoculars, have a sidearm, can turn off your shield early, and most importantly, can play the battlefield like Sun Tzu himself compared to the simple-subroutined robots.
Once you get the top level of Phreaker, you can recruit an entire barrack’s defense force. Try to avoid doing that, as bases have a limit on how many robots can be in the field and the bots you just recruited still count. Enemies can take their bases back, and will do so with speed if you’ve taken all the defenses with you.
Also, play conservatively. Unless you’re taking a bunker, you have to head back for more reinforcements, so heal your men instead of losing them unless you’re going to sacrifice all of them.
Finishing off with an advanced tip, pay attention to your soldiers during fights. Remember when I said that ALL AI are drawn to fights? Discovering enemy reinforcements when they tear up your rear means the end of any warband. Your allied bots have better situational awareness than you do.
Written by Catnapper.


Be the first to comment