
Complete walkthrough of the classic game, including some hidden easter eggs and additional resources.
You may also like:
Contents
Introduction
Full Throttle follows the story of Ben, the leader of notorious biker gang The Polecats. You’ll be in control of him throughout the entire game while interacting with numerous other characters in the world.
The game takes place in an alternate reality where biker culture dominates the environment. Each phase of the story has its own share of puzzles, all of which have varying difficulties. Most of the time, you have to collect objects before you can proceed to the next part of the story.
I highly recommend taking the time to watch all of the cutscenes and explore each area closely as this helps you understand the story. However, if you’re just looking to blow through the game or if you just want help when you’re stuck, feel free to keep coming back here!
Easter Egg in the opening cutscene, the hood ornament that Ben crushed with his bike is a naked drawing of the game’s creator, Tim Schafer.

Part #1: The Kickstand
After the introductory cutscenes you’re taken to a back alley with a dumpster, but no characters are to be found! Right now, you have few options other than clicking. If you click any part of the dumpster, you hear a punching noise and see a dent appear and disappear quickly where you clicked it. If you click the furthest-right dumpster lid, Ben punches it open and climbs out. Walk to the next area by moving your mouse to the right until the cursor turns into a red arrow and click.
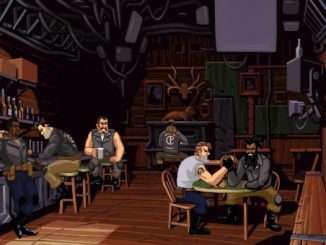
You’re now facing the front of the Kickstand. In the corner you see an awesome bike. While it’s worth seeing if you can start riding right away, Ben quickly realizes his keys were stolen. Let’s check out the bar to see if someone knows what happened. Use the ‘kick’ command to… unlock the door and enter the bar.
Now you’re inside the Kickstand, which is empty aside from you and Quahaug the bartender. If you’re new to the story, it’s worth chatting with him to see what he has to say. But if you’re impatient, keep going!
Use the punch command on Quahaug to interrogate him. After the cutscene, you receive your keys. Head back outside and try to use your bike. This time you see the cutscene of Ben starting up his bike and heading off after his gang.
The next scene is where your first fight begins. The best guidance I can provide here is to keep mashing the left mouse button as you move in closer to your opponent. This is the first of many fights you’ll get into but this is much easier than the rest.
Once you defeat the Rottwheeler, the game cuts to the video of Ben’s crash, signalling the end of Part 1!
Part #2: Melonweed
Ben has crashed his bike! Luckily, he’s been saved by a reporting who happened to be passing by the area. He wakes up in Maureen’s shack which is where the game picks up again.
After chatting with Maureen, you learn there are three items needed to get your bike working again:
- Maureen’s missing Welding Torch
- A new pair of forks
- A fresh tank of gas
Before you leave Mo’s shack, grab the gas can and hose in the background. Feel free to talk to Miranda, the reporter, before heading out. There isn’t much to be gained by doing this however.
*Note – the order you collect these items isn’t really relevant, but I put them in the most efficient order since you need to collect items from most locations to help you with each puzzle.
Mo’s Welding Torch
Head to the trailer on the left side of the map. Notice the glow coming from the skylight? Looks like someone is doing some serious welding down there!
Knock on the trailer door to get the trailer’s owner, Todd, to come upstairs. Once you hear him start shouting at you from inside, kick the door to both enter the trailer and knock him out.
Alternatively, you can keep knocking on the door and speaking to Todd for some nice dialogue before knocking him out. If you stop interacting with him, he heads back downstairs to continue working on his ‘art’.
Inside the trailer, open the cabinet on the left side of the screen and grab the lockpick inside. Next, open the refrigerator behind you and take the steak. Now, click on the bright platform to the right of you to take the elevator to Todd’s basement.
Feel free to use the ‘look’ option to admire Todd’s many works of art before grabbing Mo’s torch sitting on the table. When taken, the game cuts to you returning.
Gas
Leave Mo’s shack again and head to the gas tower at the upper-right corner of the screen. The first thing you see here is the locked door by the gate. Use your lockpick on the padlock securing the door to open it. Before heading in, grab the lock that was thrown to the side.
Once inside, touch the ladder that leads up to the tower. This immediately sets off an alarm and after a few seconds, the authorities arrive. Instead of climbing the tower or running away, click on the large gas tank in the upper-left corner of the screen to have Ben hide behind it.
Now when the cops arrive they won’t be able to find you. This leads them to land so they can look for you in the tower. While they’re distracted, use the hose and gas tank you collected from Mo’s Shack on the hovercraft’s gas cap. Finally, use the talk command to begin siphoning gas from the craft.
The next cutaway is of the cops discovering Ben stealing gas from their craft and him running back to Mo’s where he delivers the gas.
Forks
Last but not least, you need a new pair of forks to finish your bike. Head to Todd’s Junkyard at the top-left corner of the map. Use the padlock from the gas tower on the lock below the garage door to secure it, then click on the chain to climb over the junkyard wall.
Todd has a vicious junkyard dog that protects his property so you need to take care of it before you can grab the forks. These are located on the pile right in front of you when you first enter the junkyard.
To take care of the dog, first begin by clicking anywhere on the ground inside the junkyard to get on the ground level. Then, keep walking to the right until you enter an area where Todd’s dog and a bunch of cars are parked. Place the steak you collected from Todd’s refrigerator inside the car closest to you to distract the dog.
Leave the lot to the left. Notice the crane that hovers just over the lot – hover over it to get the arrow and click to get Ben to enter it. This takes you back to the lot view, except now you’re controlling the crane! Move the magnet over the car with Todd’s dog and lower it. Click the red button to activate the magnet, and then raise the car as high as it can go. Now, leave the crane.
Finally, walk back to the pile with the forks on top of it and collect them. Immediately after, you’ll cut to a scene where Ben is delivering the forks.
Distract the Cops
After the cutscenes of Mo delivering Ben’s repaired bike, you hit one more obstacle – the cops you encountered at the gas tower have set up a roadblock on your path. Distract them by heading back to the gas tower and setting off the alarm again by touching the ladder. The cops will head back to the tower, allowing you to pass.
Following this are a few minutes of cutscenes.
Leaving Town
After your conversation with the dying Malcom Corley, you’re taken back to Mo’s Shack where you find her place trashed. Use the ‘look’ command to search the debris pile to find the picture with Mo and her Uncle Pete at his Mink Ranch. Leave Mo’s Shack and head back to the Kickstand by hopping on your bike and heading north. This location is noted with the different arrow icon when you move your mouse to the upper-center of the map view.
Upon arriving at the Kickstand, head back in the alley where the game began and use the chat command to speak with Miranda who is hiding there. She will give you a Fake Federal Investigator ID that can be used to get past the new roadblocks.
Now, head inside the Kickstand where you see the news report about the police looking for you.
Easter Egg Keep bugging Emmett the truck driver about trying the knife game he’s playing. After ten times, he lets you take a stab at it!
When you’re ready to move on, use the Fake ID on Emmett so you can stow away in his truck to pass the roadblocks.

Part #3: The Gorge
After passing through the roadblocks, Ben wakes up outside of Uncle Pete’s Mink Ranch to the sound of Emmett fixing something on his truck. Once he leaves, Ben realizes Emmet has stolen a hose from his bike.
Enter the house on the right-side of the screen to find yourself in Mo’s bedroom. Use the pillow to uncover the tire iron. Use this on the Corley Motors chest to find a hose that can be used on Ben’s bike. Following this is a cutscene where Mo races out of the Mink Ranch and has Ben chasing her.
Easter Egg Emmet has an Imperial Tattoo from Star Wars on his right arm, which is visible during his closeups.
We’re also introduced to a second biker gang, the Cavefish, who attempt to steal the cargo from Emmet’s truck. When they fail, they instead blow the truck up while it crosses the bridge over the Gorge. Maureen has made it to the other side, but now Ben must find a way to cross. After some poking around, the only logical conclusion is to jump the gorge, but you need three items for a successful jump:
- A fan from a hover car
- Fuel for your bike’s recoil booster
- A ramp
Again, the order here doesn’t really matter but I’ve placed them in the most efficient order of collection.
Hover Car Fan
After the cutscenes end, Ben arrives at the wrecked Semi Trailer containing concentrated fertilizer. Before continuing, take a handful of the fertilizer as it will be used later.
Now, use the tire iron on the wheels of the trailer to loosen the wheels, then, push the now unstable trailer over, dumping a mess of fertilizer on the road.
Meanwhile, Bolus and Nestor have been instructed to wait for Ben or Maureen at the Mink Ranch. Get back on your bike and head towards the Ranch. Once you arrive, you’ll be immediately turned around while Bolus and Nestor begin chasing you in their car. Keep traveling and don’t stop until after you pass through the mess of fertilizer on the road.
The fertilizer dust is thick enough that Bolus and Nestor can no longer see, causing them to crash into the side of the road and rendering their car useless. Ripburger picks them up and they disappear from the area.
Now, head back up the highway until you reach the car wreck where you can now stop. Use the tire iron on the rear end of the car (about where you might expect the gas panel to be located) to retrieve the hovercar fan. Use the collected fan on your bike to install it.
The Old Mine Road
Before continuing with the game, it’s important to learn about the Old Mine Road. This is a place notorious for bikers to brawl while riding using various weapons. The combat mechanics are similar to Part 1 except now there are different weapons that enter the mix. However, the strategy remains the same in that you can essentially button mash your way through it, though some weapons offer a significant advantage and others are only effective on specific opponents.
Opponents appear at random and some disappear entirely after you defeat them. Once an opponent is defeated you collect their weapon and you can only collect one of any weapon
To enter the Old Mine Road, get back on the highway until you find an Exit that lets you enter the Old Mine Road. If it’s your first time on the road, you’ll meet Father Torque, a former Polecat leader. He’s a great resource for tips and information on what you can do to get past the now destroyed bridge, or you can ignore him.
Tip: If you want him to stop showing up, exhaust all of the chat options when you speak to him.
Afterwards, all opponents appear randomly. As you come up on someone, you can usually tell what gang they’re in based on their profile but you won’t know the exact opponent until you enter the battle sequence. You can always hit ‘Backspace’ to skip past an opponent if their profile doesn’t match what gang member you’re searching for.
- The Vultures have skinny bikes. You can get a chain, chainsaw, or the coveted recoil booster fuel from them. There is also an opponent who just fights with her fists.
- The Rottwheelers have fat, red bikes with a massive front wheel. You can earn a spiked mace and a wooden plank from them, but you can also fight your buddy from Part 1 again who is still only using his fists.
- The Cavefish have yellow bikes with a large back wheel and they’re configured so they must ride lying down with their head forward. You don’t earn any weapons from them but you do collect a pair of Cavefish goggles when you defeat one, which are used to locate the ramp.
Recoil Booster Fuel
One of the ‘surprises’ Mo had for you was a recoil booster that lets your bike reach insane speeds. Unfortunately, she stole the fuel from you while you were searching through her things. This means you’ll now have to steal from someone else. enter the Old Mine Road.
Due to the random nature of opponents appearing on the Old Mine Road, you’ll have to be patient until you find the opponent you’re after. To get the booster fuel, you’ll first need to fight the member of the Vultures gang who uses a chain to attack his opponents. This is a man wearing a red shirt with a black vest and goggles. He can be easily taken out with your fists but it’ll be easier if you already have another weapon.
With the chain collected, you’re now searching for another member of the Vultures that has a recoil booster. The first time you encounter this opponent Ben will chat with him about his booster before the opponent activates it and speeds off. Any subsequent times you encounter him, you want to quickly change to the chain and wrap him with it before he can speed off. If you do this correctly, the opponent activates his booster just as you wrap him, causing his bike to speed off without him. If you’ve done it correctly, you’ll see a different cutscene showing Ben’s bike with the attached booster fuel.
Ramp
If you’ve been searching around, you’ll have come to learn that the Cavefish are responsible for stealing a ramp that was previously used by a biker to jump the gorge and that it’s likely stored in their hideout which is hidden somewhere along the Old Mine Road. Find it, you need a pair of Cavefish goggles.
If you’ve come across a Cavefish before, you’ll know that they’re an incredibly difficult opponent to beat. In order to properly defeat one, you need to collect a few more weapons:
- First you need the chainsaw which is held by a Vulture with a red mohawk. The only way to beat her is by throwing a fistful of fertilizer in her face before she starts chopping away at you. The advantage to getting this early is literally every opponent can be defeated with it; Cavefish can also be defeated with it, but because it doesn’t knock them out, they activate a self-destruct function on their bike which destroys everything before you can collect their goggles.
- Next you need to collect the wooden plank held by a Rottwheeler with a small ponytail. The chainsaw is a very quick and easy way of doing that.
Edit: after playing through the game again, I was able to also get the wooden plank with only the spiked mace. It was a little more challenging as you need to keep your distance to avoid getting hit, but it seems the chainsaw is actually not the only way to get the plank.
With the wooden plank you can finally knock out a Cavefish and steal their goggles. The key is to enter a battle sequence with them and wait to come across cracked pavement. The bumps in the road cause the Cavefish to sit up on their bikes momentarily, giving you the ability to knock them out with the plank. Be swift, but also careful! If your bike touches theirs, they release an oil slick that causes you to fall off your bike and forcing you to find another one to take out.
One you’ve scored a pair of goggles, you can wear them on the Mine Road. You must be wearing them to enter the hideout. Keep riding until you come to a point in the road where it looks like you’re crossing an intersection – you’ll be riding up a hill with a plateau with the intersecting road, then it drops back down again into the canyon. You’ll be alerted that there’s an exit you can take, but wait for it to beep a few times. Click to exit the moment you see the text ‘Cave’ where it previously said ‘Exit’ to enter the cave.
Once in the cave, keep driving through the tunnels until you make it to where the ramp is. Get off the bike and ‘Use’ the ramp twice – once to push it to the bike, and the second time to attach it. Travel back to the next room and get off your bike. ‘Use’ the ramp again and Ben will use the edge of the ramp to pry off the dots in the road. A cutscene will start showing the Cavefish coming after the stolen ramp. Because the Cavefish Goggles rely on the road dots for navigation, Ben prying them off the road in their hideout causes them to miss a turn and instead run off the side of a cliff.
After the cutscene, you’ll be back at the bridge. Get on your bike and move your mouse over the edge of the Gorge to get an arrow. This time, Ben will use the resources collected to jump the bridge and continue onto the next part.

Part #4: Corley Motors
Ben travels into the night until reaching the headquarters of Corley Motors. There isn’t really a defined list of items you need to collect here, but the task at hand is still to try and find Mo.
Find Mo
Mo is currently hidden away at the Vultures’ hideout. However, it’s surrounded by a large minefield that you need to maneuver before you reach the entrance. To get past it, you first need something to help.
Head down the ramp at Corley Motors towards the stadium; you should get a red arrow just under it that takes you to the souvenir stand. Use the ‘look’ command on the t-shirt to get the vendor to turn his back. While he’s distracted, take the bunny on the leash and leave.
Get on your bike and head to the Vultures’ hideout. This is found on the far-left side of the screen – you’ll get a yellow arrow when you hover over the right spot. Upon arrival, Ben will toss a stone that blows up upon hitting the minefield. Right now, all you need to do it ‘use’ the bunny you stole and wait for it to blow up. Once that happens, collect the battery that appears on the ground after the explosion.
Head back to the souvenir stand and use the battery with the toy car. Drive it into the area to the right and click on the turnstile to trap the car. This causes the souvenir vendor to leave his post, which allows you to steal the box of bunnies. Head back to the Vultures’ hideout.
You’ll need to use the box of bunnies to clear a path through the minefield. The best approach I’ve found is to ‘use’ the box with the minefield and immediately begin collecting all the bunnies as they start hopping away. Then, get Ben as close to the start of the minefield as possible and release only one bunny at a time. As you see the path beginning to form, you can either keep collecting the same bunny and walking up the path you’ve created or just letting it go until it explodes, then releasing another. You’ll know you were successful when you get to the cutscene of Ben arriving at the hideout entrance.
If you’re just trying to get through the next part quickly, say the following lines as the Vultures are trying to tear you apart:
- “Let me go or else…”
- “I’ll call you names!”
- “Diapered Dynamo!” (this was a nickname Malcom had for Mo when she was a child)
Easter Egg If you can, pause while there’s a close-up of the Demonlition Derby plans during Suzy’s explanation. Most of the sentences are just the game developers making fun of each other.
Immediately following are a bunch of cutscenes, followed by the demolition derby.
Demolition Derby
Easter Egg During the cutscene where the Demolition Derby contestants are introduced, the driver on the far left is George Lucas. You can also see a reference to Sam & Max Hit the Road on the stadium wall with the skull and crossbones using Max’s head instead of a skull.
The key to beating this event is using the ramps to bounce off of other cars – this causes them to stall. You’re ultimately trying to trigger a head-on collision with Mo’s car (yellow) to fake her death as she ejects from her car. However, Bolus and Nestor have a car of their own that will block you from reaching her directly.
Drive to the left side of the arena until you find the ramp. Jump off it onto the car that stops just under it to make it stall. Then, push it to the bottom of the screen, then all the way to the right where you’ll find another ramp. Push the car up and over the ramp and jump off it. This gives you something to bounce off of so you can get on top of Nestor and Bolus’s car to stall it, providing you enough time to cause the collision with Mo.
Next you’ll be outside of the car, on fire. This part is simple – have Ben walk along the wall of the stadium to start lighting it on fire.
Now that the crowd is evacuating, Bolus and Nestor have enough time to restart their car and try to crush you. When you regain control of Ben, he’s standing on top of one derby car while Bolus and Nestory try to ram it. As they’re ramming it, climb on top of their car and wait for them to make a loop. When they’re passing by the massive bonfire, have Ben walk into it. This makes Bolus and Nestor chase you into the wreckage and ultimately causes their car to explode. Cue a bunch of extra cutscenes where you end up back at the Vultures’ hideout.
Find Malcom’s Will
To play the game correctly, you’d search through the pile of parts in front of Maureen; as she tells you the code to Malcom Corley’s safe, which contains his will, is etched into one of the parts. Until you actually see the safe you wouldn’t know the combination. If you want to play it correctly, feel free to continue following, but I’m going to give you the code where you’ll use it.
Leave the Vultures’ hideout to get back to Corley Motors HQ and Ben will get off his bike. Hover around the roadway near the left side of the building to get an arrow indicating you can walk to a different area. This takes you to a new area with a bunch of utility meters and a cracked wall.
This puzzle is originally a pixel hunt sort of thing where you’d find the spot that would have lined up with her eyes as a six year old. Find a spot on the wall on it’s left side where the wall joins the ground. The correct spot is in a place that looks like two cracks overlapping to form a sort of notch or button near the ground. Use the ‘kick’ command at that spot – if it makes a sort of mechanical sound it’s the right place to kick. Wait for the utility meters to all turn black before klcking again and a hidden door will appear in the middle of the screen.
The passageway takes you directly into Malcom’s office. You’ll notice a discolored square in front of his desk – this is his safe. Click on it to view the code entry screen. The code is ‘154492’. Once you’ve entered it, click the MXC square under the code to open the safe. Ben will grab Malcom’s will and a keycard.
Easter Egg Apparently entering the birthday of one of the developers, Mark Crowley, into the safe combination will make Ben fart. I haven’t tested this because I haven’t figured out his birthday, but I may post it when I do.
Expose Ripburger
Walk down the hallway to your right and use the keycard with the card reader to the left of the door on your right. This opens the door and cuts to a video of Ripburger’s keynote address. Afterwards, you need to disrupt the meeting to get Mavis to leave her post in the room on your right. ‘Use’ the motor control lever on the left to stop the video reel’s motion by moving it down (one click), then ‘use’ the light contrrol lever on the right to increase the lamp’s power (two clicks). This will burn the film and fry the machine, but you’ll need to wait a moment for the cutscene to appear showing the meeting coming to a halt.
You’ll reappear in the hallway again. Now you can enter the door on your left. Use Malcom’s will on the tape reel and Ben will automatically place Miranda’s photos of Malcom’s murder on the projector. Now you’ll see a cutscene of Maureen kicking Ripburger off stage, which allows him to escape the building before he can be caught.

Part #5: Finale
After the next few scenes you’ll see Ben and Mo riding on the highway, presumably to get Mo’s bike and rescue the Polecats from jail. However, Ripburger ends up behind them and attempts to run Ben and Mo over, trapping them on the front of his semi.
Stop the Truck
When you regain control, you’ll be controlling Ben hanging onto the front of Ripburger’s semi. ‘Use’ the grille on the truck to pull it open.
Easter Egg If you have any leftover bunnies, you can grind them into the truck’s fan (now exposed from opening the grille). This also works with the Box of Bunnies if you grabbed one while Horace was still away from the souvenir stand, but you’ll be waiting for Ben to smash every bunny in the box.
There’s a panel that sort of blends into the truck just above the grille. ‘Use’ this, which makes Ben lift it over the windshield. This makes Ripburger use his cane to try and put it down. As he’s doing this, ‘use’ Ripburger’s cane to grab it from him while he’s putting the Panel down. Now, use the cane you just acquired on the fan which was exposed when you opened the grille cover. This allows Ben to climb through the truck and reappear on the backside of the truck.
‘Use’ the tire iron on the far-right hose (it’ll have stripes on it) to loosen it. Ben will lift it then to cause a gas leak. A cutscene starts showing Ripburger trying to shoot at Ben, but Mo tackles him at the last second and causes him to lose control. At the same time, the Vultures’ plane, which has been tailing you this whole time, swallows the semi into its cargo bay.
For some reason, everyone thinks Ben is the right person to figure out how to stop the plane before it goes tumbling down the gorge you’ve been headed for. Climb up the ladder, pausing for a moment while Ripburger fires the semi’s machine guns at you. Click on the screen in the middle of the console.
Enter the following menus:
- Take-off
- Post Take-off
- Landing Gear
- Raise
This will lift the landing gear into the plane, causing you to come to a skidding halt and stopping just before going over the gorge. Subsequently, Ben is now in the semi after tacking Ripburger before he shoots Mo, but the sudden stopping of the plane causes the semi to go barreling out the front of the plane. However, it gets stuck which keeps it from falling down, but now the vehicles are danging over the gorge. Also, Ripburger has been saved from falling out due to his coat getting caught on a machine gun barrel.
To release Ripburger to his death in the gorge, enter the cab of the semi and click on the screen in the center of the console. Go to the follow menus:
- Defense
- Machine Guns
- Control
- System Off
Easter Egg Choosing ‘Fire’ instead of ‘System Off’ will cause the guns to fire. Ripburger’s response to that action is a reference to LOOM.
Ripburger has fallen to his doom, so now have Ben enter the plane again. Because everyone has left the plane, you only have a few seconds to get out.
If you’re playing the game with the original art this puzzle is much more tricky as once Ben is back in the plane, you have to make him walk to the left to see his bike. In the Remastered version you can already see it there, this making this puzzle less tricky. ‘Use’ Ben’s bike and he’ll make it out of the plane alive, thus cueing the last cutscenes of the game and then the credits.
Tip The credits are actually funny. They include things like a Bonus Biker Haiku section and other really random roles that the development team assigned to people they knew, plus one last run of the bunnies at the very end.
Congratulations! You’ve beaten Full Throttle!
Appendix: Biker Gang List
The Polecats
The Polecats are the gang that Ben leads. They’re in prison for most of the game so it’s hard to get a profile on them, but we know little things such as how they’re broke and that Father Torque used to lead them before Ben.
Polecats generally side skinnier bikes, similar to Ben’s but with less exhaust pipes.
The Rottwheelers
“Nobody [is tougher than Ben], but the Rottwheelers sure are uglier.” -Ben
Rottwheelers seem to be mostly fat men who wear tiny black vests.
Rottwheelers ride red bikes with a massive front tire. They fight on the Old Mine Road with either their fists, the spiked mace, or the wooden plank.
The Vultures
“The Vultures are quick, and they’re nuts!” -Ben
The Vultures are the gang Mo rides with, as first evidenced by her Vulture tattoo which can be seen in closeups of her in cutscenes. They’re known for having “Pre-Regulation Destroyer-Class Solid Fuel Recoil Boosters” which is essentially Nitro for a motorcycle in the game.
Vultures ride on bikes similar to those of the Polecats. They fight on the Old Mine Road with either their firsts, the chain, or the chainsaw.
Cavefish
The Cavefish are essentially a religious group that have their own biker gang. They’re known for hijacking semitrucks for their cargo when traveling down Highway 9, and also for the special goggles that help them identify targets and find their hideout along the Old Mine Road. However, wearing the goggles also makes them blind, but they’re able to identify the dots in the road with them which is how they navigate the roads.
Cavefish have special yellow bikes where they must lie on their stomachs with their heads facing front. They don’t fight on the Old Mine Road; instead, they squirt oil under your bike to force you to fall if you ram them.
Appendix: Character List
In order of appearance (helps avoid spoilers):
Ben Throttle
The main character you’re controlling and the leader of the Polecats biker gang.
Malcom Corley
Corley is the President and CEO of Corley Motors, the last motorcycle manufacturer in the nation. He is well respected among all biker gangs in the game.
Adrian Ripburger
Ripburger is Corley’s Vice President who has ambitions to take over Corley Motors and start selling minivans.
Bolus
The thickest of Ripburger’s assistants, but is also overcome with greed.
Nestor
We can assume he’s the more intelligent of Ripburger’s assistants (“…now I remember, YOU’RE the smart one, aren’t you?” -Ripburger), but he too is motivated by money more than anything.
Quahaug
The Kickstand’s bartender. He has some great quips but is overall very easily intimidated (“The customer with the knife is always right!”).
Miranda
A reporter who discovers Ben’s wreck on the side of the road. Her only interest seems to be advancing her career via whatever means possible.
Maureen (Mo)
Described as someone who can ‘fix anything’, she doesn’t talk much about her past. We discover why later.
Todd
An angry, criminal junkyard owner who enjoys creating ‘art’ in his spare time from what we can only assume are parts he collects from his junkyard.
Emmet
Emmet is a grouchy trucker who is a particularly effective con man.
Father Torque
The former leader of the Polecats who is found picking fights on the Old Mine Road.
Horace
The old man running the Souvenir Stand at the Corley Motors Stadium. Also a character to spend some time talking to if you like funny dialogue.
Suzy
A member of the Vultures who is pretty sassy but also clever as she comes up with the plan for faking Ben and Mo’s deaths.
Mavis
An angry old woman running the control room at Corley Motors. There’s more great dialogue from her if you keep bothering her before frying the film.
Appendix: Item List
Keys
- Found and used in Part 1
- Disappears from inventory after Part 1
- Used to start Ben’s bike
- Quahog has them, but you need to interrogate him before he gives them to you.
Gas Can
- Found and used in Part 2
- Disappears from inventory after the gas has been collected
- Needed to collect gas for Ben’s bike
- Found on the ground in Mo’s shack just by the door.
Hose
- Found and used in Part 2
- DIsappears from inventory after the gas has been collected
- Needed to collect gas for Ben’s bike
- Found just above the gas can in Mo’s Shack.
Lockpick
- Found and used in Part 2
- Disappears from inventory after Ben’s bike has been repaired
- Used to enter the Gas Tower
- Located inside the cabinet in Todd’s trailer.
Steak
- Found and used in Part 2
- Disappears from inventory after feeding it to Todd’s dog
- Needed to distract Todd’s dog so you can get a new pair of forks
- Located inside the refrigerator in Todd’s trailer.
Padlock
- Found and used in Part 2
- Disappears after using it on Todd’s Junkyard door, but it can be recollected (there’s no use in doing that, however). It completely disappears after finishing Part 2.
- Used to lock the rolling door to Todd’s Junkyard, allowing you to climb the chain to enter.
- This item becomes available after using the lockpick on the Gas Tower door. Grab it from the ground.
Picture of Mo and Uncle Pete
- Found and used in Part 2
- Disappears after Part 2
- Ben shows this to Emmett so he knows where he’s trying to go.
- This is collected automatically after surveying the damage to Mo’s place (after Bolus tries to attack her).
Fake Federal Investigator’s ID
- Found and used in Part 2
- Disappears after giving it to Emmett in Part 2
- Used for getting past the roadblocks, allowing Ben and Emmett to leave town.
- Talk to Miranda in the dumpster behind the Kickstand after Ben’s bike has been repaired.
Tire Iron
- Found in Part 3, used for the rest of the game
- This item always stays in your inventory
- Multiple uses: as a weapon on the Mine Road, prying open the chest in Mo’s bedroom, loosening the wheels on the crashed trailer, loosening the hoses on the Yellow Semi’s gas line.
- Found under Mo’s pillow at Uncle Pete’s Mink Ranch.
Fertilizer Powder
- Found and used in Part 3
- Disappears after Part 3
- Used as a weapon on the Old Mine Road
- Can be collected from the ground by where Emmet’s semi trailer crashed.
Hovercar Fan
- Found and used in Part 3
- Disappears after attaching it to Ben’s Bike
- Main item to be collected to complete Part 3
- Retrieved from Bolus and Nestor’s wrecked hovercar along Highway 9
Chain
- Found and used in Part 3, is kept for the rest of the game
- Never disappears from inventory once collected
- Used as a weapon on the Old Mine Road, and ostensibly would have been used in a puzzle that was removed before the game was launched as it remains in your inventory for the rest of the game but is never used after Part 3
- Won from a Vulture rider on the Old Mine Road
Chainsaw
- Found and used in Part 3
- Disappears after Part 3
- Used as a weapon on the Old Mine Road
- Won from a Vulture on the Old Mine Road
Spiked Mace
- Found and used in Part 3
- Disappears after Part 3
- Used as a weapon on the Old Mine Road
- Won from a Rottwheeler on the Old Mine Road
Wooden Plank
- Found and used in Part 3
- Disappears after Part 3
- Used as a weapon on the Old Mine Road
- Won from a Rottwheeler on the Old Mine Road
Cavefish Goggles
- Found and used in Part 3
- Disappears after retrieving Ricky Myran’s Ramp from the Cavefish Hideout
- Used as a weapon on the Old Mine Road
- Won from a Rottwheeler on the Old Mine Road
Bunnyt
- Found and used in Part 4, can be kept through the end of the game
- Disappears after use in the Vultures’ Minefield after being ground into the fan of Ripburger’s semitruck
- Used to get to the Vultures’ hideout in Part 4 and for fun in Part 5
- Stolen from the Corley Motors Stadium Souvenir Stand
Battery
- Found and used in Part 4
- Disappears after being placed in the Corley Motors Mini Derby Car
- Used to power the Mini Derby Car at the Corley Motors Stadium Souvenir Stand
- Retrieved from the first bunny you blow up at the Vultures’ Minefield
Corley Murder Photos
- Found and used in Part 4
- Disappears after Part 4
- Displayed at the Corley Motors Shareholder Meeting to expose Ripburger
- Given to you by Mo after the Demolition Derby
Keycard
- Found and used in Part 4
- Disappears after being placed in the card reader inside Corley Motors
- Provides entry to the Control Room inside Corley Motors
- Found in Malcom’s safe
Malcom Corley’s will
- Found and used in Part 4
- Disappears after Part 4
- Played for the audience at the Corley Motors Shareholders Meeting
- Found in Malcom’s safej
Ripburger’s Cane
- Found and used in Part 5
- Disappears after being jammed into the fan of Ripburger’s semitruck
- Used to allow Ben to reach the back of Ripburger’s semitruck
- Stolen from Ripburger
Written by Gehr Force One.
Be the first to comment