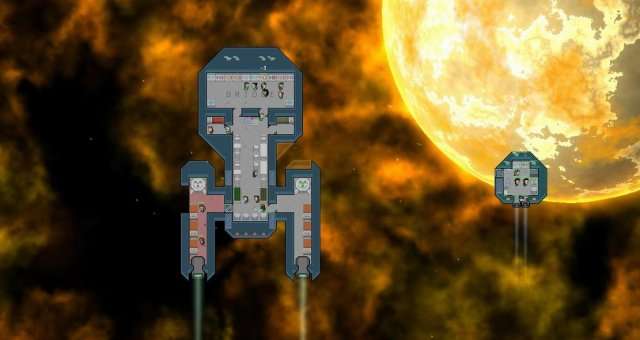
This is a walkthrough for version 1.1 of Starship Theory. It is for new players who are at their wit’s end trying to figure out how to survive the first half hour of chaos. Half the fun of these games is trying, failing, and learning so I encourage you to only use this guide as a last resort. If you are past the point of wanting to figure things out on your own and just want help to get a good start, this guide should suffice.
Crew Selection
All credit goes to Catbert 7!
Right after you hit “New Game” you will be asked to select your crew. What you really want is one crew with 3 skill in Engineering (orange) and a different crew with 3 skill in Intelligence (blue). You will always want a good engineer on hand to build and maintain your craft and you will need at least one strong scientist to man the research console. Beyond that, Speed (green) is always helpful, mostly for engineers and it’s good for the other 2 crew to have decent skill in either engineering or science.
- Get one crew with 3 Intellect and another with 3 Engineering.
To the Ship!
Now we are ready to start tricking out our sweet ride.
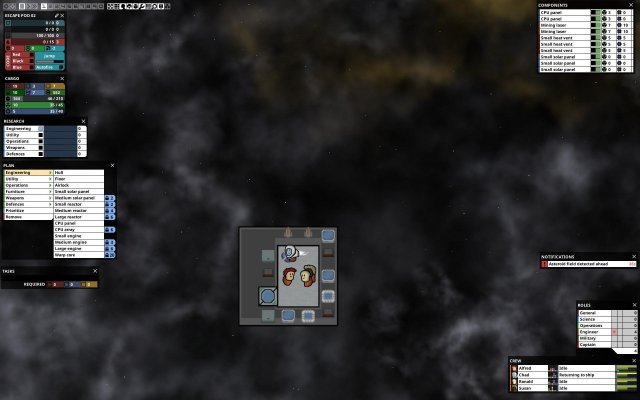
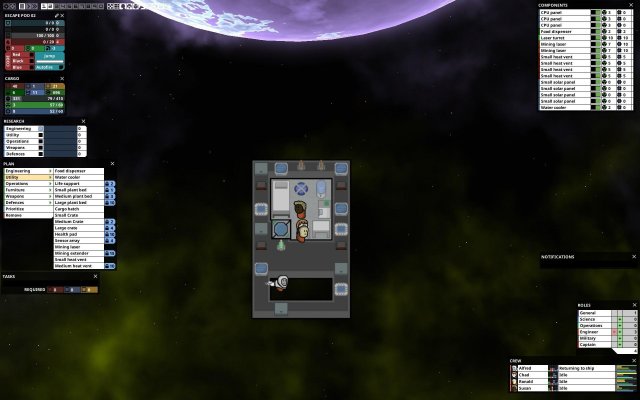
Step 1: Pause! We need to get things sorted before the chaos begins. Right now we need all the builders we can get so go to your Roles menu (up at the top) and set everyone to Engineers. Now we’re ready to build. Go ahead and open every menu (at the top) other than Colors (the far right). They will all be useful to us. Arrange them along the left and right sides of the screen in whatever way makes sense to you.
- Pause.
- Set everyone to Engineer.
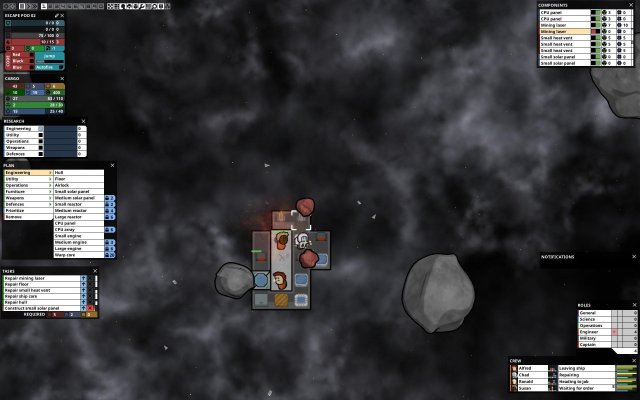
Step 2: The first threat we need to prepare for is asteroids. There are two ways to go from here. You can either keep your Engine and make 1 Mining Laser or Remove your Engine and get a 2nd laser. Both are viable. In this guide, we’ll go with the latter (I prefer relying on RNG as little as possible). Go to the Plan menu and select Remove (bottom of the list). Click the Engine. Now queue up a Cargo Hatch, 2 Mining Lasers, 3 Small Heat Vents, 2 Solar Panels, and a CPU Panel (all in engineering and utility tabs). Do the hatch first so we don’t lose any material from the engine dismantle. We’ll also need the hatch to make sure an unlucky asteroid doesn’t destroy all our storage (that’s game over)! Put the lasers in front for best range. This will give you the means to tackle any asteroid other than the largest size (ignore those for now). You’ll need to add a few Hull squares (engineering tab) to fit all this. We want to be as efficient as possible so make sure you place them where they will be useful for expanding the interior floor later on. I like to expand the left or right side out and use the initial floor space as a hallway.

- Remove the Engine. Queue up 2 Mining Lasers, 3 Small Heat Vents, 2 Solar Panels, and a CPU Panel.
- Build a Cargo Hatch.
Step 3: The first asteroid field is upon us! Brace yourselves because this is going to be rough even with the best possible preparations! Because our one laser cannot destroy the largest asteroids sizes before they reach our ship, we may take damage here. But, it should be recoverable. Bind your mining lasers to the 1 key (double click a laser, control+1). Zoom out so you can see what’s coming long before it reaches you. Prioritize clearing a path for the ship. Ignore the largest asteroid size and the very smallest chunks of asteroid (which can’t produce minerals) but destroy every other one that gets in your way. When that isn’t occupying you, focus on mining the smallish asteroids. Try to detonate them when they are near the ship so you can collect the minerals before they float away and try to never be idle. Resource priority, from most to least valuable, is: (1)Silicon, (2)Gold, (3)Metal, (4)Water. If any of your components are destroyed by a large asteroid hit, replace it as soon as you have the resources! If you lose a solar or cpu panel, turn off a laser and keep all the vents on. If you lose a heat vent, shut off one of the lasers until you get it back up. Use pause liberally!
- Zoom out.
- Prioritize clearing a path for the ship. Ignore the largest asteroid size and the very smallest chunks of asteroid.
Step 4: If you got unlucky and still have no Silicon, take this time to build out your Hull enough to put a couple Floor spots in where you can situate your Cooler and Food Distributor. You’ll need to move some components out of the way by removing them and rebuilding them. This won’t cost anything but time, removing grants a full refund. You should have plenty of metal for this expansion but I wouldn’t go below 20 metal.
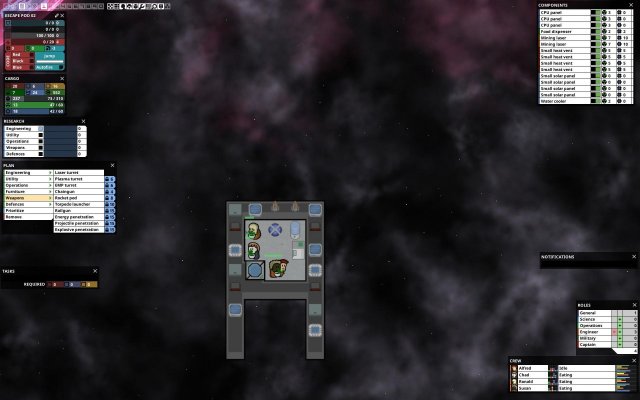
Step 5: By the time you exit the 2nd asteroid field, at the latest, you should have enough Silicon for some more components. First priority: Build a Water Cooler. Your crew will be starting to die of thirst by now and… well, we need their slave labor. Second priority: Build a Food Dispenser. Again with the dying thing… Third priority: Build a 4th Heat Vent This will allow us to use the mining lasers pretty much constantly without overheating. Yay! If you still have Silicon get a head start on step 6 with another CPU and Solar Panel. If you’re absolutely flush with it, keep going!
- Build a Water Cooler.
- Build a Food Dispenser.
- Build a 4th Heat Vent.
Step 6: We’re in a good state now but we’re still not safe from those giant asteroid road-hogs (space-hogs?). Next order of business: Build a Laser Turret and the corresponding 1 CPU Panel and 1 Solar Panel, if you didn’t already. Why not another mining laser? Well, we could do that but the turret offers a lot of versatility. First off, it allows us to Threaten unarmed ships for free credits. Second, it’s actually better for mining! The turret has infinite range which means we can fire off shots at asteroids looong before they come within laser range and have them all softened up so that it only takes a tap to finish them when they’re close! It also builds less heat and has the DPS of about 2 mining lasers but requires less than twice the cpu/power. It’s pretty great! That said, build a 5th vent when you can.
- Build a Solar Panel.
- Build a CPU Panel.
- Build a Laser Turret.
- Build a 5th vent.
Step 8: Our next most immediate threat is starvation. We could buy food from ships but it’s best to be self-reliant and we don’t want to spend our bribery monies. So, asap, build a Small Grow Bed. Assign a crew member to science. They will begin watering and you will soon(ish) have food production to keep your people fed! If you notice food reserves still dropping after a while, make a second bed.
- Build a Small Grow Bed.
- Assign a crew member to science.
Step 9: We are safe from asteroids, stars, and munchies for the foreseeable future. There’s only one threat remaining, hostile ships. In order to avoid losing valuable components (and, possibly, everything) in battle, we need to make sure we can Jump away if we have to. For that, we need to build Engines until our Evasion (Player/Ship menu) becomes positive. I’ll leave it to you whether you want to go with Small Engines or get a Research Station and work on Engineering research until you can unlock the much more efficient Medium Engine. Either way, the good news is, we don’t really have to worry about the CPU/Power cost of them for now because we don’t actually need them active except for the instant we want to Jump (at which point we can turn off everything else to power them)! Another good option is to get part of your evasion from a Navigation Console. If you have your 3 intellect crew man the nav console, you’ll get +3 evasion. Moreover, you can use the console to steer yourself toward either asteroid fields, which means a LOT more mining! Better yet, when you don’t need the evasion (should only need it in combat) you don’t need to man it AND you can turn it off and only turn it on when you want to give it commands 😀
- Build Engines until you get positive evasion.
Step 10: Win! After reaching positive evasion, you are prepared for every threat the universe can throw at you. Continue adding engines for dodge, get some weapons, do whatever. You should be good to go! 😀

Events!
Neutral Ship
These encounters can be very beneficial but are, of course, based on luck. Here’s the thing to remember: Sell Water and Metal unless you have immediate need of them. You should have excess of these most of the time. Buy Silicon, if you can afford it, it’s still the limiting factor on building. This means, if you’re not on your last couple hundred credits (we want to save those for bribes) or saving up to buy crew. Sell Gold if you will have more than around 15 left afterwards . Gold is semi-rare but we also won’t use a lot of it. Buy crew only if you are flush with cash (will have at least 200 credits left after purchase). More crew is always good but they aren’t really essential past the initial 4. If you have the option, and the enemy ship has 1-2 basic laser or no weapons at all, Threaten them after you finish trading May as well try for extra cash if they can’t punish you for it (1-2 basic lasers doesn’t have enough DPS to outpace your repairs).
- Sell Water and Metal if you don’t need them immediately.
- Buy Silicon if you can afford it.
- Sell Gold if you will have more than 15 afterward.
- Buy crew only if you have 1000 credits or more.
- Do not let your credits go below 200, except when bribing.
- Ships with only 1 or 2 basic lasers are not a threat if you put people on Engineering.
- Threaten after trading if they can’t hurt you.
Hostile Ship
Some space people just can’t get along.
Again, if they only have 1 basic laser weapon, ignore them; they can’t hurt you. Otherwise, early game, Bribe them. If that doesn’t work or you can’t afford it, Jump away. If you can’t do either, you screwed up somewhere :p
- If scary, bribe.
- If bribe fails, Jump.
Stars
Flamin’ balls of fire, it’s gettin’ hot in here! Probably should fire the navigator for flying recklessly close to this hazard. We don’t have a navigator? We don’t even have engines? Oh…
Stars aren’t as scary as they seem. Yes, they will start fires but that shouldn’t destroy anything if you’re on the ball putting them out. Yes, it will stress your heat but as long as you have kept up with heat vents you should be okay. Only if you hit a blue star very early on are you in deep doodoo.
Regardless, here’s what to do: Set all crew to Engineers and put the ship on Red Alert (Player/Ship menu). Now everyone should focus on fires and repairs. You can take control of crew members, by selecting them and pressing the T key (or right clicking them), to put out fires much more efficiently (as soon as the fire disappears you can move on, you don’t have to wait for them to finish the extinguisher animation). Remember to press R afterward to return control to the AI. Watch your heat! If you don’t have sufficient heat vents to use lasers without overheating, conserve your usage to stay cool. In the worst situations you may have to choose between letting an asteroid hit you or overheating. If you can destroy the asteroid without overheating too much, go for it; It’ll just damage your lasers a bit (DON’T LET THEM EXPLODE). Remember to remove the Red Alert and reset the crew roles when the star has passed.
- Set crew to Engineers.
- Manually control (T key) people to put out fires efficiently.
- Watch your heat, don’t use the guns while overheated.


Be the first to comment