
Quick guide for the logic sequence of Calibration testing.
Introduction
All credit goes to senornacho!
There have been quite a few posts in the Discussions board by some that are confused with what exactly needs to be done to pass the Calibration test. This short guide will showcase a few of the randomly generated lists you’d typically see, what everything on the screen means and what you need to do to continue.
Example Layouts
Below are a typical example of the two types of puzzle layouts you can expect to see. The general information is the same in all puzzles with the exception that some will display LOG.ERROR(); which will need to be worked around with an additional item in the list.
Puzzle Layout Details
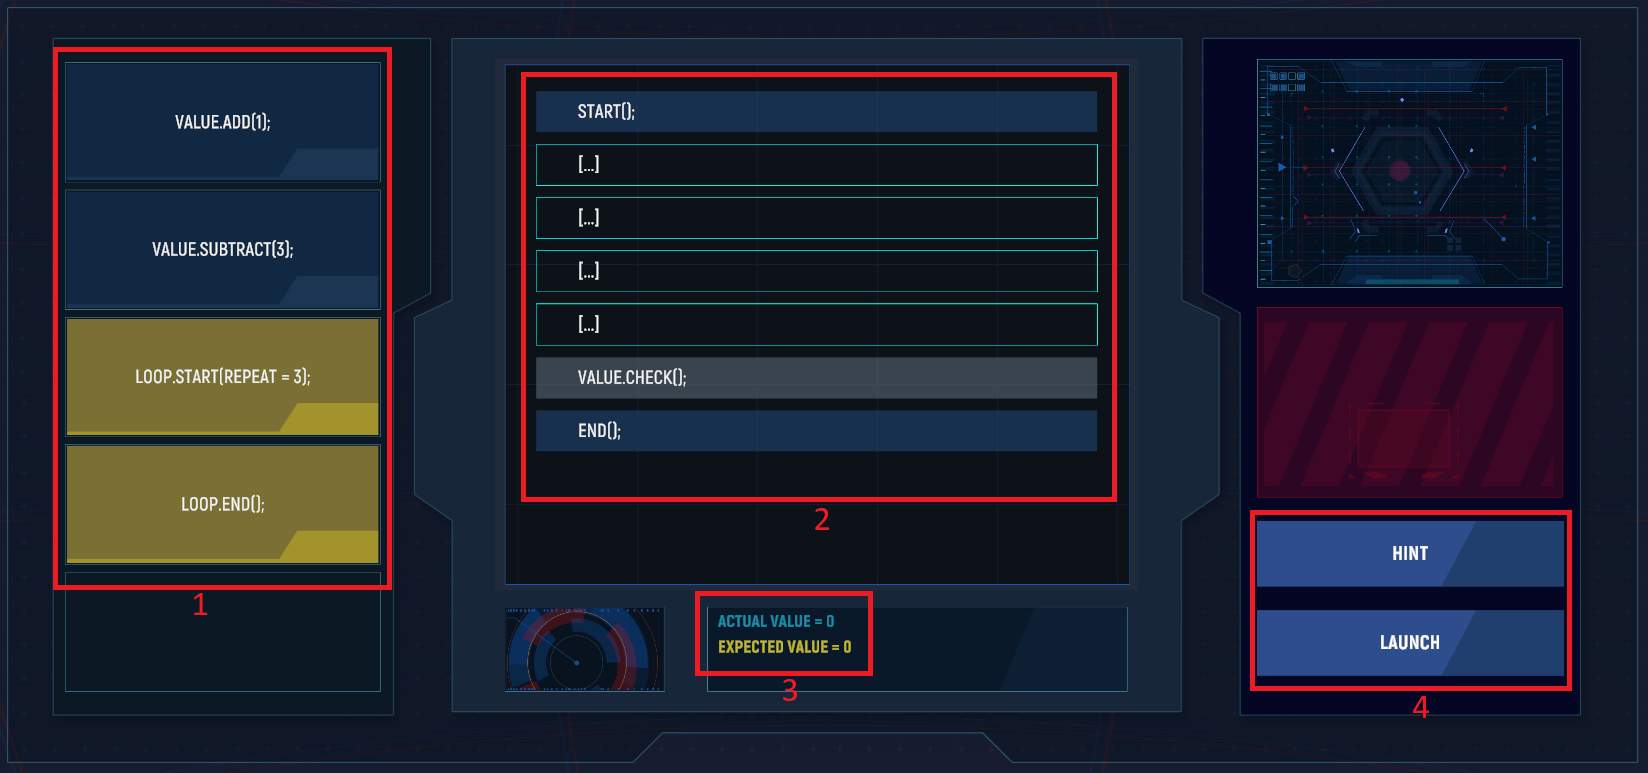
Highlighting one of the example screens above, here are the 4 major sections of the screen.
- List of commands. Each command will correspond with one blank in section 2 and must be placed in a specific sequence to complete the puzzle.
- Calibration sequence list. As mentioned above you will select the […] and then click the corresponding command you wish to enter from the list on the left.
- Value for successful completion. The goal here is to make sure that the values from your command list match the Expected Value. Actual value will increase and decrease as the commands are executed depending on the sequence you created.
- Hint and Launch buttons. The Hint button will put one of the commands from the list on the far left into the correct spot. This can help eliminate a valid space to better help you place the remaining commands. Launch will execute the commands and if they were entered into the correct spaces in section 2 you will complete the puzzle.
The types of commands that I’ve personally seen are fairly static while the values a command adds or subtracts along with loop repeat may vary. As mentioned previously, if LOG.ERROR(); exists in section 2 then you will have a command called SKIPNEXTLINE(); which will be used to bypass that error as it will end your sequence if not skipped.
Okay, How Do I Complete the Puzzle?
When you first begin calibration, look at section 3 where it says Expected Value. That’s the number you need to hit and you’ll enter the commands from the list on the left to the list in the middle to meet that goal. If it says 10 then you need to make sure that your execution sequence finishes with 10. Lets look at one of these puzzles again and figure out how the command sequence should look:

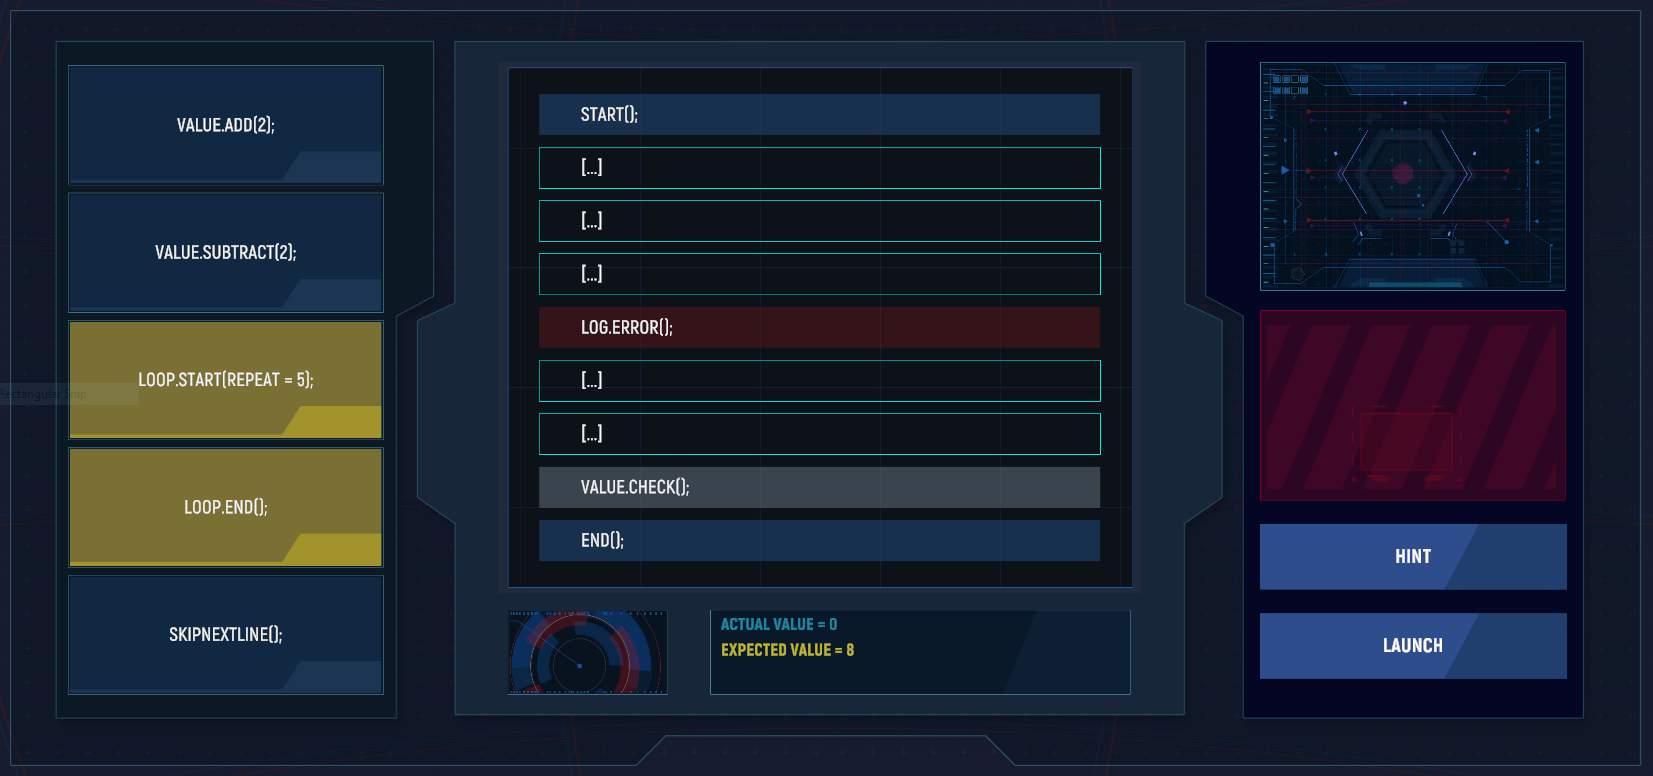
We have an Expected Value of 8 and our command list has a VALUE.ADD(2);, VALUE.SUBTRACT(2);, LOOP.START(REPEAT = 5); and LOOP.END();. The very last command is SKIPNEXTLINE(); and in this puzzle this is the easiest one to place. It goes right before LOG.ERROR();. You’d click the line above LOG.ERROR(); and select SKIPNEXTLINE();.
- START();
- […]
- […]
- SKIPNEXTLINE();
- LOG.ERROR();
- […]
- […]
- VALUE.CHECK();
- END();
Now to the loop. This is where we’ll work on making our Actual Value get close to the Expected Value. The two loop commands will be used to execute one of our add or subtract commands. In this case we need to get to 8 but if we put the VALUE.SUBTRACT(2); within the loop we’d end up with an Actual Value of -10 so the only possible solution here would be to include the VALUE.ADD(2); command within the loop. So adding those commands to the execution sequence:
- START();
- LOOP.START(REPEAT = 5);
- VALUE.ADD(2);
- SKIPNEXTLINE();
- LOG.ERROR();
- LOOP.END();
- […]
- VALUE.CHECK();
- END();
If we were to Launch the command sequence now we’d end up with an Actual Value of 10 which is two more than we need. Well, we’ve only got one space left and one command left so put the VALUE.SUBTRACT(2); into the last available space and click Launch. The sequence would look like the one below:
- START();
- LOOP.START(REPEAT = 5);
- VALUE.ADD(2);
- SKIPNEXTLINE();
- LOG.ERROR();
- LOOP.END();
- VALUE.SUBTRACT(2);
- VALUE.CHECK();
- END();

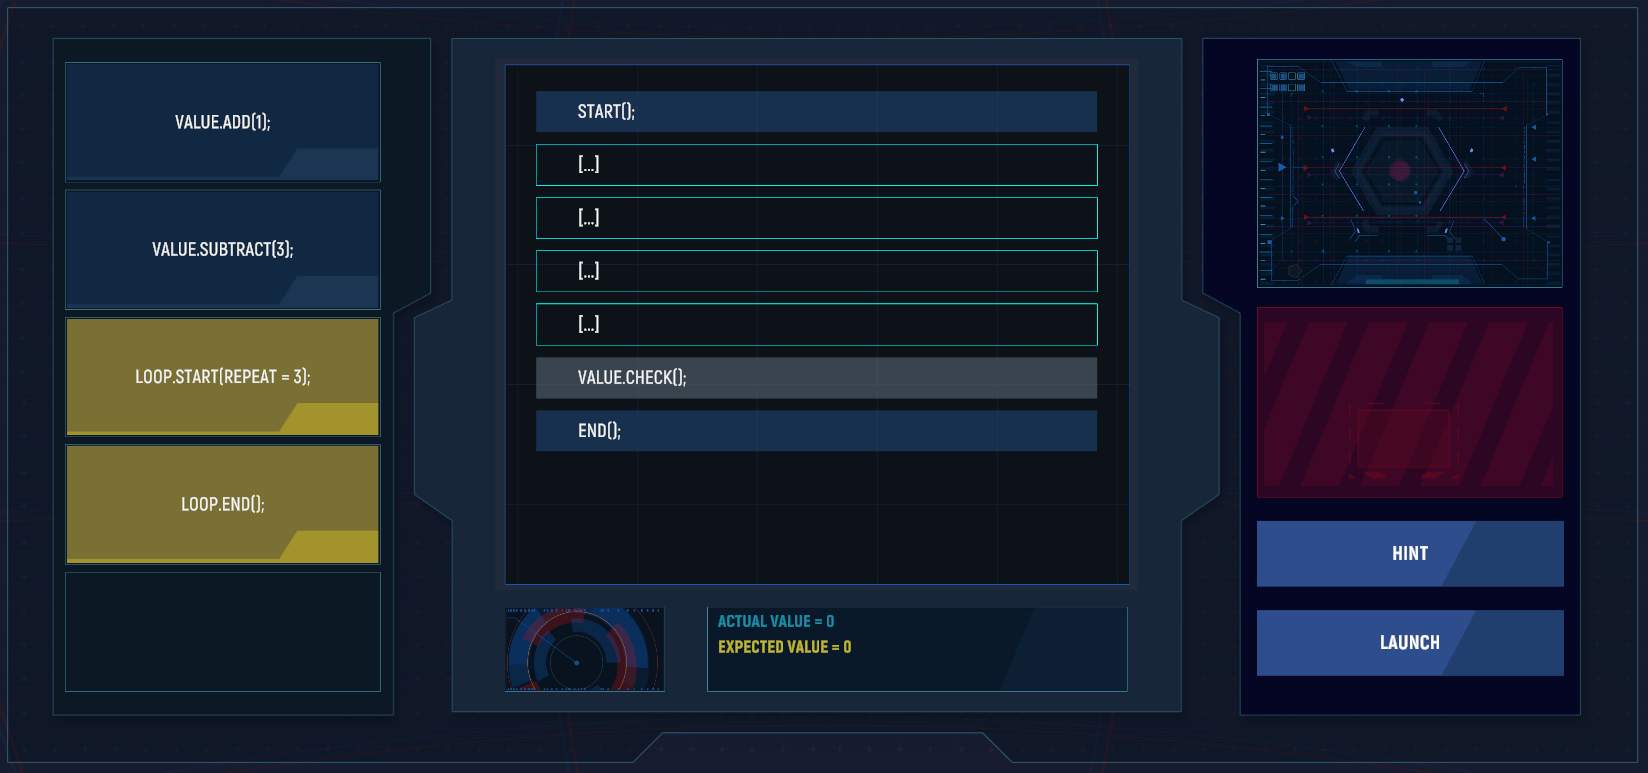
Using the information above we can see that our Expected Value is 0 and we have an add command that adds 1 and a subtract command that removes 3 along with a loop value of 3. This would be a valid solution to this problem:
- START();
- LOOP.START(REPEAT = 3);
- VALUE.ADD(1);
- LOOP.END();
- VALUE.SUBTRACT(3);
- VALUE.CHECK();
- END();
Obviously while you’re playing your commands will slightly differ from those outlined above but the process is always the same. Look at the Expected Value and determine how your loop will look based on your add and subtract commands. If you have an error line then add the skip command before it and fit your loop into the sequence. Its okay if the skip and error commands are in your loop as they will effectively cancel each other out.
OK, I got how to the logic part of the puzzle, but what do you after you hit launch? I get sent to another room and no matter what I do, time runs out