Before you Play The Oxygen Not Included game, you will definitely want to know these simple but useful tips and tricks. If you have any tips feel free to share with us!
Things to Know Before Playing
- Every duplicant (worker) will need a certain amount of oxygen and food during each cycle. So while the Printing Pod will constantly offer you new duplicants, don’t get more of them until you can keep up with the increasing demand of oxygen and food.
- You want to avoid picking duplicants with certain traits: Narcoleptic (randomly falls asleep), Flatulent (will fart Natural Gas), Anemic (very slow), Trypophobia (can’t dig), Unconstructive (can’t build), Mouth Breather (consumes extra oxygen) and Bottomless Stomach (eats more food). If your colony is running smoothly these won’t matter that much, but at the start they are very bad.
- 15 is a decent number of duplicants for a colony. While I wouldn’t take it as a hard rule, if you’re pushing 20 and still experiencing labor shortages, it may be a good idea to stop and evaluate whether there’s a way to make your current duplicants work more efficiently or take over some of their duties with automation before getting more of them.
- Gasses have unique weights to them. Hydrogen is light and will float to the top. Chloride and Natural Gas are heavy. Carbon Dioxide (CO2) is the heaviest and will float to the bottom.
- Storing food in CO2 will avoid them from rotting. Build a pit at the bottom of your base and put your fridges there. As the pit slowly fills with CO2 it will preserve your food forever. The fridges don’t even need to be powered.
- If you have an area with lots of Polluted Oxygen, build several Deodorizers to filter it to regular oxygen as soon as possible. Set the Deodorizers to priority 6-7 so they will be supplied with Sand, which is what they require to filter.
- Nothing is immediately deadly; think of the game as a terrerarium where it’s imbalances over time that end your colony. You aren’t going to die walking into vacuum or chlorine. You can drown!
- Rooms provide additional benefits. It’s one of the icons in the upper right, you can mouse over to see what’s required. Rooms are generally 64 tiles, and people typically make them 16xRooms must be completely enclosed so you’ll have to create doorways and then select ‘open’ on the door to leave it open.
- Think of the gas in this game as thick and viscous. It has trouble moving around, especially through single tiles and even moreso through ladders. For this reason, make your vertical passage ladders between floors two or three tiles so that oxygen can easily move between floors.
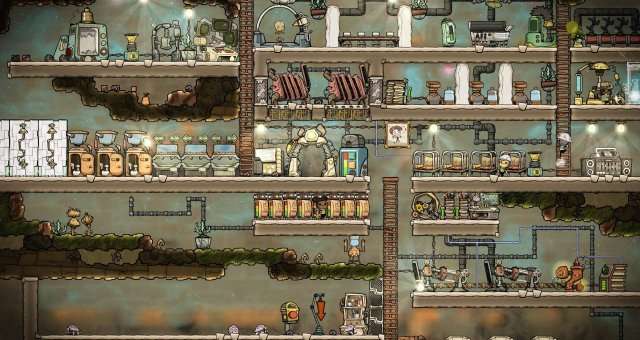
- Because of the above, it’s typical to see people’s bases as a grid of 16×4 rooms with 2-3 wide vertical shafts with ladders on the sides. This is boring but also practical.
- Build your bedrooms near the top – oxygen tends to rise so if your atmosphere starts to get marginal, you have less of a chance to suffocate when sleeping. Build your mushroom/meal farms near the bottom for the same reason – they work in CO2.
- Make a little 2×2 pit inside your dining room and store your food in a ration box there – it will eventually fill up with co2 which is sterile so your food won’t go bad!
- You need ~5 mealworm plants or ~3 mushroom plants per dupe.
- Mushrooms are generally the best early-mid game food.
- You need 1 oxygen diffuser per 5 dupes or electrolyzer per 8 dupes to break even. You likely want a bit more due to having to fill your expanding base with oxygen. When piping, you want a dedicated vent per electrolyzer since each one puts out 3/4ths of a pipe worth of oxygen when running.
- Be aware of different pressures of gas in pockets – if you’ve got a 1.5k oxygen and behind the wall is a 4k chlorine and you break it open, it’s going to try to equalize the pressure and spill out.
- The first few batteries have a pretty large passive energy loss and normally your power generators will run as long as there’s fuel. Once you get oxygen and food sorted, one of the first things you should do is upgrade to a smart battery with an automation cable connecting to a nearby coal generator. It will then only run to keep the battery topped off, saving you wasted fuel. You’ll need brute force refining for the metal to make it.
- Start with a dedicated researcher dupe – that means at lEast +7 in research, though you could get away with less if you wanted. There are varying opinions on the other two, but I like at lEast one digger to speed up the early game. You might want to consider a cook or a artist or rancher or even just a builder.
- If you select a configurable object, there’s a Copy Settings button on the bottom right you can click then select an area to apply settings to everything in it. It’s a huge convenience when setting up rows of storage lockers or farm tiles.
- The smaller buttons in the bottom right are for giving duplicants direct orders. The one to know about is the sweep liquids command for cleaning up spills, the rest will show as options when you select anything relevant to them or happen automatically.
- Learn how ranching works. While the game presents it as a food source, most of its value is in the materials critters can generate. Hatches (the ones that look like headcrabs with teeth) are the easiest to start with, dreckos are good but take some setting up to make full use out of.
- WASD scrolls the screen. I mostly prefer to navigate using the mouse, but holding mouse click then keyboard scrolling is great for laying down the big multiscreen pipelines.
- The piping system doesn’t always quite work as you’d expect for a pressurized system. Often it behaves a bit more like if the game sees the pipes as one-way roads, uses connected sources/sinks to assign directions to each section, then the gas/liquid squares act as individual cars driving along those roads. This isn’t something to worry about too much, especially early on, but as your system gets more sprawling and convoluted you may run into weird things like mid-pipe clogs or junctions where one leg is empty but the others are stuck/full. A good practice to help fix these is to avoid routing pipelines directly through source/sink squares. Instead, route the pipeline alongside it and connect each one with its own single small side branch. That way the tile is only interacting with the larger system as a single pipe source or a sink rather than simultaneously trying to be both and sometimes confusing it.
- On a circulating closed loop cooling system this behavior also means leaving air in the pipe actually helps it flow better. A full pipe starts to seize because no individual water square can move until the one in front of it does so they eventually all get locked up.
- Dig aggressively, especially early on. The cracked looking blocks hide objects, which can be things like plant seeds or critters that help jump start production. You’ll start needing new biomes and geysers by the time your initial water reservoirs start running out and digging’s how you find them.
- The game has a sandbox mode, you enable it in options -> Game then click the Sandbox button to turn it on. There can be a surprising amount of design and engineering in the game, so sometimes making a dummy game to figure out a solution to implement in your real one is the best way to go.


Be the first to comment