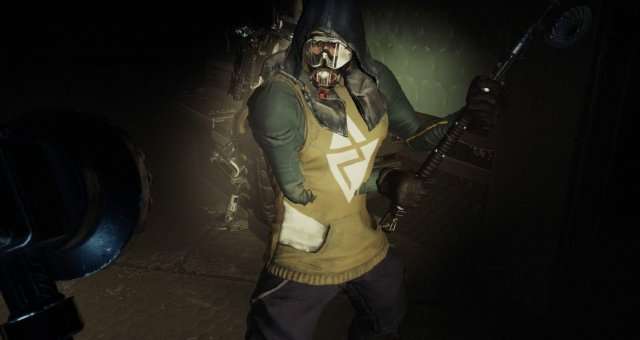
This guide will teach you about the current meta for how to play GTFO.
Contents
Guide to Basic
All credit goes to Dagga Boy!
Practice
As with most competitive games, practice is key! GTFO is no exception! Familiarize yourself with the movement, weapons, everything. This is the biggest factor in your success!
Movement
Movement is the most vital thing in GTFO. One wrong step, you’re surrounded by 20 sleepers in a matter of seconds.
Basic Movement
The current meta for getting around is to sprint and “bunnyhop” (jump repeatedly as soon as you hit the ground) simultaneously. This will be similarly effective to crouch walking constantly, in terms of detection, but will obviously be much faster.
Evasive Movement
When running from a horde, the last thing you want is to lose all of your health. You have to dodge shooters, long range splitters, while running around and trying to find a choke point. For evasive movement, there are 2 options I’ve found.
Sprinting slides
Pretty simple technique, but not the most effective. Whilst sprinting, click the crouch button to execute a slide. (if you have crouch toggle on, you’ll have to quickly click the crouch button again). The goal is to keep your speed, while making yourself a harder target. Bonus points if you add in strafing!
Bunnyhopping! Again
Probably the best choice in terms of speed and making yourself a hard target, but 1 slip up, you’re ♥. This one may take practice. Essentially, you’re still doing the basic meta movement, but with strafing included and a whole lot more pressure on you.
Clearing Enemies in Close Proximity
You’ve just entered a big room, and RNG is not on your side. 10 sleepers, some right next to each other. What do you do?
There’s a few different ways to approach it. You could go in guns blazing, but this is obviously a terrible choice. The best method for dealing with this is to:
- Make a backup plan! Create a fallback path, with mines or a sentry that you can run back to. If ♥ hits the fan, you need to be able to fall back and prepare to shoot the horde out.
- Take out the enemies that are more spread out first. Leave the groups for last! Groups are more likely to get alerted, so best clear out as much as you can first!
- With grouped sleepers, it’s best to coordinate an attack with your teammates. Make sure to execute the enemies at the same time as to avoid alerting surrounding enemies!
Flashlight
The most basic but most dangerous tool you have, but not in the way you would think. Countless times, I’ve had teammates leave their lights on as we enter a new room, thus alerting all the sleepers on the other side. Chaos and loss ensues. Don’t be that teammate!
- Make sure to use it as minimally as possible!
- Don’t ever assume it’s off, make sure to check!
Bonus Tip: If you’re trying to clear a room, but the sleepers’ clicks are overlapping and preventing you from moving, flash your flashlight at them simultaneously very quickly to sync them up with each other. This should give you a window to move in!
Enemies
“Sleepers in their humanoid form are mutated humans of pale skin and mangled body parts found in every corner of the Complex in varying numbers. They emit distinctive sounds while dormant (these sounds being different depending on the variant), making it relatively easy to locate their whereabouts. Should they be approached by a player, they will begin glowing, indicating heightened awareness of their surroundings. After being initially disturbed, there is a second phase where the sleeper’s body will begin to flash rapidly and spasm about, which will calm down after a few seconds once the disturbance has stopped. However further continuous disruption (let it be in the form of sound, light, or movement) in this second stage will cause them to awake and attack the source of the disturbance – the player. They will then let out a screeching call a few second after it, which in turn will alert any sleepers in the same room as it. It is possible to prevent a sleeper from alerting others by killing it or staggering it with a shove. While weak individually, a large group can easily overwhelm the team by sheer numbers. The sleepers have the power to breach doors. Sleepers have usually a lighter skin tone, however, occasionally, a darker-skinned can spawn, specifically in Hordes, which also can be found in the dormant state rarely.
On rare occasions, large-sized sleepers (Big Strikers, Big Shooters or other variants found deep within the complex) are encountered. It is possible to take out these big variants with four fully charged melee hits. If you intend to stay in stealth while killing a big sleeper, the team must synchronize all hits. Using c-foam is not necessary as the first hits will stagger the giants, preventing them from attacking and screeching. 4 hits will guarantee an instant kill if all the players aim to the back and/or the head. It should be noted that the removal of the head or the upper body does not guarantee a takedown.
The inside of the body of the sleeper is filled with lots of yellow, oval-shaped objects, resembling eggs.”
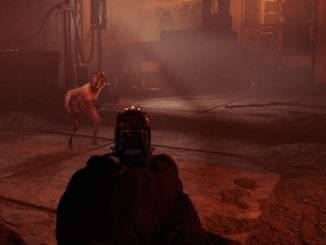
- First up is Strikers. These are the standard male species, who’s face looks like a ripped open testicle. They have short and long range attacks. Their long range attack comes in the form of a tentacle-like limb that protrudes out of the “slit” in their head.
- Second is Shooters. These are the standard female species, who’s face is covered in tumors. They only have long range attacks. Their cancerous pores are able to shoot “balls of light” at you, which can maneuver around in mid-air. You can dodge these by pressing “Sprint” and either A or D, simultaneously.
- Third is Titans (Giants, Big Striker, Big Shooter). These are the prior mentioned sleepers, just about 500% larger. One main thing to note about Big Strikers; their tongue-whip can hit you for 40% damage, so best steer clear. Big Shooters are able to shoot multiple balls of light at once, and dodging them gets real hard. Best to take Big Shooters down with up-close melee.
- Fourth is the Scout. This is a variant of the Shooter. In this stage, it freely roams around rooms periodically spewing tentacles out of the tumorous pores in her head. Upon touching these tentacles, she will emit a shriek which alerts all nearby sleepers, but also spawning a wave of between 20-30 extra sleepers. However, the Scout is not affected by light, and is only somewhat affected by walking/running. The easiest way to take them out is to snipe them when tentacles are retracted, or to very carefully smack her in the head after the tentacles have retracted. After shrieking, the Scout transforms into a regular Shooter, though is notably a little bigger and has more health than a standard.
- Finally are the Chargers. These are large enemies, though slightly smaller than titans, and easier to take down. These are almost completely black, with spikes on their head. They are very tough enemies! Easiest to take down with rifles. However, you can stealthily hit them in the back with a fully charged hammer to kill them instantly. Mines are not very effective against Chargers.
Comms
Communication is key, especially with randoms in matchmaking! You gotta make sure your prison-mates know what’s going on. If you know how many sleepers are in a room, call it out. If you have resources, let them know. Anything that is vital to the survival of the team, communicate it!
With Rundown 006, there is now a “Comms Wheel,” which can also be used.
Movement
Movement is the most vital thing in GTFO. One wrong step, you’re surrounded by 20 sleepers in a matter of seconds.
Basic Movement
With the introduction of Rundown 006, the old “kiting” method is no longer very viable. You can still sprint and slide/jump but it is not very effective, and after awhile you will slow down. This is measured by the “pulse” meter.
When not in combat/near sleepers, you can sprint at an uncapped level. However when you are in range of sleepers, this cap will become active and eventually you cannot sprint anymore.
Little known fact, you can jump at different heights! press and hold space to jump higher(though this does have a cool down time) and just quick tap space for a short jump.
MedKit
Probably the most misused item in the game. Of course, usage is up to the player, but there are some strategies that work out far better in the long run.
Simply put, you want to save MedKits for when you really need them. This is usually reserved for Alarm doors or Motion doors. You want the absolute fullest health for these. So how do we achieve that?
Save MedKit’s until the very last moment! If you’re playing with 3 or 4 players, you don’t all need to be at full health! You can sit at 20% health for a good portion of the game and still win. So take advantage of that, and have full health for the times that matter!
But what if you’re playing solo or duo?
This is kind of up to you! I recommend still waiting to use MedKits for crises, however when playing solo that isn’t always an option. This is something you will have to play around with and determine for yourself.
Mine Deployer
Probably the most misused tool I’ve ever seen. A lot of times people will place the mines on the floor, or too high up, or use too many, or a combination of all of these things. Realistically, you only need 1-2 mines for each alarm door unless you’re playing solo or don’t have C-Foam.
With mines, placement is key! You want to place them on the side frames of the door!
Do not put it on the floor EVER! If you really want to be effective, put it at about ankle height to make sure crawlers are also killed!
Bonus tip: place mines a little above your head to also take out giants!
Refill Prioritization
Sometimes arguments can break out over who gets what. In a game with finite resources and infinite ways to use them, you have to make sure you’re being efficient.
Generally speaking, in a squad that has a full loadout of Biotracker, C-Foam, Mine Deployer and Sentry (any variant), this is the order of priority of which should be given a tool refill:
- (High Priority) – Mine Deployer
- Sentry
- C-Foam
- Biotracker
The reason for this is because, you all have guns. You can do the sentry’s job. However, the mines are by far the most damaging and most effective way of thinning herds and buying time. Sentry and C-Foam are roughly equal, and I’d determine this by which is emptier.
What about ammo? Generally, I’d recommend giving ammo to the weakest or least skilled players first. They may not be very proficient with melee and may not be very good with the weapons yet, whereas more experienced players can do melee only, or at minimum be a bit more efficient and accurate with their weapons. However, this is also up to the team to decide.
Resource Efficiency
GTFO is a team game. You want your teammates to be in a good position health and resource wise! You have to all be efficient with what you have. Someone with a Sniper or Hel Rifle should be the dedicated Titan / Charger / Scout shooter, to save ammo for everyone else. If a room is way too full to kill, have the Mine Deployer set up a mine at a choke point, and alert the enemies to clear them all out in one fell swoop.
Work together to keep as much resources as possible! Efficiency is key.
Ammo Conservation
In GTFO, you need to maintain both ammo and health, which can be hard to achieve. You can go hammer only, at the cost of your health. Or you can keep your health, maybe, and use all of your ammo. Its difficult finding a balance, but overall, prioritize your ammo! You’re guaranteed 20% health, but never guaranteed ammo. But try to balance out the best you can to make sure you have enough of everything!
Clearing Enemies in Close Proximity
You’ve just entered a big room, and RNG is not on your side. 10 sleepers, some right next to each other. What do you do?
There’s a few different ways to approach it. You could go in guns blazing, but this is obviously a terrible choice. The best method for dealing with this is to:
- 1) Make a backup plan! Create a fallback path, with mines or a sentry that you can run back to. If ♥ hits the fan, you need to be able to fall back and prepare to shoot the horde out.
- 2) Take out the enemies that are more spread out first. Leave the groups for last! Groups are more likely to get alerted, so best clear out as much as you can first!
- 3) With grouped sleepers, it’s best to coordinate an attack with your teammates. Make sure to execute the enemies at the same time as to avoid alerting surrounding enemies!
Solo Runs
Probably the most challenging way to play GTFO; playing alone. But the feeling you get after finally completing a level while solo is unparalleled. So how do you do it?
There’s a few different ways. First I’ll explain the technique, and then I’ll describe some loadouts that you can use.
- First, you want to make sure you keep as much health and ammo as possible. The best way to do this, is to avoid clearing rooms whenever possible! If you can walk past some enemies, do it! The more you kill and alert, the more chance you have of screwing it up.
- Second, you need to be a good shot and be able to use your hammer well. At alarm doors, you can have up to 30 sleepers coming at you and nobody else to deal with them. You’ve gotta make sure you’re skilled enough to take them on, hand to hand or with guns.
- Third, you gotta know the map! Learn where lockers and crates usually spawn. Which rooms alarm wave spawn in, which doors they break, etc. Learn where to go, how to get there, as much as you can know! Knowledge is power.
- Finally, you gotta have confidence and make sure you stay calm. Remember that all it takes is one slip up, make sure to avoid it by keeping your wits about you!
Bonus Tips and Tricks
This section has tips and tricks that didn’t really fit in with the other sections.
- Higher FOV makes it easier to see more, though it does make the enemies appear a bit smaller. But super useful for solo runs when you need all the information you can get! (I play with it at 90 — Default I believe is 55)
- C-Foamed doors can be destroyed by trip mines! Be careful of this! Un-foamed doors do not!
- “Hack” locks, when failed, make a loud noise, everyone knows this. But the noise only affects sleepers in range of about 40 in game meters (30-40 meters away will make them click, 20-30 will trigger thrashing, ones within less than 15 usually wake up).


Be the first to comment