A step by step guide for players new to Stash and who need a bit more detailed guidance.
Contents
Movement and Basic UI Options
All credit goes to Creepycat!
So you’ve started as a small babe in the big wild world of Mitralon?
The first thing to know is you can move via clicking or using the WASD keys.
Who would have guessed?
Now let me walk you through the interface menu. You can find this button in your bottom right hand corner of the screen. It should look like this, and if it doesn’t then you probably aren’t playing the right game.
Let’s focus on the basics for now, we can address the other tabs later on in the guide.

Character Sheet: Will bring up your character sheet. (shocking?) Here you can see your character, his/her stats, gear, and inventory. At the bottom right, is your bag space. It costs 5,000t to expand to the next slot and you’re given a free 6-slot bag to go in that space. More bags can be purchased through the ‘Medallion Shop’ as well as other useful utilities. This menu can actually be accessed from the inventory button as well or by pressing ‘i’
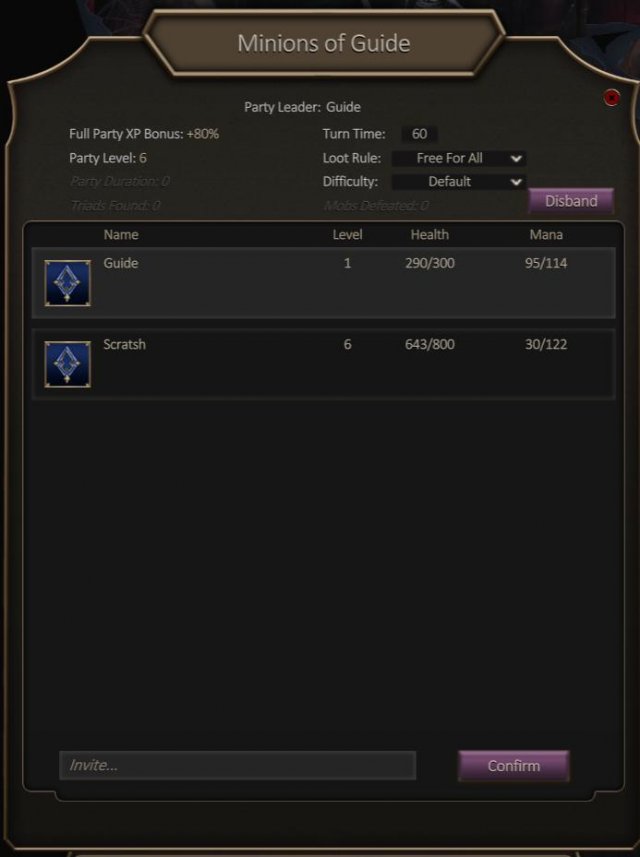
Party: this menu can also be accessed by pressing ‘p’ Here is where you will see other players in your party if you invite or are invited to one. (This can be done by right clicking a player or player name in chat and selecting invite to party, or typing their name at the bottom of this menu). At the top, the leader(which is you if you’re alone!) can change the time limit for turns during combat, the difficulty of the dungeon and the loot rules. Loot Master: the party leader decides who gets the loot Free For All: Anyone can take what they want or Loot and Go: each player will automatically be assigned random loot upon finishing the encounter.
Social: Here you can see your friends, ignore list, and give people access to your Base of Operations (BOO), and see who’s given you access to their BOO.
Stats: Here you can clearly see your characters stats, and there are a lot! To the right is your crafting and gathering skills.
Tasks: This menu shows you all the tasks or quests you’ve accepted and their objectives. In case you’ve forgotten which one you were working on. Tasks are completely optional and don’t really provide any sort of direction for you. They are simply an extra challenge for loot and exp.
System Menu: This menu allows you to change your game options, change characters or exit the game.
Now you know how to move and look at things, congratulations!
First Objective – Combat
The very first thing you’ll probably want to do is head to the starting dungeon, beat up a couple animals, and steal all their traids (currency) and loot. This section will cover exactly how combat works and why we fight things in the first place.
You must move directly onto the dungeon’s square in order to enter it.
Dungeons
Dungeons come in 4 types. World and Private. And Random World and Random Private.
Private dungeons can only be accessed by you or your party and do not contain a boss. Only several encounters. These dungeons you are able to change the difficulty of via the party menu. These are also a fixed location and do not move. Like the one you’ve entered just now, shown in the image above.
World dungeons are accessed by anyone and contrain a boss at the end. You can not change the difficulty of this dungeon because within are encounters with their own set levels. (see table below to determine which encounters are your level)
Random dungeons just mean they will move to a random location in the world on a timer of 1 hour. These can be either private or world and can be any level scale.
Encounters
Now to finally start beating something up. Let’s move onto the square of the first encounter we see. It’s should have white text when you mouse over it and have a white border underneath it. This means it’s your level. Here is a chart to determine which colors mean what.
Color / Level
- Grey / 5 or more levels below
- Green / 3-4 levels below
- Blue / 1-2 levels below
- White / Same level
- Yellow / 1-2 levels above
- Red / 3-4 levels above
- Purple / 5 or more levels above
Once you’ve moved onto the square of the encounter, a battle should start.
Combat
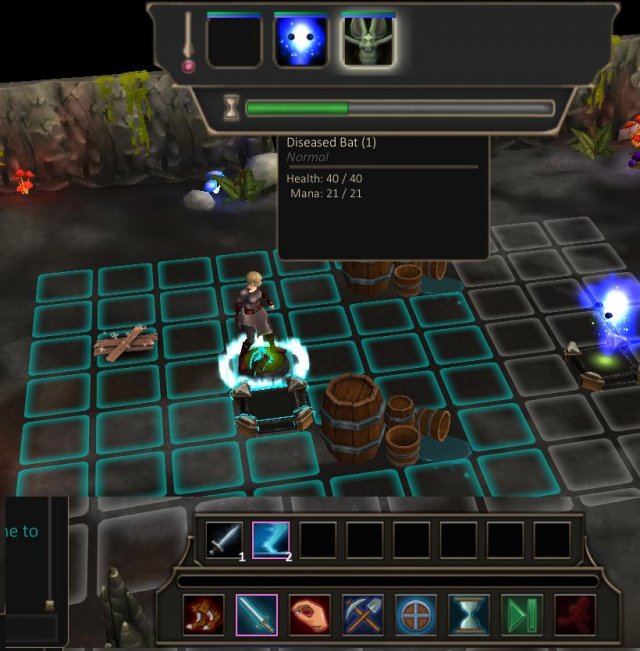
Now we’re in an instanced encounter with some mobs. This is where the turn based combat happens. At the top you will see the queue list of whose turn it is and whose turn is next. And underneath that is the timer bar which slowly depletes until you’ve finished your turn. In the upper right is your health bar and mana. Some abilities consume this mana, and obviously when a mob hits you, that depletes your health.
Now at the bottom of the screen is your in-combat action bar. You can change what goes on these buttons but hitting shift-a (out of combat). This brings up your action bar loader and you can choose where your skills go for in combat or out of combat abilities.
- Is your movement skill. each player has a set number of movements you can do each turn. This is most like the FIRST thing you will do each turn. (you can not move after you’ve chosen an action.) Position actually matters so try to position so there is only ONE mob next to you when you attack.
- This is your attack skills. pressing this brings up a second set of actions which are all your current abilities. You get new ones automatically as you level up.
- Is to use items that you’ve saved to this bar that can be used in combats. Such as potions to regain mana or health.
- Is to gather resources or bury a dead body. Occasionally resources will show up when you start an encounter. And if you’re unlucky and a mob has died and trapped you in, you can burry it’s body to clear up that tile.
- Is Brace. when you use this, your character will attack the next mob that moves to you.
- Is a delay action button (currently not useful/bugged so avoid using)
- Skips your turn
- Attempts to flee from the battle altogether. “You run away bravely!”
Remember when I said placement matters? It matters because of ‘Flanking’, ‘Surrounded’ and ‘Pinned’. What do these mean, you must be asking?
Flanking: If you and an ally are on exact opposite grid squares of an enemy, that enemy is flanked and you and your ally both deal 10% more damage.
Surrounded: You are surrounded if at least 2 enemies are in grid squares adjacent to you. This cramps your ability to attack resulting in a -10% damage penalty. For each additional enemy surrounding you, you suffer an additional -10% damage penalty (up to a maximum of -70%).
Pinned: If you are in melee range with an enemy and there is an obstacle in the grid space opposite of your foe, they are pinned. If they attack you, they do 10% less damage.
Here is a poorly drawn picture to visually explain this:
Now we understand HOW to fight, let’s see it in action! First, I’ll move right next to this ugly diseased bat, surely there’s no concern there.

Next, I’m going to whack it with my big sword. When I select an ability, a blue grid will show you the area in which you can use that ability. But I want to hit this dang bat.
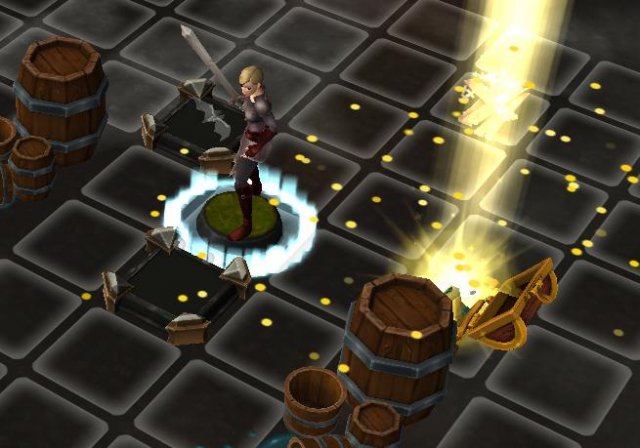
Now after a few rounds of whacking it with my sword, it should be dead. And a chest appears somewhere on the grid.
You can click this chest from anywhere on the grid. And that will bring up the loot menu.
You can select and drag each item that you want to your inventory. Or you can ‘select all’ and click done to retrieve all the items. At the bottom of this menu it shows you experience earned and the number of triads that you stole from that ugly rotten bat. Triads are Stash’s currency and you definitely want a lot of them.
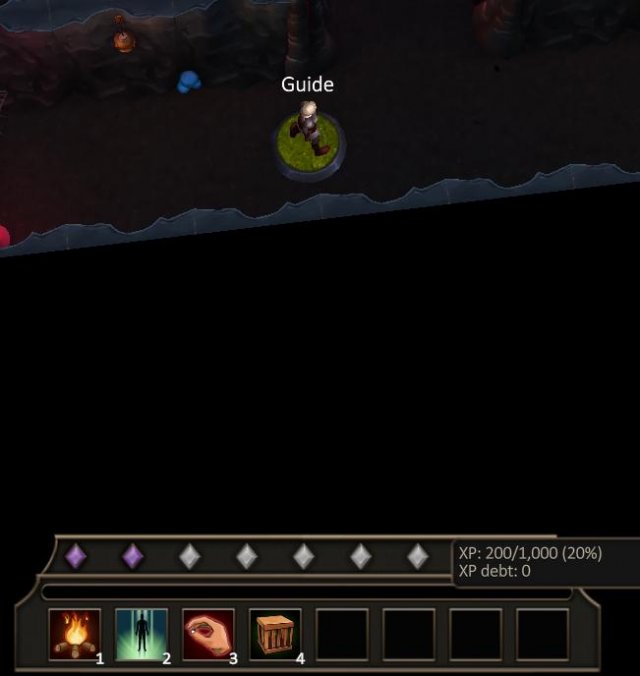
In the above picture, you can see the EXP bar. If you mouse over it, the tooltip should display the percentage. Each time the BAR fills with experience, it will fill a DIAMOND. Once all diamonds are filled and you fill the bar an additional time, you will level up!
If you just so happen to let a poor defenseless and diseased bat beat YOU up and you die, do not worry. There is no penalty until you are level 5. You will respawn in your BOO at full health, but starting level 5 you will then gain an EXP debt. You must fill this bar with EXP until you can continue normal progress in your level. While EXP debt is active, HALF the exp you earn goes into the debt while the other half is normally gained.
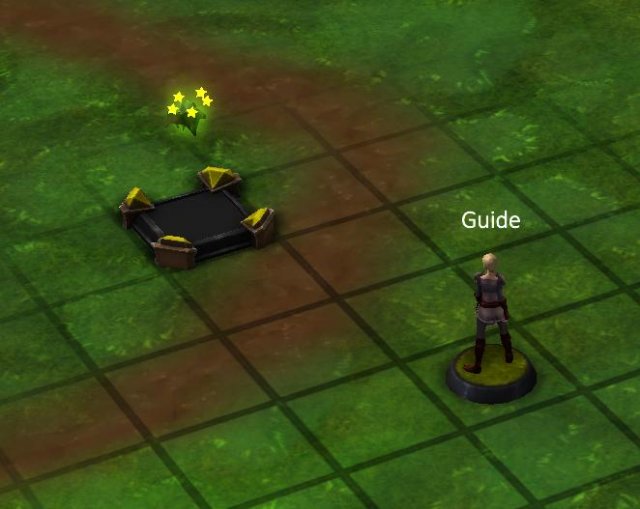
One additional thing to know about combat is that if you ever see an encounter and they’ve got stars above their head like in the following picture, that means that someone else is currently in that encounter fighting them and you won’t be able to enter it.
Congratulations, you’ve beat up a poor ill animal and stole everything it had. Let’s do this a few more times until our inventory is full and then move on to the next section.
Sub Section – Party Combat
Party combat is pretty simple and very similar to solo combat.
Step One:
First thing to do is.. well invite someone!

Step Two:
Hopefully, they’ll accept and then your party will be formed. Pressing ‘p’ will bring up that party menu where you can change turn timer, loot rules and dungeon difficulty as explained earlier in the interface section. You can also see all your party members and your current party bonus EXP % . That’s right! You get bonus experience for fighting as a party! You will also see yourself and other party members on the left hand side of your screen.
Step Three:
To move as a party, simply all party members can stand in the same square and from there, the leader will be able to move and the rest of the party will automatically follow along. Talk about pack mule..

Step Four:
Once the leader starts dragging the party members around, they can take the entire party into a dungeon and then into an encounter. In order for EVERYONE to join the encounter, everyone must be “attached” to the leader as the leader engages the encounter. Otherwise, whoever isn’t following will be left out and unable to join.

Step Five:
Once in the encounter, combat is nearly exactly the same as in solo combat, just that your allies will have their turn in the queue to move and attack. Fighting as a party yields more exp, and more loot! At the end of the fight when the chest appears, whoever’s turn it is last must be the one to click the chest to open it.
Second Objective – City
So you’ve finally beat up multiple animals and other various creatures, stole all their loot, and your backpack is buldging from the treasures. You should probably head on out of the dungeon, the same way you entered. (Or if you’re lazy like me and don’t mind the 1 hour cooldown, select the number 2 button to teleport to the entrance of the city.)
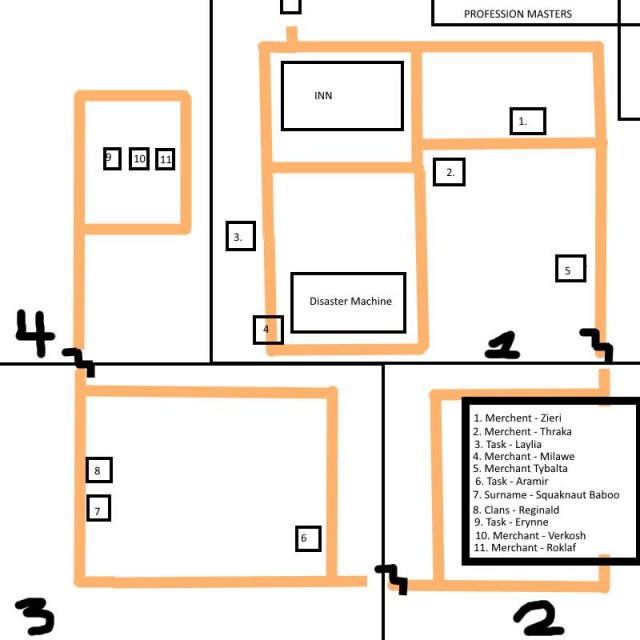
Move a few spaces up to enter the great city of Askagard! Below is another poorly drawn ‘map’ of the city with a legend.
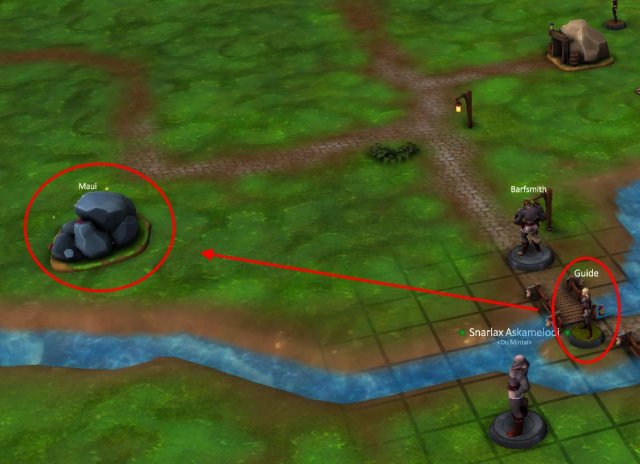
See map section to learn more about each NPC.
Step One
So now that we are in Askagard, head to the right where the profession masters are. You can choose any one you want, but you can only learn one at a time. You can change your mind later if you want but you will lose all experience in the previous profession.
Step Two
Now that you’ve picked your profession, let’s go ahead and head to Zieri, which is the number 1 on the map. Sell everything that is red (items you can’t use), and any other various things you don’t think you want. Essences are useful for most professions so you can hold on to those if you want. But any building materials (nails, planks, shingles, bricks and stone blocks) HOLD ON TO. You will need these and a lot of them. To sell things, click and drag the item from your inventory onto the merchant’s inventory.
While we are here, this merchant sells items for professions. Hopefully you should have enough money to buy your professions tool, and crafting station. For example a chef would buy the spoon and a stove. Additionally this merchant sells all the tools used for gathering. I suggest you buy all of them because it’s always nice to be able to gather all the resources available. But you won’t need all materials for your profession. (see next section for information on gathering and crafting)
Step Three
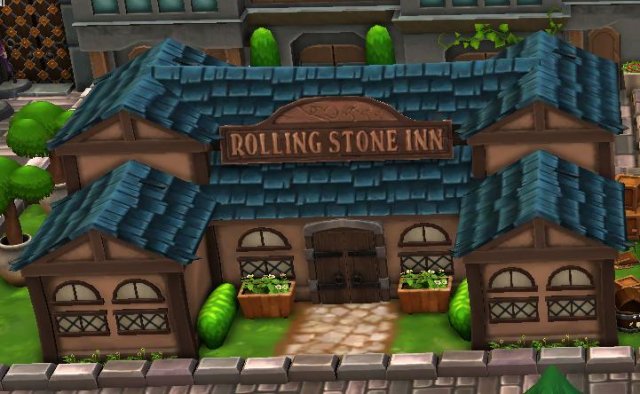
After you’ve bought these items let’s head to the left a little and enter the inn. This is where you and other plays can use buffs out of combat. Buffs are really great and help you do a lot more damage. This is also where you can passively heal up for free. So let’s hang out here for a bit while we heal. Maybe give everyone in chat a big “hello everyone! I’m following Carazan’s guide!” I like to use this time to make friends and chat with new players. You might even find some people to party up with you!
Step Four
Once you’re all healed up, press 8 to exit the inn and let’s head south to merchant Milawe, or number 4 on the map above. This is where you can purchase food to restore health and mana instantly and while you’re out in the world. Food can’t be used in combat, so you’ll have to heal up after each encounter. If you’ve got any triads left, I suggest you buy some now so you don’t have to come back again later. Once you’ve made it to level 6, eating certain foods will actually increase certain stats respectively. But until then, they have no effect besides regaining health and mana.
Sub Section – Harvesting/Gathering
Harvesting or gathering is when you collect the different materials in the world. There is ore, wood, gems, leather, cloth, and herbs. The follow table shows the proper tools required to gather each resource.
Resource / Tool
- Gems – Pick
- Ore – Pickaxe
- Wood – Axe
- Herbs – Shears
- Leather – Knife
- Cloth – Scissors
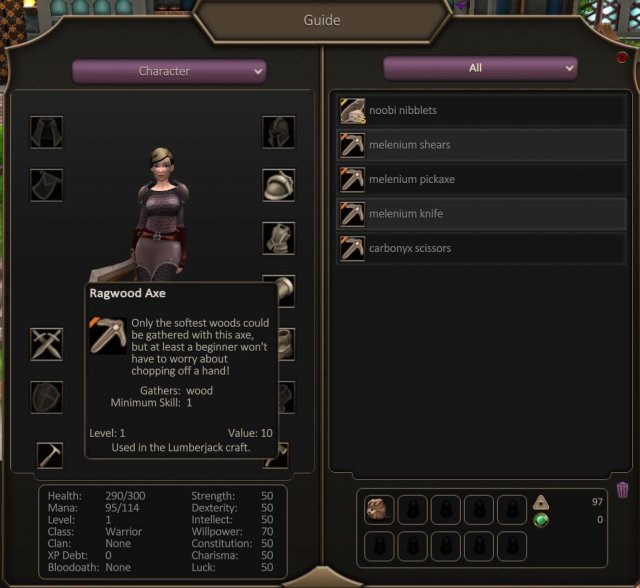
Anyone is able to harvest anything, you just need to have the proper tool equipped. You can have two tools equipped at one time and can change them out as long as you are out of combat. When harvesting in combat, you need to have the proper tools equipped PRIOR to the fight, or else you will not be able to harvest the resource.
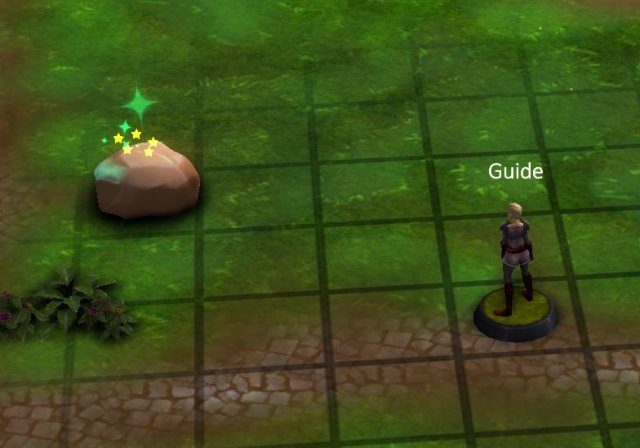
There are two ways to find ‘resource nodes’ like herbs, wood, ore, and gems. You can find them as encounters in the open world and you enter them just like a battle. However there will be no mobs, and you are free to move around this encounter. Move right up to a square and press 4 to harvest the node.
If there are stars above the resource node like in the following picture, that means there is another player currently in the encounter and you won’t be able to enter it.
The other way is during a combat encounter. Occasionally you will find a resource node somewhere on the grid during a battle. If you are willing to, you can harvest it DURING combat, while at least one mob is alive to gain bonus resources. (You will gain 2 resources each harvest if you succeeed) Alternatively, you can wait until you’ve killed everything and harvest the node at the end of the fight, BEFORE you click the loot chest. THIS will only yield ONE resource per harvest.
Harvesting leather and cloth can only be done in combat (or by slaughtering your farm animals, see farming guide under ‘BOO’ section). Sometimes when a mob dies, it’s corpse will begin to sparkle. This means it’s harvestable and yields either leather or cloth. Humanoids like goblins and skeletons will give you cloth, while animals will give you leather. And as stated above, harvesting while a mob is alive will yield you an additional resource or you can wait until the end to receive normal resources.
Step One:
Equip your tools (I’ve equipped an axe and pick to gather wood and gems).
Step Two:
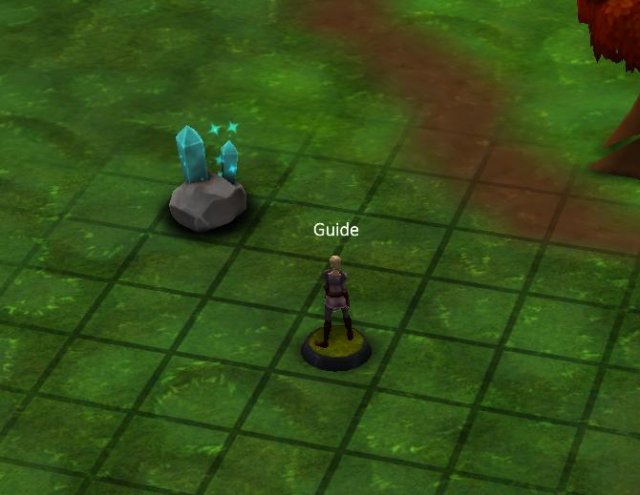
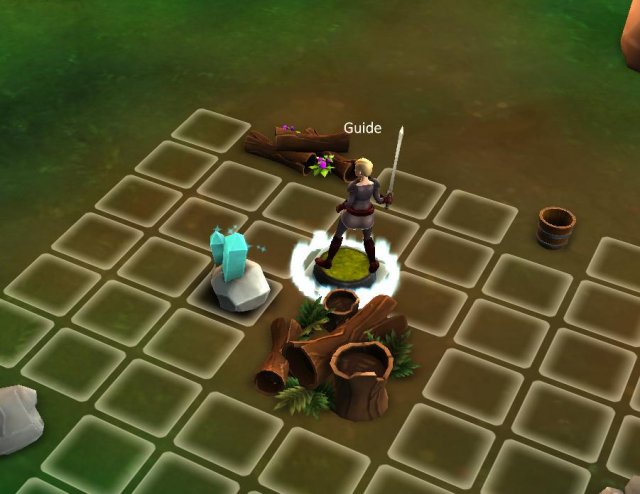
Find a resource node, I found carbonyx which is a gem. Then move onto it to enter the encounter.
Step Three:
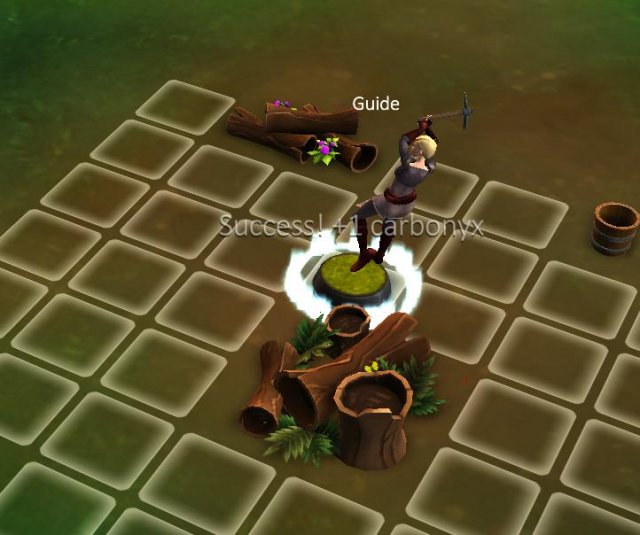
Move up to the node and plant your feet firmly on the ground..
Step Four:
Press 4 and select the node to harvest it. Repeat this until it’s gone. And then press 8 to leave the encounter.
Third Objective – BOO & Crafting
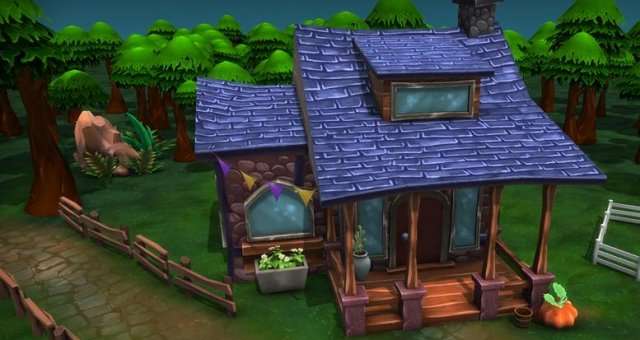
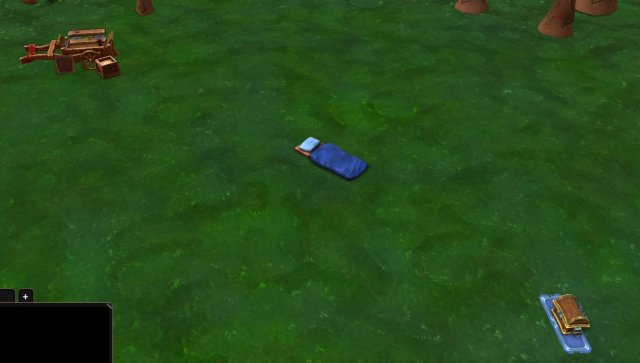
So go ahead and head back out of town the same way we came in. If you go to the right, you’ll see something that looks like this:

This is your BOO!! This is where you will do your crafting, selling, farming and interior decorating. Right now it should be pretty barren with nothing but a chest, sleeping bag and cart.
Step One
So first thing you want to do, is open up your Stash, the chest on the right. This is very important for any sort of building or crafting inside your BOO. Let’s place all of the building materials into your stash. You should see the bar at the top change and it will tell you which items you have. Additionally,
place your crafting items you just bought into the stash. The tool and the crafting station.

Step Two
Close the stash and select 1 to enter build mode. You should now see a grid and the stash inventory should pull up. If you see your crafting station in the inventory, then you can go ahead and place it into this grid. If you don’t see it, that means that it needs to be placed INSIDE… Which you don’t have an inside yet! You will need to upgrade your BOO to level 2 first.
Step Two Again
If you chose a profession that requires you to place your crafting station indoors, like a chef’s stove then you may need to go back to a dungeon to get some more building materials. If you press 6 while in the boo (see buttons below) then you can select Upgrade Boo and it will tell you exactly how much of each material is required to upgrade to the next level.
Step Three
Now you can start crafting! Press 1 again to exit build mode and select your newly placed crafting station. That will bring up the crafting menu, if you mouse over the recipe it will tell you the ingredients needed to make it. Remember, in order to craft this, you will need the ingredients to be placed inside your stash first.
BOO buttons
At the very bottom, is your BOO action bar.
- 1. Toggles build mode.
- 2. Toggles BOO Stash.
- 3. Not usable
- 4. Accesses your Stash.
- 5. Accesses your Cart (see section below)
- 6. Toggles Upgrade action bar
- 7. Enter or exit your interior.
- 8. Leave your boo
When you toggle the Upgrade action bar, here you can upgrade your boo, stash and cart. It costs certain materials to upgrade any of these things. That’s why it’s important to hold on to those materials we found earlier!


Cart and Newspaper
The cart to the left is where you can sell items to other players via the newspaper. Just drag an item from your inventory and move it to the carts inventory. There you can price it whatever you want. And once an item is in your cart, you may right click it, and select “place AD”. You can only do this once every five minutes, and this allows other players to see THAT item in the newspaper!
Press control + n to open up the newspaper. This is where you can see everything other players are selling. At the top of the menu you can change between the categories. Selecting an item will bring you to their cart where you can see all their other items as well. Double click an item to buy it.
Farming
If you see Task Master Erynne or Merchant Verkosh, you can receive a tiny barn, tiny coop, orchard, or garden. If you’ve received or bought one of these things, you can also buy animals, seeds and saplings. Put both the building and items into your stash to place them as explained with crafting. Then you can add animals, or seeds to the building and collect the items they produce.
Congratulations!! You’ve learned how to play Stash! What you choose to do from here is completely up to you! Thank you for reading this tutorial/guide and I hope you enjoy the game.
Remember you can always ask in game for help if you have questions. just type in /h
Sub Section – Farming
Farming begins in your BOO. To make understanding it much simpler than just throwing information at you, I will walk you through some steps to getting started with farming.
Step One:
Gather the following resources so we can complete some tasks that will help us out. You will need
3 balacok, 3 carbonyx, 2 melenium ore and a chef’s tool (spoon which can be purchased from Merchant Zieri). And 2,000 triads.
Step Two:
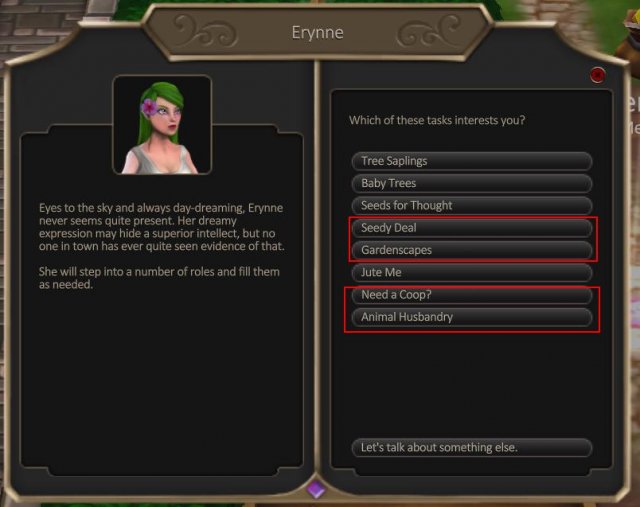
Head into town and see Task Master Erynne. For this guide we will be setting up a tiny garden and a tiny coop. But you’re welcomed to choose whatever TWO you’d like. (You can just buy them from Merchant Verkosh.) Orchards grow saplings, gardens grow seeds, tiny coops house pokka, and tiny barns house goat.
Once you’ve made your way to Erynne, accept and turn in the tasks called, “Gardenscapes” , “Need a Coop?”, “Seedy Deal” and “Animal Husbandry”. After doing this you should have a tiny garden, a tiny coop, a carrot seed and a pokka. Everything needed to get started!
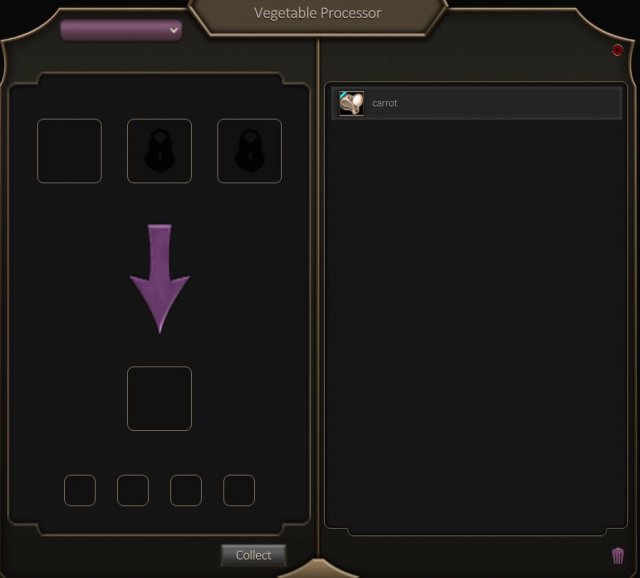
Then talk to Verkosh to purchase an egg processor and vegetable processor. (You will need an interior to your boo to place these processors.)
Step Three:
Back to the BOO! Once you’ve made it home, open up your stash and throw in all the farming items listed above. All crafting and farming items need to be in your STASH in order to be placed or planted. This goes for everything done inside your boo.
Step Four:
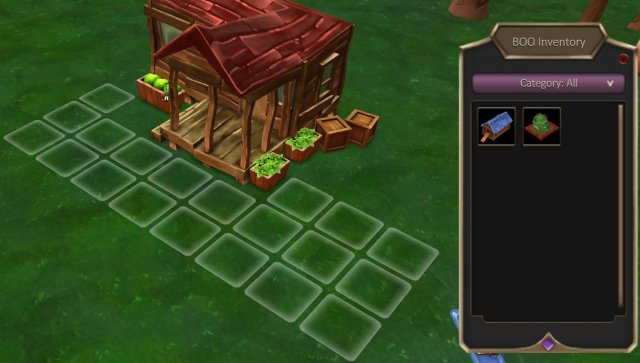
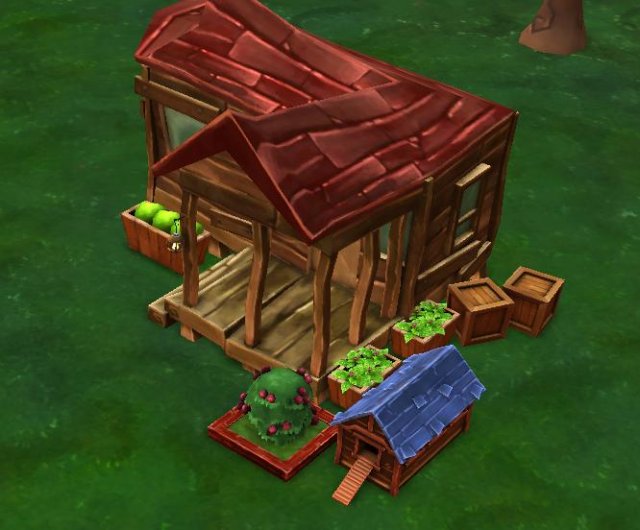
Press 1 to open build mode while outside and place the coop and garden anywhere you’d like. You won’t be able to place a third farming building until boo level 5. But you will be able to change out which buildings you have placed at a time. So if you decided you wanted an orchard instead of a coop, you could remove the coop and place an orchard down instead.
Step Five:
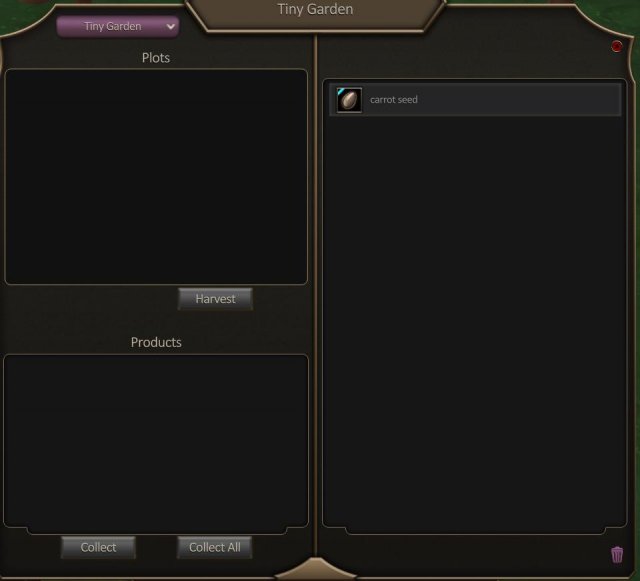
Once the buildings are placed, exit build mode and select the garden. You should see your carrot seed on the right hand side. If you select it and drag it to the upper square on the left, this will plant the seed. If you mouse over the carrot SEED, you will see that it says level 1 in the tooltip. This is the required farming lvl to plant it and harvest it. Since you’re new, you’re only level 1 and will have to increase farming to plant anything higher than lvl 1.
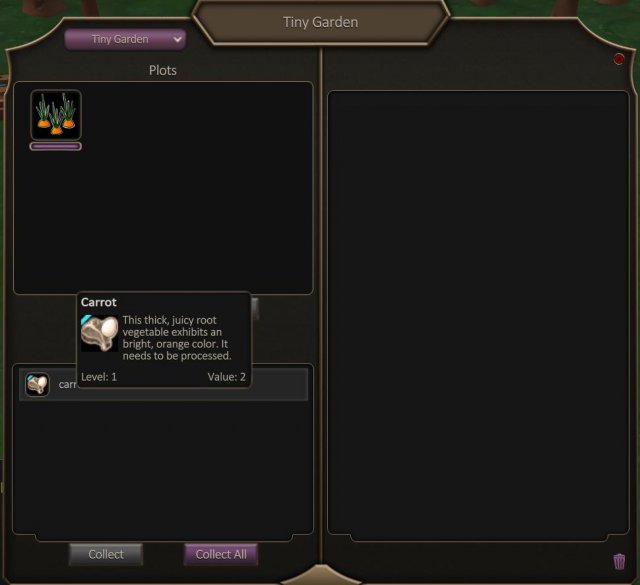
Mousing over the newly planted carrot plant, will show you it’s current lifetime. It will wilt and die if you let this timer hit 0.
Over time, this carrot plant will produce carrots for you to harvest. You can click the collect all button at the bottom to harvest all the carrots produced. This will place them into your stash and you’ll have to access your stash to move them to your inventory if you’re wanting to sell or trade them. Additionally there is a “harvest” button. If you use this button near the end of your plant’s lifetime, you will be able to turn it back into a seed and replant it.
Step Six:
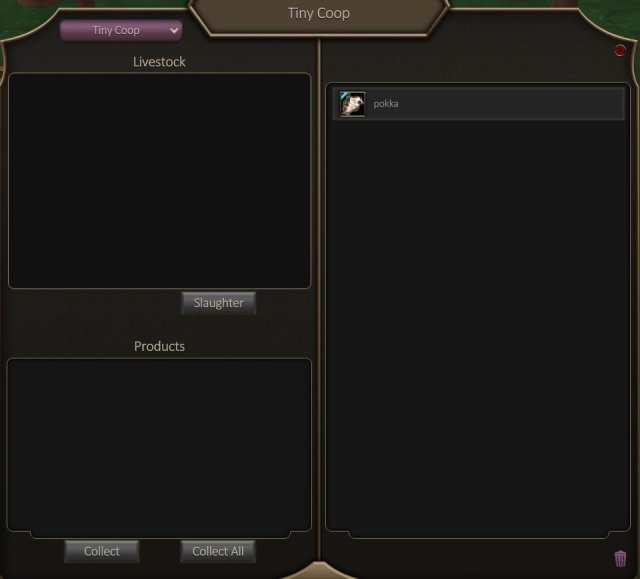
Now let’s go over to the tiny coop. Same thing here, let’s drag the pokka into the coop. It also has a lifetime, however you’ll want to ‘slaughter’ it near the end of it’s lifetime you can yield additional resources such as pokka meat or leather.
Over time this pokka will produce pokka eggs. You can collect these eggs the same way as the carrots and they also go into your stash.
Step Seven:
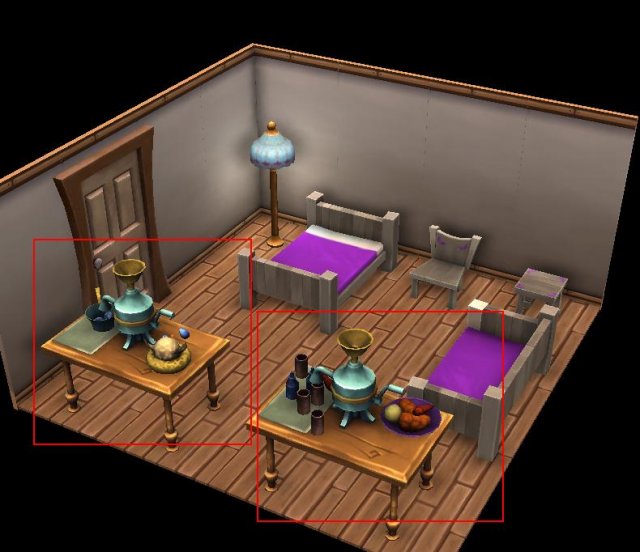
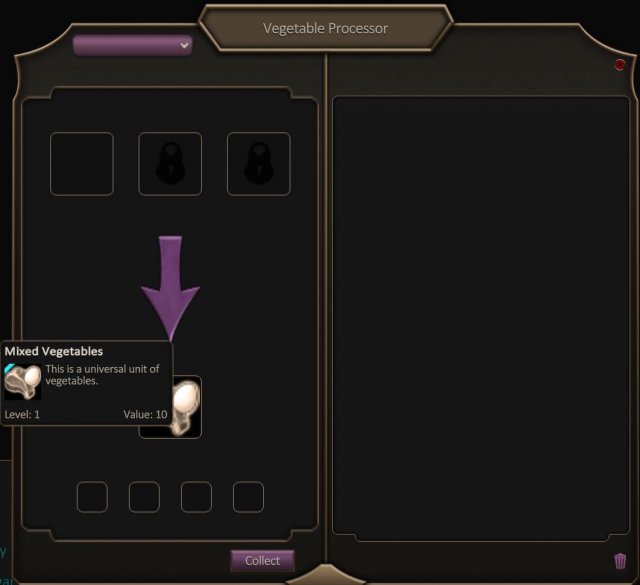
Let’s get these carrots and eggs processed and ready to actually use in cooking! If you go inside your boo, you should be able to place the 2 processors you purchased earlier. Each one takes up 2 squares. So if you haven’t upgraded much.. it might be a little cramped in there.
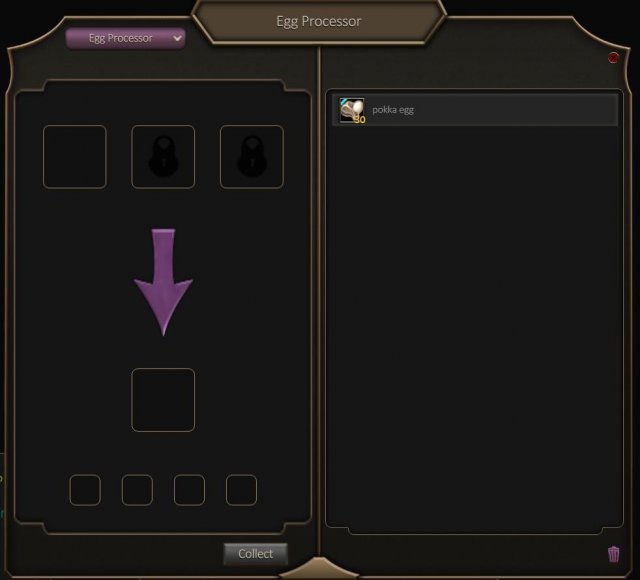
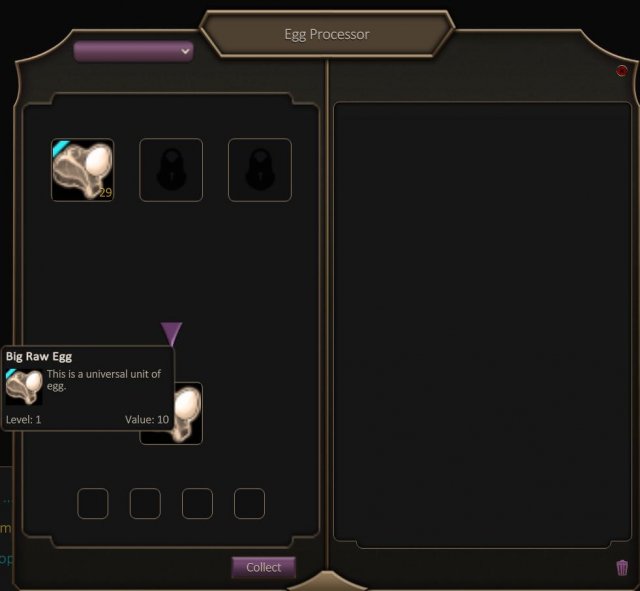
Once placed, you can place the respective items into each one and start to process them. Over time they will yield you their processed form! Pokka Eggs into Big Raw Eggs and Carrots into Mixed Vegetables.
Step Eight:
PROFIT! Either keep the items produced for cooking or you can sell them to other players to make a steady stream of triads.
Well now you know the basics of farming. All these steps apply to the other farming builds as well, just different items! Hope you enjoyed.
City Map
- 1. Merchant Zieri sells all items related to crafting and gathering.
- 2. Merchant Thraka sells basic food.
- 3. Task Master Laylia has tasks.
- 4. Merchant Milawe sells advanced food.
- 5. Merchant Tybalta sells traps.
- 6. Task Master Aramir has tasks.
- 7. Squaknaut Baboo allows you to purchase a surname.
- 8. Reginald allows you to create a clan.
- 9. Task Master Erynne has farming tasks.
- 10. Merchant Verkosh sells farming items.
- 11. Merchant Roklaf sells traps.
- The Amazing Salvage Machine: place crafting disasters in here for a chance to receive rare, fabled and legendary materials.
- Inn: hang out inside here to regain health and mana and receive/give buffs.
- Profession Masters: learn a profession from one of these.









Be the first to comment