
A few tips to help you please the unpleasant monstrosity that is the entity.
Contents
The Basics
So you’ve finally embraced the life of a psycopathic killer and you’re looking for ways to dispatch of those troublesome teenagers (minus a meddling dog).
You’re stuck in a first person perspective while the survivors use a third person one giving them better situational awareness, but you have a few tricks at your disposal. Lets take a quick look at each of your options and a few tips to help you stop them from meddling for good.
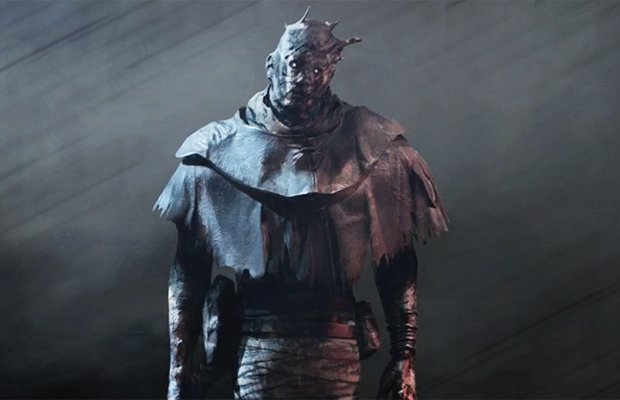
Meet The Trapper

The first of your three options as a killer he’s been available for play since the beta. Succeeding as him means making well use of your bear traps as they can not only deny an area and make survivors take the time to disarm them to continue with what they’re doing if properly placed, but can also alert you to a survivors position if ones unlucky enough to step in one of them.
This means picking them from the trap if you’re fast enough at getting to their position. Pay attention to the positions of ones you’ve placed and keep an eye out for any that’ve been disarmed as it means a survivor is nearby, and be sure to make an effort to always have at least one on you or to pick one up as you patrol the area. To make the most use out of his bear traps they should be placed:
- By important objects such as under the exit gate switches if they succeed in starting five generators and near the hatch.
- By generators and chests in tall grass or out in the open with an add on for reduced visibility.
- By objects that the survivors can interact with. This means under things they can throw down to stun you and by windows so that vaulting over it means landing in your traps.
- By doorways and halls with more than one exit. When placed correctly this denies them the use of that route without disarming the trap first.
- Underneath hooked survivors ensuring that if they help them down without disarming it one of them will get caught, and nearby any you’re using as bait.
Meet The Hillbilly

The second of the killers at your disposal the key to your success as them involves making good use of your chainsaw.
While he charges with his chainsaw and it instantly downs any survivor that comes into contact with it using it takes time to charge and causes you to move slower as well as making a lot of noise. Be careful before revving it because If they didn’t know what direction you were in before they’ll know after hearing the sound.
- While its tempting to rev your chainsaw up to hear the noise be sure to keep from doing so unless you’re sure a survivor is close by.
- If you’re getting close to a survivor consider halfway charging your chainsaw bar as you approach them. Although you move slower if the survivor makes a break in a straight line you’ll only need a second to charge them.
- You can use your charge to break objects instantly instead of clicking to destroy them. This still stops you for a brief period however.
- If the survivor is rounding too many corners and keeping too many objects between you two consider giving up the chainsaw hit and pursuing them normally. It still only takes two normal hits to down them and doesn’t waste as much time as missing one of your charges.
Meet The Wraith
The third of the deadly killers invokes the use of stealth, and the key to his success relys on the use of his bell as otherwise you’re left with hitting a survivor twice to down them. Its ringing is loud enough to give every survivor a general sense of which direction you’re in if they’re listening for it as well as if you’re visible or not if they’re keeping track of the number of times its been rung, and although you turn invisible it doesn’t grant complete invisibility.
During these periods you’re unable to attack and have to transition back, but your biggest benefit is the removal of the heartbeat sensor that survivors hear when you get close to them.
- Use your enviroment to your advantage. Although your bell doesn’t make you completely invisible it still makes you harder to see, and at the same time removes the heartbeat sensor. Staying behind objects as you move close to noise sources instead of out in the open means that you can catch survivors still working on generators more often than not as they’ll be focused on looking for where your shimmer is.
- Use your invisibility to your advantage. Be careful when changing between the two as it makes enough noise for survivors to pinpoint what direction you’re in and how close you are. If you hit a survivor consider taking an extra second to turn invisible again. This means that they can no longer tell if you’re pursuing them or not or how close you are, and allows you to follow them a little easier as long as you stay unnoticed yourself.
- Using survivors as bait has more impact to playing this killer as you can easily hook one and turn invisible again. As long as you aren’t standing directly by them or hiding behind something your shimmer will be harder to notice which means they won’t be able to tell if you’re still watching them, if you’re close, or even if you’ve moved on to investigate another area.
Putting Their Backs against the Wall: A Few Tips
Your main focus of playing a killer is to hook survivors and sacrifice them. This gives the most points, but although its more risky to do outright killing them doesn’t give you much in the way of bloodpoints. Chasing them, injuring them and letting them heal to trap or injure them again, and hanging them and letting them be rescued are risky endevours and increase their chances of success in exchange for more points.
Keep a track of how much time you spend chasing after people and patroling areas as each second ticking down is another moment they have to repair a generator. Here’s a few tips to help you not only win, but to help maximize your points doing so.
- Patrol the area. Don’t stick in one for too long. You have a lot of generators to look after and if you’ve stopped in and looked at one that hasn’t been touched yet move on. If you see a generator that isn’t on but is making noise and the pistons are moving it means someone in the area has been working on it if you didn’t hear them while you moved close. Look for them for 5-15 seconds, trap it or stay invisible if those are options, and move on to another generator if you don’t find them or see any scratch marks. If a generator has been started or someone has messed up repairing one skip the ones you were about to check and move there immeadiately and pay attention to the landscape around and nearby its source as you approach it.
- Use survivors as bait. Hooking them in the open and setting a trap underneath or by them, turning invisible, or walking away a bit as though you’re moving on to somewhere else and watching from outside the heartbeat sensor can lure other survivors out from hiding to help their friend. Know when to hook them, and know when to pick them up and drop them to come back to later. A dropped survivor is better bait as both picking someone up and hooking someone means that everyone knows where you are in addition to the time you lose doing so. At the same time nobody can know where you are if they’re left to crawl and bleed out. Just make sure this is done at a place you can easily keep track of them lest they crawl away, and if need be pick them up and drop them in a building or inside of your basement. Weigh the benefits of watching a hooked survivor to make sure they’re sacrificed if you choose to do so as during the time it takes for them to bleed out if they’re not struggling they can easily repair two or three generators. Your efforts may be better left leaving them, and you only need to hook them twice if they go into the struggle animation or three times if they’ve been rescued before then to sacrifice them.
- Focus on hooking survivors only if a hook is nearby. Pay attention to where your basement is at all times and if it’s close enough it may be worth risking them breaking free once to hook them down there. It’s always more difficult to rescue a survivor from your basement than it is from a surface hook, and as a bonus they can be reused after a sacrifice unlike those on the surface. If there are only two survivors left leaving one to crawl around is often better than hanging as it gives you more time to find the other versus hanging them, letting them die, and letting the hatch open for the other to escape through.
- Pay attention to your surroundings. Playing the game with headphones on may be the more preferable option. You need to pay attention to the sounds of whimpering if you’ve injured someone and are unable to find them, to be able to see if there are scratch marks left if someones running, if someones walking while injured you can find them by a trail of blood puddles, the sound of someone entering and exiting a closet, and checking tall grass. If they’re nearby your basement and you lose track of them they may be inside of it behind a wall or in a closet waiting for you to leave. Check closets rarely as this takes time and forces you to look there until you’re done and is better left to attempt if there’s a high chance of someone being inside. Paying attention to this also includes the sounds of someone either in the process of repairing a generator or sabotaging a hook both of which make loud distinct sounds, in addition to the loud wrapping sound of someone healing themselves with a medkit. If you’re a trapper keep note of the glowing outline that shows your bear traps and make an effort to herd survivors towards where you’ve placed them and to avoid stepping in them yourself which could waste precious time and cause you to drop someone you’re carrying if you make a bad step.
- Pay attention to the sounds you make yourself. Breaking objects, checking lockers, and moving near crows all produce sounds for you in contrast to when survivors sprint to vault over objects. During these your camera is also locked yourself so you may lose sight of them if they take the chance to flee.
- Chasing a survivor is relatively straight forward but while pursuing them keep in mind the general direction they’re moving. You may move faster than them naturally but you move slower moving through windows and breaking objects both of which force your camera to temporarily take your sight off of them. Consider walking around these objects and trying to cut them off instead of following them in a straight line. If you’re close enough to them you can attempt to grab them by attacking when they vault over something which will instantly down them and put them over your shoulder.
- Finding ways to trick your survivors is also necessary for your success. As an example you could approach a generator and see someone in tall grass hiding by it on the side of your screen. Instead of focusing your camera on them you continue walking towards that direction as though you hadn’t noticed them until you’re close enough to where they were to turn and hit them. Since your red cone is your vision and visible to survivors walking backwards can also give the impression that you’re heading in another direction and let you walk backwards towards them.
- Keep track of the items people are carrying when you start the game and the items themselves. If you can find people with toolboxes priotiize them as they can sabotage your hooks. If a survivor has a flashlight it can temporarily blind you and cause you to drop someone if you’re carrying them. Either look away while you move towards them or if you’re carrying someone press R to drop whoever you’re carrying and give chase unrestrained if there are no other options.
Note: If you’re new to the Dead by Daylight game, check out the guide for new DBD codes. They will give you Charms, Bloodpoints, Rift Fragments and more. At the beginning of the game, it will be very useful for levelling up.
All You Should to Know About Legion
I totally understand your frustration when dealing with The Legion. They’re a character that is sort of universally hated by the DBD community, and I can sort of see why – personally, I think that they’re just misunderstood.
Everyone is going to tell you one of two things: A) “Just don’t heal!” and B) “NEVER group up!”
Being told the same stuff over and over probably won’t help you – it might even make you more frustrated, because you’ve been trying to do these things already! Everyone knows not to group up against The Legion for goodness’ sake! Besides, a good Legion player is going to assume that the survivors know those things, and play accordingly. Hopefully the tips I provide here are a bit easier to understand and actually apply to real time gameplay scenarios. I do apologise in advance for the wall of text – I can get a bit wordy, but trust me when I say that I think this might actually help you.
I’ll be writing these tips based on Legion’s base kit, his popular addons, his adept perks, and perks I see used on him often.
- Q: How is The Legion finding me so easily?
- A: There are two primary ways that The Legion can get real time information on where you are. One is by using their power, and the other is from the use of information perks.
- Killer Instinct: After landing the first hit in their frenzy, The Legion gets Killer Instinct. This means that they can see you and your teammates until their frenzy runs out. This is probably how The Legion has been finding you so easily.
- Discordance: One of The Legion’s unique perks (and my personal favorite information perk), Discordance will activate if 2 or more survivors are working on the same generator. The aura of the generator being worked on will be highlighted to the killer for as long as the survivors are working on the generator (and then a for a couple of seconds after they stop). This perk synergizes well with Legion’s power, and you’ll see a lot of Legions running it.
General Tips and Helpful Hints
If your teammates double up on a generator early game and are attacked first (after Lethal Pursuer would have deactivated), chances are The Legion is running Discordance. If not, you might be able to get away with doubling up on generators for the rest of the match if you’re careful about it.
Discordance’s aura reading effect lasts for a few seconds after survivors leave a generator. Most Legion players will head straight to the generator instead of looking for the survivors themselves, which gives you time to get some distance.
The Legion can only be in one place at a time. Always try to be applying some sort of pressure. Any action that “undoes” what the killer has been working for – repairing generators, resetting health states, unhooking teammates, and getting slugged teammates up – is applying pressure. If someone is running the killer, YOU SHOULD BE DOING SOMETHING PRODUCTIVE. This tip applies to almost every killer, but it’s especially effective against killers that already have poor map control (like The Legion).
Split up and work on as many generators as you can at once, especially early game. The Legion’s ultimate counter is speedrunning the match. If they can’t apply their slowdown by forcing you to mend repeatedly, they can’t win.
Try to keep track of when The Legion has Feral Frenzy. Pay attention to your teammates’ statuses! If you start to see yellow bars (similar to bleed out timer bars) pop up next to your teammates’ icons, it means that Legion is in their power and has Killer Instinct.
The Legion’s terror radius gets a little bit bigger while they are in Feral Frenzy. You can use this as an early warning system to run away and make Legion waste more time looking for you until while their frenzy gauge runs out.
The Legion gets faster for each successful hit landed during Feral Frenzy. Their base speed is raised to 5.2 meters/second when Feral Frenzy activates, and is increased by 0.2 meters/second with each hit, capping at 6.0 meters/second.
The Legion cannot see scratch marks while in Feral Frenzy and does not get Killer Instinct until they land their first hit. A lot of (average) Legion players will activate their power early, lose track of where the survivors went, and then be forced to cancel it so they can start looking for survivors again. The best thing you can do to prevent The Legion from chaining hits is to deny them the first one, thus denying them access to Killer Instinct. If you see The Legion’s animation change (they raise their knife up and start sprinting), try and break line of sight, move unpredictably, and do what you can to get as much distance as possible.
The Legion can only get Killer Instinct pings for survivors that won’t cancel Feral Frenzy if hit. Once you’ve been slashed, Legion won’t be able to track you. Use this extra time to get far away and mend/do objectives/ect.
You are immune to Killer Instinct while Oblivious.
If your teammates are far away from your location while Feral Frenzy is active, DO NOT HIDE, especially in a locker! Try to work on objectives until Feral Frenzy ends or until you are the only survivor left for Legion to chain a hit onto.
Most Legion players, after hitting all but one of the survivors during Feral Frenzy, will try and use Killer Instinct to find the last survivor – even if they are all the way across the map. This wastes a TON of time, allowing your teammates time to reset between frenzies. Use this to your advantage!
If The Legion hits you while in Feral Frenzy and you already have the Deep Wound status effect applied, it will not count as a good hit and their frenzy will go back on cooldown. Forcing a frenzied Legion to hit you twice in a row or while you already have Deep Wound will cancel their frenzy and put it back on cooldown.
Your Deep Wound bar will not progress if you are in chase or sprinting.
Try and get as much progress on as many generators as you can early game. If all four survivors are working on separate generators most of the time, The Legion will struggle to apply and maintain map pressure.
Healing against The Legion isn’t as bad as you think, especially if you’re playing in a group, are running healing perks like Resilience, and/or if you’ve brought a medkit. As long as someone is always pressuring a generator (or two), you’re all good to heal. The Legion’s goal is to keep everyone injured so that they can get easy downs later. Rotating who heals and who is healed can really screw up this killer’s snowball potential. Try to avoid healing in solo-Q unless it’s absolutely necessary.
A frenzied Legion can vault pallets (and windows) just as fast as you can. Stunning them out of their frenzy pretty much guarantees escaping from a chase, but skilled Legion players will try and bait out pallet drops. You can actually use this to your advantage by mindgaming pallet loops to stall until Feral Frenzy runs out. The Legion has an addon that allows them to instantly and automatically break pallets when they vault them during Feral Frenzy. If you know that your Legion is running this addon, avoid dropping pallets during frenzy chases entirely.
If pallets aren’t an option, flashlights and the perk Flashbang also stun The Legion out of Feral Frenzy. Good luck landing a blind on a fourth hit Legion moving at 6 meters per second, though.
If chased by a frenzied Legion, mindgame as much as possible to waste their power. Small, rectangular loops (like the logs on the Bog maps and most large boulders on various maps) are really good against the average Legion player.
If you’re already injured and being chased and The Legion is NOT in Feral Frenzy, try to vault a window. This might bait them into using Feral Frenzy to follow you. This does give Legion a free frenzy hit, but it saves you from being downed and possibly hooked. Once you’re inflicted with Deep Wound, The Legion will have to either leave you in order to take advantage of their frenzy OR cancel their frenzy so they can hit you again, locking them in an animation and giving you tons of distance.
As the last generator is being worked on, you can actually try and heal a bit in preparation for endgame. You’ll need the extra health states for unhooks, protection hits, and to buy time. A lot of Legions use Feral Frenzy less once the gates are powered.
Perks I Commonly See Used By The Legion
Some of the current “meta” perks aren’t really included here since they’re almost identical for every killer and I felt like including them would waste space here.
- Agitation
- Bamboozle
- Blood Echo
- Corrupt Intervention
- Discordance
- Enduring
- Hex: Crowd Control
- Hex: No One Escapes Death
- Infectious Fright
- Iron Grasp
- Mad Grit
- No Way Out
- Sloppy Butcher
- Starstruck
- Superior Anatomy
- Thanatophobia
- Unrelenting
Perks I Recommend Against The Legion
Some of the current “meta” perks aren’t really included here since I felt like including them would waste space here.
- Adrenaline
- Alert
- Bond
- Chemical Trap
- Dead Hard
- Deja Vu
- Desperate Measures
- Empathy
- Hope
- Lithe
- Made For This
- Overcome
- Plot Twist
- Resilience
- Resurgence
- Sprint Burst
- This Is Not Happening
- Windows Of Opportunity
I hope it helped at least a little bit, and good luck!


Be the first to comment