
Using just the supplies you start with.
Other Stationeers Guides:
- Super Simple Steel Smelting.
- Building Your First Base.
- Quick Guide to Auto-Solar Power.
- Help! My Welder Fuel Is Gone!
Basic Framework
All credit goes to Hardly!
First things first – find your Construction Supplies Boxes (both 1 & 2), and drag them near where you want to build your airlock. Lift click the handles on the ends with an empty active hand to start dragging, tap Q to let go.

Grab out some iron frames and make the airlock corridor. For a basic airlock, you just need four (the other two sides of the cube are the airlock doors), but if you don’t have a base yet and just want to get a feel for how airlocks work, you’ll need another 5 frame to put a tiny room beyond the airlock so we can get some air pressure going.
Once the basic framework is in place, put some iron sheets in one hand, and your welder in the other. Tap the letter O to turn on your welder, and stage-1 weld (frames have two welding stages) the floors and one wall of the airlock. Turn off your welder, and leave the rest of the frames open for now so you can easily move around.
Layout

Head back to your supplies boxes, and find an active vent, a console, and a sensor kit. Mount them on the wall that you welded – be aware that both the console & the sensor have multiple placement options that you can scroll through with your mouse wheel. For the console, you want the regular console (not the double or the display). For the sensor, you want the gas sensor.


Go grab the airlocks out of the supplies box, and place them down. Make sure to rotate them so all the sockets are pointing to the inside of the airlock. If you manage to seal yourself between them, you can use the crowbar from your toolbelt to get them open.

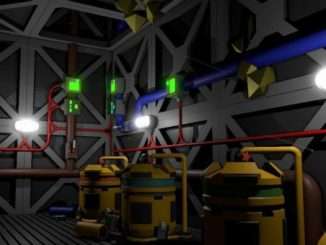
Next up, connect some pipes to the outlet of the active vent, and run them up into the ceiling cavity. An “unconnected” pipe end acts as though it’s sealed, so these pipes are actually going to act as improptu gas storage when we empty out the airlock.

Wire everything together, they need to be on the same network of wires to communicate data to each other. Finish off the circuit by connecting a line from the output of a power controller. I don’t recommend connecting generators directly – pass the power through a power controller (APC) so that the battery in the APC can help smooth out the load, and ensure you still have power at night when your solar panels won’t be generating.
Configuring


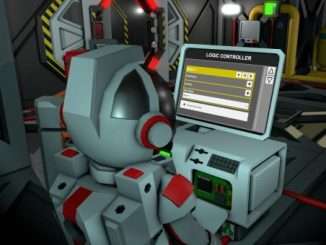
Head back to your supplies and get the airlock controller circuitboard, and a sheet of glass. Put the circuit into the console, then use the glass to finish it off. Flip the switch on the bottom and ….. oh, error.

There’s a data disk in your supplies, and it does one thing and one thing only (at the moment) – when you put it into a console, it reboots the console into configuration mode. Once you install the disk, you should get a list of all the connected things on the circuit.

New problem – for the console to operate properly, we need to select the exterior airlock door first. But how to tell which is which? I cheated – cut both wires to the interior door, select the interior door, sensor and vent, reinstall the wires and select the interior door.

If your console displays something like this, you’re all set. Pull out the data disk, and let’s finish make everything airtight.
Pressurise

Drag your big oxygen tank over so we have something to pressurise with, then weld all the frames to stage-2 (Don’t forget the floor, depending the height of the ground it can be easy to forget). Once all the frames are completely solid. switch off your welder and step into the airlock.

Click the Big Green Button to start cycling to the inside ….

But of course, there’s no pressure yet, so the console is going to stuck waiting for the airlock’s pressure to reach safe levels (about 100kPa). If the console ever gets stuck like this, click the yellow button to cancel the current step and proceed with the process – beware though, this can result in losing some atmosphere once everything is pressurised.

Open the valve on your oxygen tank, perhaps to 110kPa, and wait while the atmospheric pressure builds. You can see the external pressure in the top-right corner of the screen, or by looking directly at the gas sensor you installed. Once the gas sensor reports that the pressure is over 100kPa, close off the valve on the big oxygen tank so you don’t waste any extra. If you’ve already used some of the oxygen and can’t get the pressure high enough, bring in some Ice (Oxite), though only melt a little at a time (you can use your welder in a pinch).
Done
We’re all done, and now have a functioning autocycle airlock and a tiny pressurised environment. Cycle the airlock in and out to make sure everything’s working, and fix any problems that come up. Take off your helmet and take a few breaths of (probably not very) fresh air to celebrate.

Then put your helmet back on, cycle the airlock to the outside, and get stationeering!


Be the first to comment