
A general guide to playing Champion including things you should be doing, main differences between the lower difficulties and things you should master by the time you start playing on Champion difficulty.
Other WV2 Guides:
- All Tomes and Grimoires (Video Guide).
- Advanced Guide for Progression and Leveling.
- Basics of Melee Combat.
- Sienna (Unchained and Pyromancer).
- Tips and Basic Concepts for Newcomers.
Contents
What is the Point of this Guide?
All credit goes to Rocker Fox!
The general point of this guide is to help inform on some of the differences between vet and champion, give a list of Do’s and Don’t’s, and help players be better at the game in genreal. Champion can be daunting and following a few of these points and missteping a lot of the common mistakes can help your runs go smoother and assist you with avoiding some of the common mistakes many make.
Champion vs Vet: What Makes It so Much Harder?
As with the other difficulties both enemy damage and toughness go up in Champion compared to Vet. As with Vet you do not start and any healing and items such as healing, potions, bombs, and ammo are in far fewer numbers.
Getting downed only once puts you into a black and white state of limited hp and getting downed after that kills you. Enemy horders are in much larger number as well as special enemies. Boss level enemies are also far more common, with 1-2 bosses per run not being out of the ordinary.
The biggest change from Vet to Champ is the introduction of Friendly Fire from ranged weapons and certian class abilities.
Marking
Marking an enemy or an item with your mark key (default T) can allow your team to more easily see both special enemies, bosses, and items by applying a blue outline around them.
This is a big one i see people forget to do all the time aganist specials, especially with characters like slayer which lack range altogeather.
Marking an enemy even if you lack ammo can help your team murder a thougher enemy before they become a problem. It highlights them and makes a sound so even without saying anything your team can mor eeasily pick them out of a crowd.
This is especially important on bosses and enemies since sometimes the mix of particle effects from enemy abilities and mape elements that make them hard to see. This is also highly important with enemies like blightstormers and leeches that teleport around and could cause a serious hassle for the rest of your team.
Finally if you happen to be playing with a WHC any enemy that is marked takes more damage so it’s overall a win win situition. Though im not sure what the numbers are for increased damage it looks to roughtly be around 5-10% more damage and boss health goes down noticable faster when they are makred.
Friendly Fire
In Champion every ranged attack can do friendly fire. Some attacks do far more than others and can cripple your team pretty badly if you are not aware of it.
On top of the usual “don’t shoot your teamamtes , let your tammate cover the horde in melee” statement it’s important to reconize 2 things with how Friendly Fire work in Vermintide 2.
1) Being hooked, Assassined, or Leeched does not make your teammate immune to damage done by friendly fire. This can be a big problem where you are just wildly firing and not aiming for the rat or chaos warrior.
2) Your abilities can and will damage your team. This is especailly notable to people who play Elf’s first carear, Bounty Hunter and Unchained. The elf especially has this problem, on more than one occaustion i had someone who stood behind me and as soon as she used her ability it dropped my hp by something like 15-20 points.
To this end it’s really important to aim accurate shots and mind your lines of fire. Most friendly fire is entrely avoidable by following a few simple steps.
- Avoid firing into a horde that is acticely in melee with a teammate.
- Do not cross in front of ranged heroes ever, it is always better to cross behind them.
- Aim above your teammates heads for taller enemies and try to stay on their side when firing, never behind.
- Never walk through a hero that is firing. Always walk around.
- Carefully aim your shots when saving a hooked teammate and if you cannot get a clear shot try to engage in melee.
Defending Agansit a Horde
This falls under one of those gameplay concepts that is a big deal in champ and above and not as much in the lower level difficulties but is still a good practice to follow.
Generally during a horde wave you should pick a easy to defend spot, hunker down and fight through it. Fighting out in the open is a death sentence, your team will get swarmed and they will either go down or get dragged off 1 by 1. Here are just a few notes regarding sucessfully defending during a horde.
- Try to sit somewhere that rats or chaos can be funneled into 1-2 easy to control areas. The less places they can come from, the better. This is best done when your team has atleast 1 tank, 2 damage based heroes to the direct sides of the tank and 1 person to cover the rear and additional sides enemies can come from as well as call out if a horde is coming from the opposite direction
- Ledges are a really good defensive spot to sit on top of during a horde event. You are effectively getting free hits on rats and chaos raiders as they try to climb up and a vaunerable during that time. You also have a grader view range agansit larger enemies coming your way and can pick them off before they become a problem.
- Alternatively staning under a ledge is usualy a poor idea. On top of dealing with enemies from the front you now need to deal with enemies dropping down which can be hard to hit. Having a larger enemy land directly next to your party can end your run pretty quick.
- Be careful when using movement displacing abilities in Champion during a horde wave! This is a big one. On more than one occausion i have see either a Footnight or Handmaiden use their ability, throw themsevles on the otherside of a horde and isolate themselves from the rest of the team. They then get swarmed, die and leave their team a man down and without a tank.
- You can cancel charge ability of Footknight, handmaiden and zealot by pressing block after activating, while still getting the benefits like attackspeed, or pushback.
- Have a fallback planned for globerats and warpwind wizzards where your team all goes to the same place. Don’t just scatter because it can leave your team once again swarmed and isolated.
Hordes will often have 1-2 Waves in them. Just when you think it is quieting down a second wave will usually come. Do not think that just because it has slowed down means it has stopped entirely. A good indication if it did stop will be a change in the music and a comment from your character.
Special Enemies
Special enemies are the real meat of the challange in Champion mode and are often most of the reason a group will fail aside from Bosses. Many champion level specials can bring a teammate from full health to none in a matter of seconds so dealing with them is the top priority whenever they get involved.
Ideally in a party you should have atleast 1 desiginated person on Sepcial Enemy duty. Their job should entirely be to look out for anything that could seriously damage the party, point them out and kill them.
Hookrats
Hookrats are always to be feared near ledges, they can pull a teammate up and over even after they jumpped off. Make sure that if you hear a hookrat you all either jump down or stay in place to save a teammate if they are grabbed.
Assassins
For Asassins keep your team close but not to close, they can stagger nearby teammates when they jump on enemies. You want to be able to kill them aftter they jump a teammate or they will run off and keep making repeat attacks which will quickly drain party HP.
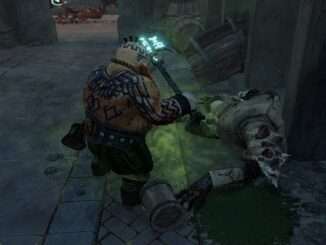
Globe Rats
Globidears will often throw 2 poison globes from far away. Marking them is imporatnt as the green gas will often obsure them from view. Dealing with them is doubly importatnt in a horde event as you do not want them to push you out of your defensive position. They will explode if you get to close and they panic.
Ratling Gunners
Ratling gunners can easily chew through your hitpoints if you are not caerful. Do not try to engage them from medium distance while they are firing! You will die. Either wait till they spin down, hit them from exreme range where their shots are not accurate, or try to peak around cover to get a shot off. If they are hitting through cover then they have glitched and the only way to make them stop is to kill them! Do not just try to wait it out as your cover is being nullified.
Warpfire Throwers
Warpfire Throwers are fairly easy to deal with at range. The main point is to keep distance and not stack up your team. After they fire they will leave an area of effect fire so keep out of it to avoid damage over time.
Leech Sourcerors
Leeches are the annoying coisons of the assassin and many of the same principles apply. If you hear a leech keep looking around and do not isolate yourself from the team. When dealing with a leech make sure to try nad land a killing blow as they will teleport away and continue to come back if you don’t kill them off entirely.
Blightstormers
Blightstormers are your number 1 priority to deal with an any situition.
- They have a massive area AOE ability that disables the whole party
- The obsure vision and make it harder to see what is coming at you
- They do a lot of damage if they are allowed to persist on the field
- They make defending any area near impossiable
Keep them marked and make sure you have a ranged character on the lookout for their distinctive chanting and muttering. The only way to stop the storm IS TO KILL HIM.
Sack Rats
I almost feel silly including this one but here we are. Lets just lay this out right now, a Sack rat is not worth the life of your party, your life or getting swarmed and killed trying to chase after it. Mark them, let the ranged class deal with it and if it gets away, oh well. DO NOT run half way across the map trying to get it while pulling every special enemy in between you and it.
Armored Enemies, Partrols and Beserkers
This section is deticated to the types of enemies that you will find in Patrols and how to properly deal with patrols. Unlike in the lower difficulties Patrols are a much larger deal in Champion and has lead to more than one party wipe due to people being careless.
Footsoliders and skaven with shields
Along with special enemies will sometimes run into nromal enemies with shields. These enemies are harder to kill with standard attacks because they will mostly bounce off unless you have a shiled breaking or armor piercing weapon. The best thing to do is the power attack them or try to get behind them while a teammate has their attention.
They are annoying but not super deadly, just don’t get stuck in a corner aganist them.
Stormvermin and shielded Stormvermin
These are generally man sized rats with either polearms or shields and Swords. Their thick armor makes them harder to kill so it’s best to leave Stormvermin to ranged heros that can land repeted headshots agansit them or to teamamkes with armor and shield breaking weapons. It’s better to dodge over blocking as some of their attacks can swing through blocks fairly easily and take large chunks of your health off.
Rothelms
Towering chaos warrios that have a large axe and are heads above most other enemies. They lack armor so just a few hits to them from ranged can eaisly down them. It is not recommended to fight them in melee but if you must dodging is the best option.
Chaos Warriors
Chaos Warriors are heavily armored versions of Rothelms that deal massive damage and are all but unkillable unless yout hit them in the head or from behind. These are the kind of enemies you wantto use class abilities on. The Bounty Hunter can down 1 of the in a single hit with their ability and make them a non issiue. Other than that used ranged attacks and shield breaking.
Beserkers and Skaven Monks
These enemies attack fast and do a lot of damage. It’s best to take them down before they get in range but if they do get close you want to block. It’s better to have a teamamte kill them while you maintain block and avoid damage.
The Patrols
In Champion Patrols are much larger than their vet counterparts on average and become something to avoid rather than to fight head on with the mix of more HP and damage. Patrols come in mostly 2 variety, Chaos and Skaven.
Skaven patrols are made up mostly of 6-8 Stormvermin and somtimes more stormvermin shield enemies. These are rough to deal with just due to sheer numbers of armored enemies.
Chaos partrols are the most dangerous since they come with a mix of Many Rothelms, several Chaos Warriors and 1 or 2 Beserkers. They have a lot more damage due to the mix of Beserkers and the Rothelms and Chaos Warriors are much harder to kill due to their armor, damage, size and limited hitbox.
Here is how to generaly deal with patrols.
- When you hear a patrol, figure out which way it is coming from and mark the leader.
- Do not engage! Hide! Stay out of the path of the patrol. Don’t soot in their general direcction as they will instantly know where you are!
- Pay attention to where they are going and take note if they are on a loop and come back through an area.
- Pass the patrol when the area is clear and move onto the next area.
There are several reasons to avoid patrols. They do a massive ammount of damage, they are hard to take down, there is no benefit to getting rid of them, and usually getting rid of a patrol eats up resoruces that could have been used in the next fight.
If you do run into a patrol then you need to have 1 person as deticated tank, another person to focus down the tougher enemies in the pack, and finally have 2 others as general damage. Ideally if you run into a patrol have a bomb to chuck at them, this will clear the majority of the patrol thus making it easier to fight. This is also the time to use any area control and damage abilities your party may have as your goal at this point is to mitigate the ammount of HP and resources lost from fighting a patrol.
The wost thing you can do with a patrol is split up. This makes it harder to focus damage and it can often leave weaker allies in melee agansit a stronger foe such as Blighthelms or multiple Stormvermin. Running past will not work either as they will continue to chase after your team. Be careful of their displacement abilities as they can throw teammates quite far away.
The bottom line with Patrols is this: It’s best to avoid the fight altogeather. You gain nothing from fighting them and are most likely to just lose a large chunk of health, ammo, and items at best.
Bosses
Boss level enemies are probably one of the most dangerous types of enemies to run into on Champion especially.
Even something as weak as a rat ogre can down multiple teammates and easily eat much of a groups resources just trying to kill it. This will both be kind of a general section and a more specific one for dealing with bosses.
- Always try to fight a boss in an open area. In champion you cannot afford to be taking repeated hits from bosses. You will likely be able to block 1-2 hits at best and that is about it. You want to have space to run around and kite the boss.
- Building on the last point, avoid splitting your team and getting them stuck in a small tunnel section. More than 1 run has ended when one half of the team kited the boss into a small, cramped, tunnel thus blocking off one half of the team from helping the other. Open spaces are key!
- If the boss agros you, run. As stated you can maybe block 1-2 hits at best but your advantage is going to be keeping away from their swings and blows.
- Keep the boss marked. As stated above you do not want to lose sight of where a boss is.
- Avoid ledges. Bosses can and will punt you off the map if they get the chance and you will pretty much instantly die from my expirence.
- Have 1 person continue to look out for special enemies! The AI director is an♥♥♥ in this difficulty, he wil often spawn specials alongside a boss. To kep your team from losing members during the fight always have one eye on the edge of the fight.
- For the Chaos Spawn save bombs or shove abilities like on Footnight, Handmaiden and Witch Hunter Captian for when it grabs a teammate. This will save the teammate from a large chunk of damage and also stop the Chaos spawn from regenerating.
- For the Storm Skaven and Bile Troll, DO NOT STACK UP! You want to spread out for these bosses and avoid their aoe attacks. In addition you want to avoid getting cornered on all bosses but espcially theses 2 as movement is your only real defense agansit both their AoE type Abilities.
- When a Bile Troll falls over, this is the time to hammer it. You can take a large chunk of their health down and stop it from regenerating.
- The Storm Skaven has both a front and back weakspot. On the front it’s their head and on the back it’s the small rat on it’s back controlling it. Both of these count as headshot damage so try to stay either infront or behind a Strom Skaven
- If a boss focuses on a downed teammate then put all effort into killing the boss! If you can get the teammate up even better but if it is glitched and you can’t grab them then just unload on the boss. If you are fast you could save the teammate and if not then atleast most of the Boss’s hp is gone.
Health Potions vs Medkits and Reviving Allies
Two types of healing in the game are health options and medkits. They generally serve the same purpose of healing you but there are some notable differences.
Potions can only be used to heal yourself and are instant. Medkits can heal yourself and others but take time to do so and requires a teamamte to stand still.
Ideally you ALWAYS want to use healing potions first and take extra medkits with you. This is mainly because you can always heal another teammate or youeslf where as with the potion it’s not always possiable to pass it to them to heal. Sometimes it could be because they are busy in combat, another time it could be due to them carrying a tome, someone may even have the nacklace trait that passive heals them but they cannot heal themselves. Either way your priority should look something like this when coming across med supplies.
- Heal teammates that were downed once always
- Heal large ammounts of missing hp with potions
- Heal with medkits if there is extra
- Take extra medical supplies with you
- If you are full on everything and cannot return but still have damage then top up hp and take extra medkits preferably.
It’s also useful to take note who has what traits. In your party for necklaces. Many of these are designed to make the most of your healing supplies in different ways.
Does a teamate heal themsevles when they heal others with a medkit? Does one get a passive health regen and can’t heal themselves? Does someone have a chance to not use a healing item? Does a teammate heal 30% more when a healing item is used on them? All these can help streach out your supplies and save them for when they are really needed.
You also want to keep an eye on the HP of characters carrying Grims. If that character dies then the Grim and the bonus is lost.
Reviving downed players
When it comes to reviving Allies always go for the lowest HP one first. This is simple stuff but if you do it the other way around with multiple down teammates you could most likely end up only saving 1 instead of 2.
Blocking is inturrupted by being hit. It is often better to kill surrounding enemies first and then try to revive an ally. In a pinch if you hold right click and revive an alley then you will actively block while getting tem up, avoiding smaller groups of enemies from interrupting your revive.
Priortize downed allies with Grims, if they die, it’s gone.
Finally, if you can make sure to have 1 person covering a teammate that is actively reviving another. That way the teammate doing the reviving takes less hits and the teammate being revived doesn’t get picked up into instant death.
Ammo
Ammo in Vermintide 2 is generally fairly scarce.
Depending on the level and the AI director you can be lucky to sometimes see 2 ammo crates per run and maybe 1-3 ammo drops.
Ideally you are going to be saving ammo for larger encounters with boss type enemies or larger nubmers of special Chaos and Skaven enemies. Wasting ammo on hordes and smaller enemies will cause you to run out when you need it the most.
Some heros have abilities that give you ammo on use as well as some traits. It’s advised that if you plan to be using a lot of ranged you take either one of these weapon traits that give back ammo for headshots or crits and/or take a class talent to do the same.
In addition you are going to want to use up ammo drops only when you really need it as the ammo you find in chests and other locations will fully refill your stock.
Potions
Potions are powerful tempary boons to your team that can cause you to attack faster, do more damage, or regen your abilties faster as well. Potions do not benefit all characters and weapons equally so you must expirement and reconize how to make the most out of your potion supply based off of your characters strengths and weeknesses.
Ideally potions should go to teammates that have the shared potion trait to make the most out of it. This can eaisly double the effect and benefit your team recives when using any potion and share something like a concentration potion between 2 characters with powerful class abilities to help get your team through a tough spot.
If someone has a double duration that can also help too, especaily if it’s someone with a strong career ability and you hand them a potion of concentration or if they do a ton of damage up close and you give them a potion of strength.
You don’t want to waste potions either as they can be very rare to find in a given level, usually you should ideally save them for bosses, large hordes, patrols that end up in awful places or emergencies where it could be victory or defeat for your team.
Bombs
This is a huge note here. Always, always, always, call out when you are about to use a bomb. Just like ranged weapons and abilities these do friendly fire as well to your team. Using one at the wrong time can end your run extremely quickly.
Ideally you should save bombs for 2 main occausions: Bosses and Patrols. Patrols go down really fast when bombs are used and bosses can be stunned and stagged which can interrrupt abilities such as the Chaos Spawn’s life steal. This is even better if your teammate has an ability that causes enemies hit with bombs to take more damage from all attacks for 10 seconds.
The big note as well is to not waste bombs on hordes. Most teams will 100% be able to deal with a horde unassisted if they take a smart defensive posture. Usng a bomb is not only wasteful but can also damage your main tank or in the case of a fire bomb it can make a previously good defensive spot no longer safe.

Be the first to comment