
This guide covers crew and captain choices, general tactics and specific match-ups for Fury’s Hold – human race battleship.
Contents
Overview
All credit goes to Chimera!
Fury’s Hold is the ruler of open waters. Her powerful broadside cannons will make everyone think twice before approaching. She can never be taken easily except uneven situations. You might find yourself being a target of several enemies once you enter the battle. That’s why it requires great positioning and knowledge of match-ups.
Strengths and weaknesses:
+ Outstanding firepower
+ Massive range
+ Decent broadside armor
+ Strong vs. medium and heavy ships
– Long firing delay
– Weak aft and fore armor
– Poor maneuverability
– Slow acceleration
– Weak vs. small and fast ships
Comparing Fury to other battleships she has best speed and firepower, average maneuverability and weakest armor.
Captains
Captains give you an active ability with decent cooldown time.
Axton Harrowfel – Inferno’s Wake
A buff that increases cannon damage and reduces firing delay.
Duration: 12 seconds
Cooldown: 50 seconds
It makes your cannons to do insane damage. Pop it when you have a clear shot and surprise them with firepower. It also reduces firing delay so your barrage is more condensed and you can hit more cannonballs on a fast moving ship. Great choice.
Flint Brinetide – Balefire Blast
Blasts fire from your broadsides knocking enemies away and deals crew damage.
Cooldown: 30 seconds
Safety tool. Good for fighting off boarders and rammers. Has a blind spot on fore and aft. Most of the match remains unused. Decent choice if you face a lot of orc ships.
Morringan Shale – Inferno’s Wake
Launches the phoenix in direction of your ship dealing a bit of upfront hull and sail damage and setting enemies on fire dealing hull and sail damage over time. Also leaves a trail which increases speed of your ship.
Cooldown: 35 seconds
Good at damaging sails. Big area of effect lets you hit small ships easy. Increases your ramming damage by boosting your speed. Very solid choice if you fight a lot of small ships. But only forward direction sometimes makes it clunky and not used.
Waifu.
To sum up: use Morrigan if you suffer from small ships and Axton to fight medium and big ones. I personally prefer Axton in any case. I enjoy big damages and the fact that his ability is never useless even vs. small ships.
Crew Mates
Crew mates passively increase your stats. You can have up to three different mates.
Basic crew setup includes 2 crew mates: a Lookout for crit chance and a Powder Monkey for crit damage and armor/hull damage. 3rd one may vary. I prefer a Navigator for acceleration and speed but sometimes I switch for Bosun for crit-hit and hull damage resistance.
")
The other viable choices can be Helmsman or Shipwright. Quartermaster or Surgeon can also be used if you suffer from boarders. Basically use any high rank crew mate you’ve got.
Poor choices are Cook, Sail Master (she is whatever) and Master Gunner (effect is kinda weak).
Passives and Hardpoints
Fury’s basic passive is Artillery. You deal more damage the farther your target is. It has synergy with long range cannons. The farther cannonballs travel the more spread they have so you hit less but this passive compensate it in damage.
Level X passive is Marksman Towers. It periodically shoots rifle at nearest enemy ship damaging their crew. Has pretty long range. Does not put you or enemy in combat. Basically, it is simple additional crew damage. Not so useful for generic play-style unless you want to deny enemy from boarding you.
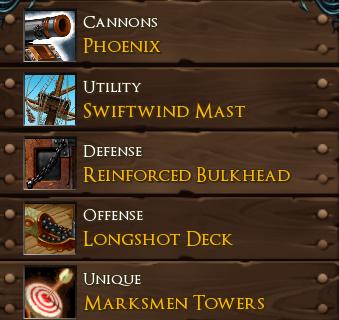
Cannons
The choice is between Harbinger and Phoenix cannons. Harbinger cannons offer increased range, less cannonball spread and higher base damage. Phoenix cannons have higher crit-chance but less range. I prefer Phoenix because it offers more damage up close and I usually don’t find myself in a situation where I need to super outrange someone. These cannons outrange most of the problematic ships.
Utility
Swiftwind Mast for Max speed over Sight range and Sail Health.
Defense
Reinforced Bulkhead gives critical hit and critical damage resistance which is very nice and definitely overshadows some broadside armor. Fury is the only ship that has these stats on a harpoint. Some ships can not land a critical strike on her.
Offense
Longshot Deck to get some extra range. We don’t want to be ramming to much, so we can skip other upgrade.
General Strategy and Match-ups
You general tactic is to get at the firing distance, fire one broadside, rotate to other side, fire again and repeat. If you use captain Axton’s ability you can fire two buffed barrages by turning your ship. If the target tries to approach you, sail back to keep your distance. Because your broadside barrage is very continuous in time you need to lead a moving target while firing. This skill will only come with practice.
Fury’s Hold plays out slow. Gather boons. Fight enemies that come to you. You are not very good at catching targets so scare away small ships with a well placed barrage.
You are very good at killing medium and big ships. Pick safe 1v1’s. Use your captain’s ability when you have a clear shot and you will be surprised by damage. Don’t get in the middle of fights or you will get focused by several enemies.
If you see a fight, hang at the edge of your range and weaken both targets to be able to finish the “winner” of that fight. You are slow so your boons will often get stolen. Don’t try to outrun someone to pick up boons but offer them a good cannonball barrage while they are out of position.
Cinder
Very tough opponent if played correctly. Hard to hit. Can sit in your blind zone forever in a late game. Unable to chase them. Like to steal you boons. Try to kill them early. When they join the fight prioritize them. It will make them scared or sunk. One well placed barrage will sink them. If met at the end of the game be happy with landing cheap shots on them. Use fore and aft cannons. Wait for their mistakes and don’t panic. If you have a chance to land hooks do it, this may let you to land a clean barrage. Ramming is also an option. Having Morrigan captain’s ability helps a lot to fight this ship.
Ashborne
Fearsome foe at lategame and easy target early. Your buffed barrage nearly oneshots them and it’s easy to land. With a full boons they are more maneuverable and dish out insane damage. Try to land first shot. It’s fight of skill from here.
Fury’s Hold
Be sure they do not outrange you if you use Phoenix cannons. If so get to your firing distance fast. Land first shot. Very easy target to hit, as well as you are for them. Try to maneuver to avoid parts of barrages.
Cleaver
Very maneuverable little ship, hard to properly hit due to small profile. They can sit at your aft and not let you to turn your broadside at them. Easier to kill early game as they have not so much speed. Shoot their sails as fast as possible. With no sails they can not approach you and you can safely destroy them. You got ambushed and they are already close. Your safe bet is to shoot their sails and break the distance. Or if you feel like you don’t have time you can try to kill them right away and bet on them making a mistake.
Press TAB to check their captain. If you see Grinner that means they have boarding build which you are very weak to. Do not let them in a hooking range.
Bloodfin
A bit slower than Cleaver and easier to hit. Has high ramming damage so don’t let them use it, especially on your aft. Shoot their sails and they are done.
Gorger
Very big target, eats your cannonballs all day! Destroy their sails and they will be barely moving. Don’t let them close especially if you see a boarding build. Not very threatening target so watch for other enemies around to not get ambushed.
Tidebraker
Super small ship. Very fast, immune to sail damage, very hard to hit. They can turn to rotate their armor making them even more hard to kill. May deliver a very high ramming damage packed with torpedoes. Don’t let them do that on your aft. Blast them with all your might if they are exposed. Very tough opponent. Basically a counter to your ship.
Thunderhead
Have a nice ship size, slow speed and short to average cannon range. You can easily outrange and dispose them. Can pack a bit of damage up close.
Strormanchor
Same as Thunderhead but have more armor. You can 2-shot them in one side but they can rotate their armor. Try to avoid fighting them up close, because with some ramming damage the might have a chance.
Other Options
Fury’s level X passive implies that you might want to go boarding build. It is also surprising to know that her cannon crew damage is very high. But in practice it is very clunky. Imagine, you want to shoot from a distance, you need to down their sails first, so they won’t just run away, then you need to kill their crew roughly to 0, because your crew damage is not super high, then you need to approach and board them from your side. That’s like 3-4 proper barrages and a proper boarding hooks. Why not just kill them the normal way? Also if the enemy is smart they will just damage 1/3 of your crew and you won’t be able to board at all.
Anyway, if you want to try, pick up Quartermaster, Surgeon and, probably, Navigator, as a captain take Flint as his ability deals crew damage. Aim for mid and close ranged fights.
In duos it’s much better, you can do crew damage from afar and your friend can board. No need for boarding crew mates.


Be the first to comment