
This is a comprehensive achievement guide for Pillars of Eternity II: Deadfire. As always, beware of spoilers.
Other POE 2 Guides:
- Characters and Classes: How to Make a Good Character.
- Efficient Ship-to-Ship Combat Guide.
- Ships (Comparision).
- Bonus In-game Pets.
- Combat Basics.
Contents
Introduction
All credit goes to fabula_rasa!
Pillars of Eternity II, in contrast to the first part, does not have that many achievements and they are all fairly easy to obtain. You can get them all in one playthrough without putting much special effort into it, just by having fun exploring the archipelago.
Those achievements are unlocked as you progress through the story and cannot be missed.
A Sailor’s Life
Repair your ship and prepare to sail the seas.
Heart of the Deadfire
Reach Neketaka.
Establishing a Link
Establish a link with Eothas to track his movements.
Explosive Confrontation
Confront Eothas in Magran’s Teeth.
The End of the Beginning
Confront Eothas in Ukaizo.
Faction Quests
There are four factions in Deadfire and, if you so wish, you can do quests for all of them throughout most of the game. Yet at the very end, before your final voyage, you will have to chose – doing the last quest for any faction will make you unable to finish the other ones. So, if you would like to get all of the achievements listed in this section in one playthrough, make a branching save when you get all the faction quests to this last step (more details below). Each faction has their own category in the journal and as such their quests are easily identified.
Note! It is worth noting that you do not always have to do exactly what the faction likes, as long as you do not fail the given quest and fulfill it in some fashion. However, you may have to use some serious silver tongued skills to appease your allies afterwards. To give one example, I killed Scyorielaphas during “The Shadow Under Neketaka” quest and Queen Onekaza II was majorly ♥♥♥ at me. Yet I convinced her (with some diplomacy) that our alliance is still beneficial – Huana quest continued with no trouble.
Making Waves
Complete the Huana faction questline.
Huana faction quests are given by Queen Onekaza II and Prince Aruihi (both located in Kahanga Palace). Just follow the questline – it is all rather straightforward. The “point of no return” comes with a quest “Taking Out the Traders” – if you do that one, you will forfeit every other alliance and bind yourself to Huana. So, save before going into Royal Deadfire Company’s powderhouse if you want to pursue other faction quests first.
Gold, Greed, and Guts
Complete the Príncipi faction questline.
Príncipi faction quests are given by Captain Furrante (in Dunnage) and Aeldys (in Fort Deadlight). Those two pirates are at odds, so you will have to choose between them at some point. It doesn’t matter who you choose, you can continue Príncipi faction quest with either of those two in charge. The “point of no return” comes with a quest “A Dance with Death” – if you do that one, you will forfeit every other alliance and bind yourself to Príncipi. So, save before sailing into deep waters to summon and overtake the Floating Hangman if you want to pursue other faction quests first.
Note! Be careful when dealing with Crookspur slavers during Príncipi questline. I am not sure if you can help the slavers and still normally do Huana faction quest. Judging by how other quests work, I think you can – yet cannot 100% confirm yet. If somebody tested it and can say for sure how keeping the slavers alive and doing their quest (“Tip of a Spear”) affects Huana faction quest, I’d love to hear about it.
A Brighter World
Complete the Vailian Trading Company faction questline.
Vailian Trading Company quests are given by Alvari and Ignato Castol (both located in Vailian Trading Company Headquarters). Those two are at odds and you will have to choose between them at some point. It doesn’t matter who you choose, you can continue VTC faction quest with either of those two in charge. The “point of no return” comes with a quest “Sabotage at the Brass Citadel” – if you do that one, you will forfeit every other alliance and bind yourself to VTC. So, save before talking to Flaune at the Spire of the Soul-Seekers if you want to pursue other faction quests first.
Hostile Takeover
Complete the Royal Deadfire Company faction questline.
Royal Deadfire Company quests are given by Hazanui Karū and Atsura (both located in the Imperial Command). Just follow the questline – it is all rather straightforward. The “point of no return” here is obvious as both Hazanui Karū and your journal will point it out. It comes with a quest “The Final Maneuver” – if you do that one, you will forfeit every other alliance and bind yourself to RDC. So, save before agreeing to commit to Hazanui Karū if you want to pursue other faction quests first.
Quests
Conduct Unbecoming
Complete the “Blow the Man Down” quest
Quest is given by Captain Furrante when you meet him for the first time – when leaving Port Maje after fixing your ship. Just follow the quest and resolve it in any way you wish.
Constellation Prize
Complete the “Berkana’s Folly” quest
This quest will be given to you by Arkemyr.
First though, you will have to finish “The Archmage’s Vault” quest – given by Tumara and Netehe (two women arguing outside of the Arkemyr’s Manor (Periki’s Outlook area of Neketaka). After you finish this quest and give the tablet to one of the women, Arkemyr will send an imp to invite you to his mansion. Go to him and he will give you “Berkana’s Folly” quest. From there, just follow the questline.
Paradise of the Mind
Complete the “A Paradise of the Mind” quest
To start this quest you need to sail to Splintered Reef (southeast corner of the map). Once there, visit The Pickled Eel and talk to an undead guy named Copperhead. Afterwards, just follow the questline and solve it however you wish.
New Gods of Deadfire
Complete “Nemnok the Devourer” quest.
To start this quest you need to sail to Junvik Village (northwestern corner of the map). Once there, speak with a dwarf Tatok. Afterwards, just follow the questline and solve it however you wish.
Dragonbane
Deal with two Dragon dilemmas
There are two dragons in Deadfire. One of them, Jadaferlas the Ancient, you will find in the Lair of the Ancient during “He Waits in Fire” stage of the main quest.
The other one, Scyorielaphas, you will find in the temple below the Watershaper’s Guild building during “The Shadow Under Neketaka” quest. This quest is given by Queen Onekaza II after you return from Hasongo. You will not be able to access the chamber with the dragon if you did not take this quest.
You do not have to kill the dragons to get this achievement. You can solve their problems in any way you chose.
Bounty Hunter
Finish 15 Bounties.
There are several NPCs that give bounties in different areas of Neketaka.
Abocco – found at The Wild Mare (Queen’s Berth area). Gives:
- Bounty – Meryel the Mad
- Bounty – Pūrākau
- Bounty – Nomu the Marauder
- Bounty – Tāhae
Aenia – found near Vailian Trading Company Headquarters (Queen’s Berth). Gives:
- Bounty – Biakara
- Bounty – Veen
- Bounty – Desiwa the Shark
Nungata – found in Serpent’s Crown area. Gives:
- Bounty – Beina
- Bounty – Flamewalker Vessali
- Bounty – The Steel Preacher
- Bounty – Uamoru the Pretender
Barati – found at Kahanga Palace (Serpent’s Crown area). Gives:
- Bounty – Diccila
- Bounty – Oheiro
- Bounty – Rafiq the Red Beard
Okauro – found in The Sacred Stair area. Gives:
- Bounty – Dhwrgas the Ascetic
- Bounty – Onadere the Siren
- Bounty – Ikorno
- Bounty – Urnox the Rathun
Fleet Master Wakoyo – found in Fleet Master’s office (The Brass Citadel area). Gives:
- Bounty – Assila Wave-Skipper
- Bounty – Radulf
- Bounty – Burunga
There are also two bounty-givers in Dunnage:
Udita – found in Lifter’s Refuge area. Gives:
- Bounty – Chornu
- Bounty – Kuaro
- Bounty – Rock-Stomper Rodul
Dessiral – found in Radiant Court area. Gives:
- Bounty – Torkar
- Bounty – Katrenn
- Bounty – Lord Admiral Imp
- Bounty – Lady Epero
Doing the bounties does not affect your relations with a faction of origin of a guy you are hunting. So you can happily sink and board every ship and their faction of origin won’t even bat an eyelash.
Exploration
Any Port in a Storm
Sail to all major ports in the Deadfire.
There are six major ports. All of them are marked on the map below:
- Port Maje
- Tikawara
- Neketaka
- Dunnage
- Sayuka
- Crookspur
Making your Mark
Name your first Uncharted Island.
You get an opportunity to name an uncharted island after you explore the locations on it. There are 12 uncharted islands in Deadfire – all of them marked on the map below. If you just follow “Mapping the Archipelago” questline given by Sanza (you will find him in Sanza’s Map Emporium in Queen’s Berth area of Nekateka) and you will find them all.
Explorer
Name all of the Uncharted Islands.
You get an opportunity to name an uncharted island after you explore the locations on it. There are 12 uncharted islands in Deadfire – all of them marked on the map below. If you just follow “Mapping the Archipelago” questline given by Sanza (you will find him in Sanza’s Map Emporium in Queen’s Berth area of Nekateka) and you will find them all. The quest has five stages, which correspond to five major areas of the archipelago:
- Mapping the Archipelago: Port Maje
- Mapping the Archipelago: Tikawara
- Mapping the Archipelago: West Wakara Reef
- Mapping the Archipelago: The Burning Shoals
- Mapping the Archipelago: Razai Passage

Companions
Gathering the Party
Recruited all Companions.
There are seven companions to recruit.
- Edér – found at the very beginning of the game.
- Xoti – found at Port Maje or later in the Temple of Gaun (The Sacred Stair area of Neketaka).
- Aloth – found at Engwithan Digsite, east of Port Maje.
- Serafen – found during an encounter with Captain Furrante right after you fix your ship.
- Tekēhu – found at Watershaper’s Guild (Periki’s Outlook area of Neketaka).
- Maia Rua – found at Kahanga Palace (Serpent’s Crown area of Neketaka).
- Pallegina – found at Kahanga Palace (Serpent’s Crown area of Neketaka) or at Queen’s Birth.
Recruiter
Recruited all Sidekicks.
There are five sidekicks to recruit.
- Fassina – found at The Dark Cupboard (Periki’s Overlook area of Nekateka). You will need to complete both “Velvet Glove, Brass Fist” (given by Fassina herself) and “The Archmage’s Vault” (see “Constellation Prize” achievement) to be able to recruit her.
- Konstanten – found at The Wild Mare (Queen’s Berth area of Nekateka). Just talk to him to recruit him.
- Ydwin – found at Spire of the Soul Seers (The Sacred Stair area of Neketaka). Just talk to her to recruit her.
- Rekke – found during Flotsam event (eastern edge of the map). Chose to bring him to your ship during the event to recruit him.
- Mirke – found at Fort Deadlight (note: I’m not sure if recruiting her is necessary for the achievement as she was just now added in a free DLC. If anybody tests that, I will be grateful for the info)
Molded to Perfection
Create an adventurer at an Adventurer’s Hall.
In every tavern, you can create adventurers and recruit them to your party. Just make one.
Steadfast Ally
Maximize positive relationship with a Companion.
In the Reputations, menu you can check likes and dislikes of all the companions currently in your party. You can also check their attitude towards you (and each other). If you express opinions that a companion approves of, you will gain reputation with him. Roughly counting, you need about 8-10 such reputation-increasing events to maximize a positive relationship (to get it to +2).
I found it the easiest with Edér and Xoti – they like clever dialogue options (which suited my character just fine) and as such I got them to +2 in no time.
Burning Bridges
Maximize negative relationship with a Companion.
In the Reputations menu you can check likes and dislikes of all the companions currently in your party. You can also check their attitude towards you (and each other). If you express opinions that a companion disapproves of, you will lose reputation with him. Roughly counting, you need about 8-10 such reputation-decreasing events to maximize a negative relationship (to get it to -2).
It is very easy to do with Pallegina. All you need to do is take her (and some character with high religion that will be able to identify the shrine) to any of the shrines located on Deadfire islands – for example to Teo Ramunga shrine on Neketaka Island. Once there, identify the shrine and choose an option to pray and rest. Pallegina is anti-religious and will dislike that. Do it about 8 times and she will hate you enough for this achievement.
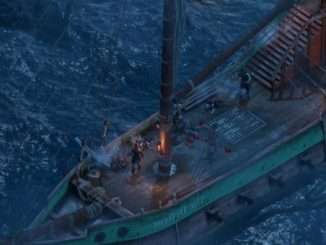
Sailor’s Life
Ship’s Carpenter
Attach your first ship upgrade.
Each ship has slots for six types of equipment: Sail, Hull, Helm, Anchor, Lanterns, Cannons, and two slots for upgrades: Captain’s Quarters, Menagerie. Just acquire any of those and equip on your ship.
Decked Out
Attach each type of upgrade on a single ship.
Each ship has slots for six types of equipment: Sail, Hull, Helm, Anchor, Lanterns, Cannons, and two slots for upgrades: Captain’s Quarters, Menagerie. Acquire items to fill every last slot (that includes all the slots for cannons that your ship has) and equip them on your ship.
A Fleet to Call My Own
Acquire each type of ship in the game.
There are four types of ships to buy in the Neketaka port. You need to buy them all. Available ships:
- Voyager (base cost 20000)
- Dhow (base cost 35000)
- Galleon (base cost 50000)
- Junk (base cost 60000)
Full Complement
Assign a crew member to all slots on a single ship.
You need to assign a sailor to each available slot on your active ship – including the slots for resting crew. Logically, it is easier to do with a smaller ship but you will find no shortage of sailors in your travels and you can always hire more in ports if you lack some.
Sailor’s Tale
Acquired First Captain Rank.
You get experience for each ship you sink/board at sea (unique ships will give you a Triumph), as well as for some events and your rank rises. You can check your current rank in “Ship Management” screen – it’s expressed in stars under your character portrait, from 1 to 5.
You can also easily do this if you have at least 4 Berath’s Blessings. Just start a new game and spend those 4 blessings on “Experienced Ship Captain” – you will begin the game as an Expert ship captain.
Old Salt
Acquired Master Captain Rank.
You get experience for each ship you sink/board at sea (unique ships will give you a Triumph), as well as for some events and your rank rises. You can check your current rank in “Ship Management” screen – it’s expressed in stars under your character portrait, from 1 to 5.
Infamous Captain
Survive an attack from a mutinous crew.
Your crew will (possibly) mutiny when their morale drops to 1. Achieving this is very easy – just take away all the food and water from your ship’s holds and their morale will be dropping like crazy. You can help it along by attacking ships and surrendering during the fight – your crew doesn’t like it when you flee from inferior opponents. Some random events at sea will also allow you to drop some morale.
After your morale reaches 1, a random even will pop up. I saw at least 4 different ones. One of those events is a mutiny. Just manage your crew (talk them down, pick a fight with them) during that event and the achievement is yours. If the mutiny did not happen to you on your first try, just keep sailing around with 1 morale, it will come eventually.
Crafting
Alchemist
Create five or more different potions.
Just go to crafting menu and make five different potions. Ingredients you can either acquire on your travels, they are plentiful, or buy from traders.
Scribe
Create three or more different spell scrolls.
Just go to crafting menu and make five different scrolls. Ingredients you can either acquire on your travels, they are plentiful, or buy from traders.
Enchanter
Enchant five items.
Only unique (named) weapons and armor can be enchanted – they will have a tiny plus icon on them. Clicking on it will take you to Enchantment Menu, where you will be able to choose and add new properties to your equipment. Just do it five times (it does not have to be five different items). Ingredients you can either acquire on your travels, they are plentiful, or buy from traders.
Explosives Expert
Create five or more different bombs.
Just go to crafting menu and make five different explosives. Ingredients you can either acquire on your travels, they are plentiful, or buy from traders.
Miscellaneous
Soulbinder
Unlock all powers of a Soulbound item.
There are not many Soulbound items in the game. Those are:
- Blightheart (arquebus) – found at Burial Mound south-west of Motare o Kōzi
- Lord Darryn’s Voulge (pollaxe) – found at Shipwreck south west from Takenaka in an enclose island
- Magistrate’s Cudgel (mace) – found at Subterranean Temple north of Poko Kohara.
- Marux Amanth (dagger) – found at Poko Kohara Ruins (Engwithan Waystation, Level 2).
- Modwyr (sword) – found at Old City Ruins, small hideout in the northeast part of the area.
After you acquire such an item, bind it to an appropriate character and follow the steps it specifies to unlock all the powers.
Trapper
Place five traps.
You can acquire traps by disarming existing traps or just buying some from a trader. You need mechanics adequate to the level of a trap to be able to set it. When you have one, place it in your quick slot and set it anywhere. Rinse, repeat.
Max Level
Reach level twenty with the player character.
Nothing to add, really. Well, except for a minor complaint that level-cap is too low.
. . .

Be the first to comment