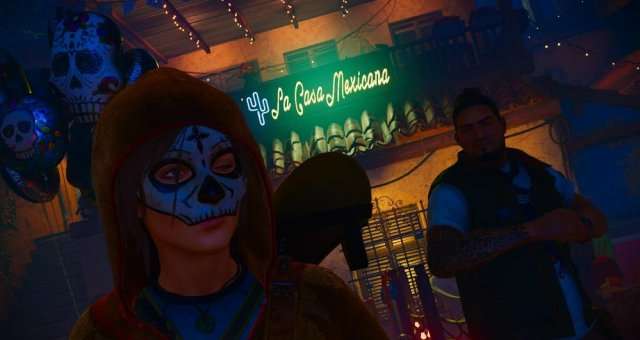
This guide contains information about achievements and challenges in Shadow of the Tomb Raider. Spoilers, obviously.
Contents
- Cozumel – Whistle in the Dark
- Peruvian Jungle – Flower Picker
- Peruvian Jungle – Ruffled Feathers
- Croft Manor – Bullseye
- Kuwaq Yaku – Bottom Feeder
- Kuwaq Yaku – Nam Deus
- Kuwaq Yaku – Crude Awakenings
- The Hidden City – High Diving
- The Hidden City – Keep Calm and Carrion
- The Hidden City – Speak of the Dead
- The Hidden City – Dropping Decimals
- The Hidden City – Changing the Weather
- The Hidden City – Dunkin’ Bones
- Cenote – Sunken Treasure
- Cenote – Respected
- Mission of San Juan – Raise the Flags
Cozumel – Whistle in the Dark
All credit goes to germundson!
Find five blue ceramic whistles hanging from rope. Shoot them to complete the challenge.
- 1/5 – As soon as you escape the narrow underwater tunnel.
- 2/5 – Before you dive into the water.
- 3/5 – As soon as you escape the narrow underwater tunnel and climb ashore, the whistle is hanging in front of you, slightly to the left.
- 4/5 – In the open space with the pyramid.
- 5/5 – In the open space with the pyramid.
Peruvian Jungle – Flower Picker
Pick five blue flowers from the canopy. These flowers are spread throughout the highground near the plane wreckage camp. Note: You can come across these flowers in the canopy other places in the Peruvian jungle as well, but I do no know if picking them counts towards the challenge.
- 1/5 – Climb up on the central rock structure near the pond where the plane crashed. Jump onto the first branch and pick the flowers.
- 2/5 – South of the pond where the plane crashed, jump up to grab some vines twisted around a tree trunk. Jump again to reach the branch above, where you can find the flowers.
- 3/5 – From your position when picking up flowers 3/5, jump to the curved vine and swing to the branch beyond. Jump onto the next branch to find the flowers. This branch is very close to the yellow crates with your gear.
- 4/5 – From your position when picking up flowers 3/5, jump to the curved vine ahead and swing to the branch beyond. There is a nest on this branch. Jump to the branch ahead of you to find the flowers.
- 5/5 – West of the pond where the plane crashed, there is a small raised platform. There is a salvage crate and a nest here, if you have not already picked these them up. Walk up the thick branch protruding from the platform and jump to the branch beyond to find the flowers.
Peruvian Jungle – Ruffled Feathers
Shoot down four oropendola nests to complete this challenge. The nests are brown, drop-shaped clusters of twigs, and can be found hanging from high places.
- 1/4 – When standing where the crates with your gear fell down, face south east to see the nest hanging from a branch ahead of you.
- 2/4 – When standing where the crates with your gear fell down, face west to see the nest hanging from a branch above an abyss.
- 3/4 – When standing on top of the central rock structure near the pond by the wreckage (where one of the ropes holding your gear up is/was), face south east to see the nest hanging from a branch in front of you.
- 4/4 – When standing on the top of the central rock structure near the pond by the wreckage, face north east to see the nest hanging from a branch ahead of you. You can jump onto the branches ahead to get closer if you want to, or you can shoot it from where you are standing.
Croft Manor – Bullseye
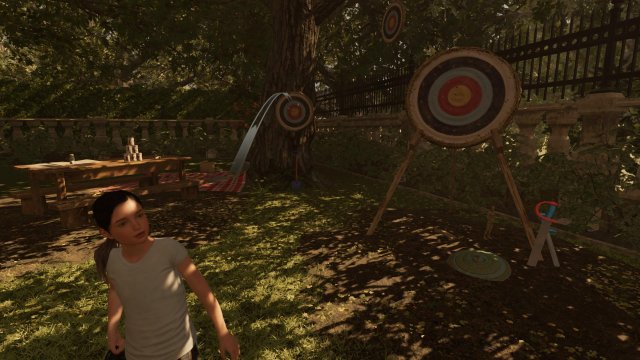
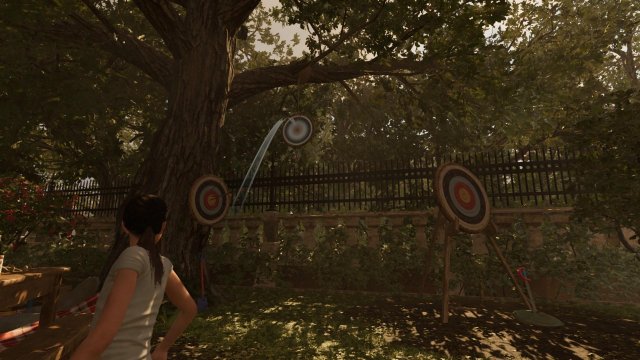
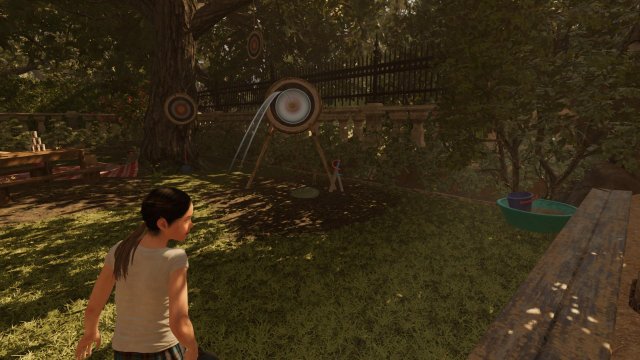
You have to hit every target with a ball. Find one of the black balls scattered around the playground (they look like kettlebells) and throw it at each of the four archery targets.
- 1/4 – As soon as you gain control of Lara, the three first targets are to your right. Target 1 is hanging on the trunk of a tree.
- 2/4 – As soon as you gain control of Lara, the three first targets are to your right. Target 2 is hanging from a branch on a tree.
- 3/4 – As soon as you gain control of Lara, the three first targets are to your right. Target 3 is standing on a tripod.
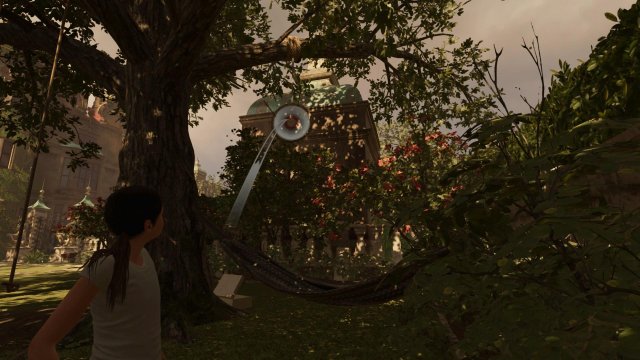
- 4/4 – This one is in a slightly different location than the other two. In the back of the garden (behind Lara when you first gain control of her) there is a hammock. Target 4 is hanging from a tree branch above the hammock.
Kuwaq Yaku – Bottom Feeder
Harvest five aquatic plants. Kuwaq Yaku is located near a body of water, so simply jump in and start exploring. Most of them are located close to the docks. Aquatic plants glow when using survival instinct. Note: If you are already full up on various plants, you will have to craft some herbal mixtures to empty your storage. Note: There is more than five plants in the water. Collecting any of them will count towards the challenge.
As this challenge is very easy to complete, I wil not include specific directions to each plant.
Kuwaq Yaku – Nam Deus
Destroy five sacreligious jungle totems. Shoot the totems to destroy them. They can be found hanging in the air throughout Kuwaq Yaku, more specifically in the northern part of the hub. Note: The totems will sometimes still glow when using survival instincts even though you have shot them down and they are on the ground.
- 1/5 – Near the entrance to the challenge tomb north in Kuwaq Yaku, find the totem hanging from a branch just at the tomb entrance.
- 2/5 – When exciting the tomb north in Kuwaq Yaku, find the totem hanging from a branch near the tomb entrance.
- 3/5 – When standing on the elevated rock structure in the clearing north of Kuwaq Yaku, face east to see the totem hanging from a branch in front of you.
- 4/5 – When standing on the elevated rock structure in the clearing north of Kuwaq Yaku (same as above), face south west to find the totem hanging from a branch.
- 5/5 – In the clearing in the norhternmost part of Kuwaq Yaku (before entering the challenge tomb), find the totem hanging from the big tree in the center of the clearing.
Kuwaq Yaku – Crude Awakenings
Detonate five oil barrels. The barrels are red and can be found scatter throughout the northern part of Kuwaq Yaku. Shoot them to detonate them.
- 1/5 – Start out standing by the merchant in the center of town. Head further into Kuwaq Yaku, and follow the path to the left, past an NPC you can talk to, sitting in a wooden crate. Follow the path past a pick-up to find the barrel.
- 2/5 – Standing where you detonated the first barrel, you can see the second barrel straight ahead.
- 3/5 – Follow the path on you right to find a camp called Hunting Grounds. The third barrel is very close to the Hunting Grounds camp.
- 4/5 – Go to the Kuwaq Yaku Ruins camp. When standing by the Kuwaq Yaku Ruins camp, face north to see the barrel.
- 5/5 – From the Kuwaq Yaku Ruins camp, take the path to the right, but instead of jumping down into the clearing, follow the path to the left. Find the barrel in a slightly lowered area, near a small pond.
The Hidden City – High Diving
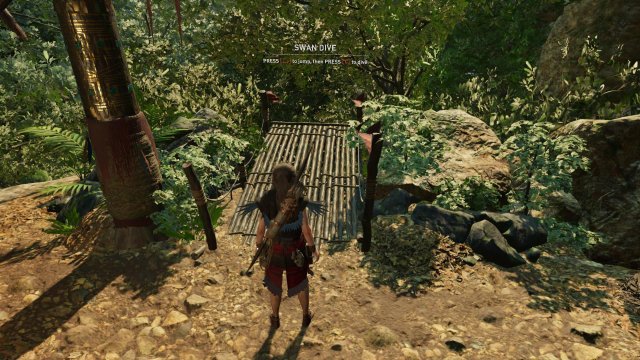
Jump off all four high dives. The high dives look like makeshift diving boards. To swan dive, press [spacebar] followed by [C].
- 1/4 – As you first enter The Hidden City, after completing the section where you have to grapple axe and swing.
- 2/4 – In the north west corner of the area with the abandoned huts, there is a wall you can scramble up. Shoot a rope arrow to the platform across the water, complete the climb to the high dive, and swan dive into the pond from it. Note: There is a crypt here, the crypt icon on the map might help you find the right location.
- 3/4 – This one requires some serious exploration to find, but hopefully the images below will help you.
- 4/4 – When standing by the altar by the rice fields in the northernmost part of Paititi, you can see a barrier to your left. Break the barrier to gain access to the high dive. Note: This requires the enhanced knife which can cut braided rope.
The Hidden City – Keep Calm and Carrion
Find and collect condor feathers from three nests.
- 1/3 – When you first enter The Hidden City and roam around a small area with abandoned cabins, there is a wall in the north west corner of the area you can scramble up. The nest is located slightly ahead on this platform.
- 2/3 – When fascing Unuratu’s home in Paititi, find the bit of climbable wall to the right of the entrance to her home. Climb up to find the condor’s nest.
The Hidden City – Speak of the Dead
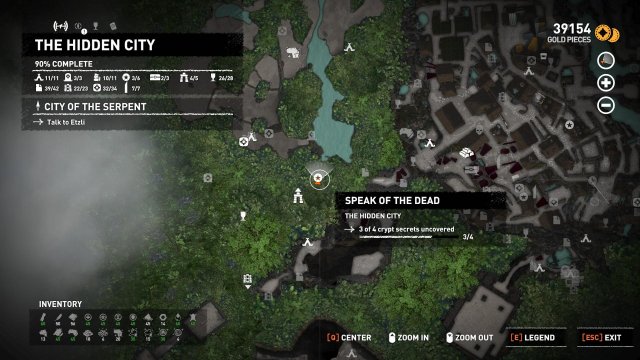
Uncover four crypts in The Hidden City.
- 1/4 – The first crypt is in the abandoned village, the first place you come to when you enter The Hidden City. The crypt is by the lake to the north; the entrance is close to a High Dive – instead of jumping off it, turn around to find the crypt.
- 2/4 – The second crypt is in the albino capibara territory, aslo near a lake. The entrance to the crypt is close to the challenge tomb in this area. The entrance is close to another High Dive, so climb up and go through a crack in the wall.
- 3/4 – During “Rebellion lives” (Reach Unuratu’s prison cell), after swinging across to the prison and landing by the “The Winged Serpent” mural, instead of following the beacon to the right, climb to the left instead. The crypt entrance is by another mural, “Uturunku, The Ferryman”.
- 4/4 – After freeing Unuratu you are going back to Paititi. When you cross the bridge (where the guards stopped you earlier), the crypt is to the left). The entrance is easily visible before crossing the bridge.
The Hidden City – Dropping Decimals
Grapple attach to three hanging quipus. Find them, jump into the air and grapple attach to them.
- 1/3 – When you have the opportunity to return to the abandoned part of the city (where you first arrived), the quipus is hanging very close to the Abandoned Village basecamp. Find some high ground to jump from.
- 2/3 – Located above the monolith south in Paititi. Climb to higher ground to jump to it.
The Hidden City – Changing the Weather
Rope pull five purple frog totems. The totems are frog-shaped rocks with purple paint on them. Shot a rope arrow at their wall attachment to complete the challenge.
The Hidden City – Dunkin’ Bones
Knock down three skeletons.
- 1/3 – During the Rebellion Lives mission (Reach Unuratu’s prison cell), when you reach the bridge blocked by the guards, follow the beacon along the climb until you have to rapel down. Instead of rapeling all the way down to the white mark, stop slightly above it and swing towards the skeleton on the left.
- 2/3 – After having hit the first skeleton, swing right. The second time you have to rapel, there is a skeleton right below you, slightly to the left.
- 3/3 – After swinging across to the prison, when you land by the “The Winged Serpent” mural, go right. When you have to jump right to the overhead axe wall, instead of continuing right, rapel down and find the skeleton.
Cenote – Sunken Treasure
Pry open five underwater treasure chests. The chests are all located in the body of water in front of the temple entrance.
- 1/5 – When you first dive into the body of water in front of the temple, the chest can be found slightly to the left of the temple entrance.
- 2/5 – In the right corner closest to the temple entrance.
- 3/5 – In the right corner farthest from the temple entrance, located on a piece of protruding rock.
- 4/5 – Close to the right corner farthest from the temple entrance, at the bottom of the underwater pit full of human skeletons.
- 5/5 – Slightly to the left of the temple entrance, some distance away.
Cenote – Respected
Rope-pull five effigies down. Shoot an arrow at the rope part of the effigies to pull them down.
- 1/5 – When jumping into the body of water in front of the temple, head to the right side of the temple to find an effigy. Shoot an arrow at the rope section of it to pull it down.
- 2/5 – This one is close to where you cut down the soldier to upgrade your arsenal (where you get the shotgun).
- 3/5 – After your first encounter with these strange new enemies in the pit, climb out of the pit (where the objective beacon is taking you). You encounted the effigie right before going into a partially flooded cave.
- 4/5 – When entering the room with the big door where Lara suggests the box could be behind this door, follow the objective beacon into a smaller room with a lot of blood, dead bodies and a burning altar. The effigy is in your left.
- 5/5 – After having opened the first of the doors to where Lara thinks the box is, swim through the now moving wheel to get to the other side. Upon climbing out of the water (near a barricade you can rope-pull to destoy to get back to the main area), there is another effigy.
Mission of San Juan – Raise the Flags
Cut the release pulley to release five flags around the mission.
- 1/5 – When you first arrive at the mission, turn back to see two cars parked behind you. The flagpole is on your left.
- 2/5 – In the southern part of the area, near the hunting ground, not far the Ruined Tower basecamp.
- 3/5 – In the western part of the area, where Isabella and her archeologist friends reside.
- 4/5 – North in the mission, up a set of stairs where a small girl seems to be diciplined by her father and a nun.
- 5/5 – North in the mission, close to a large gate being examined by two men.




Be the first to comment