
There seems to be a lot of confusion as to what you should be doing if your captain isn’t barking orders. This guide aims to fix that.
Contents
The Player
From the main menu, there is a ‘Player’ section which allows you to change your appearance. More clothing and hat options unlock as you level up. Leveling up is done through earning points, which is done by basically doing anything useful on the ship. We’ll get to that later. If you’re just starting there won’t be too many options, so pick a head, some hair/beard (or not) and the color of said hair & beard.

Running around your ship is done with typical FPS controls, ‘W’ ‘A’ ‘S’ ‘D’ for movement, ‘Shift’ for sprint, ‘Ctrl’ for crouch, ‘E’ for use, and ‘Space’ for jump. There is really no reason not to sprint if you are not boarding or being boarded. Blackwake devs, if you happen to read this guide, please add a toggle sprint option to the options menu to make this a little easier on us.
Choosing a Server
Blackwake is under development and the server browser is currently being worked on. Expect this section to become outdated quickly.
You have more than one option for choosing a server. If you don’t like the in-game server browser, you can use Steam’s built in server browser to find an appropriate server as well. Last I checked, you can’t just click ‘Join Game’ from the Steam server browser though, so you will have to copy/paste the ip address into the direct connect feature in the game.
Another thing to note, I wouldn’t put too much stock in the rediculously high pings shown in both the Steam and In-Game server browsers. The game seems to falsely report higher pings to server browser queries. Once you are actually connected & in the game, in my experience my ping is about half of what either server browser reported.

The in-game server browser has undergone a few improvements since I purchased the game just a few days ago, so if you use the Steam version, check again in a few days on the in-game and it may be more to your liking.
From what I can tell, there are a few ‘game modes’, and depending on your preference this is probably the biggest factor in determining the right server for you. I’ll provide a brief listing of the game types:
- TDM_Fleet: This has one Galleon and two Hoys per faction.
- TDM_2v2_Galleon: Two Galleons per faction.
- TDM_2v2_Hoy: Two Hoys per faction.
- TDM_1v1_Galleon: One Galleon per faction.
- TDM_1v1_Hoy: One Hoy per faction.
All of the above game modes are type TDM which of course stands for Team DeathMatch. This game mode runs on a ticket system, similar to some other well-known shooter games. Tickets are lost by dying & losing ships.
The devs have stated more game modes are coming, so keep your eyes peeled for new game types around the corner.
Choosing a Boat
Okay, so you found a server! Well done, lad. Now you need to join a team, and pick a boat to be a crew member or captain of.
At the time of writing, there are two types of vessel in Blackwake, the Hoy, and the Galleon.
The Hoy is the smaller of the two ships currently available. The Hoy maximum crew size is 7 or 8 depending on game mode, 7 in the larger games. There are 8 cannons along the sides of the ship, distributed evenly. There is also a swivel gun on each side of the ship. The front of the ship has two more swivel guns, but these contain anti-sail shot. This ship only has two locations to repair sails from, a smaller area, and one pump.

The Galleon has two decks and is the larger of the two ships. The Galleon’s maximum crew size is 13 (or 15 in 1v1 Galleon games). The Galleon has a total of 20 cannons, 16 of which are on the lower deck. The lower deck has 6 cannons to port & starboard, 2 cannons on the front and 2 on the back. The upper deck has 2 cannons per side, 2 swivel guns, and 2 anti-sail swivel guns located on the front of the ship. This ship has 5 different locations to repair the sails on the upper deck, and 2 pumps located on the lower deck.

For new players, I recommend starting out on a Galleon, but confine yourself to the lower deck. This will get you used to firing cannons, repairing, pumping etc. After you’ve gotten the hang of that, move on to the Hoy, and then finally the upper deck of a Galleon.
Choosing a Captain
The first thing you’re going to do after selecting a team and a boat is vote on a captain if it’s a new game. If you’ve joined a game in-progress this step will be skipped.
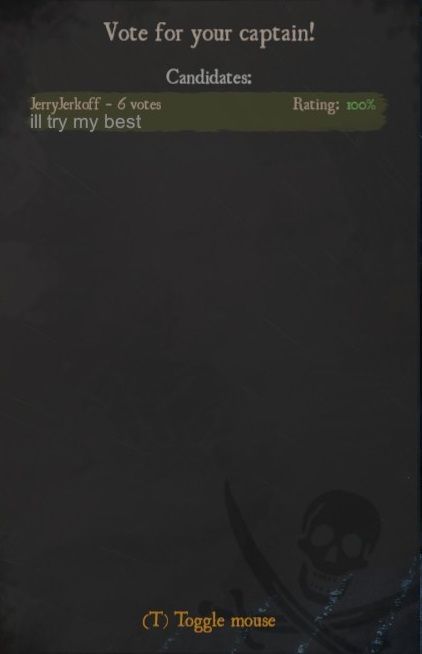
You can press ‘T’ to enable your mouse cursor and click on the dialog box for selecting a captain. If you are new to the game, and/or don’t have much experience as a crewman, do NOT nominate yourself to become captain. Also, please do not nominate yourself for captain if you don’t have a microphone. Voice communications are essential for being a good captain.
If you think your captain sucks, you can vote for a mutiny from the ‘Esc’ menu. It takes a few votes from your crew to enable a mutiny, but then the game selects the person with the most points to take over (needs fact checking).
Choosing a Loadout
Alright you have a captain. Press ‘M’ to get your guns, or change them for your next respawn.
The default choices are very good, so if you don’t know what to pick just accept what has been given to you.
Main Weapons:
- Standard Musket (Default Choice) – Treat this gun as a sniper rifle. It’s very accurate, good for a single shot and switching weapons. The reload time is fairly long.
- Blunderbuss – Basically a shotgun. Has a nice spread, but typically won’t kill in a shot. I don’t use this gun very much.
- Nockgun – Pretty much another shotgun. This one has a tighter spread, but has the longest reload time in the game. I usually use this as an alternative to the Blunderbuss if I feel like using a spread weapon.
- Hand Mortar – Very short range grenade launcher. The explosives launched from this weapon will roll across the floor. This is a great weapon, but also suffers from a long reload, and extremely limited ammo. Useful for if you’re about to spawn right before or during a grapple.
Side Weapons:
- Standard Pistol (Default Choice) – Extremely accurate, long reload.
- Duckfoot – Horizontal spread weapon. This thing is great for room clearing, but it probably won’t get the kill if they are not damaged already.
- Short Pistol – An even smaller version of the Standard Pistol, accurate, reloads fast, but low damage.
- Annley Revolver – This weapon has low damage, but it’s not bad for accuracy and fire rate. There is a short reload animation in between shots, and a long reload after a few shots.
- Matchlock Revolver – Similar to the Annley Revolver, this is a higher damage, but slower firing version. Also able to fire a few shots before the long reload, with a short reload in between.
Melee Weapons:
- Cutlass (Default Choice) – Slow but good reach and damage. Nice chance to bleed your enemies as well.
- Rapier – Faster than the cutlass, but less damage and reach. The description refers to a ‘stab’ move that doesn’t appear to be in the game yet.
- Dagger – Faster than the rapier, this has the least damage and reach.
- Bottle – Pretty sure this is a joke/troll weapon. Low damage, low reach, speed is decent, and a high bleed chance.
Special Weapons:
- Health Beverage (Default Choice) – Tea for the Navy and Rum(I think) for Pirates. Click and hold with this out to use it. Most damage will take several drinks to completely heal. You can give it to your crewmates with right click if you are aiming at them and close enough. If you have recieved a health drink from a crewmate without having one equipped, the ‘R’ key will enable you to drink it. For new players, this is the ideal choice.
- Grenade – Throw an explosive at your enemies! Does exactly what grenades do in most games. If you take this you won’t have anyway to heal yourself & will have to rely on your crewmmates for healing.
- Tomahawk – Thrown weapon. I don’t have much experience with this, but the few times I’ve used it, it made me laugh. It’s a good quick kill, but I find the other options more useful.
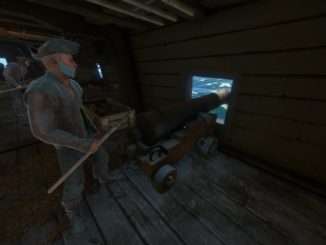
The Cannons
The game just started, people are voting for captain and picking weapons, but because you read this guide, you’re running around an empty ship while your shipmates are still making up their minds. Make yourself useful and load as many cannons as you can.

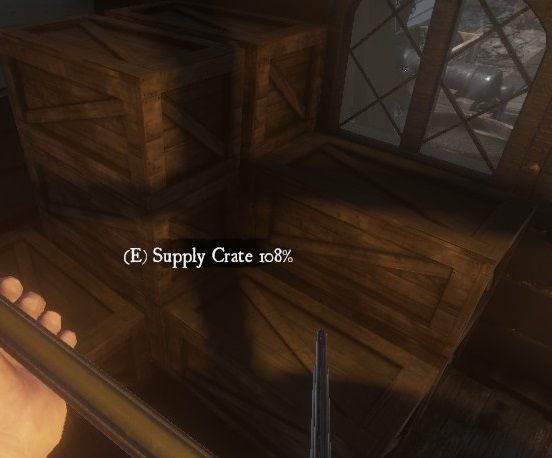
The first thing you need to know about cannons is that the ammo supply is limited, and shared amongst all the ships belonging to your faction. Cannons are loaded from nearby ammo crates, and these crates can run out. Taking any type of ammo (including powder) from the box will deplete the supply of all types by 1 in that ammo box. The ammo box can be refilled from the supplies pile by pressing ‘E’ on the pile, running to the empty ammo box and pressing ‘E’ on it with the crate in your hand. If you’re having trouble located the supplies pile, pressing ‘Q’ will make an indicator pop on the screen when you’re looking the supplies general direction.
Cannons need to be loaded right at the start of the game. Loading a cannon has a few stages, each indicated by an icon above the cannon when you are holding a cannon related item in your hands.
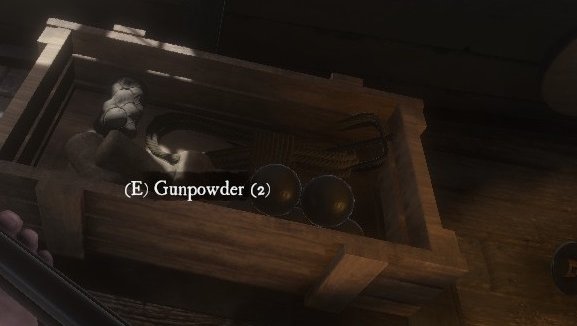
Phase 1: Needs Powder (20 Points)
Grab the powder from the nearby ammunition box by looking at it, and pressing ‘E’. Load it into the cannon with left-click. This will move the cannon to the next phase.
Phase 2: Needs Shot (20 Points)
There are three types of shot that can be loaded into the cannon. The default type is ‘Cannonball’. If it’s the start of the game, load these. Grapeshot is another option, but is only useful at very close ranges. Grapeshot is an anti-personel shot, Cannonballs are anti-ship. The third type can only be enabled to be loaded by the captain, (Captains: Press ‘C’, Load Port/Starboard, Grapples) Grapple shot. This loads a grappling hook into your cannon to pull another vessel toward you and enable a ‘Grappled’ status on both your and the enemy ship. Pick a shot from the ammo box by pressing ‘E’ and left clicking on the cannon.
Phase 3: Ram (20 Points)
Now you need to ram that ammunition down into the barrel of the cannon. If you just loaded shot, the ramrod will be pulled out automatically and you can left click and hold to ram the ammunition. If someone left a cannon half-loaded (Shame!) or you had to do something else briefly, like drink tea, you will have to press ‘E’ on the cannon itself to equip the ram rod. A little meter will appear on the screen while you are ramming, and the icon above the cannon will change once the bar is full, moving the cannon to the next phase.
Phase 4: Push (20 Points)
Now the cannon needs to be pushed forward back into firing position. Just press ‘E’ on it. It takes a few seconds, but you can walk away and the cannon will move into position on it’s own, as long as you gave it the push it needed.
Phase 5: Fire! (Variable on hit, or -40 points for a miss)
Finally, the cannon is ready to fire. If you get good at this the first 4 phases took very little time at all, & if you just pushed the cannon, then you will already have a torch in your hand. Otherwise, press ‘E’ on a loaded cannon to whip out your torch. There are two ways to fire the cannon:
- You can aim down the sight by pressing ‘E’ on the cannon again with the torch in your hand. This gives you plenty of time to wait for a shot to be lined up. Click to light the fuse. You do not need to stay zoomed in, you can press ‘S’ to exit the cannon early after you have lit the fuse.
- The other way to fire the cannon is to just left click on it with the torch out, but please don’t do this if you can not clearly see that the shot is lined up.
Either way, missing will cost you -40 points, and waste valuable ammo. Don’t forget that the cannon has a fuse, and will not fire immediately when you click. Also remember that ammunition is shared across the whole faction, not just your boat, so you’re really screwing your team if you’re just running around firing all the cannons at nothing. This will drop your score drastically, and is an easy way to check if someone needs a votekick. Last but not least, pressing the ‘Q’ key before firing can be helpful in identifying which ships are friendly. If the name pops up, then it’s most likely on your team, though I have encountered a bug that shows me all players upon pressing ‘Q’.
The Swivel-guns
Swivel guns are always on the top deck, located on the sides and front of the ship. The front of ship swivel guns have anti-sail ordnance, and have an extremely long range (Aim above your target!). Use the swivels with ‘E’ and left-click to fire.


The swivel guns on the side of the ship don’t seem to do a lot of damage, but are useful getting kills if aimed on the decks of the enemy ship. I haven’t been able to get any confirmation that swivel guns are capable of making holes in a ship, or damage sails if not of the anti-sail variety. If you hit an enemy crewman though, it’s a kill.
Repairs
This is probably what you’ll spend the majority of your time as a crewmember doing. I will break this down into sections, because each hazard on the ship has a different way of dealing with it.
At the top center of the screen will be a damage readout, if indeed damage exists to your ship (excepting fire). Pay attention to this at all times when it is on the screen, because it is your primary duty to keep the ship afloat after following captain’s orders.
Holes
Lots of people freak out when the ship has a lot of holes. Inexperienced captains seem to be especially vulnerable to this. Holes lead to a lot of problems. From the moment your ship has one hole in it, it is sinking. Getting too much water in the ship will make it so you can’t fire the cannons, enemy can board your vessel via swimming rather than grappling, & worse case scenario loss of the ship. Fixing the holes is important, but even more important is the pump(s).
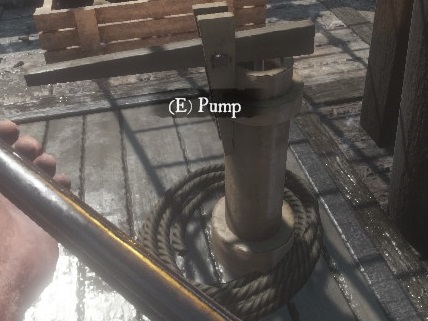
Pumps are used by approaching the pump and pressing ‘E’. This will cause your character to start pumping water, and you can’t do anything else while you pump. Pumping water will make your ship sink much more slowly, so get on it, and keep pumping until the pumps readout disappears from the top of the screen. In the Galleon, there are two pumps located below deck, and the damage readout will read ‘some pumps active’ if only one of the two pumps is being used. On the Galleon, this is bad, & you want both pumps in use unless you have 1 hole or less. On the Hoy, there is only one pump, and it’s located right by the mast. If the pumps are taken, then whip out your repair hammer by pressing ‘5’ and any holes in the hull will be highlighted bright red or green. The green ones are already being repaired by someone else, and you hitting it with your hammer does not help it repair any more quickly, so move on to the next hole. Only hit the red holes with your hammer, and do so by left-clicking & holding on the hole in the hull.
Low in Water
If this happened then you need to re-read the section directly above this. Get on the pumps! This causes your ship to move more slowly, and if you take any more hull damage in the form of holes, you will sink faster due to existing water.
Sails damaged

The sails effect the top speed and turning rate of your ship. You don’t want these to get too badly damaged or you will have a hard time getting out of a hairy situation. If you are on the upper deck of the Galleon, or on the Hoy, look up from time to time to check the sails, you can easily tell if they are damaged from a quick visual inspection, but if you pull out your repair hammer, a repair icon will display at the places that need the most repair. To repair the sails, you have to either climb up the ropes on the side of the ship and repair the sails from the ropes, climb up to the two crow’s nest (Galleon only), or run up to the nose of the vessel (Hoy only), then use your repair hammer (left-click and hold) on the sails until the meter fills. Each of these positions I mentioned are considered separate sails, and 2 people can not repair the same location at the same time, so in other words, if you see someone on the rigging, move to the next sail. The sails can be repaired and damaged, and the ‘sails damaged’ will not always appear on the screen. The Hoy has 3 sails, the nose, and two attached to the mast, both of which can be reached from either side of the rigging. The Galleon has 5 sails, 3 masts and 2 crows nests.
Nose damaged, immobilized

This is bad news. This happens whenever your vessel rams another one, or somehow the nose of the ship gets clipped. It means your a sitting duck and your ship will not move, no matter what the captain does. This is the one repair that more than one crewmember can work on effectively, because you need to fill the repair meter 3 times to get the ship moving again. Two to three people working on this tops. Any more is wasted effort. On the Hoy, the sail attached to the nose will always need repair after repairing the nose.
Grappled
This can be a good or a bad thing depending on you & your crews shooting, melee & dodging skills. Being grappled causes a drastically increased respawn time for both ships, and ends when all of one ships crew is dead or the grapple(s) is removed. Grappling can also save your ship or the enemys from sinking. To remove a grapple, you will have to find the ends of it somewhere on your vessel. It will be highlighted red, and you have to hold ‘E’ on it for a very long time (the meter fills very slowly), in order to remove it, and the whole time you are left vulnerable. If you find the grapple, announce it to your team so they can cover you while you remove it, or if someone else finds it cover them while they remove it.
There is other damage that can occur on the ship, but it isn’t represented in the readout. It is as follows:
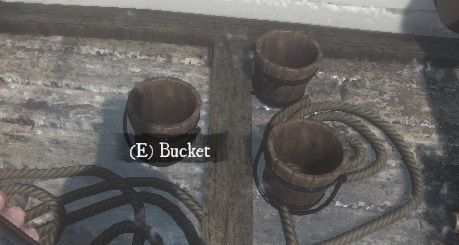
- Fire – There are buckets around the ship, pick one up with ‘E’ and left click on the fire to pour water on it and put it out. This also works on crewmen who are on fire. If you see your crewmate on fire, put him out!!
- Cannon – Cannons can become damaged also. Just whip out your repair hammer (5), and left-click and hold until it’s repaired. Regardless of whether or not the cannon was loaded before, after repairs it will need to be loaded again.
Communication
This is perhaps the most important part of Blackwake. The game provides several ways to communicate with other players on the server. Please use them to the best of your abilities.
Voice Chat
Voice chat is absolutely essential for the captain to have. Crew members should also use crew voice to relay information to their captain. Try not to talk when the captain is talking.
- F – Local/proximity voice – Use this for verbally taunting the enemy when they are nearby 😛
- G – Global voice – The whole server hears this, using it too much will likely result in being muted.
- V – Crew voice – Your ship hears this. Your captain will be using it a lot (or should be), and it will subtitle his name with ‘Your captain’ when he is speaking.
- B – Faction voice – Everyone on your team hears this, across all boats. The captains should be using this to coordinate their efforts.
Audibles
Audibles are heard in proximity to your character, but the captain versions are heard by the whole crew. These are in menus associated with the Z, X, & C keys, though the C key only works if you are captain. While holding Z or X you press a number key to select the audible you want, while C uses a mouse driven menu that will say whatever you are pointing at when you release the button. Whether or not you choose to learn the Z & X menus, the C menu should be memorized by the captain.
C:

Note: To enable the crew to load Grapple shot, you must use the Load Starboard/Port sub-menu and specify Grapple.
Z:
1 – Attack!
2 – Behind us!
3 – Charge!
4 – Objective
5 – Retreat
6 – Taunt
X:
1 – Help!
2 – Laugh
3 – No
4 – Yes
5 – Sorry
6 – Thanks
7 – You’re welcome
8 – Well done!
Text Chat
- Y – Global/Server-wide chat.
- U – Squad/Crew chat.
- I – Faction/Team chat.
Steering the Ship
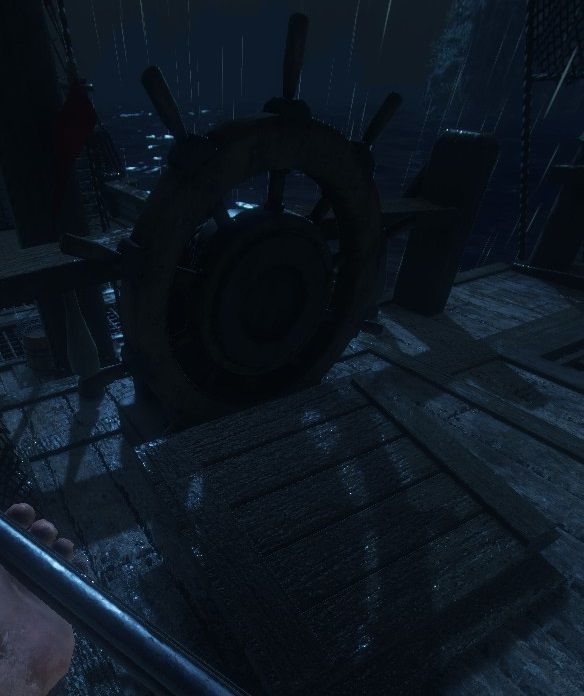
Sometimes, the captain will die, leaving the boat travelling as it was just before he died. This can lead to some pretty hairy situations, and it may be worth while to take over the wheel.
Steering the ship is pretty easy, you can turn with ‘A’ and ‘D’. Left-click unfurl the sails, Right-click to furl them. The sails have four positions going from stopped to max speed.
If you’re trying to line up a shot for the cannons, there is a very good guide that shows you how to aim from the wheel in both ships located here.
It’s also very important when steering the vessel that you communicate to the crew what your intentions are. This allows them to make sure everything is ready on the side about to see some action.
Written by Makraiz!


Be the first to comment