
The Combat Part
All credit goes to Shatojon!
It’s important to get into Mirador knowing that it’s not an easy game. You are unlikely to defeat your first Sentinel before you’ve had at least a fair amount of practice. Don’t be frustrated by these defeats; learn from them! Pay attention to the Sentinels’ animations and learn to predict which ability or attack is coming and how to avoid its impact.

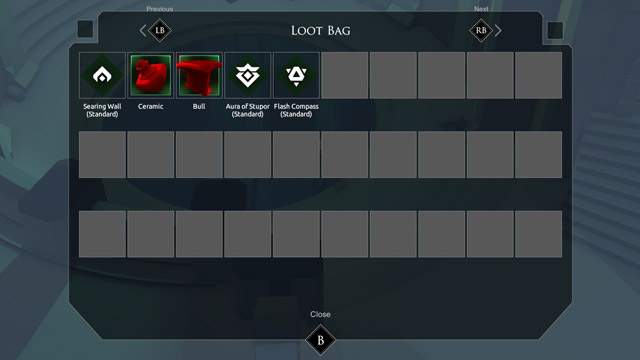
Every time you defeat a Sentinel, you will find loot. You can open your lootbag by pressing i on a keyboard or select on a controller. Your lootbag is not your inventory. It only shows you the loot you found on this run.
If you are defeated by a Sentinel, willingly leave the game or return to the Citadel, you will lose some of the loot you found on this run so far. In your lootbag, the red items have been lost due to defeat or leaving early.
You will keep all your loot if you leave at the Obsidian Gate zone without opening the next portal. After defeating a certain number of Sentinels, you will reach the Obsidian Gate. You will be healed, all of your potions will be refilled and Hologram players will be “respawned”. There is a loot chest there – open it by interacting with it. At this point, you have two choices to make:
- Open the portal and continue onto the next, more challenging set of Sentinels to try and earn better loot but risk losing some of your current loot if you are defeated.
- Don’t open the portal, not risk it, keep the loot you found so far and return to the Citadel. You can do this by interacting with the recall stone near the waterfall to the right, or even by hitting escape/start and selecting the Return to the Citadel option.

The idea here is to decide whether you want to risk part of your current loot in an attempt to get better and rarer loot from Sentinels that are more difficult to defeat.
Eventually, you will defeat all of this run’s increasingly difficult Sentinels and will safely return to the Citadel with all the gathered loot.
The Sentinel Creation Part
The important things to know are:
- You must have a “frame” item to be able to create a Sentinel. You can find those just like any other loot. Currently, the available frame is called “Knight”.
- After saving a Sentinel, you should Skirmish it before you deploy it. You can edit a saved/draft Sentinel, but you can no longer edit it if you deploy it.
- Deploying a Sentinel will permanently consume the items you’ve equipped it with.
- Dismantling a Sentinel will not return the items.
- You can inspect a deployed Sentinel to gather any loot it has gathered.
With the loot you’ve found, you can create Sentinels and deploy them for other players to fight. Sentinels will also generate loot as they fight other players. To begin, interact with the pedestal near the door by the stairs.

The Sentinel Workshop will appear. Select an empty slot (WASD or Left Joystick) and select “Create” at the bottom right.
The first section, “Frame & Armor” will allow you to customize the external look of your Sentinel with cosmetic pieces of armor, accessories and decals you’ve found.

Move onto the next section “Materials” by clicking on the “Next” button at the top right of the screen, or RB on a controller. This section will allow you to use colors you’ve found to change various colors on your Sentinels.

The third section, “Weapons & Abilities” will allow you to select a weapon, circuit and spells socketed into the circuit.
Circuits will dictate the behavior of your Sentinel. The Sentinel’s behavior will begin at the white circle and follow the arrows onto the next sockets.
White squares are weapon strikes and will vary depending on the weapon you’ve given to your Sentinel.
Colored diamonds are spell sockets into which you must socket a spell item you’ve found during your adventures. Green sockets can only hold basic spells. Blue sockets can hold basic and advanced spells. Purple sockets can hold basic, advanced and superior spells.

Some circuits have different thresholds represented by larger circles containing sockets. Your Sentinel will switch from one threshold to the other when its health reaches a certain level. The circuit pictures above has two thresholds.
Finally, the “Overview” section will allow you to preview the items you’ve socketed into your Sentinel and will allow you to save the Sentinel.
Player Gear
Dashing
You can dash as often as you like, as long as you have charges. The charges are represented by blue diamonds above the Dash icon, at the bottom of your screen. Charges will regenerate over time. Certain Sentinel abilities can stop your charges from regenerating, or even drain them.
Fast and Strong attacks
You can quickly attack a Sentinel repeatedly for a burst of small damage, but you can also hold the attack key longer and release it for a strong attack that deals more damage. Strong attacks will generate more DPS if timed properly. The downside to strong attacks is that you can not dash until you release the button and complete the attack.
Boomerang
The boomerang is a ranged weapon that deals moderate damage to Sentinels. It’s particularly useful when it’s impossible or too risky to approach a Sentinel for melee attacks.
Shield
Blocking with the shield will help you avoid damage from certain attacks without the need to dash. As long as you have at least 1 charge, you can block certain attacks. Certain attacks can not be blocked, such as Seeker Charge (the blue electric disk) or the red lazer spells.
When you block an attack, depending on which attack it is, you will lose certain Shield charges (represented by the red diamonds above the Block icon at the bottom of your screen). Shield charges will regenerate over time. If an attack depletes all of your charges, you will be momentarily stunned and will no longer be able to block until all charges have replenished again.
Healing
Using a Healing charge will fully replenish your health, but you will be unable to move or attack while healing. Defeating a Sentinel will regain 1 Healing charge. Reaching an Obsidian Gate will heal you entirely and replenish all of your Healing charges.
Multiplayer
It is possible to fight Sentinels with another player. Sentinels’ health pool is increased when you play in Co-Op.
Inviting friends
While at the Citadel, you can invite a friend on Steam by right-clicking their name in your friends’ list and clicking the Invite button. You can also invite them by interacting with the Dog standing to the left of the Portal pedestal in the Citadel.
Your friend must also be at the Citadel. When they accept the invitation, you will see each other’s name at the top left of your screen. One of you can now enter the portal and the adventure will begin.
Matchmaking with strangers
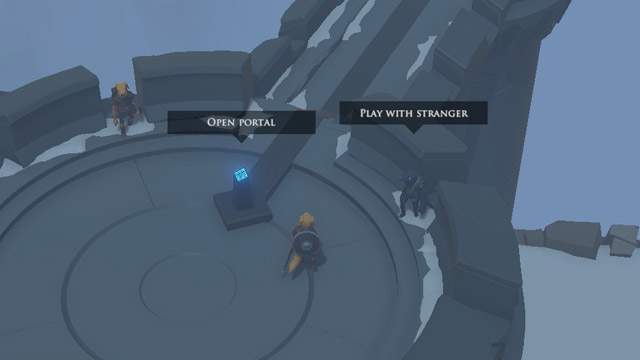
You can try to be paired with an available stranger by interacting with the Crow standing at the right hand side of the Portal Pedestal in the Citadel. After interacting with the Crow, the tool-tip above the Pedestal will say (PLAY WITH STRANGER). Open the portal by interacting with the Pedestal and step into it.
The game will try to pair you with an available stranger. If none are found after 15 seconds, you will begin your adventure in solo instead.
If you are defeated in Co-Op, you will turn into a hologram and can follow your ally around. If you reach the next Obsidian Gate, you will be brought back into your physical form and will be able to fight again.
Be the first to comment