
How to properly balance the power draw and recharge on your ship and how power modules work.
Power Balancing
All credit goes to RyanJK!
One of the most difficult aspects of Crypto Space Commander during the alpha has been managing your power levels and avoiding the dreaded weapon power overload which can prove to be swiftly lethal in combat. With the variety of power modules available it can be confusing which to equip, this article will cover the basics of power modules and power balancing, there are many more details that will be covered in a future article.
This article is current as of July 23rd on build 0.5.19 and only covers the current state of power modules.
Before figuring out how to equip your ship you should know the basics of how power works in CSC. To start, there are two general types of power drain, passive and active. I’ll give an example using a shield module to explain the differences.
Here you can see the catalog entry for the Kindled R1 Plasma shield with an abundance of stats, the two stats we want to focus on are Power Base and Power Draw. Power Base is the Passive Power, this is the power the shield is always using it will deduct this amount from the Total Power Available on your ship. The Power Draw is the Active Power, this is the power the shield will use when it is on and takes damage.

Total Power Available is one of two other stats that are the other side of the power balance equation. The second stat is your Power Recharge Rate, you can find both of these stats as well as your Total Power Draw under your ships stat on the Equip screen of any station. It will look something like this:

I’ve also circled the three primary power stats in red, these are what we will be looking at when equipping modules to make sure we are balancing properly.
When you equip a module it’s Passive Power will reduce your Total Power Available by that amount. Additionally, if it has an active power draw, it will increase your Total Power Draw/second by that amount. In short, Power Recharge Rate counters Total Power Draw/Second and Total Power Available is your starting point for power that is decreased by passive power and increased by power cores.
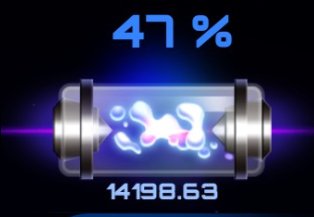
To increase your Total Power Available you equip power cores such as the BB Alpha Core Class 4, BB Core No 26 or any of the Lazarus Prime power cores. This figure is what determines the starting percentage of your power as well as the number underneath it. I would recommend trying to start with this at >80% thought if you have a high enough recharge rate that your power levels never drop then it really doesn’t matter what your TPA is at. Each ship has a max power level it can attain so once you reach that you do not want to add any more power cores as they would just be a waste. The stats above indicate the ship has a max power level of 7875 gW and is currently at 6900/7875 Total power Available.
There are currently to lines of Power Cores available the BB line and the Lazarus line. The BB line includes the BB Alpha Core Class 4 and the BB Core No 26, this line provides the best power per a module slot boost but it only increases TPA and has not other effects. The Lazarus line however increases TPA while also providing benefits to power recharge rates.
The next power stat you will be equipping modules to improve is the Power Recharge Rate, the stats above show the current recharge rate as 80.00 gW per 0.5 seconds. There are two ways you can improve this, by increasing the gW(80gW) charged per a tick or by decreasing the time(0.5s) between ticks. This is where the various accessory power modules come in such as capacitors, condensers, transmods etc.
Ideally, you should aim to get your power recharge rate to be at least equal to your Power draw rate, if not 1.5x so you can maintain power if you need to crank all your power levels to 150%.
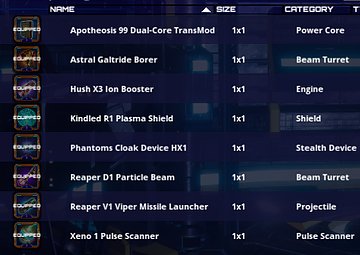
Below is an example of a exploratory miner scout build on a Reaper Eliminator. This build is able to maintain power levels with everything cranked to 150%. It also can hit 3825 mgu/s in sublight and 8.8x lightspeed in slipstream, a very fast and agile build. As you can see the power draw is 556gW per a second whereas the power recharge rate is 815 per 0.5seconds or 1630gW/s. An incredibly stable build that will never hit power overload was achieved by simply adding a single Apotheosis 99 Module to add 500gw/s to the power recharge rate.
Reaper Eliminator MP modules and stats

Reaper Eliminator MP loadout
This next build is a mining build for a Corsair-class Vulcan Voyager that also maintains a minimum level of combat abilities. On this build I added a Radeon Galtride Borer as a 2×2 mining beam for increased yield. The Radeon Galtride Borer is a very low power 2×2 mining beam making it ideal for smaller ships looking to get more yield out of their hardpoints. The power modules included on this build were 2 Apotheosis 99’s an 1 Vital CP3. The Apotheosis 99’s increase the Power Recharge Increment whereas the Vital CP3 decreases the Power Recharge Time allowing for more frequent recharge ticks.

Finally, I have included a table with some of the current functioning power modules and their effects.

That about wraps it up, hopefully you are better equipped to power balance your ship now, safe flying commanders!

Be the first to comment