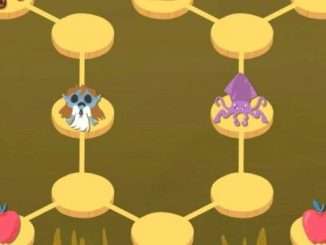
This guide will cover all floors of the game, and will show you my winning Jester strategy, floor by floor.
Introduction
All credit goes to Bullfrog12!
The Jester is the sixth character of Dicey Dungeons, and probably the most unique. Instead of having equipment or spells, he has a deck that you build and improve throughout the run [think Slay the Spire, Dream Quest, etc.]. He rolls three dice at start of turn, and that number can’t be increased.
In combat you have three card slots – that’s your hand – which cards go into. Whenever any of these slots are empty, cards will be drawn to fill these slots, unless your deck is empty. Drag a dice onto a applicable card to play it.
On the right, you can see your remaining deck size, the top three cards of your deck, and the Discard button. If two or all cards in your hand match, even if one or two is[are] upgraded, weakened and/or shocked and the other[s] isn’t [aren’t], you can discard them.
The Jester’s Limit Break is Snap!. When activated, the Discard button will turn into the Snap! button for the turn. When the Snap! button is pressed, two [three] dice of the highest possible value will be put into the matching cards.
The Jester’s starting deck is:
- 4x Boop.
- 3x Bop.
- 2x Sweets.
Total Size: 9
You will deal 6-9 damage a turn, depending on your roll.
Now, let’s start our run!
Floor One
Floor One Contents:
- 2x Level 1 Enemy.
- 1x Chest.
- 1x Exit.
There’s not very much on this floor, so I’ll cover it quickly.
Go for the chest first. It’ll have Juggling Ball. Take it. In the early game, it can deal 1-3 damage while replacing your dice. In the late game, it can reroll bad dice.
Your new deck will look like this:
- 4x Boop.
- 3x Bop.
- 2x Sweets.
- 1x Juggling Ball.
When you level up, you’ll receive a choice between two random card packs which have 2x Minor and 1x Major. Here’s how I rate them:
Freeze > Fire > Shock
Your new deck will look like this:
- 4x Boop.
- 3x Bop.
- 2x Sweets.
- 2x Minor.
- 1x Juggling Ball.
- 1x Major.
Total Size: 13
Onto floor two!
Floors Two and Three
Floor Two Contents:
- 3x Level 2 Enemy.
- 2x Apple.
- 2x Chest.
- 1x Anvil.
- 1x Shop.
- 1x Exit.
This floor is where things start to get interesting.
Always prioritize the lowest level enemies that lead to the most rewards, on EVERY floor. Here’s how I rate rewards:
Anvil > Chest > Shop > Apple
When you get to a anvil, always upgrade a Boop. You’d think it’d just increase the damage [see Slay the Spire, Dream Quest, etc.], but no! It’ll add the ability to return the dice instead! Consistency is the number one priority at all times!
Speaking of consistency, it should go without saying that you need to destroy your weakest cards[see aforementioned games]! Destroying them will increase your chances of drawing your strongest cards! Buy as many destroys as you can! The shop will have two destroys. Buy them and destroy your two Sweets!
One of the two chests on this floor will have a utility card [Bump, Nudge, Cauldron, or Spatula, chosen randomly]. Take it. They increase consistency. The other chest will have a finale card. Take it. Finale cards appear only once per run, they can’t be copied, and they always start each turn on the bottom of your deck.
When you level up, you’ll receive a Duplicate! Nice!
At the end of the floor, your deck will look like this:
- 3x Boop.
- 1x Boop+.
- 3x Bop.
- 2x Minor.
- 1x Juggling Ball.
- 1x Major.
- 1x Duplicate.
- 1x Utility.
- 1x Finale.
Total Size: 14
Onto floor three!
Floor Three Contents:
- 1x Level 2 Enemy.
- 2x Level 3 Enemy.
- 2x Apple.
- 1x Chest.
- 1x Shop.
- 1x Exit.
When you level up, you’ll receive the choice of two of Warrior, Inventor, and Witch, chosen randomly. Here’s how I rate them:
Without the fire pack:
Witch > Inventor > Warrior
With the fire pack:
Inventor > Witch > Warrior
The chest has a utility card. Take it.
Onto floor four!
Floors Four, Five, and Six
Floor Four Contents:
- 1x Level 3 Enemy.
- 2x Level 4 Enemy.
- 1x Anvil.
- 1x Apple.
- 1x Shop.
- 1x Blueprint.
- 1x Booster Pack.
- 1x Exit.
When you level up, take the destroy, and destroy a Bop.
When you reach the blueprint, duplicate Duplicate.
Booster packs cost too much consistency to be worth it.
The shop has three cards. Buy all available utility cards.
Onto floor five!
Floor Five Contents:
- 2x Level 4 Enemy.
- 2x Level 5 Enemy.
- 1x Anvil.
- 3x Apple.
- 1x Exit.
When you level up, you’ll receive another Duplicate! Nicer!
At the end of this floor, your deck should look something like this:
- 2x Boop.
- 2x Boop+.
- 1x Bop.
- 1x Juggling Ball.
- 2x Minor.
- 1x Major.
- 3x Duplicate.
- 3x Utility.
- 1x Inventor / Witch.
- 1x Finale.
Total Size: 17
Onto floor six and the boss!
Floor Six Contents:
- 1x Boss
The boss should be no match for you. Into battle!
Conclusion
This guide will help you beat episodes one, five, and six, and can help you out a bit in episode four.


Be the first to comment