
Everything you need to know, to start out.
Contents
General Knowledge
All credit goes to jack.r92!
Legend of Bum-Bo is a game that is hard to describe, but in it’s most basic form, it is Puzzle Quest in a Binding of Isaac skin.
You play as one of different Bum-Bos, each with different starting skills and stats and you try to beat all the bosses on your way down.
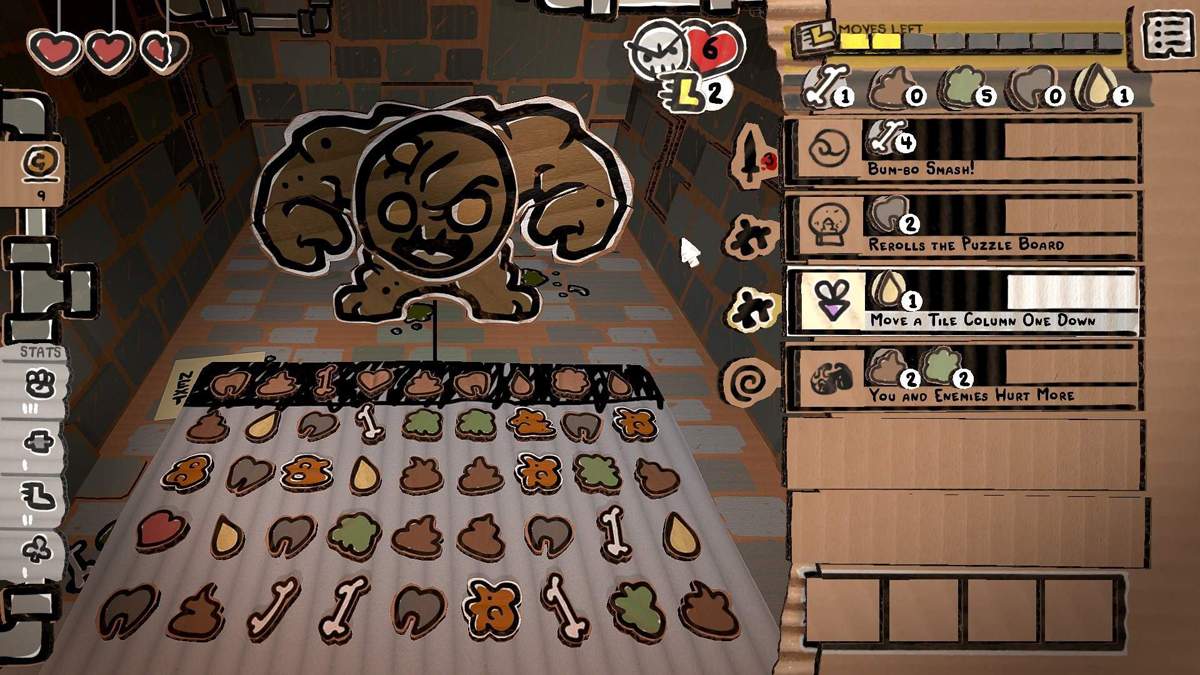
This is what most of the game looks like:
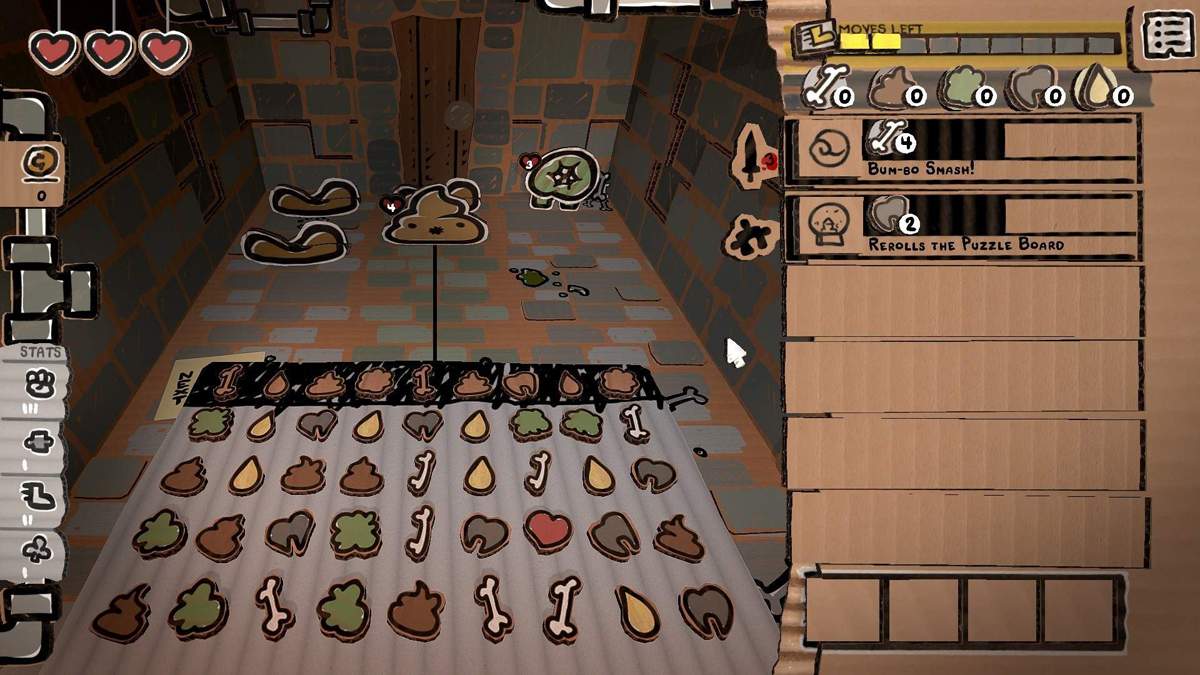
You have a 4×9 grid, where you try to match 4 or more of the same Symbol. The more you match the better the effect (5×9 if you want to count the dark area, which shows, which is the next Symbol to drop in that lane).
The Symbols you can match are Bones, Poop, Boogers, Teeth, Pee as the common ones which provide you “Mana” in the top right corner for your Spells. Rarer are Hearts, Stars, which can be used as Wild Symbols (=those can be used to substitute any other Symbol), and sometimes Curses (Purple Skulls).
The more you match, the better the effect; 7 gives you an an Ultimate Effect (and an Achievement the first time. As of right now, Achievements are bugged, but should be retroactively unlocked according to Ed’s Twitter)
Bones
4/5/6 let you fire of 1/2/3 Bones in whatever lane(left/middle/right) you want, for Dmg = to your Puzzle Piece. In case of the Screenshot it would be 1 Dmg (left corner, 2nd Stat from the Top).
7 Bones: Summon Death who let’s it rain Bones, targeting random enemies.
Poop
4/5/6 let’s you block of a lane with a Poop Barrier which takes 1/2/3 hits to disappear.
7 Poop: Summons a $hitstorm… leaving you with 3 Poop Barrier in all lanes, with 3 HP each.
Boogers
4/5/6 let’s you fire of 1/2/3 Boogers stunning your opponent, thereby freezing his next action. Stackable up to 3 times.
7 Boogers: Summon the Rain of Boogers stunning all your opponents for 3 actions.
Teeth
4/5/6 fire of a single tooth for 1/3/5 damage (more dmg if Puzzle Damage was upgraded).
7 Teeth: Summons a Black Iron Wall, dealing Damage to all enemies at once (seems to be 4 DMG).
Pee
4/5/6 gives you 1/2/3 more Moves, to take.
7 Pee: Gives you 4 Moves and recharges all your items if you have any.
Hearts
4/5/6, heals you for 1/2/3 red half hearts.
7 Hears: Fully heals you and gives 1 blue soul heart, which acts as an extra heart, but can’t be healed with hearts.
Curses
4/5/6 damages you for 1/2/3 half hearts.
7 Curses: Gives you the Achievements, otherwise it just flat out kills you.
Bum-Bos
All Bum-Bos start out with their own Stats, 1 Passive Effect, 2 Items / Spells, one of which is an Attack Spell (Sword Symbol) and the other a Control Spell, which allows you to manipulate the Board in a way.
- Hearts: Your starting Health. Each Red Heart consists of 2 Half Hearts.
- Fists: The Bonus Damage you do, with Attack Spells.
- Boots: The actions you can do on the board in a turn.
- Clover: Your luck stat. Seems to dictate how likely you are to crit and do double damage with an Attack / Spell.
- Puzzle Piece: Your basic Damage for normal Attacks, by having 4+ in a row with Bones / Teeth.
Bum-Bo The Brave
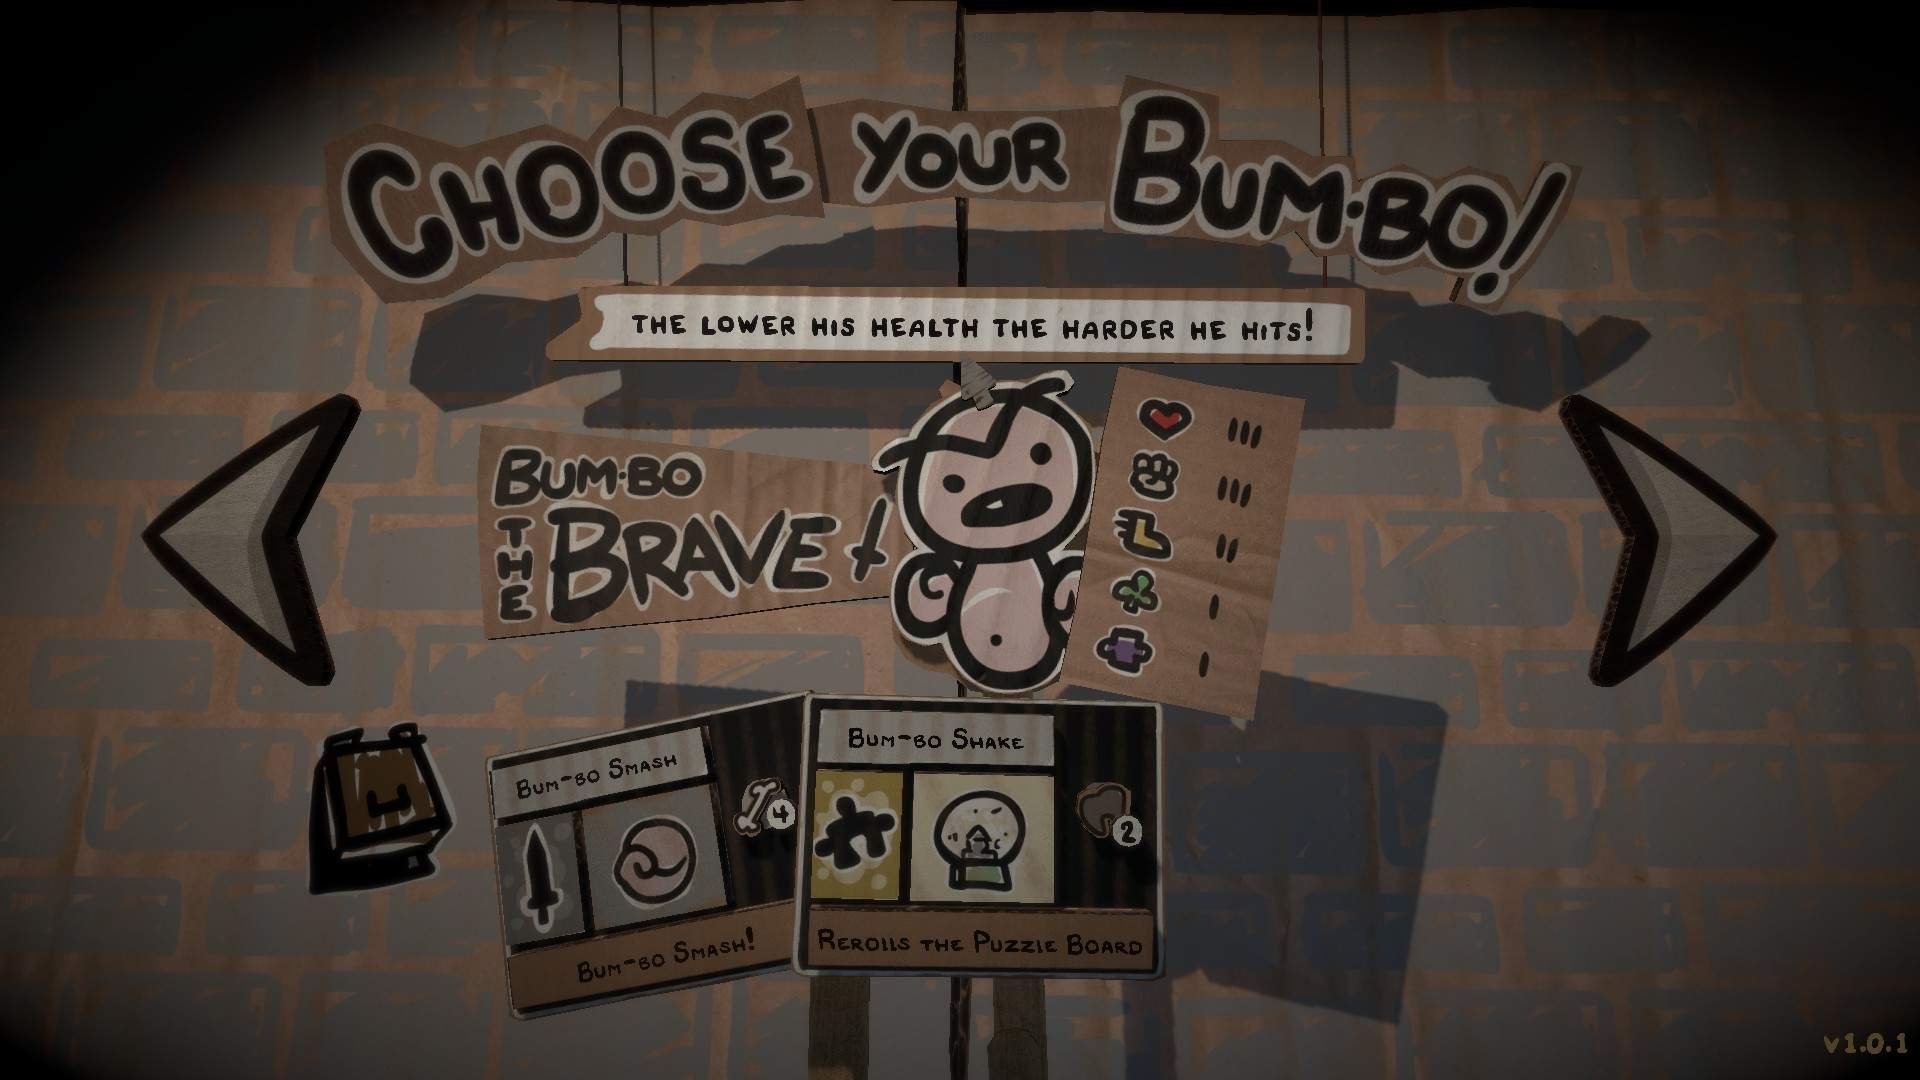
- Hearts: 3
- Fists: 3
- Boots: 2
- Clover: 1
- Puzzle Piece: 1
- Passive: The lower his Health, the harder he hits! (for each missing Red Heart, Brave gets +1 Fist / Puzzle Piece).
- Starting Attack Spell: Bum-Bo Smash, Cost: 4 Bones, Attack = 3 (more with more Fists).
- Starting Control Spell: Bum-Bo Shake, Cost: 2 Teeth, Rerolls the Puzzle Board (it is possible to get combination this way).
Bum-Bo The Nimble
Unlocked by Finish Chapter 1 (with Bum-Bo the Brave).

- Hearts: 2
- Fists: 2
- Boots: 2
- Clover: 2
- Puzzle Piece: 1
- Passive: His Puzzle Attack gain mana! (every time you attack with Bones / Teeth you get +1 Mana of every colour).
- Starting Attack Spell: Needle, Cost: 4 Pee, Attack =X+1 (for each succesful hit, it gets an additional point of DMG).
- Starting Control Spell: Toothpick, Cost: 2 Teeth, Remove a Single Tile (useful to prepare longer Combo Chains, also gives you the corresponding Mana of whatever tile you remove).
Bum-Bo The Stout
Unlocked by Finish Chapter 2 (with Bum-Bo the Nimble).

- Hearts: 2
- Fists: 2
- Boots: 2
- Clover: 1
- Puzzle Piece: 1
- Passive: Gains Bonus Mana, but can’t save it (every time you get Mana you get +2 in that “Element”, but you lose all once the turn is over).
- Starting Attack Spell: Stick, Cost: 3 Poop, Attack = 3.
- Starting Control Spell: Blender Blade, Cost: 3 Booger, Destroy Tiles & Touching.
You basically destroy all Os, if S is the one tile you chose.
XOX
OSO
XOX
Requieres a bit of planning to set up Combos, but useful to clean the board.
Bum-Bo The Weird
Unlocked by Finish Chapter 3 (with Bum-Bo the Stout).

- Hearts: 1 Red, 1 Blue (Soul Hearts also consist of 2 Half Hearts, but can’t be healed by Heart Symbols)
- Fists: 1
- Boots: 2
- Clover: 0
- Puzzle Piece: 1
- Passive: When they kill they gain Movement (Every time you kill an enemy you gain +1 Move)!
- Starting Attack Spell: Puzzle Flick, Cost: 3 Bones + 3 Teeth, removes all Tiles of one Symbol and throws them, Attack = The more removed tiles the higher the damge (have not figured the formula out yet).
- Starting Control Spell: Magic Marker, Cost: 4 Pee, (chose a Symbol and it adds around 3 more of those Symbol on the board).
Bum-Bo The Dead
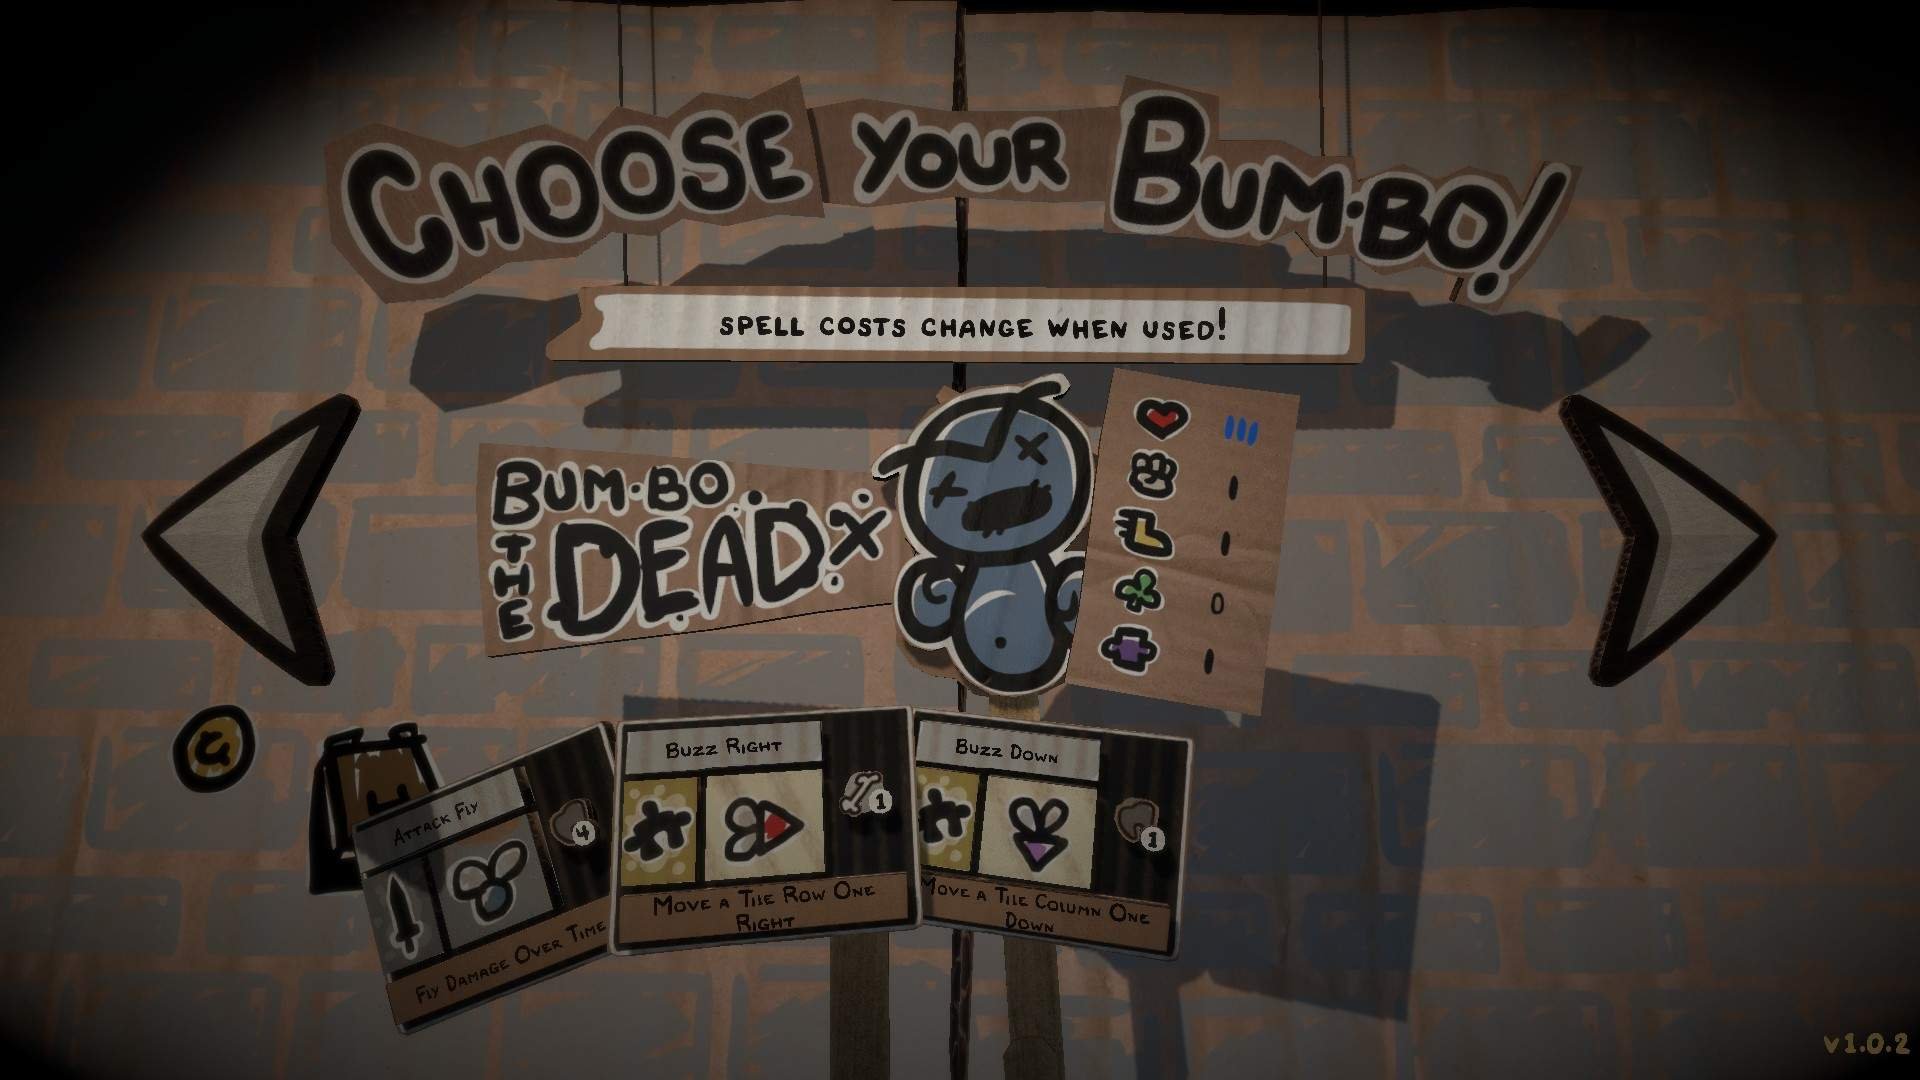
Unlocked by Complete the Game (Beat Chapter 4; The Basement with any Bum-Bo).
- Hearts: 3 Soul Hearts
- Fists: 1
- Boots: 1
- Clover: 0
- Puzzle Piece: 1 (you start with 2 in game, may be a bug)
- Passive: Spell Costs change when used (you start each room with 2 of each colour. Everytime you use one of your spells, the mana costs changes. Total cost stays the same, but it can split it into different colour. e.g. 4 Bones–>2 Poop 2 Teeth).
- Starting Attack Spell: Attack Fly, Cost: 4 Poop (choose a colum to send out your fly. It attacks the nearest enemy every time between your enemies and your turn).
- Starting Control Spell: Buzz Right / Down, Cost: 1 Bone / Tooth (Move a tile row one right / move a tile column one down).
Bum-Bo The Empty
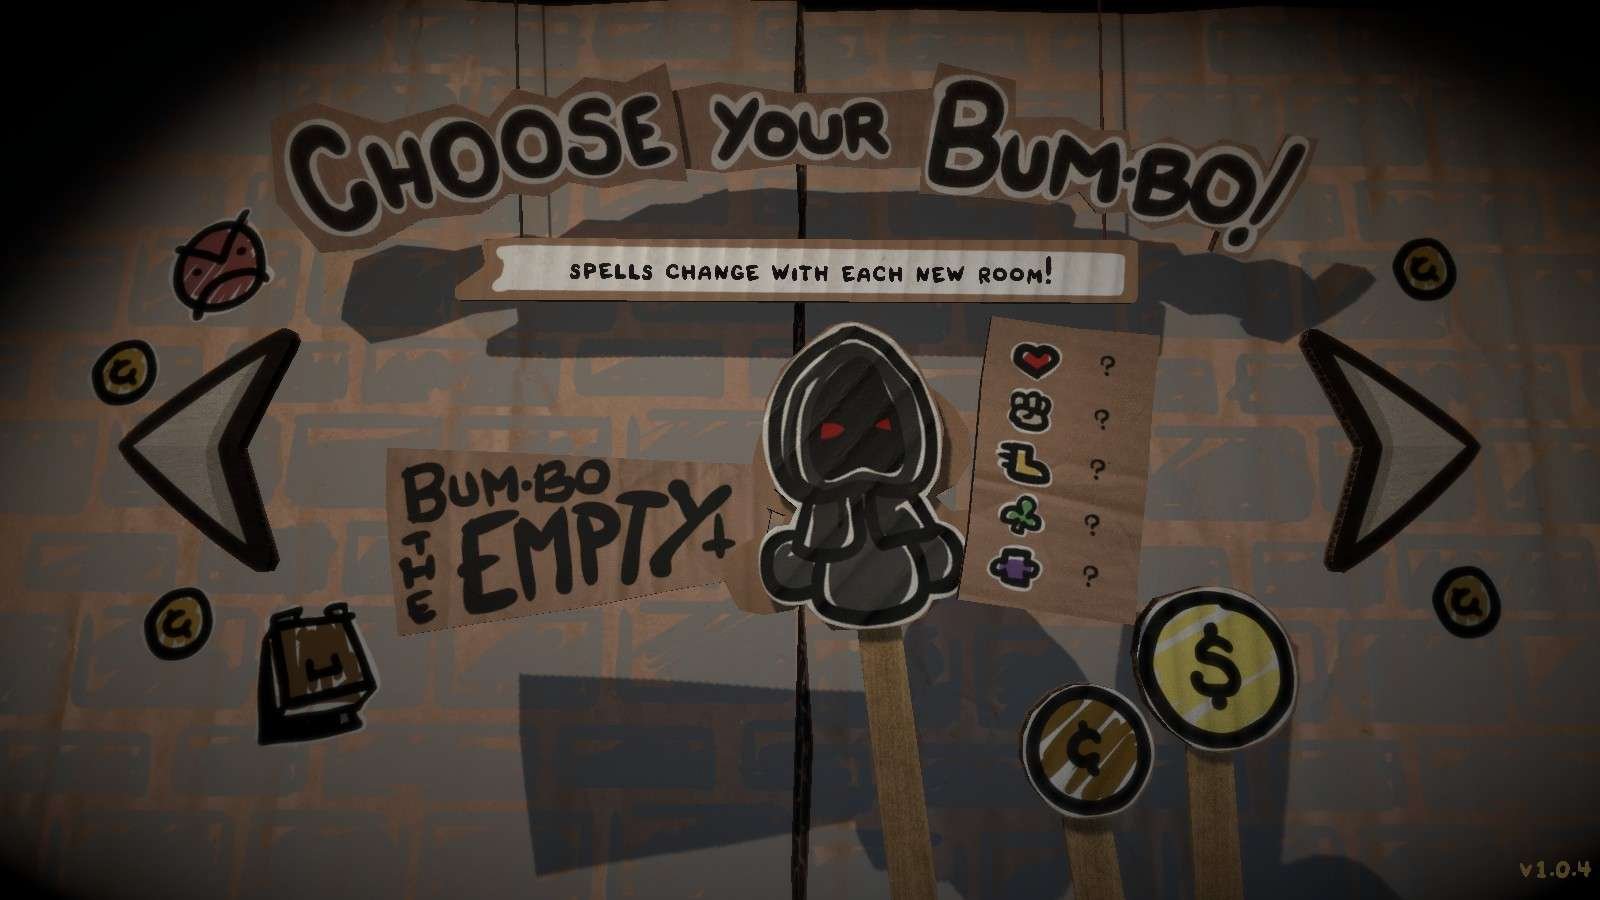
Unlocked by Beat the Game twice with all Characters
- Hearts: (1-5)
- Fists: (1-4)
- Boots: (2-5)
- Clover: (0-3)
- Puzzle Piece: (1-4)
You get random stats each run, seemingly with the total sum coming up to 9. Above I’ve put the range your stats can be in.
- Starting Attack Spell: Random
- Starting Control Spell: Random
You start with one of each, but every time you enter a new Room, they get randomized.
Nevertheless they keep being the same type, so an Attack Spell will be another Attack Spell, and a Control Spell remains an Attack Spell.
In the casino he can’t buy any spell upgrades, instead he is being offered Trinkets for 7c each.
Personal tip: make sure to have at least 2 Attack Spells if possible, otherwise the enemies who are immune to Board Damage may force you to restart the run. Even then you might be unlucky.
Dungeon Layout + Casino
The Legend of Bum-Bo is not unlike The Binding of Isaac, in that you have to defeat Enemies, progress in the Dungeon and defeat a Boss at the end of it.
Unlike Isaac however is, that the experience is linear, and you can’t decide where to go.
Generally the Layout seems to be the following:
- 1st Enemy Room.
- 1st Treasure Room, where you can choose 1 of 2 Items / Spells / Trinkets.
- 2nd Enemy Room.
- 3rd Enemy Room.
- 2nd Treasure Toom.
- Boss Room (after you defeat the Boss you can choose 1 of 2 Trinkets).
Casino
Between the Chapters you get to the Casino where you can spend the money you’ve earned so far.
Your Luck Stat may have an Influence on what you get.
On the left Side, you have 3 Skull Monty.
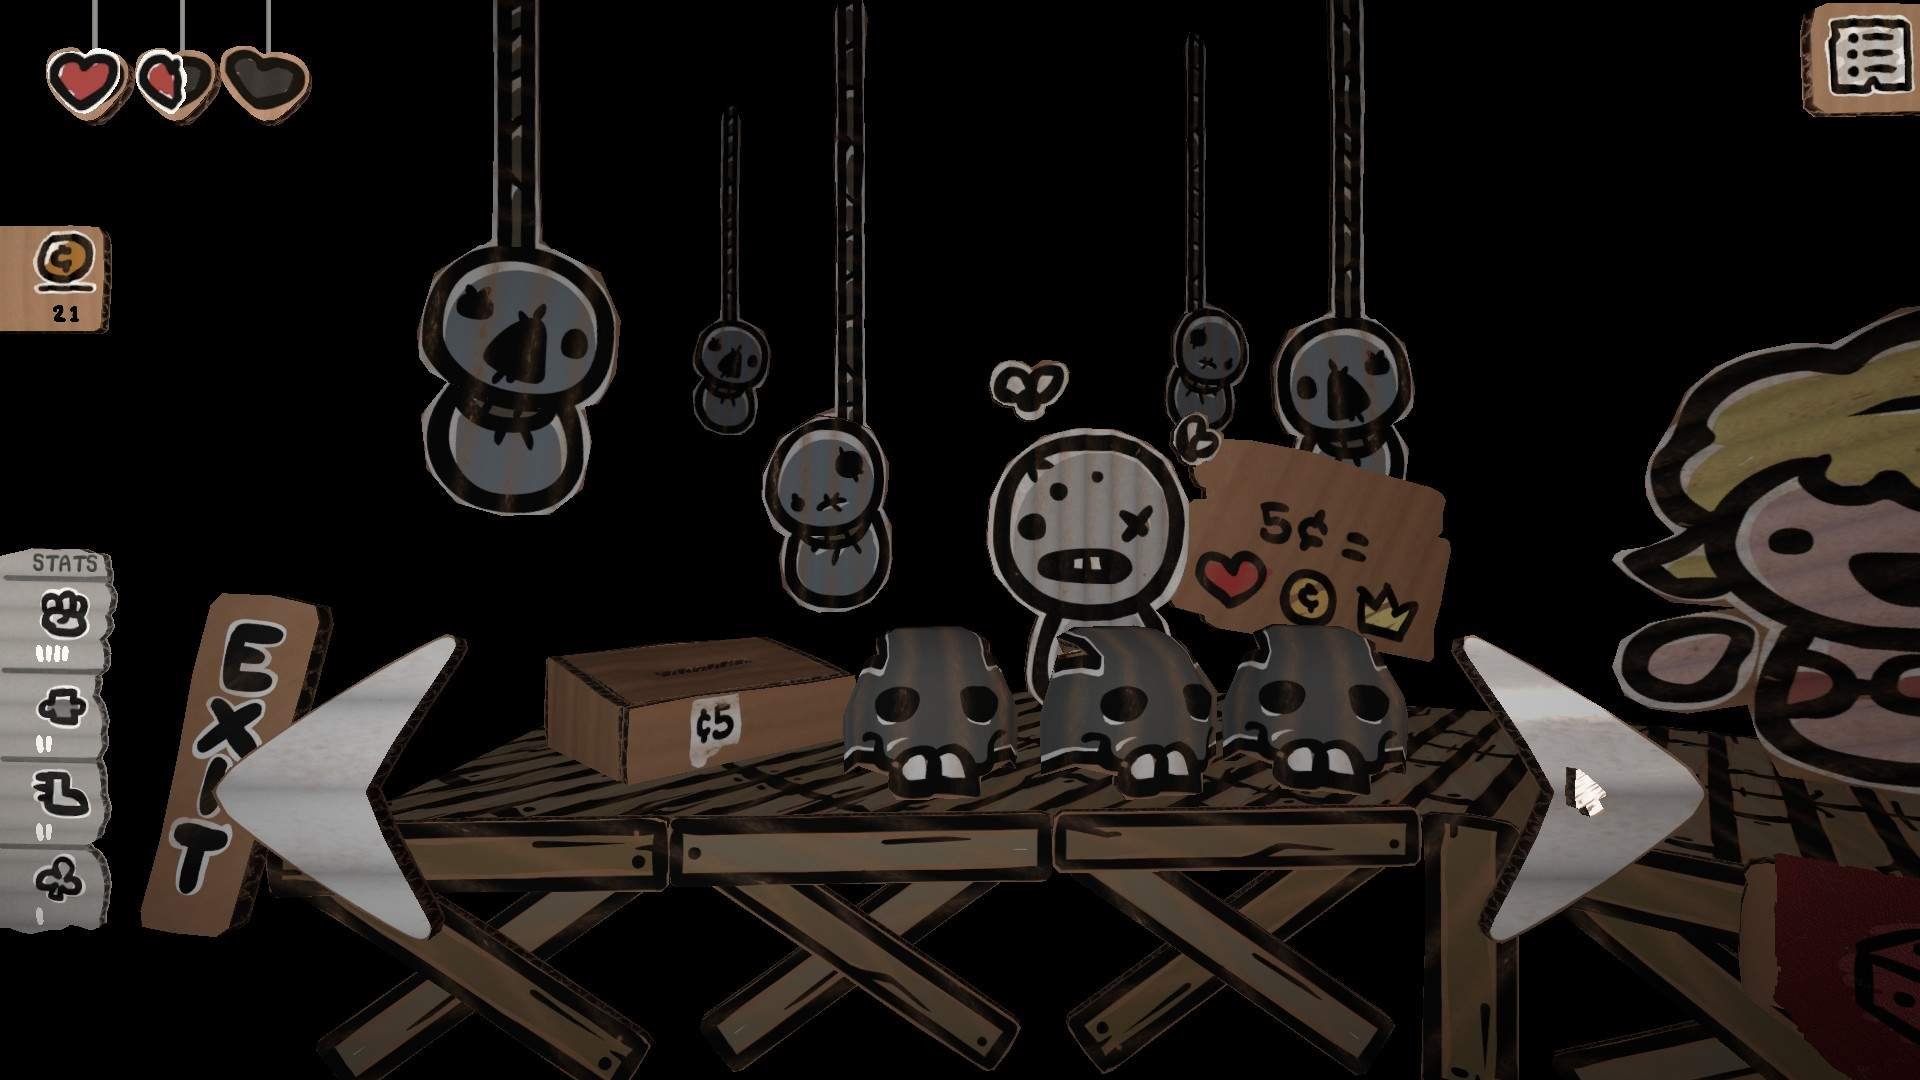
For 5 cents you have the chance to get 1 Heart (if full you get 1 Soul Heart).
- Money (unsure how much, as I usually get the Heart).
- Trinket (after you pay him, he puts a Trinket in one of the skulls before he shuffles it).
In the middle, you have the Stat Wheel (the only way to “Level Up”).
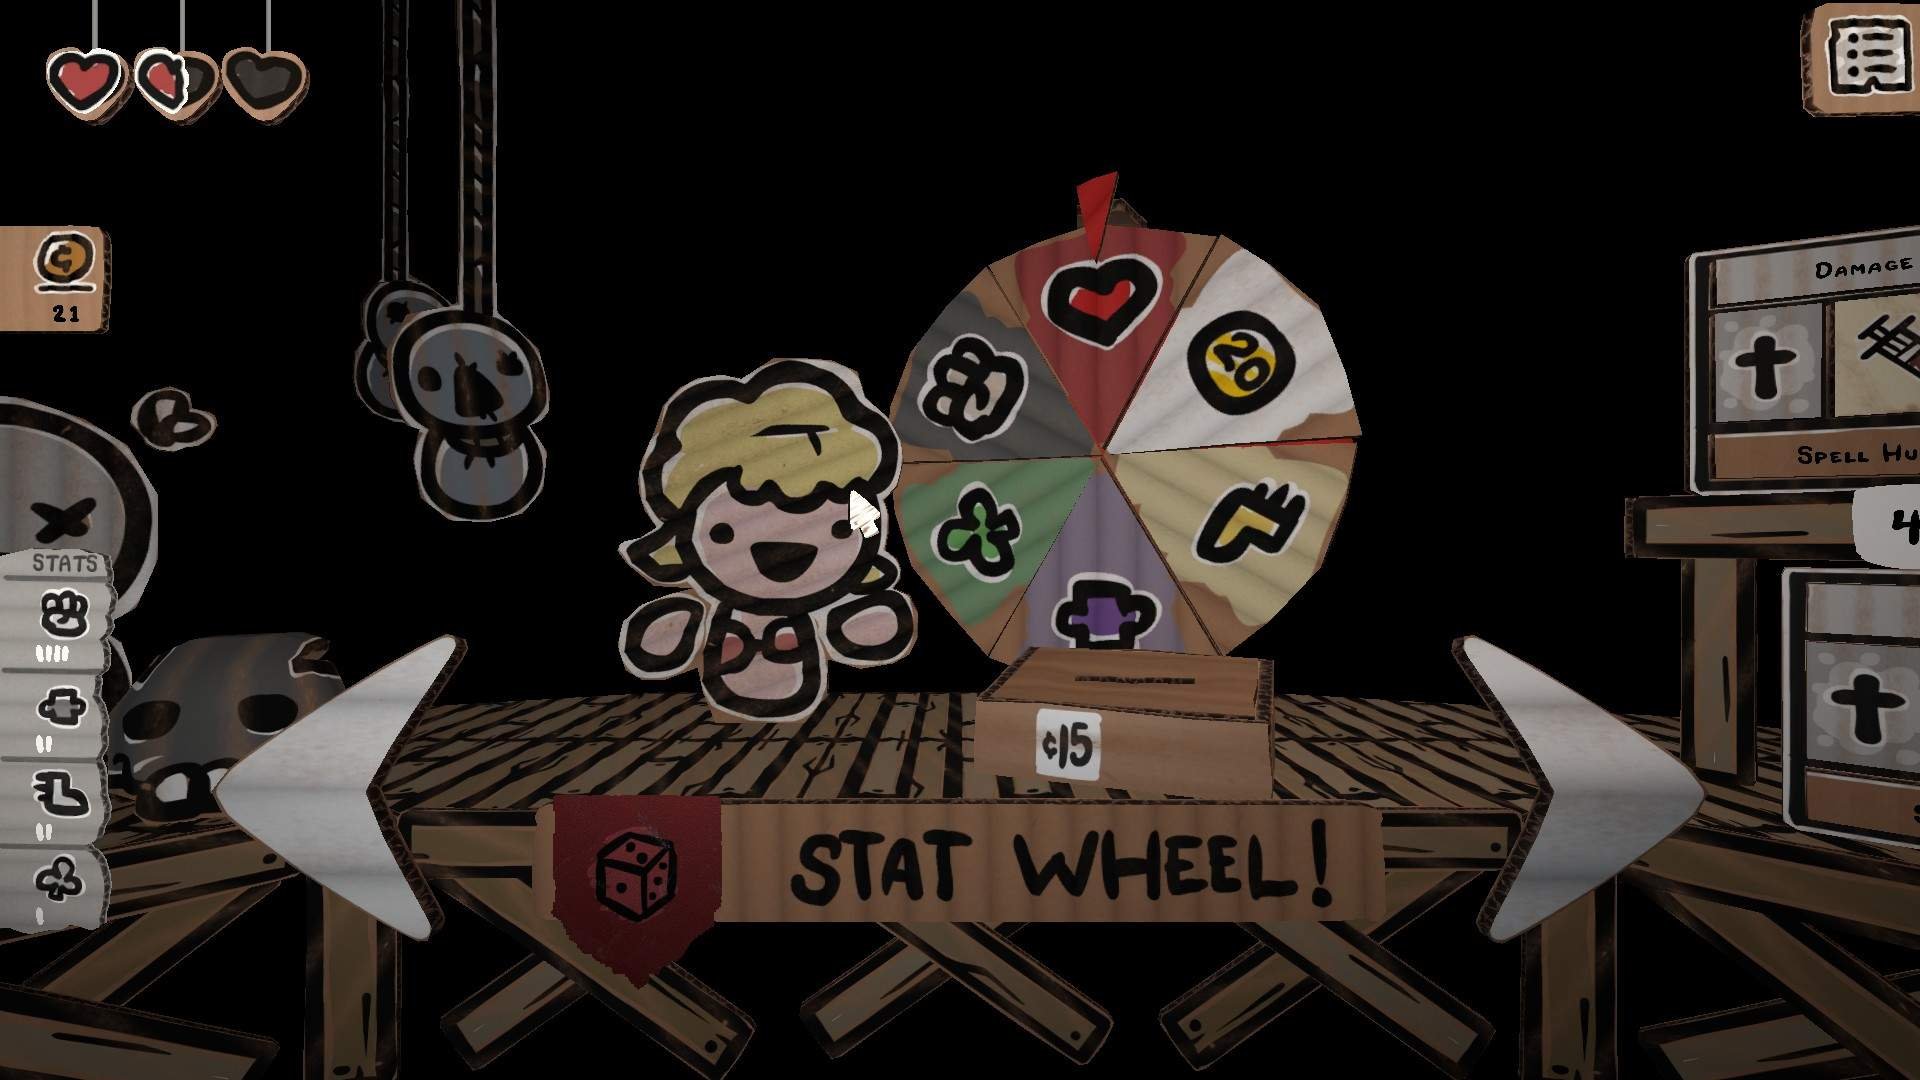
There are 6 different option what you can get. It is possible that the Spinning Wheel may have 1 Option more than once:
- Heart: Fully heals you and gives you an additional Full Red Heart.
- Fist: Your Attack Spells deal 1 Extra Damage.
- Clover: You are more likely do crit.
- Puzzle Piece: Your board combos deal 1 Extra Damage.
- Boot: You get one extra Move on the Board.
- 20 Cents: You get the money and can Spin again.
On the right Side, you have Judas, who can pimp your spells:

He has 3 different Needles which cost between 2-5 cents, and Red Hears which cost 1 cent each.
Every Needle is used up when modifying. He has the following Needles:
- Damage Needle: Cost 4, (your chosen spell deals 1 Extra Damage).
- Shuffle Needle: Cost 2, (rerolls what Elements your Spell uses, e.g. if a spell costs 4 Bones it may cost 4 Pee afterwards. The cumulative cost stays the same).
- Mana Needle: Cost 5, (your Spell costs -1 Mana. Mimumum cost seems to be 2 Mana).
- Randomize Spell: Cost 5, (you select a Spell and get a brand new one instead. Also works on rechargeable items (not sure if you can get an Item in the end).
- Charge Needle: Cost 7 (your Items need one less room to charge, can cost 0, and will then be usabel once a turn).
Enemies
Since I don’t know the official names of it, I’m going to use my unofficial names by seeing if a similar enemy has already appeared and been named in The Binding of Isaac. (feel free to tell me if you know official names, or have better ideas ;),
You fight enemies on the 3×3 Grid on over the board.
Unless stated otherwise the Enemy is a normal ground type melee enemy. That means it will use its actions to move forward until it arrives in the front row, then charges up its attack and the turn after attacks for half a heart of damage. Alternatively an enemy can be ranged, in which case its behaviour is charge up–>attack–>charge up…
If a ground and flying enemy occupy the same tile, attacks will always hit the flying enemy.
Enemies have their own Status Effects, visualized by the game:
- An exclamation mark = that enemy is charging up and will attack on its next activation.
- Veins on an enemy = that enemy has an extra action.
- A blue puzzle piece = that enemy can only be damaged by puzzle board damage.
- A grey sword symbol = enemy can only be damaged by spell damage.
- A violet skull = enemy curses you after it gets killed.
- Green Bomb = enemy explodes after death.
- A stamp = enemy mana drains you after it gets killed.
- Red Crown = gets +1 health each turn (max. 9 health).
- Yellow Crown = enemy has an extra action.
- Pink Crown = enemy drops a number of coins after it gets killed.
- Black Crown = unknown.
- Grey Razor / Lightbulb = enemy deals one full heart of damage/or has double HP (maybe a random effect).
Chapter 1: Sewers of Dross
1. Suck; 3 HP; Ranged
- After one attack uses Mana Drain (all Mana drops to Zero).
2. Tallboy 4 HP; Ranged; No Charge Up

- Burps out a green Smog Cloud (if something flies through, the cloud attacks back, otherwise disappears after a round).
- Spawn a Small Poop every other round.
3. Dip; 1 HP

4. Tatokid: 2 HP

5. Leaper: 2 HP; Ranged

6. Fly; 1 HP; Flying
7. Pooter: 2 HP; Ranged, Flying

8. Squat: 3 HP; Ranged

9. Boomfly: 2 HP; Flying

- Explodes on death. If in the Front Row can damage for 1/2 heart damage without Poop Shield.
Chapter 2: Forlorn Hollow
1. Greeding: 3 HP; Enraged

2. Mask: 2 HP; Immune to Spells

3. Dig-Dig: 1 HP; Mob monster, appears in a group of 2-4 (rarely alone).

- After hitting one of them, they hide underground and are untargetable.
- When underground uses an action to become red, before it ascends the next turn.
- All members of the Colony have to be underground at the same time to kill it.
4. Longits: 4 HP; Flying

- After getting hit by anything he shrivels up and becomes untargetable.
5. Larry: 5 HP

- After getting damaged he leaves behind a green Smog Cloud (disappears after 2 rounds).
6. Blobby: 3 HP; Ranged

- On the first hit, it takes no damage and loses its upper half.
7. Burfer: 3 HP; Ranged

- When possible moves behind a meat shield.
- Favors safety even after charging its attack.
- Can heal the meat shield in front of it, by giving him 1 of his own HP.
8. Imposter: 3 HP

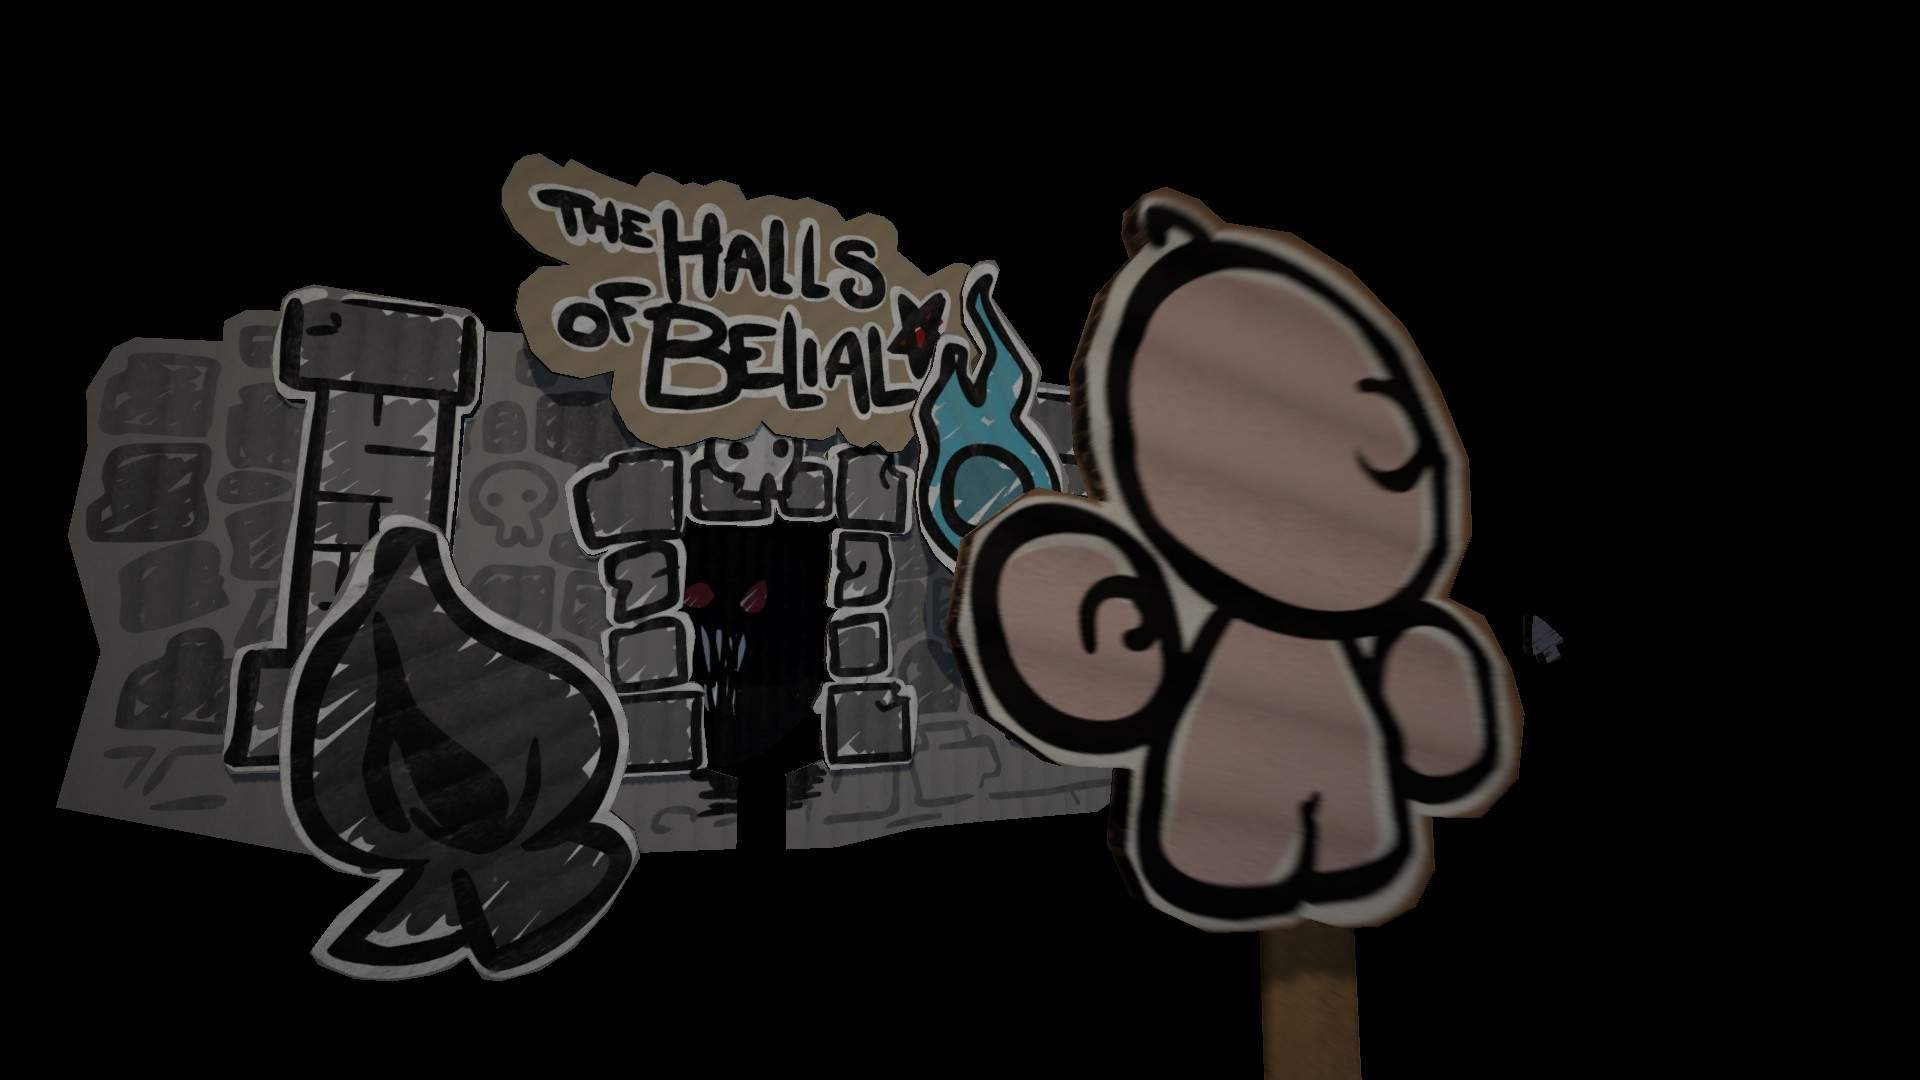
Chapter 3: The Halls of Belial
1. Wisp: 3 HP; Flying; Immune to Spells

2. Floater: 5 HP; Flying

- Curses you.
- Can spawn a shopkeep (charged up).
3. Red Floater: 5 HP; Flying

- On its turn buffs an enemy for a turn, giving it 1 extra move action (if he is alone).
- After he charges up he attacks twice.
4. Bib: 2 HP; Enraged

5. Red Blobby: 4 HP; Ranged

- On the first hit, it takes no damage and loses its upper half.
- Summons a red bubble, which only disappears after it absorbs one projecticle (bone/booger/tooth).
6. Cultist: 5 HP

7. Spookie: 2 HP; Flying, Ranged

- Steals 1 of your Moves for 1 turn (you are always left with at least 1 Move).
- Curses you when hit.
- Only takes one damage per hit.
8. Skully B.: 3 HP; Immune to Spells

- Has 2 Actions.
9. Skully P.: 4 HP; Immune to Puzzle Damage

- Has 2 Actions.
10. Meat Golum: 7 HP; Enranged

- Has 2 Actions.
- Heals 1 HP each Action if below 7.
- Steals 1 Move each Hit.
11. Poofer: 3 HP; Flying, Enraged

- Explodes on death, giving surrounding enemies +1 health.
Chapter 4: Basement
1. Nib: 5 HP; Immune to Puzzle Attacks, Enraged

- After getting hit switches to Blue Homunculus.
2. Jib: 5 HP; Immune to Spells, Enraged

- After getting hit switches to Red Homunculus.
3. Mega Poofer: 6 HP; Flying, Enraged

- Explodes on death giving other enemies +4 Health.
4. Keeper: 6 HP; Flying

- Moves forward and charges up, can attack even when not in Front Row.
5. Host: 4 HP; Ranged

- Charges up and attacks, making his skull go up for one turn.
- Is immune to any damage while skull is down.
6. Curser: 3 HP; Flying, Does not attack

- Curses you.
7. Daddy Tato: 8 HP, Enraged

- 2 Actions.
8. Black Blobby: 5 HP; Ranged

- On the first hit takes no damage but loses its upper half.
- Each hit mana drains you.
- Each attack dooms you.
9. Mirror: 4 HP; Flying, Ranged

- Spawns with a Doppelganger.
- When the Doppelganger is hit, both respawn in new locations without taking damage.
10. Screecher: 2 HP; Flying

- Steals 1 Move each turn.
11. Sucker: 2 HP; Flying

- Mana drains you each turn.
12. Stoney: – HP; Ranged

- Only disappears when all other enemies are defeated.
13.. Isaac: 4 HP; Enraged

- When killed, you get -1 Move the next turn.
Bosses
There are in total 10 Bosses.
Chapter 1

Loaf
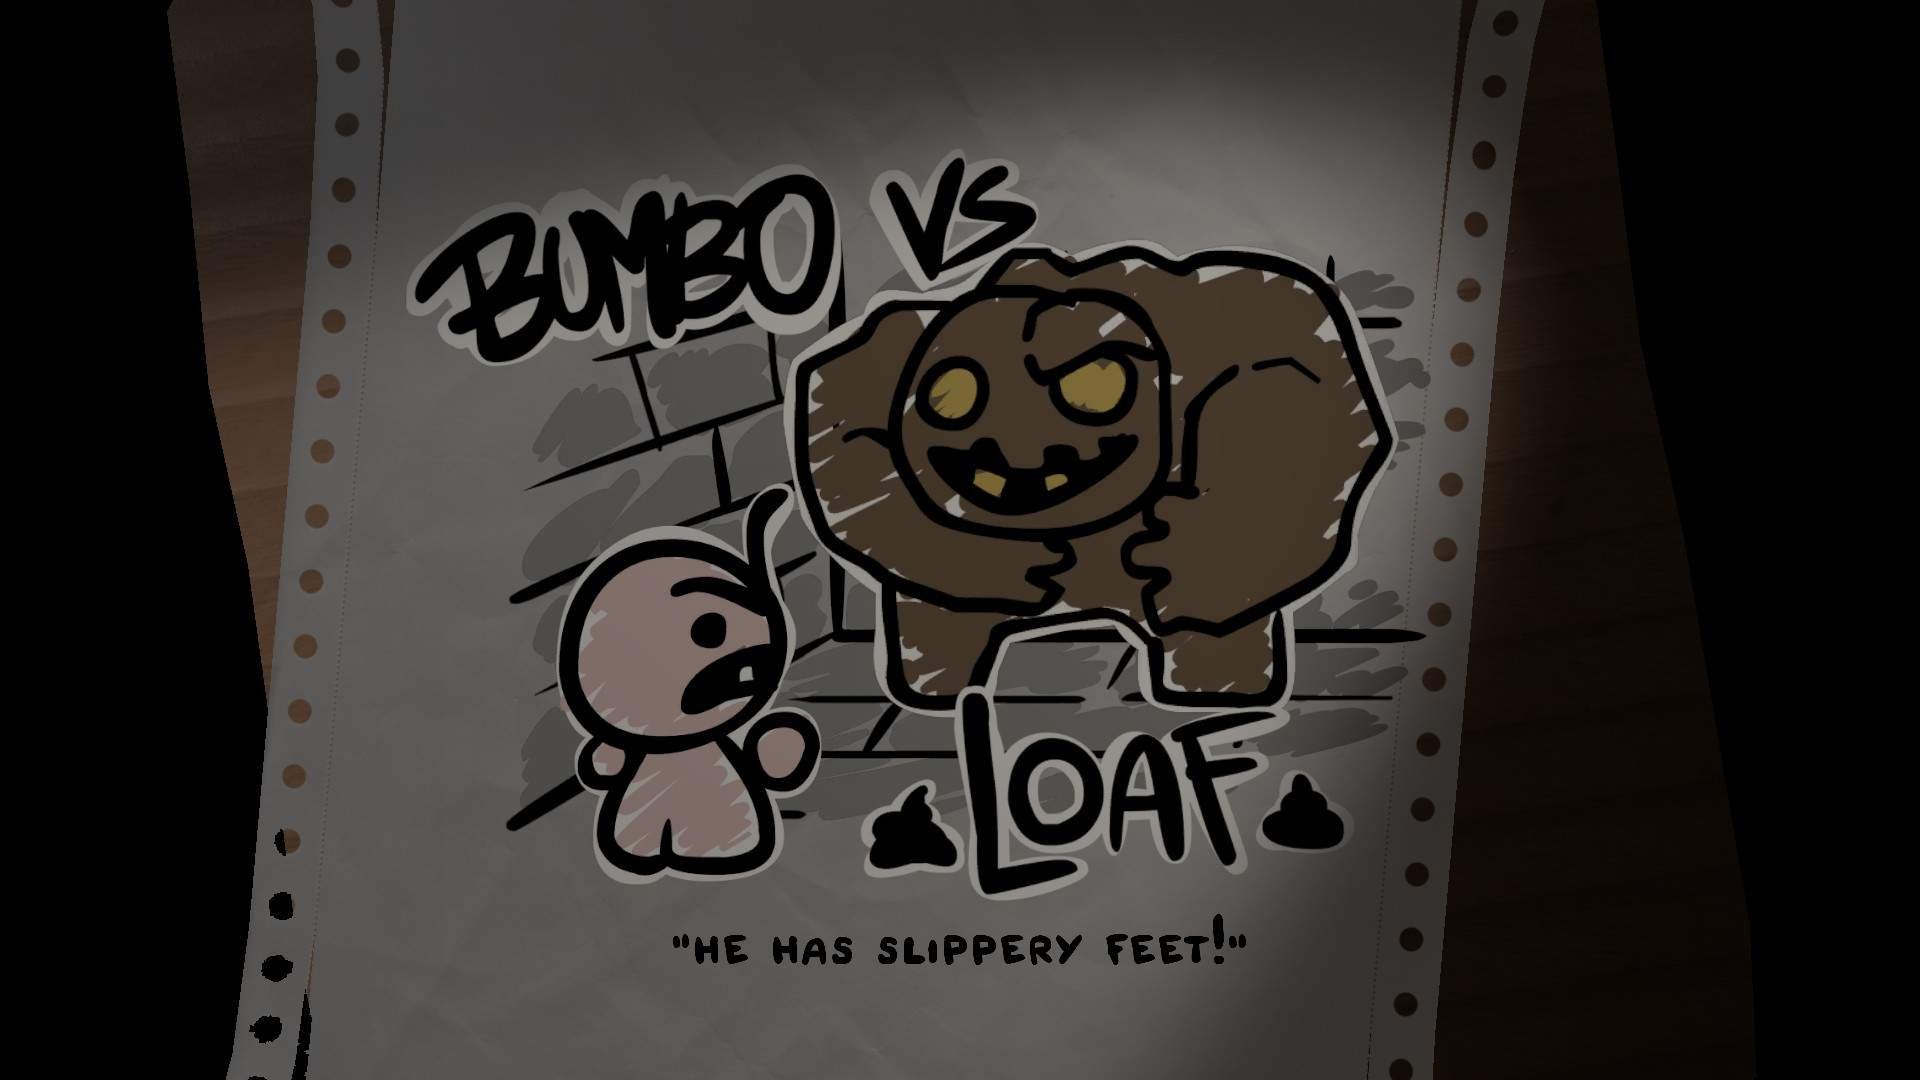
This Boss starts out with 10 HP and has 2 Actions.
- He uses his Action to come closer to you. When he is in the Front Row, he uses one Action to charge up and another to attack.
- Whenever you attack him he gets pushed back a row (if possible), leaving behind a little 1HP Poop enemy in each unoccoupied lane in front of him. Be careful as there seems to be at least one which tries to attack you.
- When he comes towards you, he kills all the Poop Enemies (those who would have attacked still do) and dirties your board.
The Symbol underneath stays the same, so it is possible to use in a combination.
Otherwise you clean the board whenever move the row or lane of a dirty Symbol (if you play as Bum-Bo the Brave his Bum-Bo Shake, can be used to clean up the whole Board, by shuffling everything).
Duke of Flies
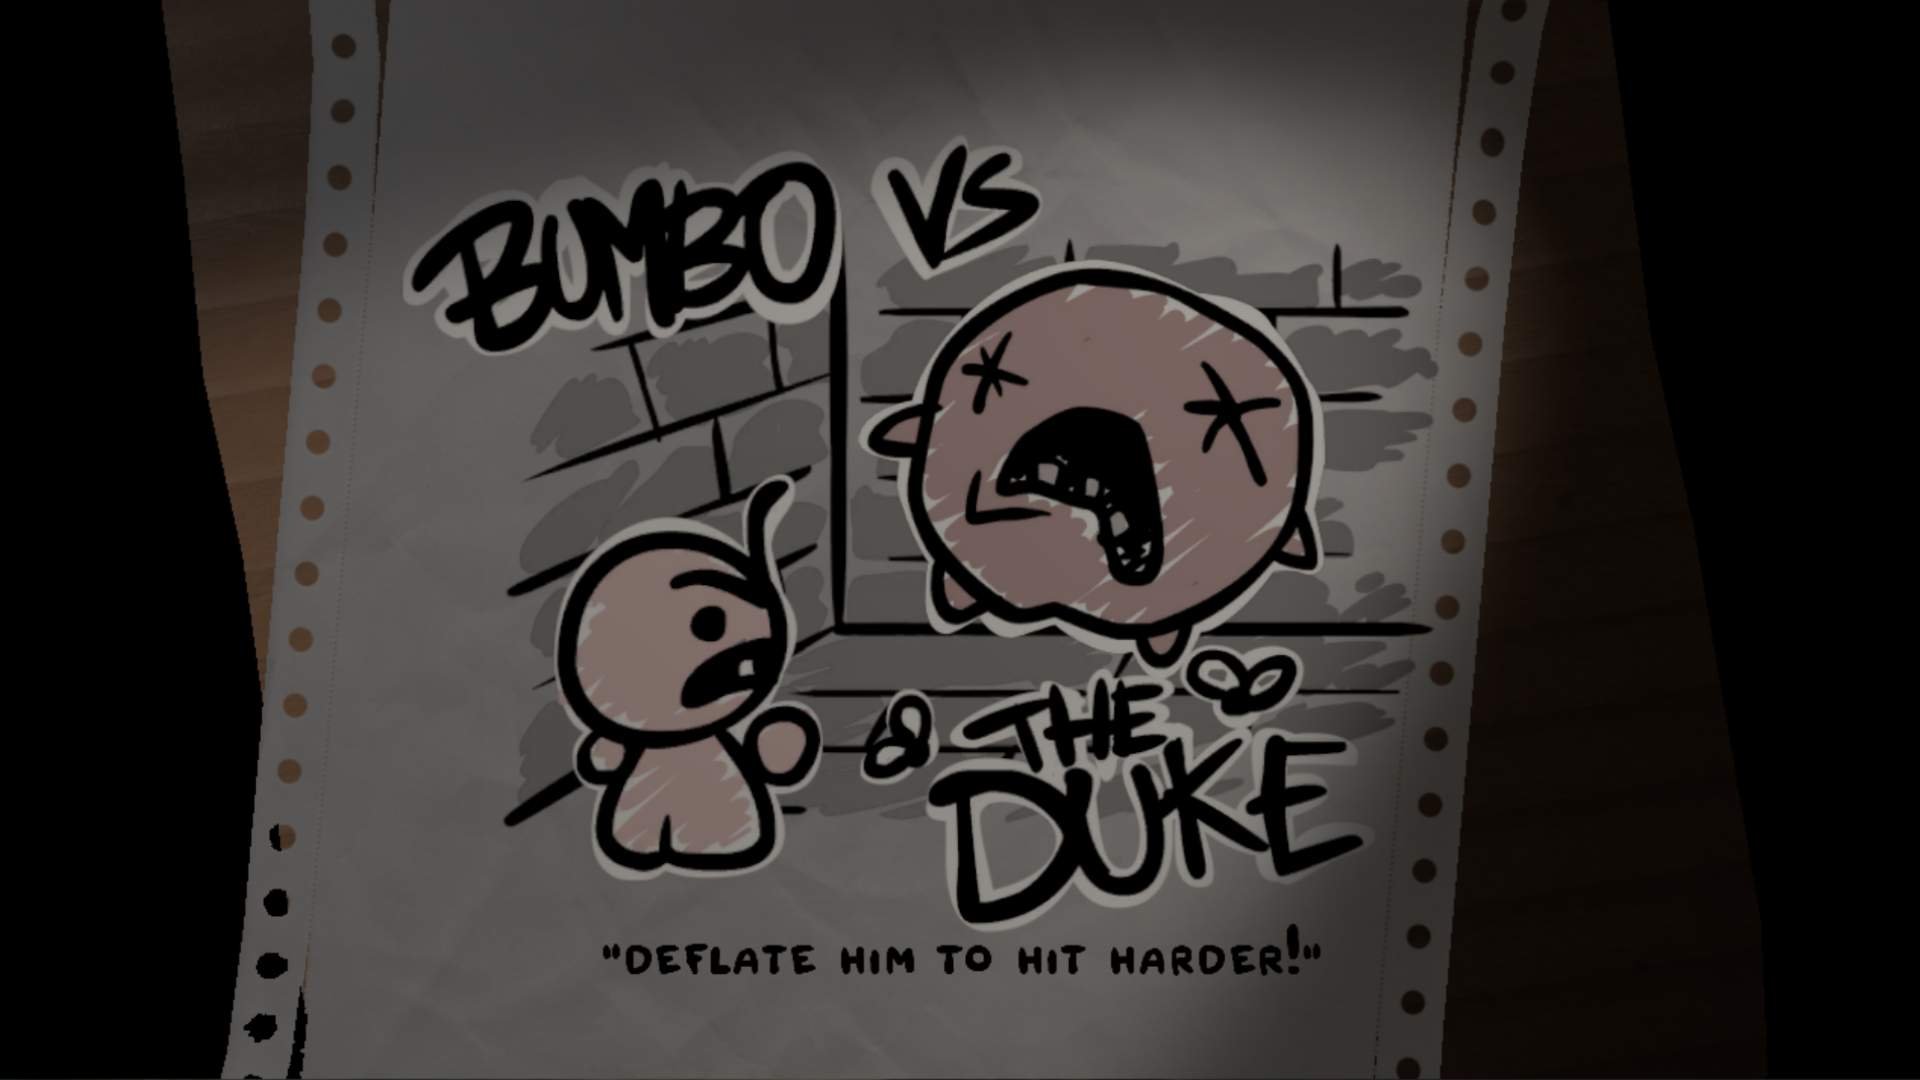
This Boss starts out with 10 HP and has 2 Actions.
- He stays in the Back Row and spawns 2 Attack Flys each turn.
- Otherwise he charges up and attacks.
- He begins the fight inflated (Size 3) and the first attack automatically gets reduced to 1 DMG. Afterwards he deflates to Size 2. If hit again he takes normal damage and deflates to Size 1.
- He seems to inflate at the end of every (other?) turn.
Peepers

This Boss starts out with 15 HP and has 3 Actions.
- The Boss also has 2 Peepers Eyes spawned on the Middle and Front Row.
- The real danger in this fight are the Eyes. The Boss stay in the Back Row cursing you each turn, whereas the Eyes go to the middle lane, shielding the Boss –> charge up –> attack you.
- The Eyes are invulnerable to attacks and spells, but once hit get moved to the site, opening up the way to damage this Boss.
Chapter 2

Dusk
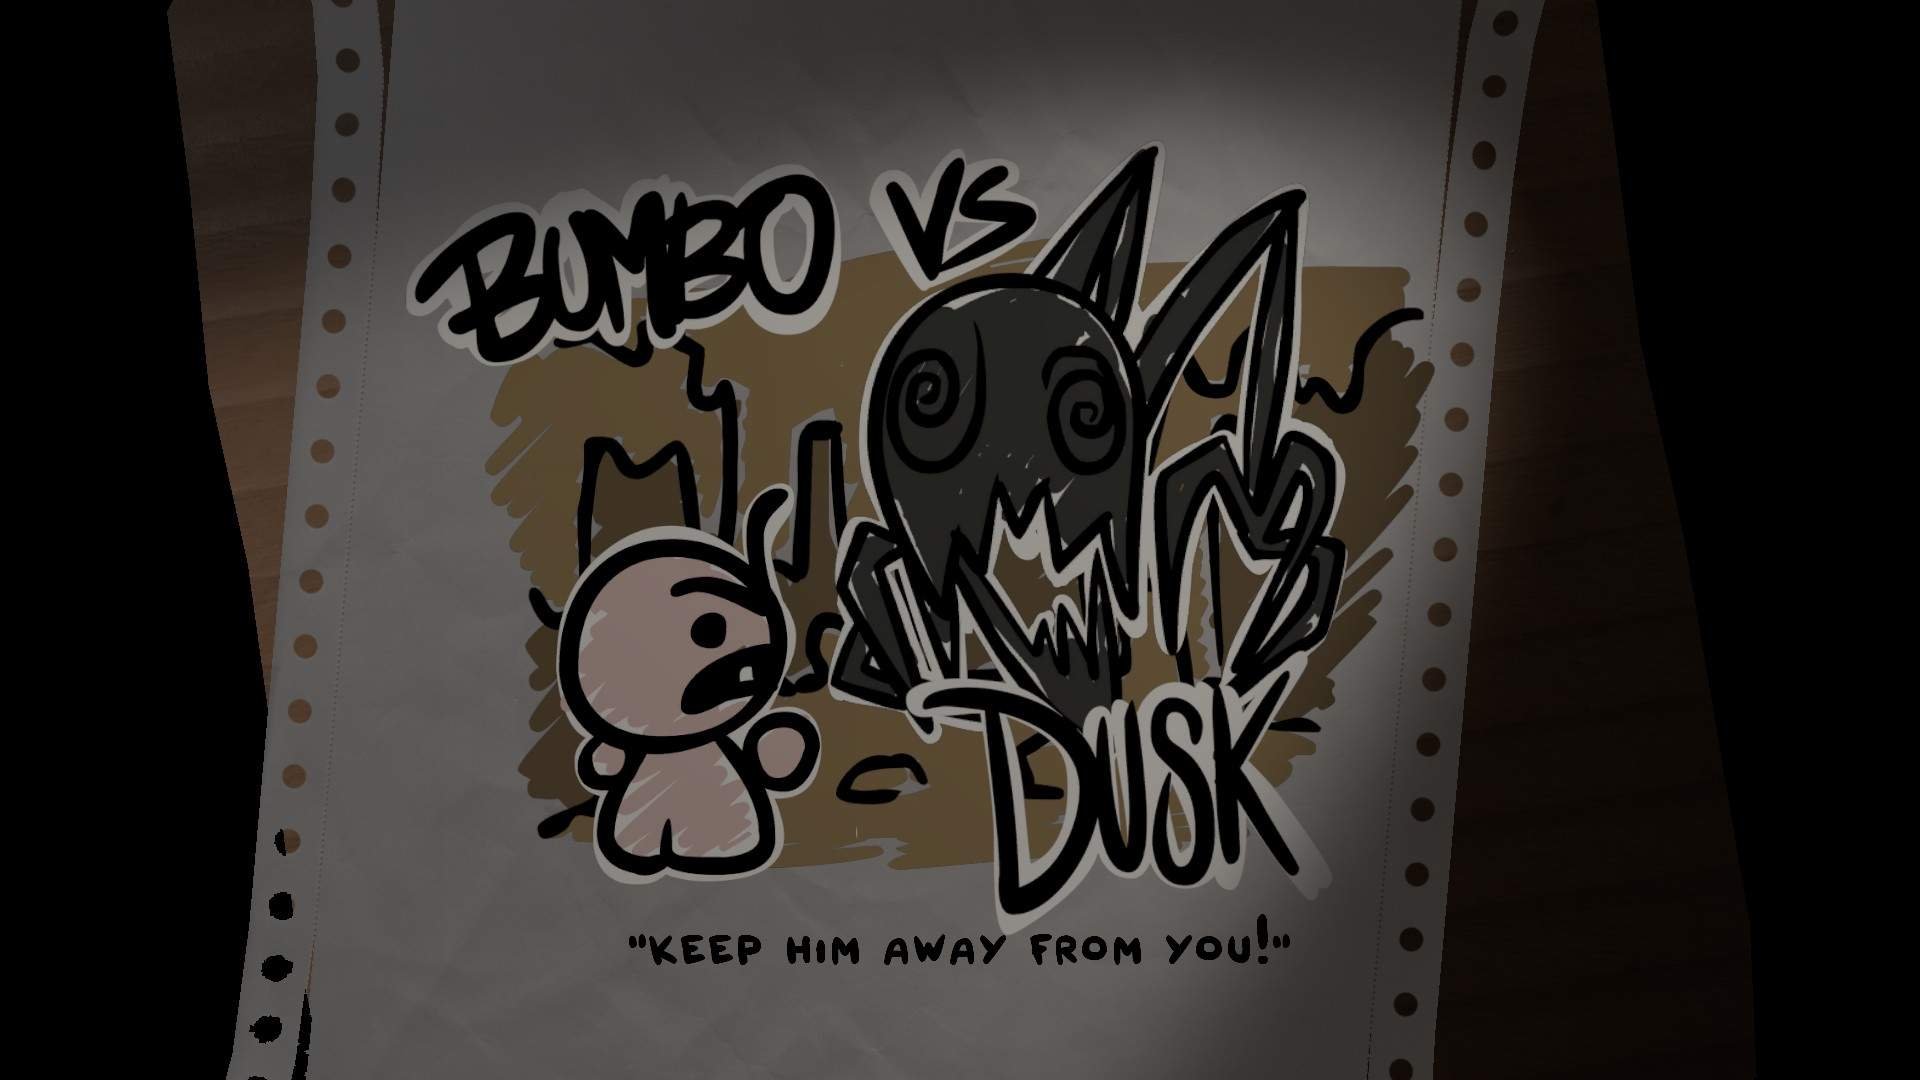
This Boss starts out with 15 HP and has 4 Actions.
- He starts out on the Back Row and comes towards you.
- Whenever you attack him he gets pushed back a row. If your damage is too high, you scare him and get doomed (unsure if it’s 4 or 5 DMG).
- If you are doomed one of your spells is unusable for this room.
Shy Gal
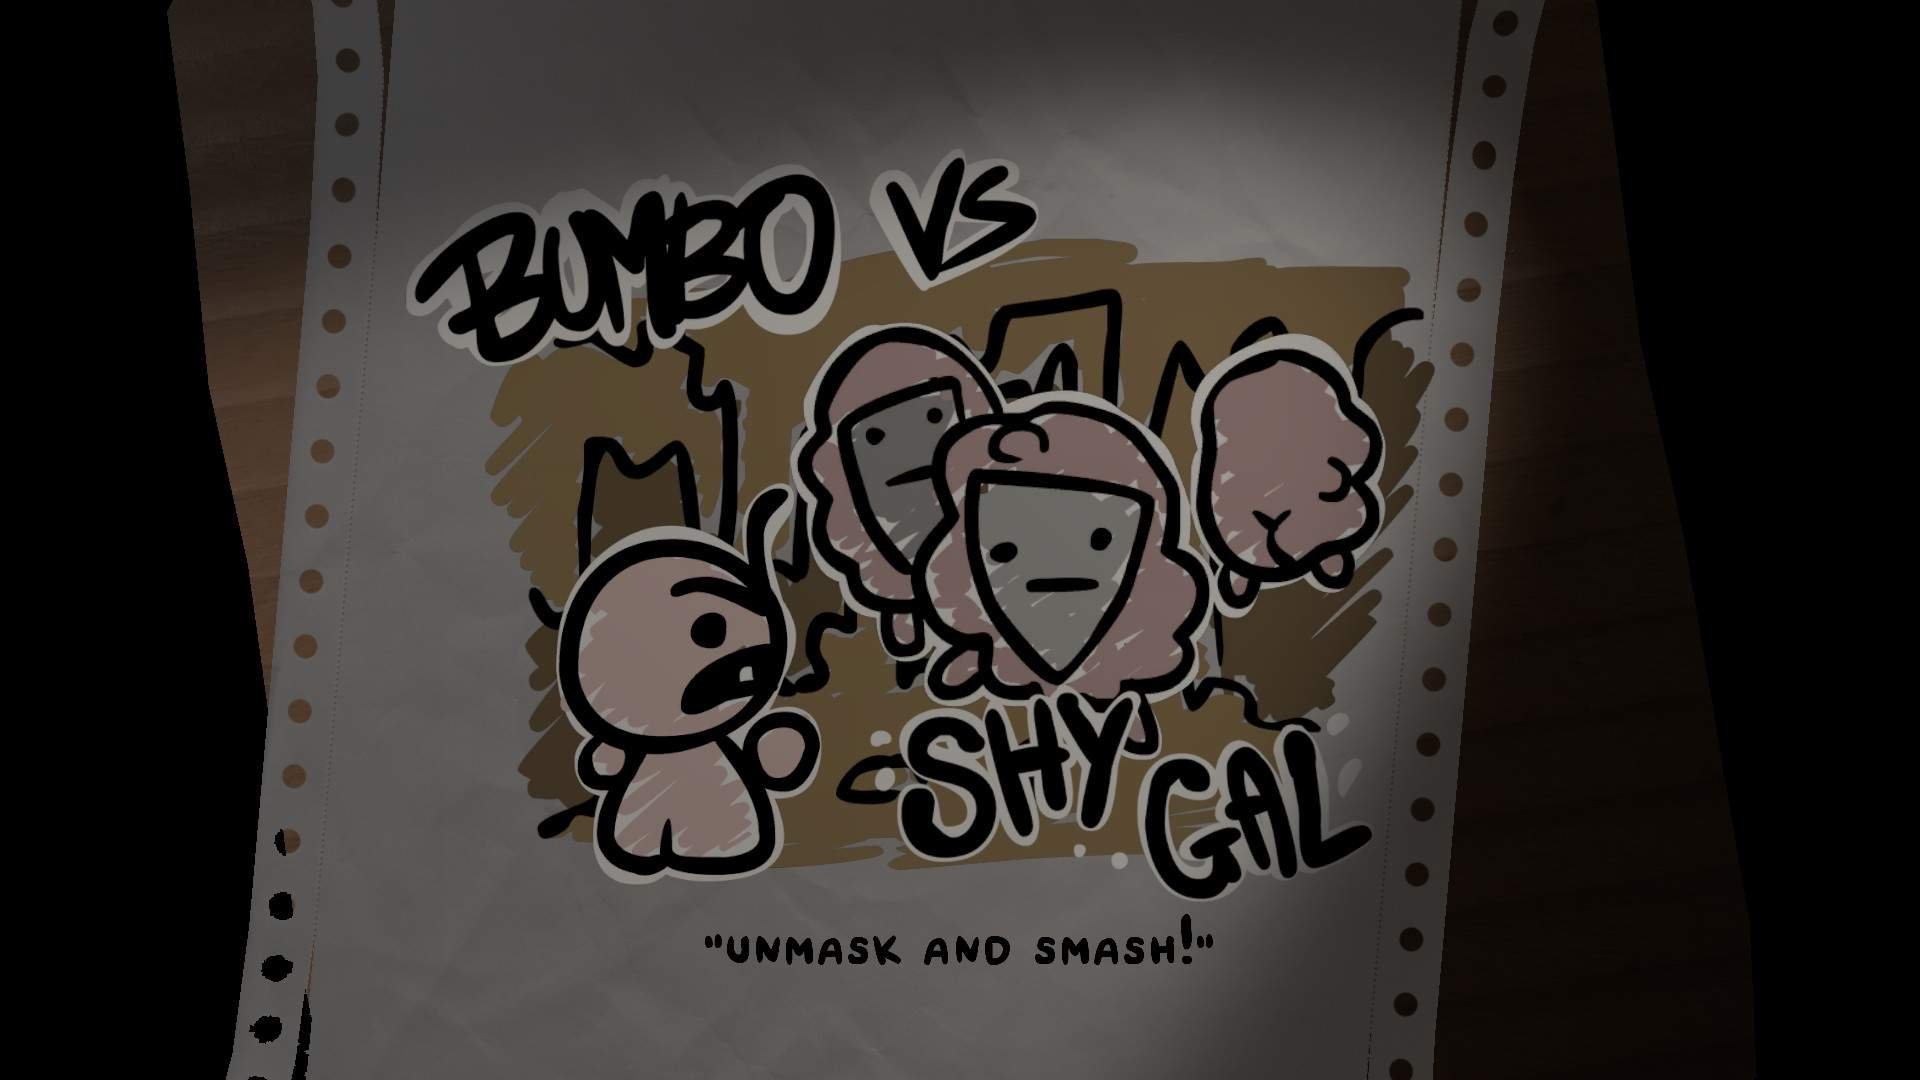
This Boss starts out with 12 HP and has 6 Actions.
- There are 3 enemies on the board, each one with an Iron Mask.
- If you hit a wrong one, you get cursed, but the double disappears.
- If you hit the right one, Boss resists the attack, but loses its Mask.
- After you hit the Boss, it respawns on the Back Row with its doubles.
Gibs
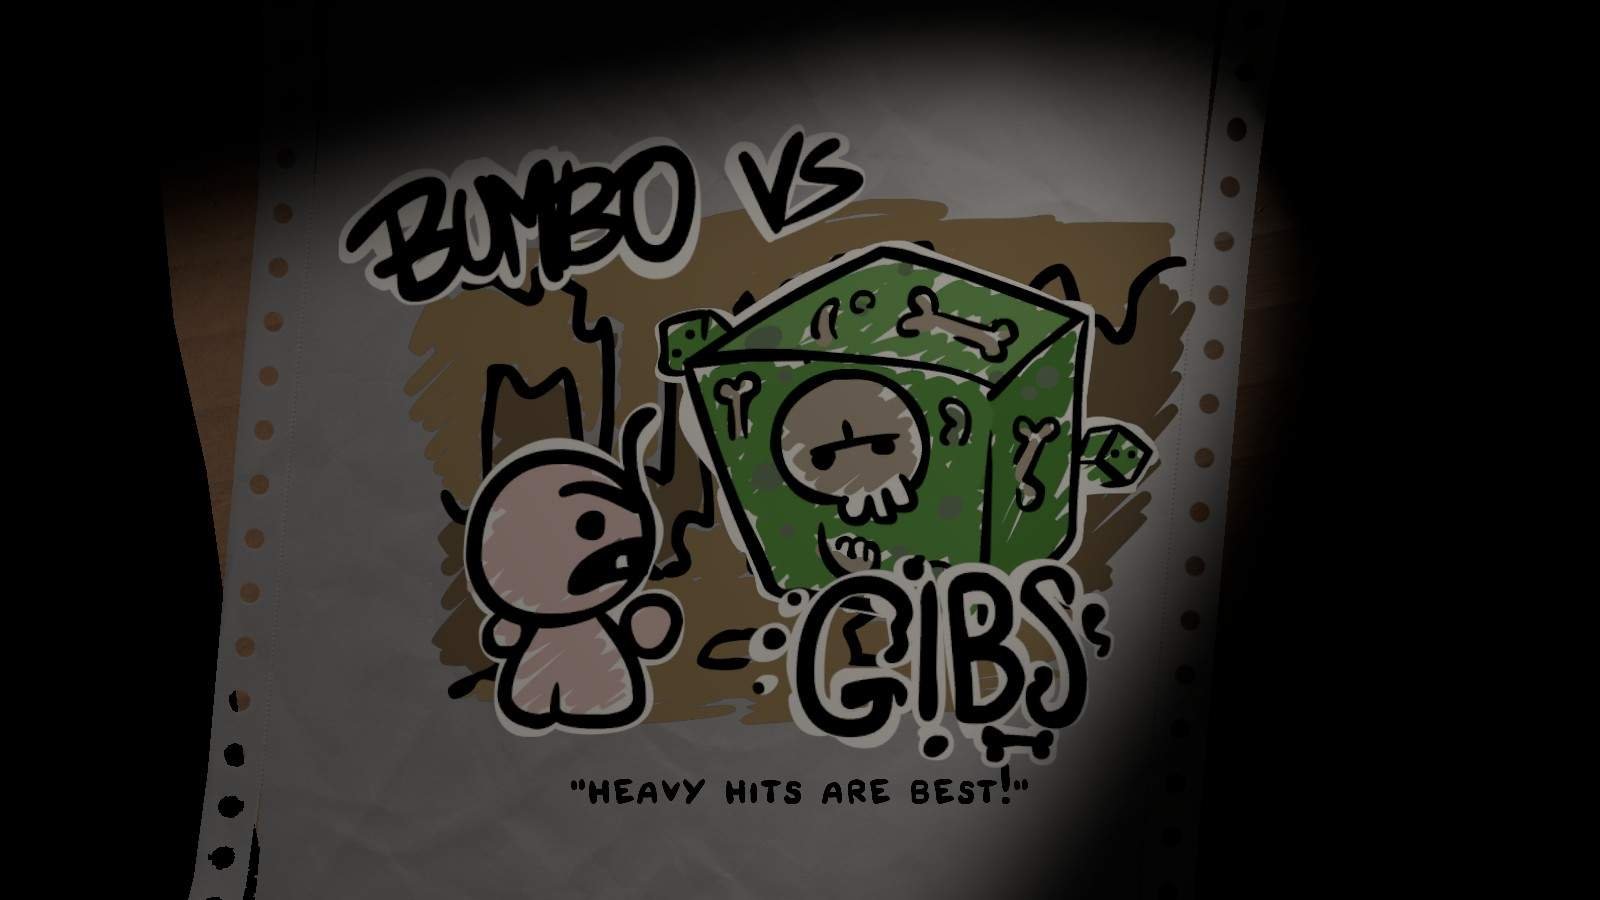
This Boss starts out with 12 HP and has 1 Actions.
- On its own it does nothing at first.
- After it gets hit, it spawns 2 more oozes (for a maximum of 3), with 2 HP each.
- On its turn it heals 1 HP, if below max health.
Chapter 3
Gizarda
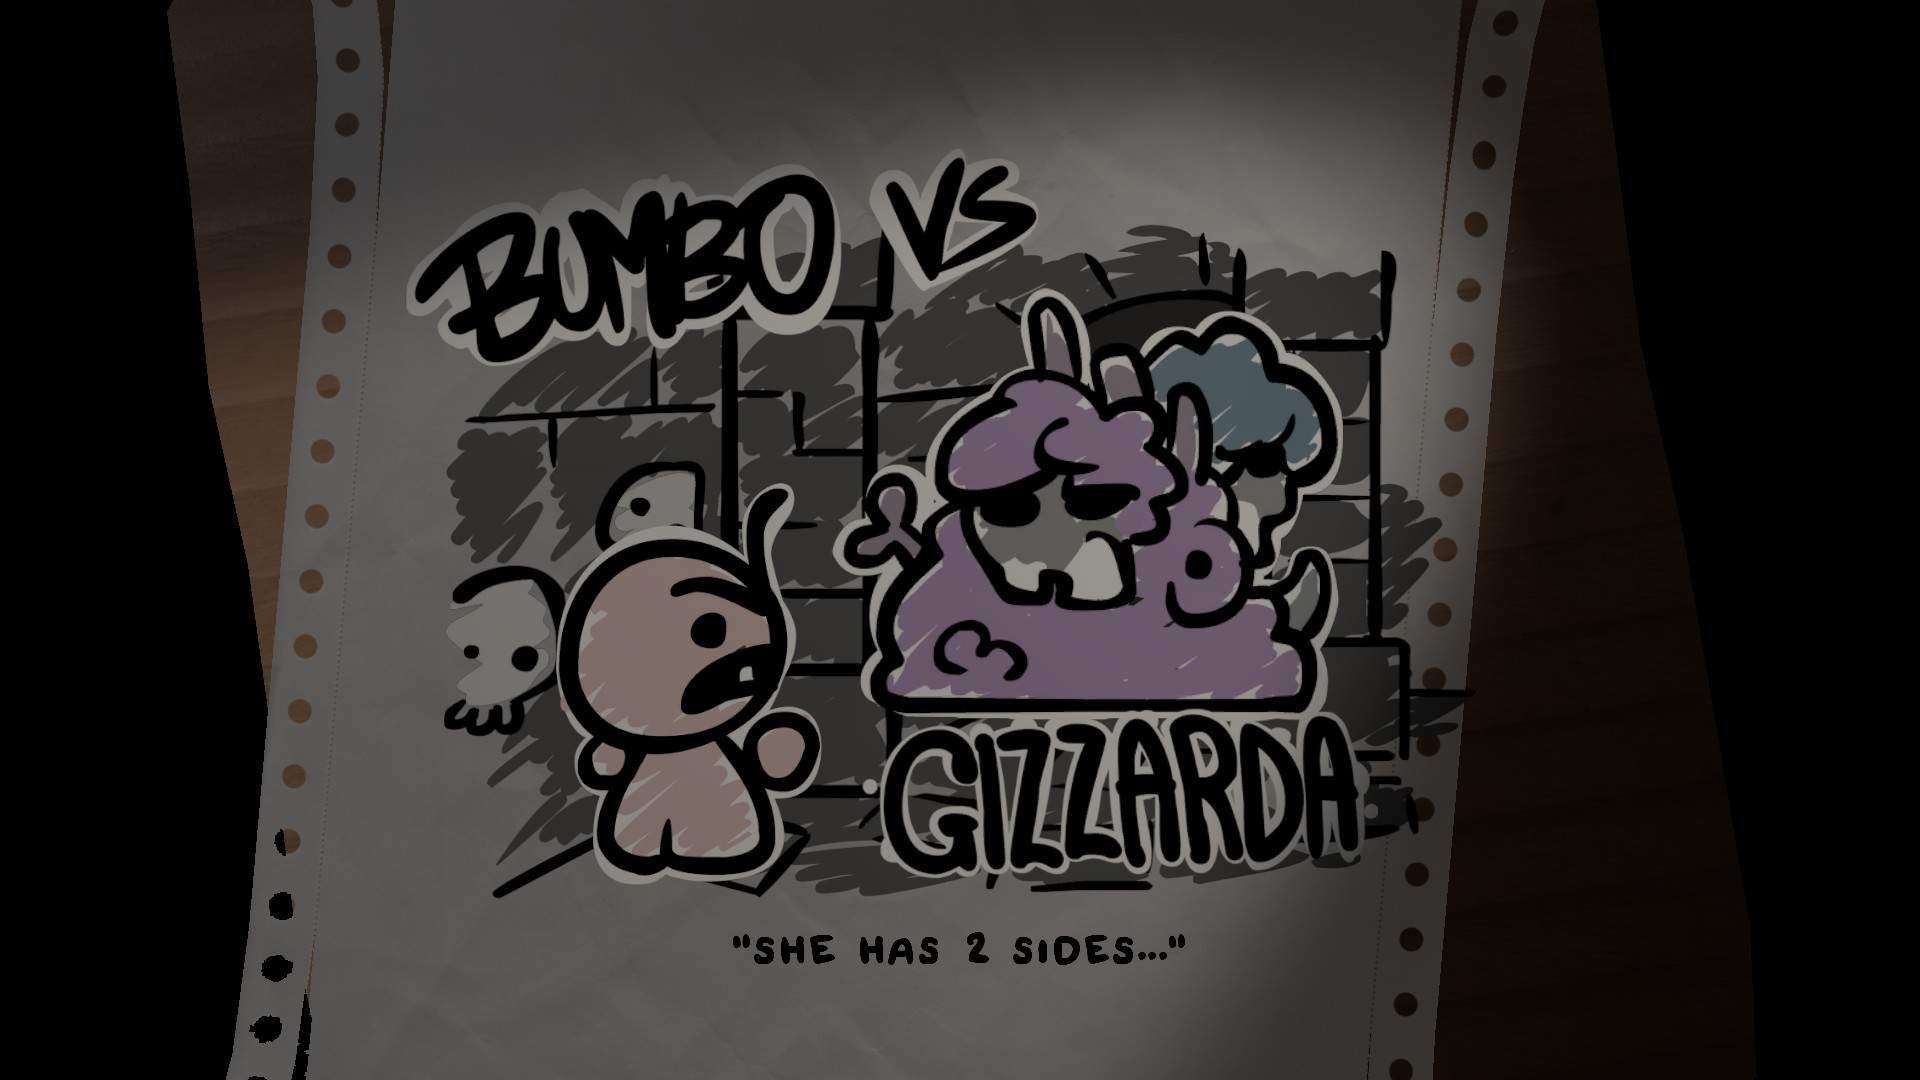
This Boss starts out with 20 HP and has 1 Action.
- The Boss has two sides, one blue the other red.
- His Blue Side, can only be damaged by using a Board Attack 4+ Bones / Teeth.
- His Red, can only be damaged by using an Attack Spell.
- Each time you attack him, he switches sides, and gets a reactive Action.
- When he switches from Blue–>Red, he spawns an attack fly.
- When he switches from Red–>Blue. he automatically attacks.
Sangre
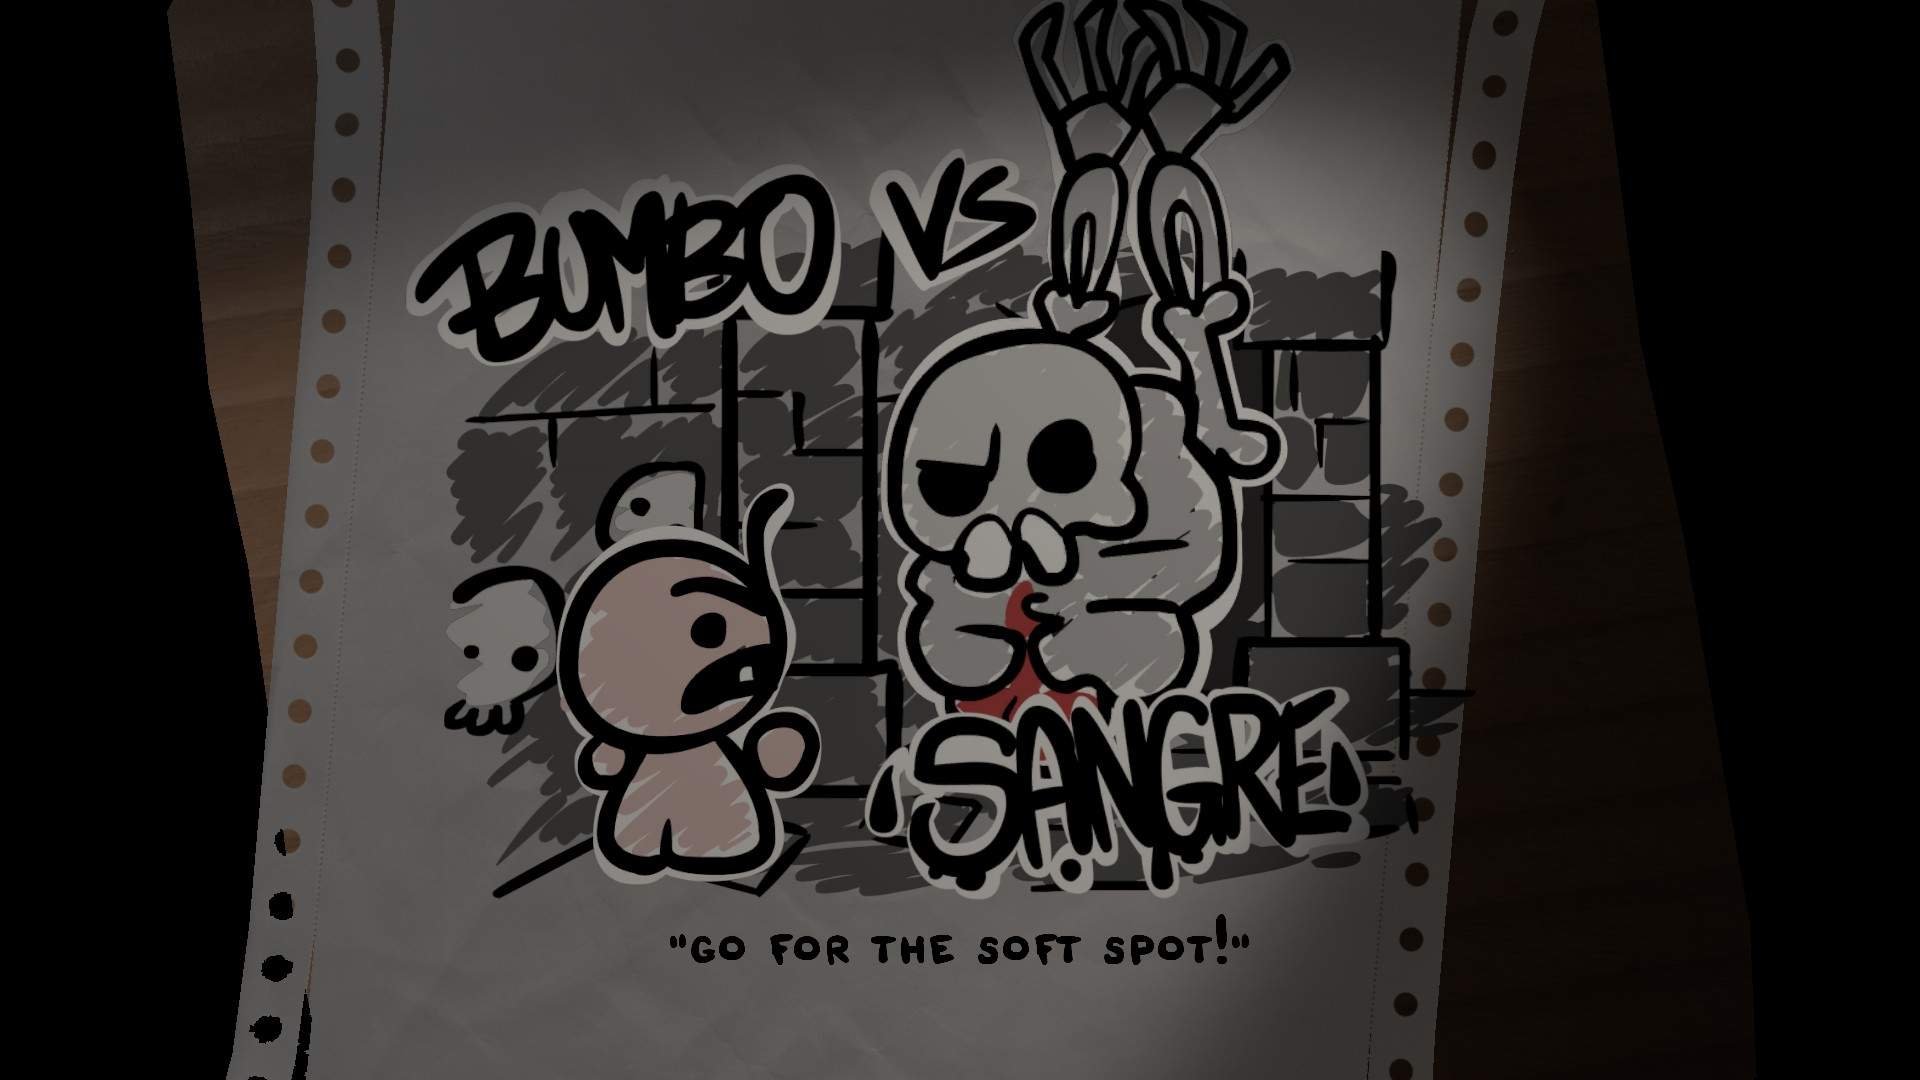
This Boss starts out with 18 HP and has 3 Actions.
- After a successful hit, the Boss becomes immune for the rest of the round.
- If hit, it will curse you at the start of its turn (does not use up an Action).
- When he is right before you, he can attack you 2 times on his turn.
Pyre
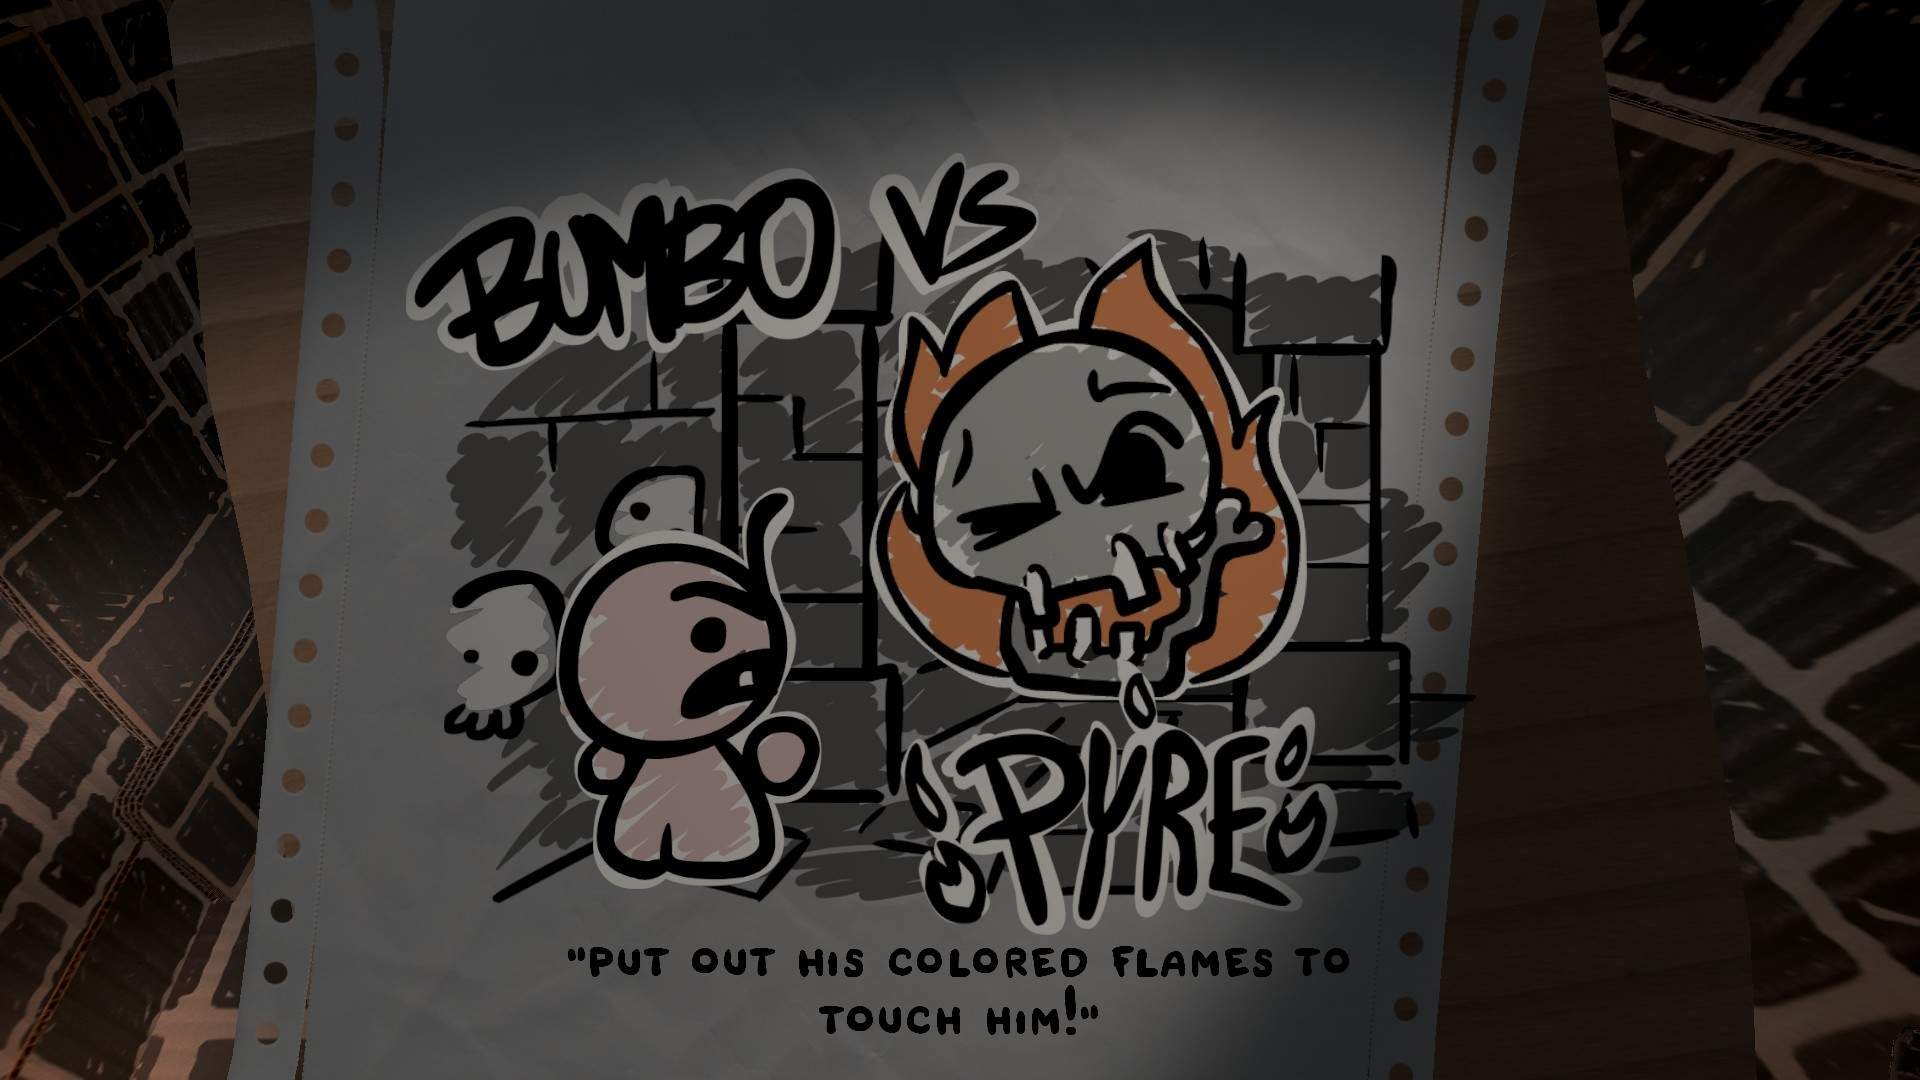
This Boss starts out with 18 HP and has 3 Actions.
- When the Boss is surrounded by Flames he is immune to any kind of damage.
- To damage him, you need to make a combination corresponding to the colour of his flames (so Bones if he has white flames, Pee if he has yellow flames etc.).
- If has flames have been extinguinshed in the last turn he starts his turn with new flames.
Chapter 4
Bygone
This Boss start out with 18 HP and has 2 Actions.
- Spawns 2 Attack Flys and attack without a Charge Up.
- When hit, spawns 1 Attack Fly and dirties you Board.
- After it is killed spawn a Ghost, which has 6 HP and 2 Actions.
- Every time Ghost is hit, it receives only 1 Damage (unless you crit for 2) and curses you.
- Ghost can attack up to 2 times, alternatively it curses you, and can rob you of one movement for a turn.


Be the first to comment