
This is a short, basic, and very to the point guide on how to play the Vietnamese classes. It also features information on most weapons in the game: their strengths, weakness, and uses; in a class per class basis. The bigger part of this guide is the explanation of the firearms, if you check each class, I explain their playstyle and usefulness before going into their weapons.
Other Rising Storm 2: Vietnam Guides:
- Gameplay Tips.
- Huey Guide.
- Maps.
- How to Skip Intro Movies.
- Secret Achievement (Nothin’ But Net).
Contents
Rifleman Class
The glorious rifleman class is one of the most important classes of the People’s Army of Vietnam! They are the brunt of our armed forces and head into the front to give their lives for the struggle. Your task is to get into the capture points’ zones, eliminate the enemy, and dig in. For this, you have an entire arsenal at your disposal.
Main Weapons
AK-47 and Its Variants
A short to mid range weapon. It serves all purposes but sniping from afar, and is perfect for quickly entering into defended positions, clearing out the enemy, then holding out in safe spots. One or two shots from the AK-47 will send any GI to the grave, but always aim down your sights, as this weapon is highly inaccurate and can quickly betray you in the heat of the moment.
Remember that it is loud and its sound is very distinct, a GI who has played enough rounds can distinguish the noise it makes and pinpoint your position thanks to that. Do not fire wildly, and wait for GI to be in your sights!
SKS-45 Carbine
The SKS is a mid to long range weapon. A soldier that is able enough can use this weapon to snipe from hundreds of meter away. When your next venture takes you to an open field, it is always useful to take a SKS and kill off enemies who are covering the field itself. Your comrades armed for close quarters combat will thus be able to move safely through the open area and into the Capture Zones.
The SKS-45 can also win medium and short range firefights if your reactions are fast and your aim good enough. A single shot to the chest from this weapon is enough to kill any GI.
Sidearm
TT-33 Handgun
A short to mid range weapon. This handgun is your lifeline if you run out of ammo and need to kill GIs fast. You’ll usually be gone for good before you can pull out the handgun itself, but if you do manage to pull it out, aim for the chest or the head and let your trigger finger loose.
Equipment
Type 67 Grenade
Your run of the mill grenade. Uncock this bad boy and let it loose on fortified GI positions. It will flush them out and you’ll be able to either kill them or advance into their positions, unless they’re foolish enough to not run away and simply die from the grenade’s blast. Be careful though, if you are killed with uncocked grenade in hand, it will fall besides your body and probably kill anyone who was at your side, so try to throw from behind cover.
The more you hold down the throw button, the farther the throw will go, and the higher up you aim, the bigger the arc it will cover. You MUST train this ability if you want to get a grenade where you want it to be, and experience in the middle of the fray is the best teacher.
Punji Trap
The Punji Trap is a board with nails plastered on it, as soon as a GI steps on its trigger he will die by way of the worst ♥♥♥♥♥slap ever recorded.
The equipment itself is represented in your hands with a shovel, aim down into the ground and you will see a projection of a small mound of earth, if it is white, you can place your trap. It will take FOUR shovel hits for the trap to be placed.
This trap serves great purpose in most capzones, put them down in busy doorways, within trenches, behind sandbag cover that GIs usually use. With time, you will learn the best spots for it. Try to ALWAYS place it during the defensive in Conquest maps, and after clearing a busy capzone like D or C in Supremacy. You will rack up easy kills, and help your team defend objectives, it’s a win-win situation.
Scout Class
The Scout class is the leader of the frontlines. You get up close and personal and can see the white in the eye of the GIs while hosing them down with your MAT-49 SMG or Hunting Shotgun.
You are armed with smoke grenades that you MUST use during attacks, you will live many lives while in the front, so do not fear throwing your smoke grenades if you think it will help your comrades enter the capzone safely. Offensive maneuvers are anything but safe, and you exist to make them ever so slightly safer for the main force of Riflemen rushing to the front.
Main Weapons
MAT-49 SMG
A revved up BB gun. This SMG is all about getting as close as possible to the GIs and spraying an entire magazine into their general direction, hopefully enough of them will hit and the GIs will go down in a pool of blood and bullets. If used right, this SMG can be quite a beast, and clear out entire rooms thanks to its mobility and high rate of fire. Do not use this gun at anything but short range, you need multiple shots to kill a GI, and if you hit him once he’ll know where you are, and he’ll have time to turn around and shoot. So keep quiet, get close, and THEN give them hell.
IZh-58
This weapon has three variants and two of these variants have two types of ammo. You must always take into account that you have only two shots at any time, and it takes a while to reload. So be patient, fire from safe positions, and only head into enemy positions when you are sure that there are no more than 2 at any given time.
Types of ammo:
- Rifled slug: Will reach much farther than its buckshot counterpart, but can kill only one foe per shot. This should be your go-to ammo type if your purpose is to do anything but clearing trenches and tunnels.
- Buckshot shell: Has much smaller reach, but in tight spaces it can kill a few GIs in one hit, which can sometimes mean the difference between life and death.
Variants:
- Hunting shotgun: This variant, coupled up with the rifled slug, can behave akin to a sniper rifle. I’ve seen kills that reached up to 100 meters with it. It gives the scout a chance in medium and long range engagements. Use it from a rather safe position from which you can cover a lot of ground. Always close or within the Capture Zone.
- Coach gun: The middle ground variant. This gun can win you most medium and close range encounters, and is an awesome way of clearing open trenches like Song Be’s D Capture Zone.
- Sawn-off: The short range variant. This gun should only be used in very specific situations, such as clearing the tighter tunnels in which the GIs can enter. If you’re close enough, a single buckshot shell can kill two or three GIs if they’re so slow that they can’t react.
Equipment
Tripwire Trap
The usual tripwire trap. Just like the Punji trap, you must aim below you and put down each stake of the tripwire. And just like the Punji trap, it is absolutely great for tighter spaces and doorways, but it is superior as it can kill/hurt more than one GI at a time.
RDG-1 Smoke Grenade
This is the tool that makes the Scout a useful asset to the team. The smoke grenade will deploy a smoke screen wherever you throw it, which will break the enemy’s line of vision and thus allow your team to move through fortified enemy positions. Every time you spawn, throw them towards the general area where you think that your allies will move through to reach an enemy Capture Zone. Avoid dying without having used them.
Machine Gunner Class
You, my friend, have been chosen to hold the glorious RPD LMG in your hands. Your purpose is area denial. Your weapon is extremely efficient at supressing the enemy, very accurate, and can kill in one shot at most distances. You must spray down from afar the area that your team is attacking, cover open areas that the enemy must cross to head into the fight, and defend the most frequented areas of the Capture Zones.
This is a class that requires map knowledge, as you need to know good hiding spots from which you can safely fire without the enemy noticing and/or being able to retaliate. So only ever pick it if you’ve played your fair share of hours at the given map and know what you’re doing.
Main Weapon
RPD LMG
As I’ve said before, this LMG is a beast. You can kill a whole squad of GIs before they have a chance to talk about the medals they’re getting for this one. Do remember that you can only unleash its full potential when you’re stationary and your bipod is deployed on a still surface with right click. As soon as this is done, you’ll effectively be able to cover all the ground in front of you, and the enemy will only be able to retaliate by using smoke grenades, flanking, or sniping from afar, so take these into consideration when selecting the spot where you deploy your machine gun.
Other
The Machine Gunner has the same loadout as the Rifleman except for the RPD LMG, the weapon which defines its class.
Marksman Class
You, my friend, have chosen to wield the glorious Dragunov SVD rifle (or the nugget) into battle. If your aim is true, you will be the king of the open fields. No man will be able to cross as long you stand watch (and don’t get flanked). If you can find a high vantage point, you will be able to clear your surroundings of enemies. You also have a tripwire trap that should be used to protect yourself from, or at least warn you of, incoming enemies.
Your greatest friend is the Hold Breath button, which defaults to Shift. When you take aim, make sure to hold your breath when you spot an enemy, and then fire, wait for your breath to stabilise, then kill them with glorious 7.62×54 bullet. Apart from that, pressing X while aiming will switch between your scope and your iron sight, in case you find yourself in a close quarters situation.
It is also useful to use the Z key to tell your team where you’ve last seen an enemy, the more information your teammates have on the map, the better.
Main Weapons
Dragunov SVD
The glorious Soviet Dragunov SVD Sniper Rifle is your go-to weapon for this class. It has slightly less range than the Mosin Nagant, but it also has less recoil and no bolt action, which allows you to quickly redress from your first shot and fire a second one without having to hold your breath again. It’s hard to still be holding your breath for the third shot, so you’ll have to hold it again and fire in quick two and two successions. A wisely used Dragunov can snipe out foolish enemies looking out of cover, and clear careless enemies running through distant fields all by itself.
Its reload is fast, so you might think that it is better for close quarters situations, but its scope is dreadfully huge while aiming down the sight. It covers the center left of your screen entirely, and even half of your iron sight. Making it unsuitable for close quarter combat.
Scoped Mosin Nagant 91/30 PU
The Mosin Nagant, the Nugget, the classic, he who is in every war imaginable. This cheap son of a ♥♥♥♥♥ has been in every war you can think off ever since the Russians created it back in the late 19th century. It’s found its way to Vietnam, and it’s here to kill one GI for every shot you take. This gun has a longer range than the Dragunov, it doesn’t matter where you shoot, if your reticle is on the target, it’s gonna hit, and it’s gonna kill.
Your guaranteed kill comes at a price though, it’s a bolt action rifle, so every time you fire a round you have to load the next GI killer in manually, which means your character will unscope, load the round into the chamber, then scope in again (after loading the round, your character will aim down-left from where he was originally aiming, so try to learn how to compensate that in training). More than enough time for a GI who saw his friend die to a sniper bullet to take cover behind something.
The reload goes bullet by bullet, akin to the shotguns. This means that it is slow, and it only has 6 bullets loaded in at most, and a full reload can take way too long for comfort in the frontlines.
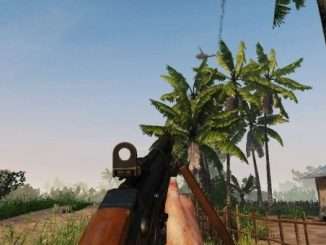
Sapper Class
Welcome my friend, to being every capitalist pig’s nightmare. You are the sapper, the man with mines, but most importantly, the man with the glorious PPSh-41, one of WW2’s most efficient killing machines.
Your task as a Sapper is area denial through laying down as many as 6 (!) MD-82 mines all across the battlefield, concentrate on one Capture Zone, or spread them evenly, it doesn’t matter. When a GI steps on them, he’ll either die or get in a world of hurt. They will only survive if they’re sprinting past it, even then they’ll suffer it’s dreadful blow. The only way to destroy your mines is to shoot them directly, for the area they’re in to get bombed (a reason to put down your mines somewhere indoors when possible), or when grenade explodes too close to them. The first one usually won’t happen as the GI is too busy running carelessly, the second one is the most likely mine destroyer, and the third one can be avoided through careful placing of mines.
But being a sapper isn’t all about mine laying. They also have the SKS carbine for long range engagements, and the PPSh-41 for everything else. And since mines persist even after death, the Sapper with a PPSh will share the scout’s task of leading assaults on enemy positions. From close quarters, the PPSh’s high rate of fire and unusually big magazine (when using the drum variant), will give you plenty of staying power when the filthy GIs decide to get up close and personal.
Main Weapons
PPSh-41
The PPSh-41 is one of the most glorious Soviet creations when it comes to SMGs. It will tear through a whole attacking force of GIs before you even have to think of reloading. This weapon can dominate close quarters situations, and put up a fight in medium range, but it lacks any sort of long range potential, so if you’d rather go for long range, take the SKS carbine instead.
The PPSh has two variants. One which uses the 35 round Stick magazine, and another which uses the 71 round Drum magazine: The first one is more adapted to medium range situations, where you’d rather get defensive and watch over your mines for any surviving stragglers rather than head in the brunt of the fighting; the second one is about getting close and personal, and clearing a whole Capture Zone without having to reload at any point.
A single three to four round burst is more than enough to kill someone inside the trenches, and you have up to 20 of those bursts, which means 20 dead GIs before you even have to reload the other Drum magazine in. This should tell you enough about why the PPSh is such a beast. A good player armed with a PPSh can win any close range engagement, hell, he’ll spray down a whole squad before they can even think of aiming in his general direction.
Equipment
MD-82 Mine
The sapper’s role relies on these mines. In order to plant them, you must aim down, wait for the white projection to appear, and hold the left mouse button until your character takes the safety pin off, which will be pronounced with a loud *click*. A GI that steps on these will die unless he is sprinting past them.
If you want a guaranteed kill, putting them close to cover from which the GI usually shoot could be more effective than busy doorways. But if you want a guaranteed hit, lay them down in tight hallways and doorways. The GI that notices it will have to take his time to shoot it from afar, which is a few precious seconds wasted on aiming at a mine. It’s unlikely that they notice them when attacking a position though, as the frenetic search for cover and a good hold-out position will not give them time to check the ground for them.
The mines will be more noticeable when laid on hard surfaces, such as floors or sandbags, as the entire mine will be shown. When buried in soft ground, only the very tip of the mine will show, making it nigh invisible in combat situations. Try to lay them in soft ground so that the GIs have less of a chance to spot them.
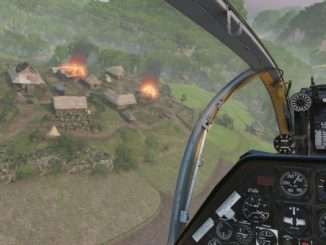
RPG Class
Welcome, my friend, to having one of the most iconic rocket launchers in history, the RPG-7. As soon as you take a hold of this mighty beast, you will feel like a God in the battlefield, but do not trust this sensation too much, as the RPG-7 is fickle, and mastering it may take much more time than you originally anticipated.
Your role as the RPG class is to strike down enemy helicopters, that’s it. Sounds simple, doesn’t it? Well, hitting helicopters is not as easy as it seems, and it only gets harder when the pilot is more and more skilled. These big hulking metal devices that fly in the air might be big targets, but they are far away and move very fast. If you are not yet a master of the RPG through years of training, desist from bringing them down in the air, instead, go for their usual landing spots.
The RPG class needs a bit of map knowledge, more specifically knowing good helicopter landing spots. Wait there, and give them hell when they land. A helicopter can have up to 7 occupants in it, so this means that you’ll get 7 kills in one RPG shot. Sadly for your kill count, these situations are rather rare, and you have to be there at the right moment, and hope they don’t see you. The machine gunners in it will usually not have time to react to you though as the helicopter moves extremely fast. Do not fear even if they spot you, your rocket will not relent when you set it on its path.
Otherwise, if no helicopters are in sight, you can head to the closest Capture Zone to assist your team in capping. Using either the SKS Carbine or the Shotgun, whichever you feel more comfortable with or is more reasonable to the situation in hand. You can see how both of these weapons work in the Rifleman Class section (SKS) and the Sapper Class section (Shotgun).
Main Weapons
RPG-7
The RPG-7 is a higly effective anti-vehicle weapon. Sadly, it is not so effective when dealing with human targets. It could be useful during stalemates inside a cramped area, but its slow and clunky nature make it not so great when compared to the GI’s thumper, or the Rifleman’s regular grenade. The main objective of this weapon is to destroy helicopters, and it will do so with a single direct hit.
If you are a daring sort of man, you can try to shoot helicopters in the air. For this, you have to predict where the helicopter will move, compensate for the drop (which can be done for the first 500 meters by going up in the mouse wheel while aiming), then understand the rocket’s tendency to go wherever the ♥♥♥♥ it wants after a certain distance. I wasn’t joking when I said that only a true master of the RPG can shoot down a helicopter in the air. It takes practice and skill to do so, something you probably won’t have unless you take your sweet time to master the weapon itself.
Commander Class
Being the commander of the Vietnamese Forces is not an easy task. You’ll have to be at the frontlines to make full use of his abilities, and have a radioman close to you. I do NOT recommend picking this class unless you know this game more or less well. And by that I mean having more than 40-50 hours in it.
Some people will claim that you should play 500 hours or something before picking commander, but these same people say that you must play 100 hours before moving out of rifleman. That’s not fun, and we don’t have this much time on our hands to gloriously wipe out GIs. So take the role when you think you’re truly ready. This can be 20 hours in, or 100 hours in, doesn’t matter. Just give it a go in pub matches.
The first thing you must know about the Commander is that this is the class that needs to COMMUNICATE. All of the time, no matter what. Talk to your Squad Leaders, ask them to put down marks, give them objectives. They may or may not listen, it doesn’t matter, keep trying.
It is a basic requirement to have a microphone, though text also works for basic stuff like asking for artillery marks. So in public matches it may not be necessary to use anything but text, but a microphone will allow you to give and receive information in a faster, smoother way.
Commander Abilties
When at the Radio, a commander can call in 5 different abilities. Some of these abilities can only be used when you are at the radio closest to the frontline, so bear that in mind if you think that camping at spawn is a good idea.
Scout Recon
You must constantly use this ability. Every time it cools down, use it again. Sometimes it could be more useful to save it for specific situations, but these times only come when a team is truly organized and working together, and that is a rare sight indeed.
Scout Recon makes your hidden scouts give you information about enemy positions, which will then be marked on your map. This is useful to see good spots for artillery marks, to know when enemies are advancing and where, or to acknowledge the position of those pesky snipers that keep killing your teammates.
Even though the “Scouts, report in.” voice message is enough of an advert for your players to check their maps for enemy positions. Sometimes reporting it yourself through mic can gather their immediate attention.
Ambush Deployment
This ability will immediately spawn all dead players on your position. This is useful to bring a surprise offensive (or defense) to the fold after a particularly bad bombing run on your men. Do not use this ability foolishly, as it can mean the difference between losing a Capture Zone or keeping it.
Ho Chi Minh Trail
This ability will reduce respawn time and ticket consumption by half. If you are in the middle of a particularly intense situation, such as attacking a fortified enemy position, or defending the last point against a particularly persistent enemy, this ability can be difference between victory or defeat. You will have your men back on the ground faster, and these men will either be killing GIs or distracting them by being nooby baits. With ticket consumption reduced by half, rushing in will become a more forgiving endeavor, as it will not cost so many resources to the team.
Take into account its huge cooldown. This is not an ability to be taken lightly, and must be used only when a dire situation demands it, or when victory is at hand.
Request Barrage
The NVA does not have much artillery, rockets, or mortars. But combine them all into a single salvo of pain and shrapnel, and it can become quite a deadly barrage. This is what this ability represents. Destroy well fortified positions before rushing in to attack, or cut off a way into a Capture Zone for a minute or two while killing the would-be assailants. An artillery barrage is the traditional way of saying “Fuck You.” to any number of infantrymen that are becoming too much an annoyance to your glorious way to victory.
Request Anti-Air
Are your forces harassed by any sort of aircraft above 75 meters? Namely, a combat helicopter, a Spooky gunship, or a recon plane? Fear not, glorious soviet imported missile weaponry is here to save the day. If you hear a recon or a spooky gunship going off somewhere in the distance, activate this bad boy to take care of it.
Written by Crusading Crow.

Be the first to comment