
A relatively short guide to help you defeat Tyranmutanoid.
Contents
Introduction
All credit goes to kvazio!
Operation Dimensional Portal Attack is an eight man raid that focuses on completing four separate stages with multiple parts. This is done in multiple teams that work together in order to ultimately take down the final fey type boss Tyranmutanoid.
Premium is preferred when doing raids as it provides an extra card. This means more loot and more chances at mythic drops.
Raid Prerequisites
In order to start this raid, you must first meet the requirements of 500K Combat Power and possess an Operation Order of OPDA. You can purchase a ticket from the NPC Tramp in Windy Highlands Camp near the Evergreen Sky Garden portal.

These tickets are purchasable with either 500,000 gold or 50 green stones and there is a purchase limit of 1 per day per currency type. This means that you can accumulate 14 tickets per week which matches up perfectly with the weekly limit of 14 attempts. They can also be purchased in the cash shop for 100 Cash each, up to 6 per week (those tickets still apply to the same weekly entry limit).


Creating a Raid Party and Raid Interface
Once you meet the requirements to start the raid you can open the Operation Team interface (accessible by unlocking your mouse and clicking it on the basic menu).
Here’s a picture of what it looks like:

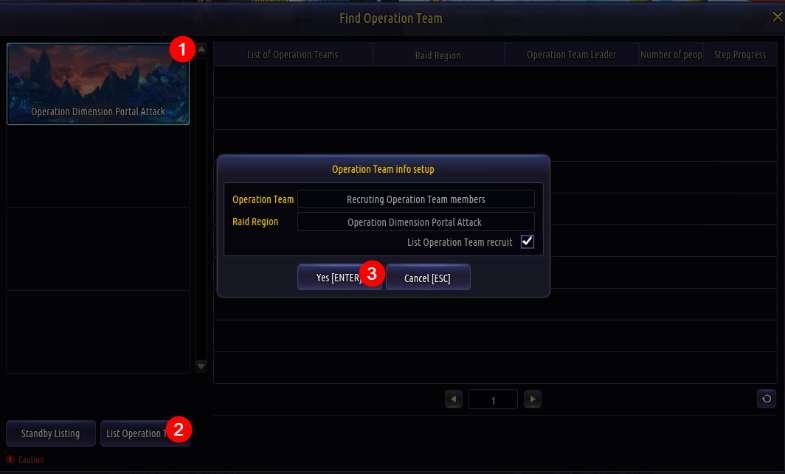
After you open the menu, you need to either list an operation team (start a new raid group) or apply to an existing operation team. Listed below is the interface to apply to an existing party. Simply select the party you’re looking for and apply. Once the operation team leader accepts you, your place in the raid will be confirmed.
In order to apply to an operation team you need to do the following:
- Click on the team you wish to apply to.
- Click the “Make request for Operation Team”.

In order to create an operation team you must first not be in a party and then do the following:
- Click on the raid you wish to lead.
- Click the List Operation button.
- Confirm the selection.
After creating your own Operation Team you’re greeted with this menu after clicking the Operation Team button again:
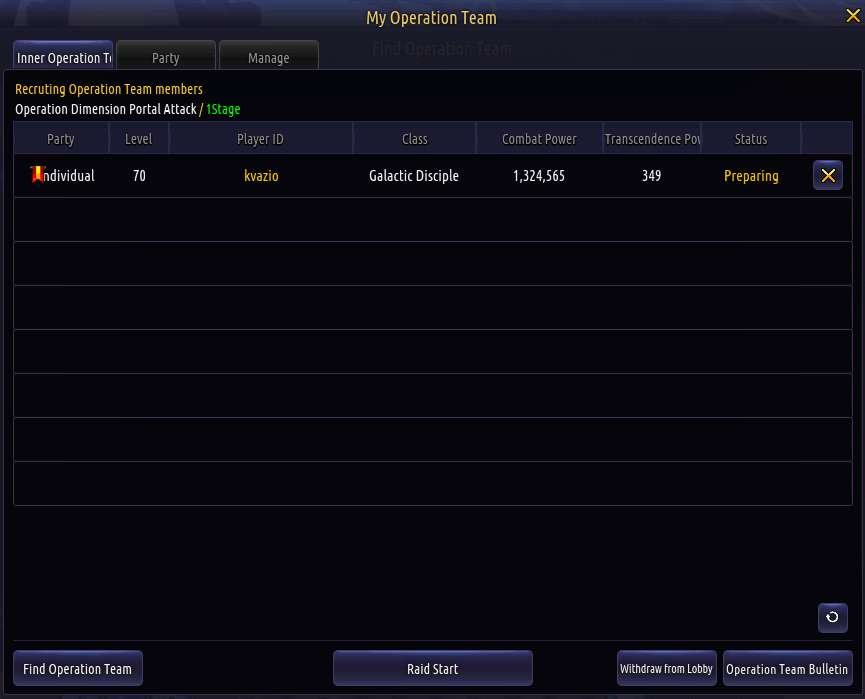
Here are the following functions of the buttons listed above:
- Raid Start – Performs a Ready Check for the whole Team and when everyone accepts it in time the raid stage starts(available only to the Team Leader).
- Withdraw from Lobby – Sends you back to the town.
- Operation Team Bulletin – Shows timer and progress of the current raid stage.
- Find Operation Team – Opens the public operation bulletin to search for a party.
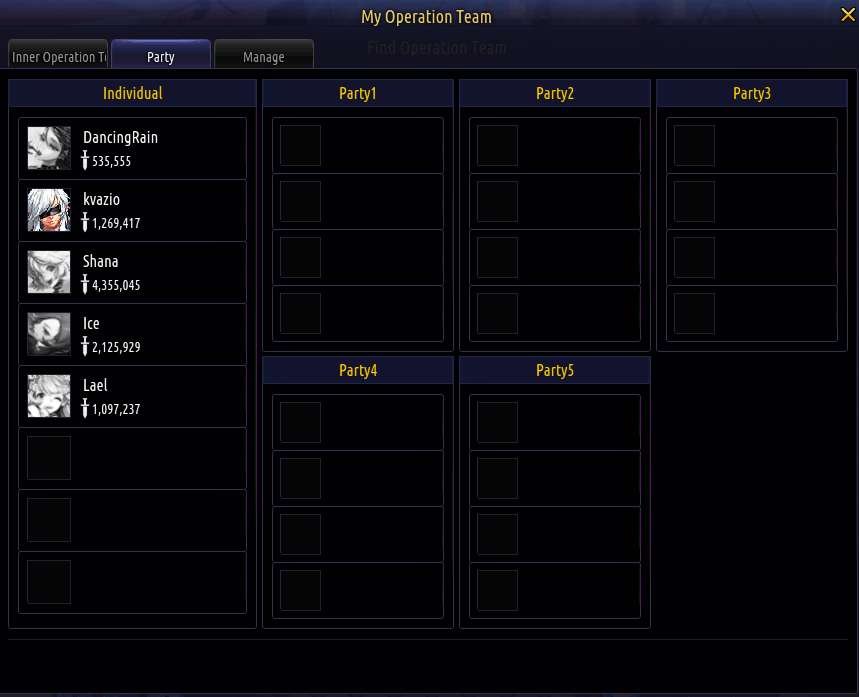
In the middle tab, Party, the operation leader will be able to assign themselves and other members of the team into parties to arrange groups for the raid. Individual members will be able to also join parties themselves.
Lastly, in the Manage tab, you’ll be able to Accept invite requests and invite players yourself to your Team.

Starting the Raid
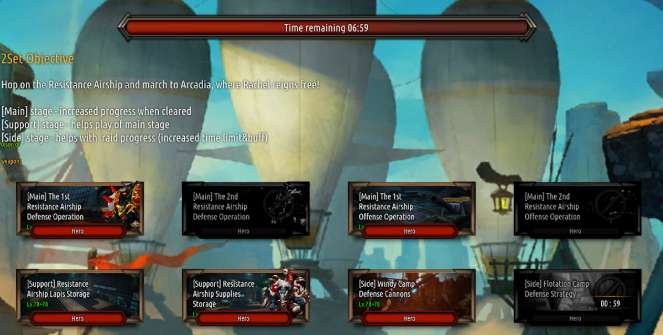
Once you click the raid start button and everyone agrees, the timer will start to count down. This timer persists for the entirety of the stage and you will fail the raid if you cannot complete the objectives before it expires. In order to prevent the timer from expiring, you must complete the [Main] dungeons of the stage.
In addition to the [Main] dungeons in each stage there are [Support] dungeons you can complete to assist the party completing the [Main] dungeons. Some stages may require [Support] dungeons to be cleared in order to progress in the [Main] dungeons. There’s also [Side] dungeons which can increase your time limit and provide buffs.
Stage 1
In stage 1 there’s 4 dungeons to complete, which can be done in any order. There is no special mechanics to them, just DPS them down as fast as possible.
Warning: Boss in “Southern Region” dungeon has slow, but very powerful attacks.

Stage 2
In stage 2 there’s 4 dungeons to clear, but this time some of them are locked until the previous [Main] dungeons are cleared. I suggest sending the stronger 4man party to Offense Operations and the weaker 4man party to Defense Operation. “1st Resistance Airship Offense Operation” has a mechanic that might make the dungeon easier if you’ll still find it troublesome.
When you get to the boss room in “1st Resistance Airship Offense Operation”, you will find 2 engines on the sides you need to kill, but you might find them pretty tough to kill. To make it easier, you’ll have to defeat waves of enemies. After defeating each wave a green advanced enemy will spawn. After killing it, a short AoE effect will appear on the ground that gives you a strong damage buff which stacks to 2.

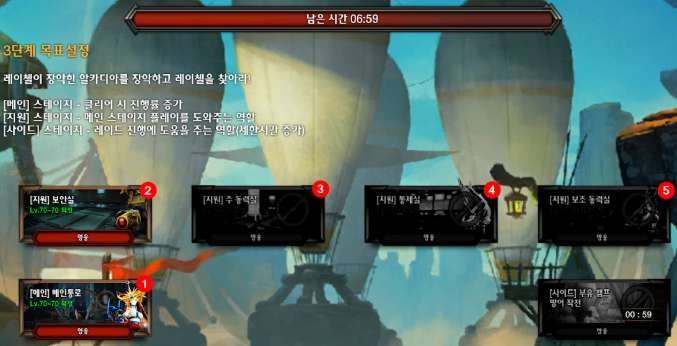
Stage 3
This gets a bit trickier from here so I’ll provide order in which party enters which dungeons.
Main Party enters dungeon #1.
In order to progress further in dungeon #1, the rest of the raid group will have to clear dungeon #2, #3, #4 and #5 which unlock one after another.
Some of the bosses in the dungeons #2 – #4 will be invulnerable until the Main Party progresses further in dungeon #1.
If only dungeon #2 and #3 is cleared, the Main Party will be able to finish dungeon #1, but there will be inconveniences if dungeons #4 and #5 have not been cleared(e.g. massive DoT on last boss of dungeon #1).
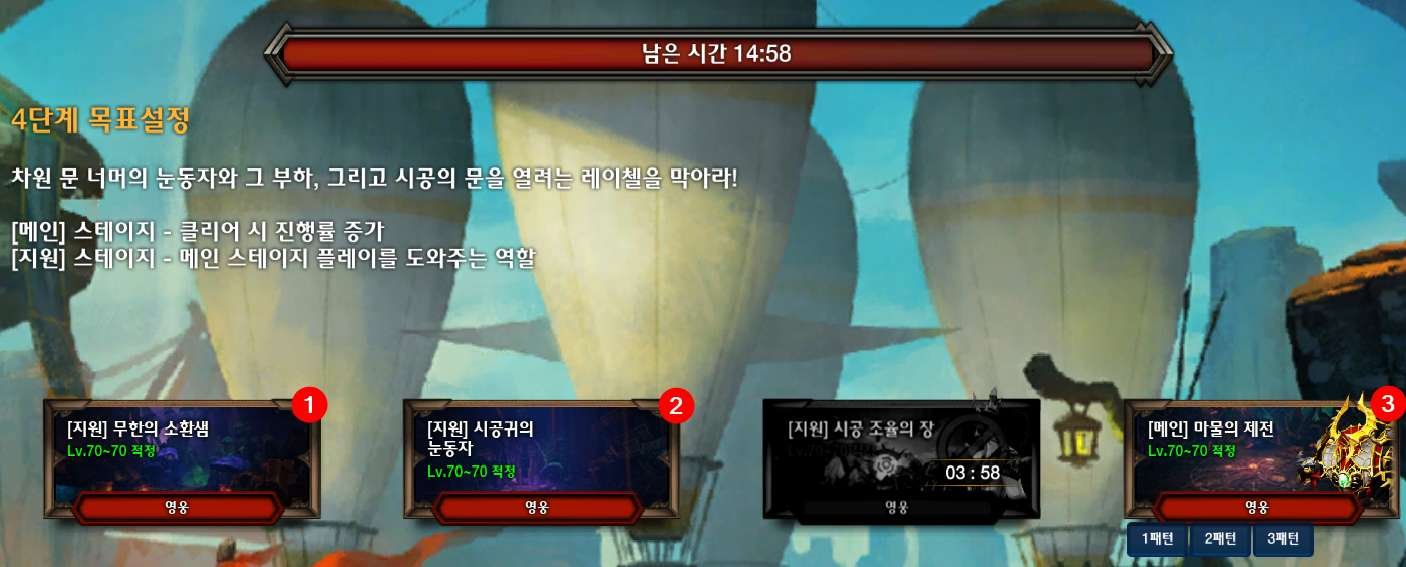
Stage 4
Main Party goes to Dungeon #3, while the rest of the raid group may party up and clear Dungeon #1 and #2 to help the Main Party.
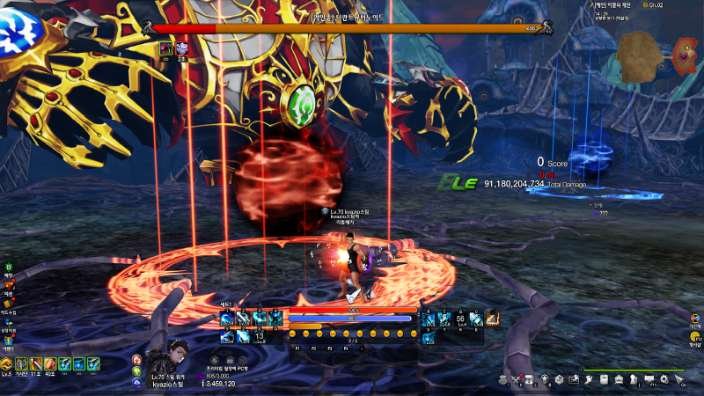
Dungeon #3 mechanics:
After getting the boss to 90% HP, it will summon these 2 circles. Simply walk into either of them to start the mechanic.
After the boss goes back to his basic attacks, you will start to see numbers stack on top of your head after you avoid the shockwaves of his attacks, it’s a buff that massively increases your Attack Power(stacks to 6, after reaching 6 stacks, triggers Burst Mode which boosts your damage even further and consumes the stacks).
If you failed to dodge the shockwave you will see a purple / pink symbol appear on top of your head, that means you’re about to “explode”(a damaging AoE for you and your party will appear shortly on top of you). Simply walk away from the party and i-frame the explosion.
If you haven’t walked into either of the circles you’ll be punished by putting the explosion attack on you every shockwave.
Conclusion
That’s it, you’ve cleared the raid with your group. Remember that this can be done 14 times a week while the tickets can be bought daily meaning you can stack them up and choose one day to do them. Just keep at it and you’ll eventually get the items you need.


Be the first to comment