
This guide will take you through the new connector system implemented for the full release (20th of February 2020). This guide will be useful for both new players and players experienced with the old Connector system, although experienced players might want to specifically look at step “Changes: from old to new connector system”.
Contents
What are Connectors?
All credit goes to Needo!
Connectors are found in the Circuits category in the construction panel to the right and includes pipe, belt, cable and tube.
Different parts, but mostly machinery, require one or more specific types of “inputs” to function which other parts can “output”. The different connector-types can transfer these different outputs/inputs between parts to make them function (more on that soon).
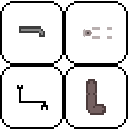
There are 4 different types of connectors:
- Pipe: Can transfer “Steam” which only a boiler can output. Steam is used for many things in Mechanic Miner, but is mostly used for engines.
- Belt: Can transfer “Rotation” which an Engine can output. Rotation is mostly used to make wheels rotate.
- Cable: Can transfer “Control” which a Lever can output. Control is used in almost everything and can transfer the players directional keyboard input, mouseposition and mouse-clicks.
- Tube: Can transfer resources which only modules and storages can output. Tube is mostly used to transfer resources to ranged weapons or/and boilers.
How to Connect Parts I: The basic
Connecting parts is actually very simple when you get a hang of it. In this screenshot below you can see the most basic setup consisting only of the necessary parts needed to create a simple driving vehicle.
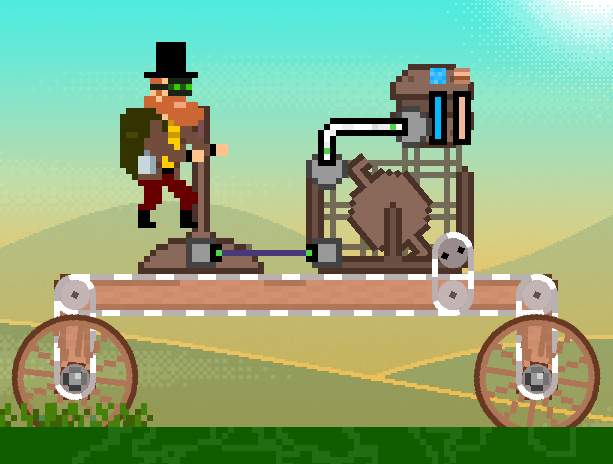
This is how it works:
- The lever (the part that the player is on) outputs a cable that transfers control to the engine. The player can use left and right to control the rotational direction that the engine outputs.
- The engine (to the right of the lever) needs a steam input to work. That steam input is transferred from the boiler (just above the engine) through a pipe connector.
- The engine outputs rotation which is transferred to both wheels using belts. Notice that the belt must run all the way to the bearing (grey dot in the center of the wheel) for the wheel to actually work
Notice that on each part there’s a specific spot for every connection. E.g. the Engine can only output rotation (with belt) from that spot, and can only input steam (with pipe) on that specific spot.
How to Connect Parts II: A Step Further
Connecting parts is actually very simple when you get a hang of it. In this screenshot below you can see the most basic setup consisting only of the necessary parts needed to create a simple driving vehicle.
This is how it works:
- The lever (the part that the player is on) outputs a cable that transfers control to the engine. The player can use left and right to control the rotational direction that the engine outputs.
- The engine (to the right of the lever) needs a steam input to work. That Steam input is transferred from the boiler (just above the engine) through a pipe connector.
- The engine outputs rotation which is transferred to both wheels using belts. Notice that the belt must run all the way to the bearing (grey dot in the center of the wheel) for the wheel to actually work
Notice that on each part there’s a specific spot for every connection. E.g. the Engine can only output rotation (with belt) from that spot, and can only input steam (with pipe) on that specific spot.
How to Connect Parts III: Understanding Relays
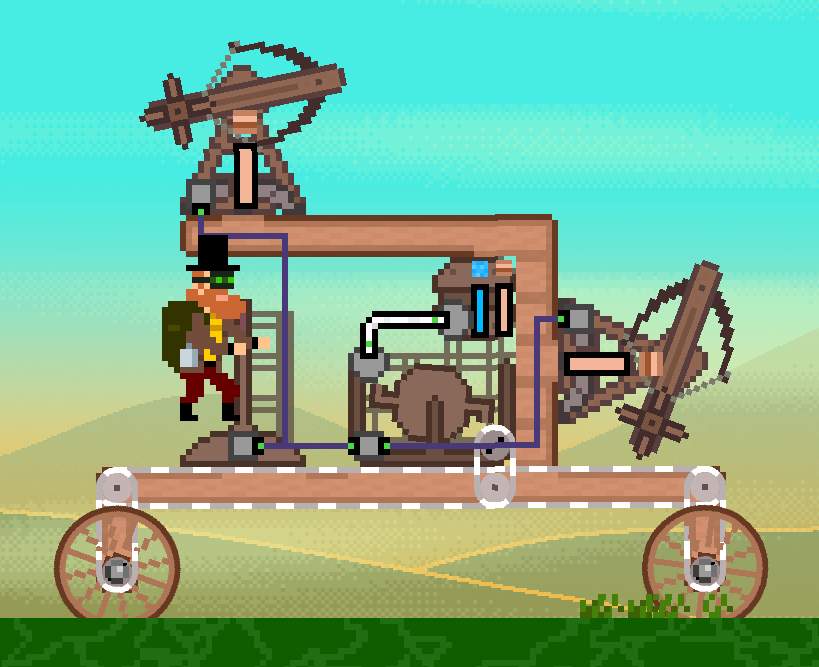
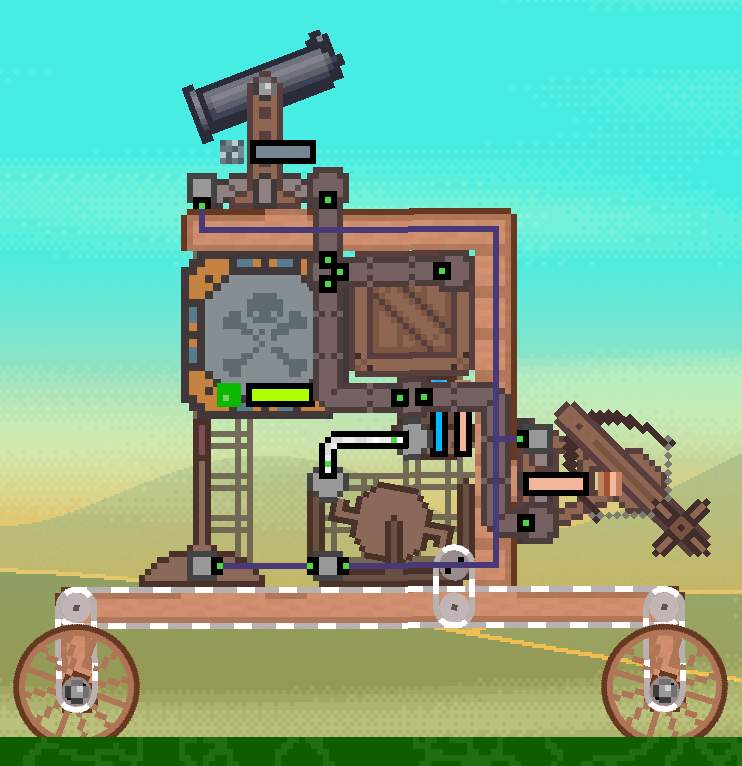
Later in the game it can be very useful to be able to control different setups on the same vehicle without using more levers. It’s possible to do so by using the relays that are found on the iron lever and the advanced lever. In the screenshot to the left you see the same setup as before but with an iron lever that includes two relays.
This is how it works:
- When the player is on the lever, it’s possible to swap between relays using the “1” and “2” key on the keyboard.
- When on relay 1, the player will control everything that is connected to the red connection point on the lever – in this case the right ballista and the engine.
- When on relay 2 the player will control everything that is connected to the green connection point on the lever – in this case only the top ballista.
It’s possible to make much more advanced and efficient connections than shown in this guide, but that will not be part of this guide.
Bonus: The Magic of Tubes
While using tubes is not strictly necessary (unless you want to use modules), the use of tubes can prove to be very useful, even in the very early stages of a play-through.
As mentioned before, tubes have the ability to transfer resources from modules and storages to any part that has a fuel-bar. With that said, tubes will function and follow the same logic as any other connector type.
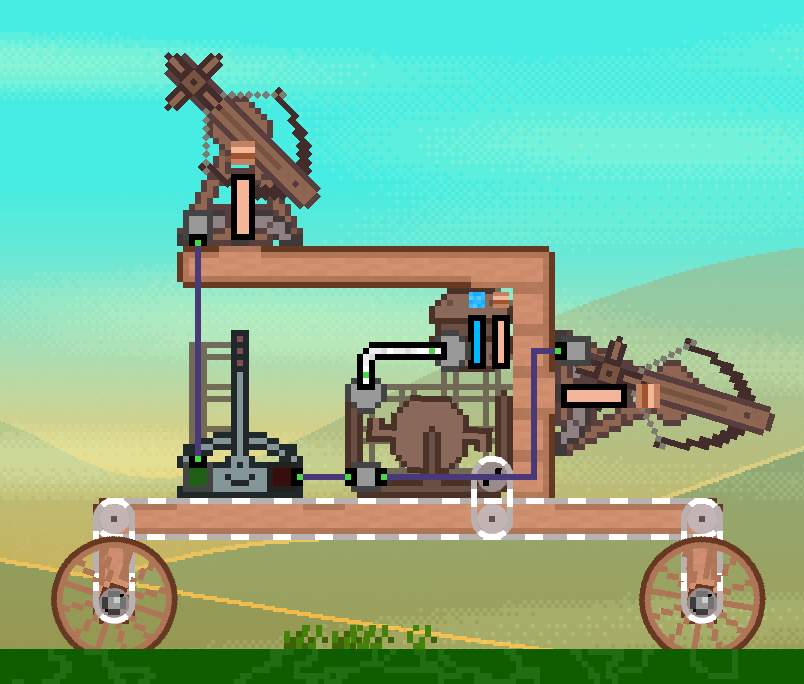
In the Screenshot above you can see a setup using tubes to automatically move resources around. The Storage box in the middle contains water, wood, venom and iron and will transfer these resources automatically to:
- The poison module which requires venom
- The boiler which requires wood and water
- The ballista which requires wood
- The cannon which requires iron
Furthermore the poison module applies a poison effect to the ballista and cannon by transferring its stored venom (which was transferred to the module from the storage box) to these ranged weapons.
Tips, Tricks and Troubleshooting
Connecting parts can be difficult, and it can be especially difficult identifying the problem in a faulty setup. Here’s a few things you should look for when identifying problems in your setup:
- The change of color of a connector line usually indicates that something is wrong with that specific part of the setup. A cable will turn red and a pipe turn grey.
- When you send a signal through a cable – e.g. using a lever that has a cable connected to it – the cable will light up. This could be used to identify if a cable-line is not connected at all.
- Remember that the iron and advanced lever has 2 and 3 relays. Are you using the correct relay?
- If the end of a connector line has a small red cross, the connection is not ending on an output or input of a part.
- Picking up a specific type of connector – e.g. a pipe – and hovering over your machine/vehicle will highlight where that specific type of connector can be connected.
Changes: From Old to New Connector System
If everything in this guide has been new to you so far or you haven’t tried the old connector system, just discard this specific section of the guide.
This section will highlight the changes between the old and new connector system, but also contain developer comments on how a player might overcome some of the limitations that the new connector system has created.
Change: Each type of connector can now ONLY be connected to one specific place on a part, but each connection point can have 4 output/inputs instead of 1.
For most players this will not present a problem or a limit, although the 4 input/output limit per connection type is theoretically a reduction of possible connections. We still believe that this will most likely not affect the experienced player, as they would be able to bypass the 4 point limit with “T-connections” and clever use of logic gates (cable only) if the limit should ever be a problem.
Change: You can run connections through connections points.
For most new players this will be a huge QoL life as it allows for the creation of a more intuitive circuit and reduces the likelihood of making a faulty connection. With that said, we quickly noticed that this could become a huge problem when trying to connect two or more separate circuits to the same part, but without wanting the circuits to merge with each other. So, we’ve created a somewhat secret rule experienced players can use to bypass this situation:A cable connection will NOT run through a connection point if the other side has a cable-output in its circuit.
Be the first to comment