
A guide to basic gameplay loop and couple in-depth things.
Contents
Gameplay Tips and Tricks
All credit goes to Sharethepain!
Introduction
I shall provide some enlightenment on your journey through the forsaken temple depths that lay ahead. I will be spoiling boss fights, mechanics, and possible builds, if you are okay with that feel free to proceed below.
Rooms
Each game starts with you choosing a room to start in, there is a total of 7 rooms excluding boss rooms, I´ll quickly go over what each one contains.
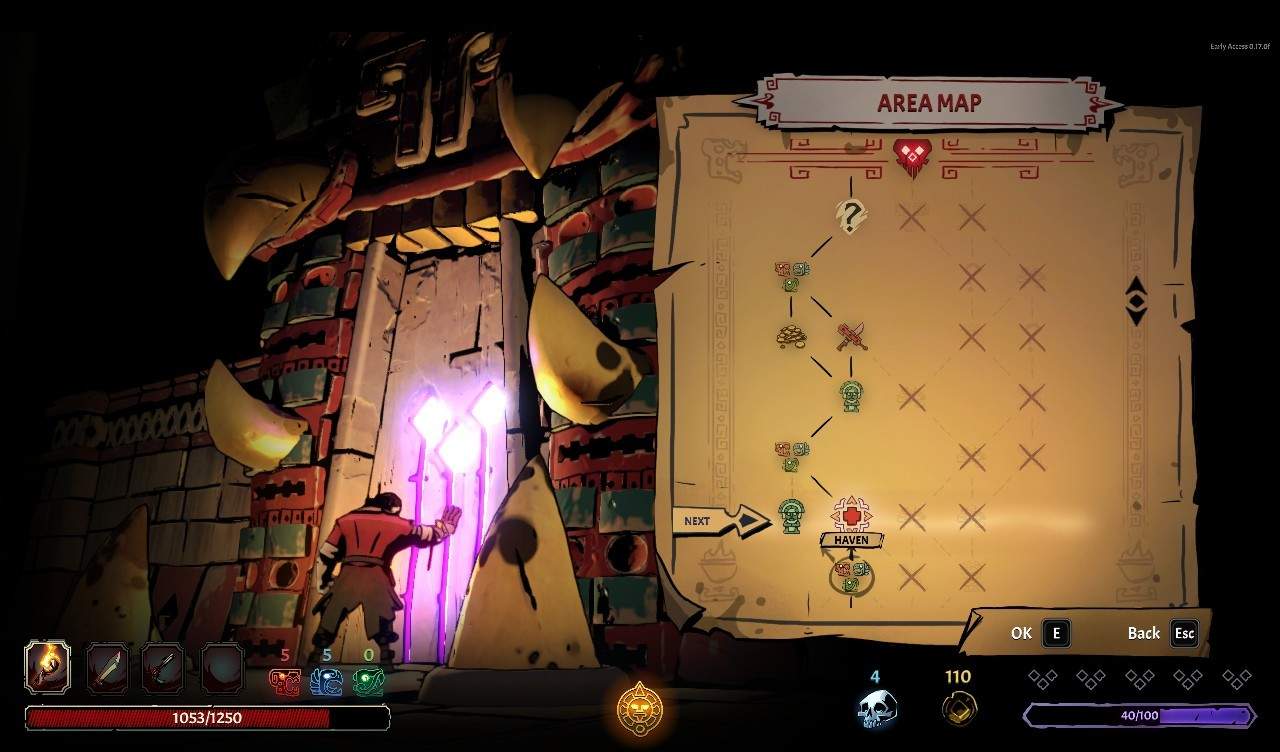
Weapon room
Three waves of enemies, starting with simple to defeat working up to elite enemies in the later waves, in harder runs, the third part of the map is basically made up of all elites. Killing them all unlocks the weapon shop in the room.
Relic Room
Contains a relic shop at the end, pay heed that the later rooms do not have the shop at the very end, but about 80 % of the end, with a room fight after them, so make sure to not miss them along the way.
Gold
Have the biggest amount of breakable walls, which hide gold or sarcophagus behind. These walls are destroyed with enemy projectiles, renegade swings, explosive urns, trap projectiles, or heavy hammer/sword hit. Gold is scattered around to be collected and sarcophagi are present which yield random drop of relic or a weapon + a set amount of gold. There is at least one sarcophagus per gold room, some have two – one or two rooms after the second boss seem to have none of them though.

Haven
Serves as a healing room at the cost of corruption, 10 corruption per tap of healing. On normal runs you will see one prior to the first boss, and then right after every boss defeated. Hard run only has Haven after the first boss.
Time
A fight against time, the faster you can kill all the enemies in the room the more gold you can keep after triggering the timer. Sometimes there are traps that can be used against the enemies present. The gold on the floor is subject to Blinding Greed curse and perception gold bonus modifier.
Blessings room
A room which contains a blessing shrine. These rooms are the most affordable gold and blood offering wise. From the three possible blessings: +25% gold found, +10% damage and +250 max health, two of them randomly spawn in the shrine.
A “?” room
A randomized room, can be anything from the above mentioned.
I’d like to mention that not only treasure rooms contain breakable walls, keep on lookout for them.
Weapon Types
You start each game with the same machette and the same gun, but in the right hands these two weapons can easily take you to the second boss, at which you should really upgrade though, unless you want a long boss battle.
The weapon types you can find are:
Main
- Swords – They possess a combo string which always ends with a critical hit at the end.
- Maces – Slower than sword, hard hitting, three hit string with slightly bigger reach than sword, last hit deals increased damage.
- Claws – Fast attack speed, lower damage, you can close in on distanced enemies. Gives good mobility and rewards you for possible perfect dodges by giving you 100% critical chance for two seconds afterwards.
Secondary
- Pistols – A decent secondary if you always perfect shot, AOE off-hand combo.
- Daggers – You can dodge by using their off hand combo. Their charge attack is a dash with a series of slashes.
- Shields – Have a single tap bash attack, their charged up attack is a forward dash that stuns and interrupts all enemy attacks and casting, except for bosses. Off hand combo stuns and pushes enemies far away. Shields also apparently increase invincibility frames for parrying when you have them equipped – meaning it should be easier to parry.
Heavy
- Spears – Long reach, Aoe charge attack, good for keeping distance. Spears have a range at which they always critical hit. The last hit in the combo interrupts enemies.
- Two handed hammers and swords – Share the same jump charge attack, slow, but hard hitting. Their attacks interrupt enemy abilities. Can break walls, traps, and light sources. Last hit in the combo critical hits.
- Bows – As pistols they can perfect shot, some make their shots pass through all enemies so you can line up the enemies and hit all of them.
Champion weapons
Dropped by the first and second boss. Prerequisites currently unknown. No damage clear did not drop them.
Blood hunter – Kill all jaguars before dealing the killing blow to the boss.
The Twins – parry at least three hits in the dark phase.
Blood hunter’s spear:
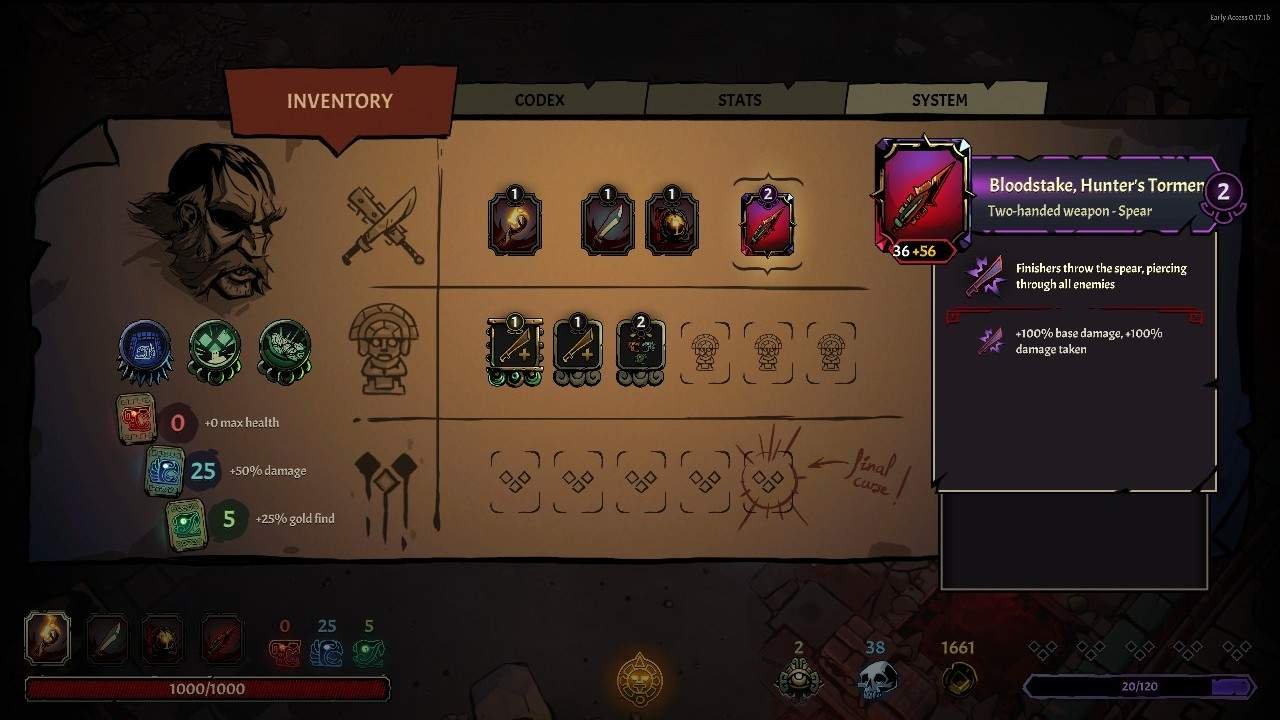
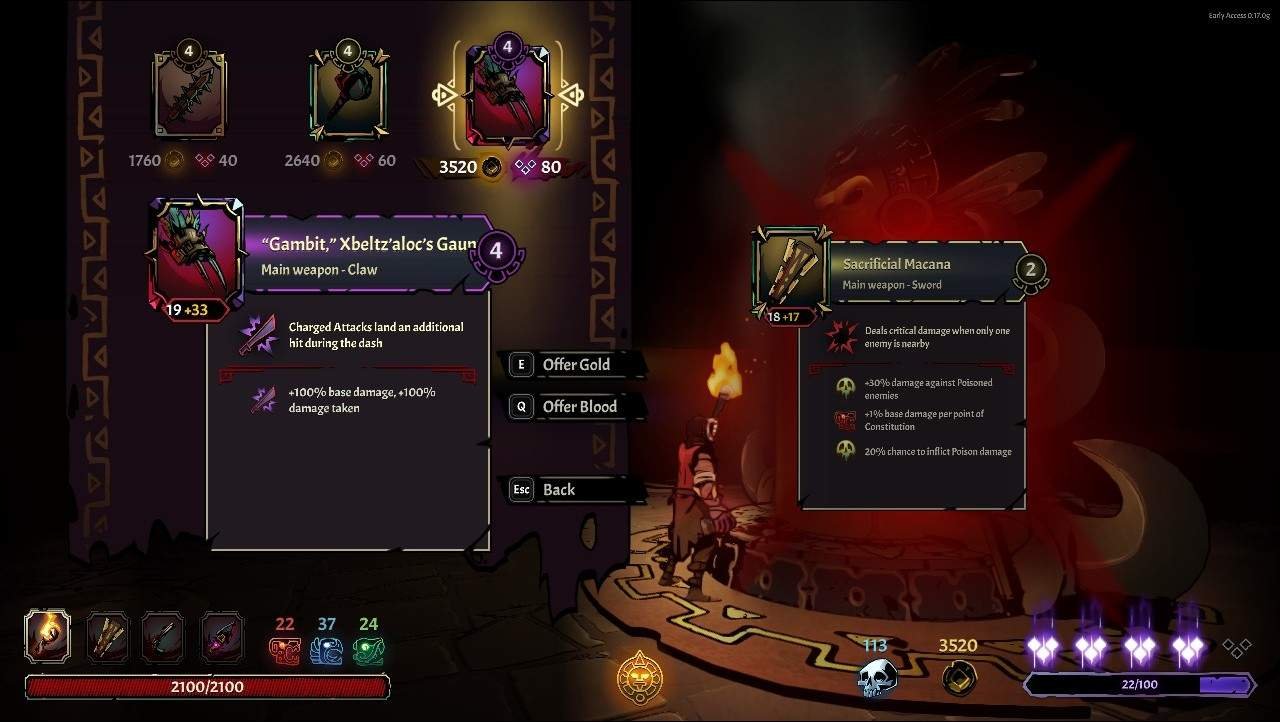
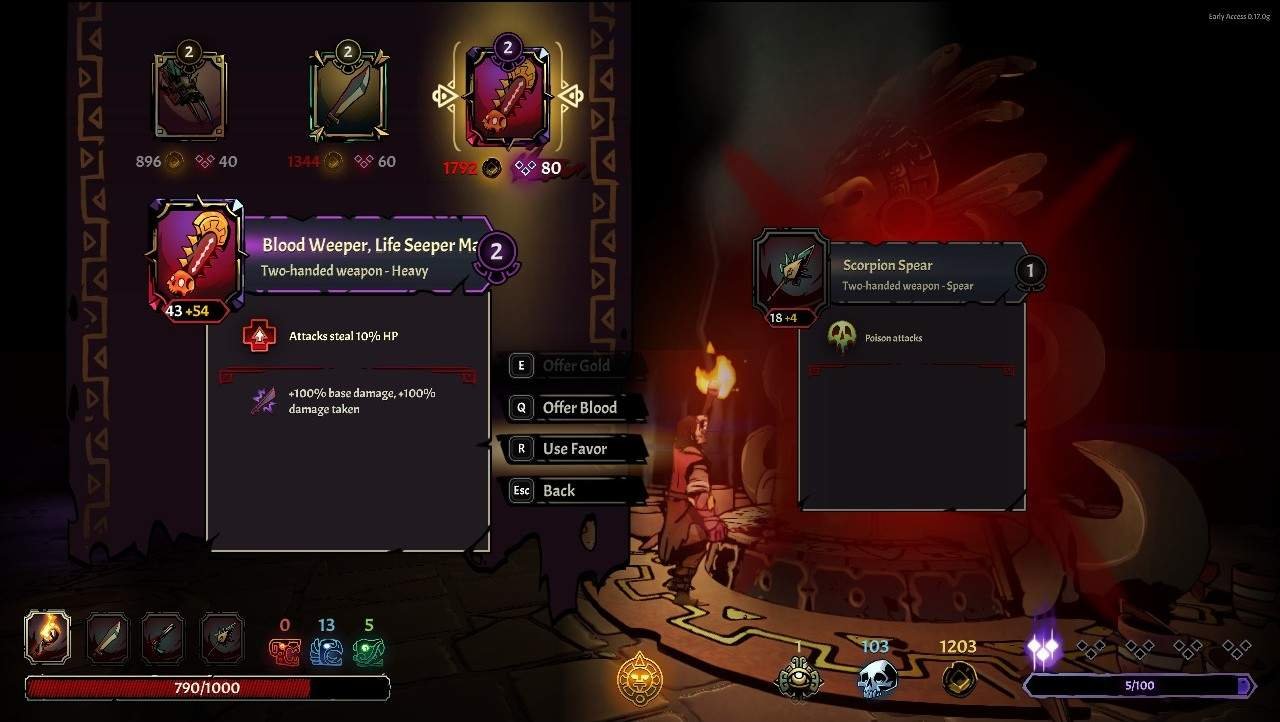
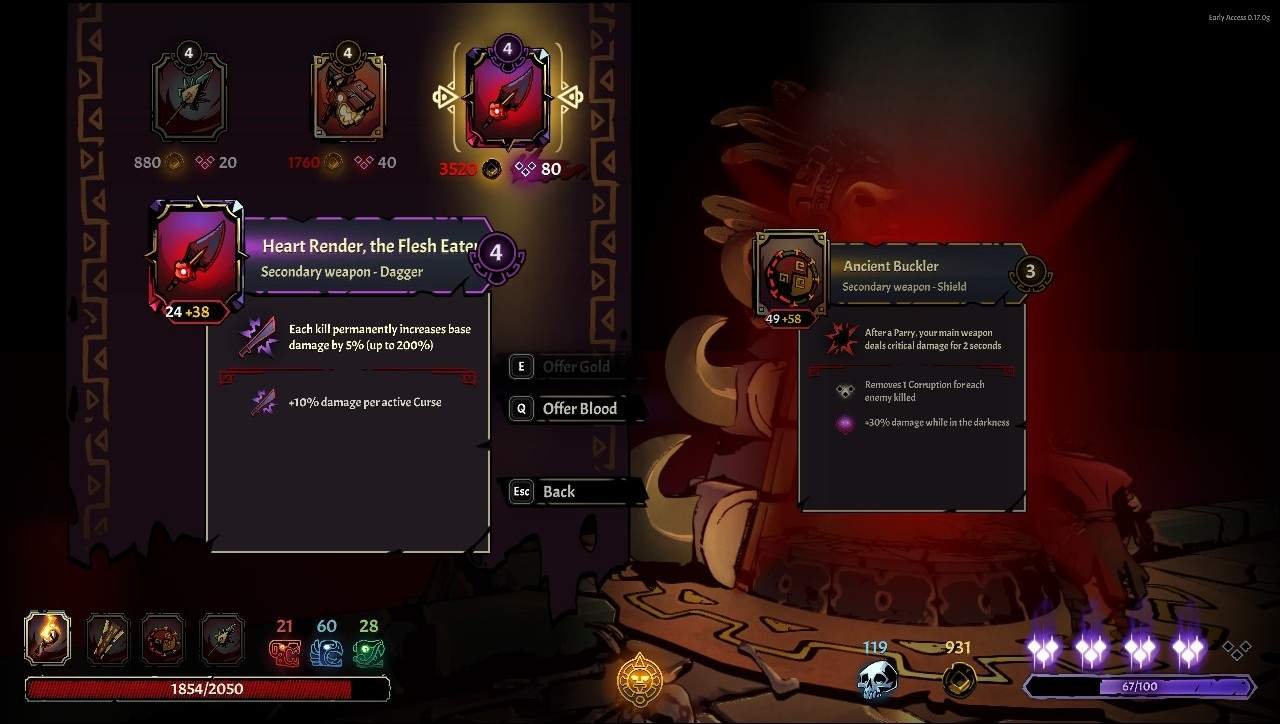
There are also special cursed weapons, each of them has a unique ability, such as heal 10 % of damage dealt by the weapon, they rarely appear in weapon rooms. More on those below.
The Twins drop a one handed sword that does:
Charged Attacks trigger a powerful dash attack, damaging all crossed enemies.
The rarity of weapons goes like this:
- White – Common – No affixes or only one.
- Gold – Uncommon – 1-2 affixes
- Green – Rare – 3 affixes
- Purple – Cursed – single affix
Generally speaking the better rarity of the weapon the more affixes it will have.
The heavy weapons, as well as ranged weapons, expend one stamina point per attack.
Fire weapons also don’t burn enemies for damage, but merely make them walking candles. They can light up normal light sources and traps with their attacks though.
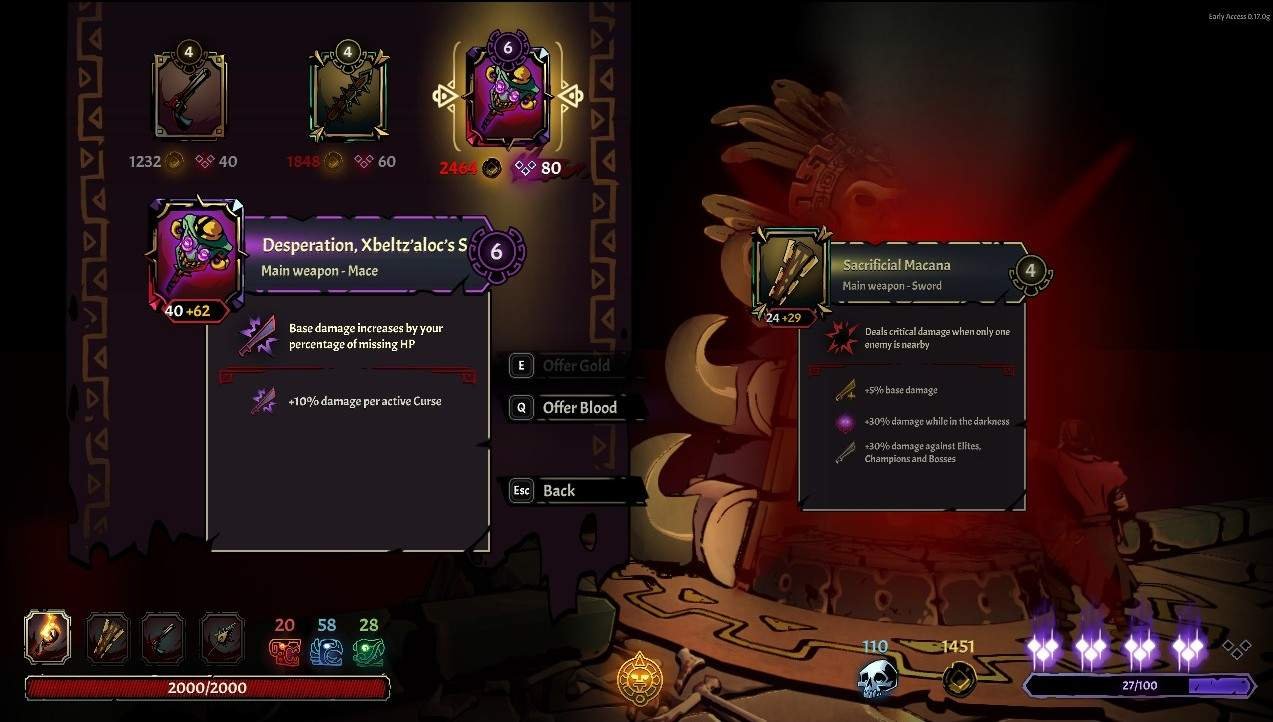
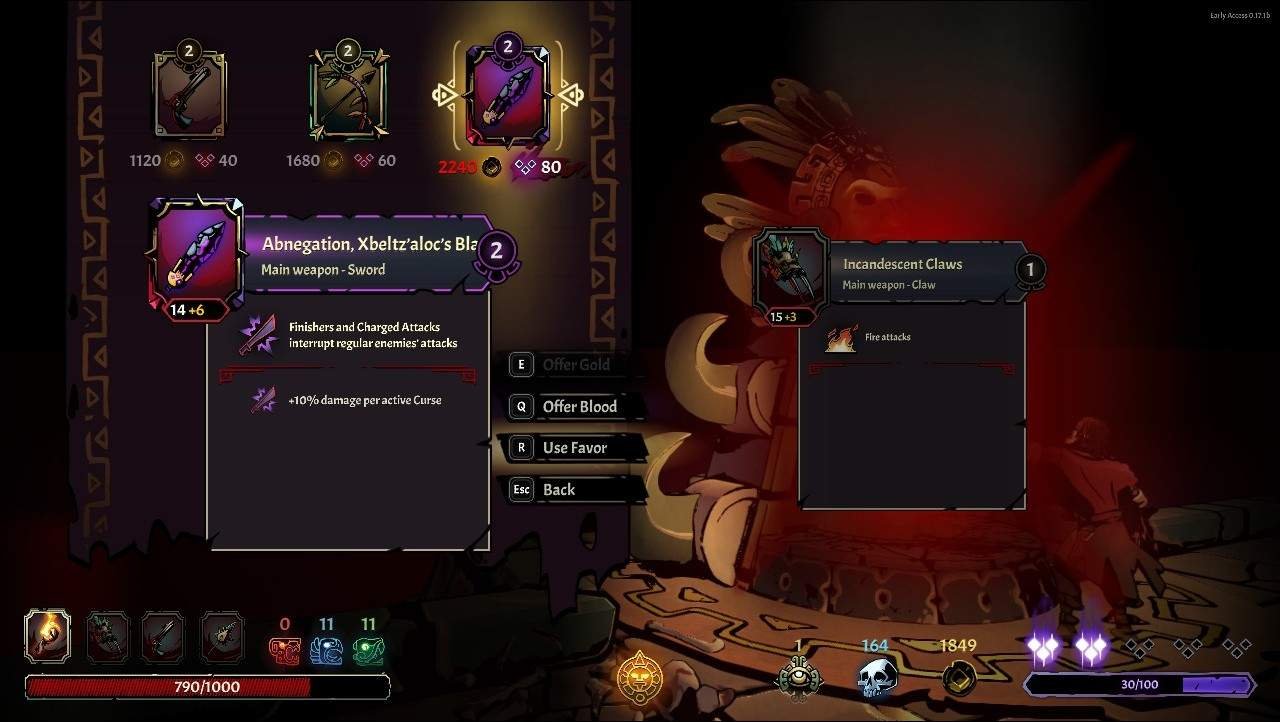
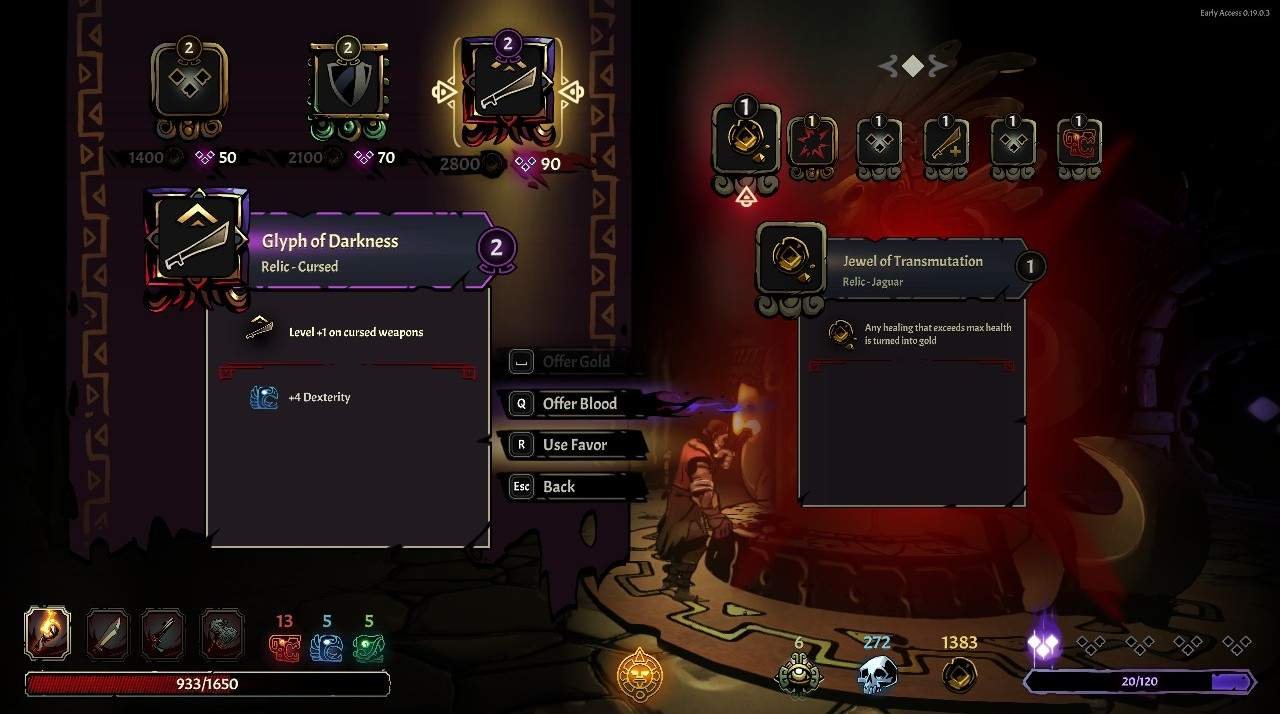
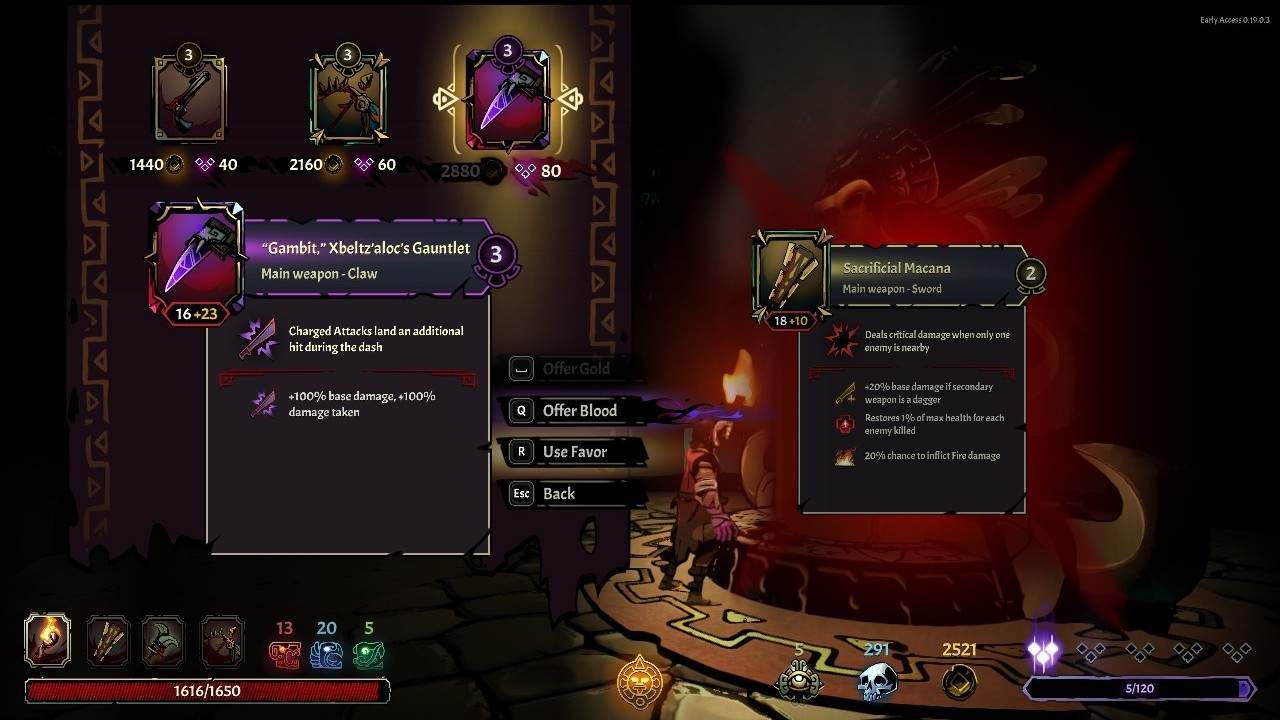
Cursed Items
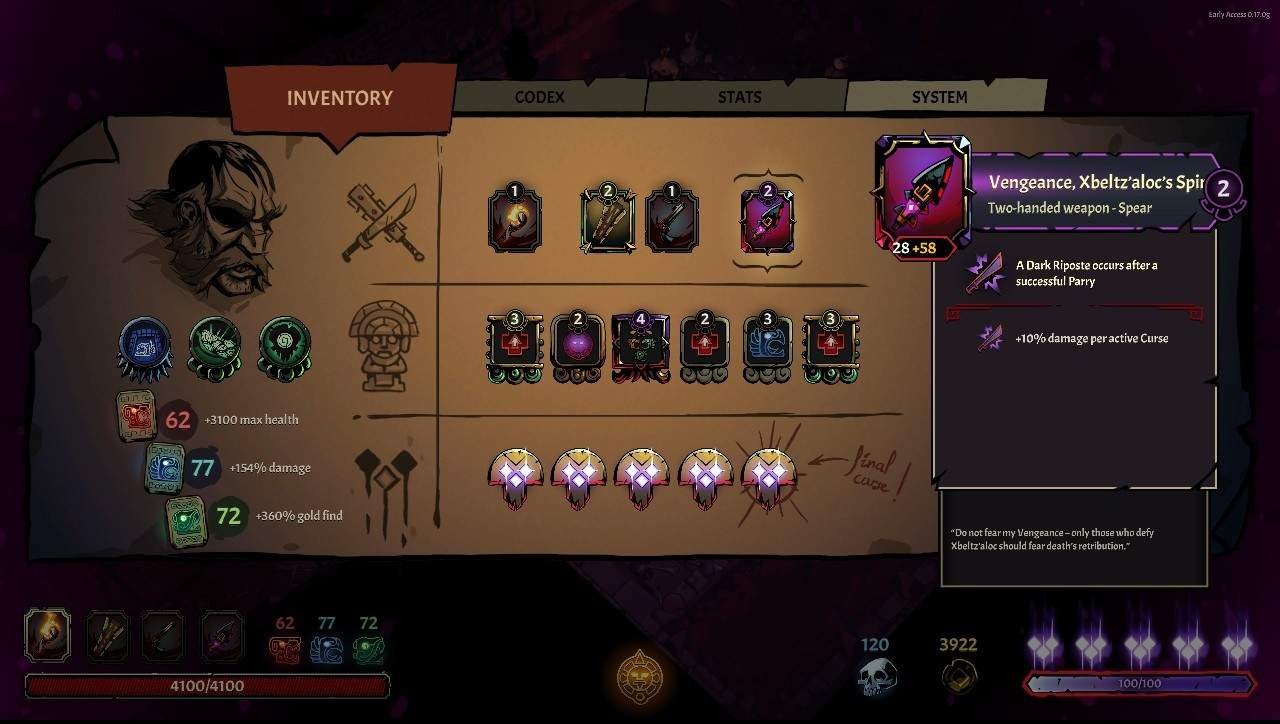
Curse weapons are rarely in the shop, and cannot have the randomized stats that normal weapons have, they have their two suffixes, one selected at random on a weapon.
Here are all the cursed items that can be acquired as of now.
Relic 1
Relic 2
Claws
Spear
Pistol

Greatsword
Mace
Dagger
Sword
Shield

Relic 3
Claws 2 (reskin)
Combat & Enemy Types
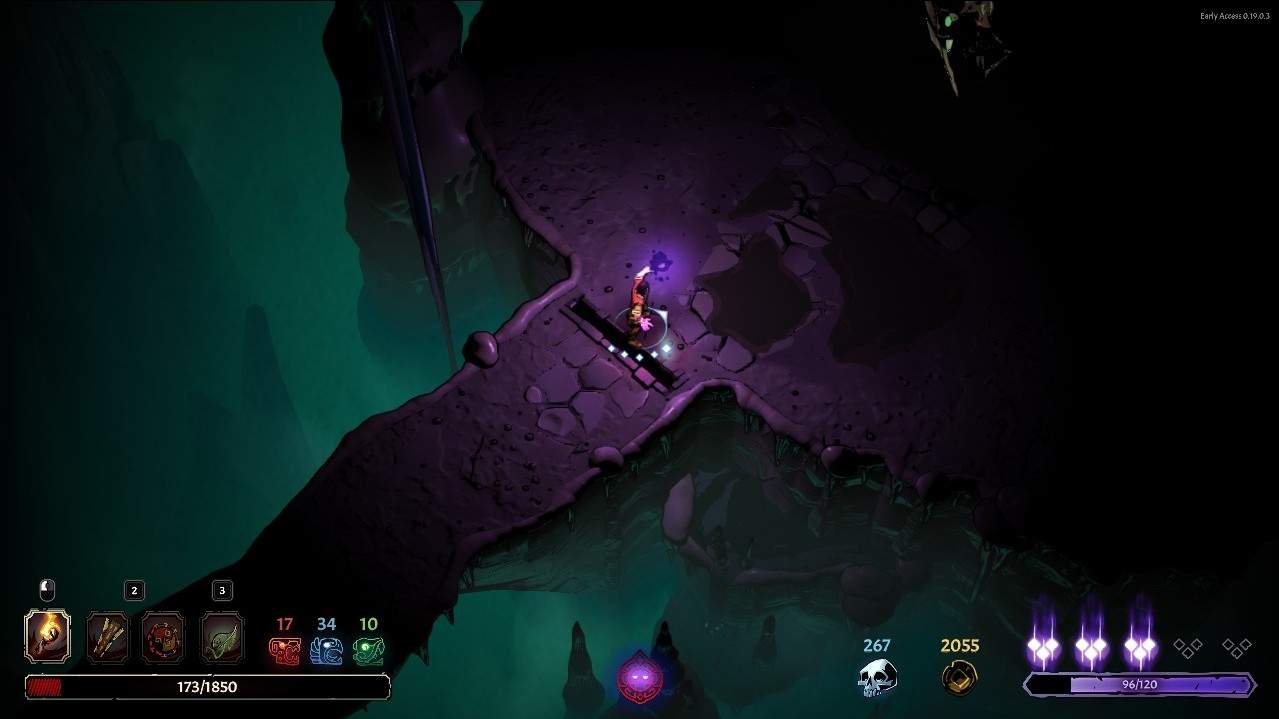
There is a light and dark mechanic, when in darkness you take increased damage and cannot see traps. There are relics which boost your power considerably in the darkness though.
The enemy types in the game are as follows:
Jaguar Temple
Lurker
Contrary to their look you should keep them close, their dash attacks can be dangerous if you don’t dodge behind them directly. They possess only two attacks, a standing sweep or a dash sweep + a neutral roar. Same applies to the Elite Lurker.
Sacrificed Virgins
They either throw orbs at you or use an aoe blast if you happen to be too close. After they take a full combo they always teleport behind you. Their orbs extinguish light sources when they hit them. Elite version shoots three shadow orbs in a cone instead.
Renegades
They have two attacks, a three hit combo ending with a ground slam which stuns all enemies present at the hit, or a forward double spin. Their swings destroy pretty much everything that is destroyable – traps, walls, pillars, light sources. Elite version has a red mask instead of a blue one and hits and recovers faster after swings as well.
Guardian Eyes
In 90 % of the cases no more than one guardian eye can attack you. Can be baited to damage themselves if positioned near a pillar or explosive urn as their own blasts harm them. Their shots light up light sources. You can also parry their shots. Elite version is mechanically the same.
Healers
If no enemy is injured or if he is the last one alive, he proceeds to spawn a lurker periodically. After he takes a full combo he teleports behind you. He tends to teleport towards injured enemies if they are far. Their summoned lurkers do not count as live beings, they don’t increase greed counter. Therefore if Healer is the last one alive he will keep spawning more and more enemies. Healers cannot heal each other. The Elite version spawns Elite Lurkers instead of a normal one.
Jaguars
Start appearing after the first boss. They have two attacks, either leap from range in a straight line, or a spinning aoe tail hit in sword range. Sometimes they roll back to dodge if they are within your striking distance. Elite version is mechanically the same.
Curse bats
Come from Cadaverous infestation curse. Spawned from dead enemies, 2-6 per a slain enemy. They run away from you if you hold torch, but approach you otherwise. After flying near you for some time they will try to attack you. They can be killed in one hit and also don’t refund stamina for kills, nor increase greed counter, but they do extend it’s timer when hit.
Serpent Catacombs
Serpent Cultist
Has two attacks, a lunge in front or a circular sweep around itself, cultists can also dodge and gain invincible frames akin to dodge of the player when they slither aside. Elite version throws his spear instead of lunging with it forward.
Plague bringer
Periodically spawn corruption circles beneath you, when injured they spawn vermin. When summoning they gain invincible frames, but those can be broken by a two handed hammer or sword and I assume shield charge as well. Elite version spawns two elite vermin instead.
Vermin
Possess single lunge attack in front which inflicts poison. On death explode and inflict poison in a circular area.
Prophetesses
Use heal Aoe when nearby injured enemies. Have a two hit lunge sweep attack. Can counter hit when flashing eye appears above them, if hit they teleport directly behind you and attack. Immune to knockback in their healing stance unless hit by a two handed hammer, sword, or third spear hit.
Tomb Horrors
Possess a jumping attack from range which inflicts aoe damage around the impact area. Have a standing sweep attack in front of them.
Titan Skulls
Can become untargetable and hit an area damaging you, or throw two blades homing on to you in a circular motion.
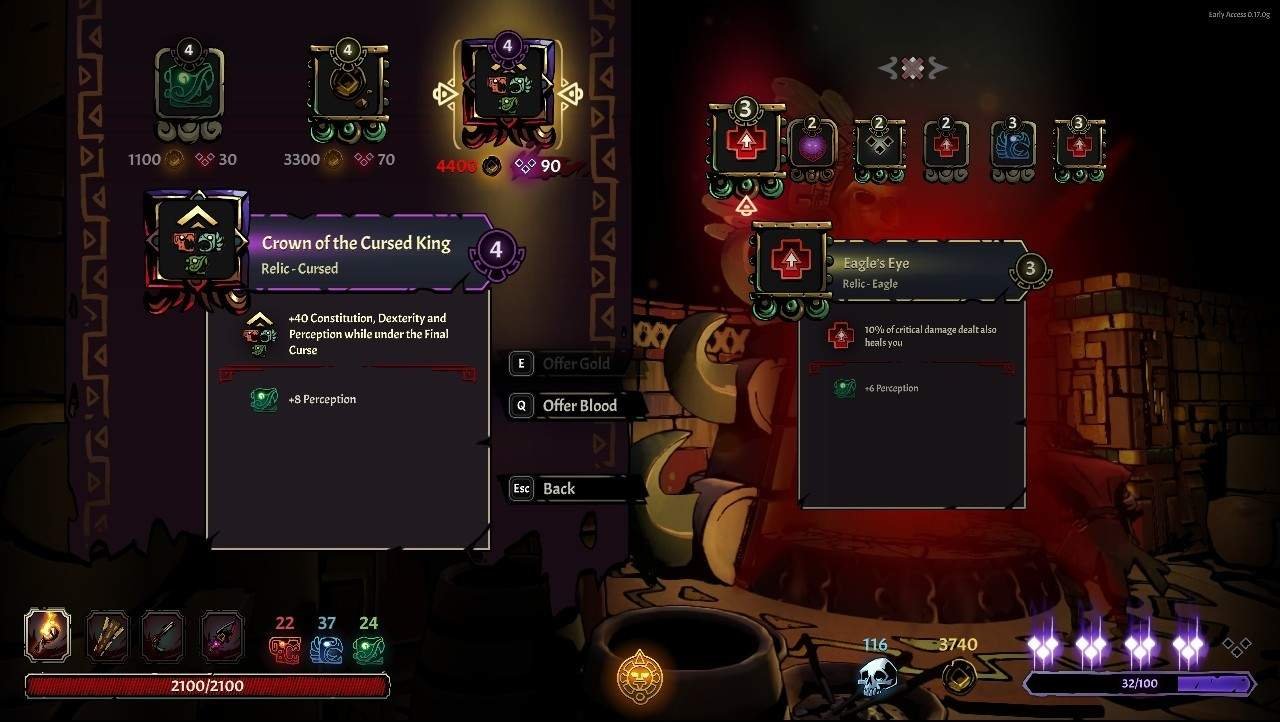
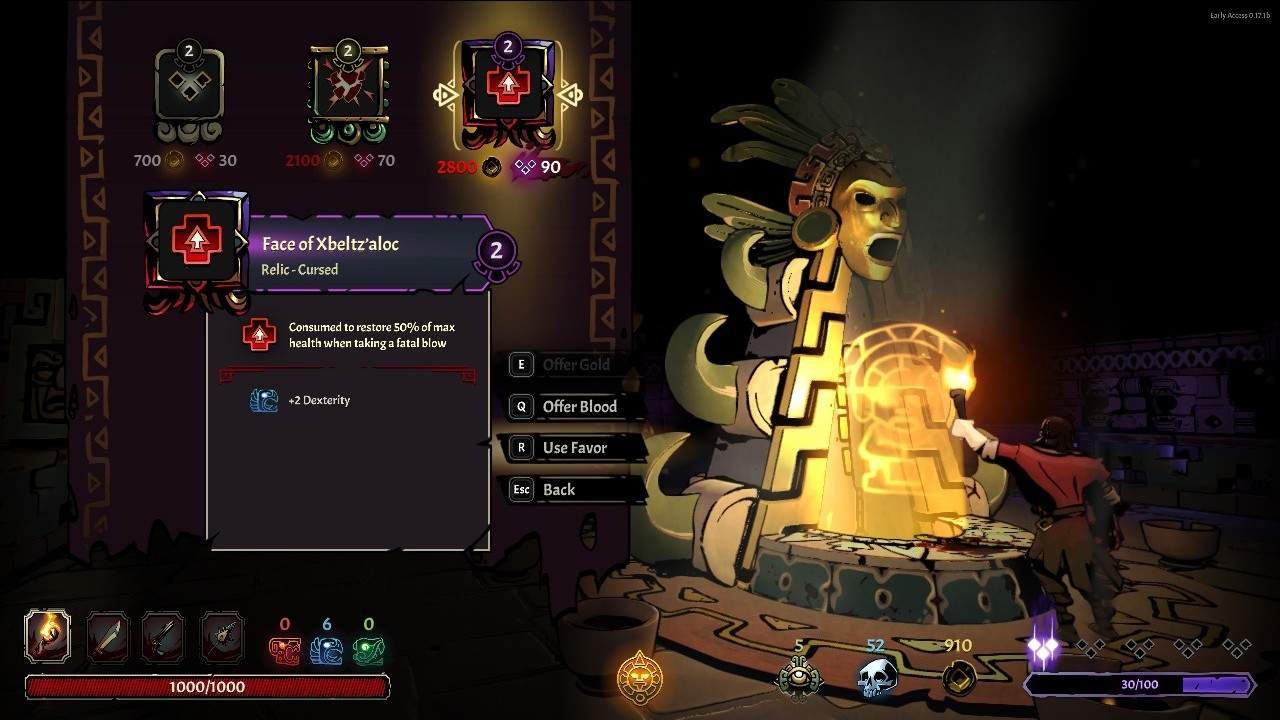
Curses and Corruption
You get a curse each time your corruption meter reaches 100, or 120 if you wear a certain blessing. Each room traversal costs 20 corruption by default. Corruption can also be built up by offering blood instead of gold to shrines, or by getting hit by certain enemies.
The curse you get is random, apart from the fifth one, which makes you rapidly bleed until your health reaches 1 Health point. Curses are lifted after slaying a boss. If you have more than one active you can choose which one to purge.
The possible curses are:
Shadow Word
Normal enemies are invisible and intangible in dark unless they attack, for some reason this applies to the summoned elite lurker as well.
- “The shadows can play tricks upon the eye, best they be named, so the enemy cannot lie.“
Dark Swiftness
Dodging makes you intangible, giving you longer invincibility frames, but it’s not possible to get perfect dodge stamina refunds anymore. Dodging with Dark Swiftness puts out your torch for a brief moment when you are holding it. Dark swiftness also destroys projectiles that hit you when you dodge into them, without you taking any damage, it can be used to block enemy projectiles from destroying possibly useful traps, or jumping through the third boss fireballs.
- “There is mysterious comfort in the moments when death is near, when all becomes clear and the shadows are a refuge.”
Mortal Harvest
Replaces the gold inside urns with blood that you can consume for a bit of corruption in return. 1 corruption per blood consumed.
- “The life essence of those who sully the sacred temples is not wasted. The value of blood is far greater than that of precious metals, when used wisely.“
Blinding Greed
All gold that is on the ground has a timer after you after which it disappears, the gold on the ground is worth a bit more though.
- “The glint of gold is the only light that truly soothes when darkness and ambition join forces.“
Auric Malediction
You lose gold equal to health lost, but all health damage taken is reduced by 25%.
- “Gold impregnating skin and bones.“
Temple’s Bite
All traps trigger themselves sequentially. Means you have to time your jumping through them.
- “The Temple’s traps come to life as if following the beat of a silent drummer sounding Death’s march.“
Shadowflame
Some light sources cannot be lit up and extinguish any light source in their vicinity, as well as any fire projectiles coming into their range.
- “Even the light and warmth of fire can be touched by the cold embrace of darkness.“
Volatile Remains
Enemies killed by fire attacks or while on fire explode after a short delay. The explosion damages enemies as well so it can trigger a chain reaction.
- “The wrath of the Death God will ignite the very heart of his Servants.“
Raging Temple
All jaguar statues now trigger fireballs. Active Jaguar statues are red when exposed to light.
- “Xbeltz’aloc controls the servants of the gods he has defeated, their champions, their watchers, their hopes and their fate.“
Visions of Madness
Taking a hit causes hallucinations. You lose sight of the healthbar and other HUD elements. The whole screen also gets a bit discolored.
- “The wounds inflicted by the denizens of the Temple are not physical, but often psychological, and some even spiritual.“
Fool’s Bounty
Opening a gold chest inflicts corruption, but chests contain more gold. 10 Corruption per chest opened.
Cadaverous Infestation
Regular enemies can spawn additional creatures when killed. Regular enemies must stand for anything but a boss since they spawn from literally everything. The tougher the enemy the more bats that will spawn. Curse bats are covered in the enemy section.
- “Some enemies lie dormant, hidden within hosts, waiting for the moment to strike at yet another unwary prey.“
Xbeltz’aloc’s Truth
Health drops over time until it reaches 1 health point, you won’t die unless you take damage though. It’s possible to outheal the bleed you get with healing through critical hits though.
- “Immortality is the greatest of all curses, and death it’s cure.“
Torch of Sorrow
Your torch loses fire properties thus giving you no light, but still revealing hidden traps around you, you also take no more bonus damage in darkness.
- “Look to the moon to see the sun’s light in its reflection, look to the sun if you want to go blind.”
Divine Pact
One of your relic slots get locked out but you gain 3 divine favors for the rest of the run, even if you cleanse this and regain the slot by defeating a boss.
- “Xbeltz’aloc favors those who shed their dependency for the frivolous.”
Sincere Offerings
Blood offerings do not cost Corruption but health instead – anywhere from 100 to 400 health depending on the level of the relic / weapon. If you run a healing build through crit or something you essentialy gain free shopping everywhere.
- “When the cut is deep, and blood flows in abundance, the mind is liberated and the body endures.”
Creeping Gloom
Taking damage extinguishes all nearby fire sources in a large radius, but you deal 10 % more damage in the light. If you manage to get this in combination with shadow word proceed to the nearest trap and save yourself the misery of playing with both of them.
- “The greatest lesson pain teaches is that anything can be lost at any given moment… light, hope, and life itself.”
Blurred Vision
Part of the map transforms into unknown rooms.
- “The mind is confused and desires conflicting, the path is veiled and the future uncertain.”
Dark Mysteries
Other curses are unknown as long as this one is not lifted
- “There are some things that must be lived to be understood.”
Blessings & Divine Favors
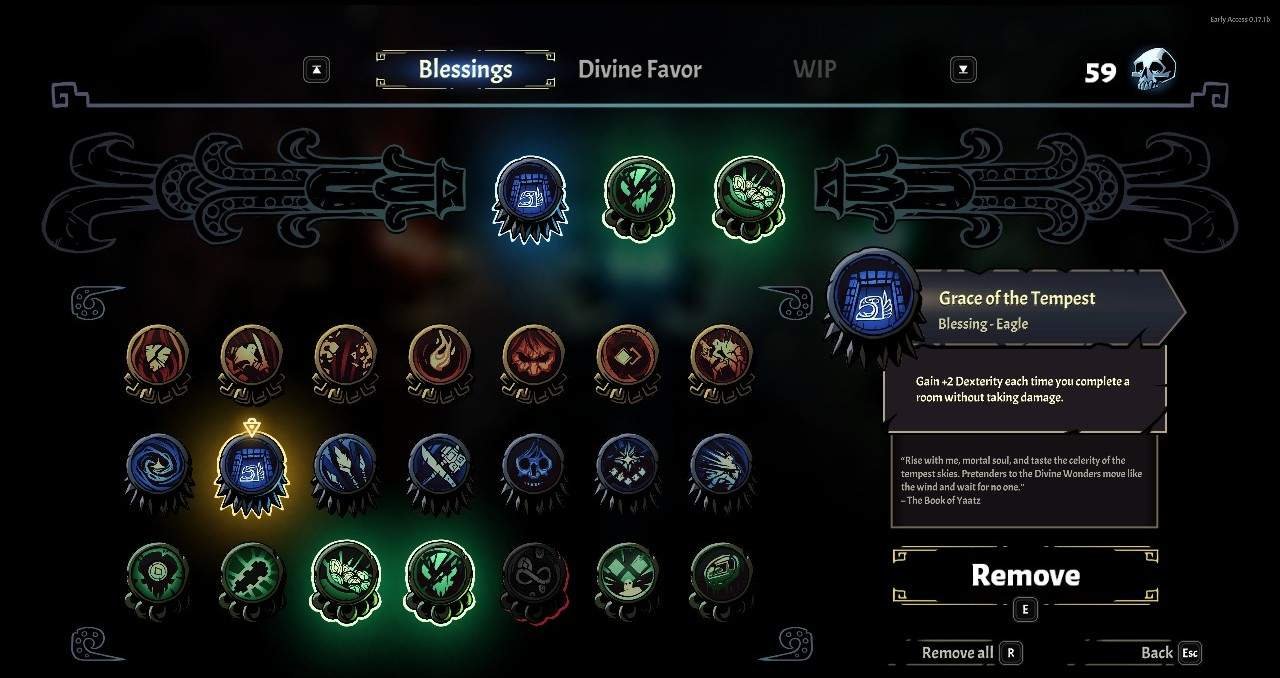
Enemies and bosses drop spectral skulls which are used as a currency in the game lobby. Higher difficulty games make enemies drop skulls more often, and bosses drop more of them as well. Elite enemies are more likely to drop spectral skulls than normal ones.
Crystall skulls are spent for either blessings which you can have up to three of, or Divine Favors, which allow you to re-roll a Weapon or Relic’s room items. Divine favors are not expendable so every run you are given as many Divine Favors as you have unlocked in the lobby. If you have four divine favors, every run you will be able to reset the shops that many times.
Stats and Relics
The three main stats in-game are:
- Constitution – each point adds 50 health flat.
- Dexterity – each point adds 2 % of damage to all your attacks.
- Perception – each point gives 4-5%? more gold gain from all sources.
You can carry up to 6 Relics, and infinite number of shrine blessings, since they add flat amount of stats after purchase. Relics have a level in their corner which shows their “strength”. Higher level usually means better relic, but there are golden border and cursed relics as well. The starter relics usually don’t give you anything but their main effect, but higher level relics offer for example an increased critical damage with additional increase of one of your three main stats by a flat amount.
Boss Fights
Jaguar Temple
Kiliz’Puzah, the Blood Hunter
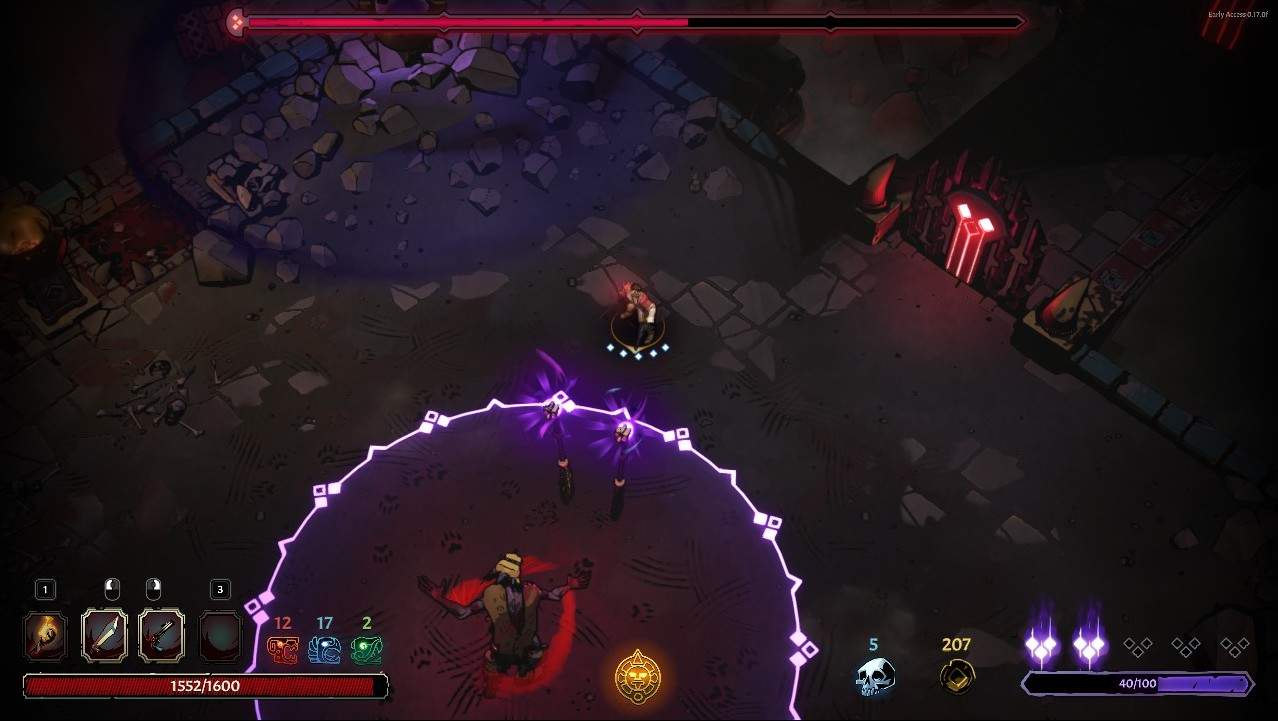
He does only two things – Summon a Jaguar periodically, or throw a spear at you, the spear can either be one, or he throws two in succession. The spears can be parried if you don’t feel like dodging. His summoning circle inflicts damage and corruption so stay away from it when he summons.
The way to deal with him is quite simple, when you enter the room, he already has one Jaguar present and summons another one, stand in front of the summoning circle to bait the first Jaguar to leap at you, then when the second spawns you can take them both out with melee hits. First get rid of the jaguars, then proceed to hit the boss, its a simple loop. You can get two combo strings on the boss after dodging his thrown spears, after which he summons another jaguar, rinse and repeat.
’Chi’Kin & Tchi’U, the Cursed Twins
First phase, the fire one, only has two attacks. She spawns orbs which you can destroy, and her 1-2 whip attack which detonates said orbs. This phase always starts with the spawning of the orbs, therefore you can take couple a free hits on her. Once she loses about 25 % she switches with her twin, initiating the second phase.
Second phase changes the arena from light to dark, so if you have any darkness damage buffs, here is where they come in handy. He also only has two attacks, one is 1,2,3–4 combo, which has a slight delay before the last hit, which also tracks you, and a charging slash which he mostly only does after he teleports to the middle of the arena. After he loses about 25 % they switch again.
When you run in you can take a couple free hits on the fire twin, then lure her where there are no orbs and dodge her hits, afterwards hit her again, until she switches with her dark twin. Try to keep him close so he initiates his 1,2,3–4 combo, dodge through him after the third hit after a short delay and hit him back, they´ll proceed to switch again, and thats basically it.
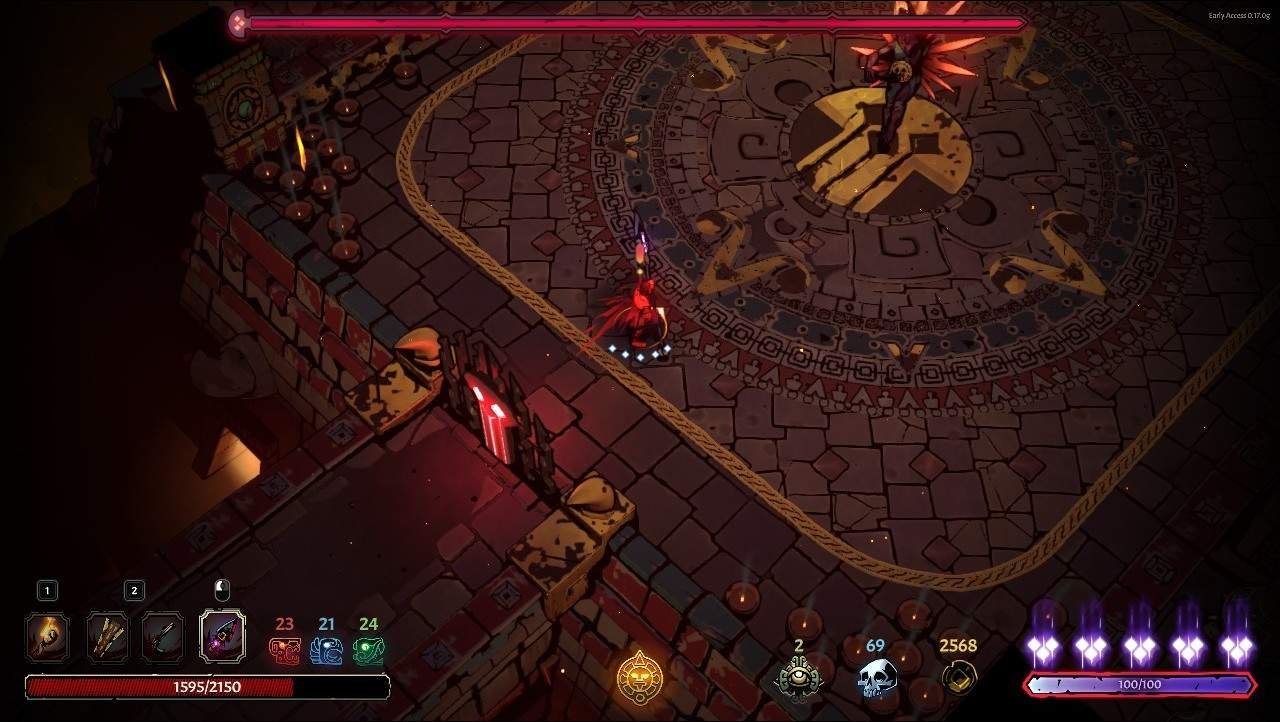
Dark Avatar of the Jaguar
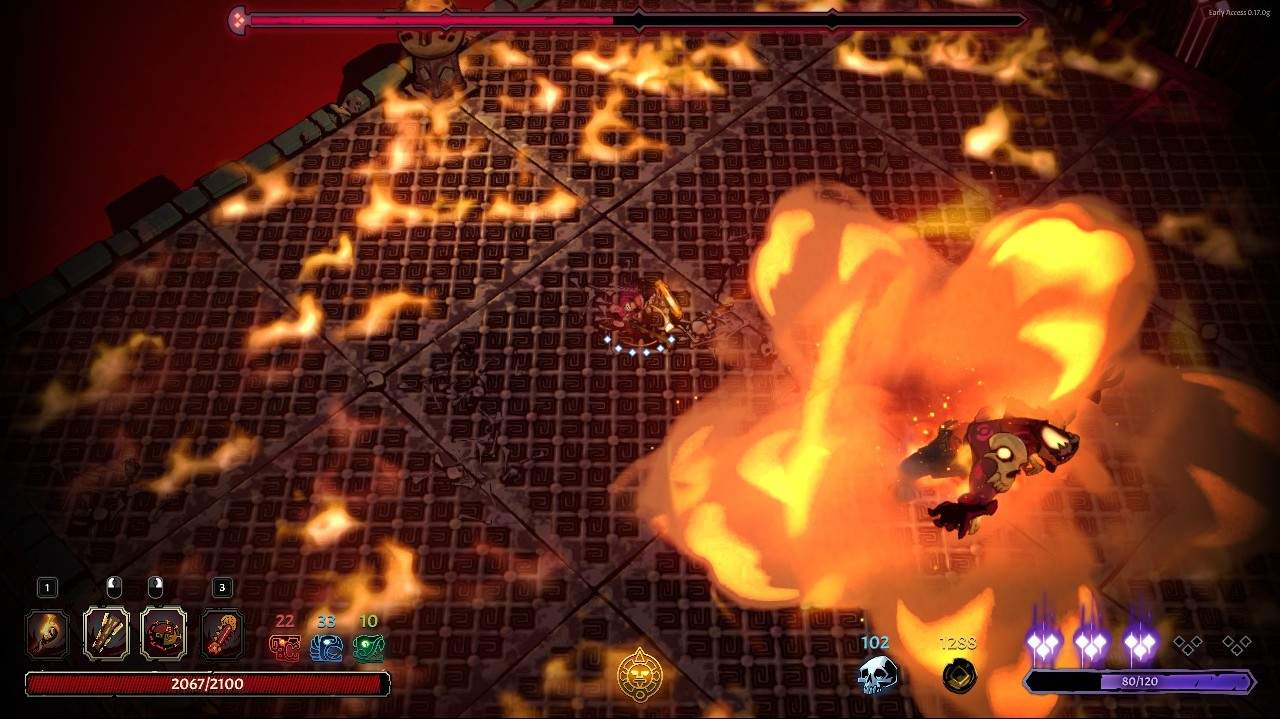
Has some huge health pool and hits hard. Has more attacks than previous bosses as well as changing arena. The arena is 16 tiles 4×4 squares. It will periodically switch from non-burning, to having a burning outer layer, or the burning middle 4 squares. If the boss steps into the fire he gets enhanced, his attacks deal more damage, inflict burning, and his detonation has larger radius.
His attacks are:
- A huge sweep in front.
- 1-2 sweep in front and the second hit tracks you.
- A leap from middle to long distance, slamming the ground at your position.
- Detonating himself and setting himself on fire in the process, or extinguishing with larger radius.
- Spawning five fireballs moving forward in a cone – You can’t dodge through them without dark swiftness.
When at or below 50 % – moving 1-2-3 sweep charge.
Try to make him stay away from the fire as he gets more dangerous after he is set aflame, but other than that stay close to him, dodge his sweeps and hit him back, thats basically all there is to it. The biggest danger is being stuck on the middle four squares when he blaze detonates.
Serpent Catacombs
Xucat’, The Witch
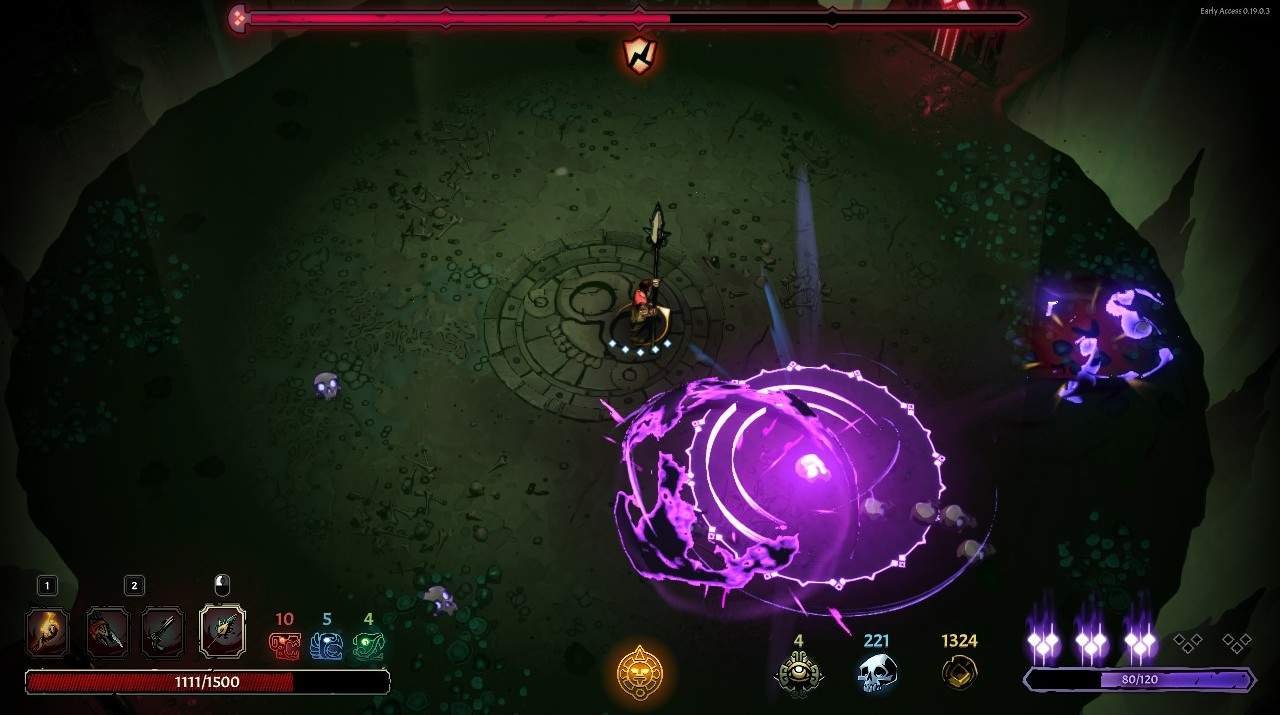
When hit she drops corruption skulls which detonate when you get near them, but are destroyable by attacks. She can cast a volley of corrupted skulls in five or six different patterns, similiar to bullet hell games. She also tends to summon five skulls in a circle around you from time to time. She can teleport to the middle and either shoot a barrage of skulls or spawn the skulls in a circular area around you.
Pretty simple fight, when you finish your combo on her just get some distance so you can properly dodge the incoming barrage of skulls and pay heed where you step because of the skulls laying around. Repeat ad nauseam.
Also not sure if intended but sacrificial sword does not crit on her, possibly considering the skulls on the ground enemies.
Ratyapu, The Abomination
All Abomination attacks inflict poison on hit.
His attacks are:
- A 1-2 front sweep where the second hit is slightly delayed.
- A projectile throw in a straight line much like Blood Hunter.
- Forward hitting puncture hit with medium range.
A spinning combo
Every 25 % of health he loses he enrages for about five seconds gaining increased movement and attack speed.
Tactic is similiar to third boss from the Jaguar temple, stick close and dodge his sweeps and punish them. When he starts to enrage gain some distance to get some breathing space, dodge his double sweep and keep hitting back. The sole thing to be wary off is his spinning combo. Keep repeating till he drops.
Dark Avatar of the Serpent
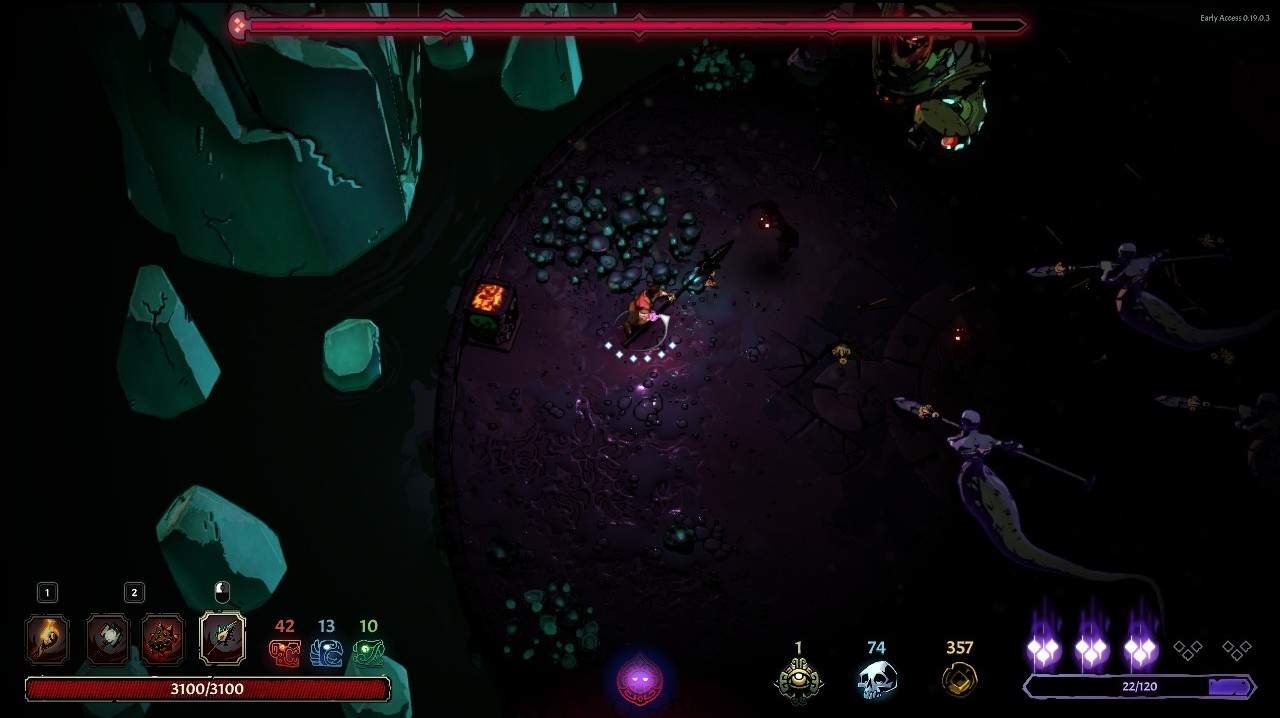
He possesses the following attacks:
- A chomp with his snake hand followed by – if out of range a jumping attack to your position much like the Tomb Horrors, or when close a wide sweep with his snake hand.
- A slam in front of him with his hammer hand.
- A summoning circle dealing corruption damage and summoning three serpent cultists if none are present.
- At 50 % health all the Serpent cultist that get summoned are Elite.
All his attacks damage his allies and if he kills them by chomping them with the snake hand he heals roughly 15 % of his max health.
This is more a battle of attrition and patience than anything else as he can continously heal by killing the cultists, I’d advise killing two and leaving only one and making sure he never wobbles in front of the boss as to not get killed by him, aside from that focus on hitting the boss and dodge his attacks. If he summons three Elite Cultists on you just keep kiting them in the circular area and take a couple hits on him every now and then till he eventually dies.
Builds & Tips
To all the people who are either new or have trouble getting through some parts of the temple I’ll dedicate this small section. It’s mostly just my playstyle but it might help a bit.
Healing
First off, you should gather some healing relics, never rely on the fountains, you should avoid them as much as possible. Best you can get is x% healed by critical damage, combine either two of these or put it together with + x% healing from all sources and on top of those try to gather + % critical damage done. If you manage to get three or four of these you’ll heal half of your health per room purely by damaging enemies well. Worst case if you dont find anything get + x% healing when passing through door.
Combat
Focusing certain enemies is rather important in combat, I always choose to take out the ones I know will die fast as it leaves less variables in the fight and I do not have to dodge as often, contrary to usual games it is better to kill healer’s targets first rather than the healer themselves in this game, as they cannot heal themselves anyways and are not proficient in combat, this only works when you are not surrounded by Elite enemies though, as their health bar is rather big and in that case it is better to take out the healer, but in all honesty it depends on how much damage you deal at that point.
Also do not parry, seriously, unless you have killed every enemy fifty times or more and are really confident that the parry will work. Parrying is a really good thing, but only if you can pull it off, and even then its not such a game changer, the enemies might drop faster, but the risk of missing and getting hit is always high.
Weapons
Spears, that’s it. Or possibly sacrificial swords, critical hit builds have always been strong in games and it is the same way here. Spears have 100 % critical hit chance at exact medium range, have decent knockback on top of their safe range and their third hit interrupts, if you gather bonus damage for critical hits with relics you are pretty well off. Same thing with sacrificial sword which always crits with last enemy, therefore most of the bosses are subject to 100 % the entire fight. Not only do these two deal a lot of damage, but can also heal you very well with critical healing relics.
Stat distribution
Generally I always try to get as much Dexterity as possible sacrificing health and gold gain for it. When you get proficient enough to not take as much damage and possibly have some healing relics the only reason you will need more Constitution is for the boss fights and that is just in case you make a mistake there. Its always good to have some bonus health though as some curses and enemy parties will leave you damaged no matter how good you are.
The Perception stat is subjective but I always keep it the lowest, instead of paying gold you can just sacrifice blood and gain corruption at least twice or three times and still complete the full three boss run without gaining the final curse.


Be the first to comment