
A small guide to help you reach Eden!
Contents
Guide to Newbies
All credit goes to Baby Pigman!
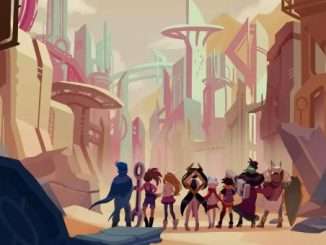
Introduction
One Step From Eden is a very hard game, especially if you’ve never played anything similar to it. Hopefully after reading this guide you’ll be able to get your first victory!
Focus and You: Selecting the Best Archetype
In One Step From Eden, spells fall under 10 different categories, called ‘Focuses’. When you open your deck (default key: I or Start) you can set up to two focuses, increasing the probability of finding a spell from that focuses after each encounter.
Anima
Elemental spells. You want to focus Anima if you want a build focused (pun intended) on either frost or fire damage. Generally, fire spells will burn a tile on the ground, and whenever a unit steps on the tile they will take damage over time.
Convergence
Convergence is kind of a weird Focus with no real cohesive style. It mainly contains spells that restore or increase your mana and spells that work with Trinity.
In this Focus you can also find the spell Sera Cannon, a must-have for money focused builds.
Doublelift
Doublelift spells can fall in one of two categories: card manipulation and Jam. Some strong synergies are possible between this Focus and artifacts and spells that activate on Consume.
Glimmer
Like the in-game description says, “Light and Beams”. Not much to say about this Focus, except that it contains the very strong spell “Soul Link”.
Hearth
Hearth’s main mechanic is Flow, but it also contains spells that Root your enemies or Break tiles.
Hexawan
Like the tooltip says, this Focus specializes on creating structures such as turrets and walls on the field.
Kinesis
Kinesis is all about movement: the spells in this Focus can teleport units on the field or move them in each of the four cardinal directions.
Miseri
This Focus specializes in healing, applying Fragile, or applying Poison.
Phalanx
If you want to facetank every attack, Phalanx is for you. Almost every spell in this archetype generates a temporary shield, but unfortunately there aren’t many offensive spells. A notable exception is Shield Throw, which deals damage equal to your shield.
Slashfik
The main purpose of Slashfik spells is to generate Kunais, 0-cost spells with limited range that deal low amounts of damage and get consumed. While this doesn’t seem very appealing, there are a number of artifacts that synergize with kunais and consumed cards.
General Remarks
Remember your ABCs:
- Always.
- Be.
- Casting.
While not always true if you want to set up specific combos, it’s generally a good idea to always be doing something to deal damage to your enemies! Every second you’re spending doing nothing at max mana is another second where you could be taking unnecessary damage.
While it seems appealing to pick a card every time you’re offered one, it’s often times not a good idea. You should strive to keep a cohesive deck with cards that work with each other and maybe a couple of powerful spell that do not fit in, rather than taking as many spells as possible.
Consuming Jam: What Do Keywords Mean?
- Break: whenever a Cracked tile is Cracked again (or is stepped on by a unit), it becomes Broken. Units cannot step on Broken tiles.
- Consume: once you cast this spell, it’s removed from your deck until the end of the encounter.
- Flow: add a number of Flow stacks to yourself. Every time you cast a spell, one stack is depleted. If you have at least one Flow stack on you, Flow spells have an additional effect.
- Fragile: take 150% damage from all sources.
- Frost: applying 3 stacks of Frost will deal 150 damage to the unit.
- Jam: spells with the Jam keyword are usually pretty powerful, but they have the drawback of adding Jam cards to your deck. These cards cost 2 mana to play and don’t do anything (besides getting consumed).
- Luck: increased quality of rewards but also increased difficulty.
- Poison: after a certain amount of time, deal damage equal to the amount of poison stacks, after which reduce the poison stacks by half. If more Poison is applied, refresh the timer.
- Trinity: add one Trinity counter to yourself. When you reach three counters, the next Trinity spell will have an additional effect and return your counter to zero.
Each stage starts you on a normal battle, at the end of which you can select one of three paths. Generally, two of the paths converge between each other around the middle of the map, while the third stays separated.
To reach the boss of each stage, you will have to go through different encounters:
Battle
The default (and most common) encounter, it’s just you versus an amount of enemies.
Treasure
This encounter will have you face two crystals and one (or more) chest(s). Destroying the crystals grants you money, while destroying the chest before it expires provides you with an artifact
Campsite
A place of respite, the campfire will help you recover some health. Here you can also find a rabbit (which you can kill for 1 bonus luck) and some of the bosses you decided to spare on your way to Eden
Shop
Here you can meet the friendly Shopkeeper. Like the name implies, you can exchange money for artifacts, upgrades, and removals. You can also pick up one or more pacts, which will give you a benefit in exchange for a debuff for a certain amount of encounters
Distress
This encounter will place you in a field where you need to save one or two hostages against turrets or exploding crystals. There are three types of hostage, and depending on the color of their shirt they will give you a different bonus if you manage to save them:
- Pink hostage: heals you for 100 hp.
- Green hostage: gives you spell power.
- Black hostage: gives you an artifact.
Danger
This type of encounter will place you in a normal battle with an additional structure:
- Volcano: erupts every few seconds, sending a projectile to about half the tiles in your side of the field.
- Missile: slowly travels towards a tile. If you don’t finish the battle (or destroy the structure) before the missile lands, it explodes, dealing 300 damage to all units.
- Self Defense Turret: a white and red obelisk, can be placed anywhere on the field. If it’s damaged, it shoots very fast to its attacker.
- Monolith: while there are different subtypes, they all work in the same way. They have a timer (the small circle near their health), after which they activate and attack in difficult to avoid patterns. Your best bet is to prioritize hitting them.
Miniboss
Very similar to a normal battle, after which you will get to choose an additional artifact. It’s not as scary as it sounds, and it should be prioritized whenever possible
Boss
To access the next stage, you need to defeat a boss. There are 8 “standard” bosses, two for each different biome. After defeating a boss, you can decide to kill them to gain an artifact or spare them to recover 400 health. Spared bosses will sometimes appear in encounters to grant you an additional benefit.
Additionally, sometimes one of the three paths in a stage will begin with a red encounter; choosing this path will lead you to a “dark” version of the stage, where luck is increased and shop items cost health instead of money. Furthermore, treasure encounters will have a mimic, a chest with 666 hp that will attack you after a short while. Simply surviving the attack will be enough to grant you the contents of the chest.
Stages and sparing benfits
Glacier
- Selicy: appears in battles and deals low damage to all enemies.
- Violette: appears in battles and grants you spellpower and extra mana.
Volcano
- Saffron: appears in battles and deals high damage to a single enemy.
- Gunner: appears at campfires and grants you extra health.
Forest
- Hazel: appears in battles and spawns a turret in front of an enemy.
- Shiso: appears at campfires and grants you extra money.
Ruins
- Terra: appears in battles and cracks some tiles in the enemy side of the field.
- Reva: appears when you die and revives you.
Routes
The game has 3 different routes, depending on the number of bosses you spared.
- Pacifist: Spare all bosses. This will lead you to fight Terrable.
- Neutral: Kill at least one boss, spare at least one boss. This will lead you to fight the Gate.
- Genocide: Kill every boss. This will lead you to fight Serif. To kill Serif, you need to also kill the shopkeeper.

Be the first to comment