
Contents
Tips, Strategies and Routes to Reach SL802
All credit goes to quacksouls!
Introduction
TL;DR For each area and boss, it’s important to find the strategies that work for you.
The SL802 run is a challenge run as it requires you to speed run the game multiple times to reach the maximum soul level of 802. Of course you can use Cheat Engine to give you all the souls necessary to level up to SL802, but that would be like a hollow victory: you would gain precious little from your experience and cheated yourself out of valuable lessons you would learn from speed running the game.
Before starting your SL802 run, ensure your character is Hollowed and remains Hollowed throughout the run. The main reason is that your character must be Hollowed in order to level up 5 times with Yoel in each NG cycle. Consider being at under 30% weight ratio to allow your character to move as quickly as possible. Most of your time would be spent sprinting from boss to boss. Having the Ring of Favor+3 would help with the running as you can perform the Ring of Favor glitch to dash without depleting your Stamina bar:
As you’re sprinting to the boss arena, equip gradual healing items to restore some HP on your way. For example, equip a Blessed infused Caestus+10 in the left hand and the Sun Princess Ring. Some route requires you to jump off steep cliffs or from high places. Use the Silvercat Ring to negate any fall damage. Another trick to help you save some time is to backup your save file “DS30000.sl2” before you fight any boss. If your character dies during the fight, you can reload the backup and try again without having to sprint to the boss arena.
Consider using spells or items to buff your damage output. The most useful spells are Sacred Oath and Deep Protection, but if you don’t have Sacred Oath you can use the weapon art of the Sunlight Straight Sword. After killing a boss, quickly equip these items for extra souls: Mendicant’s Staff, Shield of Want, Symbol of Avarice, and Silver Serpent Ring+3. Just before you start fighting a boss, if your weight ratio is over 30%, you might as well equip 1 or 2 soul boosting items to save some time. Generally, you should have a fire and lightning weapon ready to hit some enemies that block your path en route to a boss. My weapons of choice for this case are the Chaos and Lightning infused Lothric Knight Swords+10. An un-infused Lothric Knight Sword+10 also works, but you must buff it with Charcoal/Gold Pine Bundle to quickly dispatch of any enemies that block your way. Swamp areas tend to slow you down and make you fat roll. Two-handing a dagger and performing the weapon art would allow you to quickly traverse a swamp area. Furthermore, your character should have all items necessary to help you defeat bosses as quickly as possible. If you don’t know which items you would need, collect all items in the game or ask another player to drop you items that you’re missing. Note that spells and boss souls cannot be traded between players.
If you want to use the glitch, ensure you have 600+99 of each type of great arrows: 600 in your storage and 99 in carry. These videos show how the glitch works:
If you plan on using sorcery, miracle, and/or pyromancy to fight most or all bosses, consider allocating your (Ashen) Estus Flasks. I find that an Estus Flask to Ashen Estus Flask ratio of 6:9 is a nice balance between the number of heals I want and the number of times I need to cast spells.
Iudex Gundyr
This boss is weak against fire. Here are some strategies to fight him, assuming that you first cast Sacred Oath or use the weapon art of the Sunlight Straight Sword, and cast Deep Protection:
- Buff an ultra great sword or a straight sword with Carthus Flame Arc. My weapon of choice is the Fume Ultra Greatsword+5. With this weapon 2-handed, after pulling out the Coiled Sword I would do 2 R1 and strafe around to do another R1. Then wait for chances to R1 Gundyr to death. If you’re using an ultra great sword, you might as well equip the Mendicant’s Staff and the Shield of Want so you can quickly swap to them after the boss is defeated.
- Buff the Astora Straight Sword+10, Lothric Knight Sword+10, or Anri’s Straight Sword+5 with Carthus Flame Arc, pull out the Coiled Sword, and spam R1 the boss to death. Also use Lloyd’s Sword Ring and/or Flynn’s Ring for some extra damage output.
- Attune Chaos Bed Vestiges. Equip a Pyromancy Flame+10, Witch’s Ring, Great Swamp Ring, Lloyd’s Sword Ring, Fire Clutch Ring, and throw Vestiges at the boss.
Vordt
Before you enter the boss arena, make sure you first talk to Emma and receive the Small Lothric Banner. Vordt is vulnerable to lightning. Here are some strategies to fight him, assuming that you first cast Sacred Oath or use the weapon art of the Sunlight Straight Sword, and cast Deep Protection:
- Two-hand the Dragonslayer’s Greataxe+5, be at his rear, and R1 him. When he starts roaring to enter his second phase, perform the weapon art on him. If you’re quick, you can complete 2 rounds of weapon arts. After finishing roaring and sprinting around during this second phase, Vordt would stop to blow frost. Run to his side or rear and weapon art him to death.
- Attune Chaos Bed Vestiges. Equip a Pyromancy Flame+10, Witch’s Ring, Great Swamp Ring, Lloyd’s Sword Ring, Fire Clutch Ring, and throw Vestiges to barbecue the boss.
Undead Settlement
The 2 most important things you need to do in this area are:
- Talk to Yoel and accept his services. Exhaust his dialogue so he would teleport to Firelink Shrine.
- Light the Undead Settlement bonfire. You might need this bonfire to prepare for later bosses.
After you have talked to Yoel, accepted his services, and light the Undead Settlement bonfire in the listed order, return to Firelink Shrine and level up 5 times with Yoel. Now warp back to the Undead Settlement bonfire and sprint to the Road of Sacrifices bonfire.
Crystal Sage
From the Road of Sacrifices bonfire, spam the Ring of Favor+3 to sprint to the Halfway Fortress bonfire. From here, equip the Silvercat Ring and jump off the cliff from the left-most edge. Keep to the left and sprint to the Crucifixion Woods bonfire. Have a fire weapon ready because a Starved Hound might chase after you. If you hit a Starved Hound with a fire weapon, it would stop to writhe on the ground to put out the fire on its body. Light the Crucifixion Woods bonfire. You will need this bonfire later on to get to Farron Keep.
The Crystal Sage is a magic spammer, but can easily be countered if you equip the Magic Stoneplate Ring+2 and cast Great Magic Barrier. Also cast Sacred Oath or use the weapon art of the Sunlight Straight Sword, and cast Deep Protection. The boss is weak against fire. My weapon of choice for this fight is a Chaos infused Lothric Knight Sword+10. A straight sword buffed with Carthus Flame Arc should also be effective against the boss. When you enter the boss arena, run straight to the boss. If you’re lucky he would cast a purple variant of Homing Crystal Soulmass. If this sorcery is cast, you can be next to the boss, constantly strafe to your left, and R1 him. As long as there is one Soulmass hovering above the Sage’s head, he would not teleport to a different location within the boss arena. In his second phase, the Sage would summon clones of himself. The true Sage is the one that uses purple magic; all other copies use blue magic. If you want, experiment with Chaos Bed Vestiges to see whether you’re comfortable with a pyromancy strategy.
Deacons of the Deep
From the Crystal Sage bonfire, use the Ring of Favor glitch to sprint to the Cleansing Chapel bonfire. Halfway through the route, a number of Starved Hounds might chase after you. These enemies are relentless and can teleport behind you. If you want, consider casting Tears of Denial before you start the sprint. From the Cleansing Chapel bonfire, you can sprint straight to the Deacons. Some enemies in the grave yard can block your path. Use a fire weapon to clear your path as necessary. If you want, have the Torch ready in case you’re hit with maggots, which would cause bleeding. Once you’re hit with maggots, use the Torch to rid yourself of maggots and consume a Bloodred Moss Clump to remove the bleed bar.
The Deacons is a gank boss, but can easily be cheesed by means of the Dragonslayer’s Greataxe+5. Before entering the fog wall, cast Sacred Oath or use the weapon art of the Sunlight Straight Sword, and cast Deep Protection if need be. Equip Alluring Skulls and 2-hand your weapon. After entering the fog wall, throw an Alluring Skull and look for the Deacon with a glowing crimson aura to kill. Repeat for the duration of the first phase, throwing an Alluring Skull each time before you start killing the crimson-glowing Deacon. In the second phase, the head Deacon would spawn in, surrounded by a number of purple robed deacons. Stand next to the head Deacon, lock on to him, and use the weapon art of the Dragonslayer’s Greataxe. If your Stamina bar is near empty or fully depleted, strafe around the head Deacon to recover some Stamina for a weapon art. Repeat until the Deacons are defeated.
Abyss Watchers
From the Crucifixion Woods bonfire, sprint to the ladder that takes you to Farron Keep. Two knights would stand near the ladder to harass you. If you don’t want them to harass you, get to the ladder as quickly as possible, descend the ladder a bit, and wait for them to fall to their death. Another strategy is to cast Hidden Body when you’re on the shore of the swamp and then sprint to the ladder. Light the Farron Keep bonfire. Two-hand a dagger and cast Hidden Body as you weapon art your way across the swamp of Farron Keep to diffuse the 3 fires. Refer to this video, starting from time stamp 18:35 onwards:
The Abyss Watchers are weak against fire. Here are some strategies to fight them, assuming that you first cast Sacred Oath or use the weapon art of the Sunlight Straight Sword, and cast Deep Protection:
- Equip a Pyromancy Flame+10, attune Chaos Bed Vestiges, and equip these rings: Lloyd’s Sword Ring, Witch’s Ring, Great Swamp Ring. The fourth ring can be any you want. If you want high risk and high reward, equip the Fire Clutch Ring. If you want fast Stamina regeneration, equip the Chloranthy Ring+3. Then spam Vestiges in the boss’ face.
- The Abyss Watchers can be staggered with a 2-handed R1 of an ultra great sword. For example, 2-hand a Fume Ultra Greatsword+5 and buff it with Carthus Flame Arc. An R1 suffices to stagger the boss. If you want, you can perform a fully charged thrust R2 to stun lock the boss.
- Summon an NPC and use any of the above strategies. In Embered state, you can summon either Black Hand Gotthard or Londor Pale Shade. Depending on how far you progress with Anri and Sirris’ quest lines, you can summon Anri. If you play online and use the Dried Finger, you can summon a second NPC phantom to help you.
Wolnir
Starting from the Abyss Watchers bonfire, head down the stairs and keep to your right. You will find a shortcut that leads on the way to the Catacombs of Carthus bonfire. Don’t light the bonfire. Instead head to the boss arena of Wolnir. The boss is easy to cheese. Equip Pestilent Mist, Poison Mist, and Toxic Mist. After touching the goblet and triggering the fight, stay to your right and walk to Wolnir’s hand. Don’t hit the boss. If you’re equipping any pieces of the Armor of Thorns, be careful not to roll into the boss. When you’re close enough to the hand, cast Pestilent Mist. Then cast Poison and Toxic Mists on Wolnir’s hand until he is toxic and poisoned. Continue casting Pestilent Mist until the boss is defeated. Refer to this video for the cheese strategy:
Irithyll of the Boreal Valley
Before reaching the Central Irithyll bonfire, you would be harassed by a Sulyvahn’s Beast as you cross the bridge to Irithyll. Sit at the Irithyll of the Boreal Valley bonfire and attune Chaos Bed Vestiges. Equip these rings to boost your fire damage output: Witch’s Ring, Great Swamp Ring, Lloyd’s Sword Ring. For the fourth ring slot, you can choose to equip the Fire Clutch Ring or the Chloranthy Ring+3. Before entering the bridge, cast Sacred Oath or use the weapon art of the Sunlight Straight Sword, and cast Deep Protection. Now run to the designated location as detailed in this video:
Once you’re at the designated location, the Beast would pounce at you. Before it lands on the ground near your location, lock on to the Beast and cast a Chaos Bed Vestiges. This would stagger the Beast for an easy riposte. Cast another 2 or 3 Chaos Bed Vestiges to finish it off. Now light the Central Irithyll bonfire and sit at the bonfire if you need to.
From the Central Irithyll bonfire, run up the staircase. Cast Hidden Body and use the Ring of Favor glitch to sprint past the first group of 3 Irithyll Knights. Continue dashing your way to the Church of Yorshka bonfire, casting Hidden Body on the way as necessary. Once you have reached the bonfire, light it and sit at the bonfire if necessary. Now use the Ring of Favor glitch to sprint to the Distant Manor bonfire, light the bonfire, and run to the arena of Pontiff Sulyvahn. After entering the building where you would meet the first group of 3 Silver Knights, cast Hidden Body and sprint past the Silver Knight standing on the ground floor. Exit the building, head up a flight of stairs, cast Hidden Body, and sprint past the Starved Hounds.
Here are some strategies to fight Pontiff Sulyvahn, assuming that you first cast Sacred Oath or use the weapon art of the Sunlight Straight Sword, and cast Deep Protection:
- Attune Chaos Bed Vestiges and equip these rings to boost your pyromancy: Witch’s Ring, Great Swamp Ring, Lloyd’s Sword Ring. The fourth ring slot is up to you to decide. Equip a Caestus in the left hand and a Chaos infused Lothric Knight Sword+10 in the right hand. Enter the fog wall and sprint to the small flight of stairs in front of Pontiff Sulyvahn. Parry the very first attack of the boss and follow up with a riposte. Now switch to Chaos Bed Vestiges to finish off the boss.
- Use the above strategy together with summoning an NPC phantom to distract the boss while you’re spamming Vestiges in the boss’ face. There are at least 2 signs in front of the fog wall for summoning NPC phantoms to help you distract the boss. One is Black Hand Gotthard, the other Londor Pale Shade. Depending on whether you have been following Anri’s quest line, you can use the Dried Finger to also summon Anri as your third phantom. However, note that 1 or 2 NPC phantoms are enough to distract the boss.
Yhorm
Use the weapon art of the Storm Ruler.
Aldrich
Aldrich is vulnerable to fire. Here are some strategies to deal with him, assuming that you first cast Sacred Oath or use the weapon art of the Sunlight Straight Sword before entering the fog wall. In each of these strategies, equip the Magic Stoneplate Ring+2 and cast Great Magic Barrier. If you cast Deep Protection, then casting (Great) Magic Barrier would nullify the effect of Deep Protection.
- Attune Chaos Bed Vestiges and equip these rings to boost your pyromancy: Witch’s Ring, Great Swamp Ring. Throw Vestiges at the boss.
- Equip a Blessed infused Caestus+10 in the left hand and a Chaos infused Lothric Knight Sword+10 in the right hand. If you want further HP regeneration during the fight, equip the Sun Princess Ring. Spam R1 at the boss. During the second phase, Aldrich would summon a field of fire around him. If you want, equip the Flame Stoneplate Ring+2 to boost your fire damage absorption.
- Cast Vow of Silence next to Aldrich to negate his spells and yours. Use a fire weapon to hit the boss.
Dancer
The Dancer is one of the easiest bosses to cheese. Here are some strategies to help you fight the Dancer, assuming that you first cast Sacred Oath or use the weapon art of the Sunlight Straight Sword, and cast Deep Protection:
- Equip the Scholar’s Candlestick in the left hand and a Court Sorcerer’s Staff+10 in the right hand. Attune Crystal Soul Spear and equip these items to boost your sorcery: Crown of Dusk, Young Dragon Ring, Bellowing Dragoncrest Ring, Magic Clutch Ring. Two-hand the Court Sorcerer’s Staff+10 and buff the staff, then cast Crystal Soul Spear at the Dancer.
- Attune Chaos Bed Vestiges and equip a Pyromancy Flame+10. Equip these rings to boost your pyromancy: Witch’s Ring, Great Swamp Ring. The other 2 ring slots are up to you. However, consider equipping the Chloranthy Ring+3 to boost your Stamina regeneration. Cast Tears of Denial if necessary and throw a Vestiges every now and then.
- Don’t enter the fog wall, but stand in front of it. Equip the Red Tearstone Ring and Flynn’s Ring. Use Pestilent Mist, Symbol of Avarice, and/or Bloodlust to lower your HP enough to trigger the effect of the Red Tearstone Ring. Now equip the Morion Blade in the right hand and the Millwood Greatbow+5 in the left hand. Use the weapon art of the Millwood Greatbow to cheese Dancer from outside the fog wall.
Dragonslayer Armour
The route to the Dragonslayer Armour is extremely dangerous, especially the 2 dragons breathing fire near a small bridge in front of the shortcut gate. From the Dancer of the Boreal Valley bonfire, climb the ladder and sprint to the Lothric Castle bonfire. Light this bonfire if you want or continue dashing your way to the Dragon Barracks bonfire. Now comes the most dangerous part of the route: the 2 fire breathing dragons. Stand in front of the bridge, but not crossing it yet. Cast Tears of Denial, Sacred Oath, and Flash Sweat. Equip the Flame Stoneplate Ring+2, any other rings to boost your damage absorption such as the Ring of Steel Protection+3, and equip an armour set having decent damage absorption. Wait for your Stamina bar to fully regenerate. Now sprint across the bridge. As the dragons start breathing fire, be ready to roll. Wait for the fire wave to hit the ground and start rolling and rolling and rolling, heading to your right aiming for the entrance to the lever that opens the shortcut gate. You should be safe from the fire when you’re near the entrance. Heal up and continue sprinting towards the shortcut elevator in front of the boss arena. There’s no need to open the shortcut gate. If you need to restock your (Ashen) Estus, send the elevator down, Homeward Bone to the last bonfire you rested at, teleport to the Dancer of the Boreal Valley bonfire, climb the ladder, and sprint to the elevator shortcut you just activated.
The Dragonslayer Armour is generally easy by itself, but is dangerous due to the aerial support from the Pilgrim Butterflies. During the second phase of the fight, the Pilgrim Butterflies would spam spaghetti meatball projectiles at you and would occasionally charge up and fire a powerful laser. Don’t get greedy and start spamming R1. This boss is aggressive and can 1- or 2-shot you to death. Here are some strategies to fight the boss, assuming that you first cast Sacred Oath or use the weapon art of the Sunlight Straight Sword, and cast Deep Protection. For some HP regeneration during the fight, equip a Blessed infused Caestus+10 in the left hand and/or the Sun Princess Ring.
- Equip an Irithyll Straight Sword+5, a Chaos infused Lothric Knight Sword+10, and (Poison) Throwing Knife. Cast Tears of Denial if you want. Use the Irithyll Straight Sword+5 to R1 the boss until frost is triggered, then switch to the Chaos infused Lothric Knight Sword+10 to R1 the boss. After frost is triggered, hitting the boss with a fire weapon would remove the boss’ frost bar, thus allowing you to switch back to the Irithyll Straight Sword+5 to build up the frost bar again without having to wait for the bar to slowly decrease. A (Black) Firebomb also works; generally, any fire weapon. As you evade the boss’ attacks, occasionally use a (Poison) Throwing Knife to chip down its HP metre, e.g. after rolling away from an attack.
- Attune Chaos Bed Vestiges and equip these rings to boost your pyromancy: Witch’s Ring, Great Swamp Ring, Lloyd’s Sword Ring. The fourth ring slot is up to you to decide. Cast Tears of Denial if you want. Be at a decent distance away from the boss and throw a Vestiges at its face.
- Attune Crystal Soul Spear and equip these items to boost your sorcery: a Scholar’s Candlestick in the left hand, a Court Sorcerer’s Staff+10 in the right hand, Crown of Dusk, Young Dragon Ring, Bellowing Dragoncrest Ring, and Magic Clutch Ring. The fourth ring slot is up to you to decide. Two-hand the Court Sorcerer’s Staff+10, buff the staff, and fire a Crystal Soul Spear once you’re at a decent distance from the boss.
- Use any of the above strategies and summon an NPC phantom to distract the boss. There are at most 2 NPC phantoms you can summon for this fight. Depending on how far you have progressed with the quest lines of Eygon and Sirris, you can summon one or both NPC phantoms to distract the boss while you sneak in a hit here and there.
Twin Princes
The route to the Twin Princes arena is more dangerous than that to the Dragonslayer Armour arena. Use the Ring of Favor glitch to sprint most of the way to the boss room. Cast Hidden Body, Tears of Denial, and Sacred Oath as necessary. The only shortcut you might consider activating is the elevator shortcut in front of the boss room.
The Twin Princes fight is similar to a rhythm game. Lorian would telegraph his attack, you strafe or roll away, then get in 1 hit. When he does his double swing, you roll twice if necessary and get in 1 hit. Avoid being greedy and try to sneak in an extra hit. Only perform 2 hits if you’re certain you can immediately recover from the attack animation to dodge an incoming attack. Here are some strategies to fight the boss, assuming that you first cast Sacred Oath or use the weapon art of the Sunlight Straight Sword, and cast Deep Protection. Also cast Tears of Denial for extra safety. Consider equipping a Blessed infused Caestus+10 in the left hand and/or the Sun Princess Ring for some HP regeneration during the fight.
- Equip a Lightning infused Lothric Knight Sword+10 and a Chaos infused variant. Equip (Black) Firebomb or attune Chaos Bed Vestiges. In the first phase, use the Lightning infused Lothric Knight Sword+10 to fight Lorian. In the second phase, switch to the Chaos infused Lothric Knight Sword+10 to hit both Lorian and Lothric. It is more effective to strafe around behind Lothric’s back and hit Lothric with the weapon. When Lorian drops to the ground and Lothric charges up his miracle to revive Lorian sneak in 1 or 2 hits, roll away, and throw 1 or 2 (Black) Firebombs or Chaos Bed Vestiges at Lothric.
- Consider using an un-infused Lothric Knight Sword+10, Astora Straight Sword+10, or Anri’s Straight Sword+5. Buff any of these weapons with Lightning Blade and cast Sacred Oath and Deep Protection. Use the weapon to fight the boss during both phases.
- Before entering the fog wall, warp to the Undead Settlement bonfire and suicide off the nearby cliff. Warp to the Dragonslayer Armour bonfire, sprint to the nearby shortcut elevator, ride the elevator all the way up to the area in front of the boss room, and stand in front of the fog wall. Equip the Red Tearstone Ring, Flynn’s Ring, and the Farron Ring if you want. If you have a decent number of Ashen Estus Flask uses, then you don’t really need the Farron Ring. Use Pestilent Mist, Symbol of Avarice, and/or Bloodlust to lower your HP enough to trigger the effect of the Red Tearstone Ring. Now equip the Morion Blade in the right hand and the Millwood Greatbow+5 in the left hand. Use the weapon art of the bow to kill Lorian and bypass the first phase of the fight. Once Lorian is dead and the first phase is over, use an Ember to gain a full HP bar. Enter the fog wall to start the second phase of the fight and hit Lorthic with a fire weapon.
- Depending on how far you have progressed with Sirris’ and Orbeck’s quest lines, you can summon any or both of these NPCs as distraction while you throw Chaos Bed Vestiges at the boss.
Soul of Cinder
This boss can be easy or difficult depending on how you fight him. Here are some strategies to deal with Cinder, assuming that you first cast Sacred Oath or use the weapon art of the Sunlight Straight Sword, and cast Deep Protection:
- Attune Chaos Bed Vestiges and equip these rings to boost your pyromancy: Witch’s Ring, Great Swamp Ring, Lloyd’s Sword Ring, Fire Clutch Ring. Be at a decent distance away from Cinder and throw a Vestiges every now and then. Don’t get greedy and spam Vestiges at the boss.
- Attune Homing Crystal Soulmass and Crystal Soul Spear. Equip these items to boost your sorcercy: Bellowing Dragoncrest Ring, Young Dragon Ring, Lloyd’s Sword Ring, Magic Clutch Ring, Crown of Dusk, Scholar’s Candlestick in the left hand, Court Sorcerer’s Staff+10 in the right hand. Two-hand the staff and buff it. Cast Homing Crystal Soulmass. Be at a decent distance from the boss and cast Crystal Soul Spear.
- Trigger the fight, quit out, and restart your game. You should now be in front of the fog wall outside of the boss arena. Equip the Red Tearstone Ring and Flynn’s Ring. Use Pestilent Mist, Symbol of Avarice, and/or Bloodlust to decrease your HP enough to trigger the effect of the Red Tearstone Ring. Equip the Morion Blade in the right hand and the Millwood Greatbow+5 in the left hand. Use the weapon art of the bow to cheese Cinder from outside of the boss arena. Once the first phase is over, either use the same cheese to defeat Cinder or enter the arena to fight the boss.
Conclusion
When you start your speed running on the road to SL802, pay attention to which weapons, items, and strategies work best for you for a particular area or boss. Generally, you want to use strategies that you are comfortable with and allow you to quickly dispatch of bosses. After speed running the game a few times, you might notice there are a small number of weapons you use to effectively deal with bosses and enemies en route to the boss arenas. Remove any items you don’t need from your carry inventory and place them in storage. Your inventory should be as uncluttered as possible to allow you to quickly swap to soul boosting items once a boss is defeated.
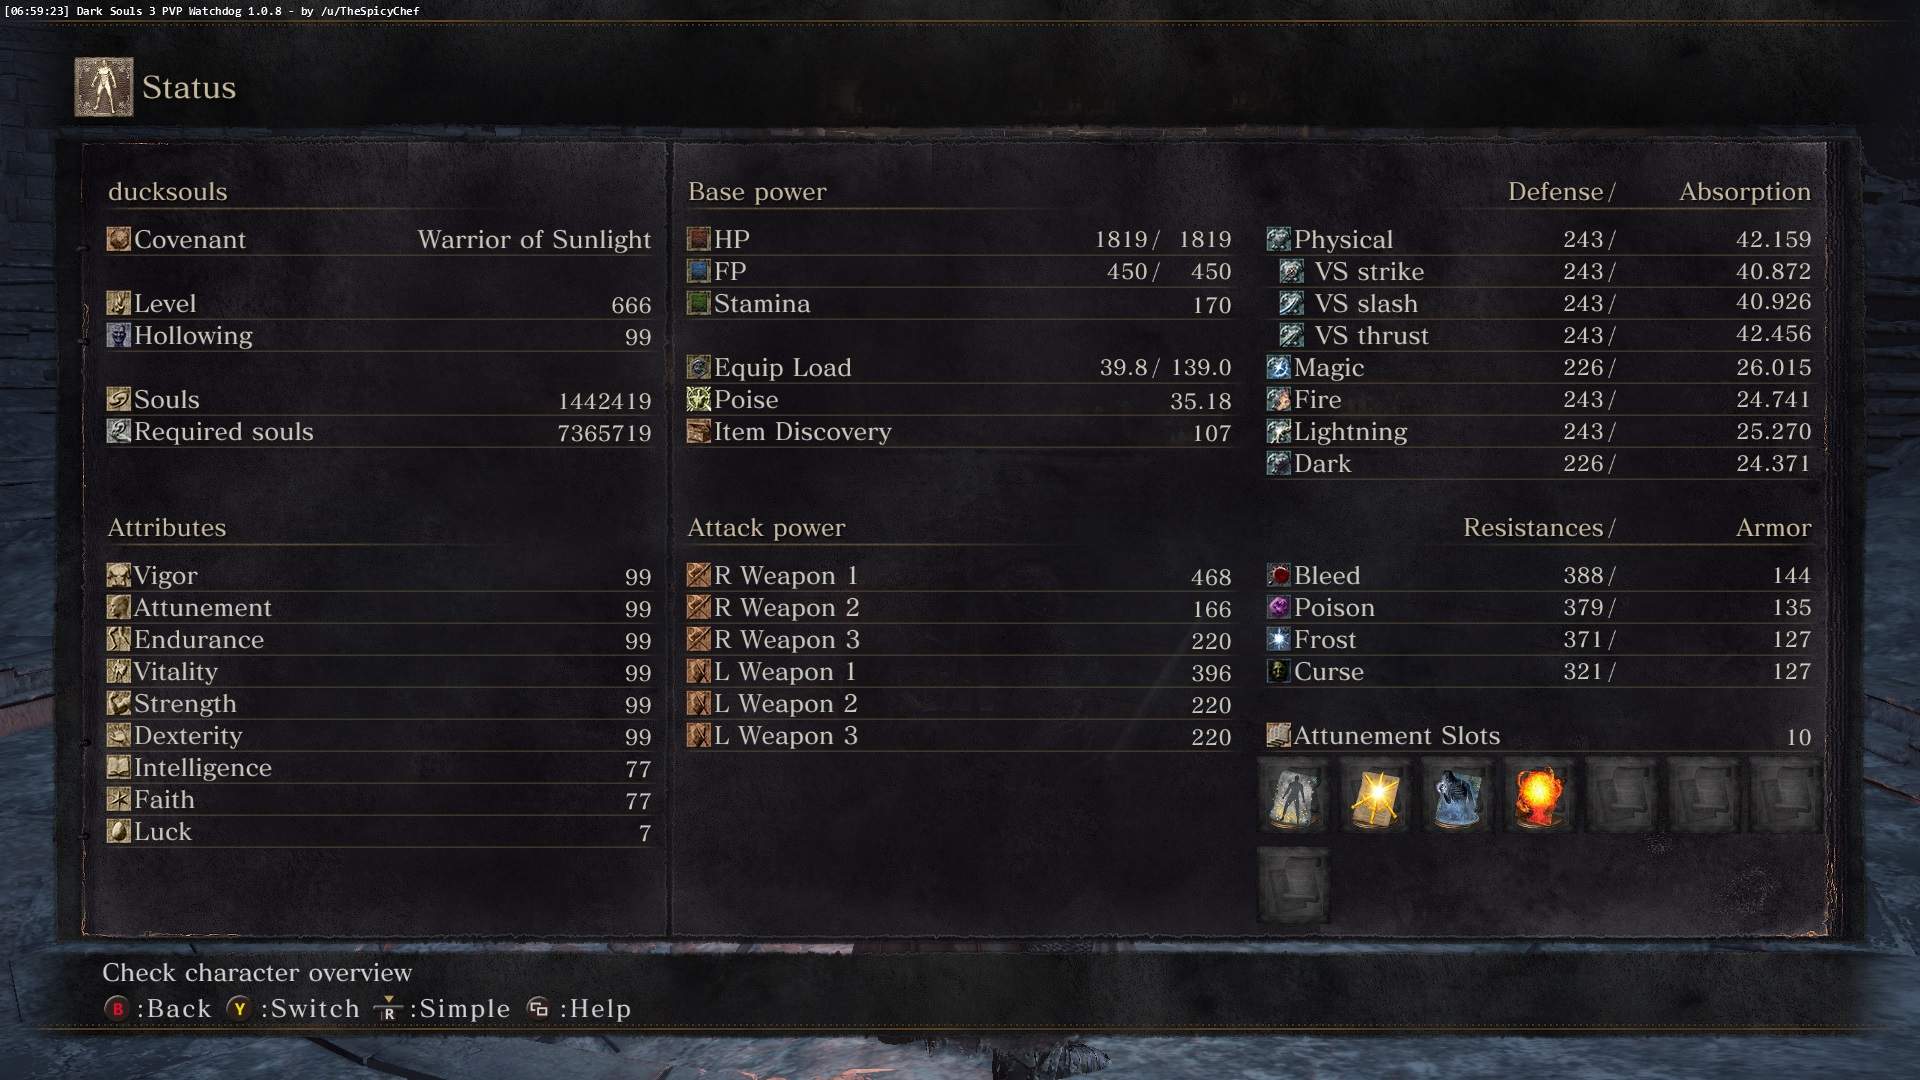
Here is a screenshot of the time my character joined the dark side and became evil. Forgive me, I was young, naive, and new to speed running.


Be the first to comment