
Using simple breadboarding, we can make very functional enemy indicator. Especially useful in adventure mode when we manually aim our cannons.
Enemy Range Indicator Guide
All credit goes to dazguss!
Spin Block Setting

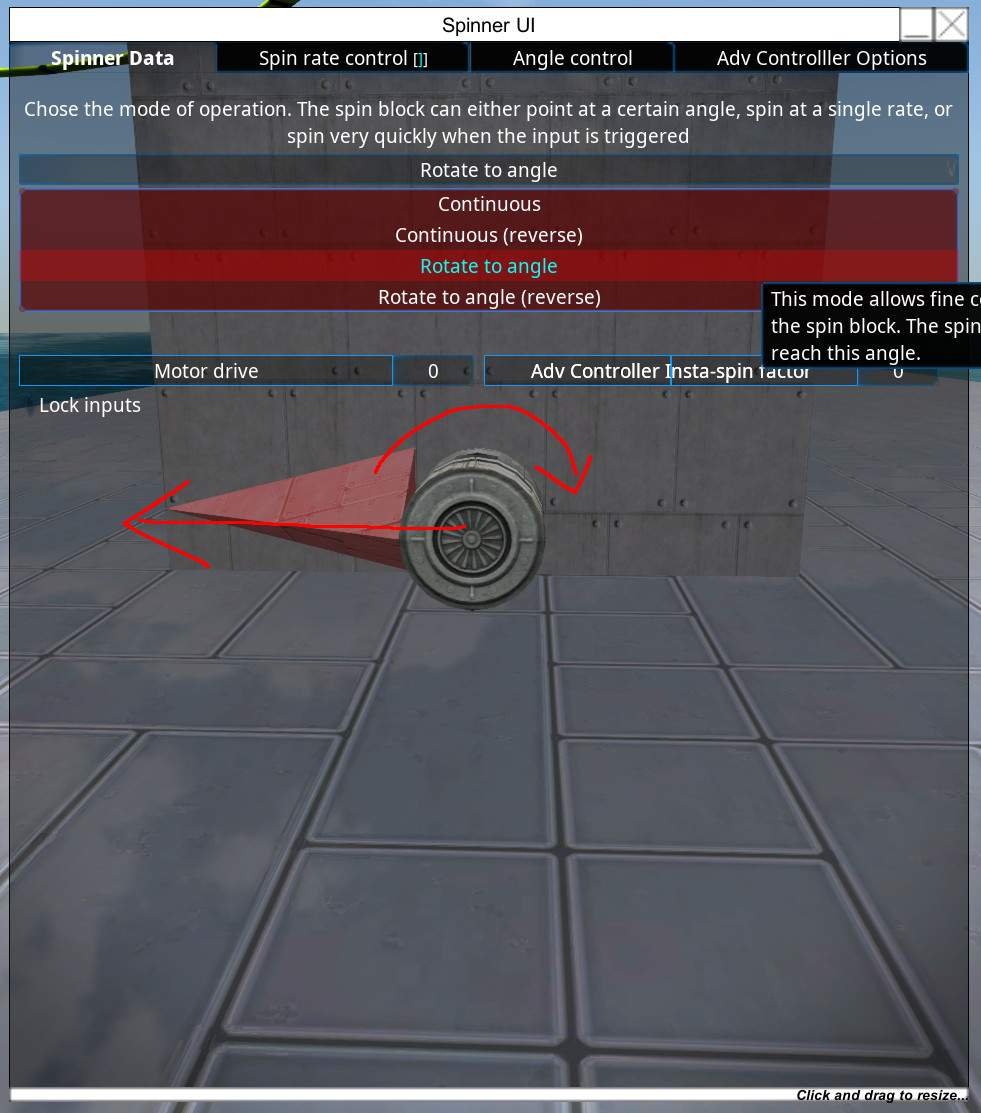
Place a spinblock. Make sure the spinblock points to the direction you want the zero.
Zero means enemy is not spotted / or enemy is crashing to your ship.
Be sure it is set to rotato to the angle.
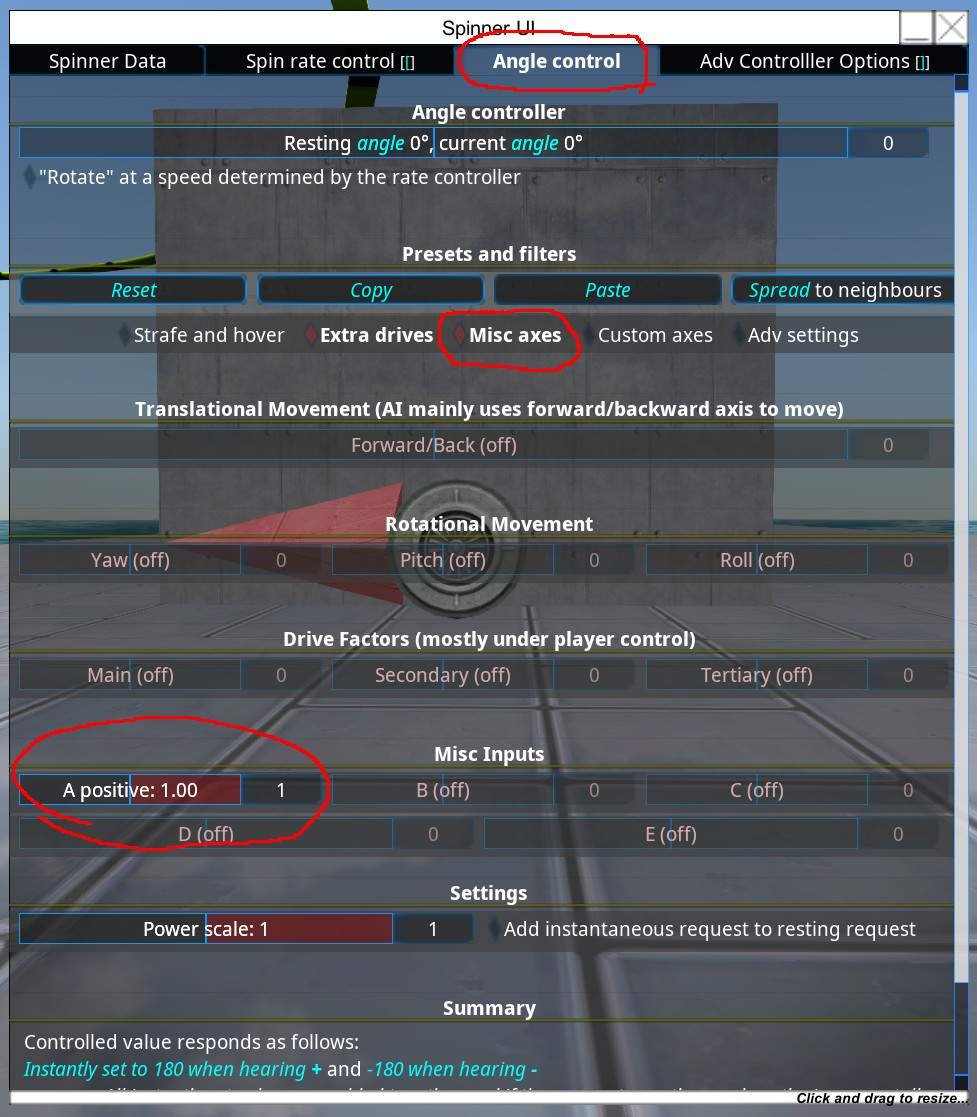
Since there’s no direct way to make spinner move according to enemy range, we’ll use misc axes A.
That’s it for the spin block part. simple, huh? but there’s even more simpler way, which I will tell you later.
AI Breadboard
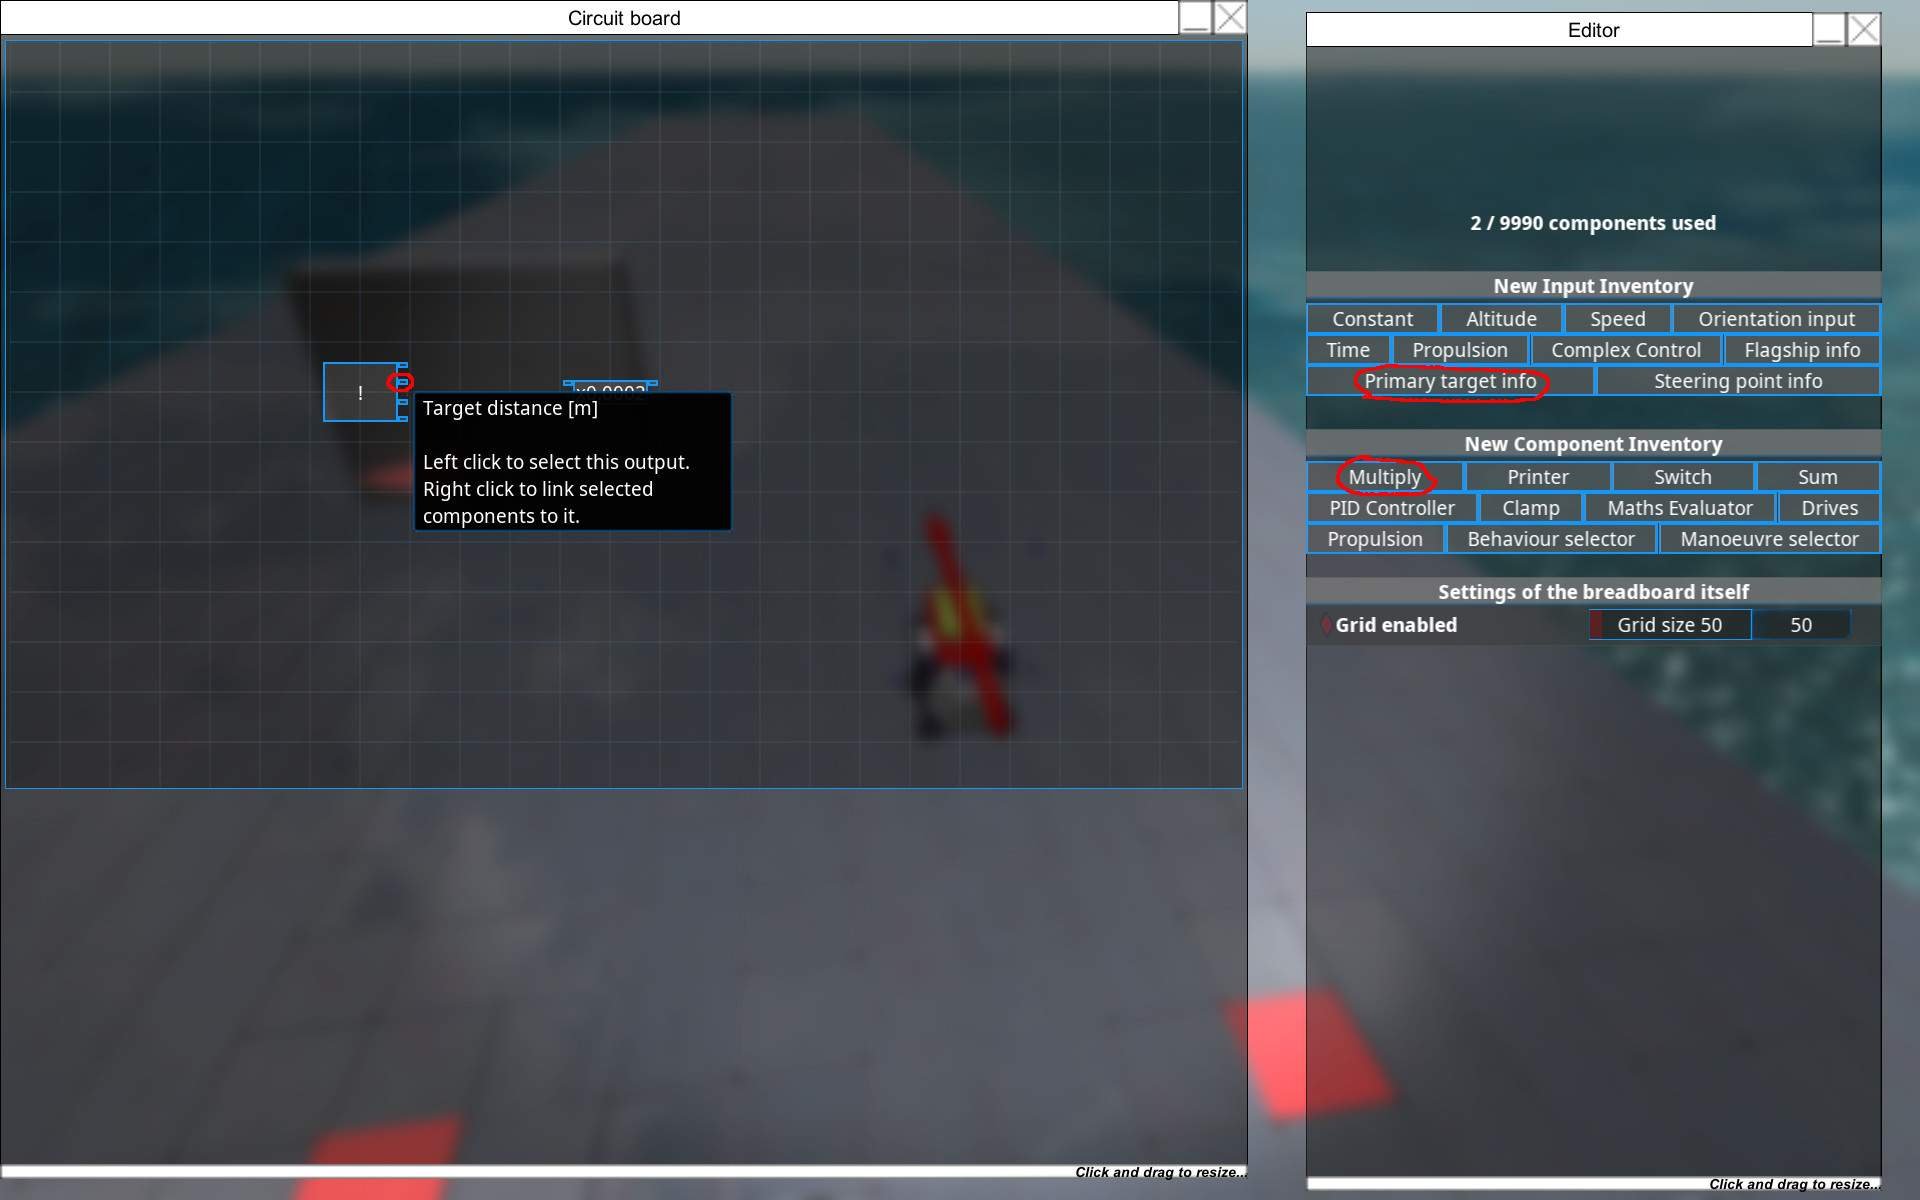
Make sure you’re using AI Breadboard, in AI inventory tab. Place “Primary target info” and “Multiply” component.
Connect target distance (the second) node to “Multiply” component. Edit “Multiply” to x0.0002.
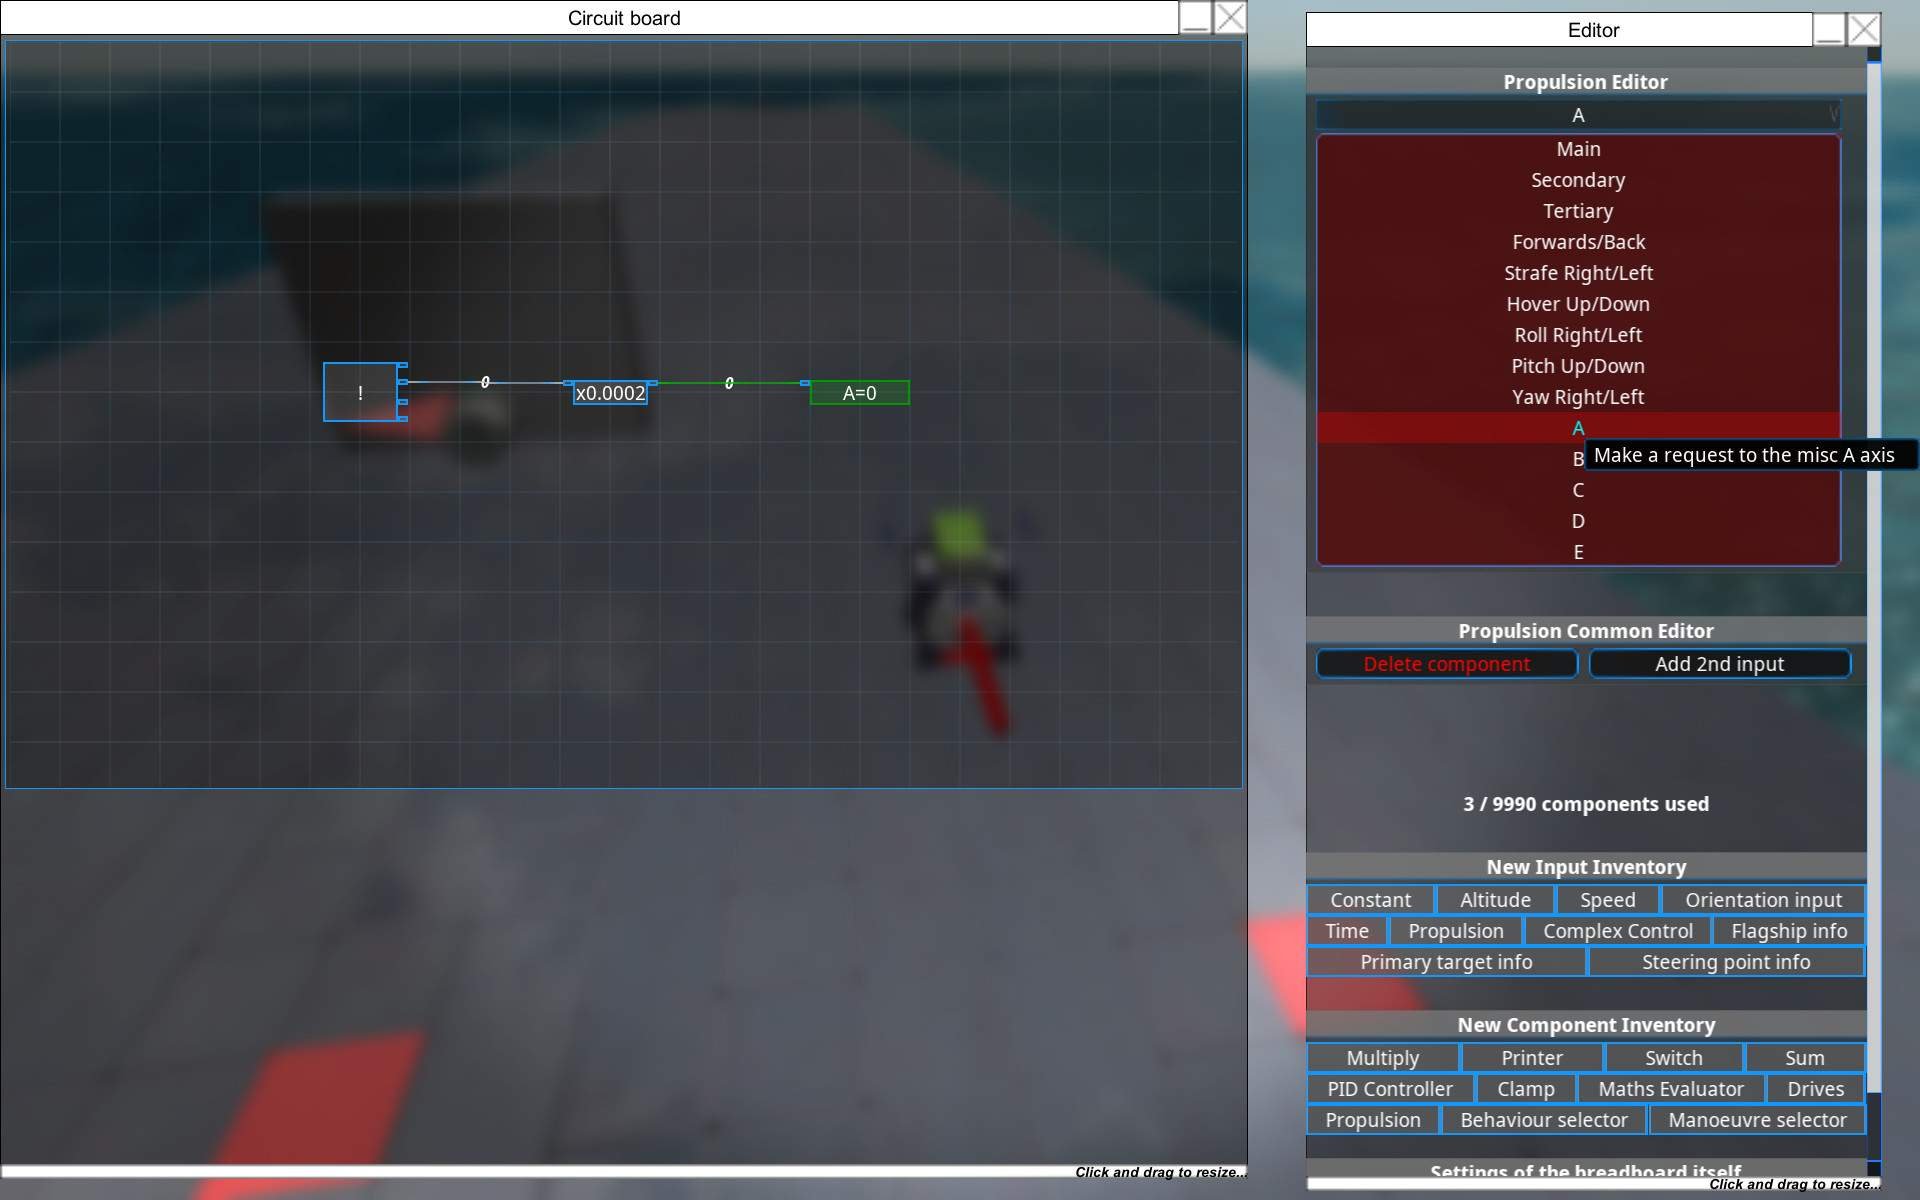
Place “Propulsion” component. In Editor, Select “A” from drop down menu.
Connect “Multiply” output to “Propulsion” input.
At this stage, We used “A” misc axes respond from detected enemy range. If enemy is 5000m away, “A” axes gets value of 1 (5000 x 0.0002). If enemy is 2000m away, the value is 0.4.
At this stage, The spin block works as we intended, but there’s one tiny little problem:
If enemy hits exactly 5000m, the spinblock wants to move to 180degree, but depending on the factor I don’t understand, It sometimes rotate to counter-clockwise. It’s not big deal, but It’s not pretty. I decided to make shotgun solution. If 180 degrees makes problem, make sure it doesn’t get to 180.
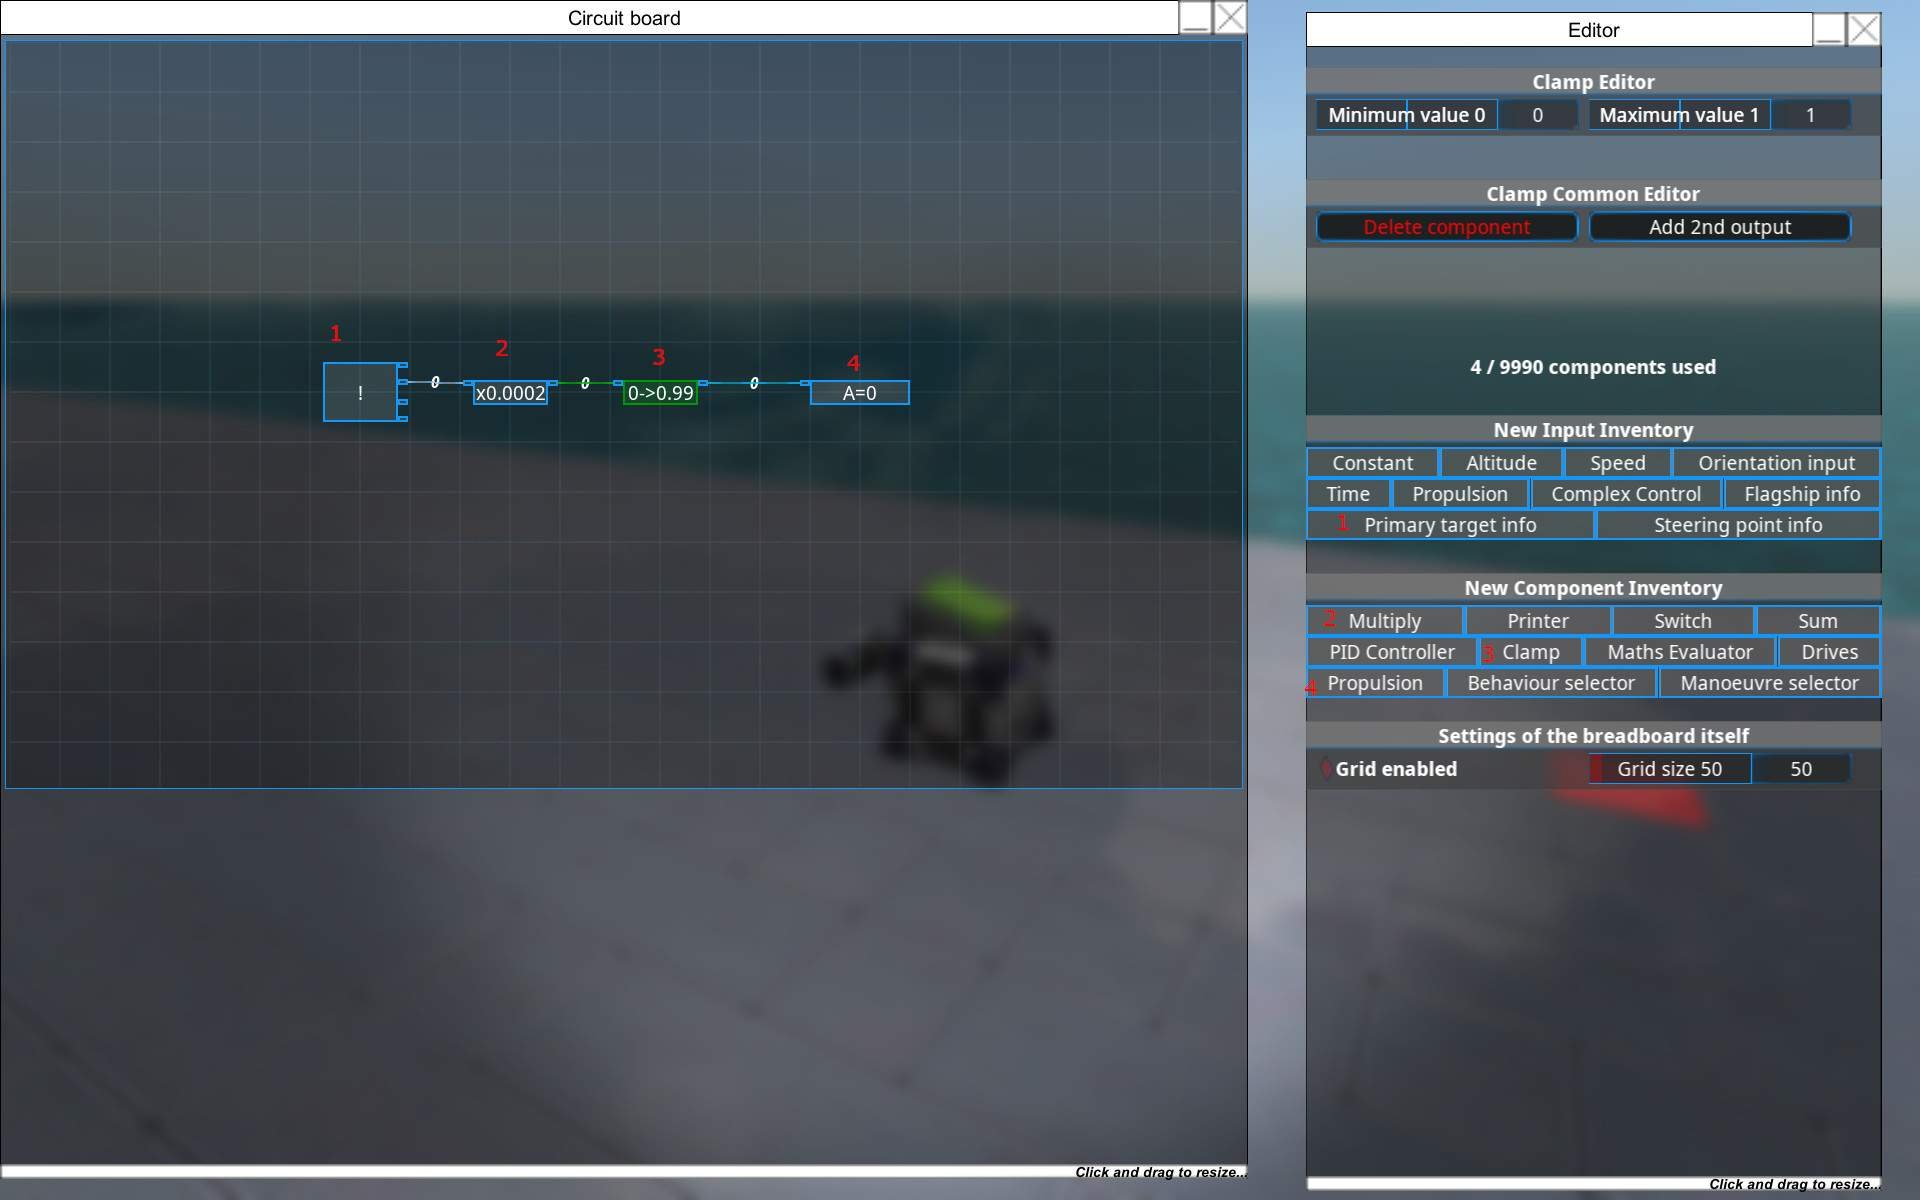
So I just slap “Clamp” component before “Propulsion” input, set minimum and maximum to 0<0.99.
Congratulations! we made 3 blocks, working enemy range indicator. You can use Hologram or Image display to make it more pretty, like writing numbers over panel.
But I said there’s even more simpler way.
Display Block
In Display section (In decoration inventory tab I think). The first block is Display Panel. It says it displays useful information of your vehicle. I thought this block is just decoration with no function, but It actually works as display with 3 gauge.
BTW, did you know this block existed? I didn’t, and I played right after Introduction of CRAM and APS. Oh, and removal of NPC. I miss scuttlebot.
But after all, I’m merely 300 hours in. Any hour less then 4 digits are humble noob in FTD. I just recently start to “Play” the game, go dangerous adventure leaving cozy harmless designer mode.

Display Panel has three gauge. Choose one of them and set to respond “A” axes.
Be sure to set the range 0 to 1.
I usually use the other two for vehicle altitude and speed.
Conclusion

Finished work, testing with good old marauder 2000m away. Since 5000m = 180 degree, 2500m is right on the middle.
I think this solution is very fast, simple, easy to follow solution for LUA illiterate like me.
Best of all, In the process, kinda sorta “programmed” something and I’m proud of it.
I wish there’s way to actually “print” a component value to hologram projector. It would make more functional display.


Be the first to comment