
This guide will detail how to use Blender to effectively import armatures from A Hat in Time as well as how to effectively export armatures into your mods!
Contents
Guide to Import / Export Armatures Properly for Blender
All credit goes to Classytimes!
Introduction
This is a basic guide and only covers importing and exporting relating to armatures. Anything not covered here is most likely not under that specific scope.
Importing: There’s a Missing Root Bone!
Blender has a nasty habit of eating the root bone of any model from the game when you import it. This means that if you want to either edit the model and put it back in the game or use your own model with the skeleton (take, for example, custom costumes or playable characters) then you will need to add the root bone back into your model! Here’s how you do it.
Begin by importing the model into blender (File>Import>FBX). For this guide, I will be using the model most people will probably be using, Hat Kid.
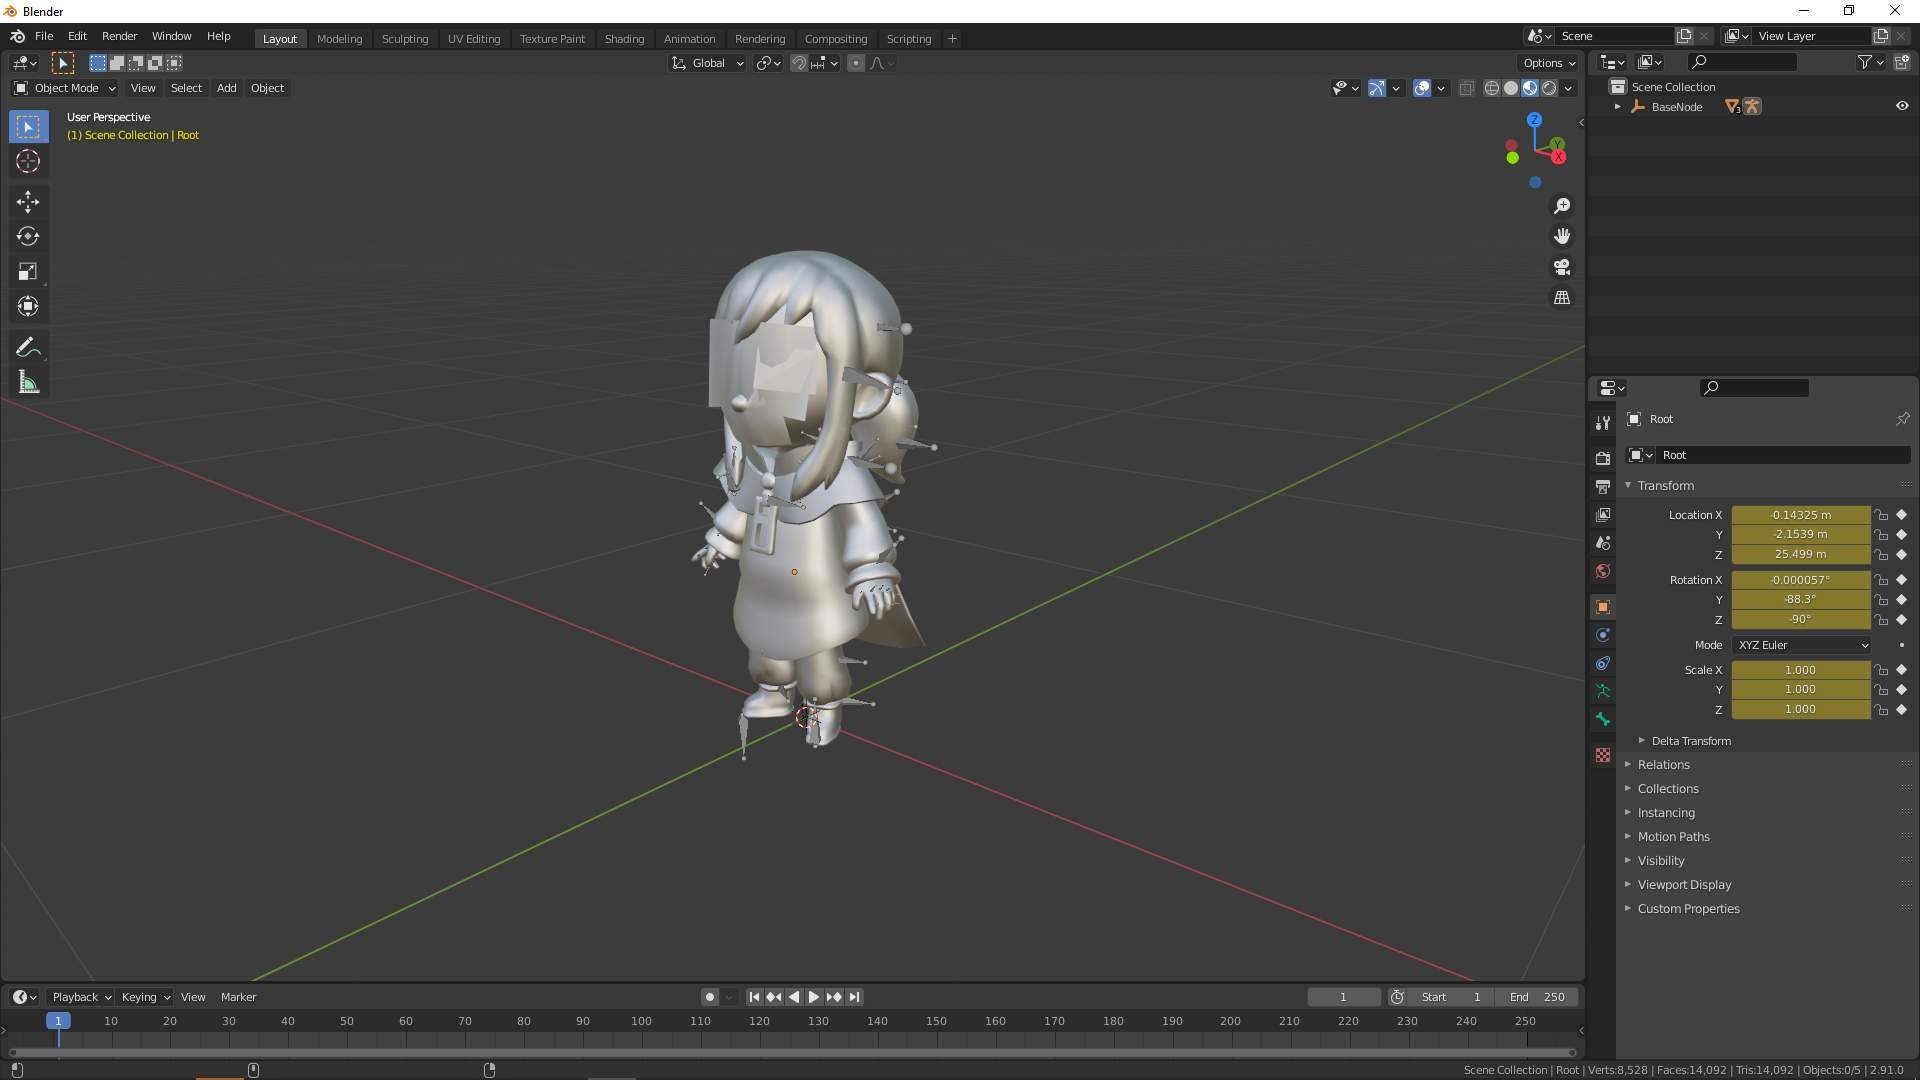
What we are doing right now is pin-pointing exactly where you need to re-add the root bone. Go into the upper right corner and open the BaseNode heirarchy to reveal the armature, named “Root.”

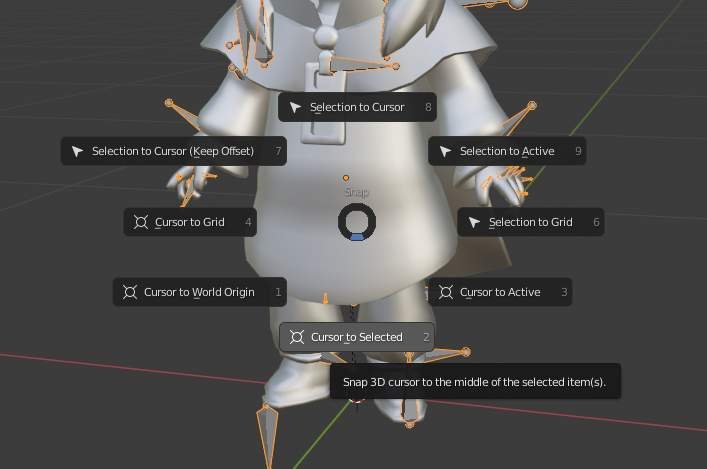
Go back to your main view of the model. We want to move the 3D Cursor to the exact location of the armature. To do this, hold Shift+S and select “Cursor to Selected.”
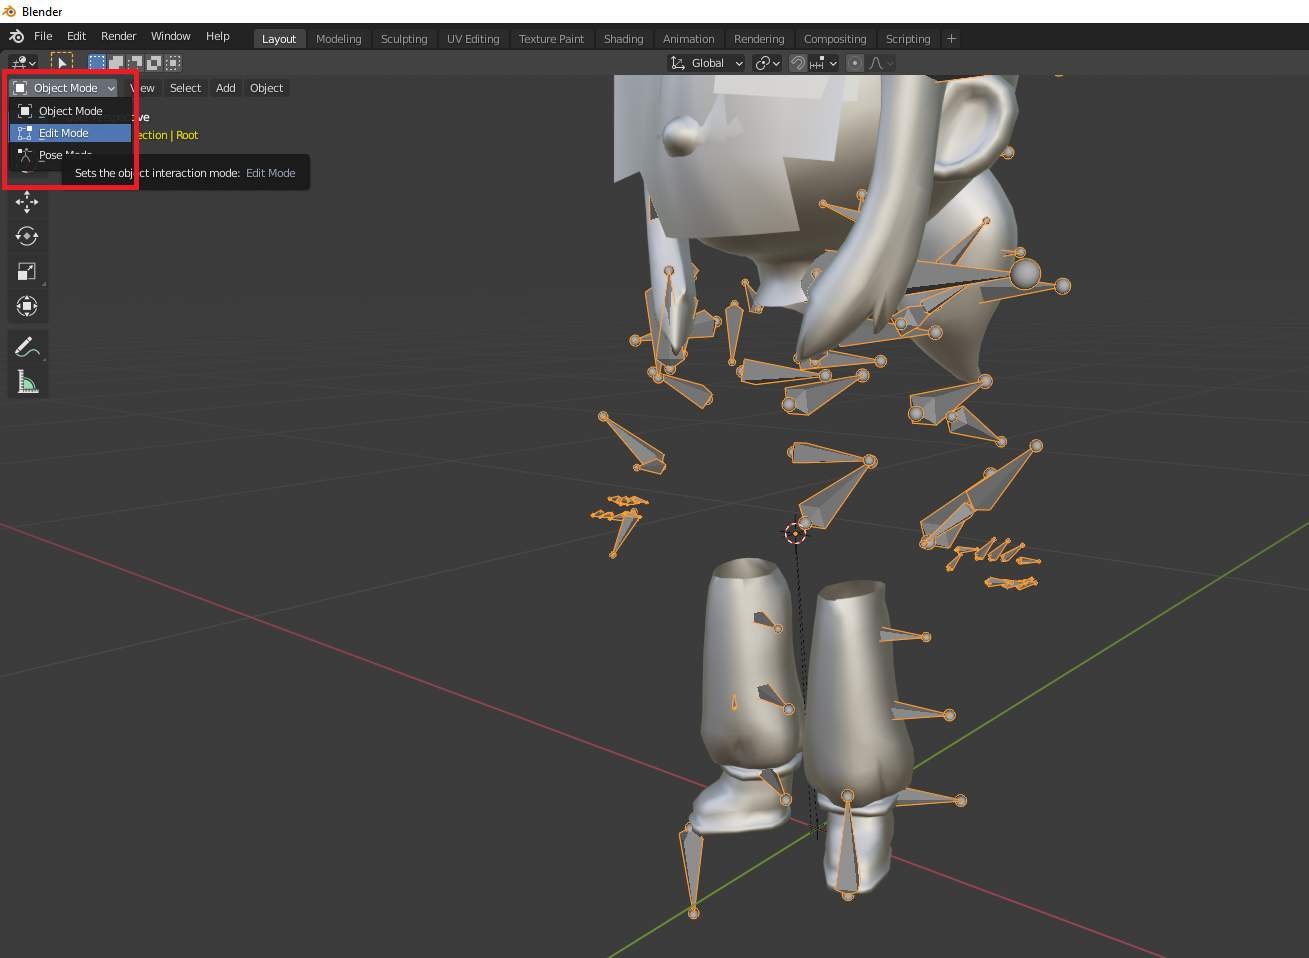
This next part is optional, but I think it makes the next few steps easier. I’m hiding the main body mesh by selecting it and pressing H. Now then, re-select the armature “Root” and go into Edit Mode.
Now, add a new bone.

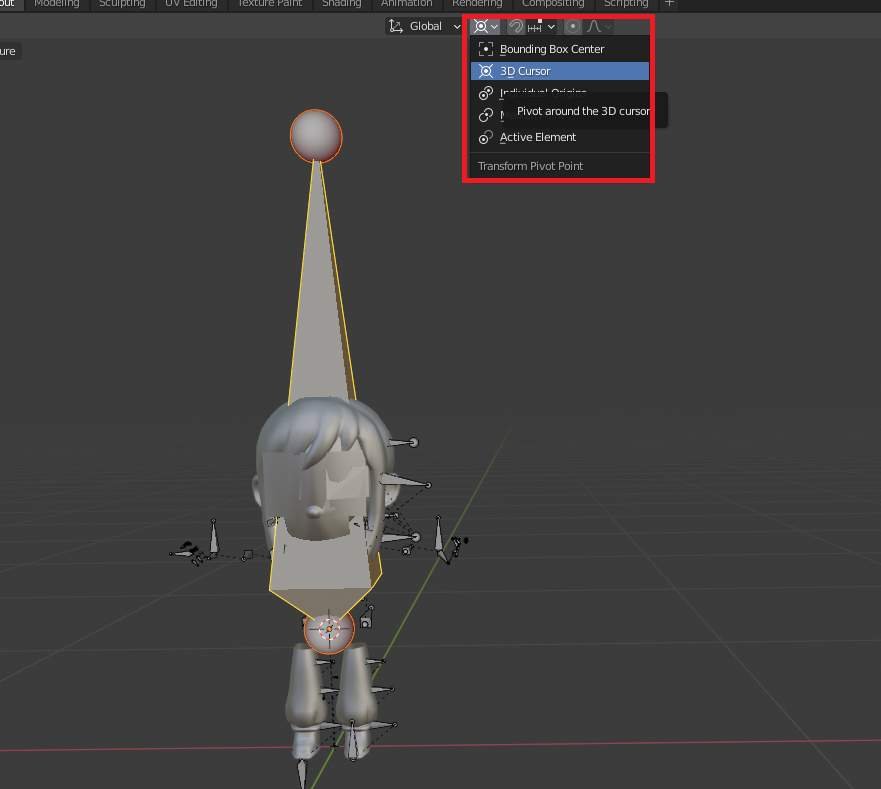
Wow, that bone is way too big! We might want to shrink it down before we move on to the next step. With the new bone selected, change the Transform Pivot Point to “3D Cursor” and scale down your new bone. The shortcut for scaling is S.
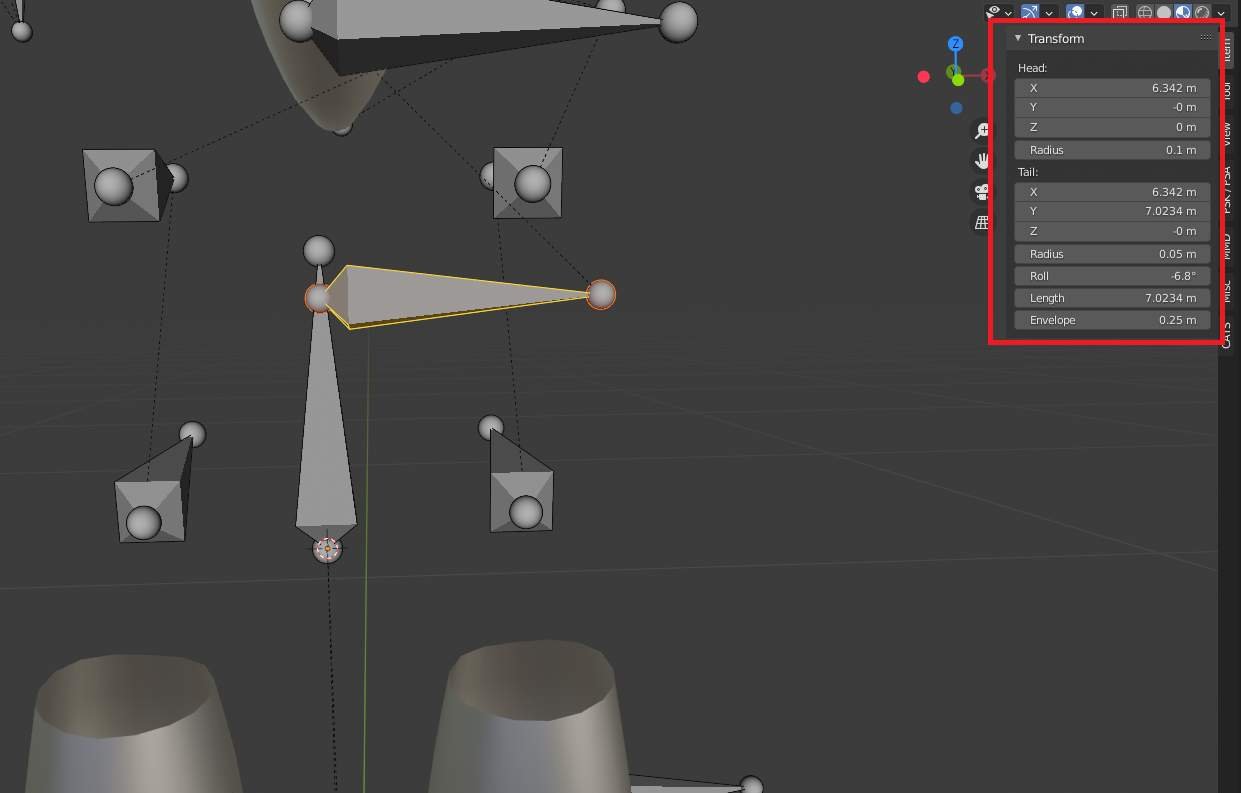
Now that our bone is a decent size, we want to position it correctly to line up with the rest of the janky armature. For this purpose, I recommend copying the locations and roll of the head and tail of a spine bone. To keep it down in the root position though, let your new bone’s X location value stay the same and only copy the spine bone’s Y and Z location values. Also, I am not positive how much this will affect matters, but I always copy the roll of the bone as well, which is -6.8 in this case. To bring out this handy menu popup in the screenshot that tells you this location info, hit N.
Okay, our bone is beautifully in place now. It still is named “Bone” though, and that’s no good. Go back into the upper right and rename it to “Root” and remember that capitalization is important!

Next, for the sake of keeping things tidy, you still have two things named “Root” above your bone, and that may get confusing. It may be best to rename those as well, so sometimes I just go with a generic “SkeletalMesh” or “Skelmesh.” As long as they have separate names that you are fine with, then you’re good.
Now, every other bone that is sitting at the same level as your Root bone will have to become children of your Root bone. To do this, select the bone in edit mode (preferably through selecting them in the upper right) and set the bone’s parent to “Root” from the “Bone Properties.” Do this for all of the bones that are on the same level as your Root.

The armature has been successfully repaired! What about the model though? It is missing weight data for the Root bone! Thanks a lot Blender. No worries, we can restore the weight of the Root pretty simply.
Importing: There’s Missing Weight Data!
In order to restore weight data to our model, go to the bottom right with your model selected and go to the “Object Data Properties” tab. Once there, you should be greeted by the Vertex Groups in full view. Go to the right and click on the plus icon (+) to add a new vertex group. Name it “Root” to match with your new bone, and remember again that capitalization is important!

In Edit Mode, select every single vertex on the model. The shortcut for that is A. Go back to the vertex groups, and click the “Assign” button while you have the “Root” vertex group selected. For those of you who aren’t completely new to Blender, you may think I am committing a grave crime. Bear with me for a second, I promise this is for a reason.

Now, click on the lock icon next to the “Root” vertex group. After you do this, go to the dropdown menu in the screenshot below and invert the locks. This will lock every single vertex group except for the Root.

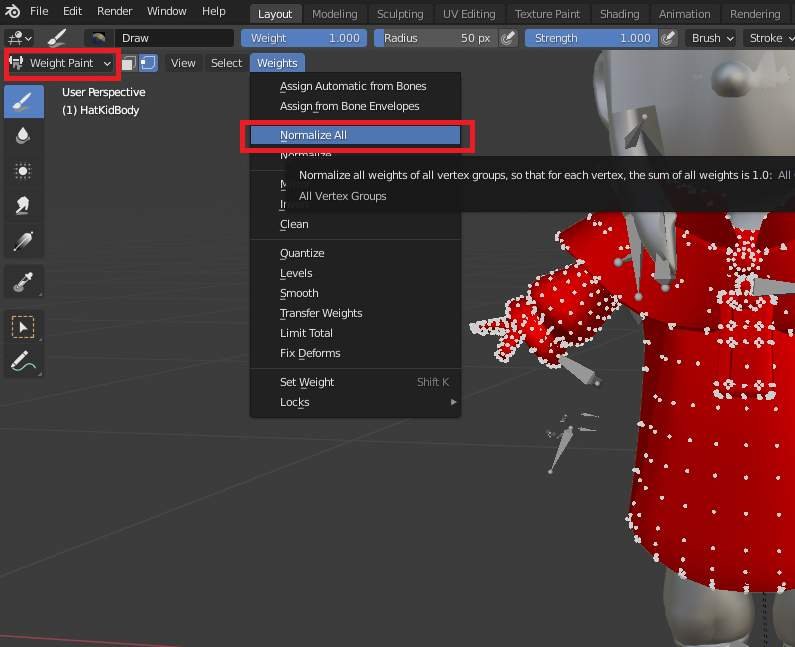
Go into Weight Paint Mode and use the “Normalize All” function (Weights>Normalize All).
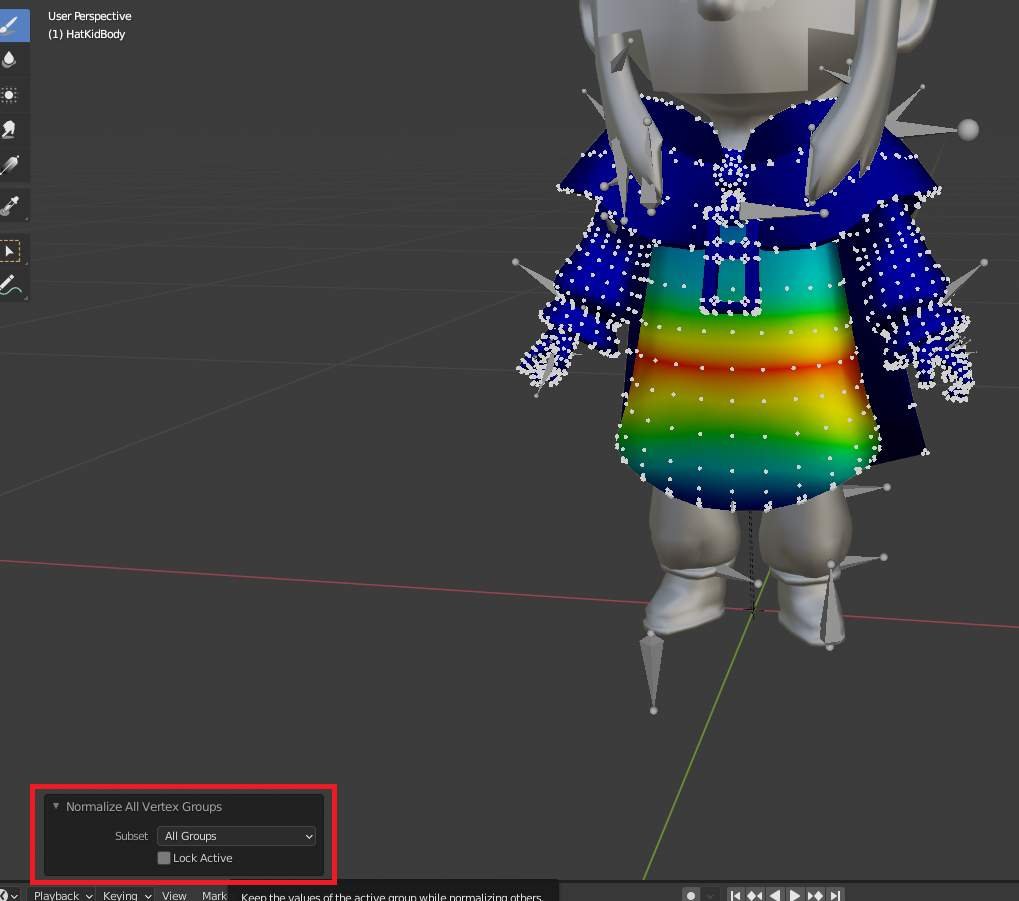
If nothing happens, look in the bottom left and make sure that the “Lock Active” box is NOT ticked.
For Hat Kid’s model specifically, part of her leg model is weighted to the Root as well. Repeat all of these steps for any other models that need weight restoration. Congratulations, you have successfully restored the Root bone’s weights to the model!
Exporting: My Model is Not Animating Correctly In-Game!
I am detailing this part for the sake of convenience instead of simply putting a link.
For some odd reason, Blender likes to add a new root bone when you export to FBX. The Modding Tools don’t like that sort of thing, so your models will not animate correctly unless you prevent Blender from doing this. Locate Blender’s FBX export python script by navigating to
- C:Program FilesBlender FoundationBlender”Version”scriptsaddonsio_scene_fbxexport_fbx_bin.py
This is a protected file, so you need administrator permissions to edit it. Open any text editor of your choosing (like Notepad) in Administrator mode. Once you have the specified file open in your text editor in Admin mode, find the following lines:
elif ob_obj.type == ‘EMPTY’ or ob_obj.type == ‘ARMATURE’:
empty_key = data_empties[ob_obj]
connections.append((b”OO”, get_fbx_uuid_from_key(empty_key), ob_obj.fbx_uuid, None))
It is quite a lengthy document, so it helps to simply have the computer to the searching for you. Hit Ctrl+F and search for elif ob_obj.type == ‘EMPTY’, and it should find the necessary lines immediately. Put a pound symbol (#) before each of those three lines. It should now look like this:
# elif ob_obj.type == ‘EMPTY’ or ob_obj.type == ‘ARMATURE’:
# empty_key = data_empties[ob_obj]
# connections.append((b”OO”, get_fbx_uuid_from_key(empty_key), ob_obj.fbx_uuid, None))
Save the file and restart Blender. Blender will no longer add a new root bone by itself. Remember, if you get a new version of Blender or upgrade your current version, you will most likely have to do this again!
Conclusion
Now you’re an armature-using master! Get out there and show Blender you mean business!


Be the first to comment