
A guide detailing the mechanics of Dusk Pirates’ Den, meant to help players clear it as fast as possible.
Dusk Pirates’ Den Guide
All credit goes to pururut!
Overview and Prerequisites
Dusk Pirates’ Den is the newest dungeon added to Kritika in the first January update of 2021. This guide should hopefully help you understand some of the nuances regarding the dungeon and thus help you not lose any drops.
- First thing to get out of the way, this is an endgame dungeon. Despite the bar of entry only being 10m CP, you shouldn’t consider seriously attempting any runs until around 100m (even then variable).
- You have to be careful about bringing any weak links into your party. This dungeon is one which scales the stats of the monsters according to party size, so a party member that can’t keep up will end up being dead weight.
- While the bosses of this dungeon are incomprehensibly tanky, their armor isn’t much to boot. Consider bringing a party member who’s playing a class which can shred armor easily, as being able to stagger the bosses for as long as possible is ideal.
The entry limit for the dungeon is once per day + one single bonus entry using a blank ticket. Without further ado, let’s get to the gameplay.
Dungeon Contents
Sector 1
This sector is rather simple. The enemies inside are very easy to dispatch, and the only ones you even need to kill is the group near the exit of the sector (indicated on the minimap). The only catch is, if you walk too close to shore, you’ll start getting bombarded by cannon fire from a pirate ship. If you pay attention near the beginning, you’ll see two rabbits. Follow them, and they’ll lead you to a tunnel which not only acts as a shortcut, but allows you to avoid getting spotted by the pirate ship making it so you don’t have to deal with the random projectiles.
Sector 2 – Midboss
This turtle dude isn’t very complicated, seemingly only having a few normal attacks. A straight punch (which can sometimes be charged up to also unleash a projectile with wide coverage, has a very long windup so it should be easy to dodge) and a somersault which deals damage in the area he lands in.
There’s only two special attacks you need to worry about. When he retreats into his shell, he’ll go invulnerable and start chasing a player. This player should stand on top of the box filled with explosives and lure the boss there (the box is a named entity and shouldn’t be hard to miss). Once the boss gets close enough, quickly jump off of the box or iframe to avoid the explosion which will bring the boss out of invulnerability and briefly stun him. The second one is signaled by the turtle jumping into the middle and four seashells appearing. Attacking one of these seashells will freeze nearby players. Why is this useful? Well, if you pay attention to the boss, you’ll see him charging something up. Once the red glow around him starts to dissipate (might be hard to see with low graphics settings) he’ll unleash a tornado that affects the entire arena and deals a lot of damage, but doesn’t affect frozen targets, which is why you have to time the seashells with his animation.
Sector 3
The three elites present in this sector are the two elites from Icefang Pit and the midboss aide from Woods of Wandering Predator. They’re somewhat tanky but overall shouldn’t be too hard to deal with. The only dangerous attacks I’ve noticed are:
- One can unleash a flurry of shurikens similar to Warrior-Type Fusion from Temple of the Outer World.
- The fat guy’s barrel will explode when thrown, creating a zone of fire which deals damage to players inside.
Sector 4 – Midboss
This shark monster is noticeably squishier than the previous midboss, but can still stall you out for quite a bit, which is the thing you least want to happen in this dungeon. For starters, stalactites will constantly fall from the ceiling, similar to the Habur fight in Revengeful Knights, however these only deal damage once upon landing rather than sticking around. The shark seems to exclusively use melee moves (preferring to swipe players with it’s horn) but can close the distance by jumping or charging at someone (the latter of which can knock a player up). If you see it’s mouth light up, you’ll want to move away, as it will attempt to catch a player and chew on their body for a solid few seconds before releasing them, similar to Darkmir.
The main thing to worry about in this fight is when the boss burrows into the ground (this can be interrupted if you break it’s armor at the right time). It will begin to chase a player, popping out to deal damage and inflict a knockup on anyone caught close enough to it. The only way to stop it’s pursuit is to find the stalactite which has an arrow above it (the stalactites stop spawning and despawning when this phase starts) and lure it there. If done right, the boss will hit it’s head on it when popping out of the ground and stun itself, continuing the fight as usual afterwards.
Sector 5
This is the most straightforward sector in the instance. All you have to do is clear three sets of barricades to proceed. These are similar to the gates from Usurper’s Jail meaning the number of hits matters more than the damage dealt.
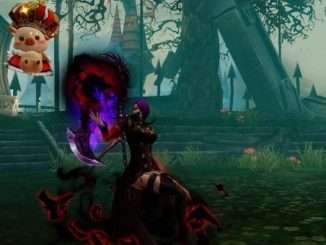
Boss – Sen Spiria
When the battle starts, the three elites from Sector 3 will spawn. Don’t focus on them as they’ll likely end up dying as collateral from your attacks on the main boss anyways. The first thing to take note of is a special buff that Spiria has, which makes her effectively impervious to damage when snared (possibly extending to some other forms of CC). The rest of the fight is just about quick dodging.
Her melee attacks consist of various kick combos. One has her jump into the air and dash towards a player several times, making it near impossible to stay away from her if she’s trying to stick to you. Her projectiles (gunfire and blue orbs) all move in straight lines and aren’t much of a threat, making the only normal attack worth worrying over her homing ice. She’ll kick the ground and create a wave of ice crystals which moves through the ground and tracks a player. It moves fast and freezes you on contact, making it very hard to effectively outrun especially if you get hit once (not to mention that it leaves you open to the rest of her attacks).
Her two special attacks are both signaled by prompts, but are likely the easiest things to dodge in the entire fight. The fire attack simply creates a few large explosions which are very clearly telegraphed, while the ice one has her create several frozen columns that affect a straight line. This one is a bit more dangerous as getting hit by one practically means you are guaranteed to get hit by the rest which might kill you depending on your remaining HP. There’s no other mechanics related to this fight which I was able to notice.


Be the first to comment