
Contents
Guide to Vehicles, Heavy Armor and Artillery
All credit goes to DemonicSpoon!
Light Vehicles
Armored Cars E.g. Humber, 221 Scout Car
Light vehicles are another role that somewhat defies description because it encompasses many different types of units. For the purposes of this section, I define a light vehicle to be something heavier than an ultra-light vehicle like a Dingo or Jeep, but lighter than proper heavy armor like a Crusader or a StuG.
Light vehicles are generally pretty cheap as far as vehicles go, and they come out at a distinct phase of the game before tanks are available. Light vehicles are immune to small arms but are very easy to kill with any kind of serious AT weapons. Light vehicles also tend to have very strong support abilities; they do something other than kill stuff. Many light vehicles act as recon, but they can do other things as well. For example, the British Humber can deploy smoke and mark targets to make them easier to hit. The British 15cwt truck with the 20mm AA upgrade can tear through infantry, but also can hang out in your backlines to shoot down planes if your opponent took a battlegroup with airstrikes.
Using light vehicles effectively is all about understanding these two types of roles and when to employ them. When they first come out onto the field a few minutes into the match, light vehicles can act as bullies and powerhouses; your opponent likely has little AT on the field and having a light vehicle can virtually guarantee a victory in any engagements. While you still need to be wary to avoid early AT like snares, bold early light vehicle play can win you the game by cementing your control of the map or even chasing down fleeing enemy squads.
This phase of the game, however, is temporary. When serious AT or tanks come onto the field, light vehicles must become substantially more cautious to stay alive. Light vehicles can still be useful in combat, but usually not at the front – use them to quickly chase down infantry squads capturing ancillary points, or to punish an enemy flank that is separated from its AT. However, it is at this point that the vehicle’s support abilities become more prominent; the Humber’s smoke and target marking become more useful than its main gun.
Be very careful when using light vehicles even during their early power spike. You usually won’t know when an enemy deploys a counter to your light vehicles, and a match can quickly turn against you if you invest in getting out an early light vehicle only to lose it to a bazooka squad you didn’t know existed!
Halftracks/Support Trucks e.g. 15cwt Truck, 251 Halftrack
These units come out at a similar time as light vehicles, but perform an even more supportive role. Most obviously they can transport infantry units and team weapons (even towing AT guns), so they offer you some mobility benefits. Most important, however, is their ability to reinforce and sometimes heal allied infantry.
At any given moment, many of your infantry units may be wounded and you will need to choose between retreating them – and having a weakened force on the field for a long period – or keeping them on the field, weakened and less combat effective. Support trucks allow you to sidestep this concern by reinforcing and healing troops on the field, allowing you to maintain a much more consistent field presence.
Later, in Strategy, I describe how sometimes, having units off the field reinforcing will require you to cede territory or risk fighting a losing battle. Halftracks and support trucks allow you to keep your units on the field, allowing you to hold ground more consistently.
Soft Retreat
When possible, when infantry units are in danger, it can be advantageous to “soft retreat” – this just means to pull them back without using the retreat command. If you can do this safely, it can be a powerful technique for maintaining field presence and keeping your strength up Having a halftrack or support truck on the field makes this considerably more appealing; even if you lose unit hitpoints or a squad model or two during the soft retreat, you can bring them back to full effectiveness without having to wait for them to trek back from base.
Heavy Armor/Tanks e.g. Panzer IV, Crusader
This class encompasses anything heavier than light vehicles. Your late game powerhouses, tanks have the durability to stay alive in the face of AT and the power to inflict serious losses. There’s considerable variance in this class, from the anti-infantry specialist Bruumbar to the versatile killing machine that is the Grant.
Your choice of first heavy armor unit should be based on how the game has been going. Dedicated anti-infantry tanks like the Wirbelwind are absolutely devastating if the enemy does not yet have tanks of their own; their infantry killing power allows them to somewhat counter the infantry AT that is meant to counter them. However, they are extremely vulnerable to being chased down and killed by enemy medium tanks, so getting one as your first tank is a questionable move if your enemy already has a Crusader out.
When deciding, consider each side’s fuel income and how much fuel you have seen them spend. If you’ve seen your enemy invest heavily into light vehicles, or your team has successfully cut them off from fuel for a substantial chunk of the game, you may have some minutes of freedom before enemy tanks start rolling out. However, if you do not have a fuel advantage, a versatile medium tank – such as a Panzer IV – is a safer bet.
Do pay attention to tooltips; some tanks are versatile, and some are only good against infantry or other tanks. An anti-infantry tank likely has a main gun with a very wide AOE, but weak penetration. Similarly, a tank hunter like the StuG has a high-penetration main gun but almost no AOE.
Armor & Penetration
Armor in Company of Heroes is probabilistic. That is, almost any weapon (save for small arms) can penetrate almost any tank some percentage of the time.
All weapons have a penetration value. When the weapon hits an armored target, the chance of inflicting damage is determined by the weapon penetration value divided by the armor value of the target. For example, a weapon with 100 penetration value has a 50% chance to inflict damage upon hitting a target with 200 armor.
Penetration values vary with range – the closer you are, the higher the penetration. This is part of what makes handheld AT like bazookas more effective close up. However, like other range-varying stats, this is not uniform across units; while bazookas gain a lot of penetration from closing in, AT guns only gain a little bit of penetration, emphasizing their role as long-range units.
Armor values only vary with the side of the vehicle. Almost all vehicles have the strongest armor in the front, weaker armor on the sides, and the weakest armor in the rear. Most of the time, this means that you will inflict vastly more damage on enemy armor if you’re able to hit its sides or rear. Angle of attack does not matter; a shot that hits the side at a 60-degree angle will have the same chance of penetrating as one that is aimed directly perpendicular to the tank’s armor.

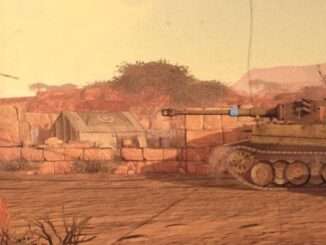
Above, we see that the Matilda has an extremely high armor value of 260 in the front, but much more manageable values of 150 and 100 on the side and rear.
Penetrating lower armor is, in general, the only benefit to attacking the sides or rear. This means that if you are almost guaranteed to penetrate – for example, your Tiger is shooting an enemy Humber – there is no value in going for the sides. However, if facing a very high-armor target – such as a Tiger or Matilda – attacking from the sides or rear is necessary for most weapons to inflict good damage.
Tank Guns, Explosions, and Infantry
As explained in an earlier section, cover is extremely important to protect your infantry. However, when tanks come onto the field, the landscape gets a little more complicated. Cover works exactly as it does for small arms against the hull, coax, or pintle MGs on tanks. However, tank main guns require different concerns.
First, tank main guns almost never “hit” infantry. Anything that affects the “accuracy” of a tank main gun does next to nothing to affect its infantry killing power. When a tank fires, its accuracy is compared to the target size of what it’s shooting to determine the probability of a direct hit. If a hit is rolled, the shell will invariably land on the target directly (even going through obstacles to do so!) The target size of infantry is very low, and tanks will almost always miss.
If the tank misses, its shot will “scatter” – it will go wide by a random angle and collide with the first obstacle it hits. A scattered shot is, however, still deadly to whatever it hits. This is why anti-infantry tanks have big AOEs – they rely on the shot scattering, but still landing near enough to enemy infantry to kill them.
As for what counts as an obstacle, it for the most part follows intuition. Often, yellow cover (e.g. a bush) will not block a tank shell; thus, putting infantry behind a picket fence will do little to protect them from a tank. Green cover generally will block tank shells – infantry behind a stone wall are generally fairly safe from direct tank shells, though the tank shells can destroy the cover itself and leave your infantry unprotected.
Dedicated anti-infantry tanks have big AOEs, allowing them to hurt squads no matter where their shells land. Additionally, tanks like the Bruumbar fire their shells upward at an angle, allowing them to clear obstacles that would be blocked by a standard tank gun.
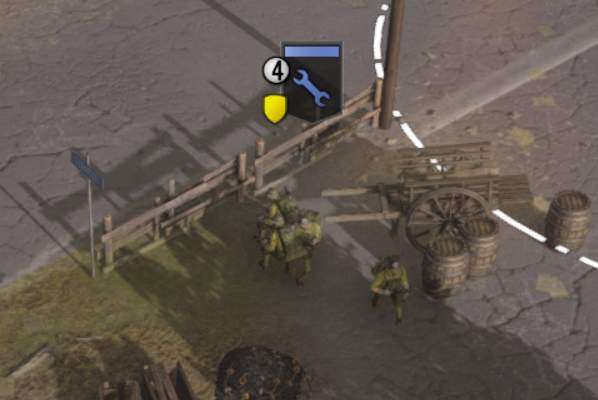
With that in mind, when facing tanks, it becomes important to position such that you minimize the risk from those big AOEs. For example, you’ll notice that around small bits of cover, infantry units can cluster up a bit. This small, cluster-prone cover can be fine against enemy small arms but makes you extremely vulnerable to tank shells, or other explosives like mortars and grenades. The engineers below are protected from small arms, but any AOE weapon landing amongst them will kill them almost instantly.
Artillery e.g. Bishop, Nebelwerfer
Artillery generally serves the role of punishing an enemy for occupying an area. It is usually most effective against team weapons, but can also be devastating to enemy infantry as well.
Artillery is generally most effective against less mobile armies, for a couple reasons. One is that the artillery units themselves are fairly squishy and will die quickly if overrun. This is compounded by the fact that they usually are encouraged to get closer to the front, as this makes them more accurate. For this reason, after firing any barrage, you should reverse the unit to a safe place where your opponent is unlikely to find it. Good use of mines can also deter the enemy from going hunting in your backlines with a fast vehicle.
Additionally, other than the first shell or two, artillery is quite easy to dodge. As soon as the first shell lands, your opponent will almost certainly be moving their units out of its affected area to safety. Less mobile armies will have more difficulty doing this. Team weapons in particular are extremely dependent on positioning; they are vastly less effective when forced out of their ideal location, making artillery an excellent counter to team-weapon-heavy armies.
Artillery units pair extremely well with recon units. Aside from simply telling you where to shoot to hit without putting combat units in danger, artillery units suffer a major scatter penalty when firing into the fog of war; firing into a location that was spotted will give you a lot more precision.
Be the first to comment