
Guide to a pure warrior or a warrior with no magic.
Contents
Guide to Crusher Warrior
All credit goes to Desperado!
Introduction to Crusher
Crusher is a basic warrior character. Smash things with straightforward melee attacks. You can do a few other things, but in general what makes this build great is how flexible and consistent it is. You don’t have to set up a bunch of status effects or deal with magic. You can run up to an enemy, smash it to death, and leave.
I’ve played several different builds and have a decent but not perfect idea of how to compare them. Here’s my overall rating for crusher:
- Offense: 6/10.
- Defense: 8/10.
- Management: 9/10.
- Mobility: 6/10.
A score of 5/10 is average. Management score is higher when you don’t have to worry as much about buffs expiring, getting ammunition, restoring mana, and things like that. Overall, crusher is a great balance. I recommend this build for new players.
I’m going to avoid any spoilers for the game as much as possible in this guide.
Chapter 1: Character Creation
You need 4 strength and 1 intelligence. That 1 intelligence is necessary in the long term to increase your max stamina, which will be extremely important. What matters most is having full strength for the most melee damage you can get, and being able to use crafting skills to upgrade things.
That leaves 2 points to put in either agility or charisma.
If you choose agility, you can dodge and do a little more archery damage that won’t be useful. The dodge can be useful for times you’re getting overwhelmed by too many enemies, and canceling out of animations that slow down your actions.
If you choose charisma, you get one companion and better prices with NPC merchants. Having a companion can be helpful early on to have a second source of damage output and a second body to draw aggro away from you sometimes. Having points in charisma also improves bard skills, including a buff you can use to give yourself and your companion a passive health regeneration status effect. You can stack up this buff between fights and make use of it during battles. Having better prices for merchants isn’t extremely important since you won’t need gold very often in general.
In this guide you don’t especially need either one, but I recommend charisma over agility for a simple reason: you’re going to have attacks that make you invincible a lot longer than the dodge does, and you’re attacking enemies while using those attacks. The dodge is most useful when you’re starting out but becomes increasingly obsolete as your character gets stronger.
Technically you get a passive healing rate from having 3 or more strength, but it’s only 1% of your max health every 10 seconds. That’s very little. It won’t help you during fights where you’re losing a quarter of your health every time you get hit.
You could split those 2 points to have 1 agility and 1 charisma. You wouldn’t get the dodge or any companions. Instead you’ll get me pointing and laughing at you.
You could put those 2 base stat points into intelligence. That’s a different build. Crusher doesn’t use spells. Blood magic doesn’t require 2 intelligence, so don’t worry about missing out on passive healing from that.
Make your character have the strong body type. Any other choice is wrong.
Chapter 2: Puny Pusher
You start with a two-handed melee weapon and two skill points. Open your skills menu, go to ferocity, and put one point into its general mastery. Now put your second point into powerful strike. Set up a hotkey for powerful strike. This skill is always going to be useful and powerful. For maximum consistency and damage, use a two-handed sword with this skill. The animation is different with different weapons including how long it takes to actually attack. Two-handed axes and hammers have a little jump that makes you vulnerable while two-handed swords have a brief pullback followed with stabbing forward. I haven’t checked for certain, but I’m pretty sure the sword also has a longer hitbox to reach enemies a little further away from you. You get a faster attack and larger area.
Get the horse. Do the quest. If you have 2 charisma, you can pay gold to skip the quest by spending some of your starting gold. You’ll get plenty more gold later and there’s few things you’ll need to save it for, so I recommend paying to skip the quest if you chose to have 2 charisma. Generally you want to avoid combat for now and having the horse is necessary for that to be an option.
Grab waypoints. Use your map to see which ones are near you and go get them. You get a bunch of experience and you can use those fast travel locations later. On your map there are areas you can’t see because of clouds. Every area has multiple sub-areas that you need to go to the “middle” of to reveal that part of the map and earn some experience. It’s an okay source of experience when you’re riding around on the horse, but not required.
Mine all the ore you come across. For now it’s only copper. Dismount your horse next to the ore so you can mine it, collect the ore, and mount back up to ride away before any nearby enemies attack you. You can fight them if you really want to, but taking damage at this point is an unnecessary risk. Also harvest a few trees for wood.
When you start earning some levels, put skill points into bard until you can get serenade of serenity. This is your healing buff. You can also get musical finesse after, for more duration. Any time you’re not in battle, use serenade of serenity to give yourself health regeneration and a little armor. The armor bonus applies to both physical and magic damage. The amount of healing scales to your character level. If you chose to have 2 charisma, your bard buffs also apply to your companion. If you don’t have 2 charisma, you’re going to be sad and alone forever.
Alternatively to bard, you can use blood magic. Don’t worry about your low intelligence, you don’t need 2 intelligence to use blood magic. Bloody attacks gives all your physical attacks a 10% chance to passively regenerate a percentage of your max health. It’s not as consistent as serenade of serenity, but it costs less skill points and is completely passive.
You have two choices for factions: warrior or merchant. The warrior faction will involve a lot of combat and traveling on horse. The merchant faction requires you to be level 5 to join but is a lot easier. After you fully complete the questline for one, you’re allowed to join the other. Wait until you’re level 5 so you can join the merchant faction first. The warrior faction can wait.
After you have serenade of serenity, save up skill points. Don’t spend them yet.
You can block. This is probably going to be the only time you use it. It has a very short duration. It’s almost always better to move to the side to avoid attacks than to block. If you have 2 agility you can dodge, which is a little better than blocking. You can practice blocking if you want to be cool.
If you have 2 charisma, you can get a companion. There’s three companions accessible in the first map area. Companions can be convenient in battles. If their health gets depleted, they get downed and wait to heal so they can stand up again. Companions never permanently die. Having 2 charisma means your serenade of serenity also applies health regeneration to all your companions.
Here’s a simple combat strategy: use your basic melee attack combo, then when the combo deals its last swing, use powerful strike. You can overwrite the “cooldown” after the last swing where you can’t keep attacking by using powerful strike, then go back to more basic melee attacks. You can’t afford to do this a lot, so watch your stamina and let it regenerate when you don’t need to deal big hit damage.
There’s a dungeon in the first area that involves plants. The boss of this dungeon has a special equipment item that helps with stamina. You might need to come back to do this dungeon later, but you should get it as soon as you’re strong enough to complete this dungeon.
Chapter 3: Little Puncher
Spend skill points on weaponcraft and blacksmithing. Don’t bother with copper items. Go find iron ore. Your first priority is to craft a two-handed sword. This is why you needed the wood. Second priority is to craft iron armor. The damage you get from having a better weapon is a lot higher than the survivability you gain from better armor. If you have a lot of copper, you can use hardening to upgrade your iron armor for a little more physical defense and your sword for a little more attack. Enemies that used to be a struggle to fight are suddenly crumpling in your hands. Get used to that feeling.
You’re going to realize how slow you attack. This build focuses a lot on big hits, not little stabs. Attack speed will generally not matter because it only affects your normal attacks and not your skills.
When you’re not spending skill points on blacksmithing or weaponcrafting, spend them on ferocity so you can unlock charge. Charge is a jump attack. Its damage is low, but what matters is it often knocks enemies down. If enemies are walking to you, use normal attacks and powerful strike to smash them to death. If enemies are backing away and throwing things at you, avoid any projectiles before you use charge. Practice with charge to get used to how much range it makes you jump. Generally, charge is for dealing with archers and mages that run away from you which often group with melee enemies. You can back up and use objects nearby as cover to protect yourself from the archers and mages while you deal with the enemy warriors. Let your stamina replenish before going after the archers and mages. Don’t let yourself take hits from archers or mages unless you know for certain you can kill them before they shoot at you. They have to stand still to charge up an attack and shoot at you. You can take a few steps away to avoid the attack and follow up with pursuit.
Should you spend more skill points on serenade of serenity? There’s three levels of it. Sure, but it doesn’t improve by much. You could also use the other two serenades. Serenade of speed gives some movement speed and jump height, which can be helpful for chasing down archers and mages. Serenade of assault is a big damage bonus which is great. Both of these have the same problem: their durations are bugged. Sometimes they suddenly expire and you lose your whole stack. You don’t want to be distracted by babysitting these two serenades. Serenade of assault is a great value of an attack buff after you gain some levels and if you have 2 charisma, but otherwise I wouldn’t bother.
The merchant quest shouldn’t take very long or be difficult. You only need to equip one item of the set to get the benefit that matters. It’s up to you whether you need the effect or if you prefer full heavy armor.
Buy the player home and build some mining spots. Choose mythril ore even if you’re not high enough level to improve blacksmithing or weaponcrafting to use it yet. Always set up large ores. Anything else is wrong. There’s only one other option and it’s wrong.
Backtrack for obelisks if you haven’t already been grabbing them for skill points. When you level up it’s two skill points. Each obelisk is one skill point. You can get them at any time, but they’re usually guarded by enemies that you can’t handle very well in the first chapter.
Chapter 4: Medium Squisher
You can skip mythril armor and weapons to go straight to kainite. It won’t be easy since most of the ore is near enemies, but you should at least be able to make a kainite two-handed sword and craft mythril armor. At that point you can kill one of those enemies guarding kainite ore. If you’re taking a lot of damage, back off and use serenade of serenity to heal. Kainite armor is great. You’re going to need it as soon as possible.
Kainite equipment is also when you should upgrade your armor and weapons with hardening if you weren’t upgrading your equipment already. You’re going to be using these items for a while so upgrade your sword for damage, harden your armor for defense, and start using tailoring to embroider your armor.
You’re going to quickly gain a huge new advantage: increasing your max stamina so you can use warrior skills repeatedly without needing to back off to regenerate stamina. You specifically want to use red silk since it adds health and stamina, which can be obtained in the same areas kainite can be found. You can also use leatherworking to patch your armor but it’s not as much benefit as embroidery.
Keep spending skill points on ferocity’s mastery so you can upgrade charge to its second rank. You’re now invincible during the jump. Use it on mages. Use it on warriors. Don’t use it on friendly merchants. Upgrade powerful strike. Get whirlwind so you can spin to win. It doesn’t have much range, but you can charge to jump right into an enemy’s face then spin it to death. Usually powerful strike will be more powerful than whirlwind, but whirlwind has more area to deal with multiple enemies crowding around you. Whirlwind works very well with blood magic’s bloody attacks, having both multiple hits and a big area to potentially hit more enemies.
After that, you’re ready for passives. Ferocity has a passive melee damage bonus. Defense gives more max health for its mastery, two ranks of a passive, and most importantly the mastery skill that gives a multiplicative bonus to your health. Speech gives some stamina.
Arcane magic needs 5 mastery plus 3 ranks in magic resistance to get 9% magic resist. Holy magic needs 8 mastery plus 3 ranks in divine protection to get 3% physical and magic defenses. These are high cost and low benefit so only spend skill points on these when you can afford it.
Bard isn’t a very high priority for skill points. The chord attack skills don’t deal nearly as much damage as your ferocity skills and it’s a big investment to get the chord status effect stacked up enough to make use of it. Passive healing is great and you should upgrade it as much as you need.
You might be wondering why I’ve been ignoring the combat mastery skill so far. The benefits of combat mastery for this build don’t come into play until later. Attack speed doesn’t help with your active skills and you don’t need more normal attacks when powerful strike is much more damage in much shorter time.
Chapter 5: Large Crusher
At this point you have a lot of power. If you haven’t already, go to the darklands and start killing common enemies. Get used to fighting these. You’ll need some practice since you’ll have to deal with an assorted mix of enemies in this region before you can upgrade your equipment to the next tier. Make sure to grab loot from enemies, especially the yellow cloth material, adonite ore, and yellow crystals along the way since you’ll need plenty of those three in particular.
If you haven’t already picked up any quests that require you to be level 40 or higher, go back and grab those. If you aren’t level 40 by this point, and you have full kainite weapons and armor, you should be able to kill darklands monsters to quickly level up.
There are dungeons in the darklands. Bosses are tough, but your main goal is to get a two-handed sword that gives a lot of health as loot from a boss. This sword isn’t required but it’s the one I recommend most for this build. You also want a heavy armor set obtained as loot from certain bosses in the darklands, the crusher set. You’ll understand why you want the weapon and the armor set together when you see what benefits they give.
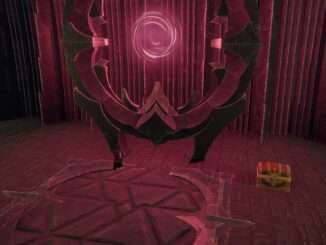
You won’t be able to get much of the crusher set before you open the door to a certain dungeon which requires five of a certain item obtained from the events in the area. These events each spawn specific monsters and won’t all be equally difficult for you. They respawn when the world’s resources reset every two hours of real time, so if you’re stuck with some of these events you can wait for the ones you can do to reset.
After you have the full crusher set and your weapon of choice, you can finally make use of something I’ve been ignoring so far: rage. Earlier on you may have been tempted by the damage and attack speed bonuses. Those stack additively and have a very short duration. The stacking status effect from rage isn’t what matters. Angry strike giving you projectile slash attacks is what matters. Whirlwind can generate many stacks of rage quickly when you’re spinning on multiple enemies at the same time. Now that you can afford to use whirlwind often, you can use it to stack up rage and when you’re low on stamina or an enemy is running away from you, throw a slash attack. The slash projectile travels a while and pierces through enemies. You’ll also want mastery: killing frenzy to stack up rage more quickly for more slash projectiles. You don’t really need any of this, but it’s a long range attack with a decent area and damage that doesn’t cost stamina.
As soon as you get any pieces of the crusher set, and especially if you get your weapon of choice, upgrade them. For the armor you want to embroider for max stamina using the yellow cloth material. You want stamina a lot more than health. You can harden the armor either for physical armor, a chance to evade physical attacks, or a chance to evade magic attacks. Dealing with enemy mages has been difficult for a while, but before you decide on what to do, know that if you apply either hardening or the evasion chance you can change it by upgrading for the other one. You’ll get a way to increase magic resistance much more in the near future so don’t worry about it for now. At this point, you may as well use leatherworking to patch your crusher set since you’ll be sticking with this armor set. Use the blue leather to increase attack speed, movement speed, and critical chance all in one.
As for your weapon, obviously you want to harden for more damage but you’ll have the choice between simply adding more melee damage or a chance to regenerate health or stamina. The stamina regen enchant only regenerates 1% of your max stamina per second, for 5 seconds.
After you kill the main boss of the dungeon you get most of the crusher set from, you’re finally ready for the end game.
Chapter 6: Crushing the World
Turn in the quest that directed you to that darklands dungeon you got some of the crusher armor pieces from to unlock the postgame feature, expeditions. Expeditions are the repeatable gameplay loop where you complete some objectives, kill some monsters, and collect treasure from a chest.
You have plenty of leftover skill points. You shouldn’t need my advice on what to do with it, but I’ll list some skills you can get some benefit out of:
Combat mastery for throw weapon to pull a distant target enemy close to you, defensive stance to negate attacks but it eats a lot of stamina very quickly, and some passives that can increase your damage output a little bit. Raising the mastery of this skill adds a little attack speed. Throw weapon can be useful to grab a single distant enemy then use whirlwind or powerful strike to pulverize the enemy you pulled.
Blood magic for more passive healing with bloody attacks. Raising the mastery of this skill adds some health.
Defense for more health and knock resistance. You probably have this already.
Bard to fully upgrade serenade of serenity and anything else you’re using from this skill.
Arcane magic for the magic resistance. You can’t use anything else in this skill.
Holy magic for the physical and magic defense bonuses.
There’s only one more thing you need my guidance for: put at least one skill point into speech’s mastery and another skill point for the first level of encouraging speech. Encouraging speech by itself isn’t a good buff. It becomes an amazing buff after you make use of what you get from expeditions. You can also put skill points into pressure to debuff enemies, but it won’t make much of a difference.
Conclusion to Crusher
Crusher is one of the most simple builds possible in this game but it’s never easy to tank hits in high level areas. Make use of invincibility during skills by timing when you use those skills with when an enemy is about to attack you so that you can negate the attack and still deal damage.

Be the first to comment