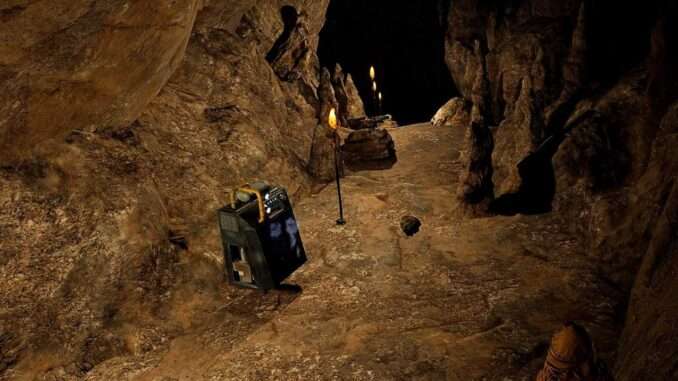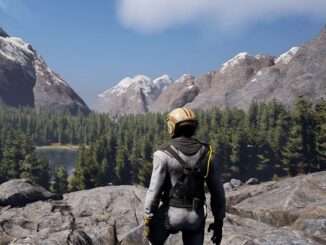
What to expect, and what to do to survive.
Contents
Guide to Complete Livewire Solo Walkthrough
All credit goes to Nysch!
Introduction: Leveling-up
Ideally, you got to level 5 in the tutorial, if not your going to have a lot more work.
This guide assumes you are firmilar with survival/craft genre games and attempts to break down what will be useful on this your first mission.
Unlocks
Run down for what you need to unlock:
Tech Tree
Requirements
- Wood Bow (Your Primary Ranged Attack)
- Bone Arrows (Better than Stone/Default Arrows)
- Campfire (Food Source)
- Oxidizer (Better Oxygen Source)
- Stone Knife (For Leather/Fur)
- Bedroll (For Sleeping through night/spawn point incase you die)
- Thatch Wall
- Thatch Door
- Thatch Floor
- Repair Hammer (For repairing thatch during storms)
- Stone Hatchet (Starts Unlocked)
- Stone Pickaxe (Starts Unlocked)
Recommended
- Cloth Armor (all Pieces)
- Wood Wall
- Wood Window
- Wood Floor
- Wood Door
- Bone Knife (better than Stone)
Replay (no death run)
- Waterskin
- Oxygen Bladder
- Oxygen Extractor
- Crafting Station
- Rain Collector
- Skinning Table (Gives More Resources than On-site)
Talents
Generally you’ll want to take the solo tree for Health and Health Regen (This guide assumes your playing alone, and for the first time).
Also anything you can take to speed you up or stealth you helps.
Step 1: Landing
Upon Landing you will have nothing on you (exception: Things on replays crafted from the station), the first objective the game assigns you I’m going to ask you to ignore for the moment, because just rushing this mission is a good way to end up death and with a ton of experience debt.
To the West of where you land is a small lake, I suggest you initially build your “Semi-permanent” base in this general location, as it is central to the mission sites and nearby the escape pod for when you return.
First you’ll want to gather the materials for a basic thatch structure, to do that you need to collect a few stones, craft a pickaxe, then mine stone. Once you have enough to craft a knife and hatchet, go ahead and setup camp. You’ll want to keep near your basesite/escape pod at first.
As soon as you can, craft a bow and about 10 stone arrows (bone won’t be available without killing something), I recommend you take out dear, in stealth mode. Stealth kills get 2.5x Damage but only if the animal isn’t alerted. Aim for headshots when you have to fire, and remember to lead moving targets. Do not waste arrows trying to hunt down fleeing prey, if you can’t get a deer in one bow shot, chances are you’re not fast enough to catch up. Wolves you’ll want to use your bow on from as much distance as you can. When you run into Bears (like in the 2nd objective: Scan the 1st Location) do not engage, this is a death trap; instead sneak away silently, as best you can. Bears will move on from objectives after a while. Focus on getting sustainable before taking on the objectives, and you’re life will be much easier.
Once you’ve got a shed to work with, your next objective should be getting an oxidizer online, this will greatly increase the oxygen you get from oxite. Only load the oxidizer with 5 oxite at a time, 4 is more than enough to fill your suit, and more is wasted. Remember to put everything indoors, except fires, and potentially the Rain Collect on replays. Also note that the “Wood Stack” and “Stone Stack” that you can craft from the beginning can help place resources outside that will withstand storms, saving you valuable indoor space.
When you have your bedroll, campfire, oxidizer, and basic gear in check, it’s time to move out, but before you start taking any objectives, if you have anything you want to keep in case of your untimely death I recommend storing it away in either the drop pod or an indoor chest (tbpf the items you get from the orbitial workshop should probably be put in your drop pod before doing objectives incase you need to leave early, this is ideal time to do it).
Step 2: Find the Radar
The Radar is a unique item that dropped with you in a seperate cargo pod, it’s location has been marked on your Map since you got here, and now it’s time to retrieve it.
It may be confusing but it consumes you “Back” Slot which is bound to the G key.
Once you find the radar it will be strapped to you back until you deploy it / store it. This prevents taking things like Backpacks, or Carrying Animals.
The Radar Pickup Objective is Safe enough. Closest to your location after picking it up is the “Scan Location 1”, and “Scan Location 2” (which I recommend doing last) is in the upper east. and “Scan Location 3” is in the lower west.
Step 3: Tiptoe Through the Death Trap
Ok so the time in which everyone dies their first time is upon you. Chances are you won’t survive this first encounter, luckily win or lose this fight, the bears will move on eventually and you’ll be able to finish the scan from where you left off without further interferance.
To successfully complete this objective solo requires some very simple principals: The Bears represent an enemy you absolutely cannot beat, and they run faster than you. What do you do then? Simple. Place the Radar, and interact with it, and get in a vantage point where you can see the bears coming, go into stealth and stay there. When the eye turns yellow you have a few seconds to get out of sight of the bears before they kill you, quickly sneak away from the radar (note: the best way to go is the one that looks impassible: Jumping off the cliff behind you).
If your lucky the eye symbol will close at some point at which you can breathe a sigh of relief, having successfully shaken off the bears. Now it’s just a waiting game, if possible watch the bears from a distance until they leave the area, then slowly sneak back to the radar and reactivate it, assuming the bears didn’t linger because of some bug, it should start where it left off, and complete this time. Pick it up and quickly RTB, you don’t want to stick around here.
Step 4: Scan Location 3
I recommend doing this before scan location 2 because it is slightly less difficult than bears but this time you can win.
In the lower west of the map is a another scan point, assuming the weather holds, and you set out at dawn with full bars, you can make it within a in-game day cycle. However for your first time I recommend setting up a shelter about half-way to the site, to allow for the possibility of a shelter that you can take refuge in because of storms. Also when your almost there I recommend placing a bedroll and campfire and making sure you can spawn nearby (you’ll want the bedroll in a thatch building, which is easy enough to assemble)
Note that if you have cloth armor, you can stay out in storms a little longer (not much but the full set helps about 5%). This can easily mean the difference between riding out a storm and needing to take shelter.
When you get there, deploy the radar as before, and again take up a defensive stance, however this time have bone arrows at the ready to deal with the 2x Jaguar as they approach. 2 – 3 Shots to the head will kill one. less if you get crits. It will be a difficult fight but you can definitely win. When your finished with the scan go RTB again, if neccesary stop by your “Half-way” point to get a rest from any storms that may have come.
Step 5: Wolf Pack Recon
This is scan location 3, assuming you’ve got plenty of arrows, and once again leave at Dawn with full bars, you can reach this location in about the same time. The Bears will have moved on by now and likely have despawned, so don’t be afraid to cut through the old site.
Location 3 is similiar to Location 2, but the difference is instead of 2x Jaguar you’ll be facing a pack of 3 – 5 wolves, which should be easy prey if you keep your wits about you. Try to focus on one at a time, and make sure they don’t get any closer than you want them, In an emergency you can switch to your stone knife at melee range and that’ll get you some damage but they’ll die in about 2 – 3 stabs per wolf.
Once you complete this scan, and retrieve the radar your mission should read complete. However, this is no time to celebrate. If you’ve followed my guide thus far, the winds will be picking up very soon, and they will knock over trees, your best bet is to bee-line to the Escape Pod, you may take some damage on the way but the storm shouldn’t kill you from exposure unless it’s one of those “Freak” storms that are followed by another storm. Once you get to the drop pod, and leave the site, you’ll have completed your first real mission.
Step 6: Future Replays
In the future should you replay this mission it’s largely the same conditions, however you can save some time by skipping things like the oxidizer and going straight for the oxygen station, crafting bench, and skinning table. Additionally at Tier 2 you unlock Waterskins, and Oxygen Bladders that can expand the amount of terrain you can cover away from safety. Also as you increase in level your chances of dying like you did the first time go down. I wouldn’t recommend taking on the bears unless you have Tier 2 Weapons and Armor which means level 15 minimal. If you take this on in a team, one viable strategy might be to have the players work together vs. the Bears. I’m not sure how it will respond in a group as I’ve only done it solo.


Be the first to comment