
I put at your disposal, my knowledge, to allow you to optimize your PC for free, with a complete, detailed guide.
Contents
- Guide to Increase Performance / FPS and Reduce Lag Input
- File to Download Before Continuing
- 1 – Clean Any Virus (2min)
- 2 – Bcdedit Tweaks
- 3 – Registry Tweaks
- 4 – More Efficient Power Management Mode
- 5 – Windows Check-In
- 6 – Clear Cached Memory
- 7 – Install NVIDIA Without GeForce Experience
- 8 – Nvidia Settings
- 9 – Use Razer Cortex Then Uninstall It
- 10 – To Install Visual C++ (All-In-One) v56
- 11 – Maintenance
- 12 – PUBG.exe Check-In
Guide to Increase Performance / FPS and Reduce Lag Input
All credit goes to excees_!
File to Download Before Continuing
It is a RAR folder, so you will probably need to install the ”Winrar” software if you haven’t already, to be able to open it. The software is free and you can download it here:
1 – Clean Any Virus (2min)
We will first do a scan, to check that your pc is not subject to the virus.
Open the folder downloaded previously then right click on ”adwcleaner_8.3.0.exe” => Run as administrator. And follow the instructions to scan and clean properly.
It’s fast (arround 2min to make the scan) and free.
2 – Bcdedit Tweaks
Optimization of Bcdedit.
- Disables HPET
- Disable dynamic tick
- Disables the synthetic timer
Open the previously downloaded folder then right click on ” Bcdedit Tweaks ” -> Run as administrator.
3 – Registry Tweaks
Registry optimization.
- Deactivates power regulation
- Optimization of the reactivity of the system
- Removal of the network limitation
- Optimization of the management of games by windows
- Correction of the exclusive full screen
Open the folder downloaded previously , then you just have to double click on “Registry Tweaks”.
If these do not suit you, you can reset the default values by double clicking on ” Registry Tweaks – back ”
4 – More Efficient Power Management Mode
1 – Launch your CMD as Administrator, then copy the line below:
powercfg -duplicatescheme e9a42b02-d5df-448d-aa00-03f14749eb612 – and do CTRL + V in your CMD window, then enter, like below:
3 – Then you just have to go to:
Control Panel \ Hardware and Sound \ Power Options and select the profile ” Optimal Performance ”, as below:
5 – Windows Check-In
Open the folder downloaded previously and:
1 – Turn Gamemode On
- Click on ”1 Turn Gamemode On” and in th new window, enable it!
2 – Disable Game Bar
- Click on ”2 Turn Gamebar Off” and put it off
3 – Disable mouse acceleration
- Click on ”3 Enhance Pointer Precision Off”
In this new window, in tab named ”pointer option”, Uncheck ”improve pointer accuracy”!
6 – Clear Cached Memory
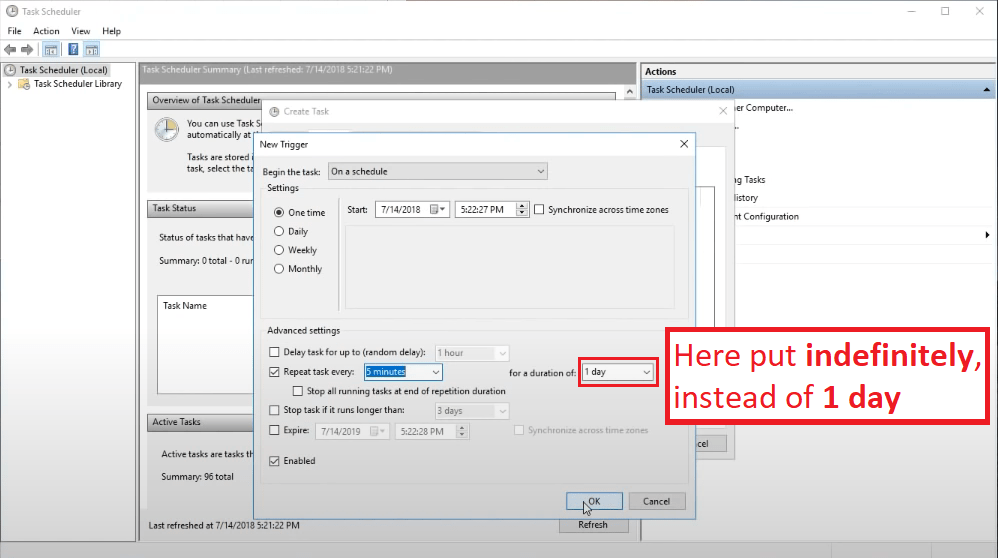
You just have to follow this tutorial.
This will allow your computer to flush cached memory regularly, automatically
There is just a small error during this tutorial, remember to correct it as below:
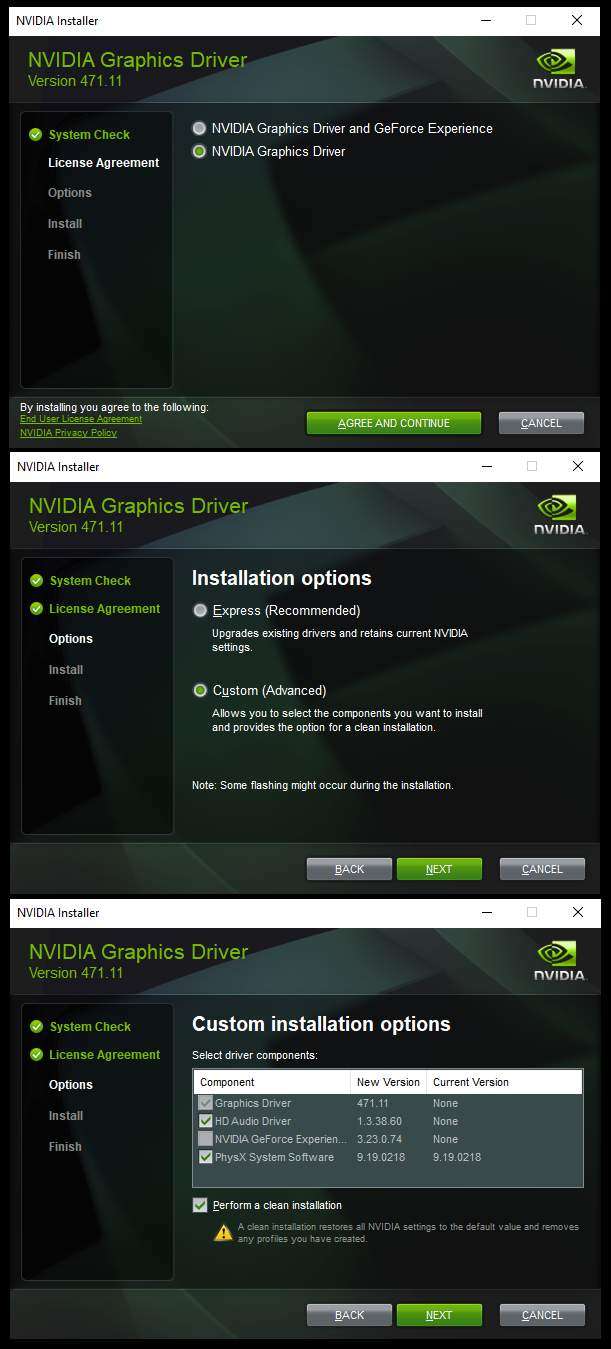
7 – Install NVIDIA Without GeForce Experience
When you instal Nvidia Driver, choose the option without GeForce Experience:
There is a solution for those who want to continue using GeForce Experience to make clips for example while avoiding the lag input, but it’s complex to explain, so I prefer not to go into too technical details.
8 – Nvidia Settings
Follow steps and copy:

Next:
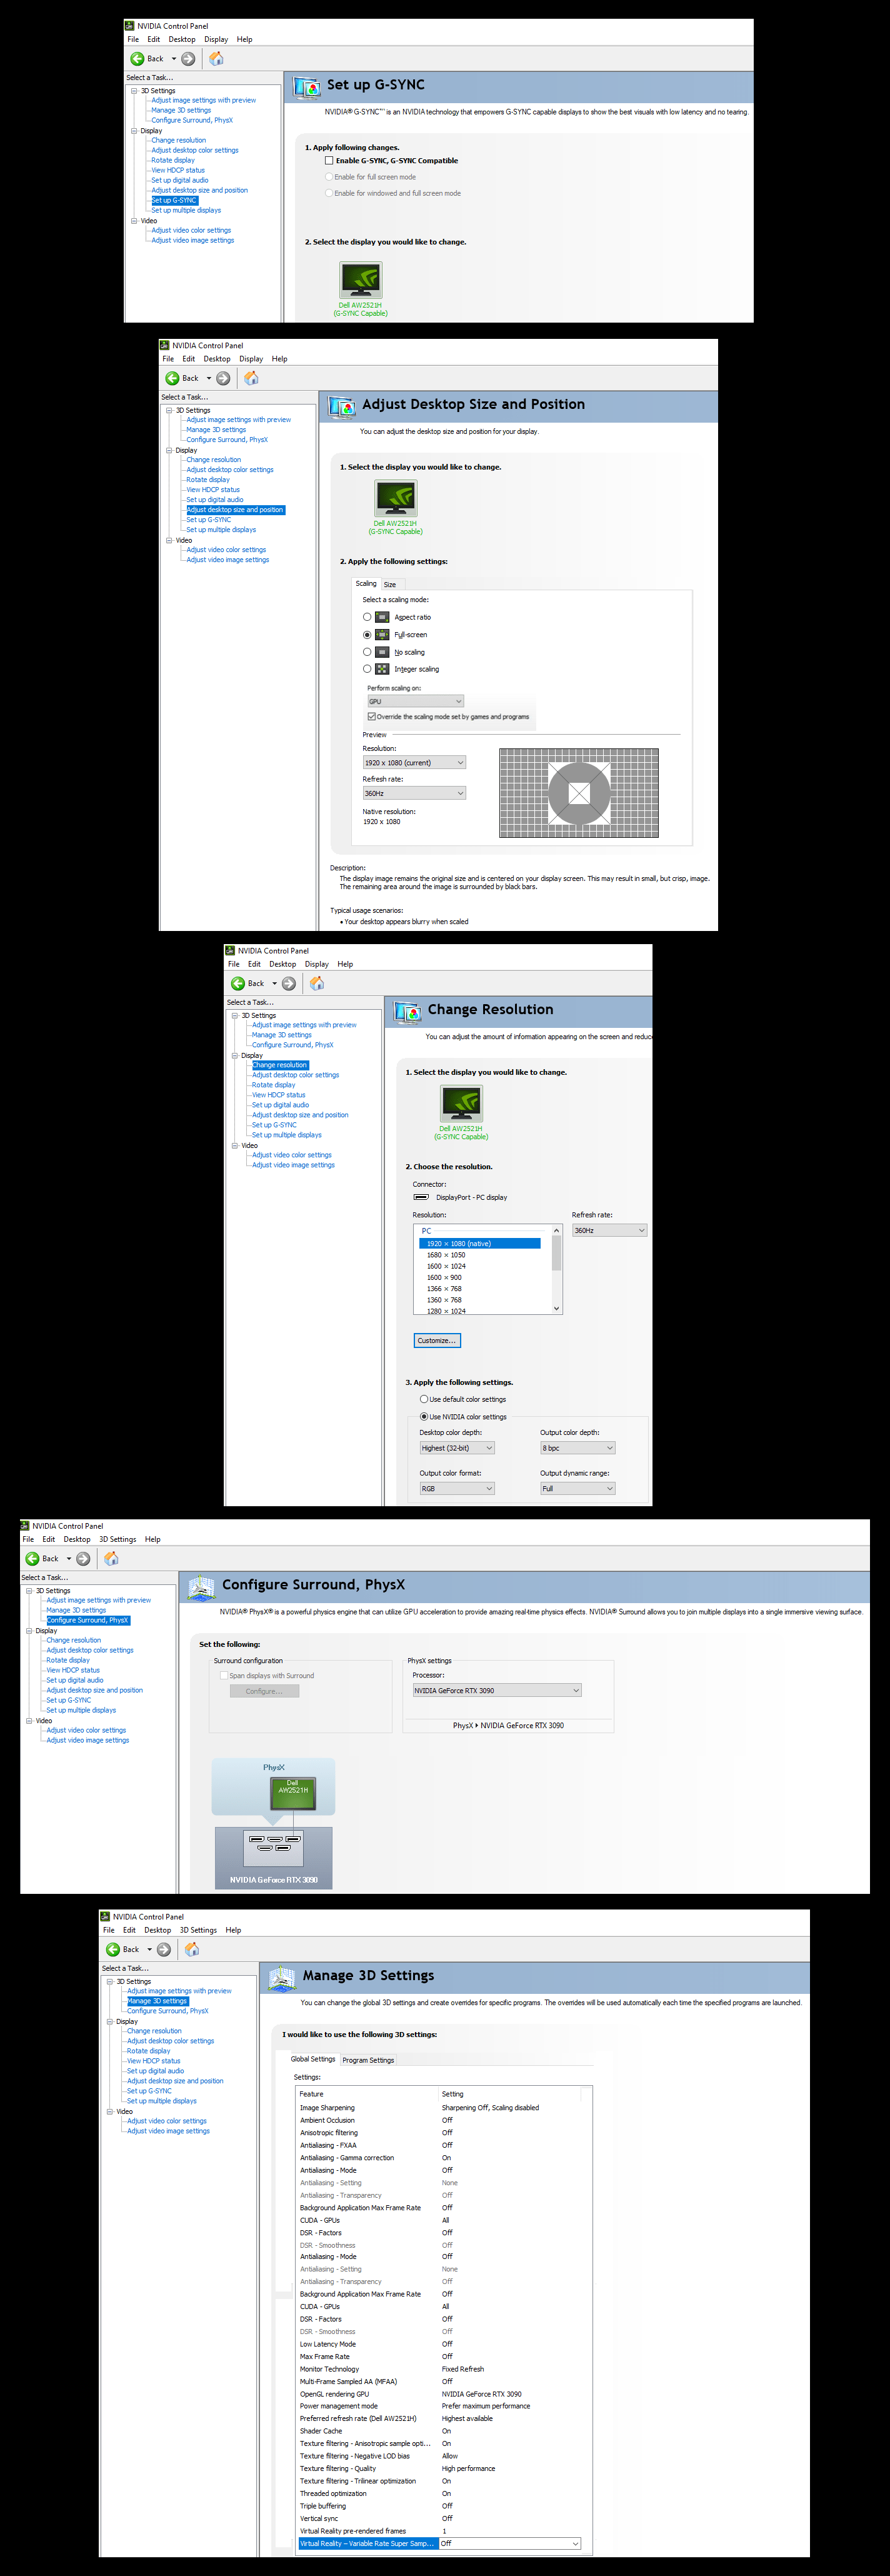
For curious guys, about ”Low latency mode”
If you put this setting in “ON”:
Your graphics card limits the number of pictures in the queue to 1
= reduction of Lag input
If you set this setting to “OFF”:
Your graphics card automatically manages the number of pictures in the queue with 1 to 3 pictures
= much more stable FPS.
In fact, in PUBG your best bet is to leave it OFF, and for those who have a very high-end pc, you can try ON, this parameter affects the feeling of the sensitivity!! (if you change this setting, you need to know, you need to restart your game, to apply)
9 – Use Razer Cortex Then Uninstall It
Open the folder downloaded previously then right click on ”RazerCortexInstaller.exe” => Run as administrator. And follow the instructions to install only CORTEX!
When the installation is complete, start ”Razer Cortex”
Go in tab “SYSTEM BOOSTER” and click on ”SCAN”
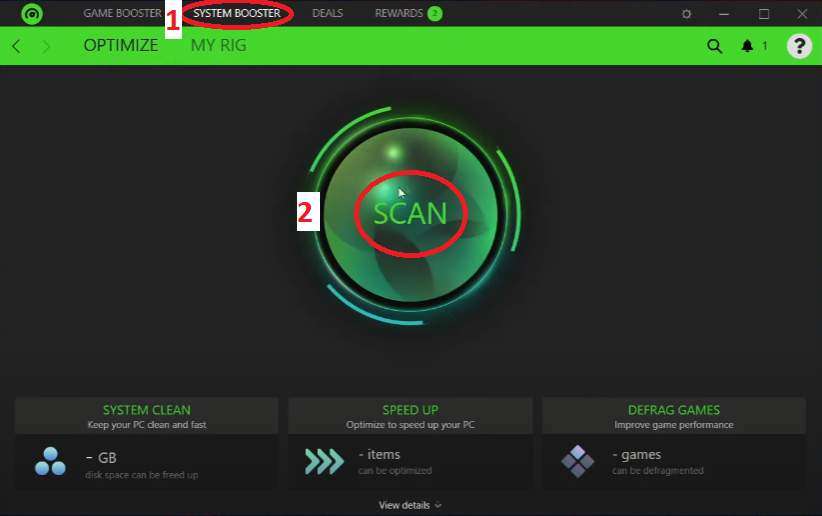
Next, check that the” SPEED UP” box is checked and click ”OPTIMIZE”

When you have finished these actions, I advise you to uninstall the RAZER CORTEX software.
10 – To Install Visual C++ (All-In-One) v56
To install ”Visual C++ (All-In-One) v56”:
Open the folder downloaded previously then right click on ” Visual C ++ v56.exe ” => Run as administrator. And follow the instructions to install properly.
11 – Maintenance
Regularly delete everything in these 3 folders (there is no danger concerning the proper functioning of your pc)
- Delete Temp Files
- Delete Temp% Files
- Delete Prefetch
And right click on ”4 Delete Windows Update Cache.cmd” => Run as administrator.
I created 3 shortcuts to directly access these folders.
Open the previously downloaded folder, then move the Maintenance folder containing these 3 shortcuts to your desktop.
12 – PUBG.exe Check-In
Go to the root of your game:
- C: \ Program Files (x86) \ Steam \ steamapps \ common \ PUBG \ TslGame \ Binaries \ Win64
Then do as below:
After having done everything, restart your computer.
Tips 1 – For those who game crashes randomly
Open the previously downloaded folder, then you just need to double click on the one that suits you best.
Personally I use
- PUBGBelowNormalPriority
You also have the possibility if this does not suit you to reset it to default thanks to
- PUBGNormalPriority
It suffices to perform this manipulation once for it to be effective indefinitely.


Be the first to comment