
Tips aimed for the players that are still struggling at the game and die often.
Tips and Tricks
All credit goes to jOj!
Introduction
This is a collection of stuff that I found out to be useful while playing Returnal. This guide is aimed for those that don’t do so well in the game (like myself).
In this guide we’ll talk a bit about useful settings, user interface terminology, my preferred weapons that I feel it makes my life easier, items (passives) that are cool and some stuff that the game does not do a great job explaining (or you might’ve missed it).
Terminology
UI explained
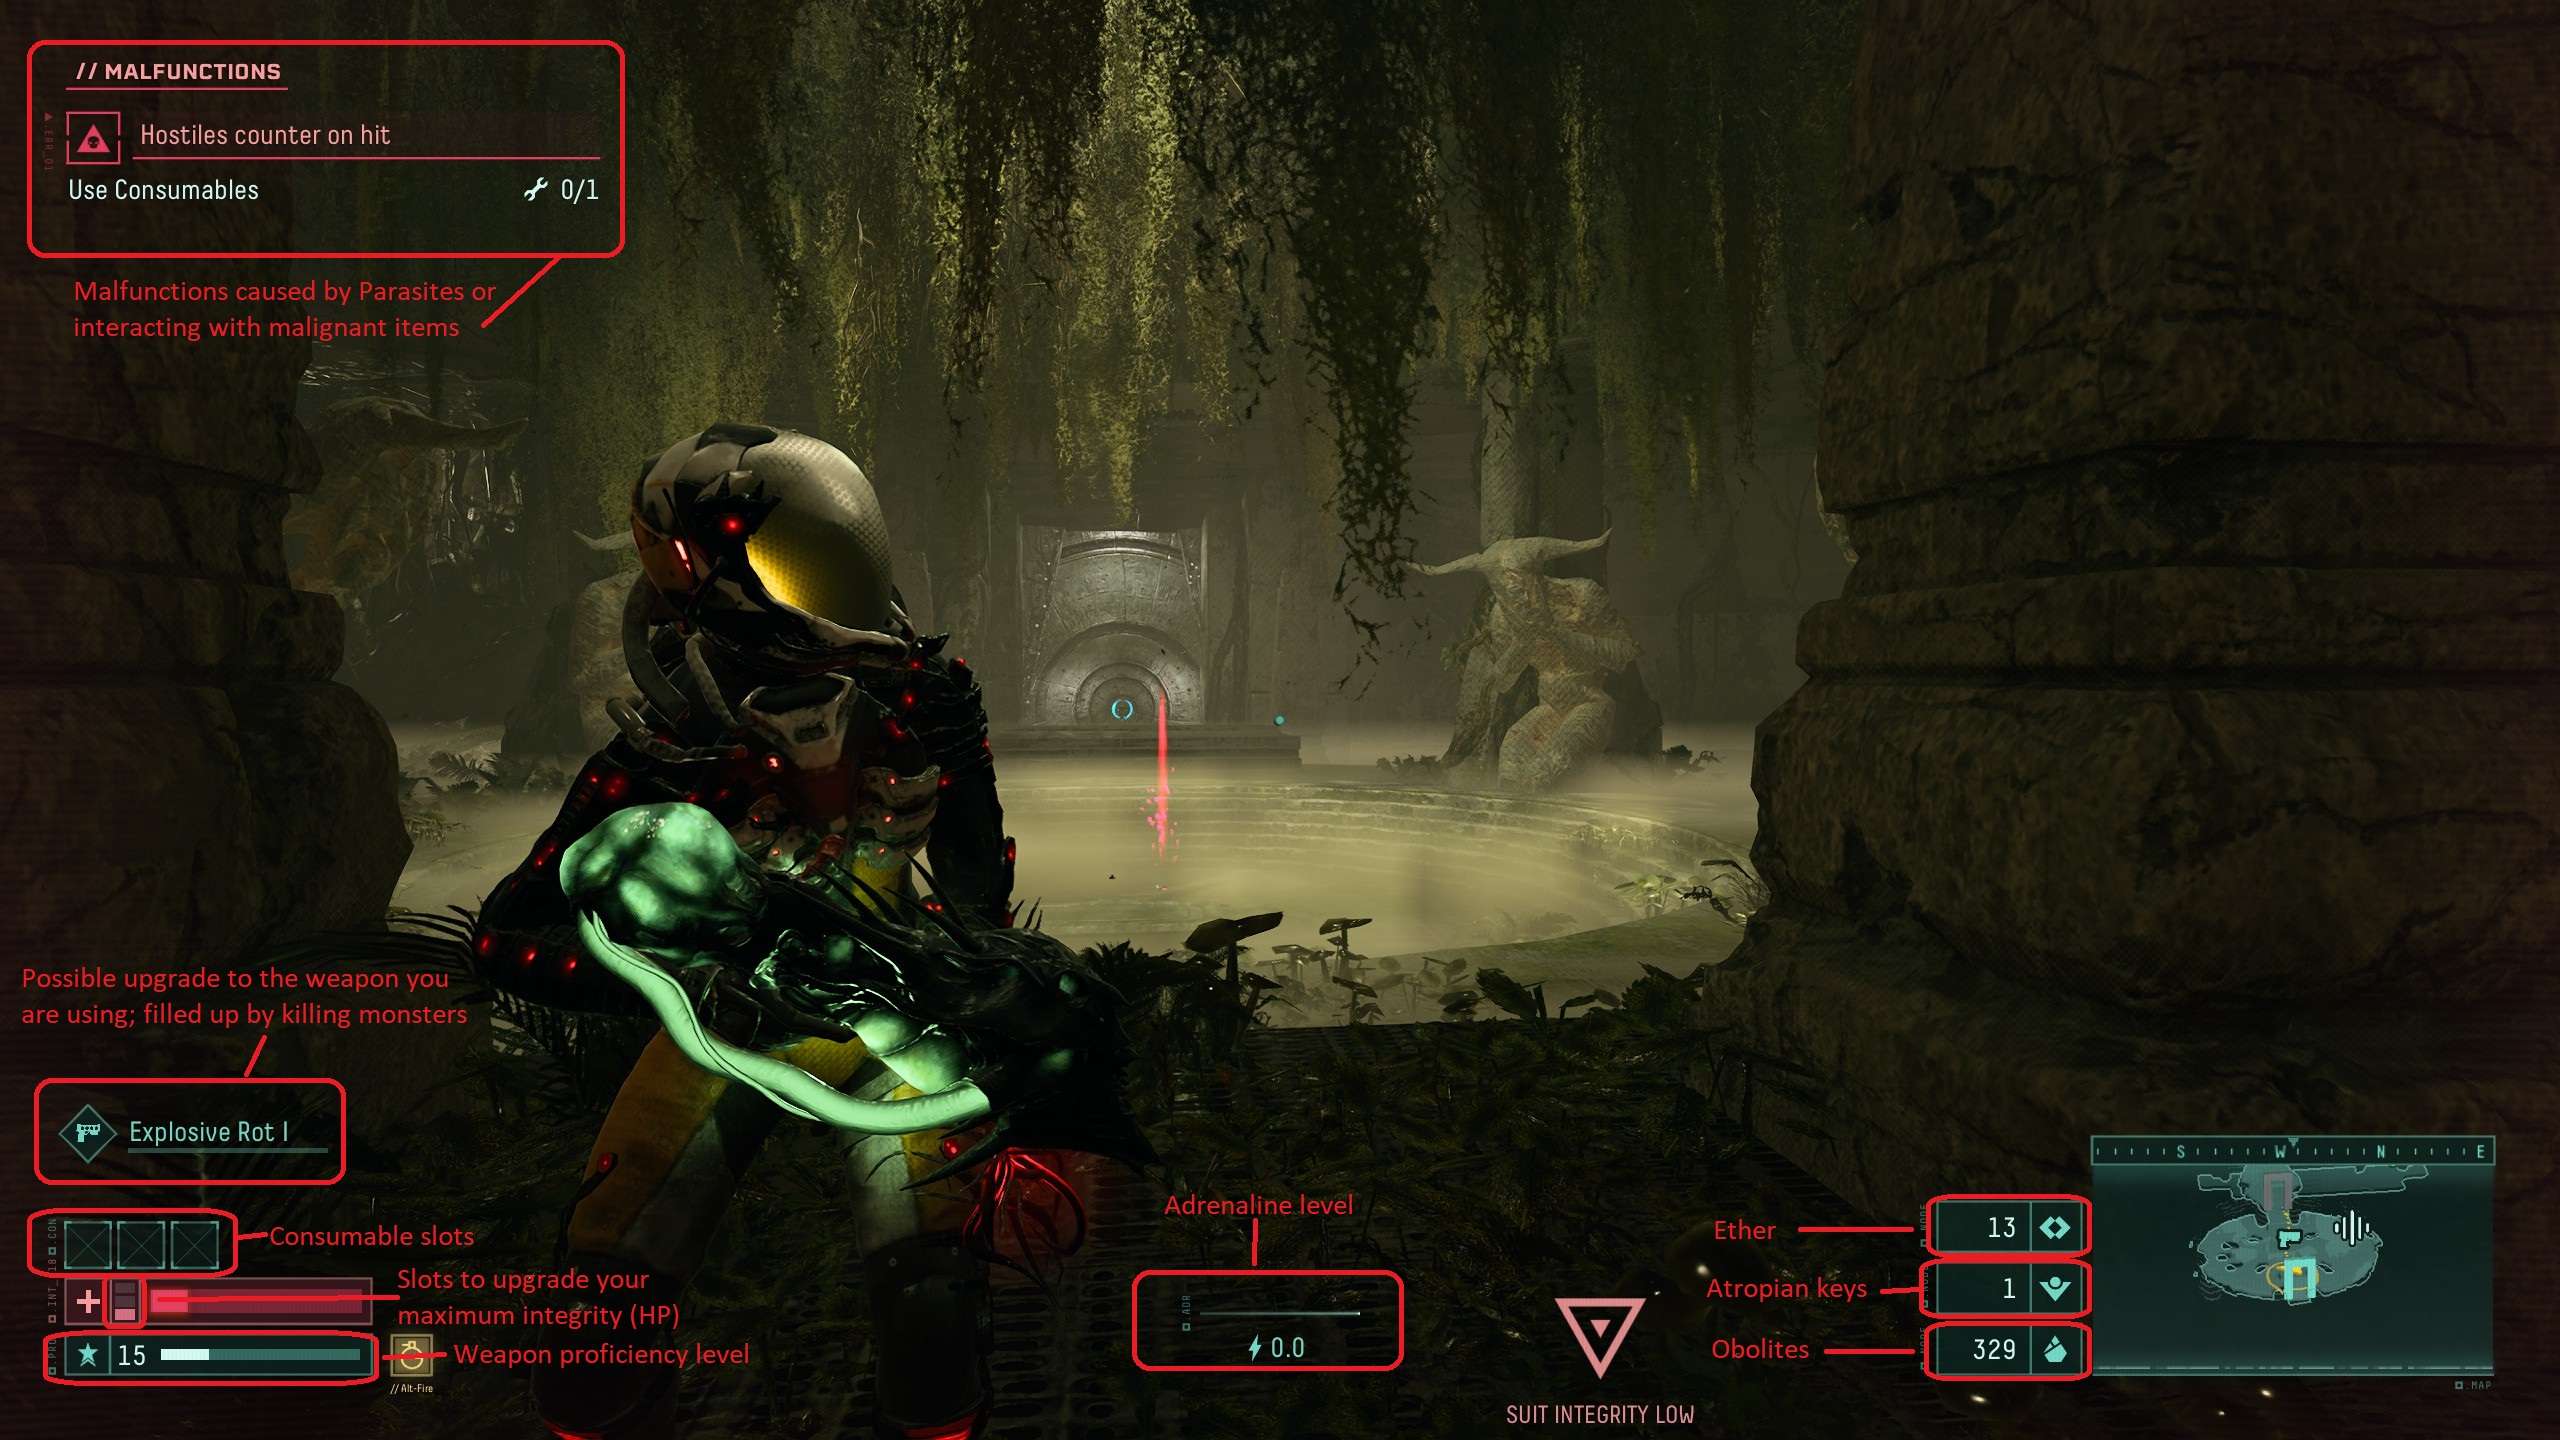
Economy pickables
- Obolites (yellow) – Main economy resource that you can use to buy items. They drop after killing enemies.

- Obolite chunk – Found around the map and usually give between 13-15 obolites.
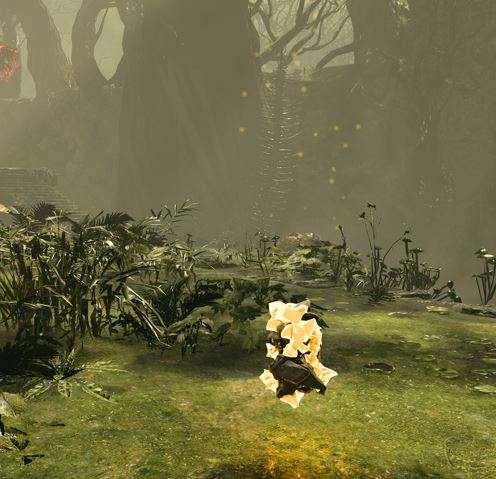
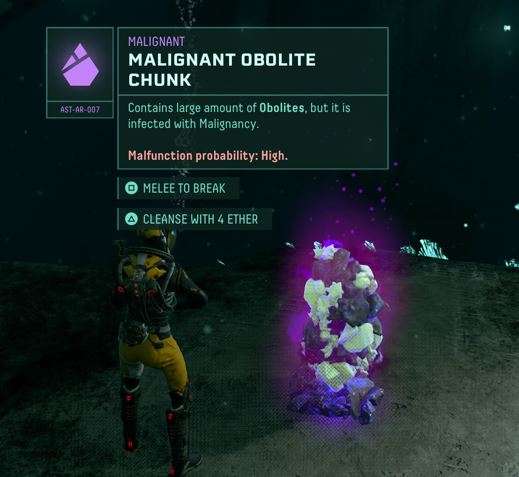
- Malignant obolite chunk (purple with yellow) – Gives 40-50 obolites when destroyed with melee. It has a chance to give a malfunction to your suit.
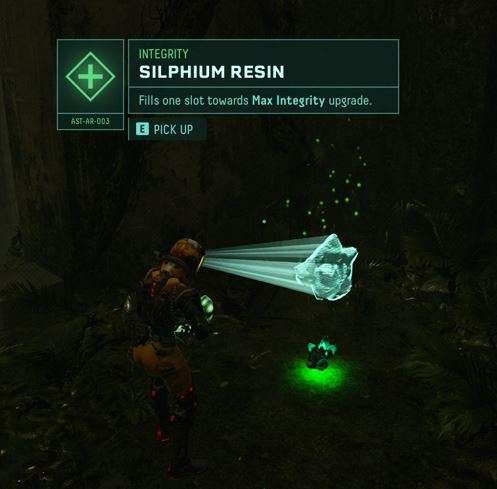
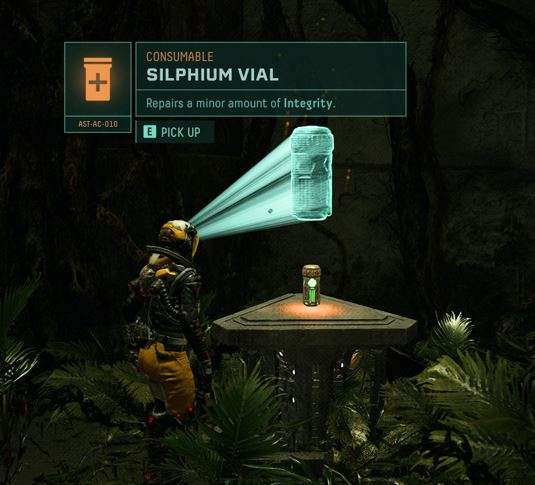
- Silphium (green) – Comes in 3 sizes and heals your HP (integrity) – Low, Moderate and High. This is transformed in resin if you’re full HP.
- Silphium resin (green) – Fills up one of the 3 HP slots. When all 3 are filled, your max hp will increase (a second bar that will grow with each upgrade).
- Malignant silphium (dark purple) – healing/health upgrade item that can cause a malfunction.

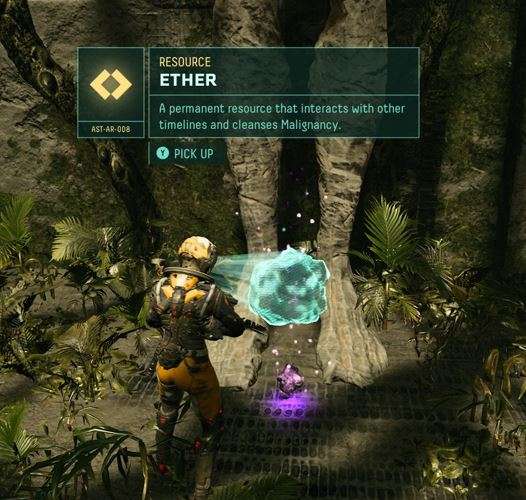
- Ether (Bright purple) – Economy item used to clean malignant items, offered to certain machines or or steal dead players equipment without avenging them. Can be found on the map, given as reward for completing the daily challenge or reward for avenging dead players bodies.
- Other malignant items (dark purple) – Items that when interacted with, usually causes a malfunction on the suit (depending on their chances) and gives restrictions or disadvantages until cleaned. Found on chests or atropian keys.
- Weapons (red) – Usually dropped from a miniboss or normal chests.
- Active consumables (orange) – Found in locked chests, dropped by minibosses or found on the map and can be activated once whenever you need them.
Other Pickable Items
- Weapon calibrators (blue) – Item that can increase your proficiency level (or less than a level).

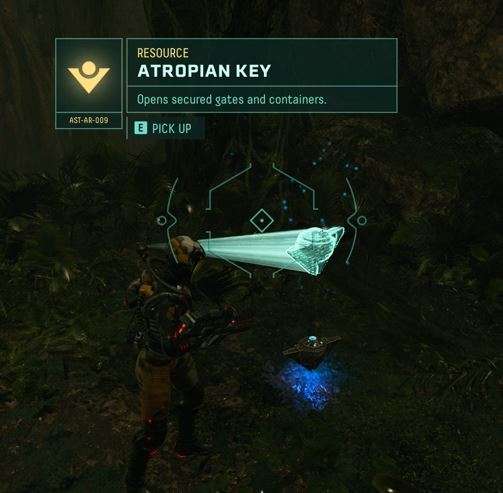
- Atropian keys (blue) – Used to open red doors or chests.
- Passive upgrades – Gives an advantage to the player (in stats or abilities).
Weapon proficiency explained
This stat determines the level of the next weapon you will find, as well as it’s bonus stats.
- Can increase when killing enemies.
- Can be maximum lvl.30 in biomes.
- Can go above lvl.30 in the Tower of Sisyphus.
- Guaranteed item when advancing to the next biome.
- Resets after each run (level 0 in Act 1 and level 5 in Act 2).
Adrenaline level explained
Adrenaline increases when you’re killing enemies without getting hit.
- Level 0 – Nothing.
- Level 1 – Enhanced Overload – Increases the reload bar of weapons.
- Level 1 – 1 additional projectile that seek enemies.
- Level 2 – Enhanced Vision – See traces of enemies through the walls.
- Level 2 – 2 additional projectiles that seek enemies.
- Level 3 – Enhanced Melee attack – Not sure what exactly upgrades here.
- Level 3 – 3 additional projectiles that seek enemies.
- Level 4 – 50% more proficiency gain from enemy kills.
- Level 4 – 4 additional projectiles that seek enemies.
- Level 5 – 50% more obolites from enemies and environment.
- Level 5 – 5 additional projectiles that seek enemies.
- Level 5 – One extra hit shield before adrenaline is reset.
Minimap elements

- Yellow door with a star – Mini-bosses room, also known as containment room. can spawn from 1 to 4 mini bosses, as well as a ton of normal enemies. gives a reward at the end and it’s required to complete to 100% a biome.
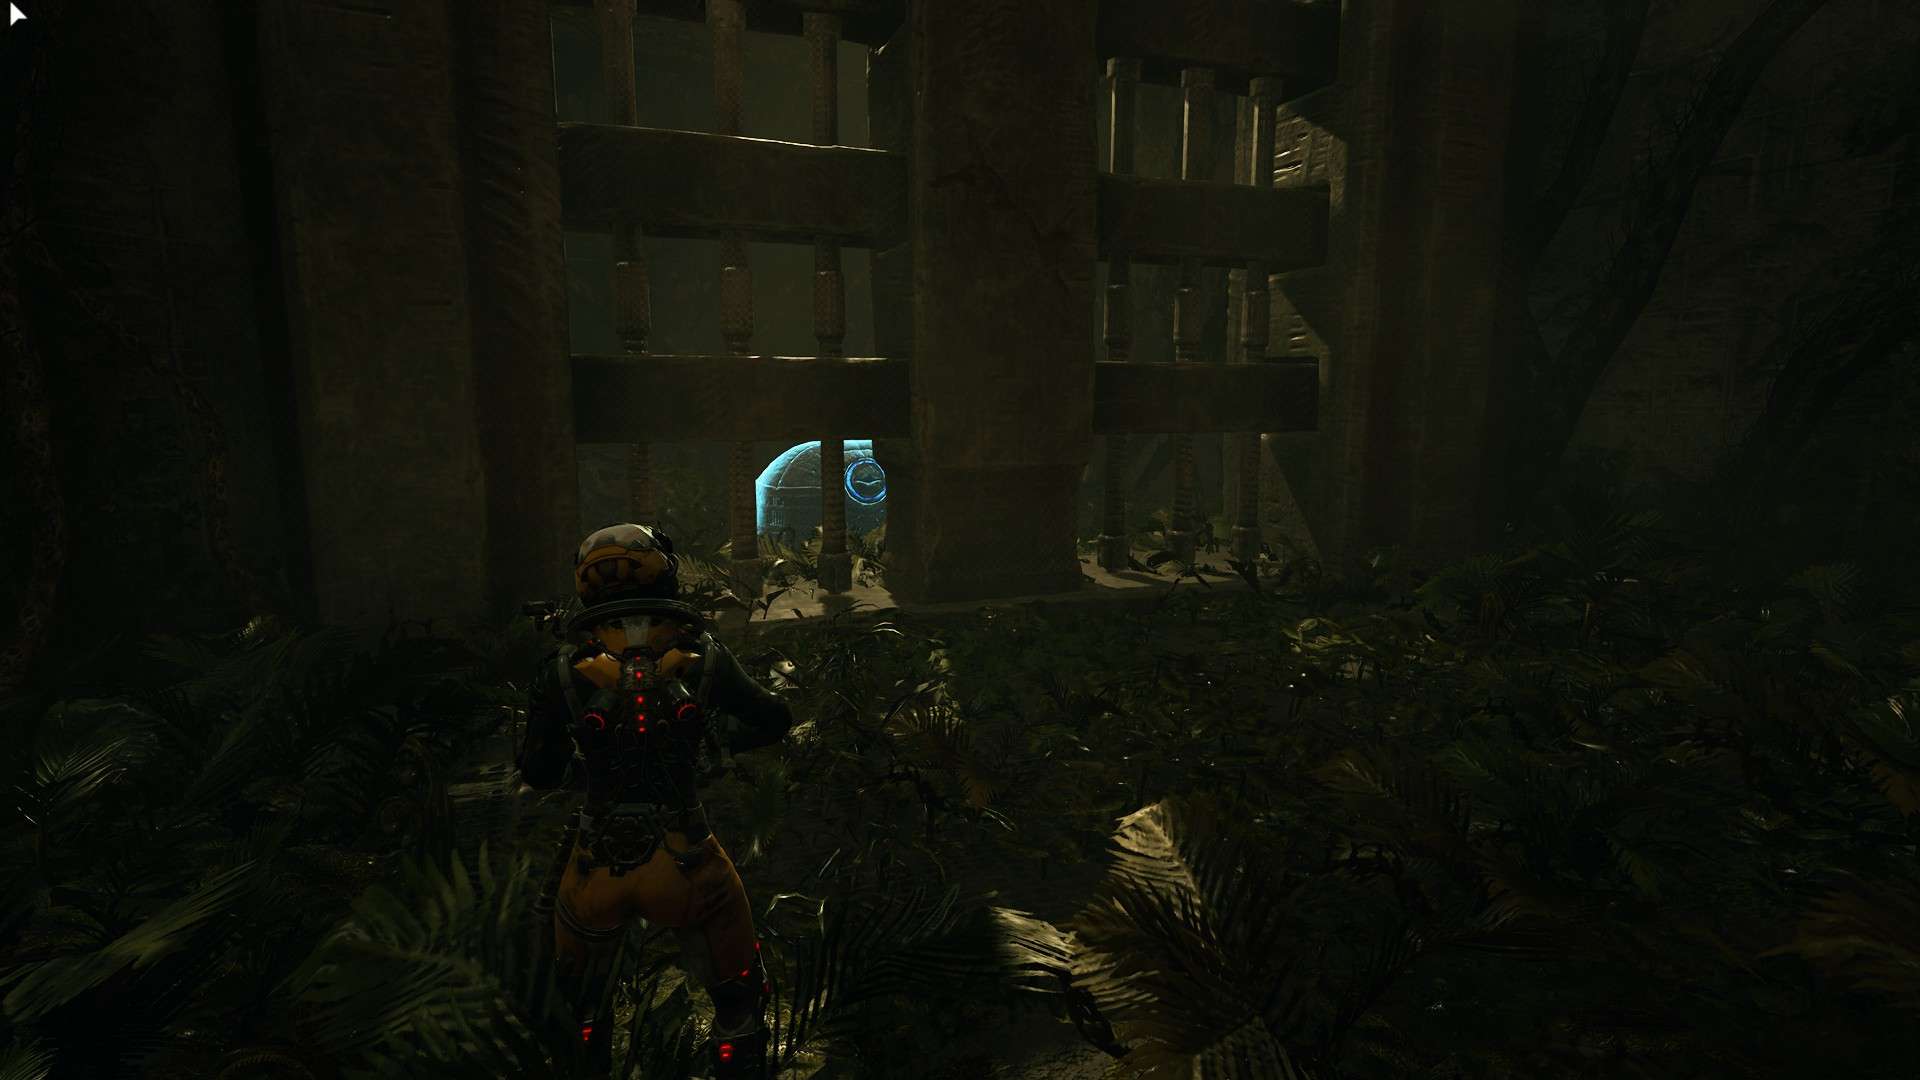
- Dot or circle inside triangle doors – This means the door is locked, requiring a key to open it.
- Dot or circle inside a chest – Same as above but for chests.
Environmental lasers, inaccesible places and early navigation
- Red moving lasers – You can dash through this without taking damage.
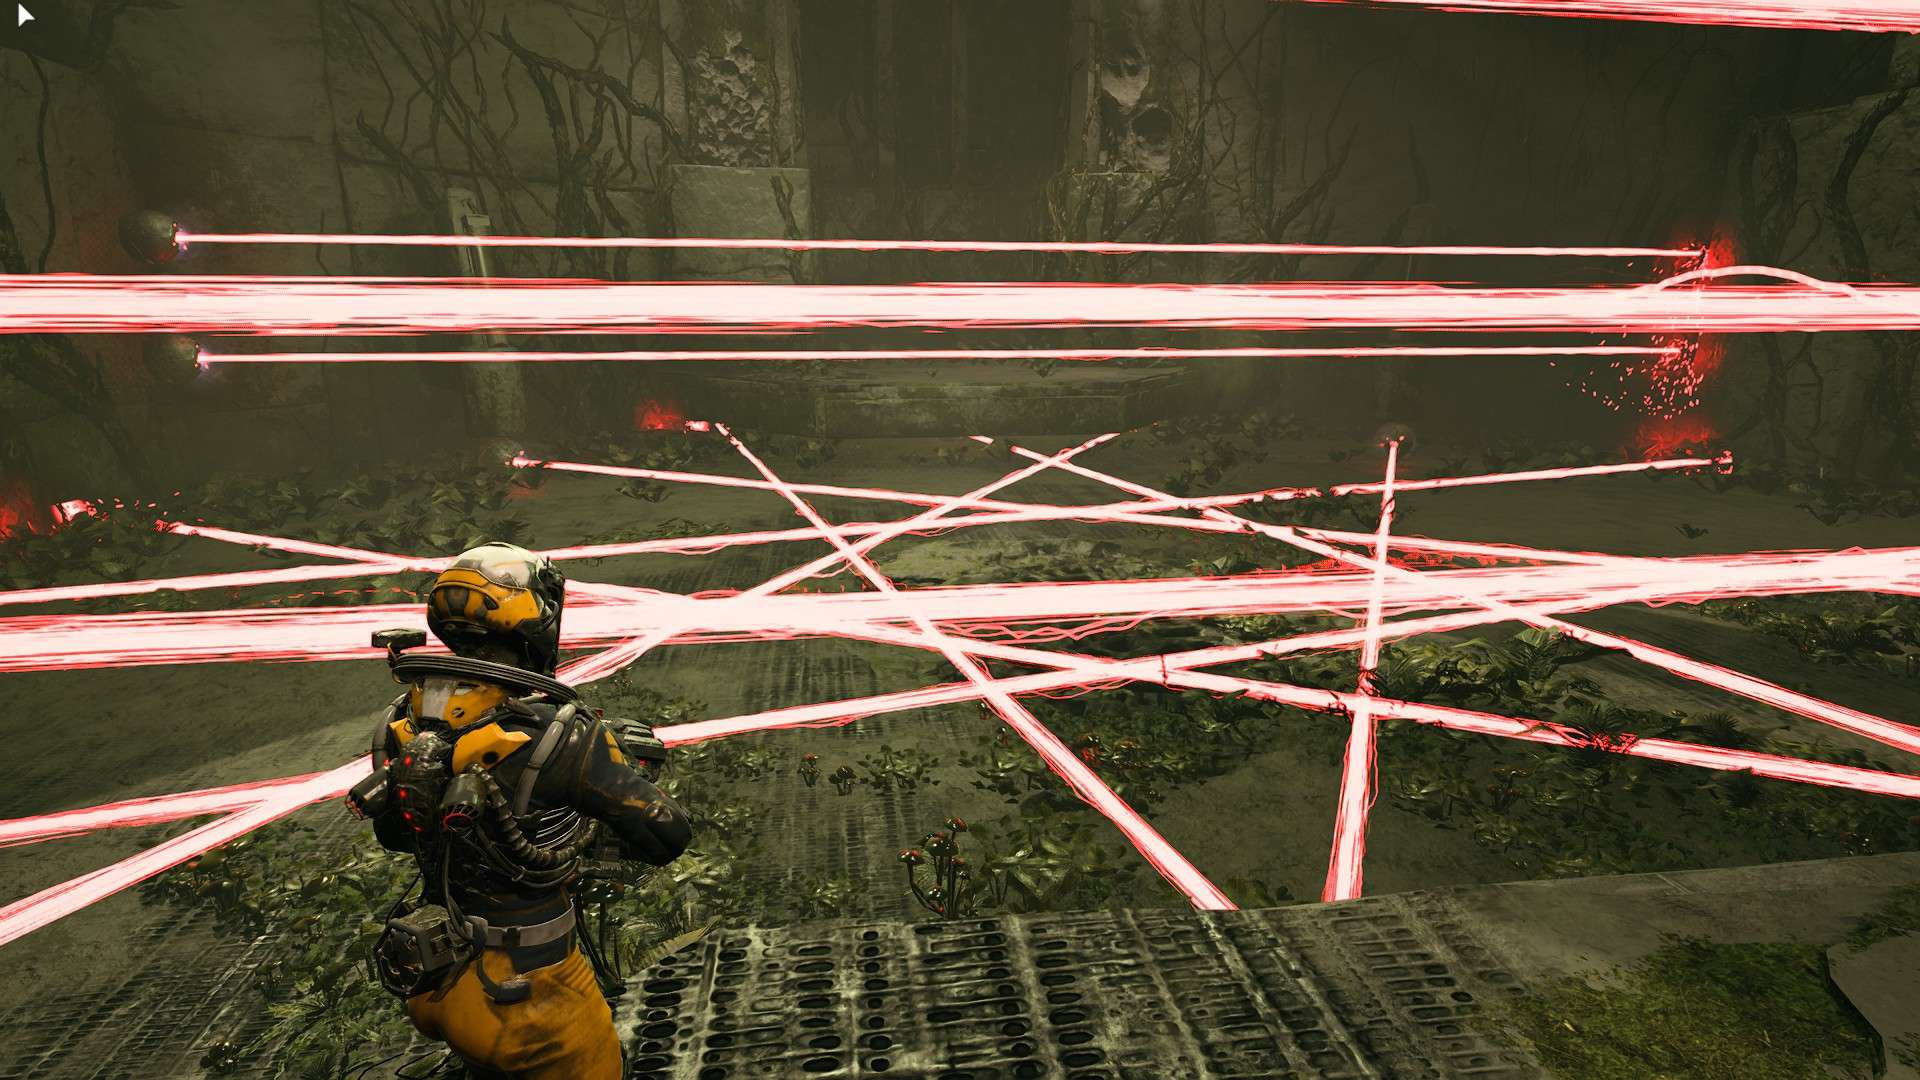
- Bright purple static lasers – You cannot dash through this without taking damage.
- Orange energy wall/ barrier – Can be destroyed with melee with the Blade Balancer upgrade (I don’t really recommend getting this).
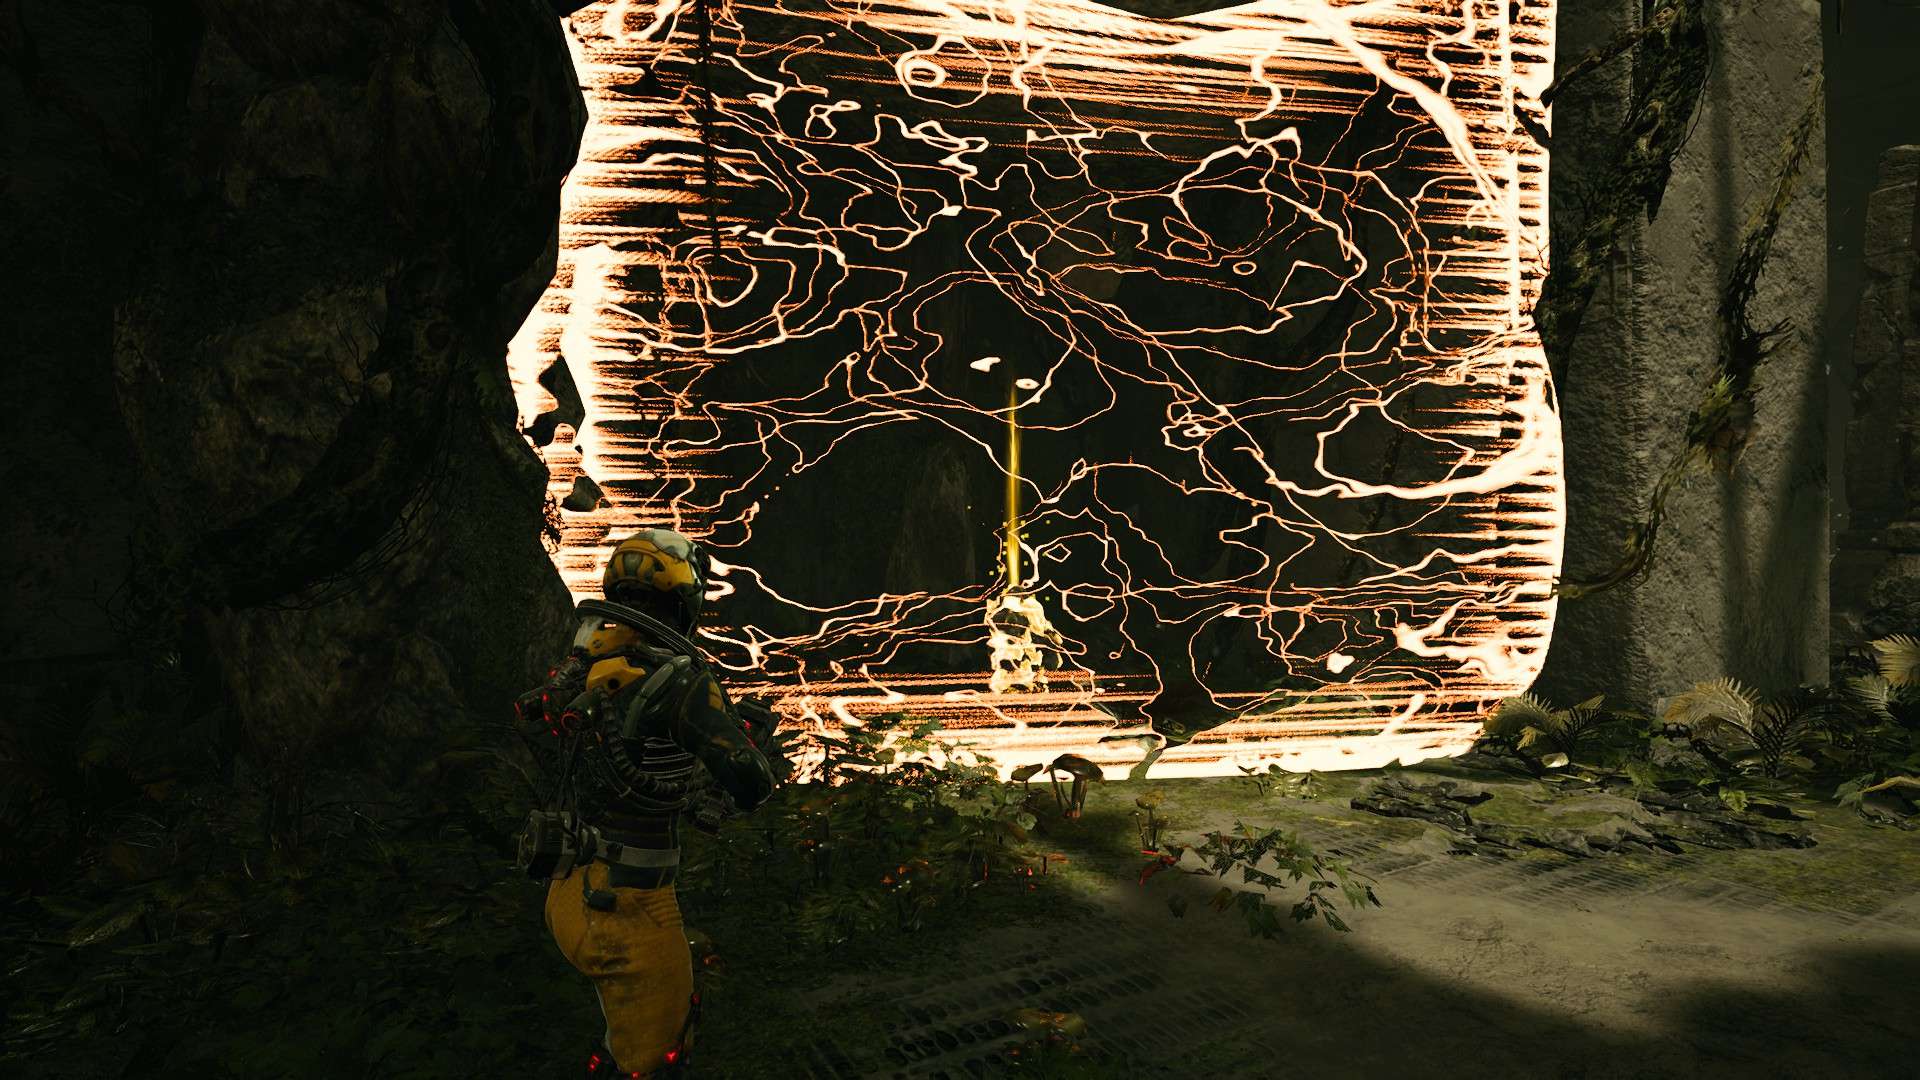
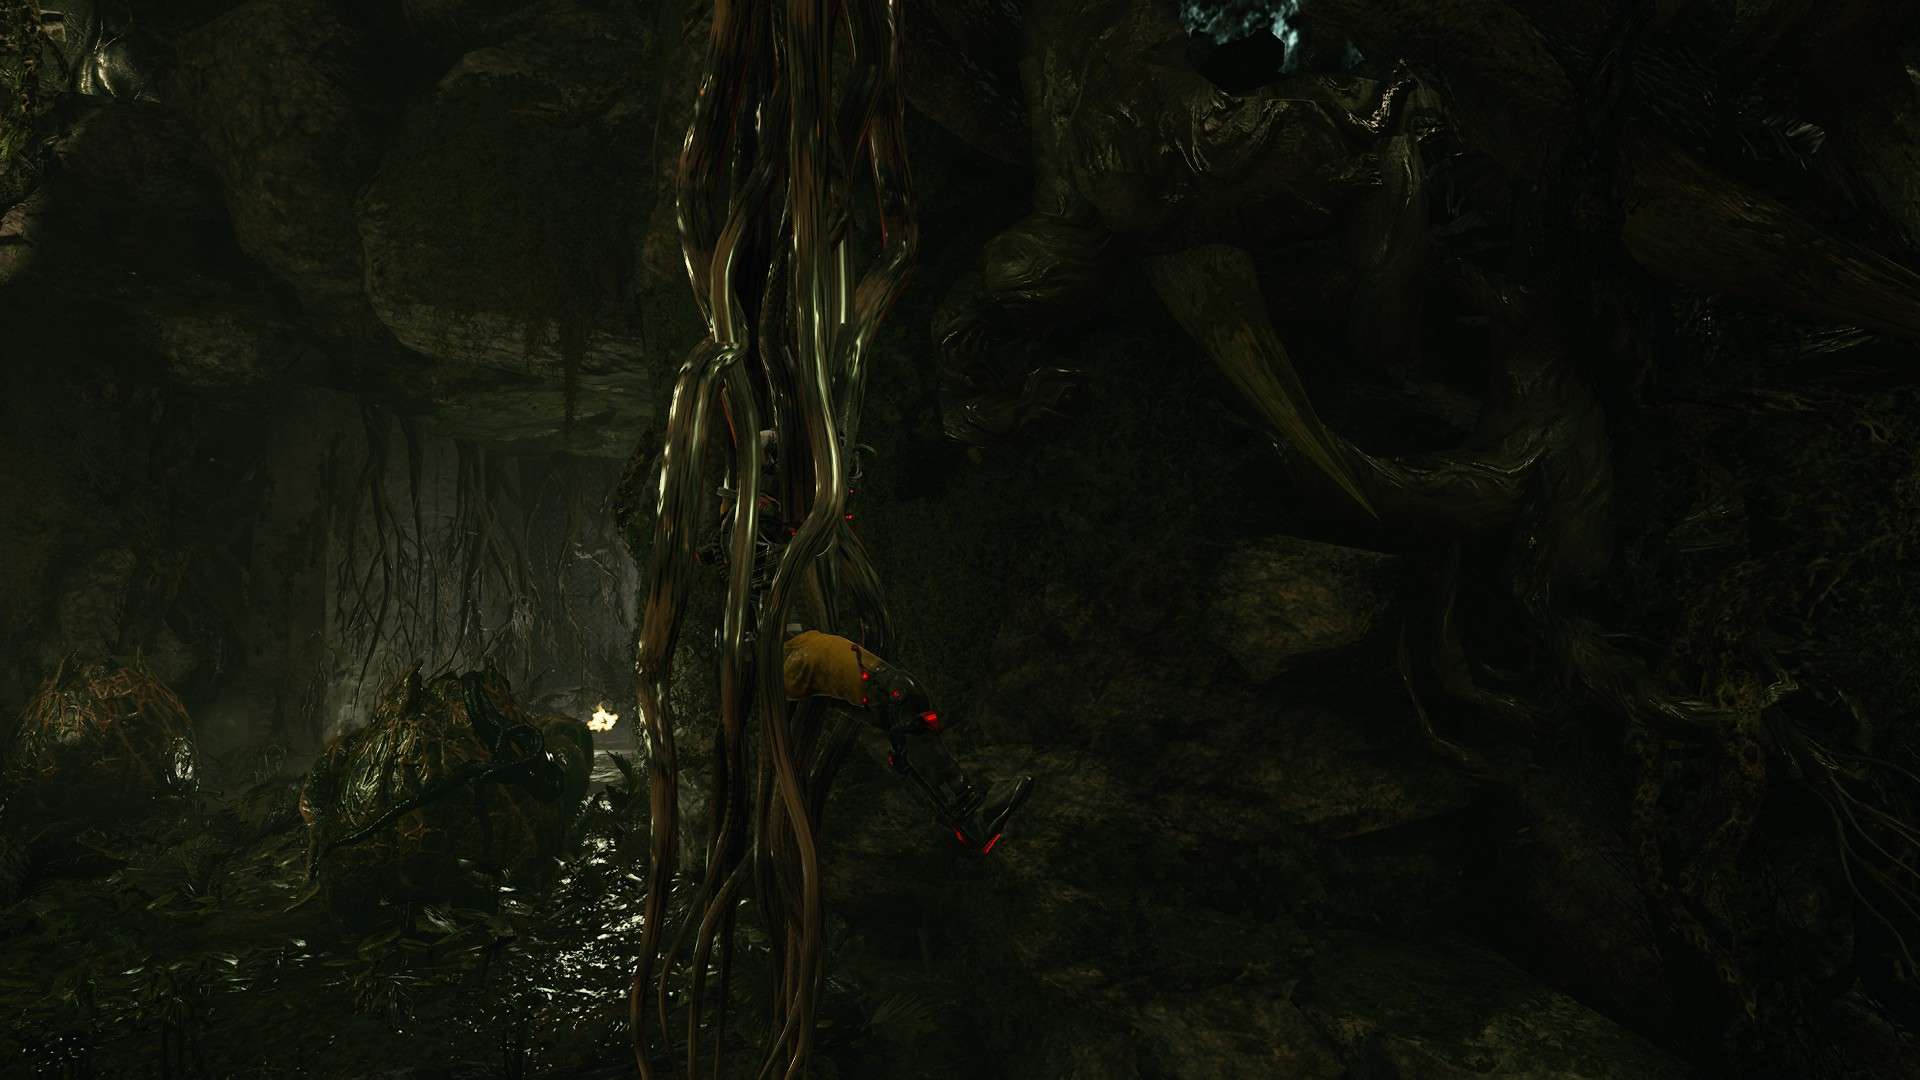
- Vine walls – Can be destroyed with melee. Usually contains healing or currency.

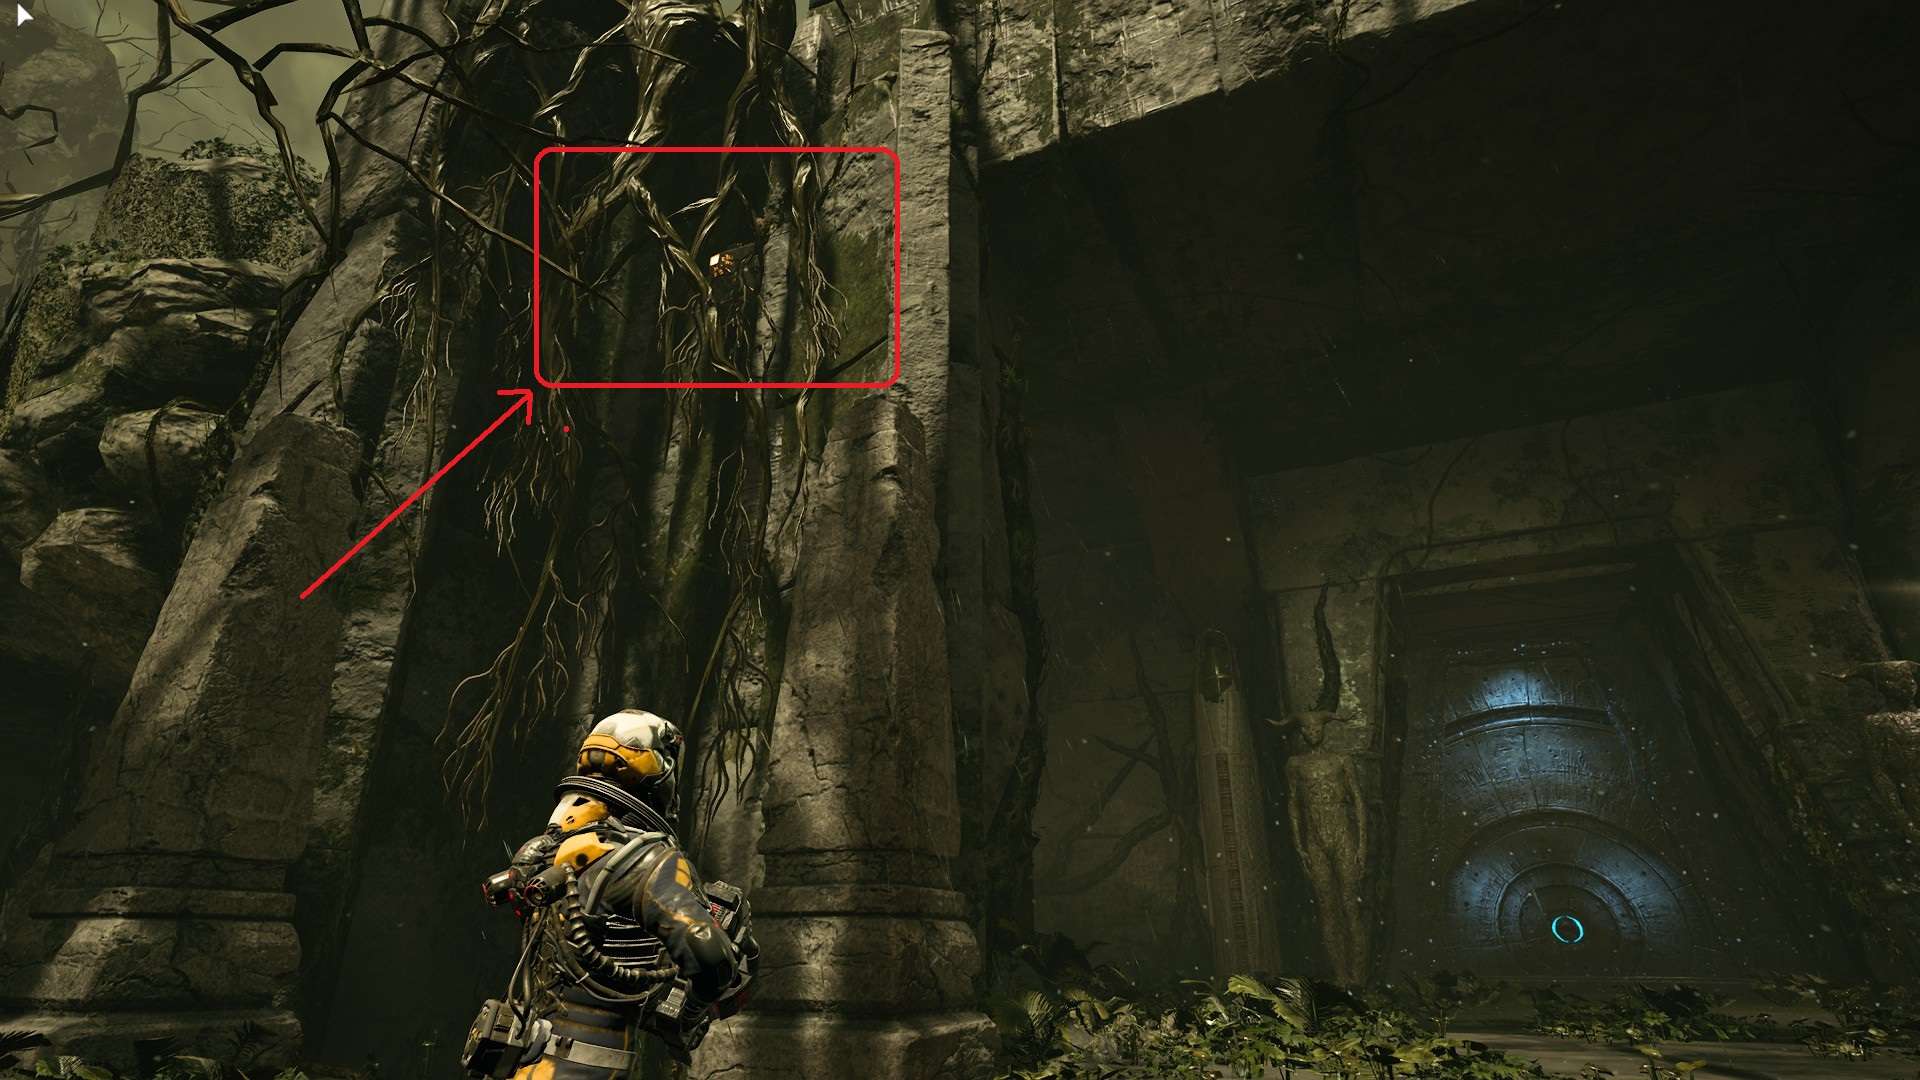
- Locked rooms – Can be opened by attacking a hidden lit button. Usually contains weapon chests or other consumables.
- Tentacle vines – They will try to eat you if you don’t dash. Can be used to reach higher platforms in early game (act 1).
General Tips
What to do
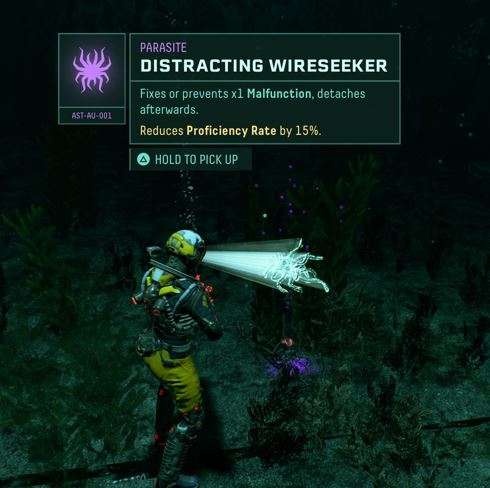
- Pick up all the parasites that you find so you can recycle them (you can 100% find one in act 2 before the boss or hub). If you want to feel safe, backtrack and pick them after all the rooms are cleared.
- Try to pick up all the obolites of the dead monsters. Try to kill them one by one so you don’t miss any.
- Use active consumables, make a habit out of it (I personally forget to use anything besides healing when they can be useful).
- Interact early with malignant items, especially with the ones giving malfunctions. It’s usually easy to complete their requirements for fixing. You can stop doing this later in the game if you’re not that sure you can overcome them.
- Destroy fauna (mostly found in biome 3 and under water) Some can drop obolites.

- Invest time to pick new weapons and research their upgrades. See what kind of weapons fits best for you (more on the weapons chapter below).
- If you unlocked the grappling hook try to use it often to create distance between you and the enemies, especially when fighting mini-bosses.
- Try to dodge towards a projectile as it grants invincibility frames. Combine it with jumping. (I usually like to jump first)
- Try to keep silphium vials for boss fights or you think you might die. Use green consumables around the map as a prio if possible.
- You can sleep in the bed in Helios to heal back to full HP.
- Don’t worry too much about opening weapon chests, there are plenty. Another option generally known in the community is to open them at the end when your weapon proficiency is high for a chance of better weapons.
What to avoid doing
- Avoid interacting with malignant items before a boss fight because you don’t have where to fulfill the requirements and it might make the boss fight harder.
- Don’t go directly to the next biome without exploring everything. it’s a good idea especially if you’re not that good at the game.
- Avoid going to containment rooms. they’re generally hard and you can easily die.
- Don’t stay in one place as it’s easy to get cornered by enemies.
- Don’t stay too close to enemies because you will have a less time to react to their attacks.
Stunnable enemies with melee
- Mycomorph.
Weapons
My favourite weapons that also gives me the best results (+ their best modifiers):
- Tachyomatic Carbine
- Leech Rounds – Chance of healing per hit.
- Armor Piercing – Projectiles will pierce hostiles and ricochet off surfaces.
- High Caliber – Higher damage at the expense of fire rate.
- Rising Pitch (best combined with Leech Rounds) – Fires faster the longer the trigger is held.
- Hardened – Increases Protection.
- Hollowseeker
- Portal Beam/Turret – Creates a projectile-firing portal that targets nearby hostiles.
- Waves – Creates a projectile-firing portal that targets nearby hostiles.
- Thermogenic Launcher
- Full auto – Fires at full-auto mode.
- Obolite Magnet – Chances to automatically gather Obolite from killed hostiles.
- (Honorable mention – Good to stick a few onto enemies and focus on dodging) – Electropylon Driver.
Upgrades & Items
Upgrades that every struggling player should have.
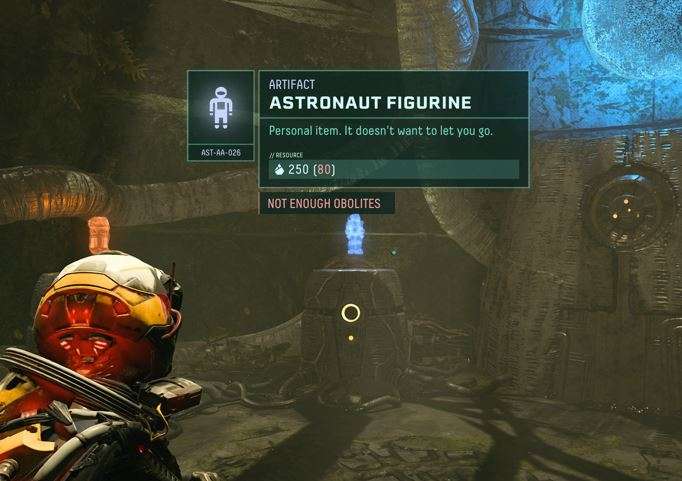
- Astronaut Figurine – Can respawn you with ~50% HP after you die.
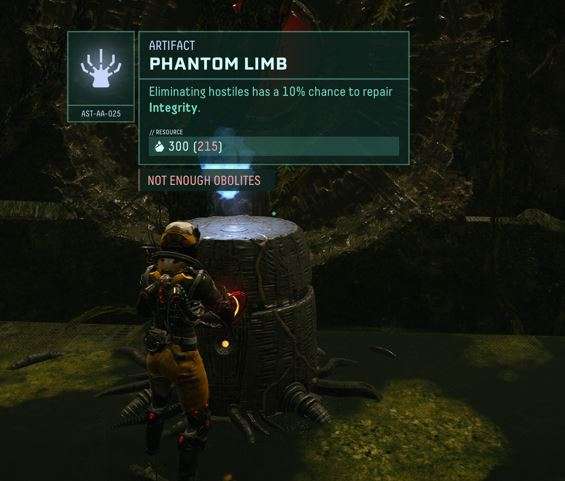
- Phantom Limb – Eliminating hostiles with a 10% chance to repair integrity.
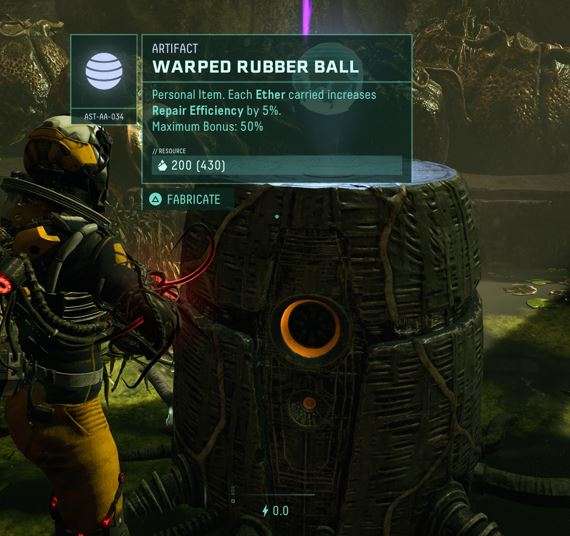
- Warped Rubber Ball – 5% more repair efficiency per ether carried (caps at 50%).
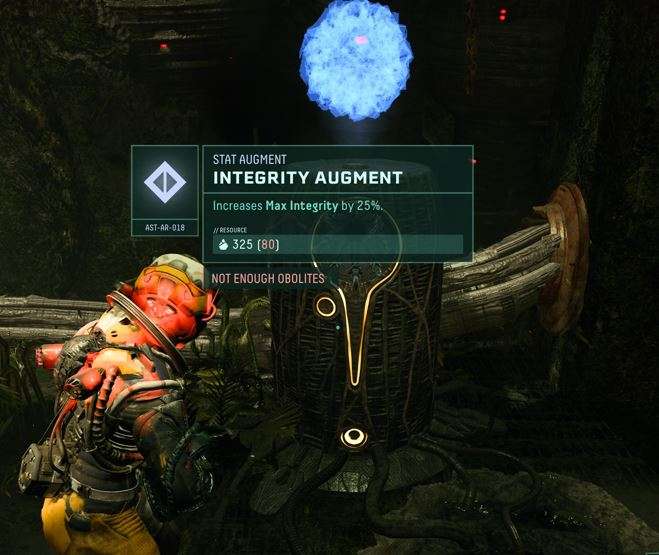
- Integrity Augument – 25% to your max HP.
- 10% more damage.
- Protection in % per ether carried.
Secrets
There are three secrets around the biomes, as far as I know:
- Secret rooms – These can contain obolites, chests with weapons, passive/active items, mini-bosses or surprise monster spawns! Enter at your own risk.
- Glowing eyes statues that drop obolites if destroyed.
Settings
Optimised settings – Digital Foundry provided some optimised graphic settings for 2060 Super (Day 0, no patches) for less to none stuttering;
- RT Reflections: OFF
- RT Shadows: OFF
- Volumetric FOG: High
- Ambient Occlusion: Medium
- Model Quality: Epic
- Particle Quality: High
- Shadow Quality: High
- Lighting Quality: Epic
- Texture Quality: Epic (8GB Vram)
- NV: DLSS | Intel: XeSS | AMD: DBS/VRS/FSR
Video here (17:55):
Other settings
- Enable one click run (instead of keeping the button pressed).
- Make crosshair bigger.
- Play around with the sensitivity.


Be the first to comment