
This is a guide to help locate all the objects in the game you must find for quests, as well as details on the quest rewards you obtain at the end of each quest chain.
Contents
Guide to Season 1 Quest
All credit goes to MeradinUnknown!
Introduction
You will know a new quest line, or the next step in the current questline is available when the quest indicator appears next to an NPC in the Elysium. It looks like this:

Unlike my Octahedron collectible guides, I will not be providing a screenshot of the map for these locations. The quest location will generally show up on your map when you enter a match. If for some reason you don’t see it right away, it may appear when you are in the general vicinity of the item. The symbol you are looking for is a red diamond, which is featured on the legend of the map. It appears as follows:

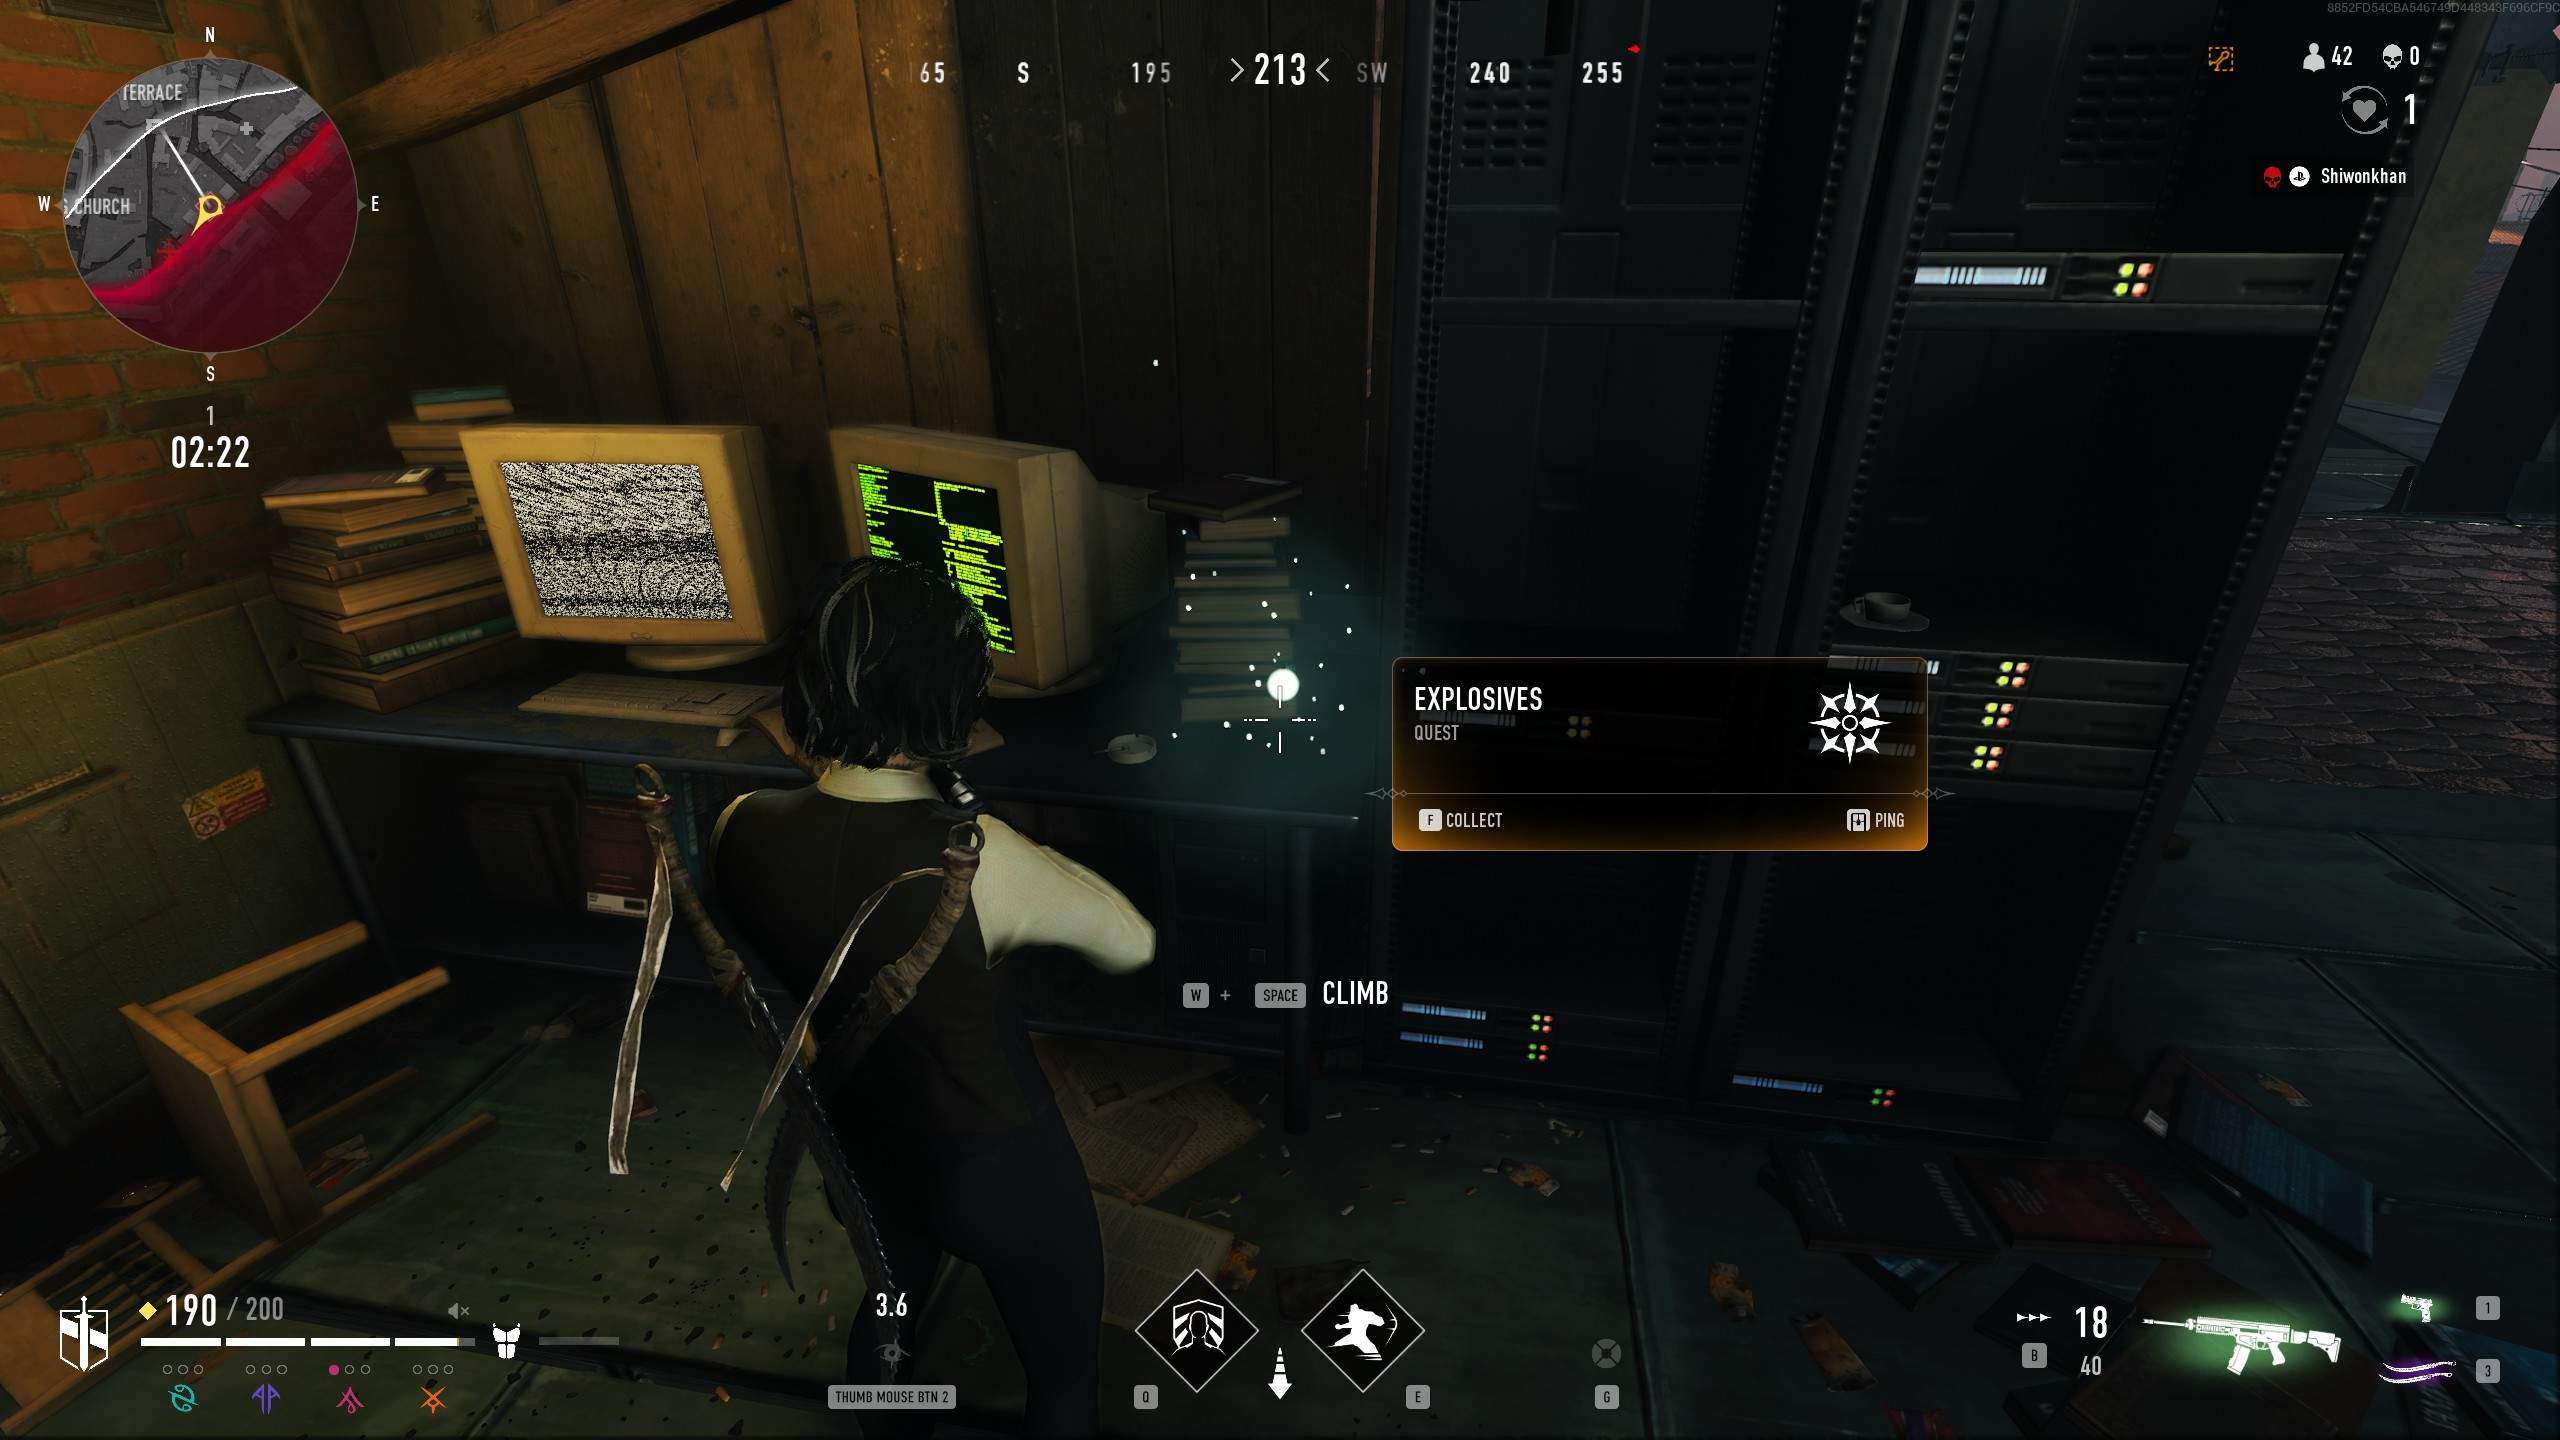
In addition, when you are near a quest object and use “Heightened Senses” to scan the area, you will be able to see the quest object through walls. In Early Access, the objects looked like the Octahedron collectibles, but with a distinct glow effect. However as of Season 1, quest objects now appear as a small ball of light on an object in the world and not an Octahedron and will look like this:

Most objectives will be collectible objects in the field, though there are some that require you to perform a specific action or go to a specific place. The quests are presented in the order they were originally acquired in the game, but some of them may be able to be picked up and progressed at the same time.
Dirty Work
Approach Kirill to begin the quest Dirty Work. Kirill wants you to pick up a package of explosives from the city for him.
Part 1:
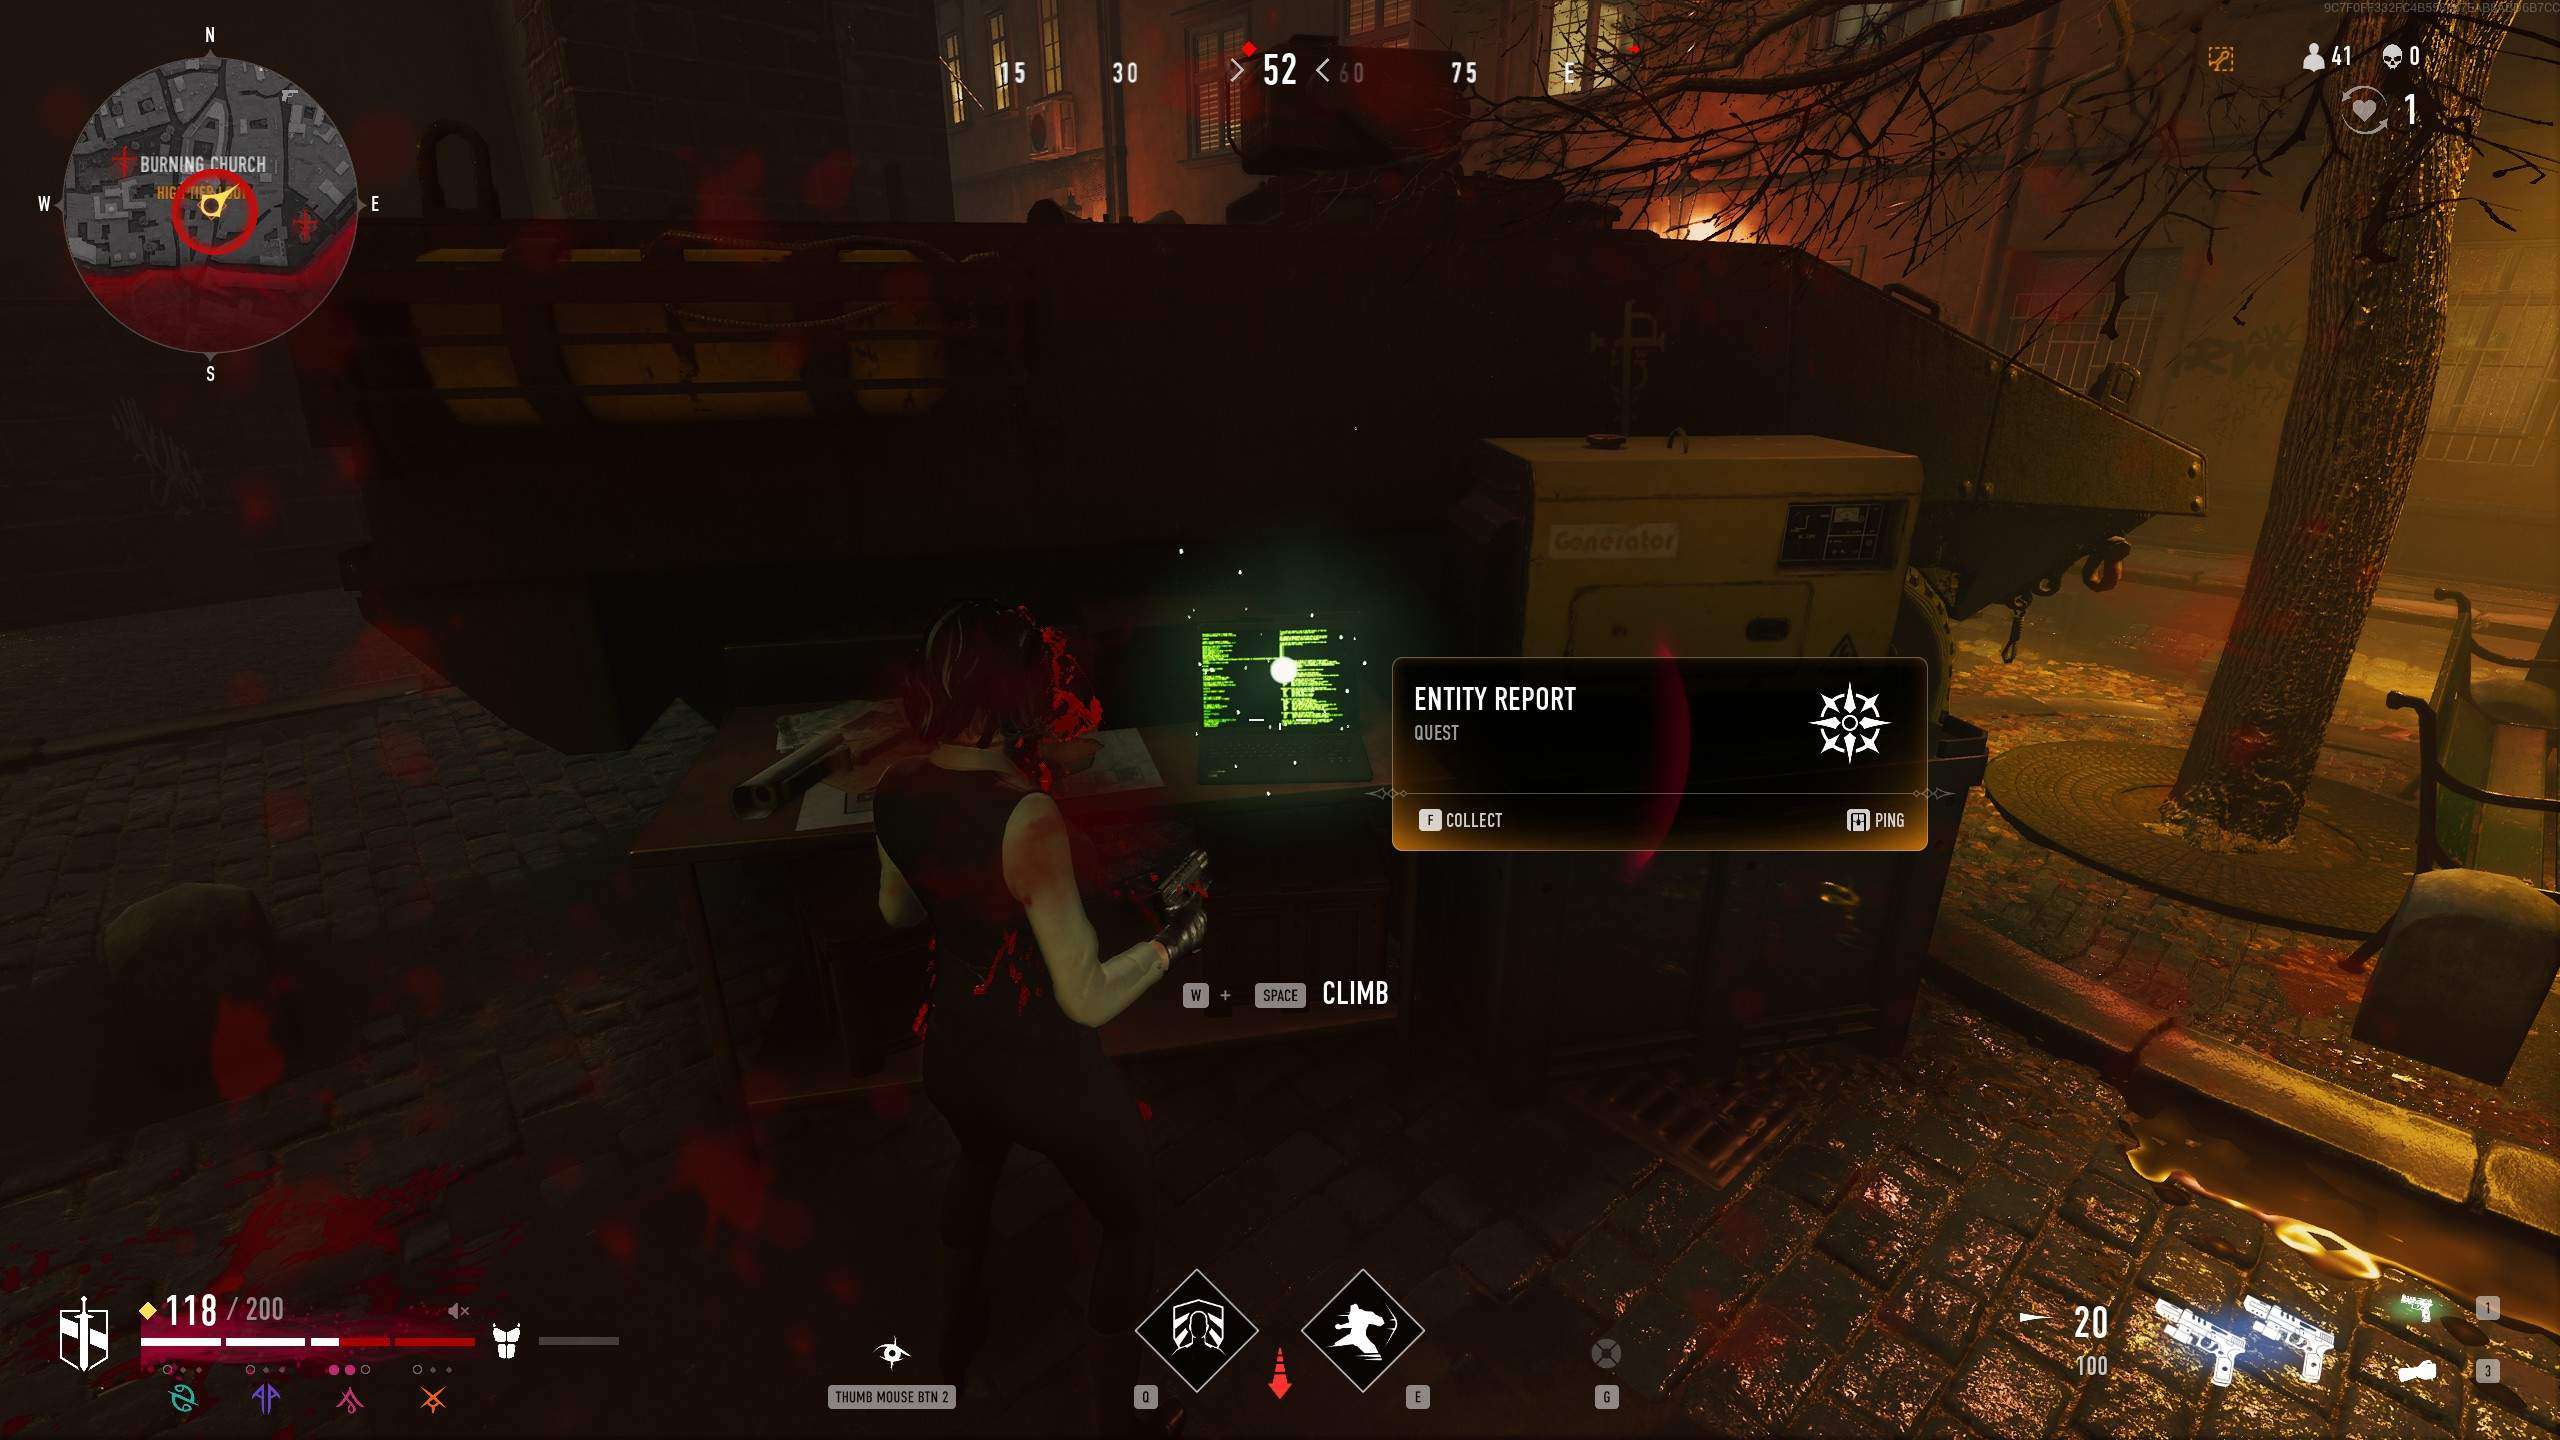
The explosives are found to the East of the Burning Church, on a rooftop desk near a computer.
Part 2:
Return to Kirill. The explosives have no detonators, making Kirill angry. Since you failed at this he needs something more and asks you to retrieve a Crossbow for him, but insists you make sure it works before returning.
For this step, you must find a Crossbow during a match and do at least 75 damage with it before returning to Kirill (this can be done across multiple matches so don’t fret if you have difficulty with the weapon).
Part 3:
Returning to Kirill after doing as he asked, he is in a better mood with your success but requests that you stay out of his way, suggesting you head out into the city “for a run”.
At this point, you must travel 1000 meters within the city. This step can also be done across multiple matches, so get running!
Reward:
When you return the final time to Kirill, he notes that he just wanted you out of the way for a bit, but approves of your ability to get around. You will be rewarded with the “Statuesque” Player Icon.

Damage Report
Approach Kirill and he task you with finding out what you can about the Second Inquisition forces in the city.
Part 1:
Your first task will be to scout the Entity forces near the bridge northwest of the Skybar. Head to the location pictured below and move towards the Entity from the bridge side and you should see the completion pop up for it.

Part 2:
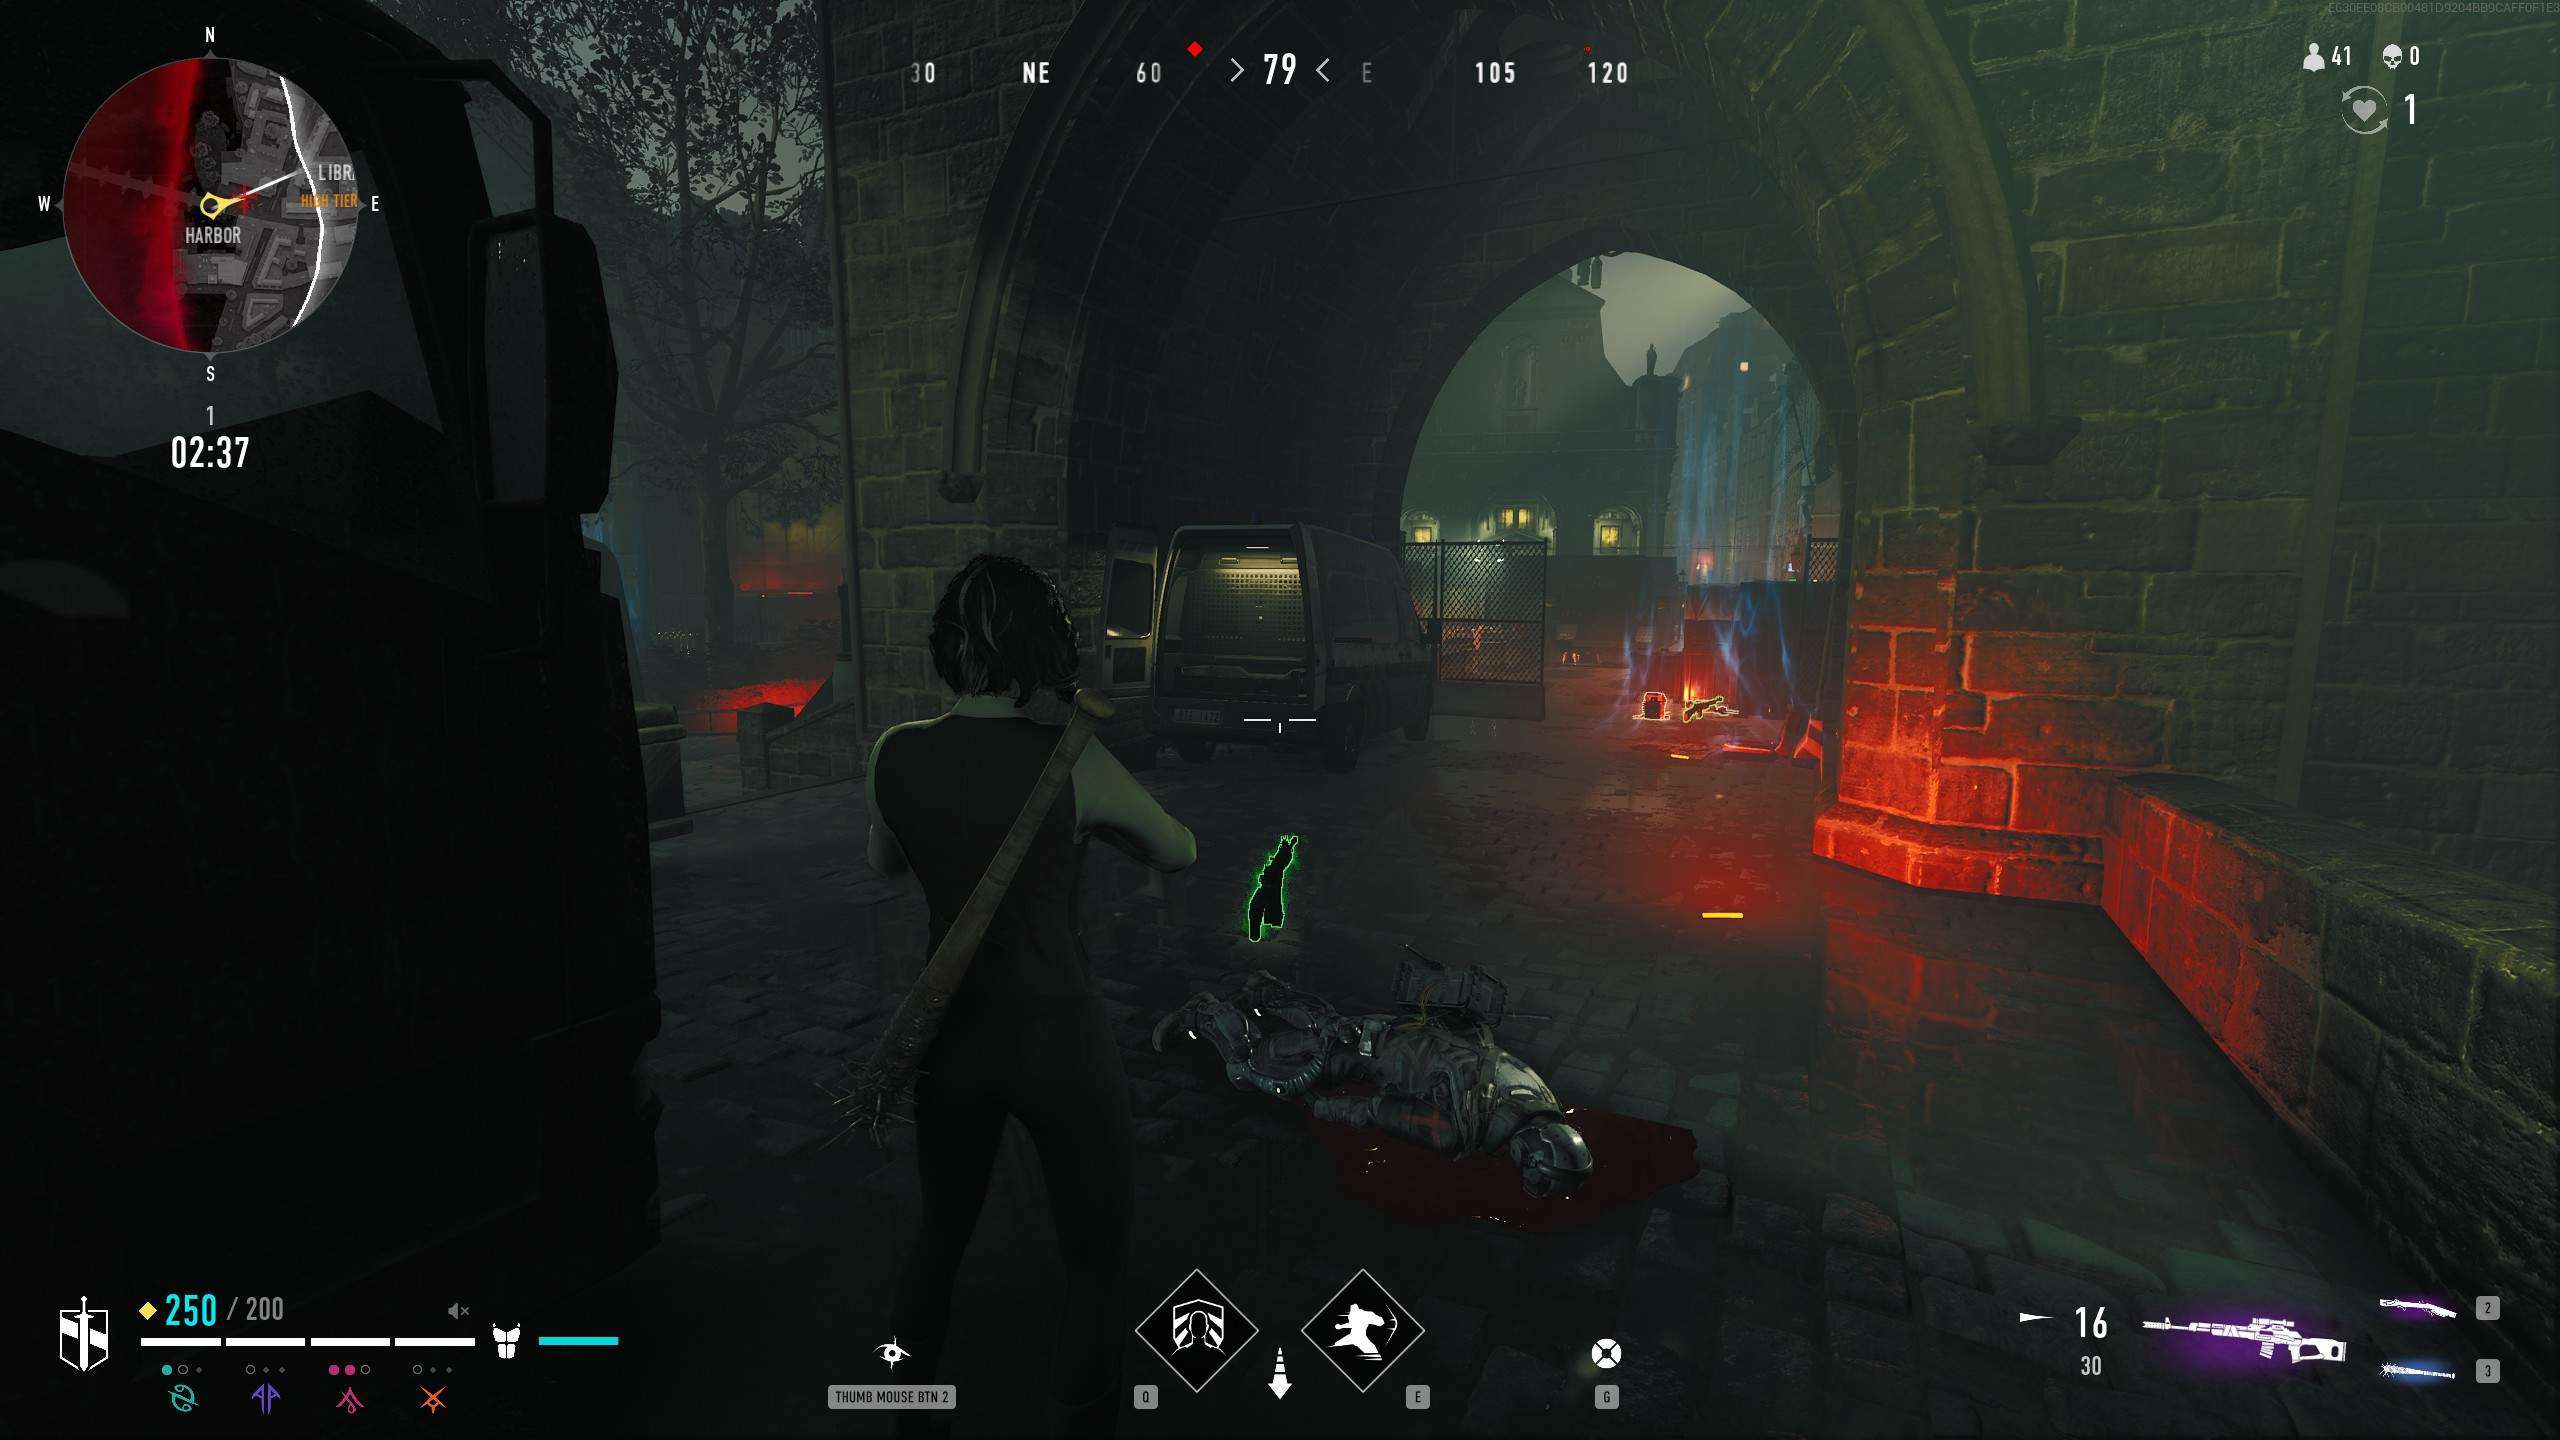
Return to Kirill. The Entity seem to be sealing off the city, letting no one in. Next, he wants you to check the Harbor. Head to the Harbor in match and once again approach Entity forces from the bridge as in the below image at the Harbor location until you see the quest complete.
Part 3:
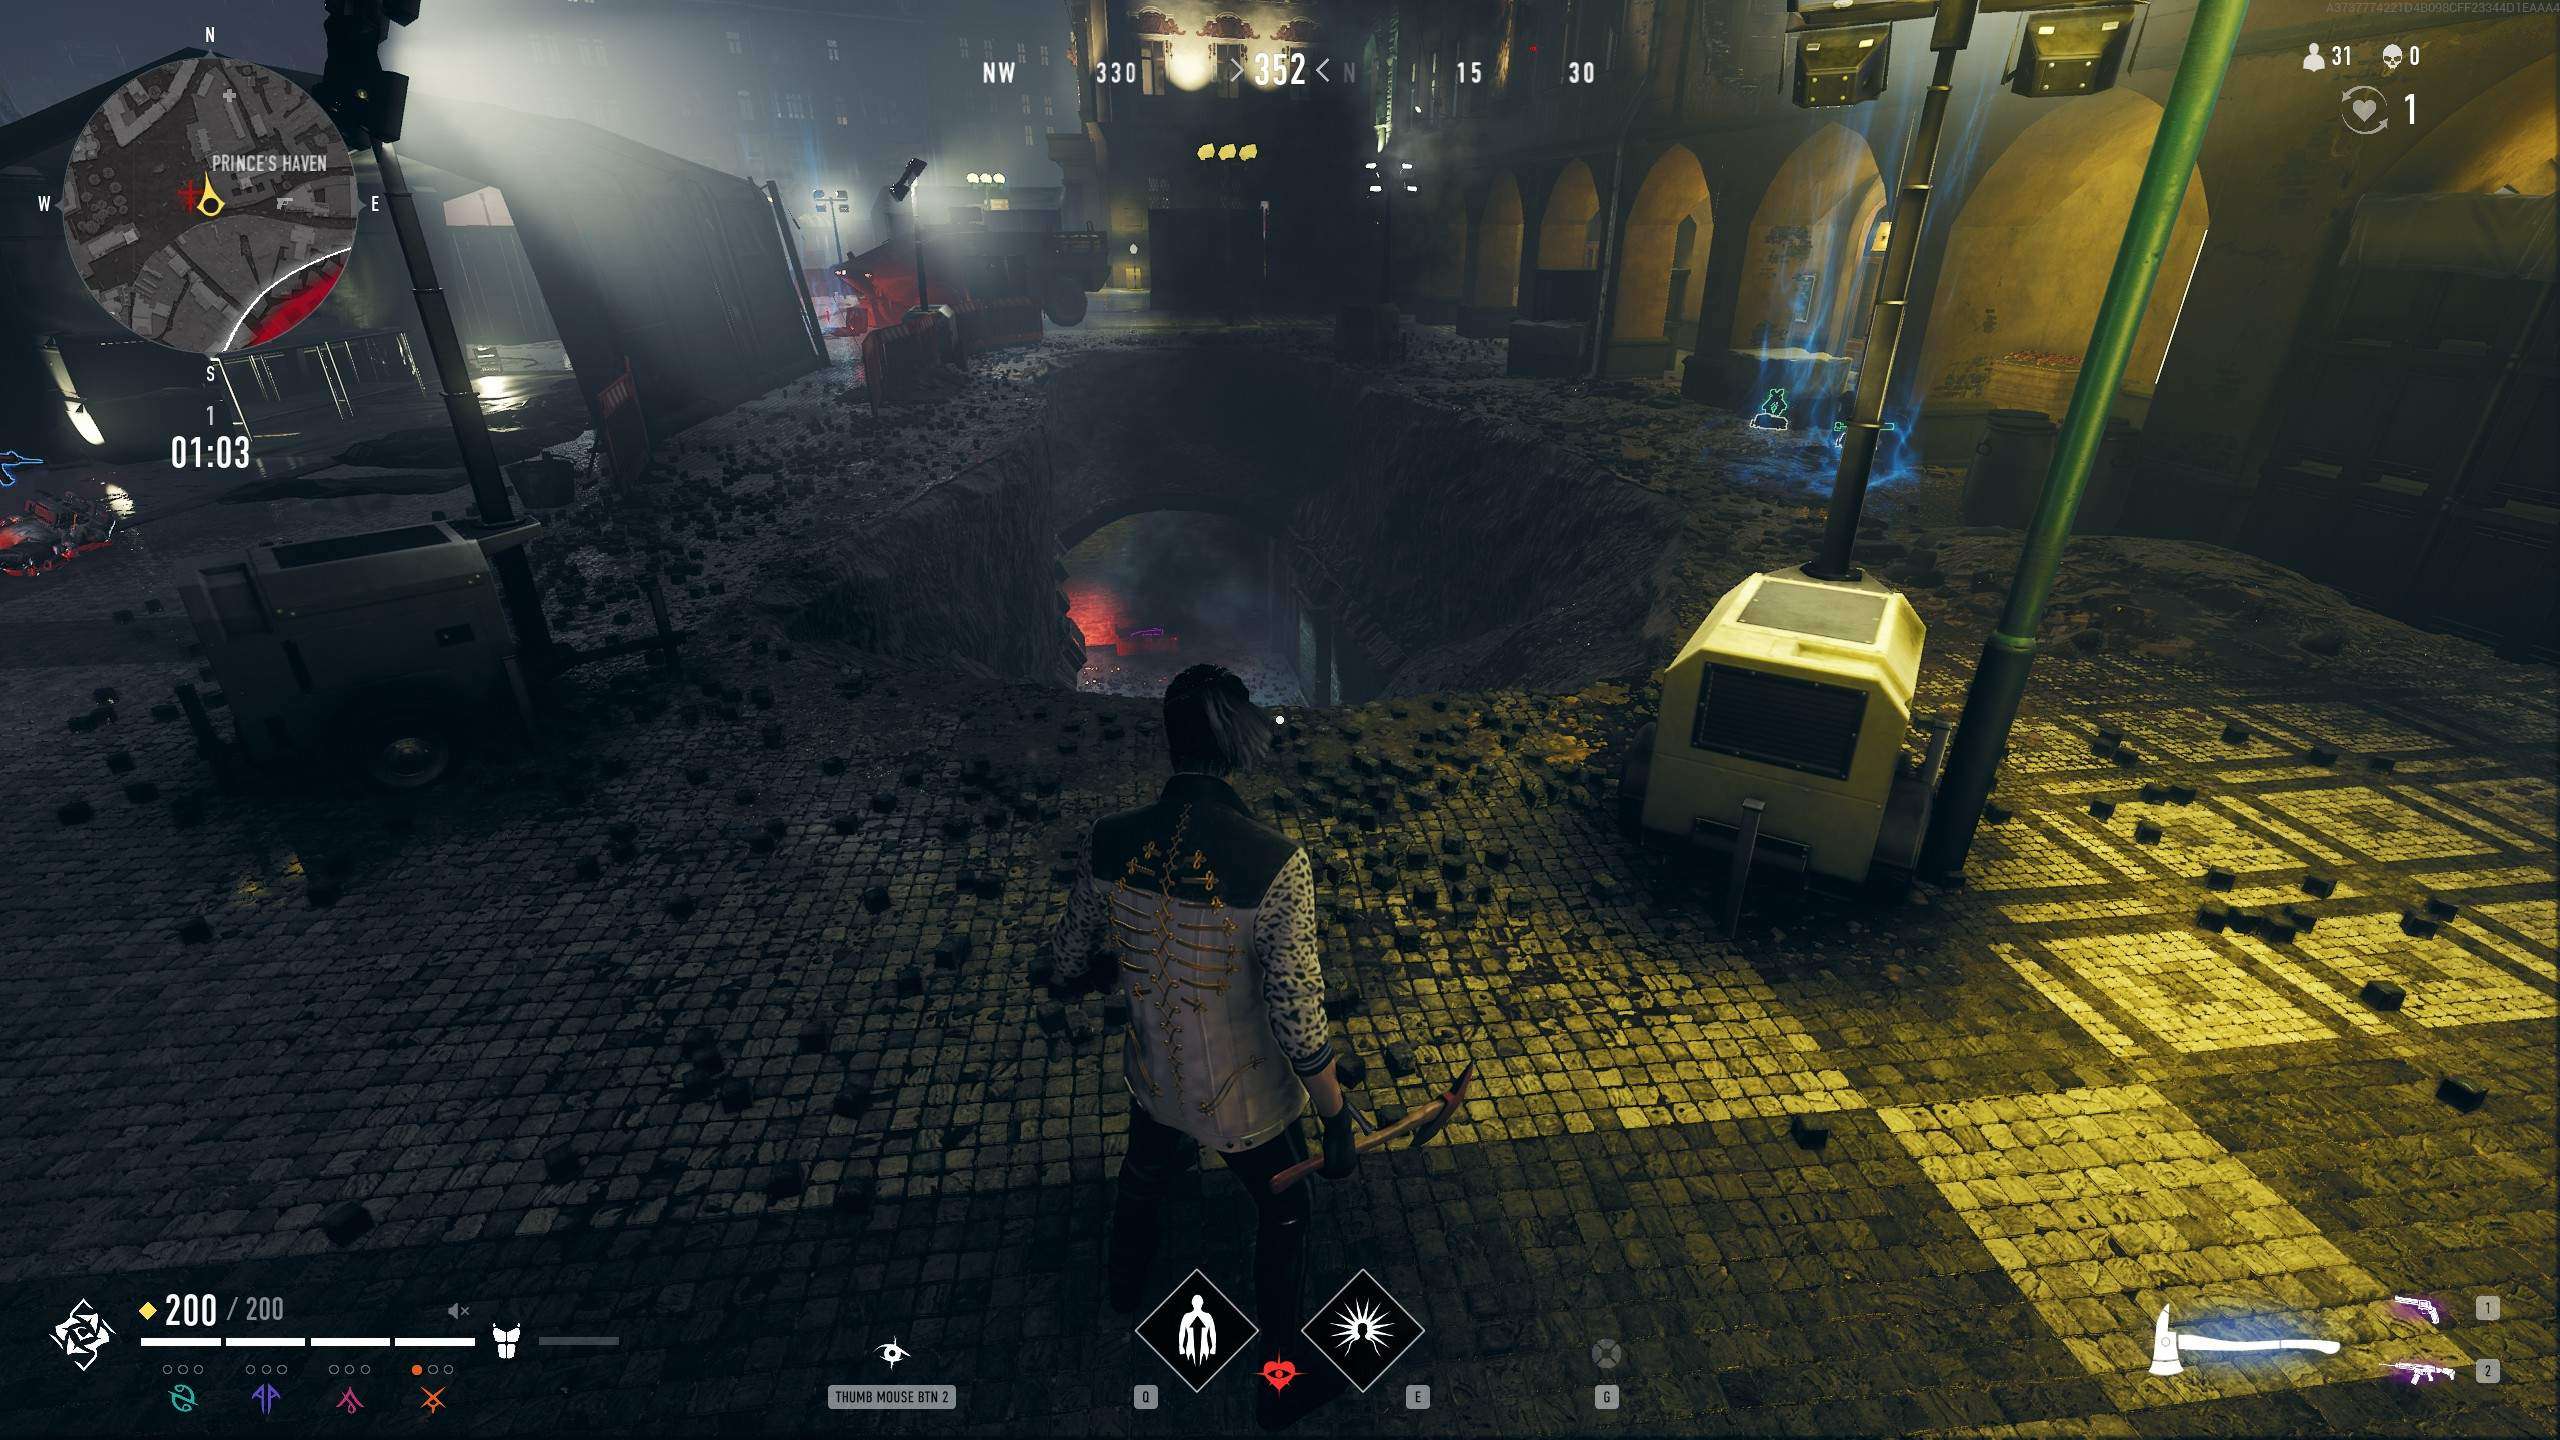
Report to Kirill that the Entity are not leaving any way out of the city either. Finally, he would like you to investigate near the Prince’s haven, as the Entity have been digging there and the Prince’s crypt is exposed.
You should complete this quest if you approach the hole that’s been dug into the ground near the Prince’s Haven location on the map as seen below:
Reward:
Your final visit to Kirill completes the quest, as he determines that they’ve used the cover of a terrorist attack to do what they’re doing. You will be rewarded with the “Inquisition” Player Banner.

Stakeout
Kirill has need of your assistance again “running one”!
Part 1:
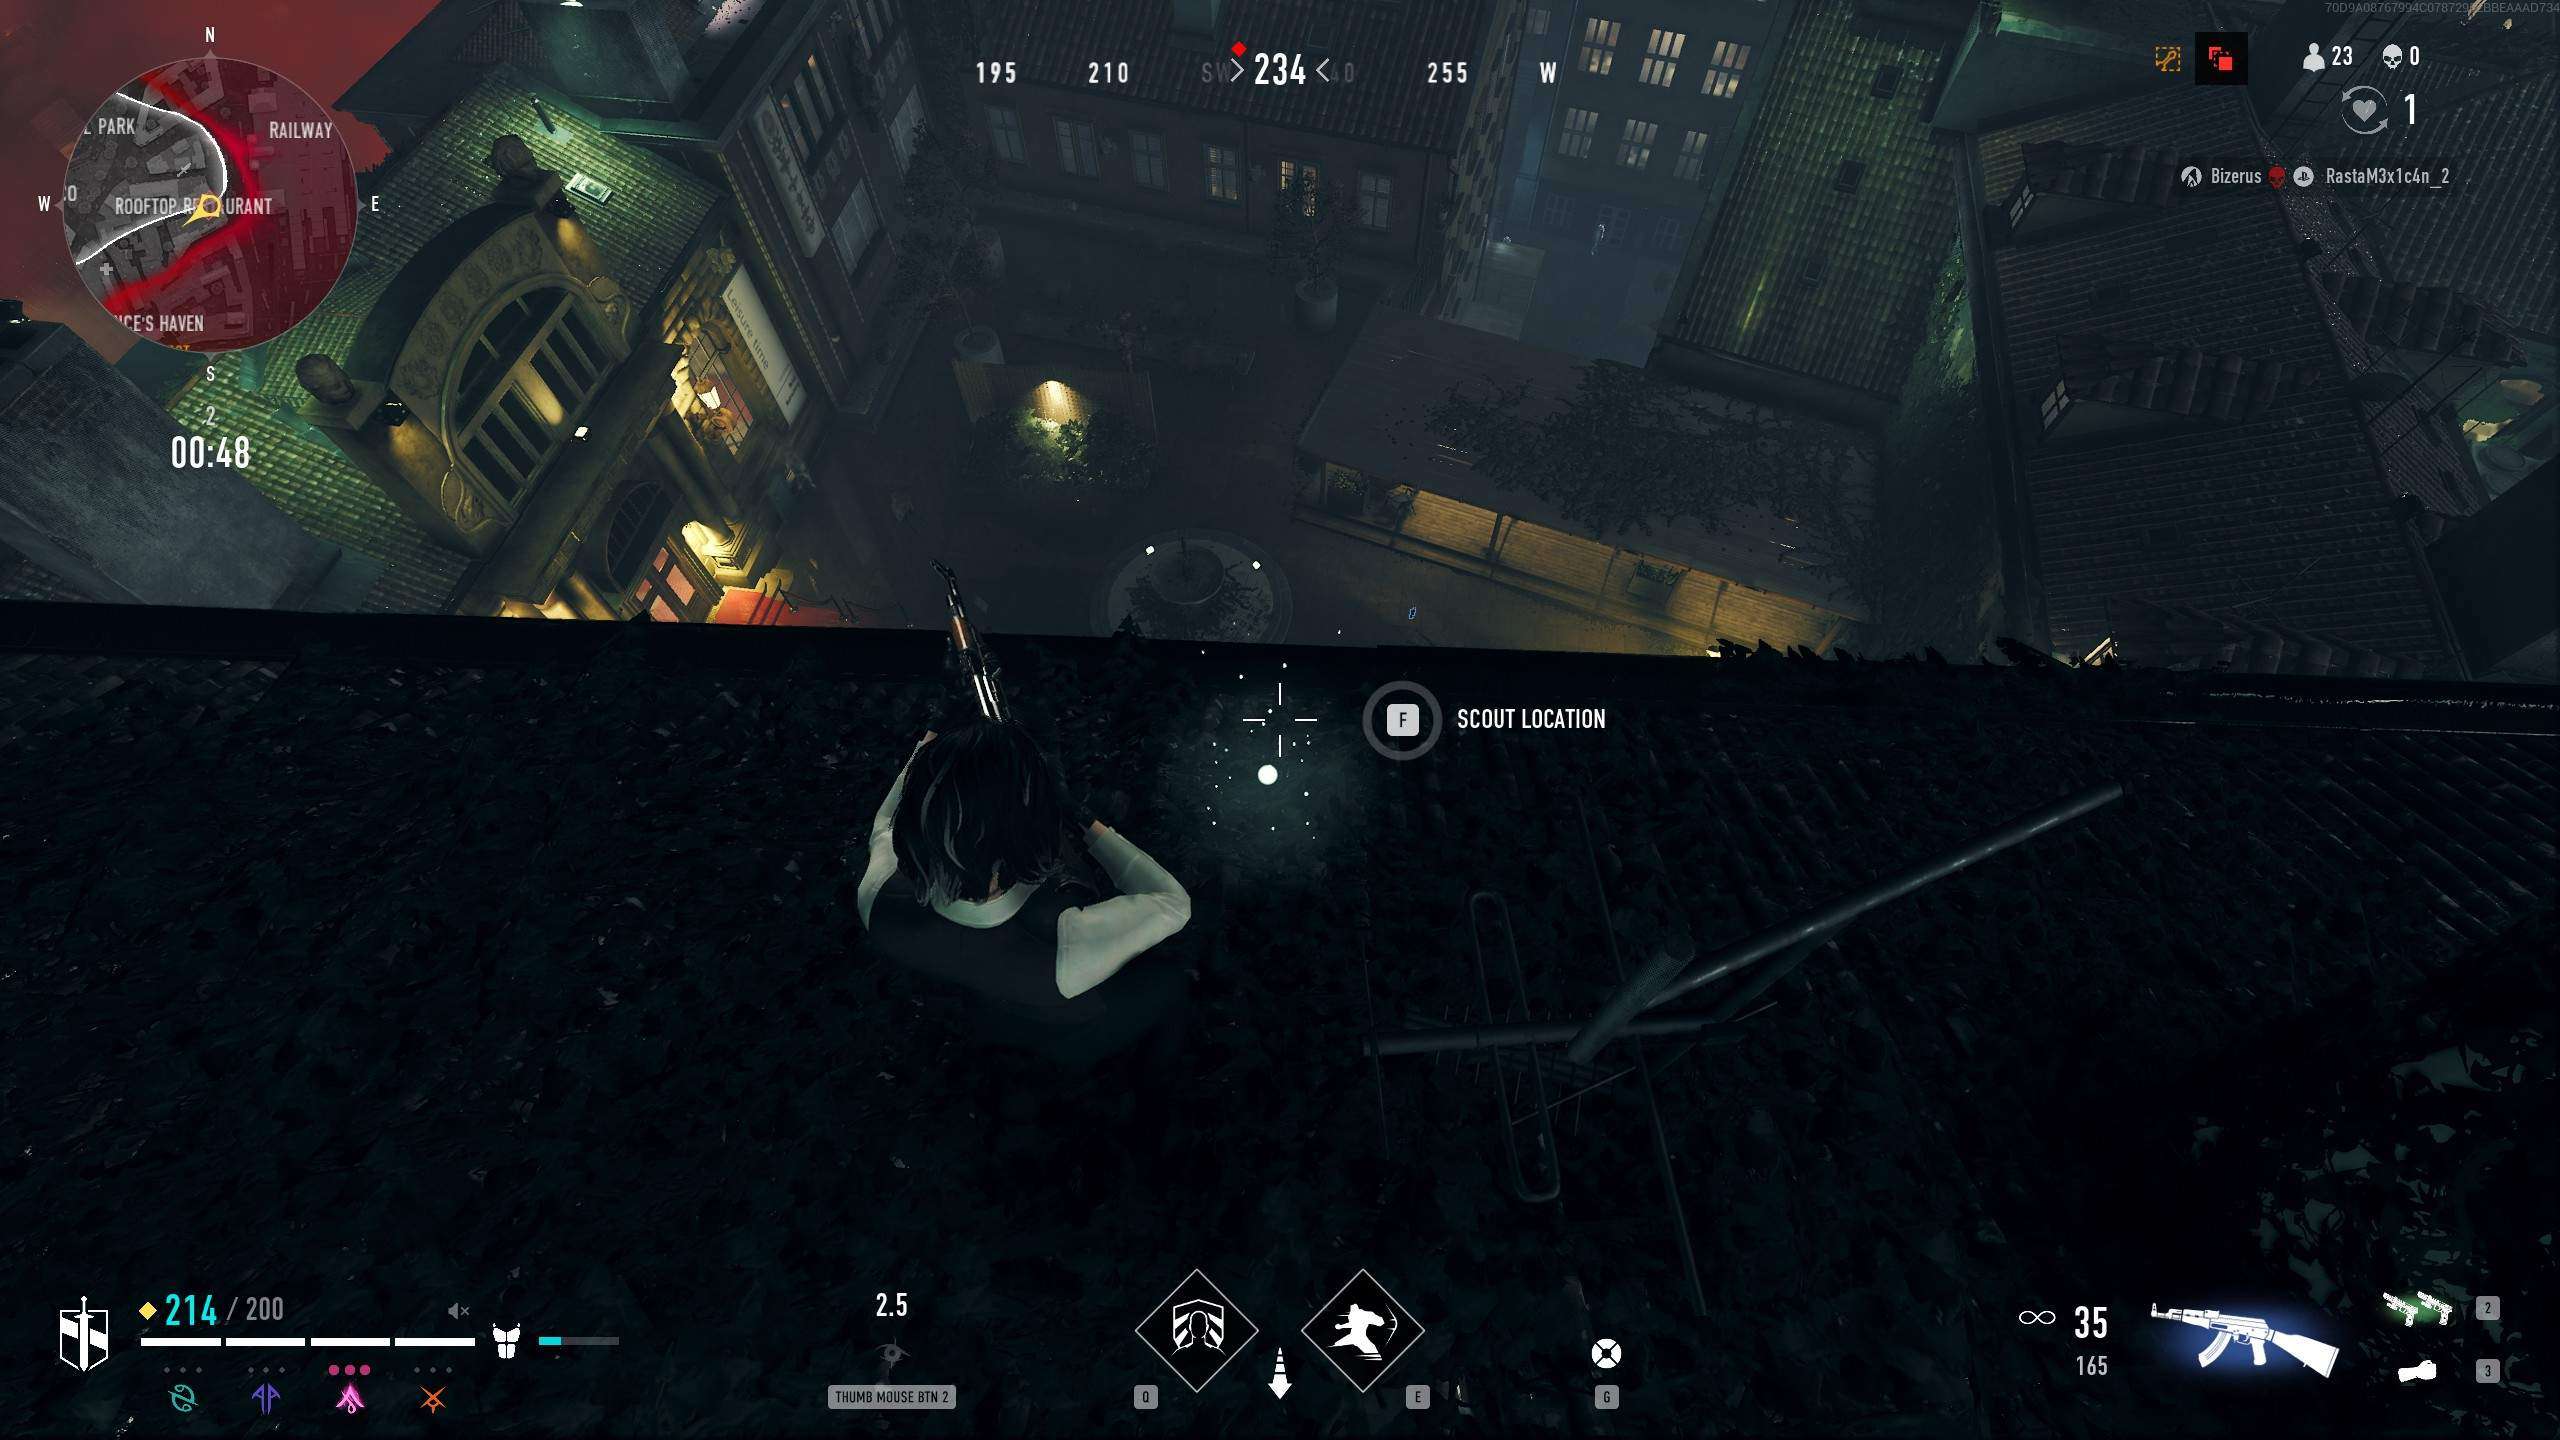
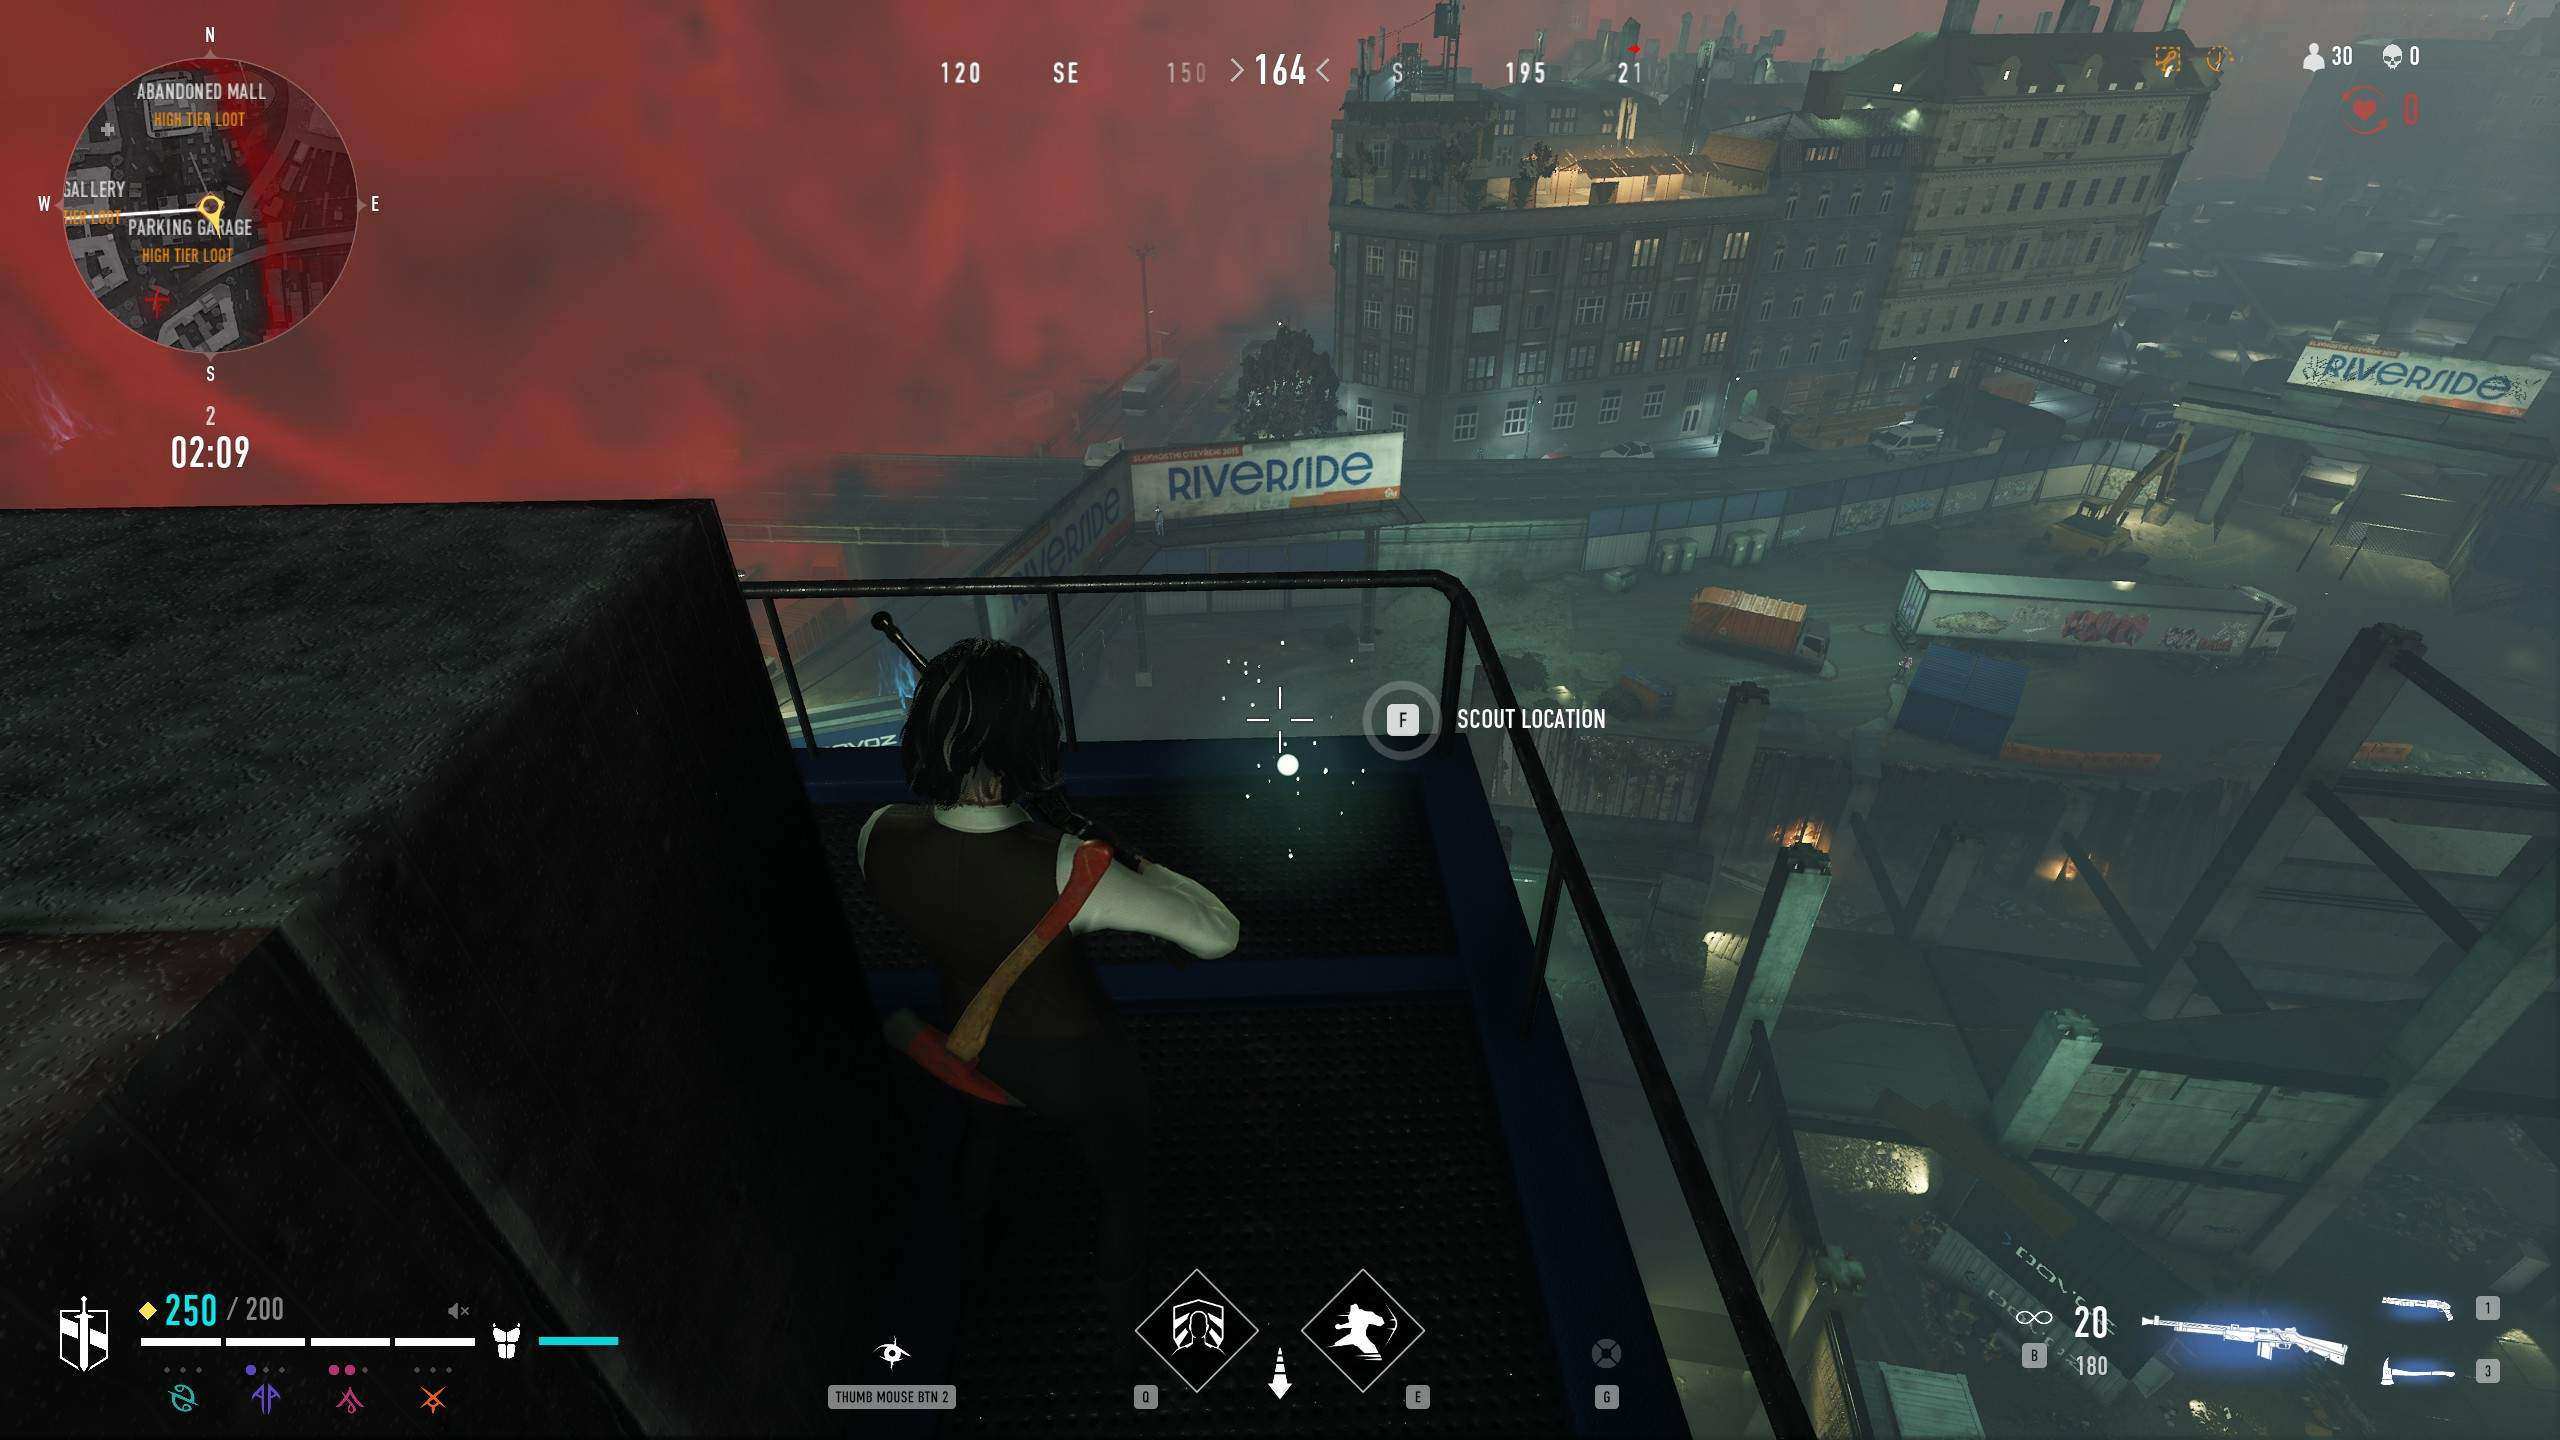
Kirill wishes for you to scout a location based on intel from Maia to check for Anarch activity near the Rooftop Restaurant. Here here to find the scouting location:
Part 2:
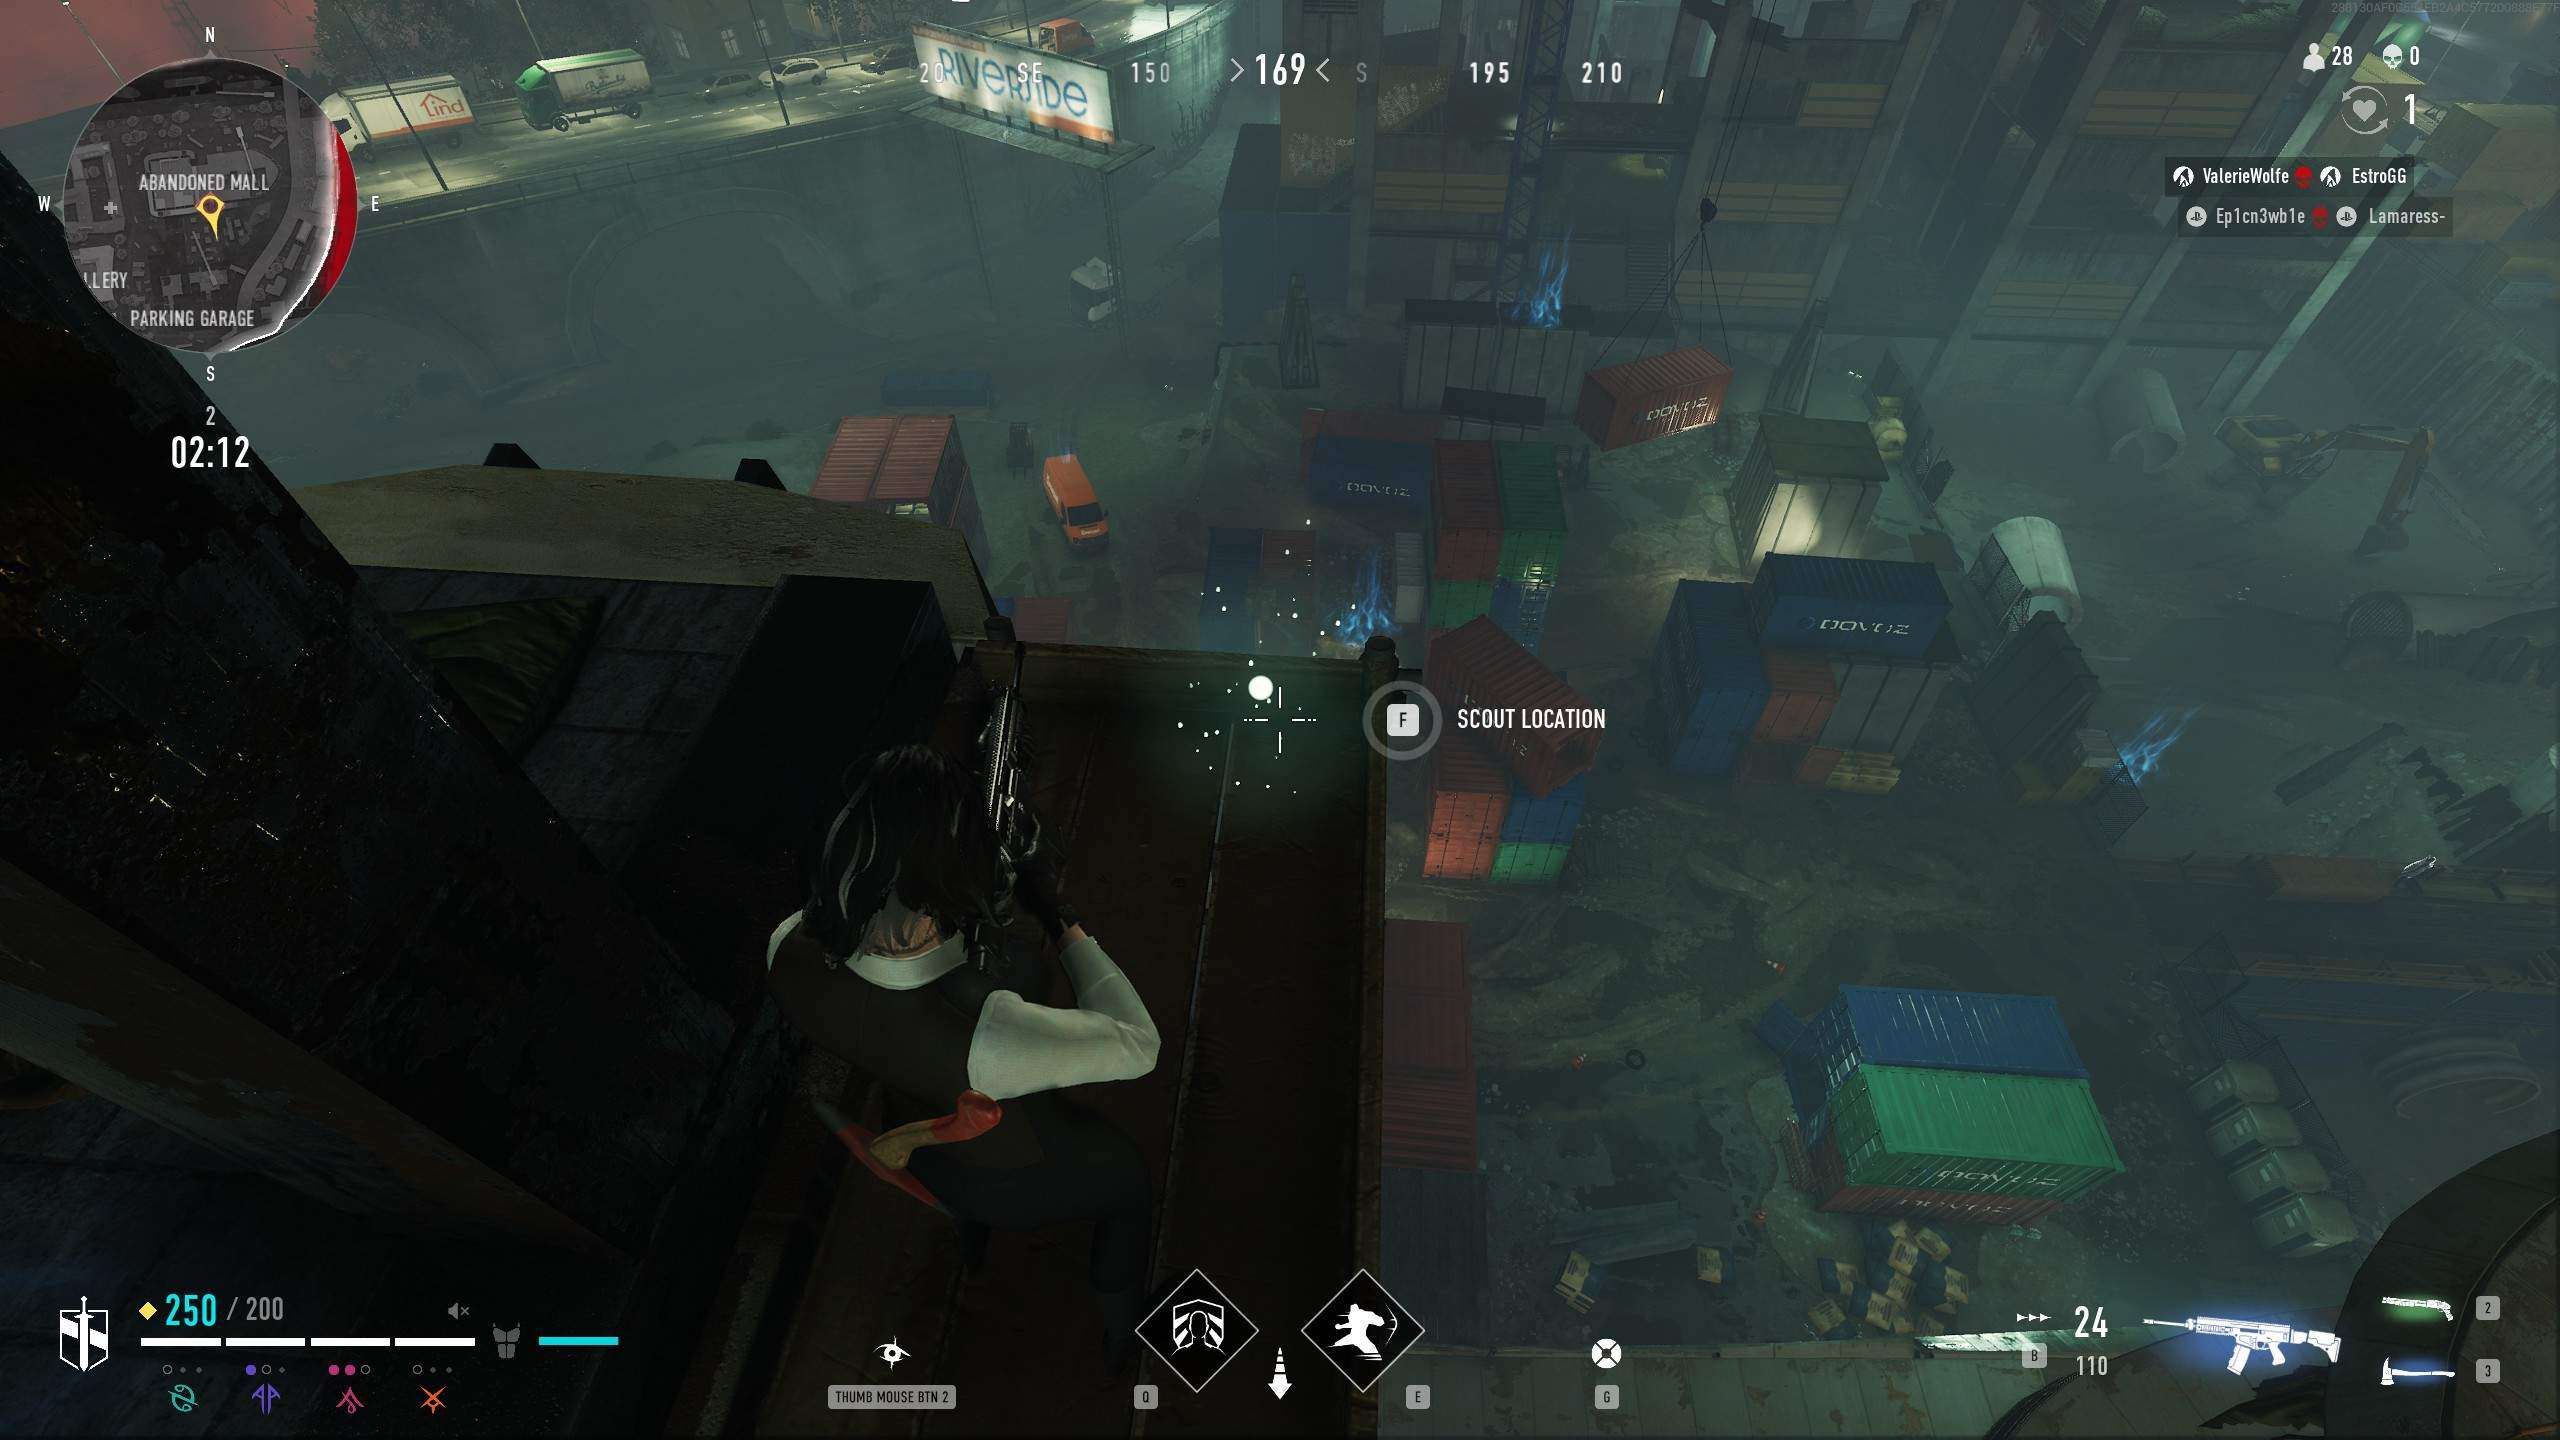
Return to Kirill with your findings. He is unhappy with the results but has his own intel and asks you to scout an area near the Parking Garage instead. Head to the following location to do so:
Part 3:
Report to Kirill once more. Based on what you found, the Anarch base must be nearby. This time he asks you to check by the Abandoned Mall. Proceed there to find the scouting location:
Part 4:
Speakin with Kirill again,this appears to have been the Anarch “nest”. Omnis has provided Kirill and your job will be to head back out into the city to set it up. Head to the Art Gallery and find a spot on the roof looking toward the Abandoned Mall to set up the camera:

Part 5:
Speaking with Kirill this time, it turns out that Omnis’ camera did not work. Luckily Kirill has a camera of his own, though it is older and will need to be set up closer to the target. Head south of the Abandoned Mall on top of a pillar near the parking garage and set up his camera:

Part 6:
Returning to Kirill, you learn that Entity soldiers are in the area, and the Anarchs may be keeping documents at the site. All his other warriors are out on missions so it’s up to you to distract the Entity and keep them from finding anything. For this step, you must simply kill 3 Entity hunters in the city.
The Entity can be found on the map around locations with the red cross:

This does not need to be done in a single match, but most locations with Entity soldiers should provide at least 3 targets for you to kill.
Reward:
Upon killing the Entity needed and returning to Kirill, he suggests you have proven yourself and he will call on you for more missions in the future. Completing this quest chain rewards you with the “Seeing Red” Player Icon.

Blood Will Have Blood
This quest begins by speaking with Custos.
Part 1:
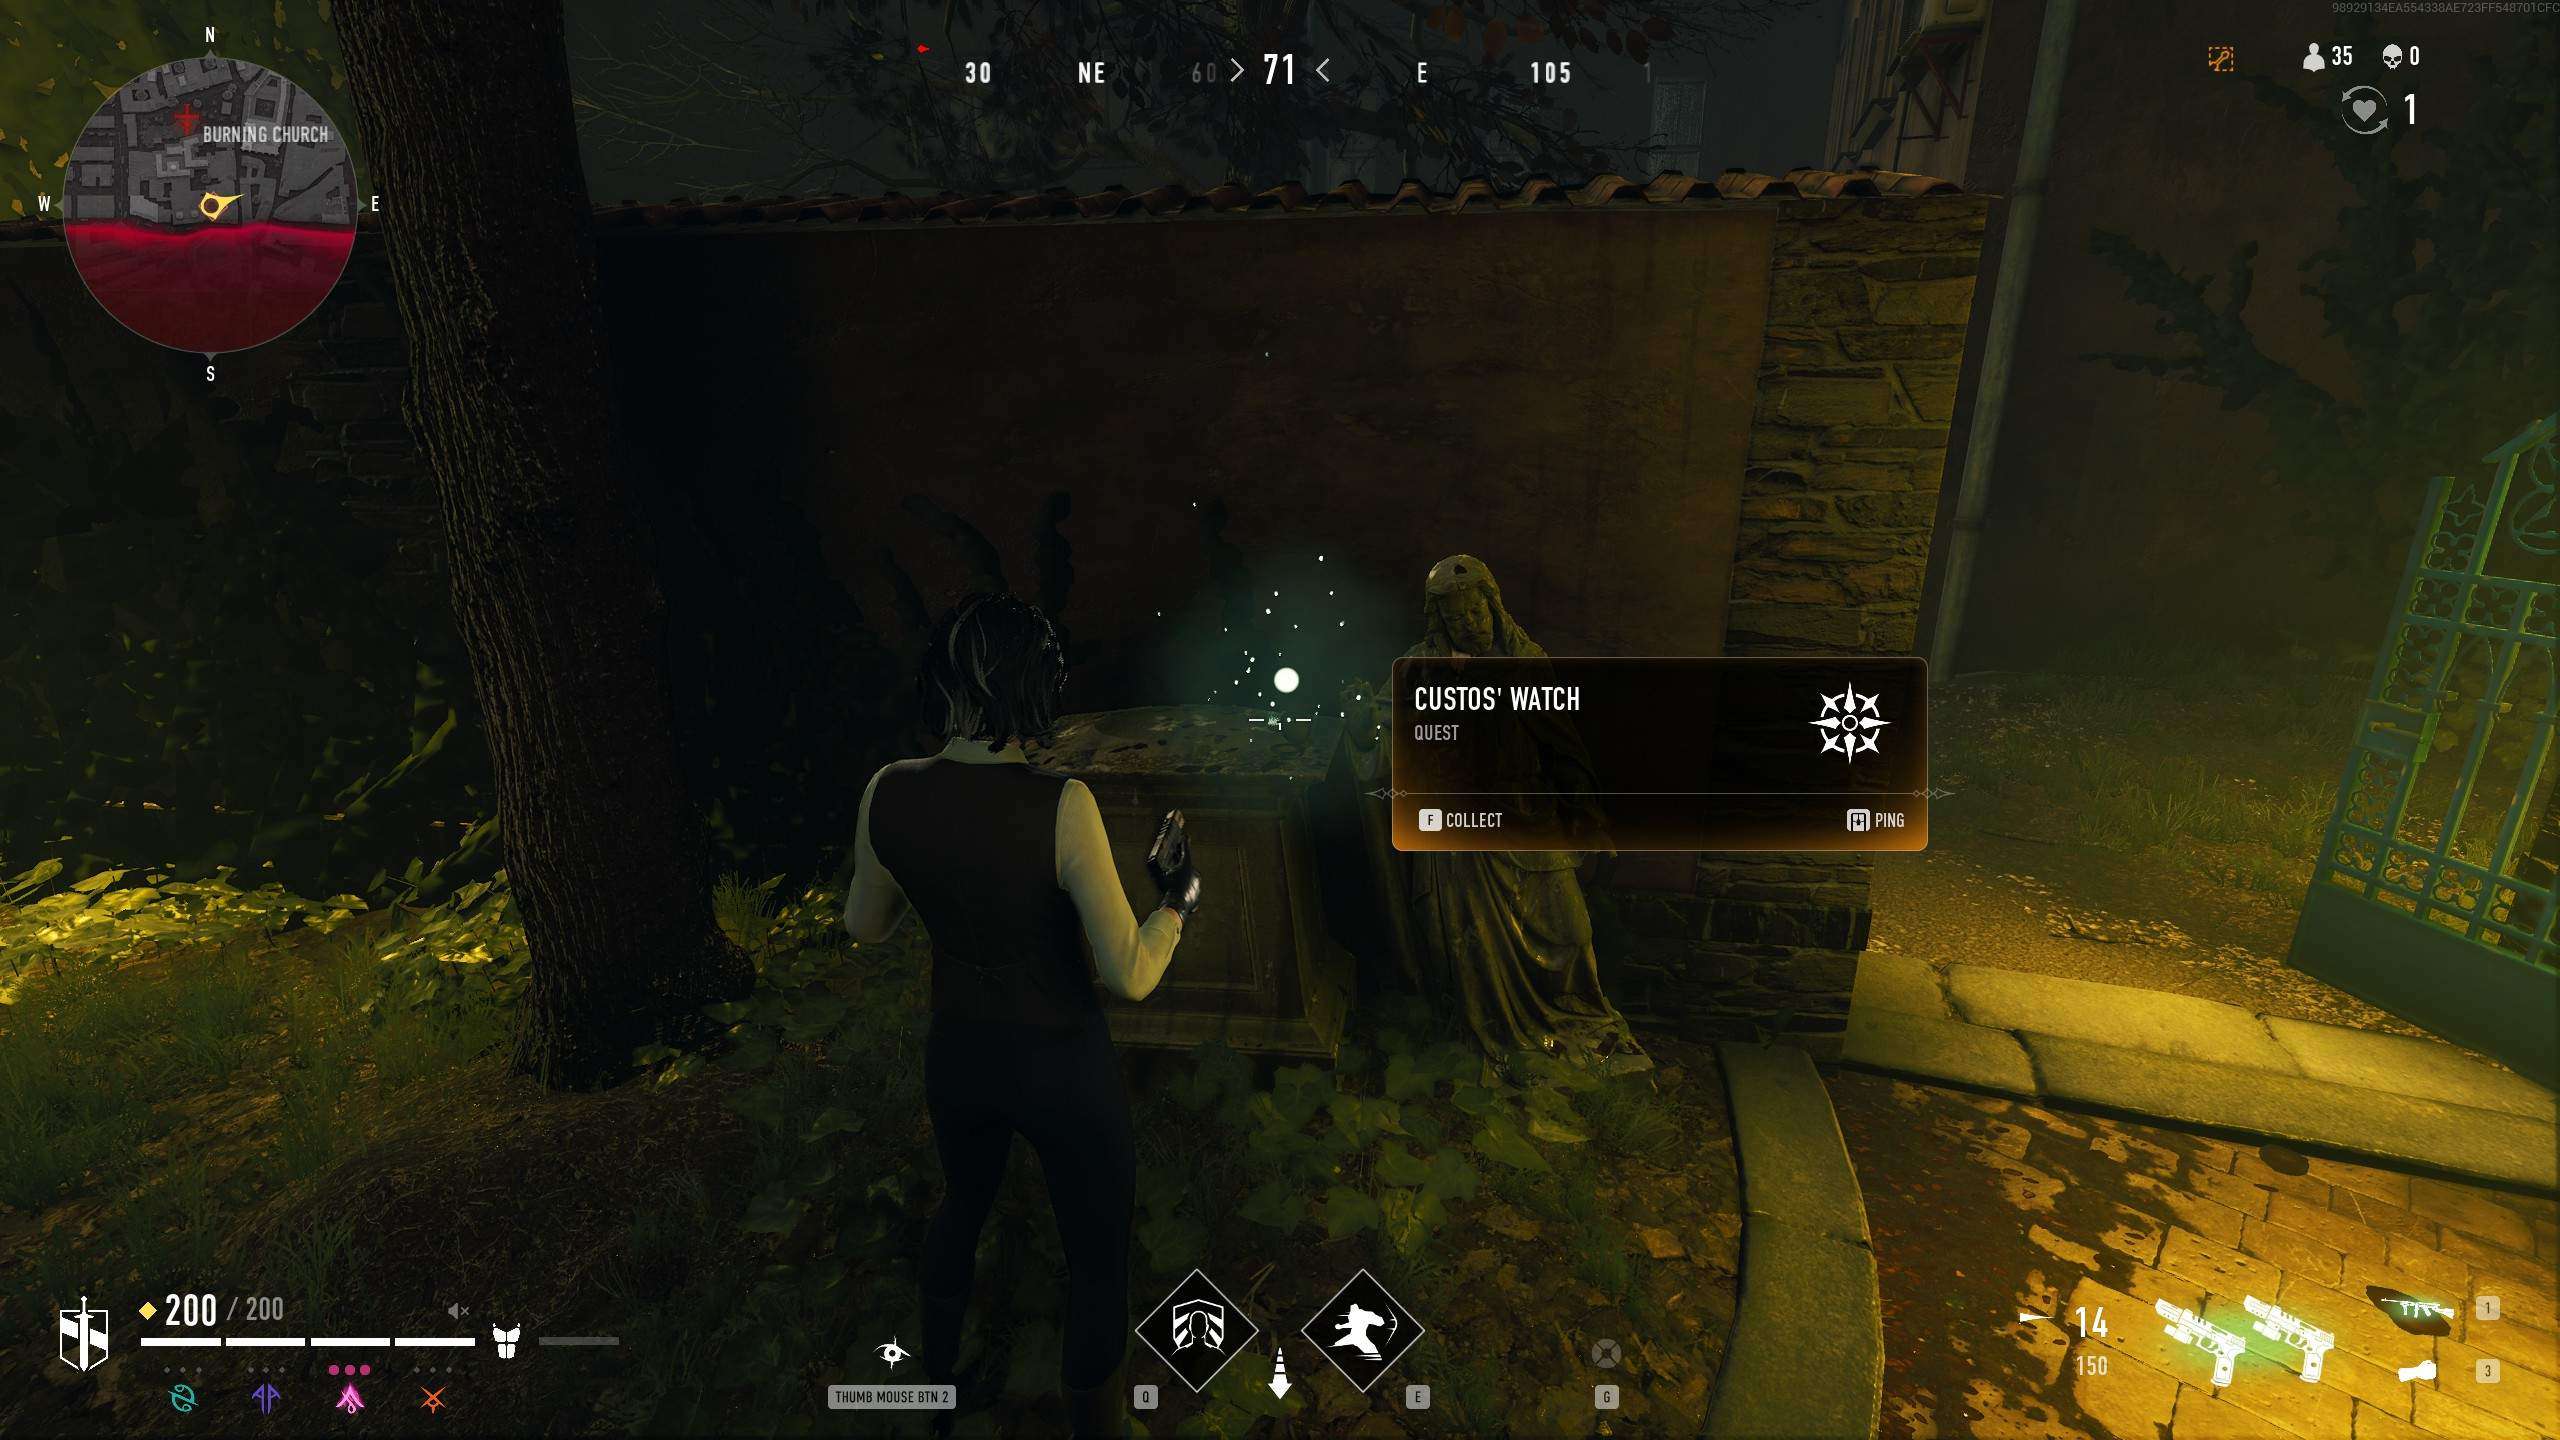
Custos wishes for you to retrieve his misplaced pocket watch. It was located by one of his thralls, and has been left out for you south of the burning church, next to a small statue.
Part 2:
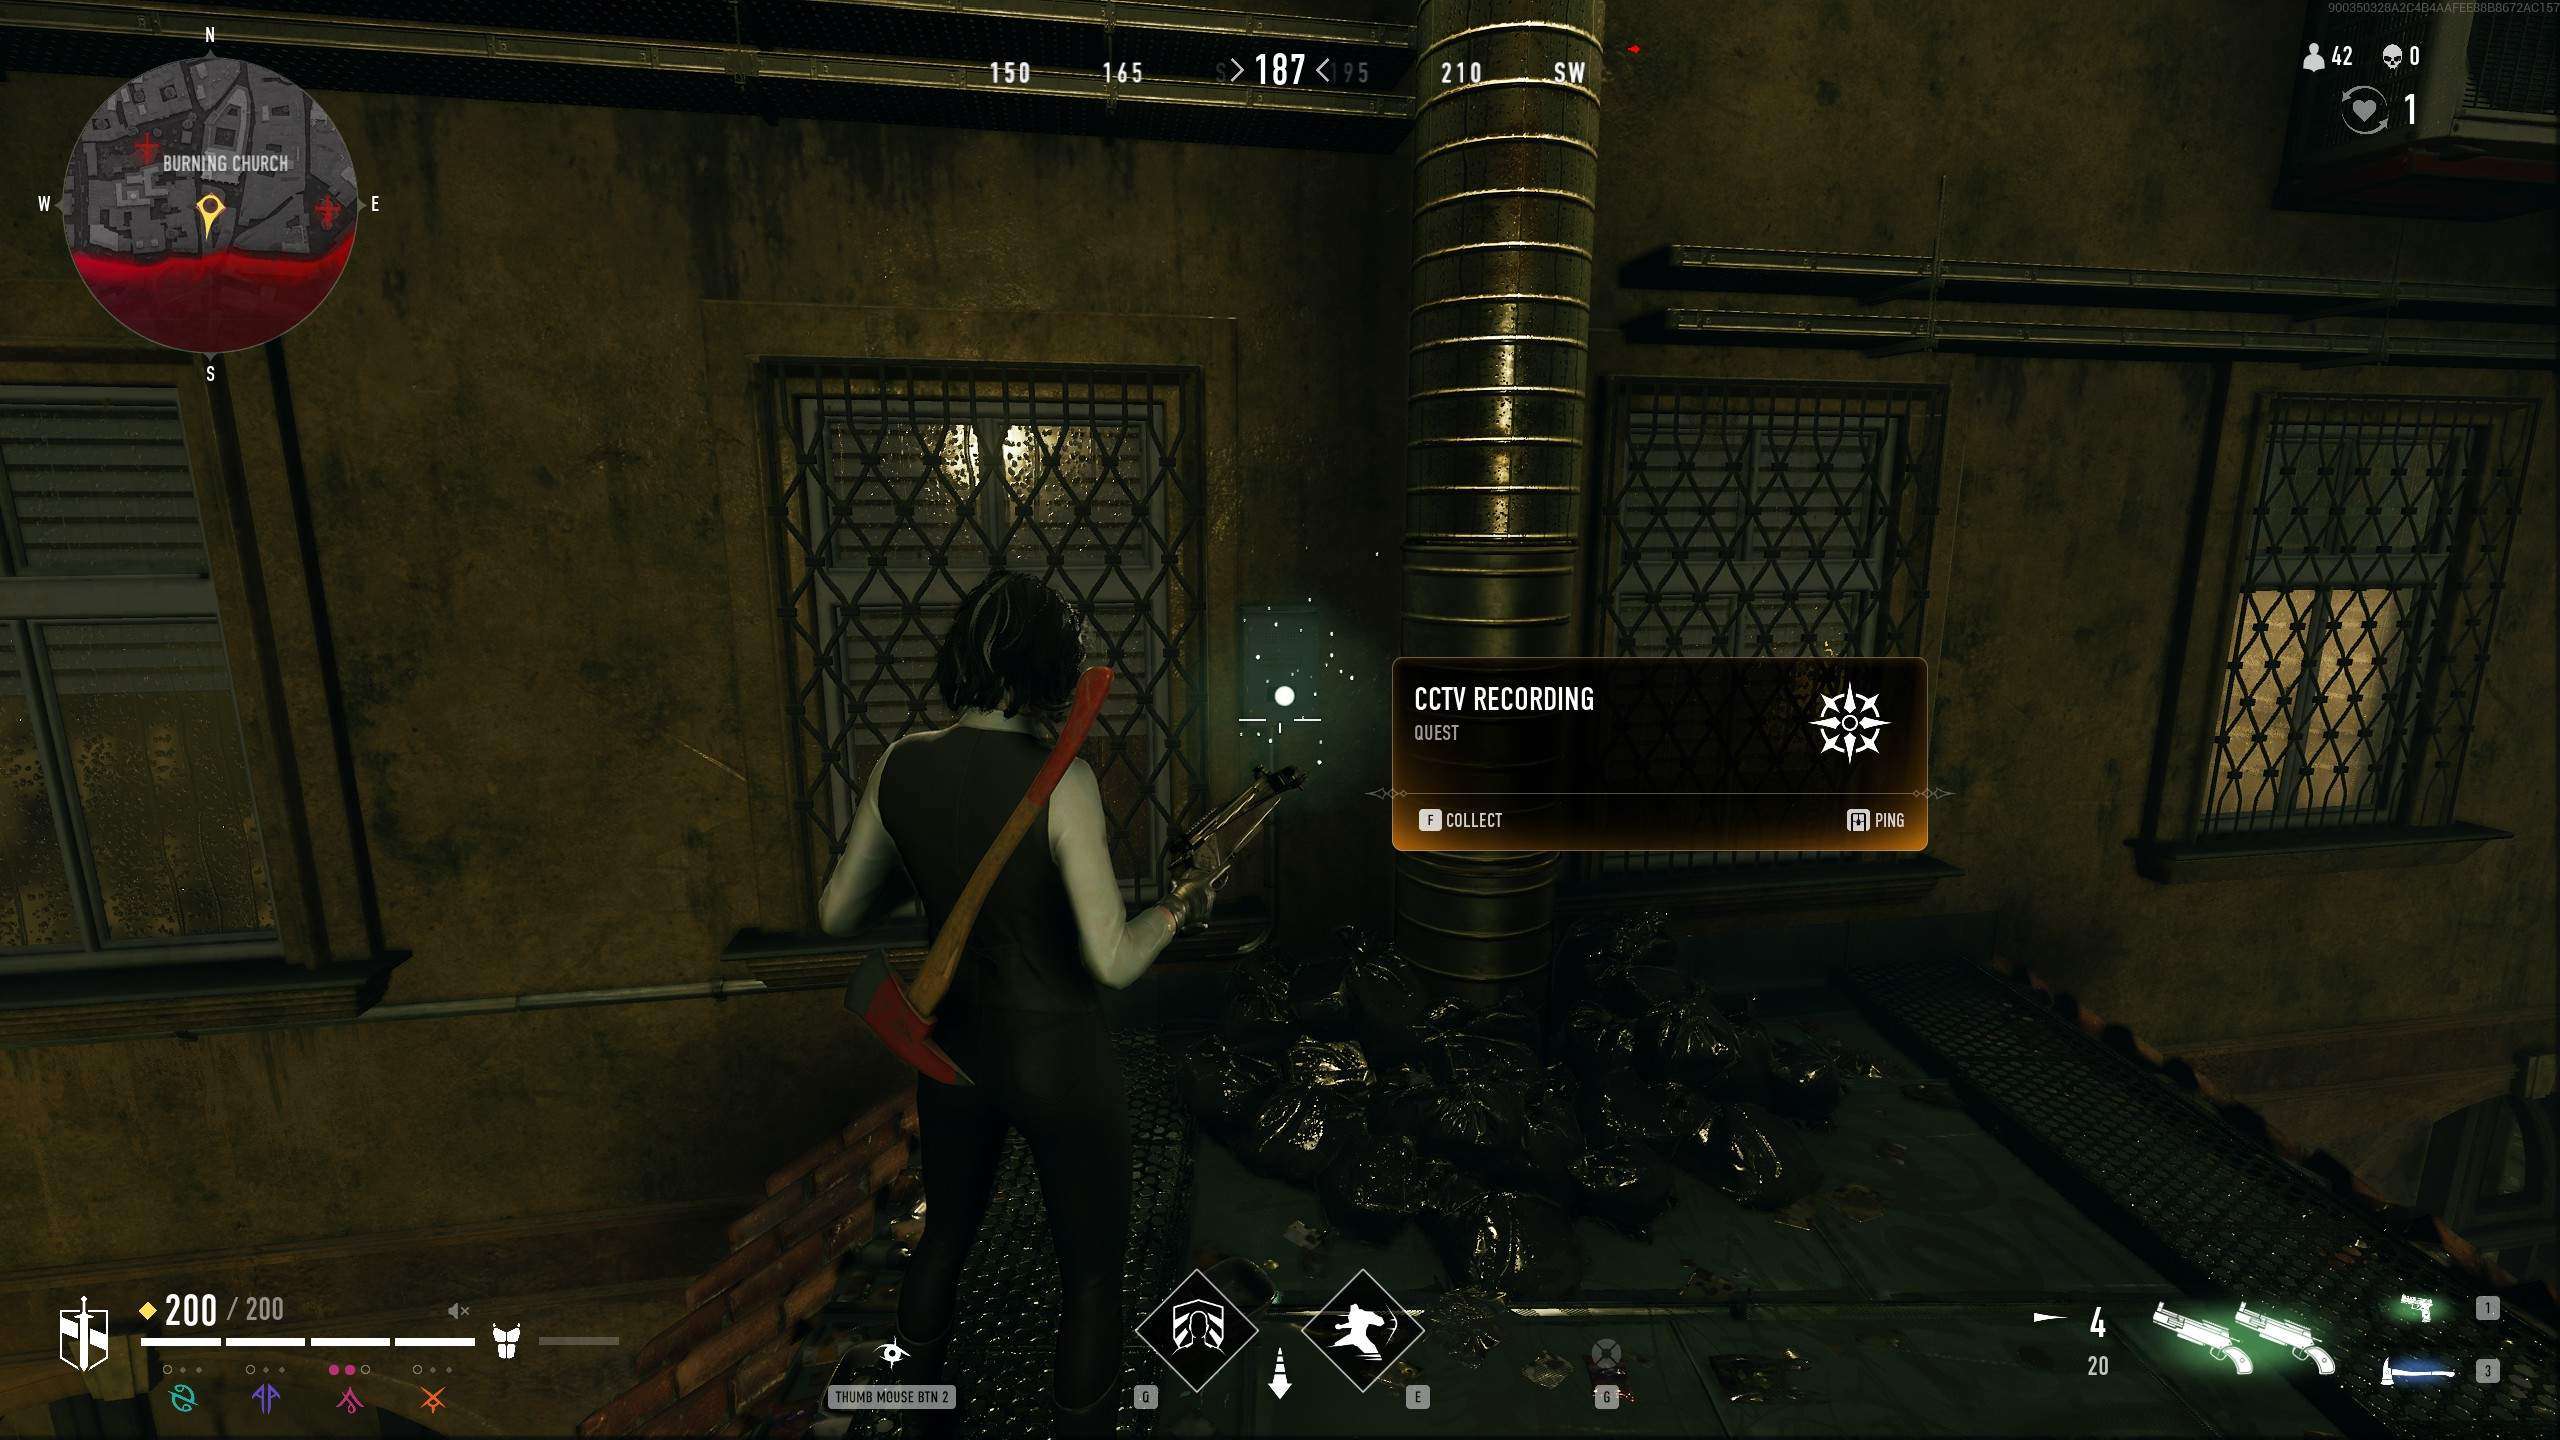
Upon returning to Elysium and speaking with Custos, he thanks you and tells you that Kirill wishes to speak with you. Head to him now where you learn that someone in the city is flagrantly breaking the Masquerade and he wishes you to gather CCTV footage from near where the incident occured near the Burning Church. Head there now:
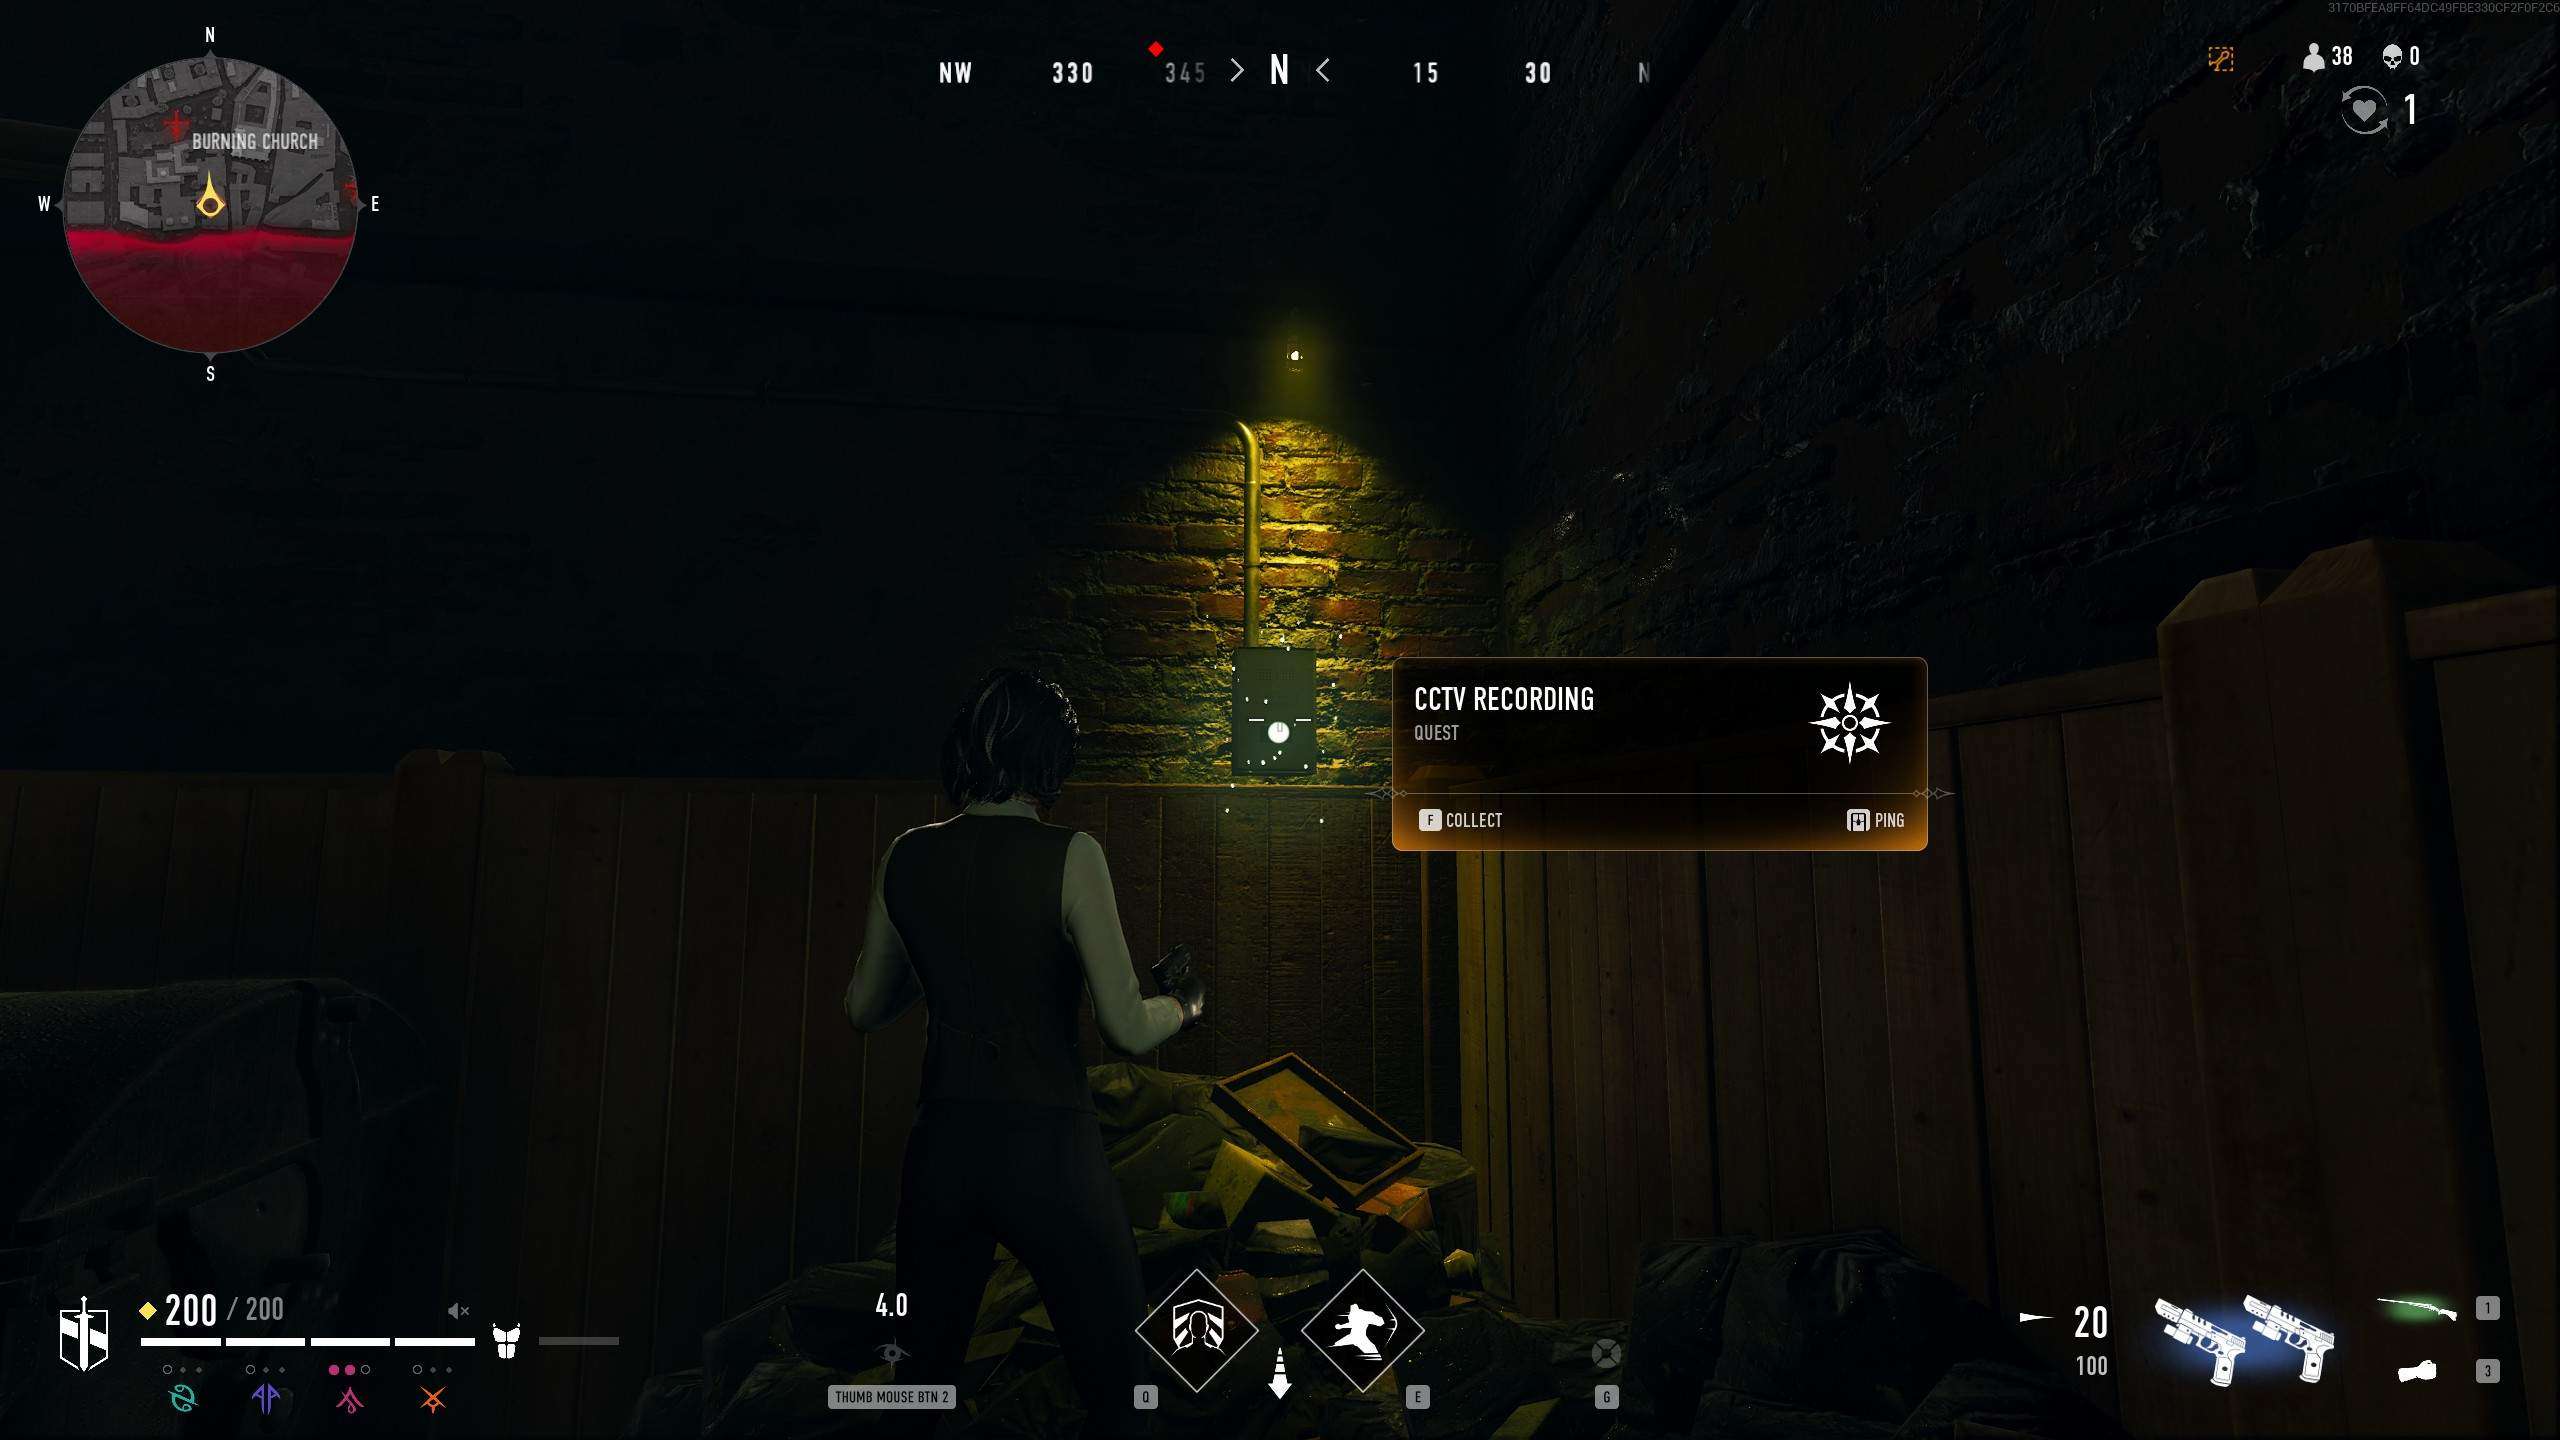
Part 3:
Returning to Kirill, you find that the footage is unclear and shadowy. He asks you to retrieve more footage from a different angle:
Part 4:
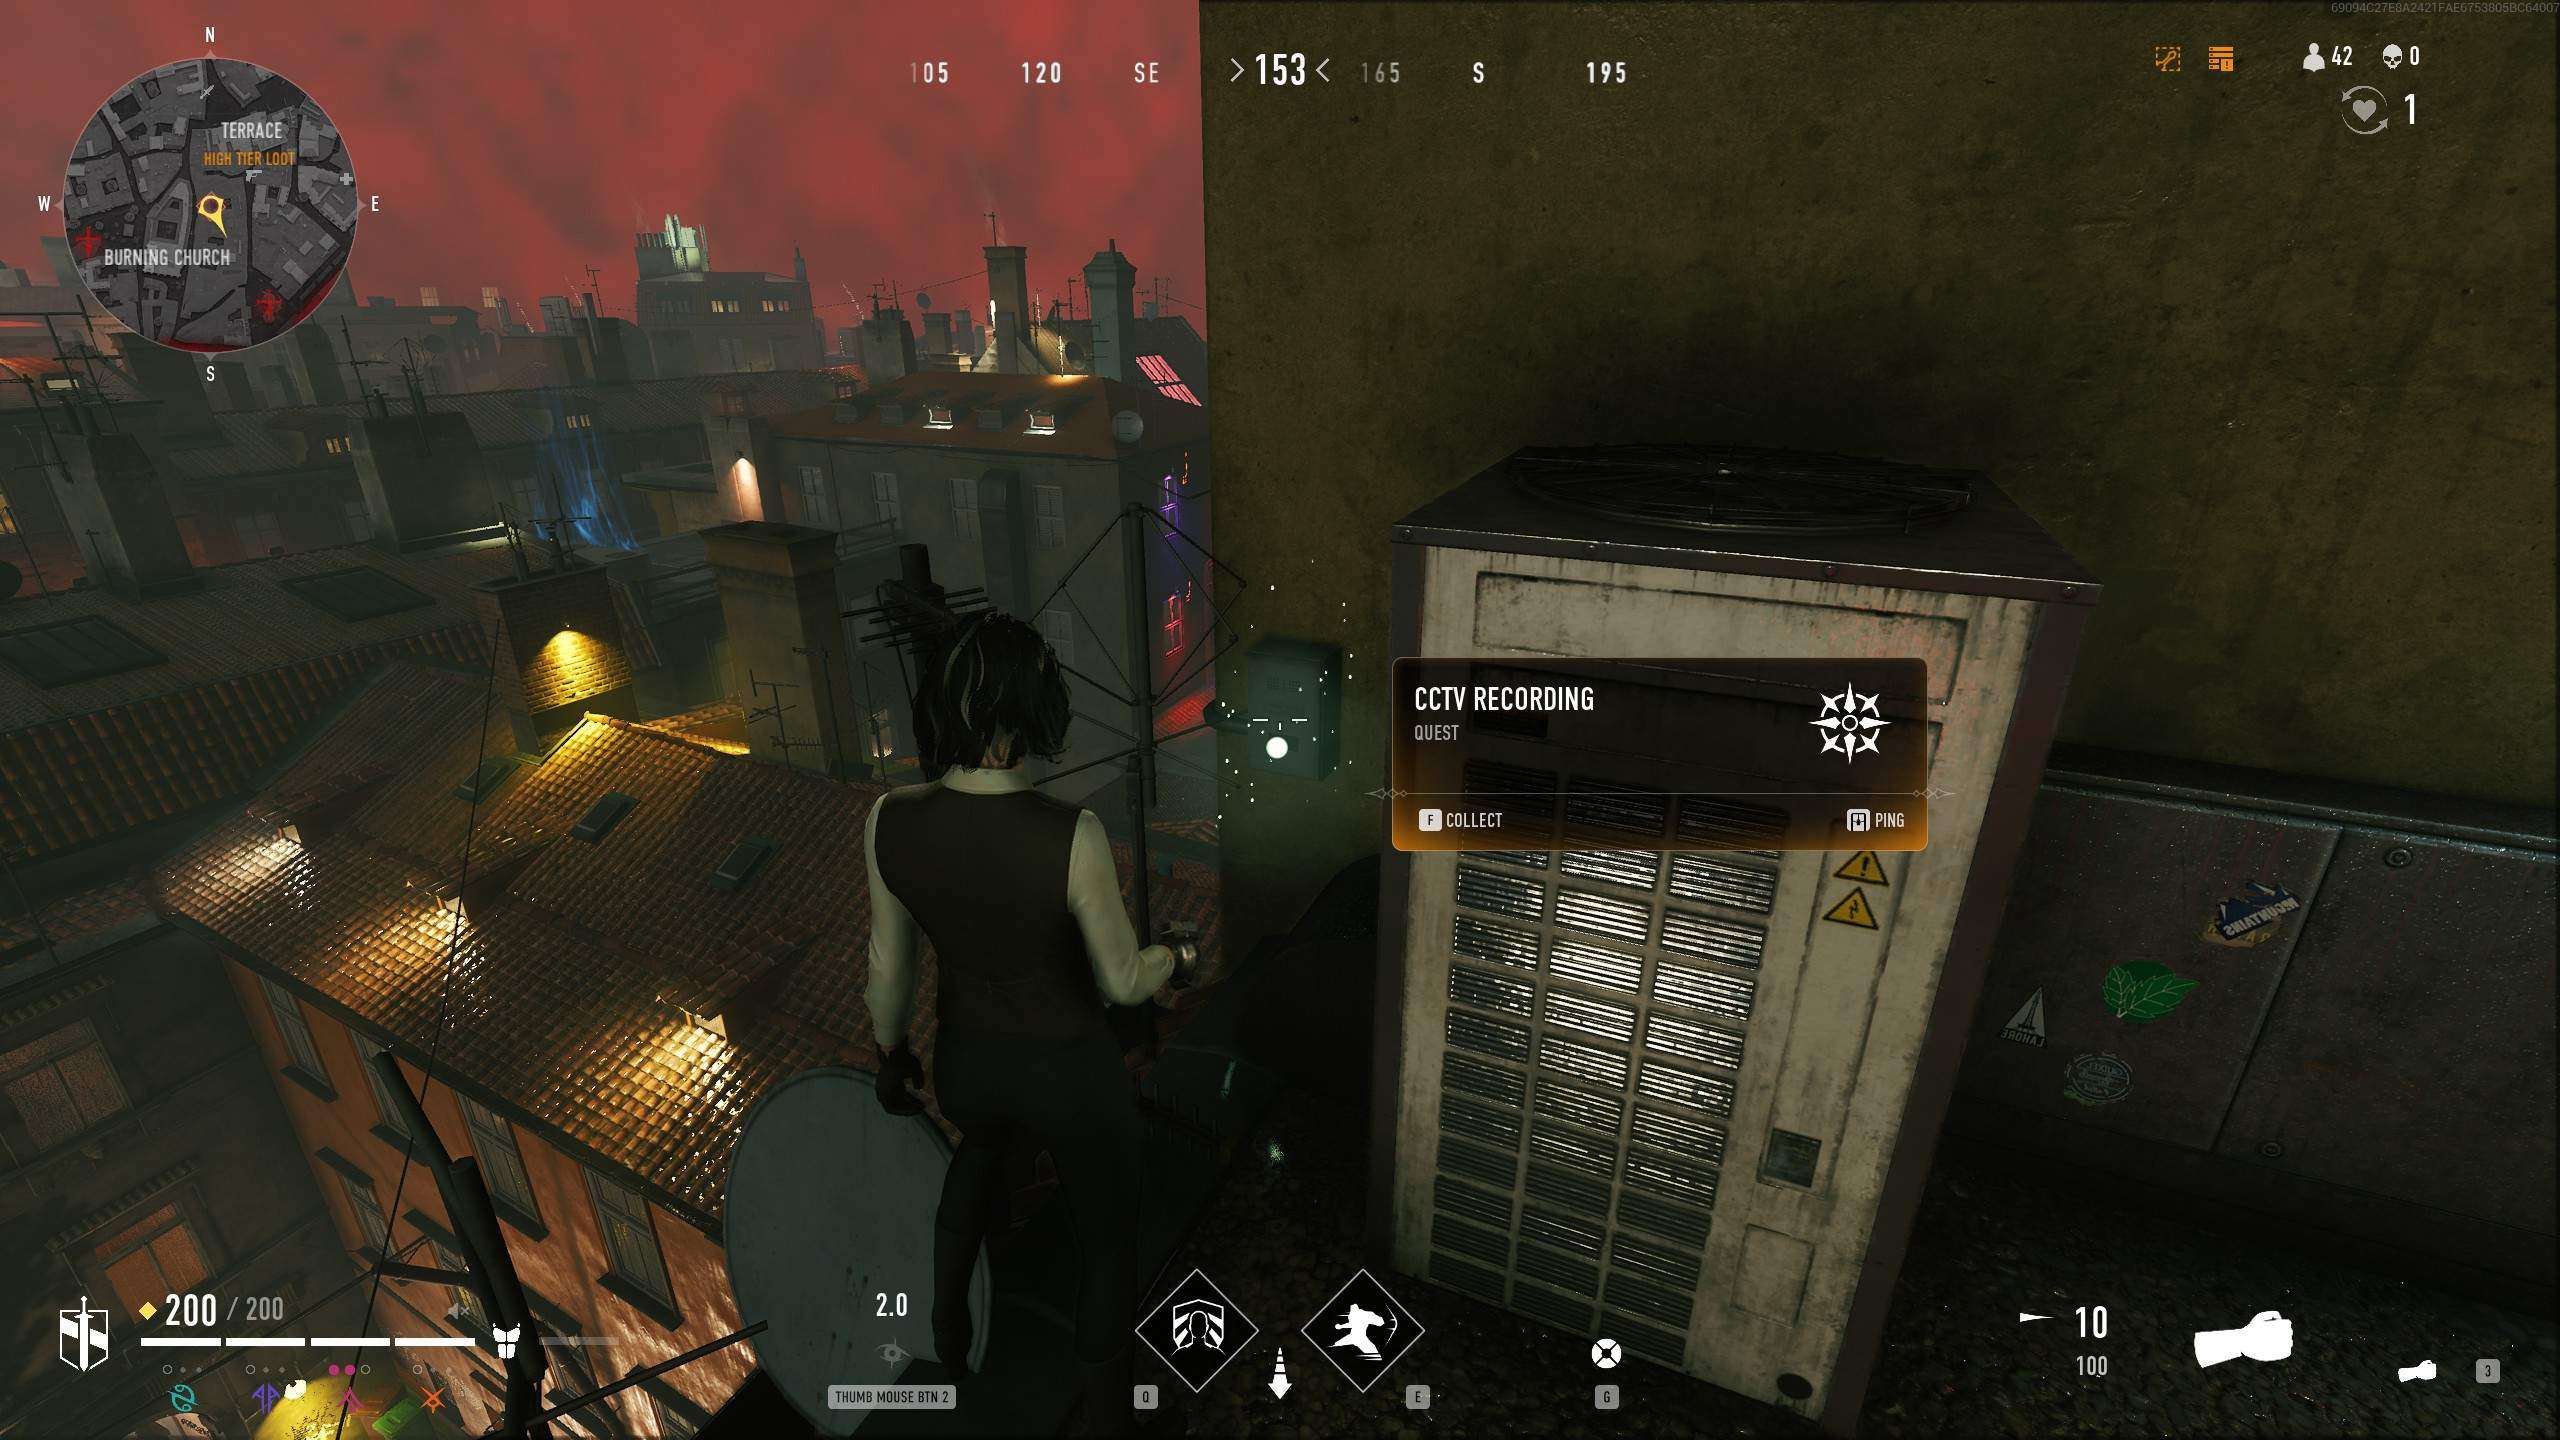
After grabbing the footage and returning again, the results are not much better, and the figure seen is blurry and unidentifiable. He tasks you with finding more footage along the path they were seen heading in the previous footage, which can be found slightly northeast of the Burning Church:
Reward:
The last footage found is still inconclusive. You are instructed not to speak of what happened, hoping that the culprit may reveal themselves. For completing this quest, you are rewarded with the “Serpenspine” Player Banner.

Proof of Unlife
Custos needs your help locateing an ally.
Part 1:
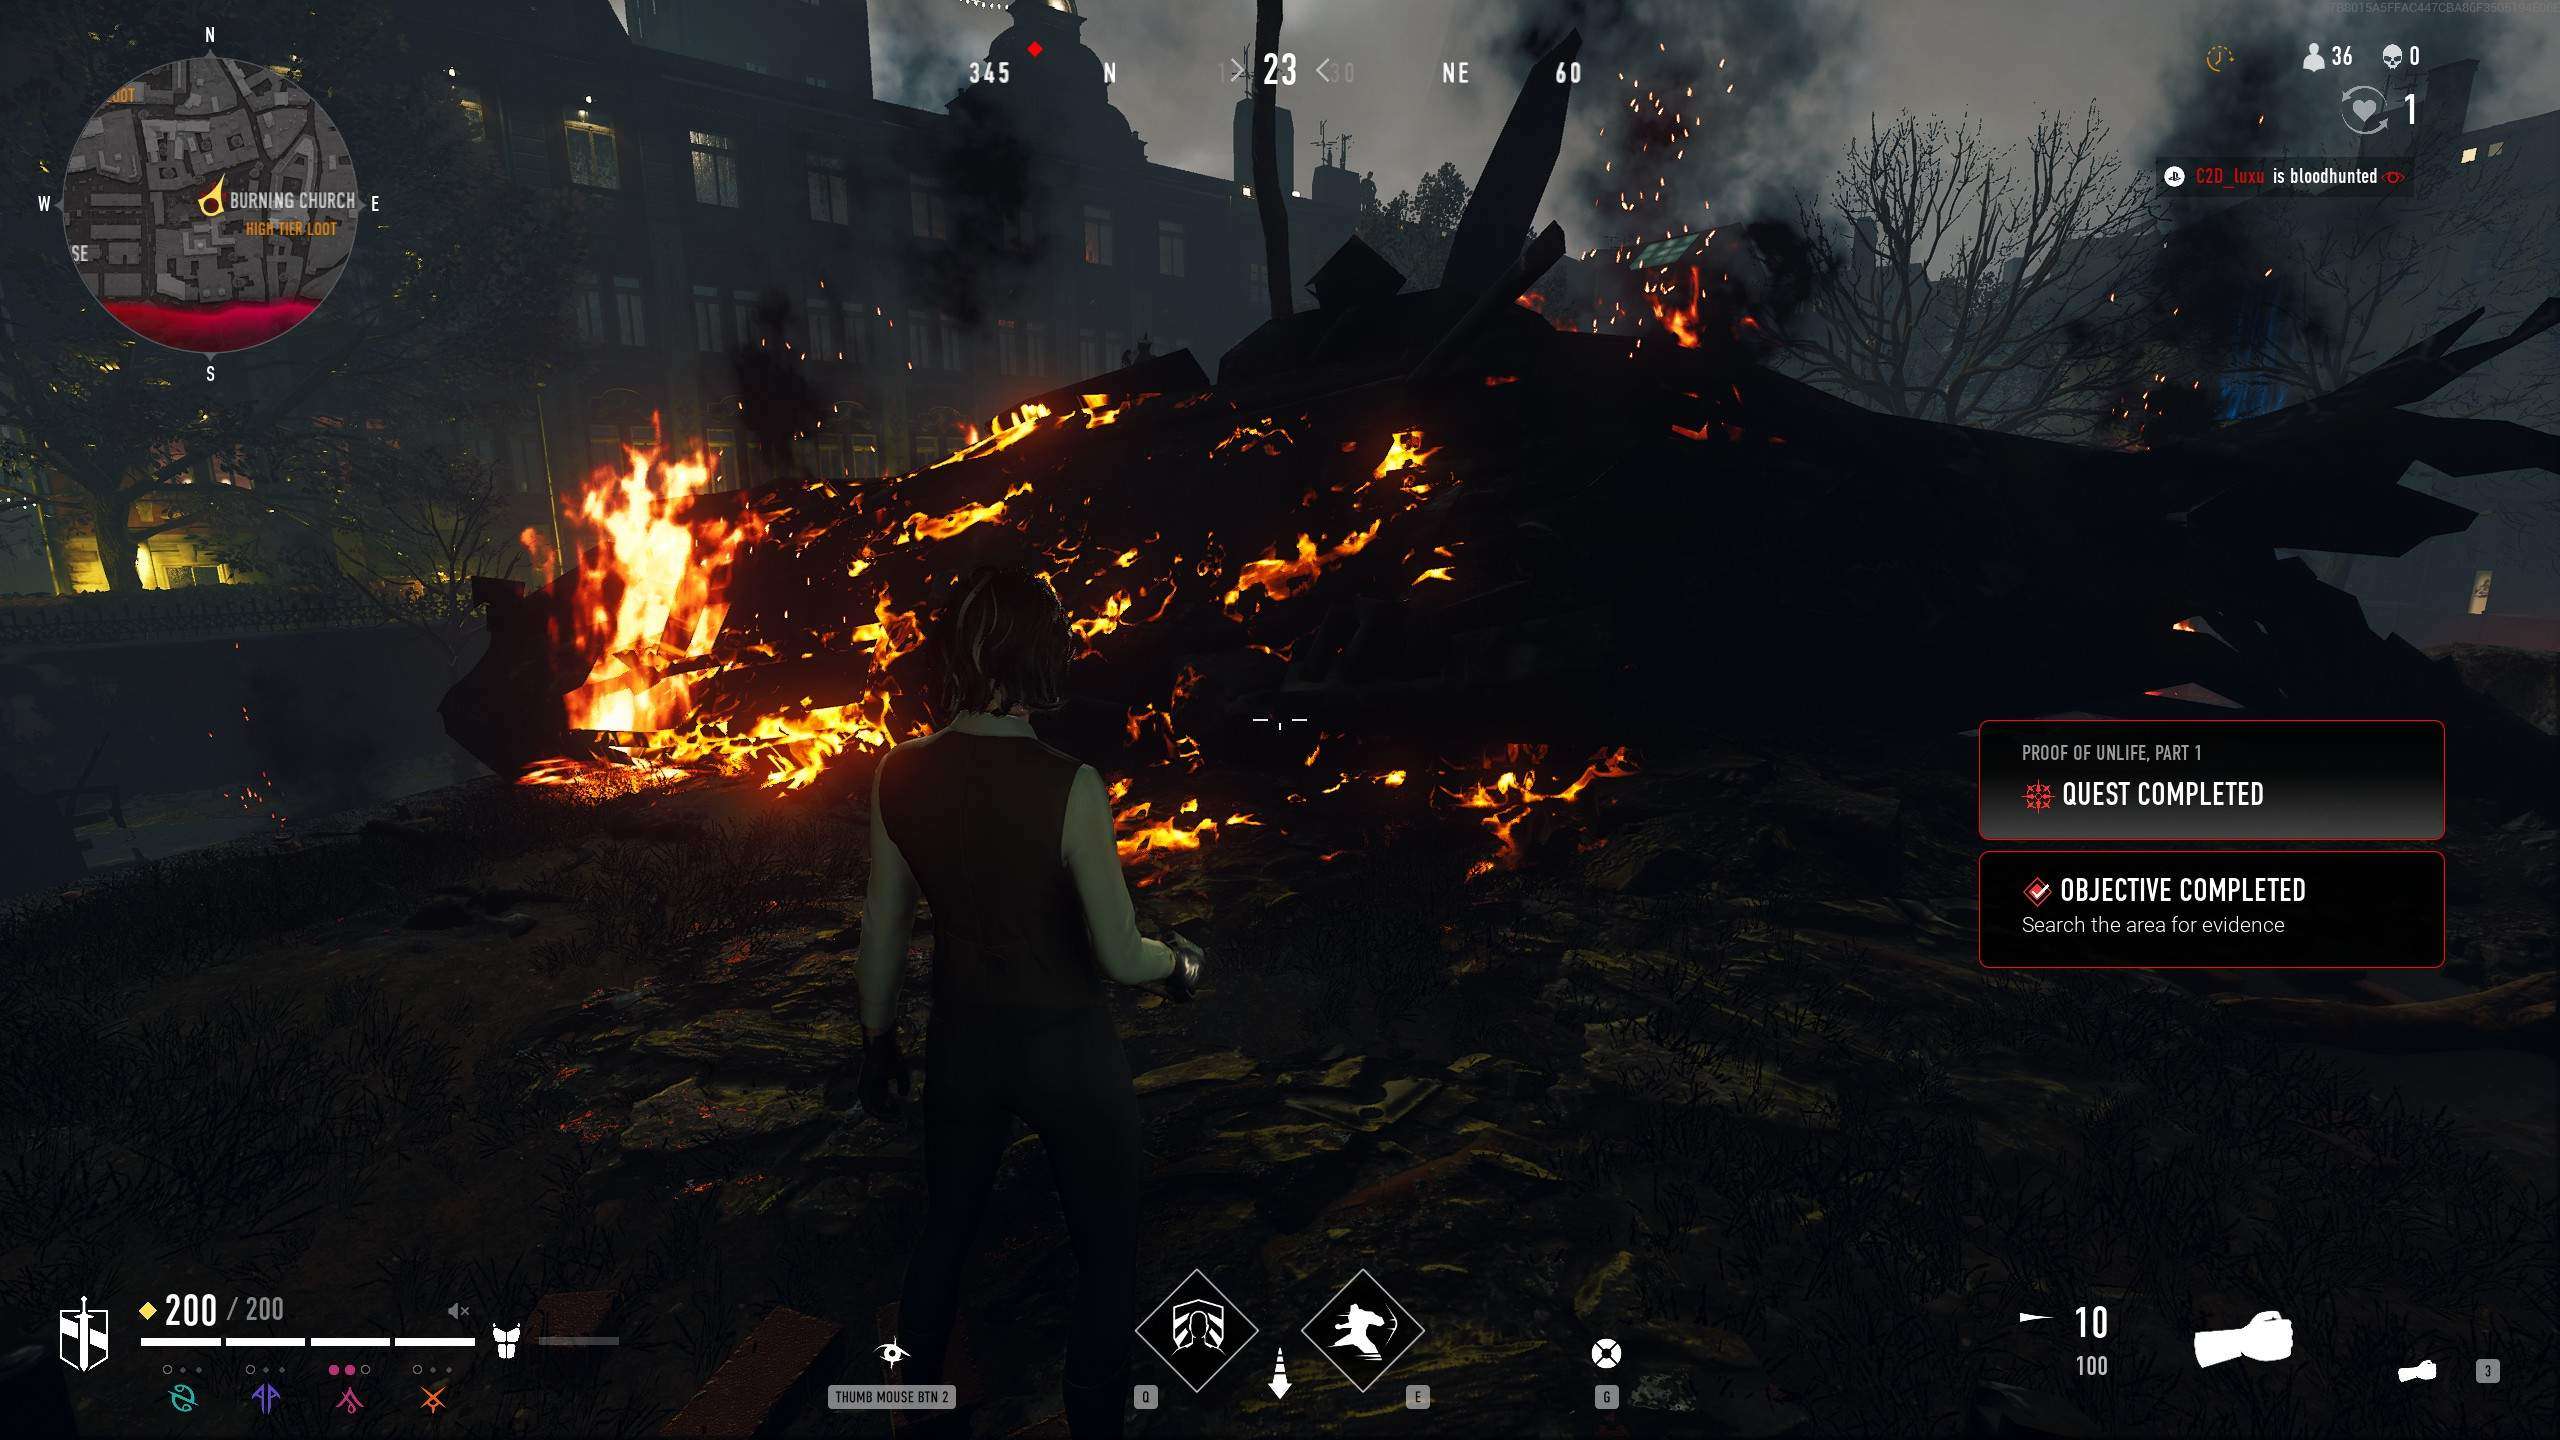
Speak with Custos, and he informs you that an Entity helicopter went down near Old Town Square the previous night. An ally was in the area and he wishes for you to find out what occurred. Seek the location of the downed helicopter to the west of the Burning Church:
Part 2:
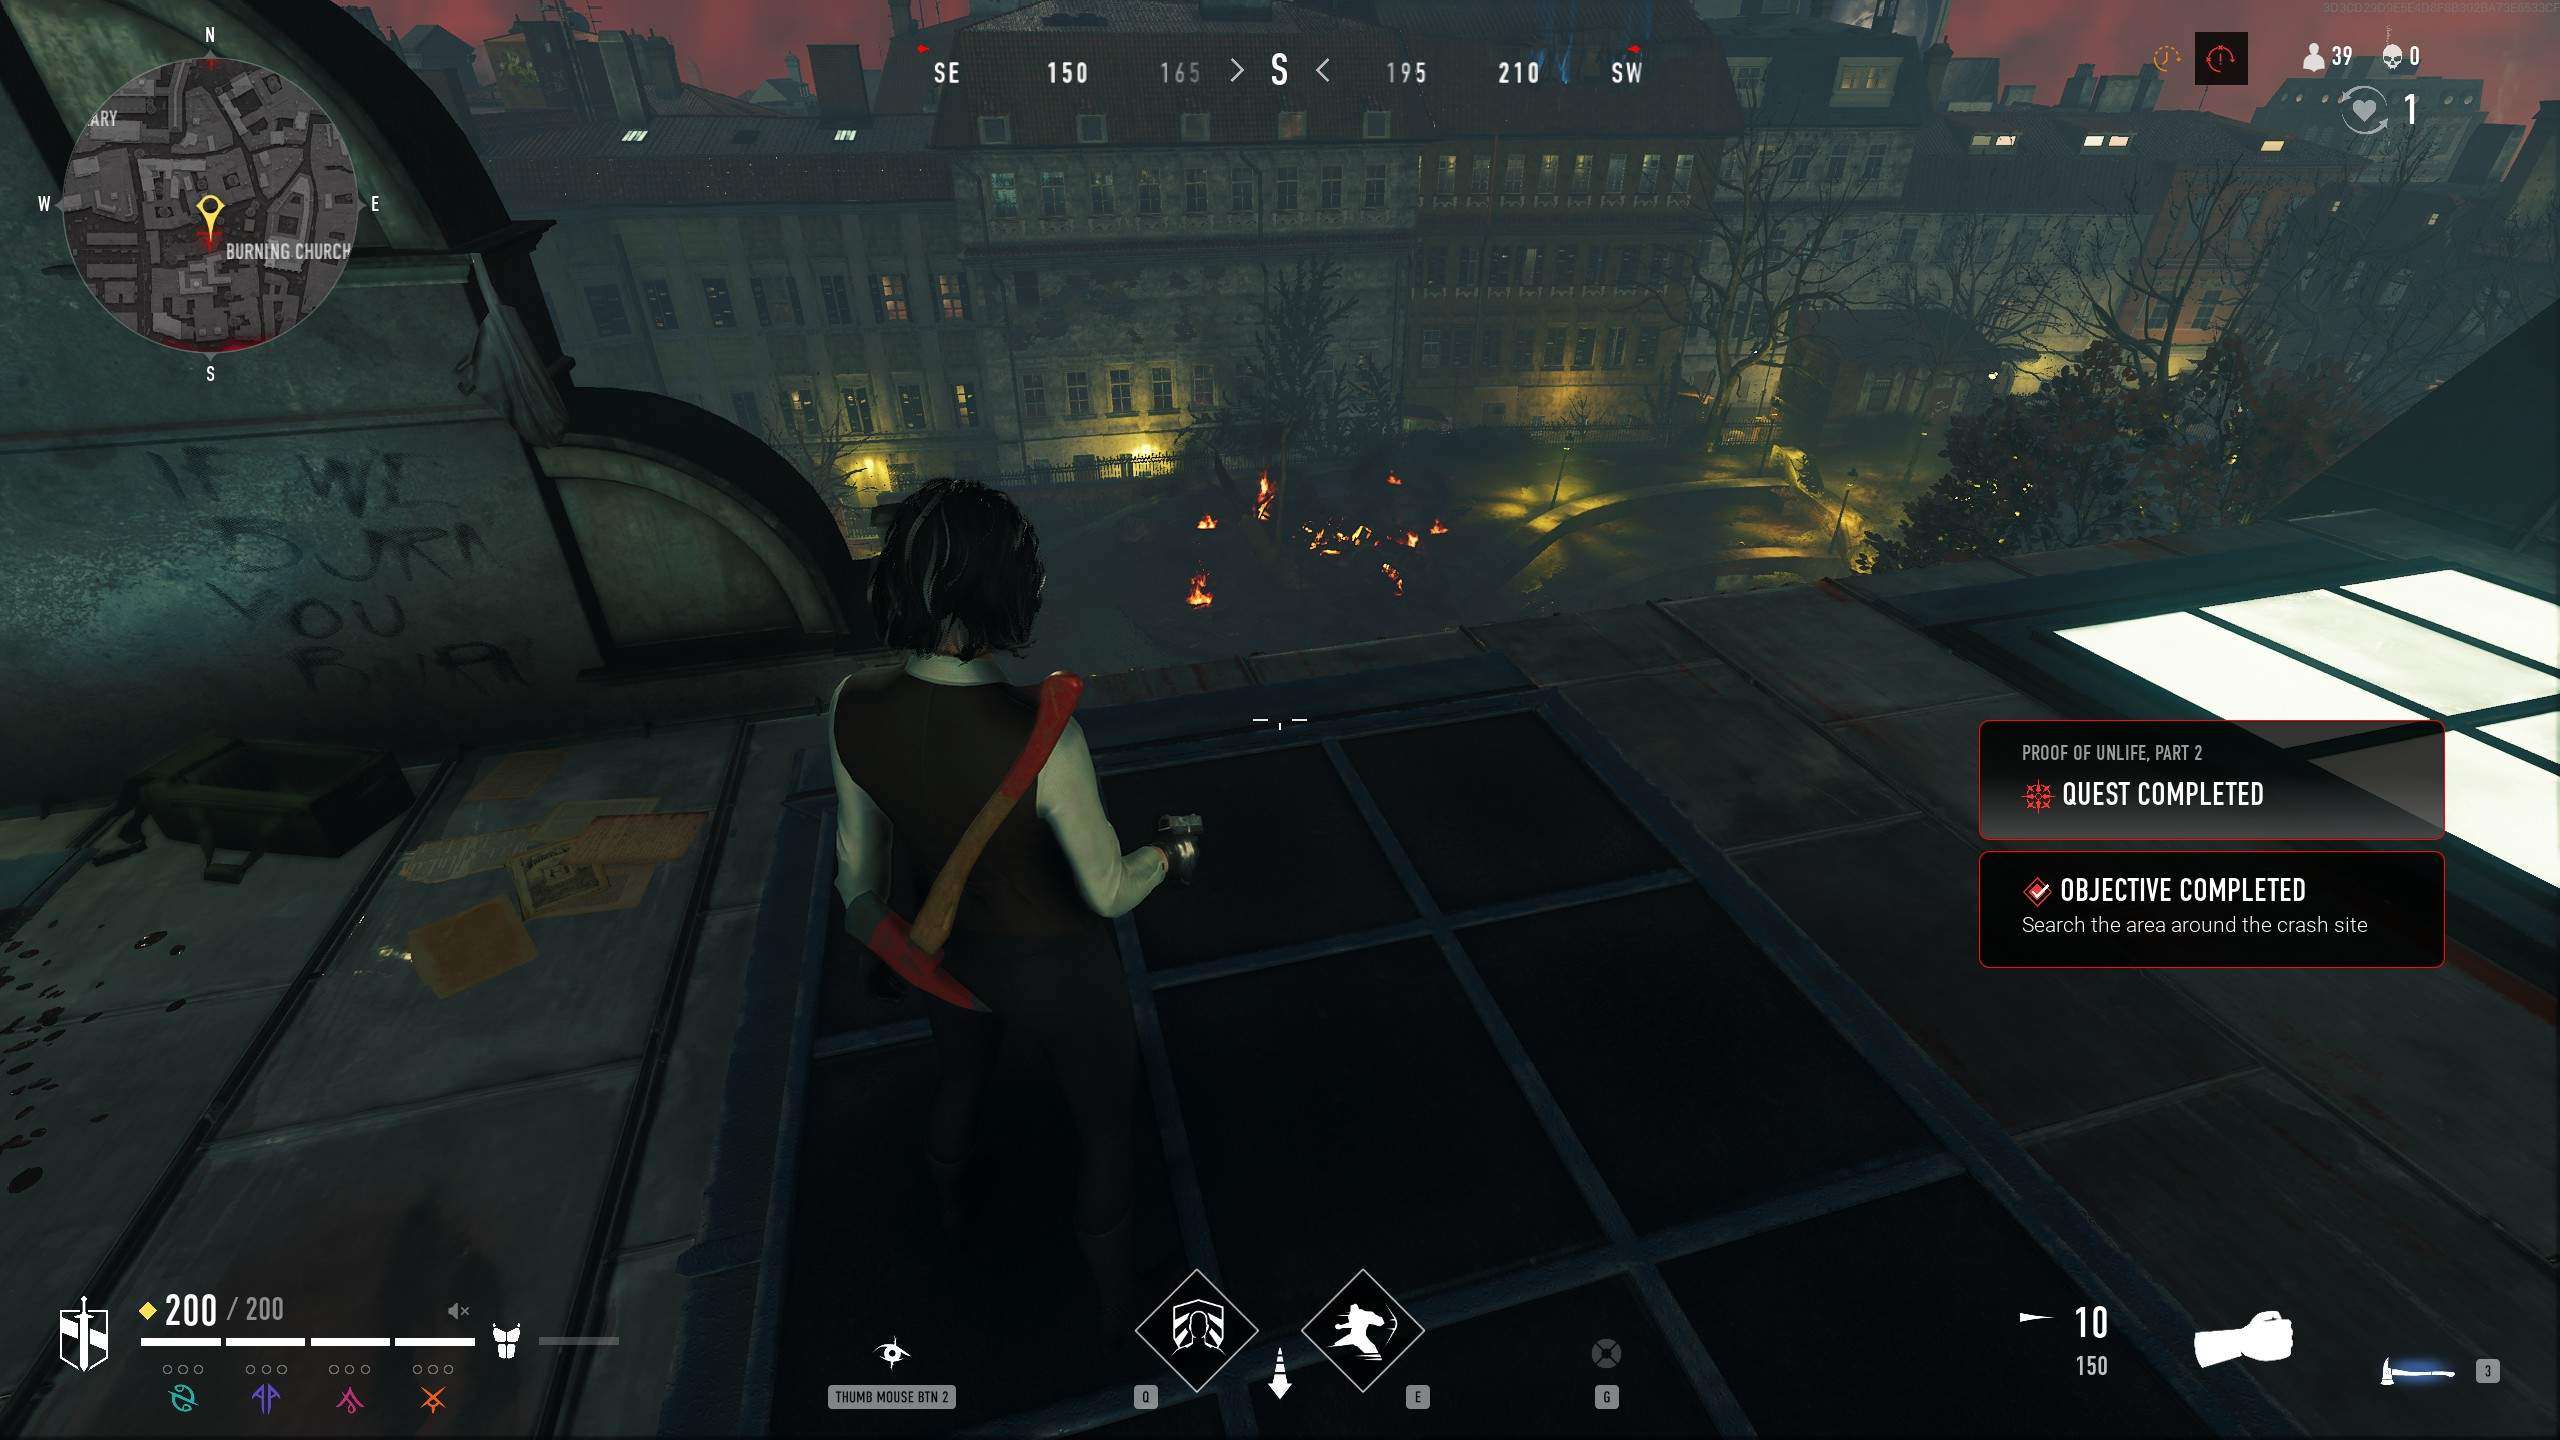
After finding the wreck, you return to Custos with a journal entry confirming that your ally made out of the area alive. You are now tasked with finding her current wherabouts and are told to survey the crash sight for clues. Return to the sight of the crash and take a more aerial view north of the crash site to see what you can find:
Part 3:
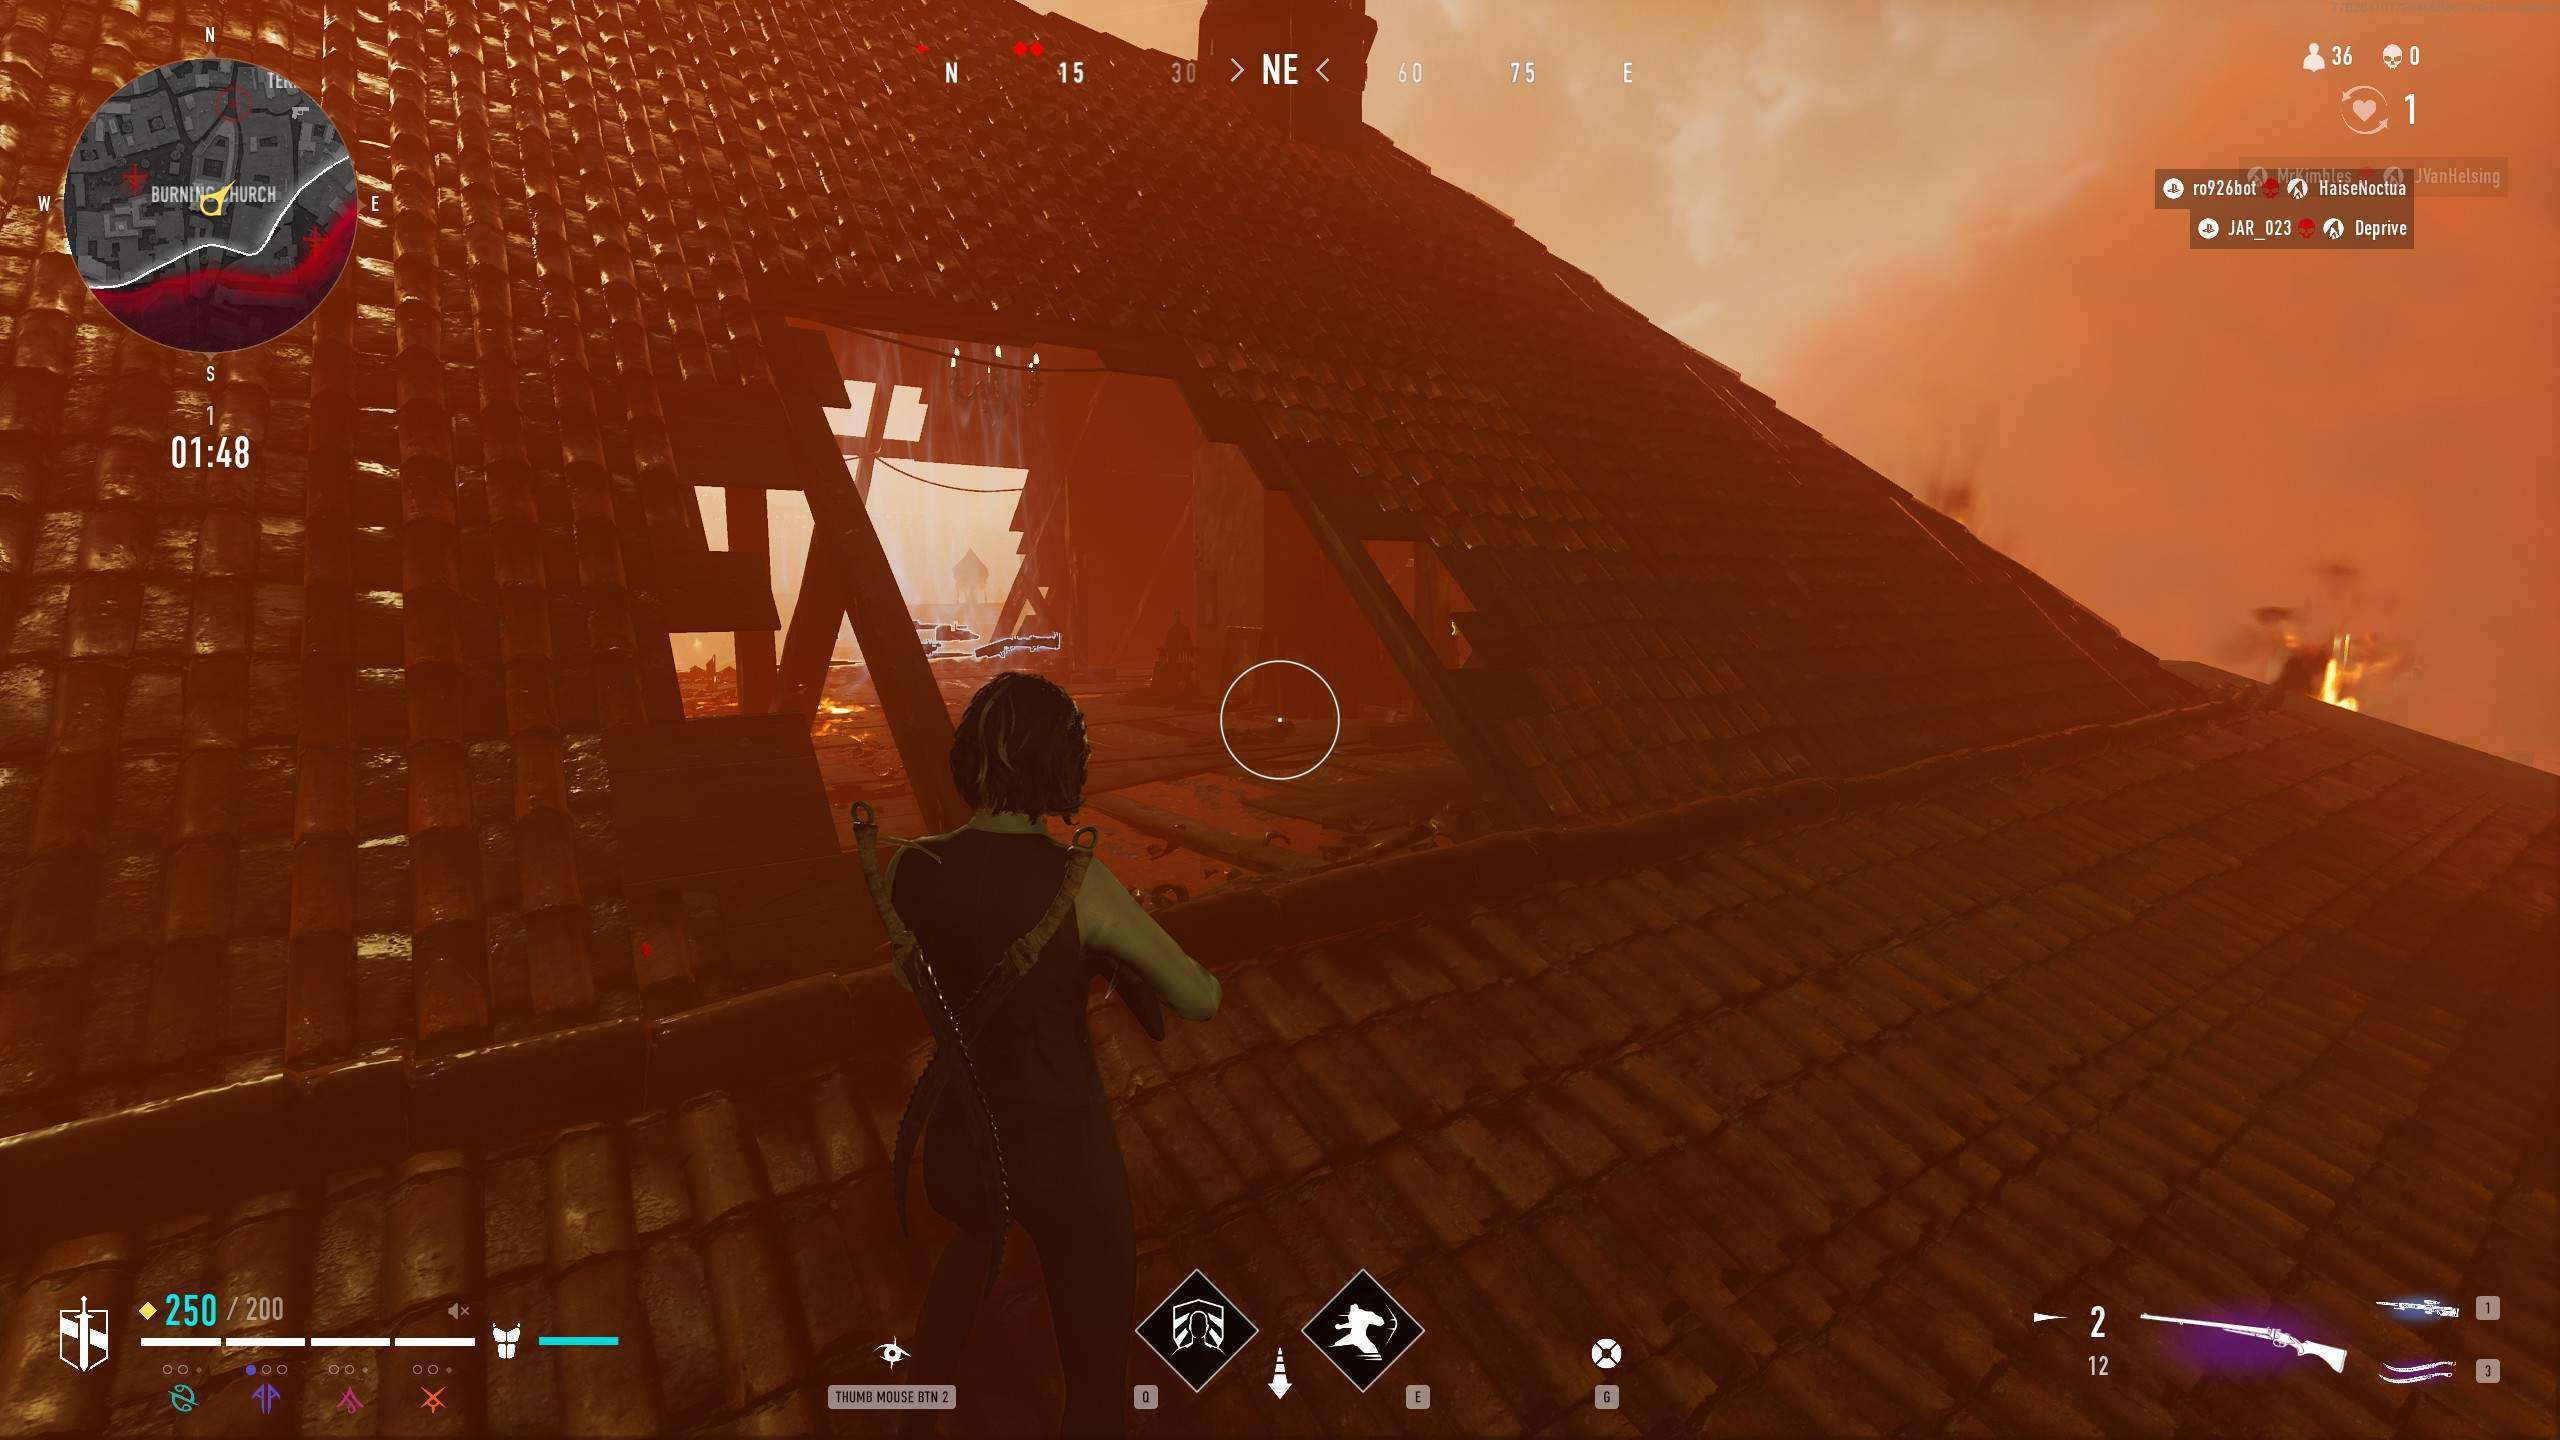
You return from the crash this time with an Entity report that indicates the helicopter was taken out by an RPG and you are told to find where the shot was taken from. Head up to the top of the burning church to investigate and complete this part of the quest:
Part 4:
Returning once more, you give Custos a note found that indicates the person in question has met their demise. Custos accepts the news and indicates that Maia wishes to speak with you. Head to her now and see what she wants.
Part 5:
Speaking with Maia, you learn that missing Kindred was a friend of hers as well. Maia is convinced that she yet lives and sends you out to seek further clues to the southwest of the Burning Church.
Part 6:
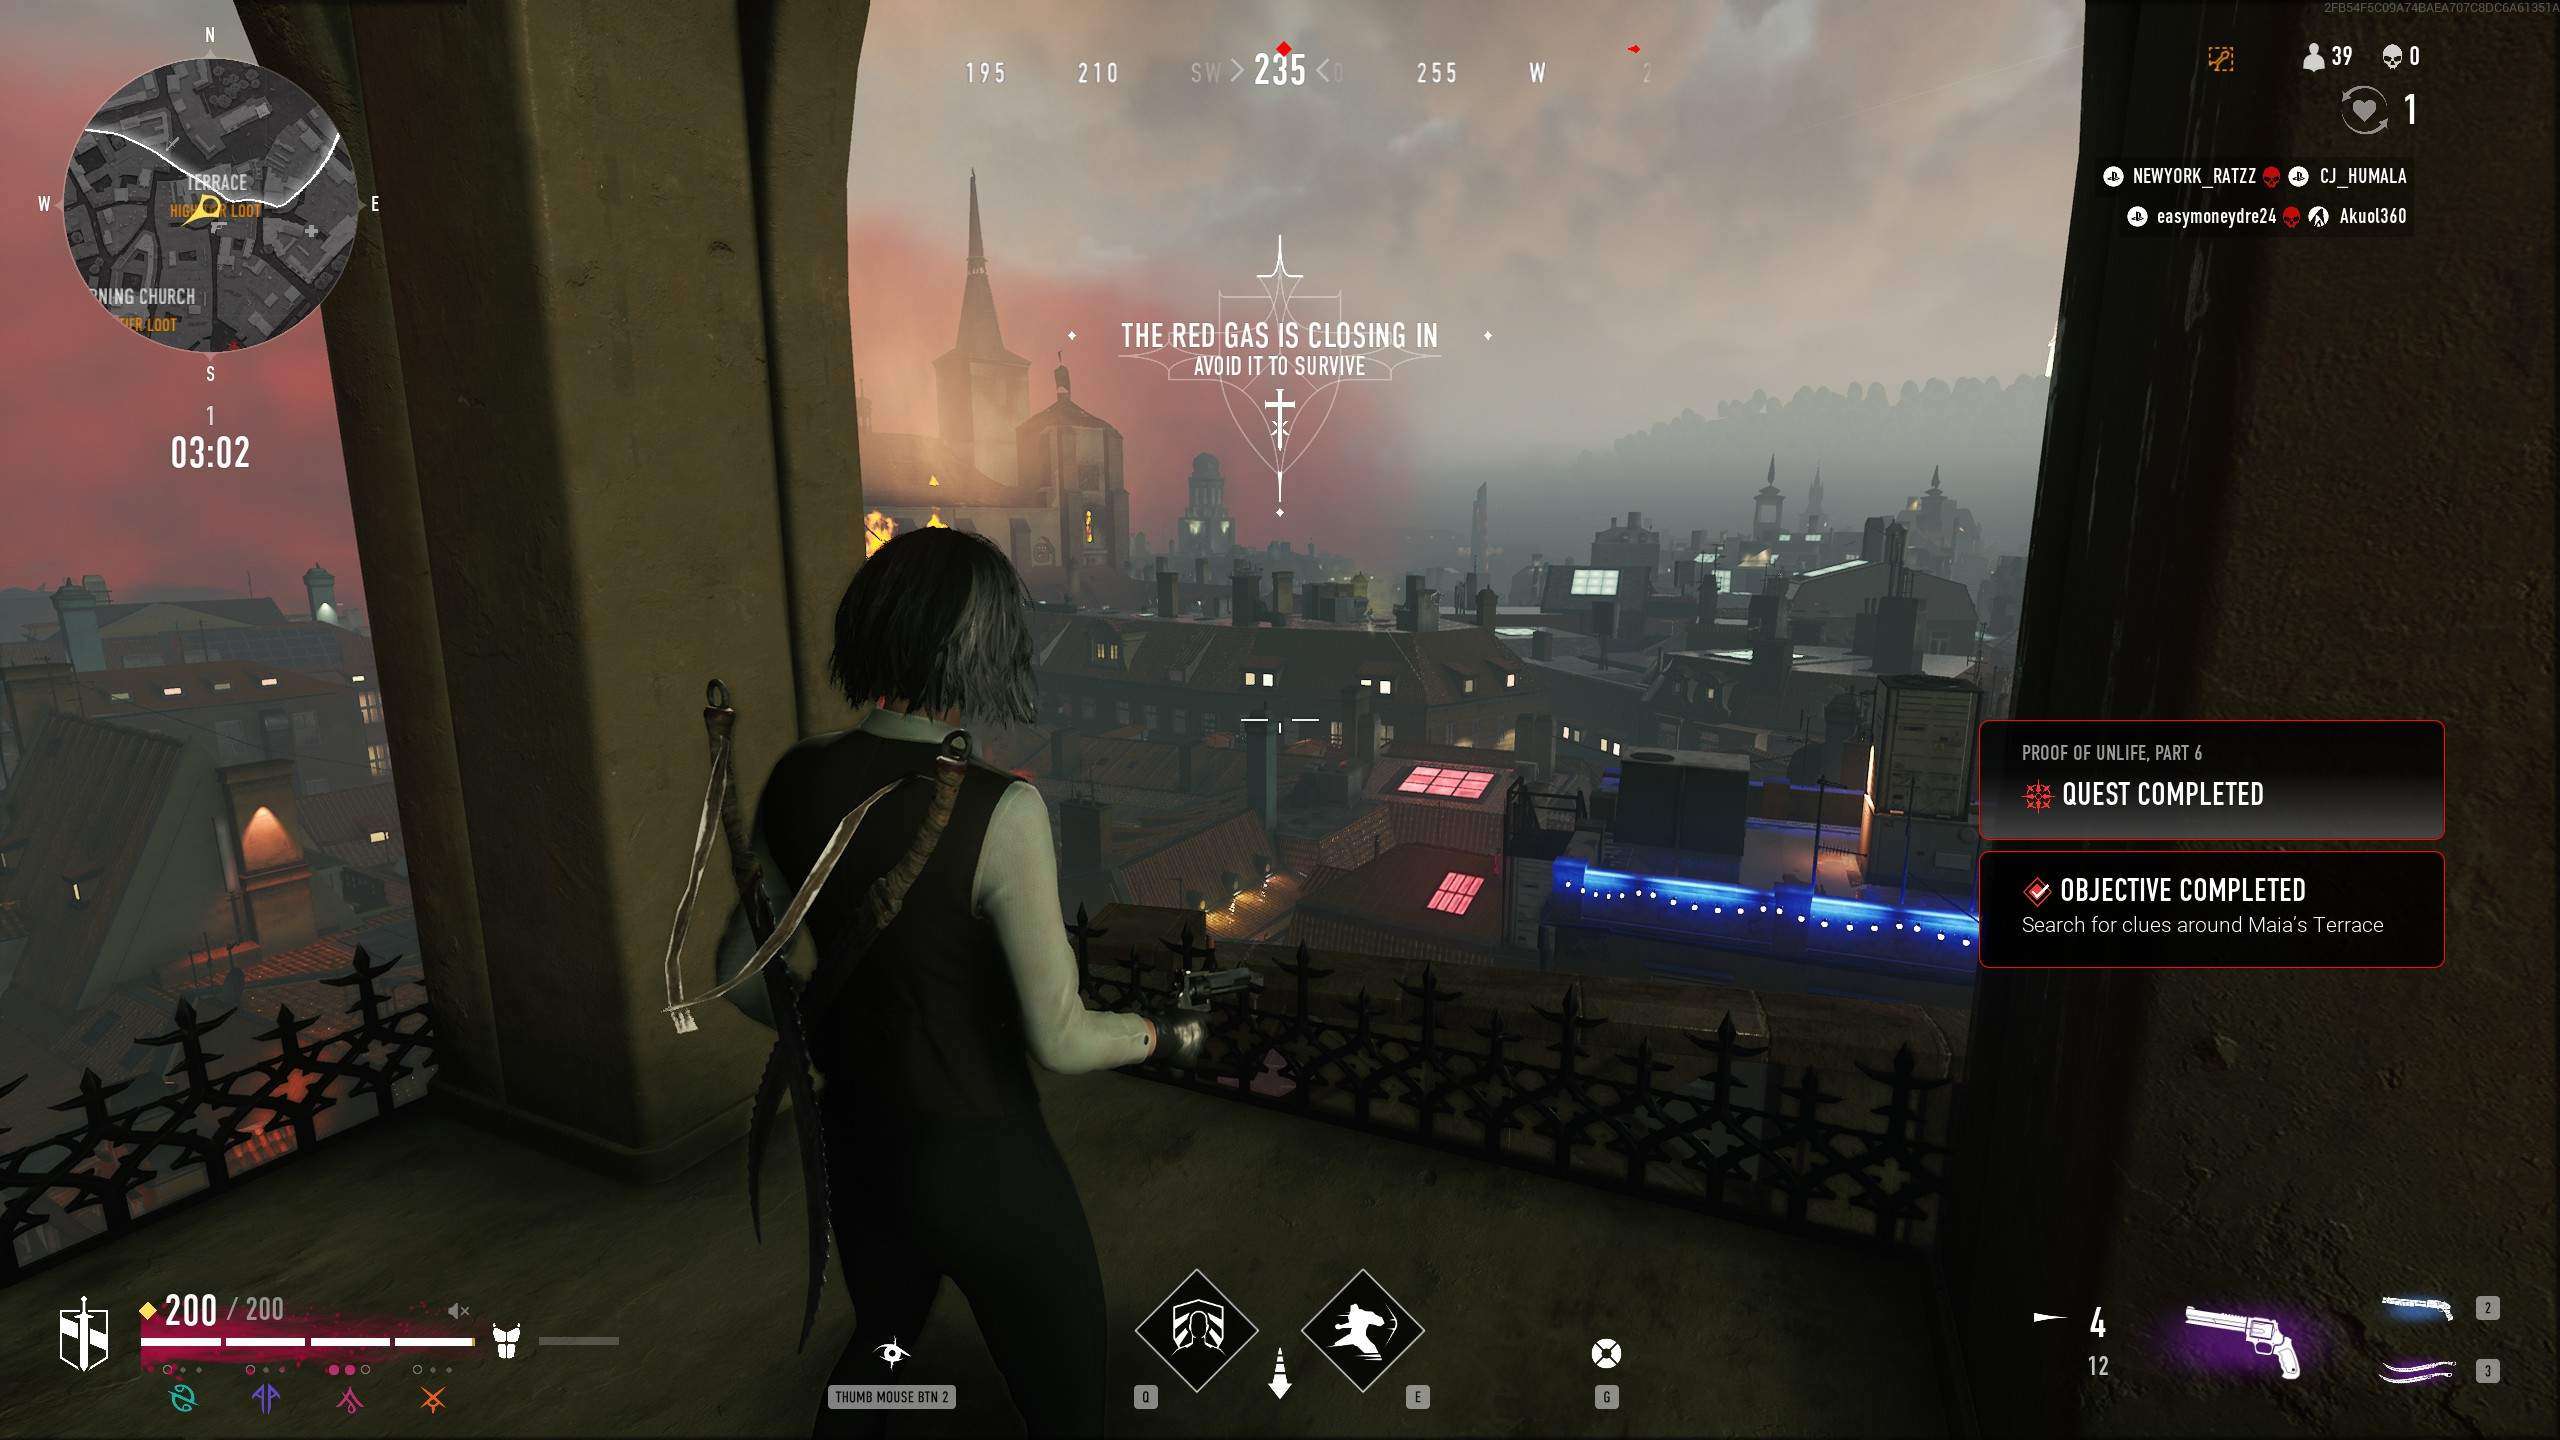
You return to Maia with an Entity report that hints her friend may have escaped them. Maia believes she may have retreated to the Terrace. Head there to look for more signs. For this objective, I had to stand in the spot depicted for about 5 seconds so if it doesn’t complete immediately, do not fret:
Part 7:
Returning to Maia, you report that you found signs of her friend at the Terrace. A relieved Maia informs you that Kirill has requested your presence.
Part 8:
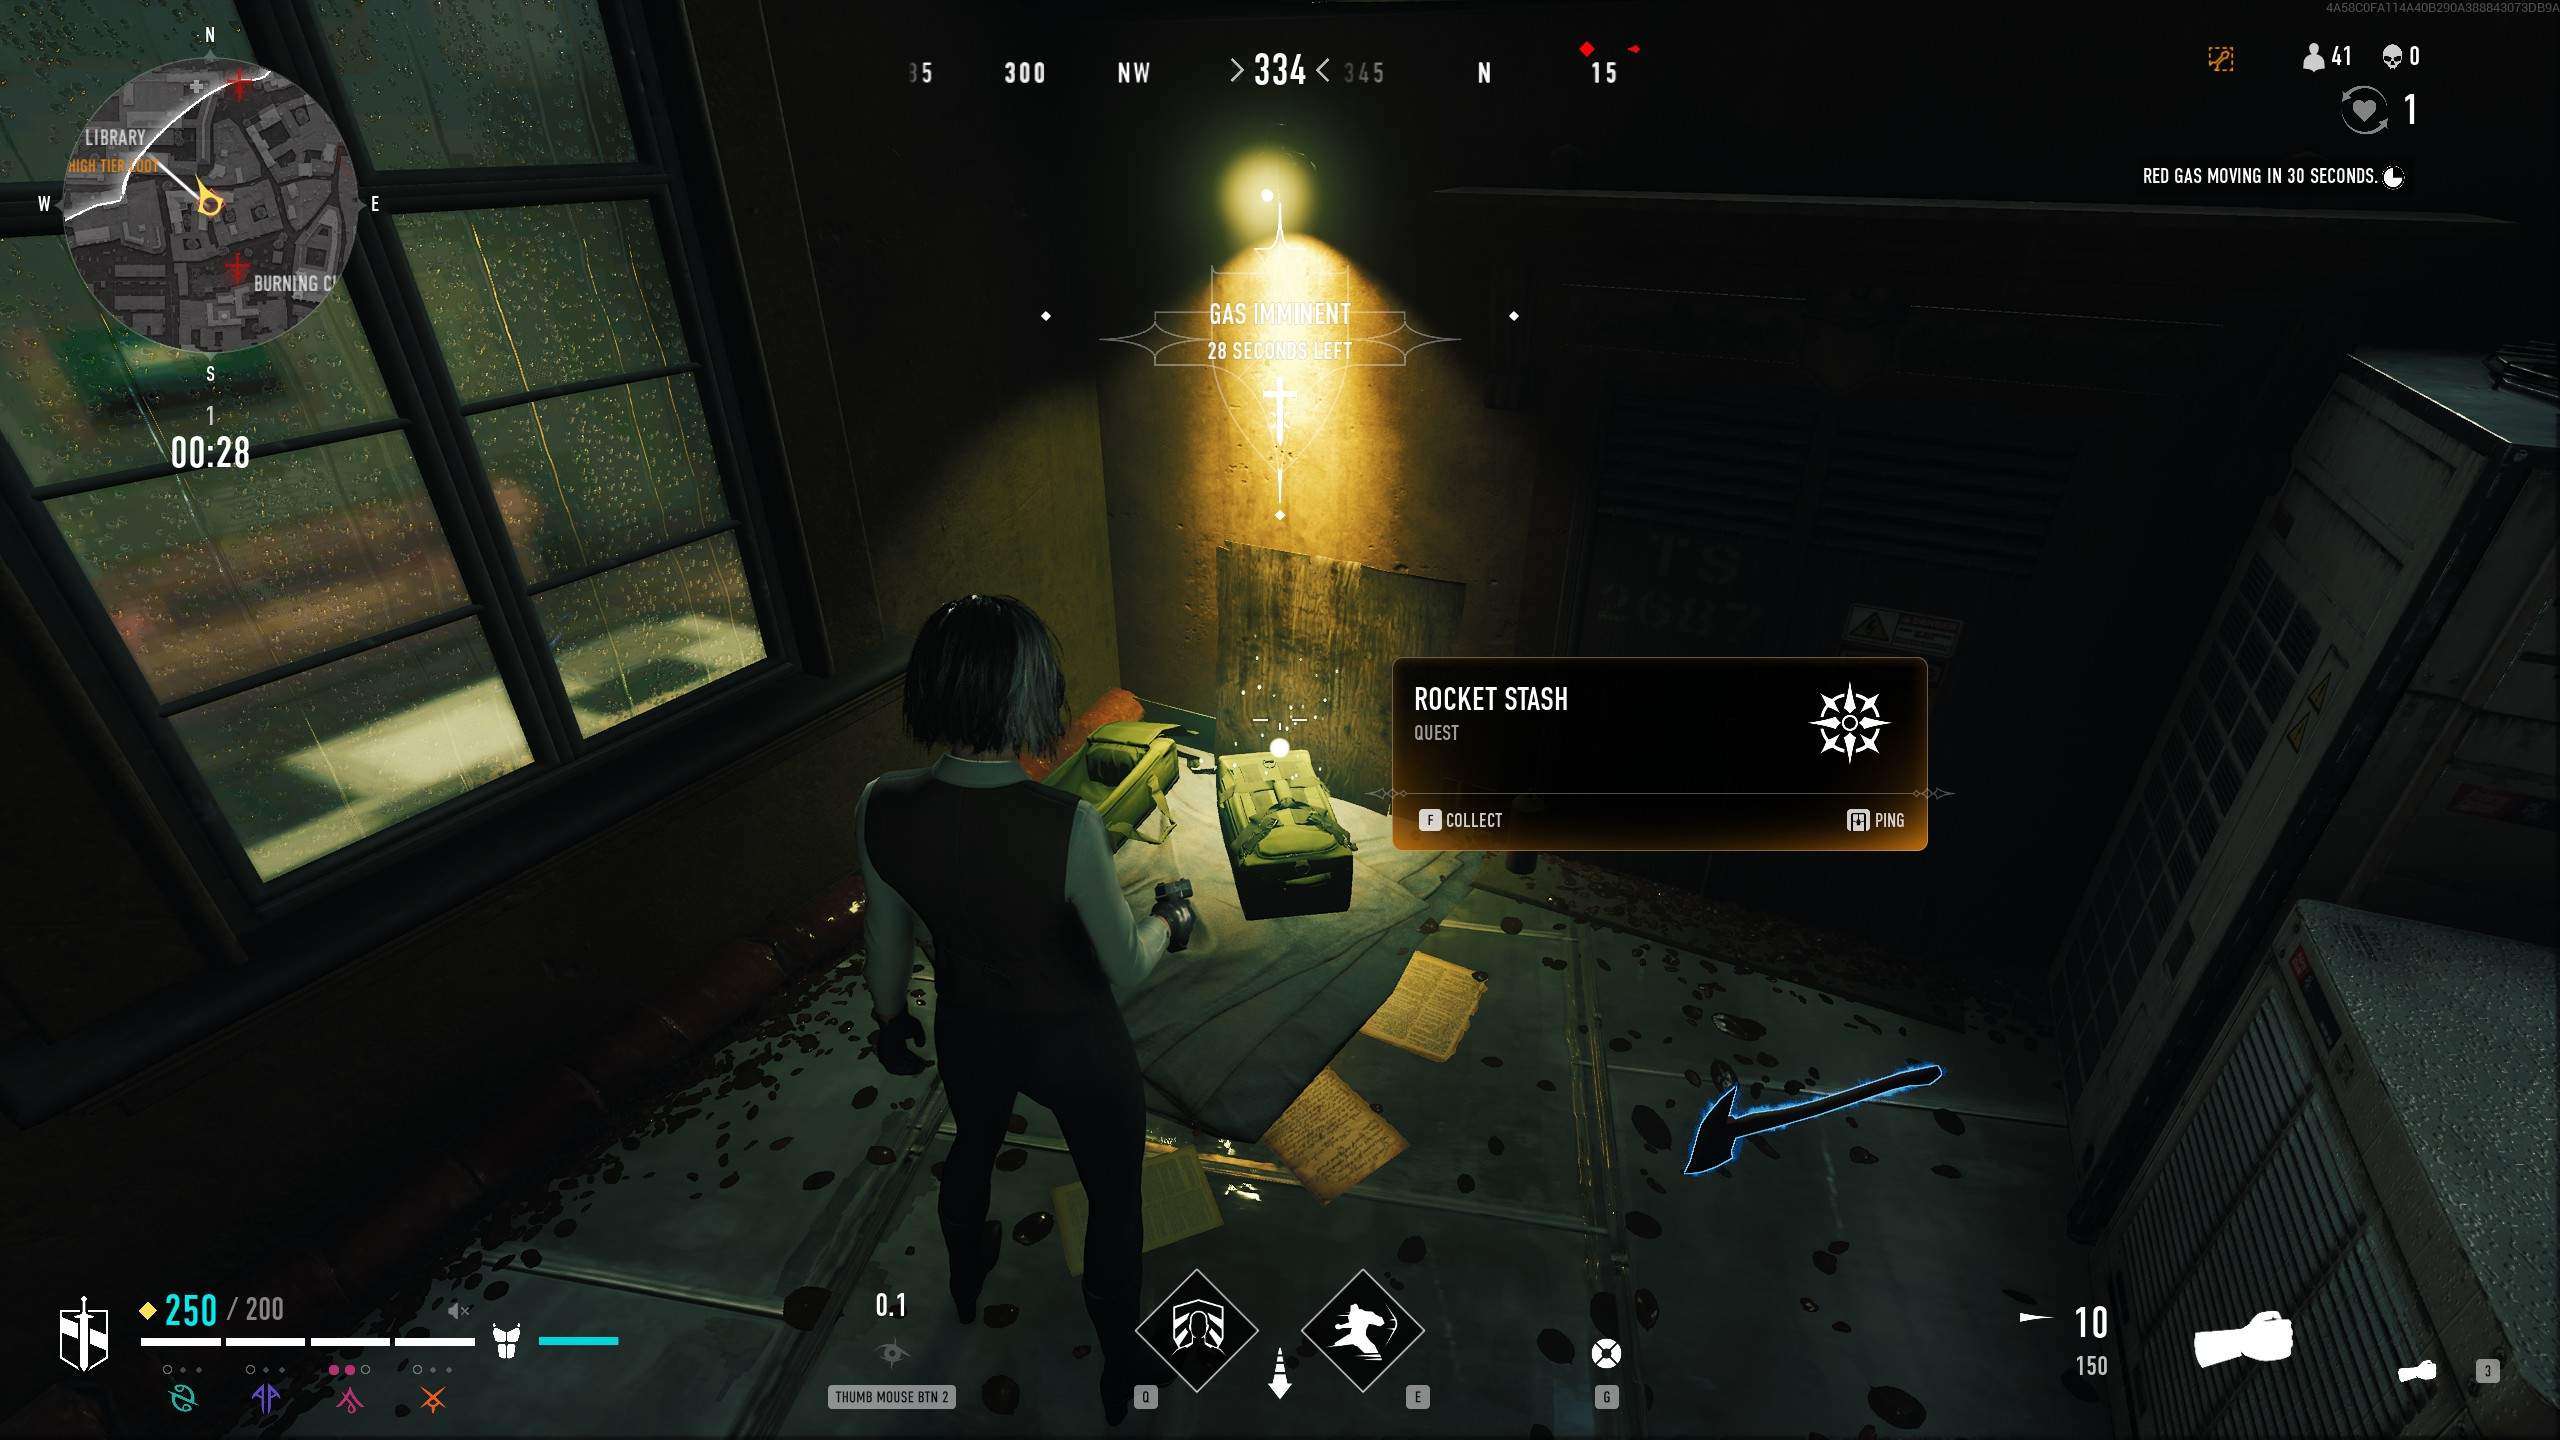
Kirill wants you to grab some ammunition for him, and points you toward a crate of ammunition. Heading out to the city, you locate a bag full of rockets north of the Burning Church:
Reward:
Returning to Kirill, you discover that none of the rockets are missing from the bag, meaning the mystery of how the helicopter crashed is still present, but that line of inquiry ends for now and you received the “Rorschach” Player Banner for completing the quest.
It should be noted that this banner is identical to the “Fleeting” Player Banner received from the Founder’s Season Battle Pass. This may be a bug and the visual appearance of this banner may be changed at a later date.

Casus Belli
Kirill is ready to reveal the first real steps of his plan that he’s been preparing for. It should be noted that all objetives for this quest involve performing specific tasks and/or using specific weapons in matches, and there are no objects to collect in it.
Also note that all objectives can be completed across multiple matches, so you do not have to worry about doing everything for each step in a single game if you struggle with some of the objectives required.
Part 1:
Speak with Kirill and he informs you that it’s time to strike hard against the Anarchs. Your first task is to enter the city and deal 300 damage to enemy players.
Simply use any weapon or ability that deals damage, making use of whatever method you wish to in order to complete it.
Part 2:
Returning to Kirill, he praises you, but says there are more Anarchs out there begging for death and sends you off again immediately. Your next task is to down 3 players with the a Double Barrel Shotgun.
Weapons can be found scattered across the map, laying out in the open or enclosed in special chests, or hidden in vans. Keep searching until you can secure a Double Barrel and let the hunting begin.
Part 3:
Kirill is just getting warmed up. Speak to him again and he assigns you the task of scoring 40 headshots on enemy players using a Burst Rifle. The Burst Rifle is a weapon used by the Entity and one is carried by nearly every Entity hunter on the map. It can be acquired by entering one of their areas and finding one or defeating one of their number and taking it when it drops from their body.
Afterward you must land headshots with the weapon against enemy players. Don’t fret if you have trouble with your aim as one method you can use to ensure success is to down an enemy with your preferred weapon, and swapping to the Burst Rifle while they are down and finishing them off with headshots from it. A downed enemy moves much slower and predictably and cannot fight back, ensuring you land multiple headshots before they die. Repeat as needed to finish the objective.
Part 4:
The success of the previous task will ensure confusion within the Anarch ranks, as they will now believe the Entity is hunting them in force. Kirill has yet another mission in mind though. Anarchs are now running wild and killing anyone they come across, breaking the Masquerade.
He tasks you to hunt down 2 enemies who have had a blood hunt called on them. When an enemy player has a blood hunt on them, they are visible even through walls as a bright red silhouette and will be visible on the map as well. Just head for them and get the drop on them, but be wary of other players who may be hunting them as well. As the objective here is to ELIMINATE the player, it is not required that you be the one to down them. Use this to your advantage if you have trouble facing off against another player openly.
Part 5:
As you continue to prove yourself to Kirill, he offers one final task: Eliminate 3 enemy players from Clan Brujah. As with the previous step, the task is to ELIMINATE as opposed to downing the enemy so keep that in mind. The Brujah clan includes the Brute and Vandal archetypes. It can sometimes be hard to determine what you are up against until you’ve already engaged the enemy, but keep and eye out for the Brujah clans distinct movement ability “Soaring Leap” to clue you in when watching an enemy from the distance.
The best method here though may be to just play and enjoy the game and you will eventually score the kills you need.
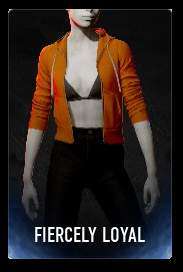
Reward:
Once you get your final kill, you will receive the “Fiercely Loyal” outfit upon returning to Elysium.


I have been looking for a very long time how to complete the 6th part of the mission “Proof of non-life” THX
Agree the last reward should be something better then a recolor i might just skip out on the quest if the rewards are just poo and nothing to show off
Part 6 of “Proof of Unlife”, there’s a table with wine to the right of the tower in the screenshot. That’s where the quest triggers.