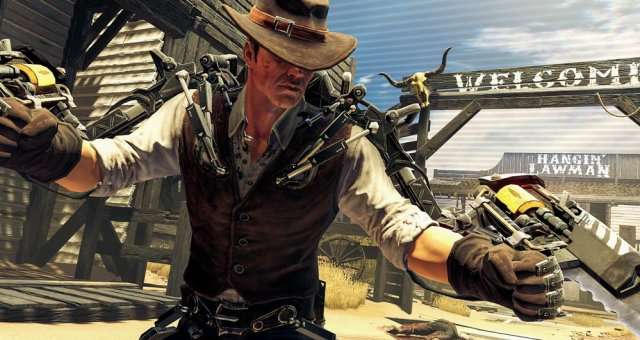
Achievement Guide for The Surge’s The Good, The Bad and The Augmented DLC.
Risk Assessment
Finished an episode with at least 1 modifier turned on
Very easy to do, just pick one of the 16 modifiers and go to town. I recommend playing your first episode without any so you can get a hang of how everything works and open some map shortcuts. There’s a limit of 4 modifiers (one from each row) and at one point or another you’ll be doing all of them, many times 4 together so better get used to it.
Desecration
Destroyed all graves in “Frontier Crypt”
The Frontier Crypt location can be found in episodes 3, 5 and 8 and it’s as easy as it sounds. Throughout the map are gravestones and all you have to do is sprint into them and they’ll crumble. Personally, I got this achievement after breaking maybe three of them so it seems to be a little buggy right now.
One-Armed Bandit
Cut 42 arms in the Testing Chamber
Another simple one, but don’t worry you’ll be cutting off all sorts of appendages by the time you’re done with the other achievements so you should get this naturally as you play.
Modus Operandi
Finished an episode with the 4 hardest modifiers turned on
This one requires you to use the following modifiers (some modifiers require you to finish certain episodes first):
- Leech – player and enemies steal each other’s life. no injectable use.
- Rush Hour – a timer is set on Warren’s life. successful kills buy him more time.
- Epicenter – every once in a while, a flame pit opens up right below Warren.
- Black Belt – dispense pain with your bare fists. hitting armoured body parts will wound you.
First off, this set of modifiers forces you to attack bare handed, which counts as twin-rigged, but you’ll do a surprising amount of damage. The downside is attacking armoured body parts will hurt you. The upside is that lifesteal from Leech will balance that out buuuut then the only way to really heal will be to attack unarmoured parts. As you can imagine, this will make the boss fights a little tricky since they’re fully armored. Epicenter will drop an AOE circle with a short fuse that will damage and set aflame both you and enemies. You can use this to your advantage but it means you’ll need to be mobile enough to avoid getting hit while leaving enemies inside the ring.
It’s easiest to just do this on Episode 1 since the enemies will be lower level and you’ll need easy kills to keep your health and timer up. If you have trouble, remember that a good implant setup can make up for your weaknesses here (since you can’t use injectables with Leech active you can swap them out for something more useful) and don’t forget that you can rely on your drone too. The Concussive Module is a personal favorite of mine in boss fights!
Gramophone Enthusiast
Collected all 7 audiologs found in the Testing Chamber
As you complete episodes, these audiologs will pop up on a table near the Gear Assembly station. Don’t worry if you forget to check back, they’ll stick around until you pick them up.
Episodic
Finished every episode
Speaks for itself. That being said, Episode 9 is a bit trickier than the others. At this point you’ll be facing top tier enemies as well as Nano Masses scattered throughout the maps. You might as well go in without any modifiers and use the shortcuts so you can save any injectibles you might have. The final boss will have three different “traps” active instead of one and on top of that you’ll be fighting all three bosses at once. The Undertaker will be the main boss but La Muerte and Totem Wolf will have just as much health as usual so don’t bother taking them out first. The good news is that as soon as Undertaker dies the fight ends and everyone else keels over at the same time.
You really want to focus on burning down the Undertaker as fast as possible and dismember as soon as you get the option. Like previous boss encounters, at some point around half health or less he’ll kneel down and use an injectible heal over time except this time around it’s a lot more powerful. Do what you can to interupt him or the fight is going to get that much longer. It took me a couple of tries but I did the DLC in NG+ in old Mk IV gear so it’s probably not as bad as it sounds.
End of Transmission
Turned off Rischboter
After you complete Episode 9 and empty the safe you’ll go down into a room to meet the “Supervisor”. There will be a station in plain sight with an audio symbol on it and you can interact with it to finally mute the *BLEEP*ing *BLEEP*hole.
Bling-Bling
Acquired all Frontier Gear Western Attire
All “attire” gear pieces are obtained from completing an episode with modifier challenges or using combinations of modifiers. One final piece is given for completing Episode 9. Here’s a list of each and what you need to do to get it:
- Dillon Head gear – Leech modifier
- Cap Horn head gear – Vintage modifier
- El Capitan head gear – Chrono-master modifier
- Conquistador head gear – Short Fuse modifier
- Shades of Black head gear – Danger Close modifier
- Malsum head gear – Epicenter modifier
- Duke head gear – Polterguys modifier
- The Mighty Hawk head gear – Black Belt modifier
- Duke leg gear – Energy Dynamo modifier
- El Capitan leg gear – Fire and Brimstone modifier
- Going Native leg gear – Cut-and-Go modifier
- Golden Dillon head gear – combine any two modifiers
- Going Feral head gear – combine any three modifiers
- Smirking Luchador head gear – combine any four modifiers
- Smiling Luchador head gear – complete bottom row of modifiers
- Shades of Gold – complete Episode 9
Suited and Booted
Acquire All Frontier Gear Sets
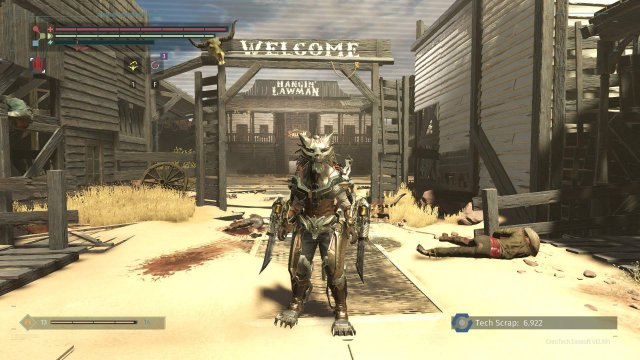
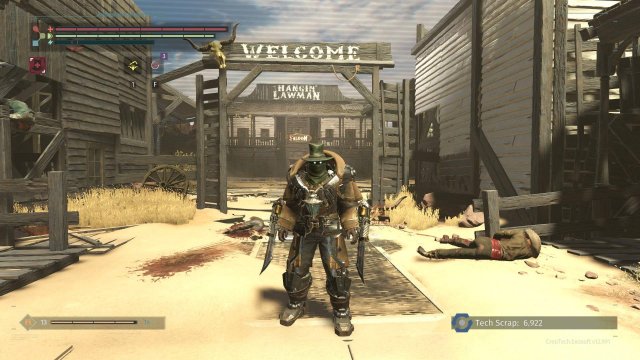
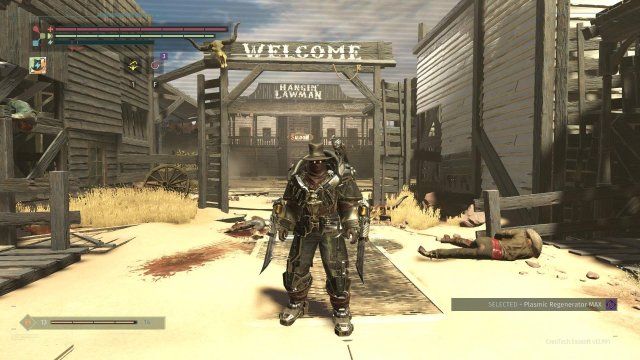
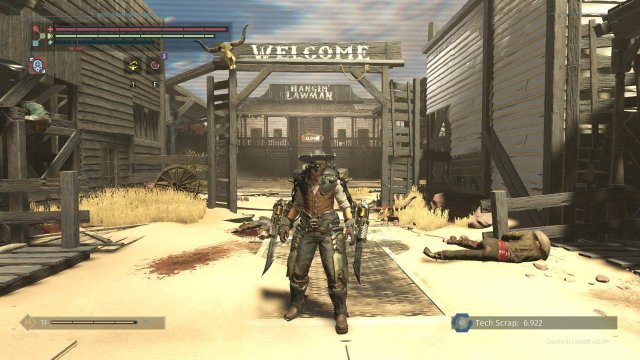
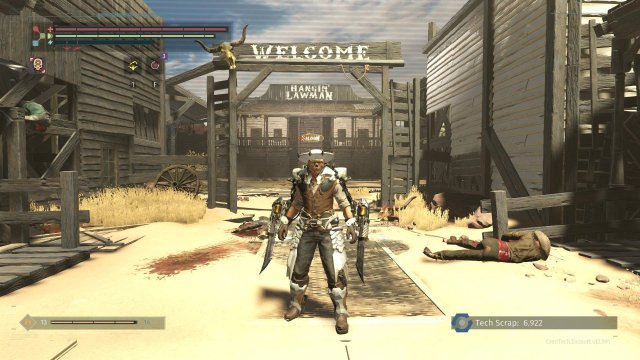
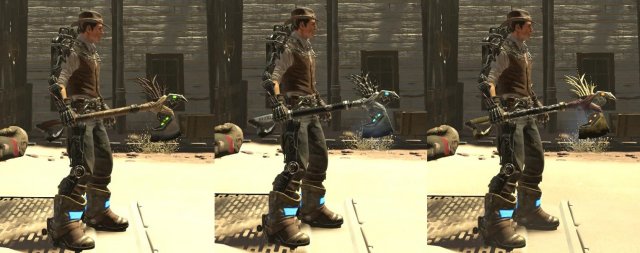
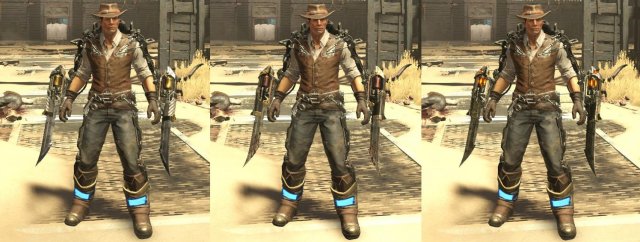
Now here’s where things get a little tricky. There are two 2 version of each of the 3 gear sets in this DLC. The regular version can drop from any regular enemies (more common in higher episodes) and the rare version drops only from bosses. Which piece of rare gear if any a boss will equip will be random and depend on how many challenge modifiers you have active. More modifiers means a higher chance! The difference in appearance between the different versions can be subtle and you’ll have to take a close look at the boss before you decide which part you want to dismember. This achievement requires you to collect the schematics AND craft both versions of each set for a total of six full gear sets. Since you can only get one schematic from a boss per run and it’s random, this will probably take a little grinding. Remember to use modifiers! In case you’re curious, I’ve listed the gear sets bonuses as well. Here’s some screenshots to show the differences in appearance:
Spirit Animal (Sentinel) – drops from regular enemies and Totem Wolf’s standard gear. (Grants a damage boost each time an enemy is hit, but reduces damage each time you get hit).
Westwolf (Sentinel) – drops exclusively from Totem Wolf as rare gear. (Grants a high damage boost aftear a succesful jump or hop attack).
Stealthy Assassin (Goliath) – drops from regular enemies and Undertaker’s standard gear. (Grants healing after cutting limbs and allows healing above full health).
Secret Assassin (Goliath) – drops exclusively from Undertaker as rare gear. (Converts energy above full to stamina and increases impact each time this happens).
Angel of Death (Operator) – drops from regular enemies and La Muerte’s standard gear. (Grants emergency healing below 25% health. only usable once and refreshes after using medbay or first aid station).
Grim Fashion (Operator) – drops exclusively from La Muerte as rare gear. (Causes all actions to cost health as well as stamina but grants healing after each succesful attack and enables users to heal over the standard limit).
Good luck!
Tools of War
Collect All Frontier Weapons
There are 3 versions of each weapon type in the DLC and they can be collected by completing certain modifier challenges or dismembering them from bosses or regular enemies. Each boss carries certain types of weapons but will equip them at random. The chance of getting a boss to equip a higher rarity weapon version can be increased by adding more challenges. Beyond that it’s pretty random and will take some grinding. Make use of each map’s shortcuts to get to the bosses faster.
Staff
- Pattern 20XX Infantry Rifle – Totem Wolf boss.
- Pattern 30XX Infantry Rifle – Totem Wolf boss.
- Golden Infantry Rifle – Lactose Tolerant challenge modifier.
One-Handed
- Tamahaac – Totem Wolf boss and regular enemies.
- Tamahaac DX – Totem Wolf boss.
- Golden War Axe – Complete all top row challenge modifiers.
Single-Rigged
- RIP (Rest in Pieces) – Undertaker boss or regular enemies.
- RIP Special Edition – Undertaker boss.
- RIGP (Rest in Gold Pieces) – Complete all third row challenge modifiers.
Twin-Rigged
- B0-W1E Twin Blades – La Muerte boss.
- B0-W1E Twin Blades Deluxe Edition – La Muerte boss.
- Golden Twin Blades – Arms Race challenge modifier.
Heavy-Duty
- Grim Ravager – La Muerte boss, Undertaker boss or regular enemies.
- Grim Marauder – La Muerte boss or Undertaker boss.
- Golden Marauder – Combo Maker challenge modifier.







Be the first to comment