
This guide will explain the following:
- Gear.
- All imprints set.
- Skill tree.
Introduction
I hope that you all will be proud & strong kitties in the future. Because this guide will explain you how to get good with catspaw (class) in Kritika: Reboot.
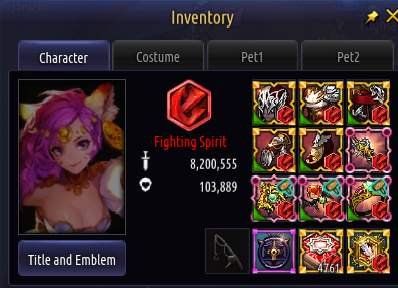
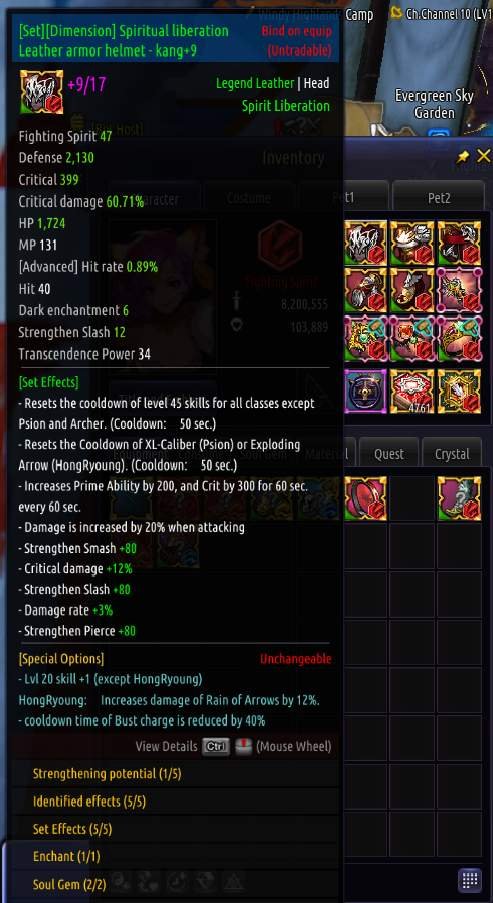
Gear
As many of you guys now, yes… Spiritual liberation is the current best set to go for on Catspaw / Siamese Lady class.
Although you can also go for Elemental tuner set for more damage.
Let me get straight to the point.
The Spiritual liberation set makes it the best set to go for this class, because it gives you full cool down reduction on lvl 45 skills for all classes. This includes the skill which is the strongest / most damage dealing skill for catspaw / siamese lady. (Note this set effect will only take effect when you got all 5 parts euipped of Spiritual liberation.
The Elemental Tuner set is the 2nd best set to go for catspaw / Siamese Lady. This because you will do more damage with your strongest skills. Yet it has no cool down reduction. Which means you can do that damage for a good amount but only once per xx amount of time, which you will have to wait again and again to use that skill again.
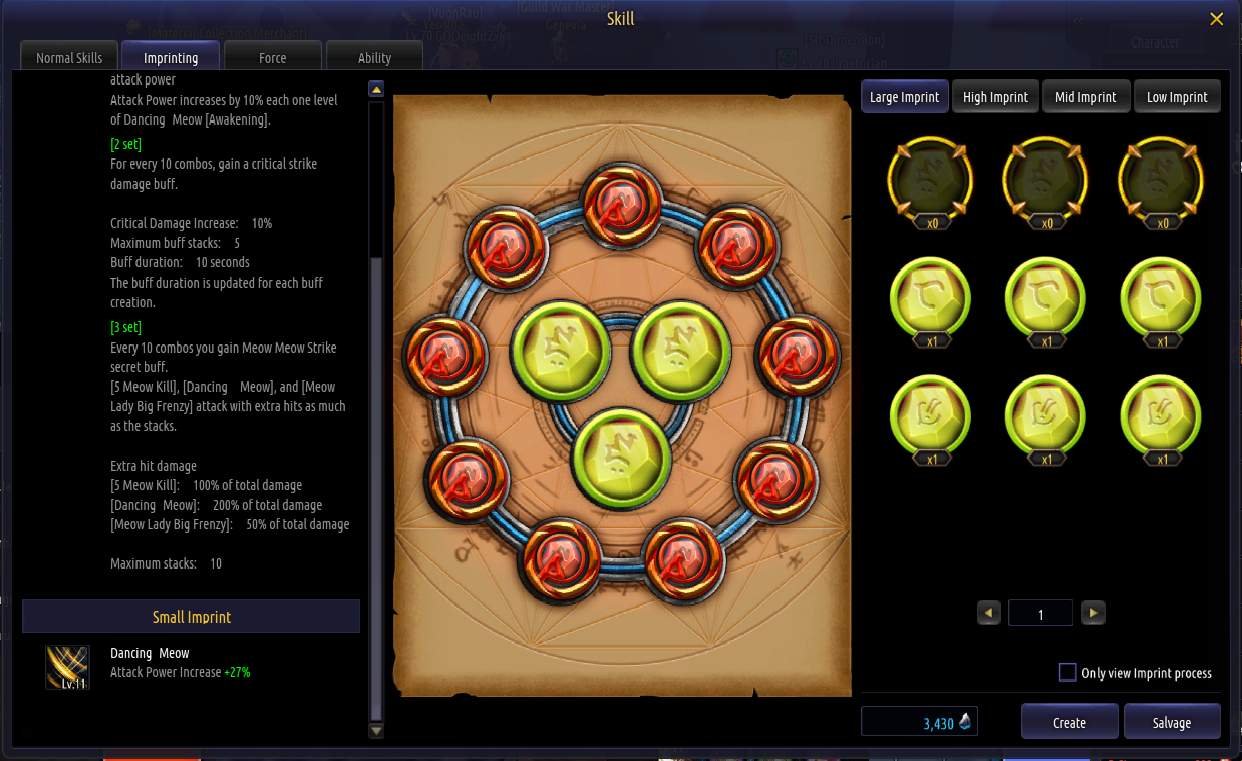
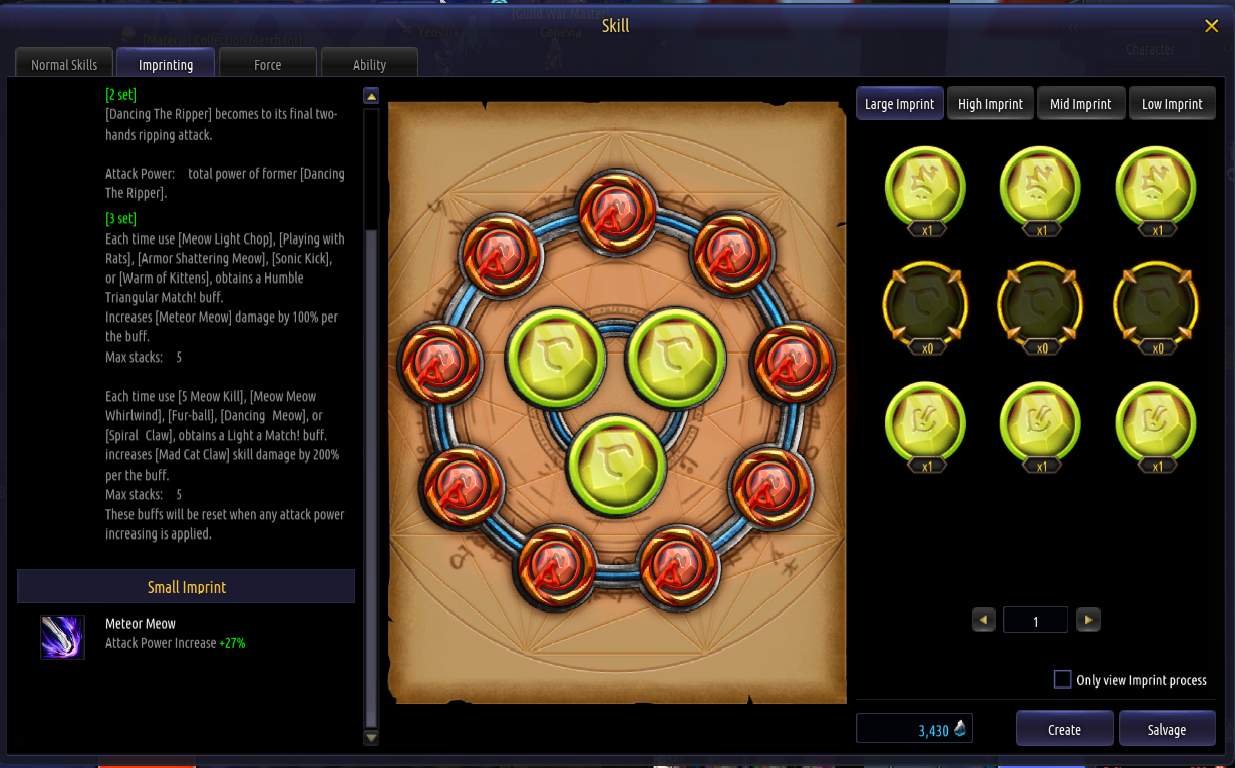
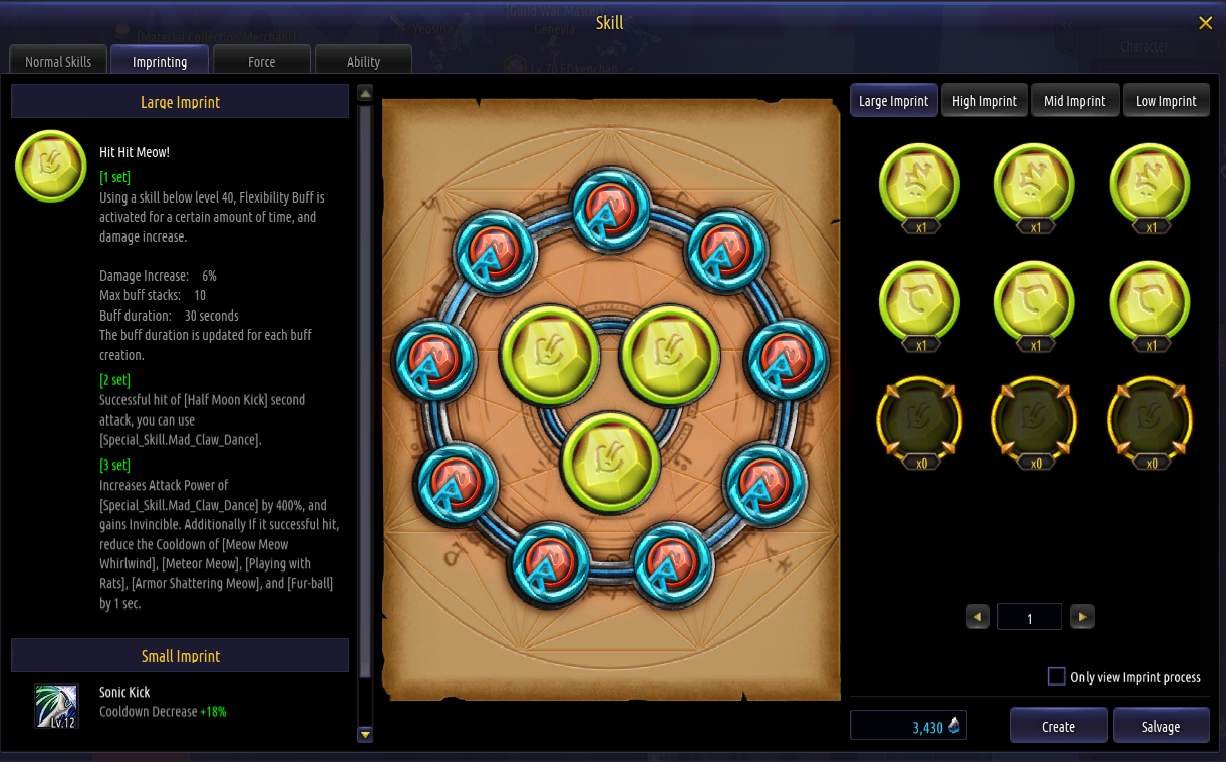
Imprints 1st Row
To get started with imprints I will already tell you that TOP ROW is the current best row of imprint sets on Catspaw / Siamese Lady. Note: Once in the month or maybe longer, the Devs might adjust some balances on classes. This already happened for Catspaw / Siamese Lady but in a lot earlier stage of he game. Even in the previous version of Kritika, the most used / best imprint set was middle row. Well now it isn’t that good anymore, yet still useful in some circumstances.
Top Row imprints & it’s superior skill bonus:
With this skill build you will have to mostly depend on 3 skills which are your most damage dealing skills.
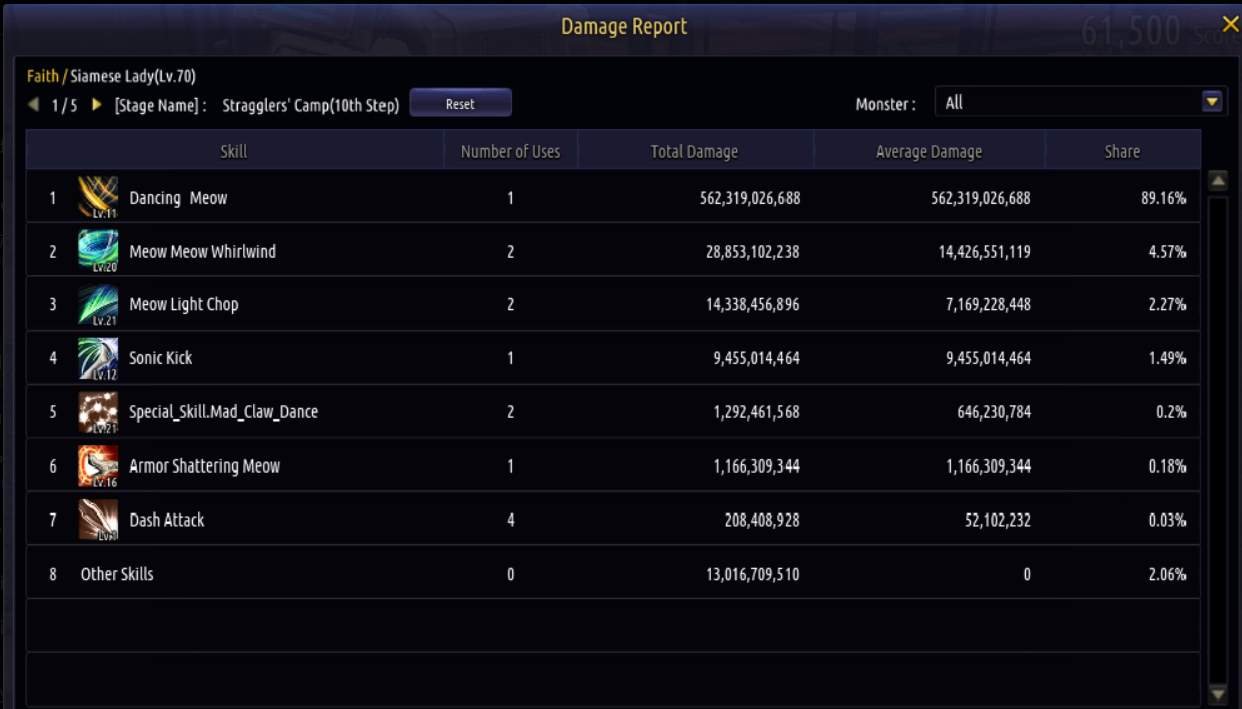
Skill 1

This skill will be your strongest skill & will do massive dmg the more stacks you have. You can gain more stacks by randomly using skills at enemy mobs (10 = the max stack you can have & the most dmg you will do with…. Those stacks are also used to get more dmg on Skill 2 & Skill 3, so once your stack is 0, you will do 0 stack bonus damage on Skill 2 & 3 as well).
Skill 2

This skill will be your 2nd best skill to use. it has rather a very short cool down. This means you can just spam random skills & use this skill every time it’s back from cool down.
Skill 3

This skill is the least dependable skill, yet one of the strongest skill you have. Bad part: it has a 90 seconds cool down & does like 2/5 +/- the Dmg of your Skill 1. With the right gear, jewels & weapon you can get a lot of cool down reduction on this skill when using your back attack skill.
Bonus Skill 4

This skill is very important to use! Once you see a purple cat paw above an enemy, you can press “right mouse button” to use it. What it does = a back attack on enemy which gives you most importantly, cool down reduction of most of your skills (this only works if you have the right gear equipped = Spiritual liberation gear set).
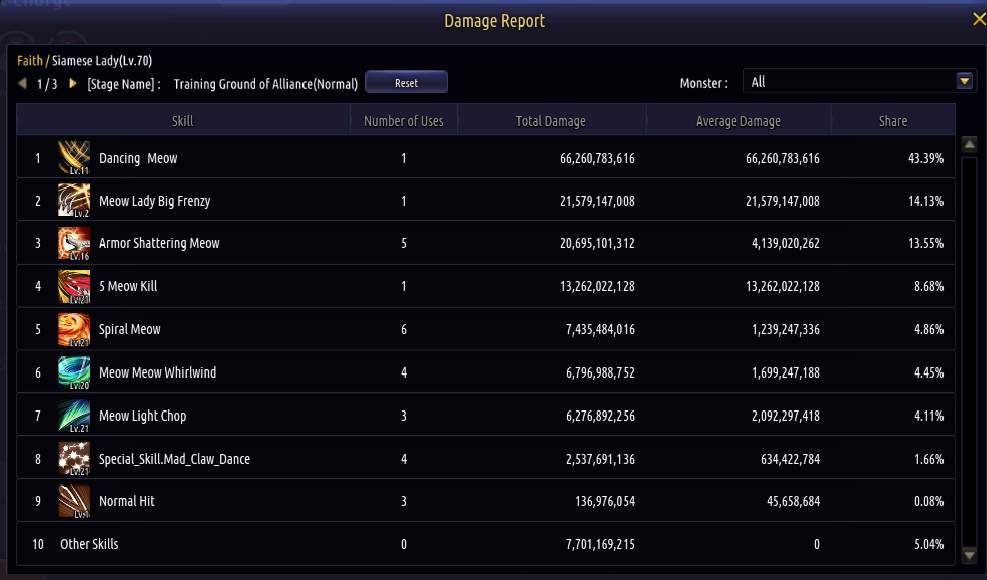
Special Bonus: When you use your Skill 1 on a mob (grouped monsters) you might get this same amount of damage at my same combat power:
Imprints 2nd Row
In the 2nd imprint row you will only have 2 skill you want to depend on. This imprint set works the same as the 1st row, yet not completely.
Let me explain:
On the 1st imprint row you also had some skills where you depend your most damage on. Although the difference between 1st & 2nd row = that in the 2nd imprint row you wont need to stack your damage by landing random skills / attacks on enemies. But purely by using the right skills to gain a stack up. The sad part why no one uses this one is that the dmg of this imprint build is not as high as 1st build + the spiritual liberation gear wont give any cool down reduction on those skills (On this imprint row you can only stack your most op skill to 5. But you have 2 different stacks that you can achieve, each getting to stack 5 max).
Middle row imprints & it’s superior skill bonus:
Skill 1

This same skill will also be previewed as Icon on your buff / status bar to show you how many stack you got. (you can stack up to max stack 5).
Note: if you want to stack this skill to max, you can use the following skills to get it max:
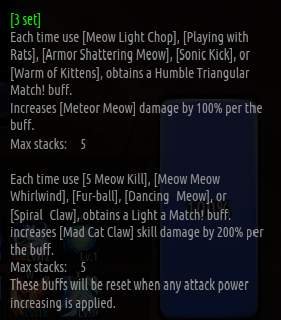


Skill 2

This same skill will also be previewed as Icon on your buff / status bar to show you how many stack you got. (you can stack up to max stack 5).
Note: if you want to stack this skill to max, you can use the following skills to get it max:


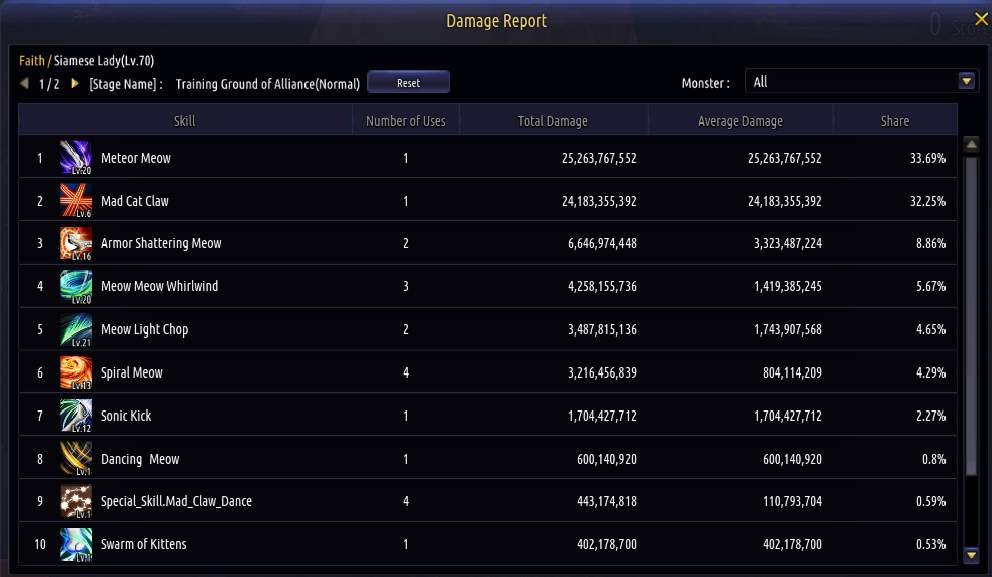
Imrpints 3th Row
The 3th row is the best row for sustain. If you want to balance out all your skills into +/- equal damage & increase your own current combat rating during dungeon runs to a higher amount. Then this is the build you should go. This is the only build where you don’t have to depend on any skill. Just spam any skill you want, but don’t forget to regularly press right mouse button. Because this will appear a lot of times & does more damage than on other imprint rows.
Bottom row imprints & its superior skill bonus:
Skill 1

This is the skill which stand out higher in damage than you would notice in the other imprint rows. As you can see the damage report, it will do a lot of damage for just a back attack (right mouse button).

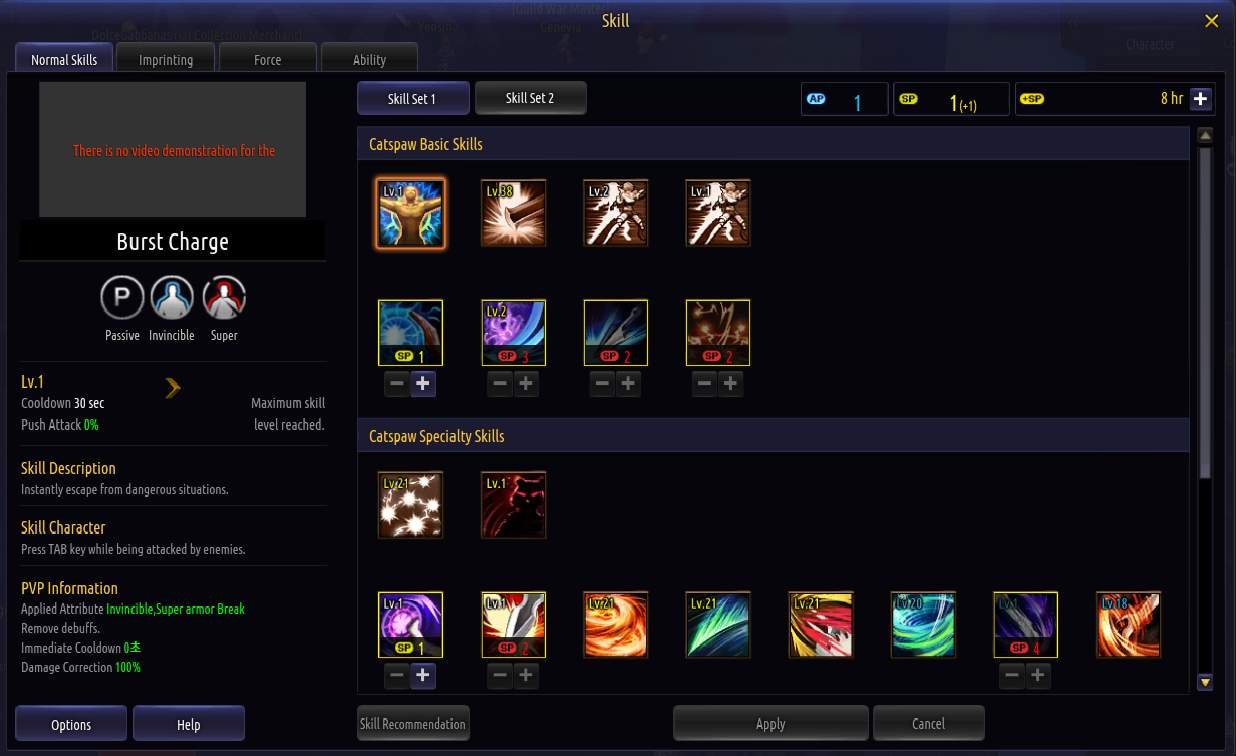
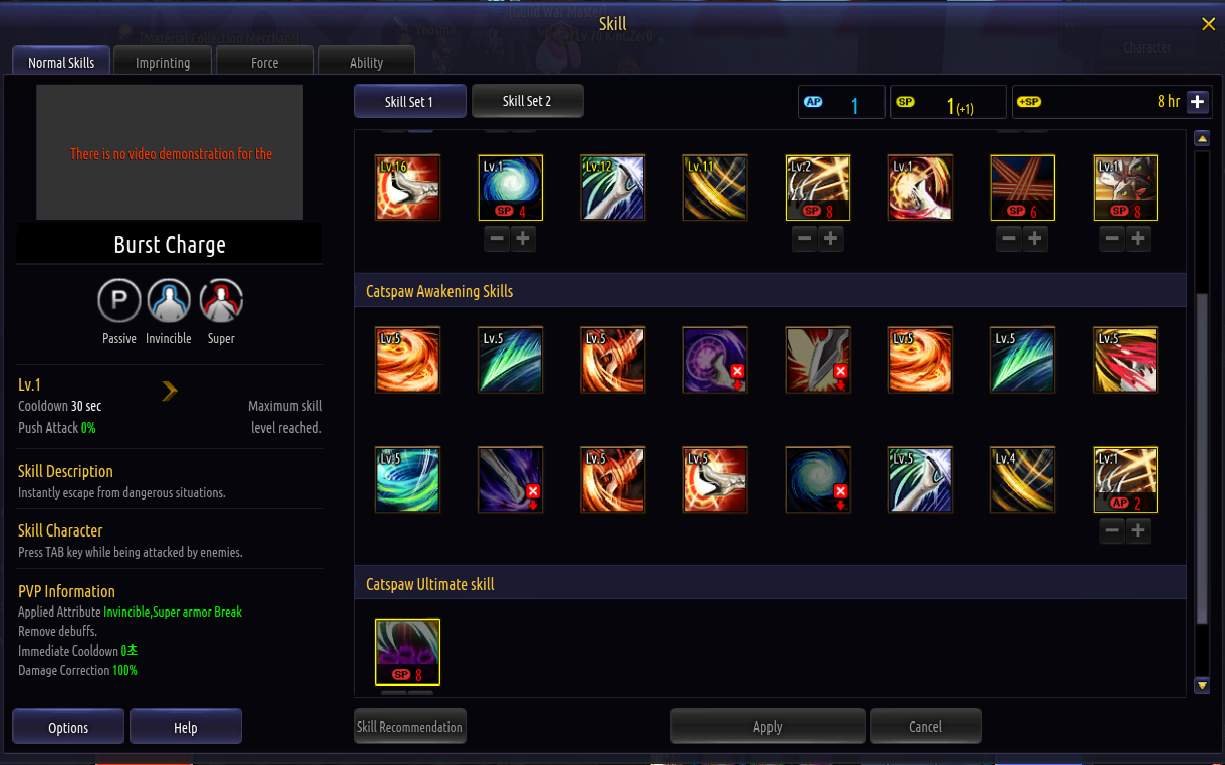
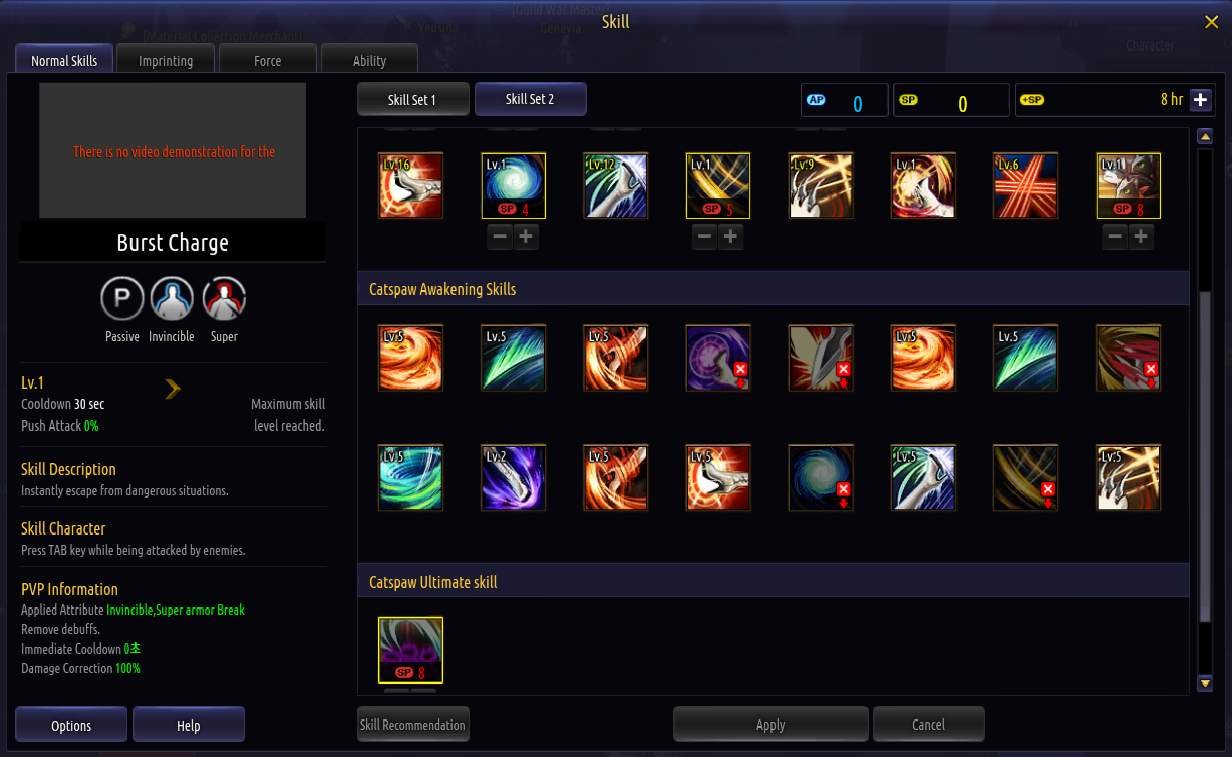
Skill Tree
This is my most used skill tree:
This skill tree can be used for Imprint row 1 & 3.
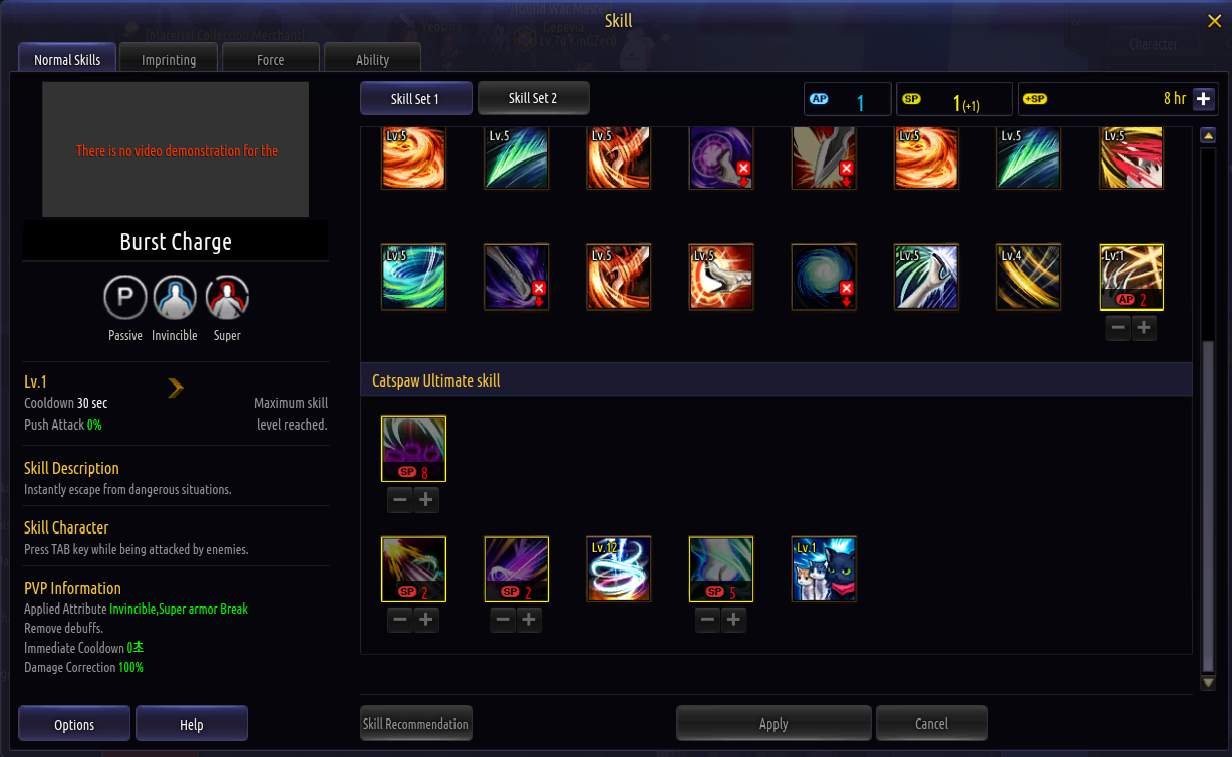
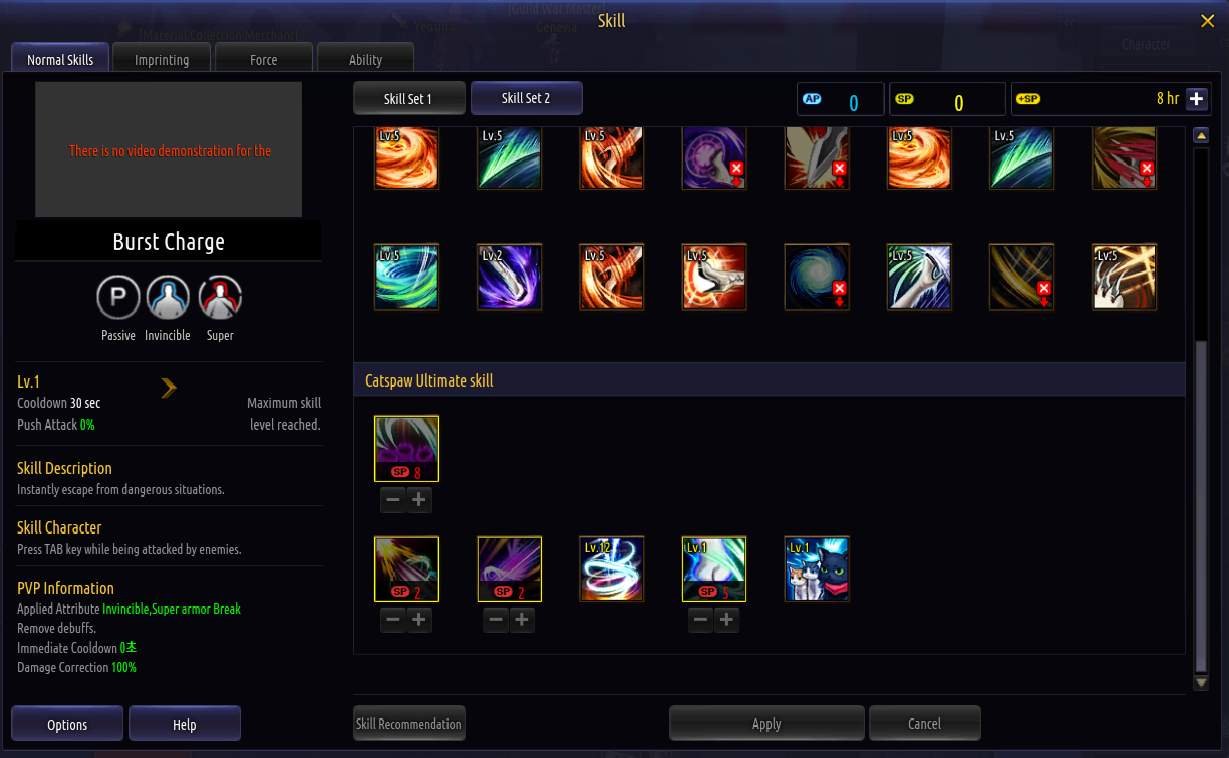
The 2nd skill tree is most efficient to use for the middle row imrpint (2nd row)

Be the first to comment