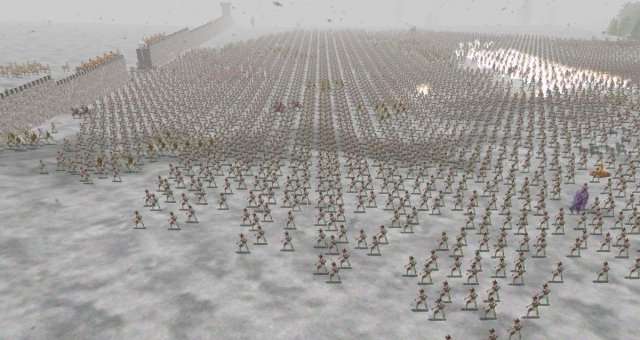
This is a basic guide to setting up your leader, your special team bonuses, and your strong individual units. It gives you a general idea of how they work and lists some good choices you can make.
Guide to Building Pretender, Bless, and Thugs
Dominions 5 is a game with a lot of stuff going on. If you don’t really know how the game works, picking the right things for your group and fighters can be tough. There are just so many choices that it can be scary for someone new.
You can find really detailed guides that explain all the numbers. But this isn’t one of those. This guide is meant to give you a quick look at some of the trickier parts of the game and give you some ideas about what to think about when you’re setting up your nation.
Pretender Body
After you pick your nation, the first thing you’ll pick is your pretender’s body. There are 4 archetypes, going by base dominion score:
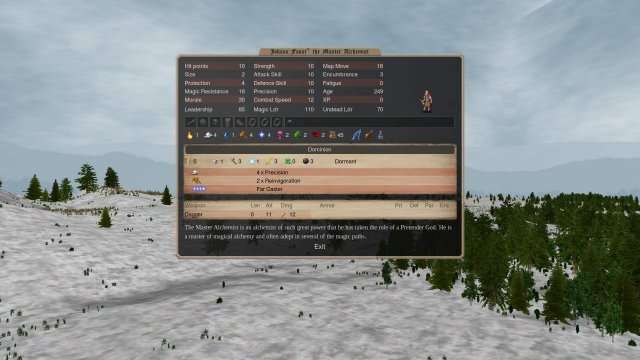
Dominion 1: “Rainbow Mages”
So named for their colorful magic skill icons. These are dirt cheap mortal bodies that are too fragile for combat, but are able to take a wide variety of magic paths.
This lets nations that normally only have access to a few schools of magic branch out into other types that they don’t normally have access to. They’re also a good way to get both good scales and a cheap bless (put 3 points in either fire/water/earth/air or astral/nature/death/blood).
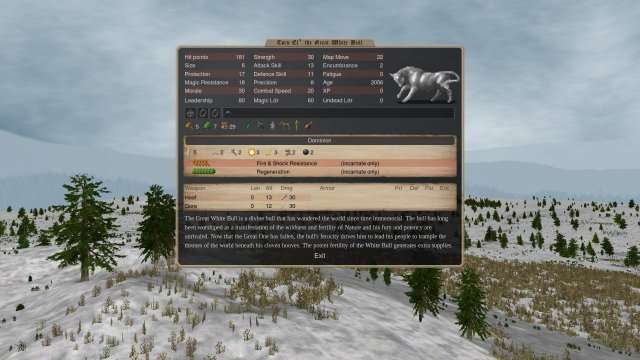
Dominion 2: “Awake Expanders”
These units are big creatures with good natural defense and attack multiple times. This makes them strong early on and they’re usually used right away. They help you take over land from computer-controlled enemies in the first year. They can also help you fight other players in the second or third year. They can’t use most equipment, so they become less useful later in the game.
Pick a starting leader if you have trouble taking over independent lands (try to have at least ten areas by turn twelve). Or, pick one if you want to be very aggressive, grab a lot of land, and start fighting early. If you want to be even more aggressive, pick one with a special team bonus that appears on your leader to try and get a big advantage early and win.
Be careful, if you’re fighting early, your leader is weaker in enemy territory. Attacking an enemy’s main city with just your leader is risky.
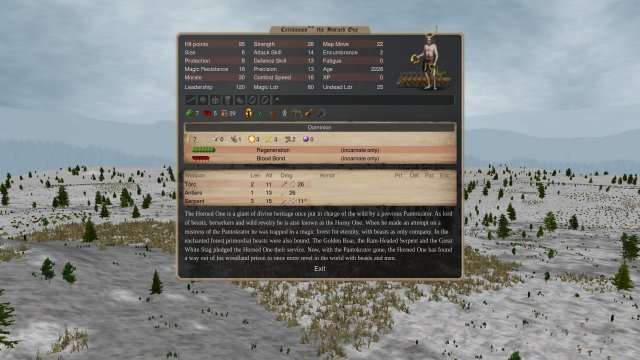
Dominion 3: “Titans”
Despite being giants, these guys are usually too weak to help you expand year 1 because most of them start out with unimpressive equipment and low natural protection. Sometimes they can do it, especially if you can quickly forge them some basic gear, but their main advantage comes in the mid/late game, not the early game.
They have good magic access in 2 or 3 paths and they have a variety of equipment slots, which means that they make extremely powerful units when kitted out fully, and around construction 4 you can expect them to become more powerful than Dominion 2 monsters.
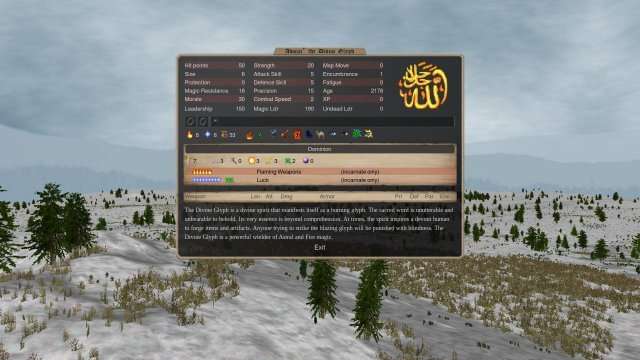
Dominion 4: “Immobiles”
These are super cheap bodies with strong magic in 2 or 3 paths, but can’t leave their province except through magic (requiring a laboratory). They are also usually quite durable, but can usually only be used in a defensive role. Their main use is to be a stat stick for a good bless or good scales.
Hybrids
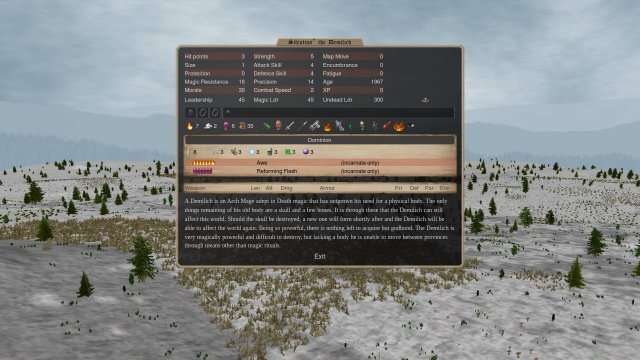
There are also a few oddballs like the Demilich, the Virtue and the Ghost King (and many more) who don’t quite fit into any of the above categories. These pretenders are more versatile, but also have their own drawbacks as well.
The Demilich is a hybrid between a Rainbow Mage and an Immobile, it has good magic access but lacks the durability of other immobiles. The Virtue is a hybrid between an Awake Expander and a Titan, it has a variety of built-in abilities that let it expand turn 1, and it has a full array of equipment slots, but it is much smaller and weaker than a true Titan.
The Ghost King is a hybrid between a Rainbow Mage and an Awake Expander, it can branch into other paths and can help with expansion, but is more expensive than a Rainbow and is worse at expansion than a dedicated Awake Expander. So be aware that there are exceptions to the 4 archetypes outlined above.
Awake, Dormant or Imprisoned?
Making your pretender start the game asleep refunds a massive amount of design points for you to use. For this reason, you should probably delay your god’s awakening for as long as you can, if there’s no substantial benefit to his awakening.
Awake
Awake means you start the game with your pretender in your fort. There’s only ever one reason to do this, and it’s that you want to have a more powerful expansion during year 1, when most of the world is unclaimed and up for grabs.
Taking your pretender awake should be done if you have a powerful incarnate bless that will significantly boost the power of your sacred troops, or if you have a powerful pretender who can reliably capture provinces with minimal preparation.
Dormant
Dormant means your pretender will wake up roughly around turn 12. This means he’ll arrive too late to help you with the early game expansion, (which is usually wrapping up by now) but he can help you search for magic sites, research, craft items, or fight against other players, depending on how you designed him.
Around the time he awakens, most players will start looking for easy targets to annex. A dormant pretender with either a strong body or a strong incarnate bless can help dissuade other players from seeing you as this target.
Imprisoned
Imprisoned means your pretender will wake up roughly 3 years into the game, which is a long time to wait, so don’t take an imprisoned pretender unless you have good national troops that can hold off an invasion by powerful enemy sacreds with a strong bless.
Giving your imprisoned pretender an incarnate bless or an expensive body is a huge waste, as a significant portion of the game will go by without either of these things benefiting you in any way. However, you can still have a powerful bless, by stacking up cheap minor blesses like strength or defence skill.
Scales
This is your nation’s economy, so named because you take from one and give to another to balance your nation the way you like. You will want to take design points from parts of the economy unimportant to your strategy, and use these points to make either the other parts of your economy or your god stronger.

Dominion

Dominion spreads out from your god, your prophet and your temples and overwhelms weaker dominions nearby. It applies your scales to provinces you have dominion over; it also provides limited vision to the area; provides bonus morale to friendly troops and morale penalties to enemies; and it makes your god much stronger when in friendly dominion, and much weaker in enemy dominion.
If you have no provinces left with your dominion, you lose the game, so 4 is considered the bare minimum. You will usually want to set dominion based on the number of sacreds you would like to recruit each turn, as this is limited by dominion. If you want to keep enemy dominion out of your lands then you will also want a higher dominion score.
Order/Turmoil and Production/Sloth

These two scales mainly tweak your recruitment costs: Recruitment Points for Order and Resource Cost for Productivity. You need these scales to be adjusted based on what your limiting factor is when building an army.
For example, if a unit that you expect to form the bulk of your army costs 10 gold 25 resources 10 rec points, then when you are building an army of these, you will probably find yourself running out of resources before you run out of recruitment points, so you can take Productivity to produce them more quickly or Turmoil to free up more design points. If your units are expensive in gold compared to resources or recruitment points, it’s safe to take both turmoil and sloth, since gold will be your limiting factor.
Test things out and see if you find yourself constantly short on either rec-points or resources, and adjust these scales accordingly until they are evenly balanced (though this will always vary somewhat from fort to fort).
Heat/Cold

Each race has an ideal temperature and deviating from this reduces income. However, throughout the year, temperatures fluctuate naturally, making heat/cold, one of the least-impactful economic scales. For this reason, heat/cold is commonly used as a dump stat.
At the very least, taking either heat+1 or cold+1 from your preferred climate is strongly recommended as any nation. Whether you go heat or cold, and how far, depends on a number of considerations. The most important one: troop mobility. In summer it takes 6 movement points to cross over plains. Look at your nation’s troops (specifically, look at the slowest ones you intend to use in your armies).
Do they have map move 12 or more? If so, they can move through 2 friendly plains/farms provinces at a time. This is extremely useful as it allows you to rapidly relocate armies as the strategic situation develops. Do you have less than 12 map move? Then your troops will have to trudge it out one province at a time. In cold-1, lands will become covered in snow and will be slower to move through, which might mean that units that can go 2 provinces at a time in summer can only go 1 province at a time in winter.
For this reason, you should go for heat if your troops are MM12 or higher. If they are lower than MM12, cold isn’t a bad idea, as it lets them cross rivers, which helps to mitigate the mobility disadvantage of having to move 1 province at a time. Another consideration is fatigue: your units will tire more quickly in extreme temperatures (unless they have resistance to heat or cold). If you rely on troops with more than 6 encumbrance, then milder temperature might be better.
Do you have fire mages? Fire spells will tire out your mages quicker in cold provinces, so don’t make your dominion too cold. As a final note, some nations (eg. Abyssia) have strong affinity for extreme temperature and their units will be much stronger when fighting in temperature they like.

Growth/Death

Population directly corresponds to income, resources and recruitment points. Also, population will grow exponentially in growth scales. What this means is that growth is the single best economic scale in the game and is almost always put to 3, as any province you hold will increase in value so much over a game that the income provided by growth overshadows the income provided by any other scale.
Death is debilitating to your economy and only ever taken by nations that are already forced to kill their own population (EG. Lemuria) or by nations that can control the rate that their dominion spreads (EG Mictlan) because they can just keep enough dominion on the map that they don’t die, while using their neighbor’s dominion for their economy.
Luck/Misfortune

Luck is the second-best scale in the game after growth for making lots of money over the course of a game, with all things averaged out. Unlike growth, the income comes in random, occasional bursts, so it can be unreliable, but can also potentially be a huge swing in power.
One benefit luck does have over growth, however, is that luck will also provide you with magic gems and heroes. Depending on your nation, these heroes can be extremely powerful mages. Depending on what you can do with the gems, these may be more valuable to you than gold.
Another benefit of Luck over Growth is that events have a chance to trigger for each province you own, regardless of the province quality. So barren, dead wastelands are still valuable under luck, while virtually useless under growth. This makes Luck a favorite for nations like Lemuria that kill their own population.
Misfortune events will cause your nation to be constantly raided by Independent NPC armies, so misfortune is a good dump stat for nations that have good troop mobility or good thugs. If you struggle to respond to persistent attacks across your kingdom, avoid misfortune. Taking drain and misfortune will cause you to lose magic gems randomly.
Magic/Drain

These affect your research speed. Since this is a flat bonus that applies to each mage, if you have cheap, spammable mages (EG 50 gold level 1 mages) then you can rapidly blitz through the tech tree with Magic3. If your mages are all expensive and have high research skill, then drain will have less of an impact.
Another consideration is that Magic Resistance is lower in Magic scales, and higher in Drain scales. Nations with banishable troops (EG. MA Ermor) tend to like drain because it makes their troops more resistant to banish. Nations with good astral mages tend to like Magic because astral can do some nasty things to troops with low MR.
Bless
A bless is a custom buff spell you design at the beginning of the game. You can use your design points to make it as powerful as you want. However, you can only cast it on sacred units and it can only be cast by holy mages (AKA priests).
What you choose as your bless should synergize well with your sacreds, emphasizing their strengths and shoring up their weaknesses. Blesses are most dominating in the early game, when nobody has researched any other buffs.
What are your sacred troops?
Normal human soldiers
Then consider…
- Luck (Astral): Due to their small amount of HP, humans tend to die easily to evocations, or getting smacked by a giant, or getting lance-charged by a knight, or just about anything really. Luck will make your units remarkably hard to kill, and will let them take powerful evocations to the face without flinching, exhausting enemy mages and letting them survive much longer in melee with enemy troops.
- Barksin (Nature): This can be useful during early expansion and in early wars. Protection (Nature 1) and Wooden Warriors (Nature 2) does the same thing as this bless and is a very easy spell to research and cast, so your bless becomes obsolete by the midgame, but if you can gain a strong advantage during expansion, it might be worth it.
- Stygian Flesh (Death): Same as barkskin, but useless vs thugs and many enemy sacreds due to magic weapons. Less reliable but cheaper.
- Attack Skill + Shock Resistance + Defense Skill + Strength (3 of each: Fire/Air/Water/Earth): If your sacreds are just regular guys with nothing going for them except a magic candlestick on their character sheet then consider if they’re even worth a powerful bless at all. Magic diversity is useful for any nation, and picking up a cheap bless on a rainbow pretender can give your sacreds a little more punch while also giving you a strong mage that serves a useful midgame purpose.
Mounted units with high (16 or more) defence
- Quickness (Water): Getting surrounded is the biggest problem that a high-defence unit can face, as being attacked by multiple enemies lowers your defence score. Quickness is the most powerful offensive bless in the game, and as the saying goes, the best defence is a good offence. Quickness lets your sacreds quickly kill enemies before they can get surrounded and harassed. Also, since mounted units are already fast and quickness doubles their speed, this lets you blitz quickly across the map and pull off flanking attacks, and massacre fleeing enemies to the last man.
- Awe (Fire): Reduce the amount of attacks made against your unit, which will even further reduce the harassment penalties they get. If you have Awe and 20+ defence, then you will be virtually untouchable by nonelite enemy troops and can kill endless numbers of them, limited only by fatigue.
- Defence Skill (Water): Push that defence skill even higher and make your units almost impossible to hit. Mounted units are more resistant to harassment penalties from being surrounded, so that makes this a good pickup.
- Blood Surge (Blood): This is a huge benefit to all your combat stats and the only requirement to activate it is that your sacreds need to kill a single enemy, which is quite easy to do if you have a lance that does bonus damage to the first unit it hits.
- Swiftness (Air): An off-brand knockoff of quickness. It’s not nearly as good, but it is a cheap way to increase your mounted unit’s ability to rush down enemy mages and massacre fleeing foes. Perhaps more importantly, it’s also a cheap way to stack defence alongside the defence buff from water.
- Twist Fate (Astral): Since your units almost never get hit, twist fate will hedge against taking a bad roll. If your troops have glamor, then twist fate will keep glamor active for longer (since glamor ends when your units are hit).
Units with high protection (16 or more)
- Hard Skin (Earth): If your units have 5 or more natural protection (IE your sacreds are big tough monsters), give them Hard Skin. This will stack with their natural protection, and can stack further with their armor if they’re capable of wearing any. If your pretender is an awake expander, this will also be a huge benefit to them when they’re fighting in friendly dominion.
- Barkskin (Nature): If your units are squishy humans in strong suits of armor and have less than 5 natural protection, barkskin is a good pick-up, since it sets their natural protection to 10, which stacks with their armor protection and can make your sacreds ridiculously tanky in the early game. Barkskin does not stack with Hard Skin, so pick one or the other. Find some way to shore up the fire vulnerability if you expect to be fighting fire mages or your troops will be roasted alive.
- Stygian Flesh (Death): Wannabe barkskin. Cheaper but easily countered by magic weapons (usually found on thugs and sacreds). At least it doesn’t make you vulnerable to fire.
- Fateweaving (Astral): Great for units that are heavily-armored tanks with weak attacks that never seem to be able to kill anything. When enemies attack your tanky units, they will become fate-woven and much easier to kill. (A fate-woven enemy will take more damage from attacks).
- Heat/Chill Aura (Fire or Water): Also great for high-defense low-offense tanks. Instead of killing your enemies with superior combat skills, just outlast them and execute them once they’ve fainted. Especially good versus thugs without the right resistances.
- Reinvigoration (Earth): Units with heavy armor also tend to have high encumbrance, which means they’ll quickly become exhausted in a fight and then are easy pickings. Reinvigoration can help mitigate this, and it’s also a great bless for your sacred mages.
Expendable troops with low cost (10 gold or less)
- Charged Body (Air): Turn your troops into landmines and put them in the way of expensive enemy sacreds or cavalry. Watch as their 50 gold unit with a super expensive bless kills itself on your 10 gold unit with a cheap bless.
- Blood Vengeance (Blood): If you want to make a serious commitment to the human landmine strategy, blood vengeance lets you kill anything that damages your troops, particularly, enemy mages. Mix your sacreds in with the rest of your army. When enemy mages drop spells on your troops, they suffer that damage returned to them and die. This bless is expensive and doesn’t help with expansion, so don’t take it awake. Fighting in magic scales also helps make sure that the blood vengeance isn’t resisted.
Giants (units that are size 3 or more and have 30HP or more)
- Regeneration (Nature): Regeneration works great on units with high HP, as the regeneration effect increases based on total health.
- Fortitude (Earth): Effectively doubles your big bag of HP when in melee. Synergizes great with Regeneration but it is extremely expensive to do both.
- Blood Bond (Blood): A much more affordable (and sometimes better) alternative to fortitude. Works great with regeneration as it disperses the damage and then each unit regenerates individually. Works great with berserkers because it makes all your sacreds go berserk at once.
- Blood Surge (Blood): Always a nice pickup, especially for giants since they tend to flatten the first person who goes toe to toe with them. The extra attack will help you kill things faster and is good for repel (since giants get a length bonus to their weapons). The other stats are welcome too.
- Quickness (Water): Giants have attacks that are very strong, and can kill most enemies in 1 hit, but are so big you can’t fit many of them on the front lines, and so you might not be able to kill things as quickly as you would expect. Quickness will let them make more attacks per turn and push more quickly into the enemy lines.
- Elemental Resistances (Fire/Air/Water/Earth/Nature): These big guys make attractive targets for mages, and getting nuked down quickly by massed thunderstrikes is the bane of their existence.
Units with multiple attacks
- Quickness (Water): Turn your troops into absolute demons who will race across the battlefield, instantly massacring anything in their path.
- Strength (Earth/Blood): If you have extra attacks that are based on unit strength (IE. your sacred is not a mounted unit that is using its mount’s body as a weapon) then increasing strength can make your sacreds very frightening as the bonus damage will apply to each attack. Stacking strength multiple times (+4 to +8) is usually much better for dealing damage than elemental weapon enchants, and it doesn’t require an incarnate pretender.
- Magic Weapons (Astral): Good for fighting units with Etherealness (IE Ghosts) or Invulnerability (IE Stygian Flesh). Counters mistform too.
- Lightning Weapons (Air): The best of the elemental weapon enchantments in melee. While probably not as good for general purposes as stacked strength, it ignores armor (which makes it good at dealing with thugs that can stack their protection score well over 30) and has a good chance of stunning the enemy with each hit. A stunned enemy is a sitting duck that can be easily finished off. Units that attack more often trigger this effect more often. This is (potentially) more useful than strength on mounted units, since the mount’s attack (EG. Hoof) will benefit from it but won’t benefit from strength buffs.
- Attack Skill (Fire): Units with multiple attacks tend not to worry that much about high-defence enemies, because they can harass them down. But if your sacred has less than 12 attack, then a good portion of its attacks will be whiffing. Take Attack Skill to make sure they hit.
- Blood surge (Blood): A great pickup to make your sacreds more deadly. If your sacred is a glass cannon with a strong offence but a weak defence, then maybe pass on this and take Strength or Attack Skill instead, because you may find that they don’t live long enough to take full advantage of the stat boost.
Shapeshifters with multiple forms
- Shapeshifters: Tend to be quite dangerous in their animal form. Use the advice for units with multiple attacks as well.
- Luck (Astral): Luck gives a 3/4 chance to ignore killing blows and triggers independently on the death of each form. So you essentially get the luck benefit twice on a unit with 2 forms.
- Resilience/Strong Vitae (Nature/Blood): The bonus HP applies independently to each form. So it effectively doubles the amount of HP you get from your bless on a shapeshifter with 2 forms.
Archers or units with ranged weapons
Because archers can concentrate fire onto a single area, and don’t benefit as much from strength as melee troops, this makes weapon enchantments more attractive.
- Withering Weapons (Death): Any human unit hit by your arrows is now on a death timer if they fail magic resistance. They will age rapidly, which causes their combat skills to deteriorate. Eventually they will just drop dead. Even if they retreat, they will continue to age and die before the battle is over.
- Death Weapons (Death): Another death sentence for anyone struck. Your arrows will deal additional magic damage that can go through armor. Also, units hit will become diseased and die within the year. (So you can put an end to someone’s awake expander or thug using this, provided you can lay enough fire on them to bypass their magic resistance).
- Unholy Weapons (Blood): Great for taking out enemy sacreds and awake pretenders by dealing a lot of extra damage. Doesn’t help versus regular troops.
- Precision (Air): Hit more often. Precision is also quite useful for your mages.
- Flaming Weapons (Fire): Deals some extra damage. It’s quite useful against enemy archers as they tend to be lightly-armored. Flaming weapons isn’t very good against units with more than 12 armor, but is still capable of dealing damage on a good roll.
- Magic Weapons (Astral): Situationally good when fighting ghosts, vampires or other units with magical resistances.
Flying units
- Death Explosion (Fire): Amusing as heck, turn your flying units into homing missiles and drop them on the enemy back-line to kill their mages. With death explosion, even if they die to the bodyguards, they might take out a nearby mage. Be mindful of clumping together your own mages if they are sacred.
- Quickness/Strength/Attack Skill/Magic Weapons (Fire, Earth, Blood, Water, Astral): Flying units tend to be glass cannons. You want to kill the units posted on the back line on guard commander and chew through to the enemy mages. You’ll want to do this before the dopes nearby notice you and surround you. To this effect, you want to be as efficient at murder as possible, and any of these options are a good choice.
- Magic Resistance/Elemental Resistance (Astral, Fire, Earth, Water, Air, Nature): Since you’re going to be targeting the enemy’s mages you can expect your flyers to be the target of a lot of spells flung at them point blank. It’s not a terrible idea to make sure they can survive the barrage.
Undead
- Quickness (Water): Undead units don’t suffer from encumbrance. This removes the biggest downside to quickness (besides the design cost) and makes it an excellent pick.
- Magic Resistance (Astral): You will want them to be able to resist banishment spam and lategame spells like undead mastery.
- Undying (Death): This is basically 2 hp with no downside for undead, twice the effect of resilience or strong vitae.
- Reforming flesh (Death): More for your undead thugs than your sacred troops. Your troops probably benefit more from undying.
- Fire/Shock Resist (Fire/Air/Earth): Undead are naturally resistant to cold and poison. Consider making your sacreds immune to the other elements as well. Your enemies will definitely want to put down battlefield wipes to remove your giant horde of longdead, and you want at least your sacreds to survive.
Small, weak summoned creatures
- Thunder Weapons (Air): Gives them an attack that can penetrate armor and stun enemies.
- Fire Weapons (Fire): Gives them an attack that can deal decent damage to enemies with low armor (ideally 12 or less).
- Undying (Death): Helps them survive longer by giving them more HP.
- Charged Body (Air): Spam out cheap sacreds and let the enemy unleash lightning on themselves. Beware that taking charged body without also taking shock resist will probably make your main recruitable sacreds almost unusable.
Thuggable Commanders
- Regeneration (Nature): Probably the single best bless for a thug, as it helps eliminate the minor damage that accumulates over a fight; and it stacks with other types of regeneration.
- Reinvigoration (Earth): Also extremely useful for thugs, as it helps them fight for longer without becoming fatigued
- Blood Surge (Blood): Helps thugs chop through the endless hordes of enemy province defence
- Awe (Fire): Useful for thugs with high defence.
Sacred Mages
Note: you can make any non-sacred mage sacred by giving him a Shroud of the Battle Saint, a cheap item that can be forged by any astral 1 mage once you research Construction 4.
- Precision (Air): Increases accuracy of spells. Decent for evocation casters. (Air or Fire mages in particular).
- Far Caster (Astral): Increases range. Mages that are farther back from the action are usually safer. Mages that are farther forward with this buff might be able to target the enemy mage line with their spells.
- Arcane Finesse (Astral): Good for death mages and astral mages as these schools have spells that can usually be resisted. Late game astral strats usually involve boosting magic penetration as high as possible and killing enemy commanders.
- Reinvigoration (Earth): Mages will typically fatigue themselves out in battle. With reinvigoration they can cast more spells over the course of a battle.
- Magic/Elemental Resistances (Astral/Fire/Water/Earth/Air/Nature): Some spells can target the whole battlefield. Don’t let your squishy and expensive mages die to these spells.
- Unaging (Nature): Mages (especially your more expensive mages) tend to be old. This means they are slower on the strategic map, fatigue quicker in combat and occasionally get diseased and DIE. Unaging has the unwritten effect that it makes them younger when you hire them, so they’re no longer old. Not having to replace your 300 gold cap-only mages every year can actually be quite beneficial. It also makes your sacreds more resilient to the death spells Burden of Time and Decay.
- Arcane/Undead Leadership (Astral/Death): some nations (EG. Scelaria, Abyssia) will be able to easily summon more monsters than they can actually lead. This will lead to forts filled with endless monsters while your mages carry only a small fraction of your troops into combat. Use this bless (stacked 2-4 times) to let your low level priests act as commanders and carry more troops into battle.
- Regeneration (Nature): Very good for giant mages with blood or astral. This lets them act as communion slaves and your communion masters can drain their life to cast spells while the slaves regenerate the damage. Not recommended for human mages as they will only regenerate 1 or 2 hp a turn, which is too weak to cast spells from HP.
Thugs
Thugs are commanders that have been given magical items and who fight in direct combat (as opposed to fighting with spells). They are usually sent in solo or in small gangs to capture undefended enemy provinces or kill enemy thugs (by using teleport or cloud trapeze).
Most thugs are designed to be economical to produce, and sent out on dangerous missions behind enemy lines, not expected to return. A variant of the thug, called the Supercombatant, is your ultimate, money-is-no-object superweapon designed to be as powerful as possible and confront enemy armies head on. Most successful thugs have some magic skill that they use to buff themselves before combat.
Building thugs to conquer provinces
The bare minimum essential quality of a thug is that it needs to be durable enough to survive being surrounded by province defence. There are four ways (non-exclusive) to build a thug to do this. If your thug doesn’t fit any of these criteria after he’s fully buffed, he’s probably going to be unreliable at his job and get killed by a random spearman. Use magic items to improve the areas that your commander is already naturally good at. It’s better to be really good at one thing than okay at everything.
Defence Skill Tank
If your defence skill is significantly higher than enemy attack skill, then they will almost never hit you in melee. Against small numbers of PD, 20+ defence is good enough for a defence tank with a mount and some buffs (eg. Mistform); 25+ is ideal for larger numbers of PD. However, you have to protect your defence skill from dropping, because if a large amount of enemies attack you at once, you will become “harassed” and your defence skill will drop to the point where you start taking hits.
Mounted units are more resilient to this, but not immune. To deal with being surrounded, you have to reduce the amount of attacks being made against you either with Awe (Shield of Gleaming Gold) or Vine Shield or some similar effect which prevents enemies from attacking all at once.
Attack Skill Tank
If you have a weapon that is longer than the enemy’s weapon (Stone Bird or Dancing Trident are good for this) and your attack skill is significantly higher than the enemy’s defence skill (close to 25 is ideal), and the enemy has relatively low morale (beware of undead), then you can tank using your attack skill via the repel mechanic. Like tanking with Defense, repel is subject to harassment and becomes weaker when multiple enemies are attacking at once, so you will need some way to stop them from all attacking at once.
Protection Tank
If you have 25+ prot (30+ is ideal), most non-elite human units will struggle to deal any damage to you. Be wary of high-damage piercing weapons (like knight lances) or units with unusually high strength (like giants). The most common way to achieve high protection is casting Ironskin.
Regeneration Tank
If you have a lot of HP (40+, but the more the better) and your thug is at least somewhat tanky in other ways (EG you have 18+ protection, and some defensive buffs like body ethereal and liquid body) then stacking regeneration on them will often mean that they can regenerate damage faster than the enemy can deal it.
A note on Fatigue
Many thugs die when they get tired due to fighting a large number of enemy troops for too long. One way to deal with this is to make sure that either they have a reinvigoration score close to their encumbrance in the province they’re going to be fighting in (equal is ideal) you can do this with magic items like boots of the messenger.
Another way, is to make sure that they have the ability to kill or rout enemies quickly enough that they win the battle before getting tired (weapons that deal AOE damage like frost brand are good for this; horror helm is good for scaring enemies away). If your fatigue goes over 50, your thug’s combat capabilities will drop. If it goes over 100, they will faint, and probably be killed.
Building thugs to kill other thugs
Every strategy has a counter. Is your enemy…
- Defence Tanked: Remove your opponent’s mobility with spells or items that root them in place (like a Vine Shield or a Vine Whip). This will drop their defence to 0 and they can be easily killed. An alternative is to boost your attack skill high enough to match them. Items like Burning Pearl are good for this.
- Attack Tanked: Counter repel with high defence (try a Main Gauche of Parrying), high morale (Dragon Helmet) or length 5 weapons (like Enchanted Pike).
- Protection Tanked?: Use high-strength units (like giants) or weapons that are Armor piercing (like Greatsword of Sharpness), or attack him with elemental spells or weapons that he doesn’t have resistance to (like Lightning Spear).
- Regeneration Tanked?: The easiest way is to surround it and kill it with a gang of lesser thugs. If it’s too strong then wear it down with items like Star of Heroes (breaks its armor), Black Bow of Botulf (removes its ability to buff itself), Eyecatcher (blind it and make its combat stats significantly worse), Bane Blade (make it age rapidly), flesh eater (chest wound, permanently adds encumbrance), try to insta-kill it (heartfinder sword), or disease it (axe of hate), etc.
Building thugs to kill entire armies (Supercombatants)
This is more of an art than a science. Anything you do can be countered by a prepared opponent. A supercombatant is more like a way to suprise an unprepared enemy than a reliable strategy. Still, it’s fun. You will need:
- A Strong Chassis – A Titan pretender, an King of Elementals, a Demon Lord, a Tartarian or any other big, high level summon are ideal. They should have naturally high stats, and have good access to buff magic.
- Over 60 HP – Enemy mages will be throwing spells at you and you need to be able to take at least a few hits to the face.
- Regeneration – you will take damage, no matter how good your tank is, and you need to make sure you’re healing it faster than it’s being dealt
- Over 30 Protection – ranged attacks bypass defence and repel.
- Close to 25 Magic Resistance – you don’t want your pretender to be insta-killed by spells like soul slay or stolen by spells like hellbind heart. Amulet of Antimagic is a great item.
- Elemental Resistance – depending on your enemy’s mages, you want to be able to tank through large numbers of elemental spells being rained down on your head
- Multiple or Area-wide attacks – you need to be able to kill large numbers of troops fast or you’ll get bogged down. Fire Brand and Frost Brand are two example weapons that let you kill multiple targets at once.
- Reinvigoration – You need to be able to fight without increasing your fatigue. To do this you need either reinvigoration equal to your encumbrance in the terrain you’re fighting in, or you need a buff spell like Soul Vortex that does it for you.
- Buff spells – Fire, Earth, and Death are the best paths for a SC to self-buff with; Astral is a liability (because astral mages can be killed by Magic Duel). Phoenix Pyre + Soul Vortex is a deadly combo that will make your SC invincible unless they can be killed multiple times in rapid succession.
- Berserk – Not essential for every situation, but if the battle goes on too long, the game will force the attacker to rout. Berserk units ignore this. Flesh Eater is an easy item to get that makes your unit go berserk when wounded.
Thug Spells
The best ones are marked with an asterisk (*)
Holy
- Blessing* – how good it is depends on your bless.
- Holy Avenger – damages attackers.
Fire
- Resist Cold – situational.
- Fire Shield* – good for clearing large numbers of weak troops.
- Phoenix Pyre* – makes you invincible as long as you don’t run out of fatigue.
Water
- Resist Fire – situational.
- Liquid body – a worse temper flesh that water mages are stuck with, reduces speed and strength.
- Ice Shield – only underwater.
- Quickness – doubles fatigue per turn, be careful.
- Breath of Winter – good for fatiguing-out enemy thugs.
Air
- Mistform* – reduces all damage taken to 1, cancelled by magic weapons.
- Mirror Image – stops a few hits, good for defence tanks.
- Cloud trapeze* – for mobility and killing enemy thugs.
- Flight – useful for assassinating enemy commanders during a battle.
Earth
- Resist Lightning – situational.
- Earth Might – increases damage done in melee.
- Stoneskin – raises protection by a lot, stacks in a limited capacity with ironskin.
- Ironskin* – best protection spell in the game.
- Temper Flesh* – halves damage from physical attacks.
- Summon Earthpower* – gives +4 reinvigoration.
- Legions of Steel – combos with bracers of protection, improves your armor’s protection.
Nature
- Resist Poison – situational.
- Barkskin – raises protection by a little.
- Elemental Fortitude – raises all your resistances.
- Personal Regeneration* – extremely useful for units with a lot of HP.
- Enlarge – raises HP and strength.
Death
- Skeletal Body – adds piercing resistance, useful against knight lances.
- Invulnerability – adds a lot of protection, but is hard to cast, and easy to counter. Better than ironskin for fighting PD.
- Soul Vortex* – drains endurance from enemies, insanely powerful when paired with phoenix pyre.
Astral
- Resist Magic – useful if your enemy is trying to soul slay you.
- Teleport* – for mobility/counter-thugging.
- Astral Shield* – stuns enemies that try to attack you.
- Body Ethereal* – good vs. regular units, worthless vs enemy thugs with magic items; you can have another mage (called a “fluffer”) follow your thug around and cast this on him at the beginning of the battle and then run away.
- Personal Luck – protects against death blows. Good for fighting supercombatants who can kill thugs in 1 hit. Not worth the casting fatigue in most other cases..
- Twist Fate – protects against the first hit to deal damage.
Blood
- Hell Power – raises your thug’s combat stats but horror marks them, so random monsters will occasionally try to assassinate him.
- Damage Reversal – very strong, but is at the end of the research tree for Blood.
Crosspaths
- Mossbody – Nature + Water – Unreliable, probably not worth the casting fatigue.
- Strength of Gaia* – Earth + Nature – Gives regeneration, barkskin and strength.
- Flying Shield* – Earth + Air – Randomly blocks attacks.
- Stygian Skin – Death + Water – Gives prot against non-magical attacks.



Be the first to comment