
This guide shows how to make and run a simple train line, with an introduction to some of the functionality in the game.
Objective and Motivation
Build a rail network by connecting stations with lines. Purchase trains to operate on these lines. Keep track of passenger demand and satisfaction. Make money from ticket sales. Then continue to expand.
NIMBY Rails is a sandbox game that requires you to set your own goals. There is no campaign or progression system to guide you. You start with editing tools, a one billion currency loan, and a detailed world map.
This guide will teach you how to create and operate a basic train line, while introducing some of the game’s features. Feel free to explore the interface beyond what’s covered here – nothing bad will happen.
Basic Controls
Top Level Controls
- F1: info tool
- F2: track editor
- F3: line editor
- F4: train editor
- F11: stats for nerds
- Esc: “get out of tool/editor”, then main menu
- Home: map mode
- End: track mode
- -: game speed down (only in single player)
- =: game speed up (only in single player)
- Space: pause game (only in single player)
Map Controls
- Left mouse button: general interactions with UI and map objects
- Drag with right mouse button: pan map
- Mouse wheel: zoom map (centered on mouse pointer)
- WASD: pan map
- QE: zoom map (center of screen)
Track Editor Controls
- M: Move, delete and edit tracks
- N: Append to tracks or create New ones
- B: Create new track Branches
- T: Create new sTation platforms
- P: Create new dePot
- 1: Viaduct track
- 2: Ground track
- 3: Tram track
- 4: Tunnel track
Building Tracks and Stations
After you start a game, the map is displayed, with the info mode selected by default. We will make use of the info mode later on. You can move around the map using the controls described in the Basic controls sections with any mode or tool selected. Move around to find a city or area you want to start build around. Then select the Tracks mode in the top left toolbar.
The tracks mode has 5 tools, which can be selected in the vertical tracks mode toolbar. From top to bottom: Move, delete and edit tracks; Append tracks or create new ones; Create new track branches; Create new station platforms; and Create new depots. There are different kinds of tracks, and you can switch between them in the left toolbar, under the depot tool button. From top to bottom: viaduct, ground, tram and tunnel. The track mode has detailed contextual help for all tools and modifiers, displayed in the center bottom of the screen.
To create a new track, select the Append track tool. Left click somewhere in the map, move the mouse away to make the track longer, then left click again to end the track.
You can create more independent tracks by clicking on empty map areas, or continue your existing track by clicking on the “+” handles at the end of it to directly create new linked track.
As you create and link tracks, you will notice some tracks become red and a conflict is noted in the blueprint window.
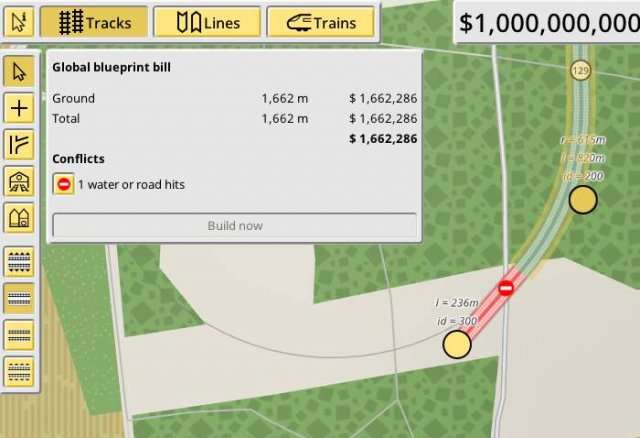
Different kinds of tracks have different tradeoffs. Ground track is the fastest and cheap, but it has many restrictions. In the previous screenshot it is not being allowed to cross over a road because they met at a too acute angle, and the game will refuse to insert an underpass. If you want to do such a construction you could switch it to a viaduct:
To quickly change the track kind while you are building, use the number keys between 1 and 4. Other conflicts are due to the geometry of the track themselves, for example making a too short or too long track, or a track with a too small radius curve. And speaking of curvature, the curve radius limits the max speed of a track segment, so watch out if intend to run fast trains on them (or even slow ones!).
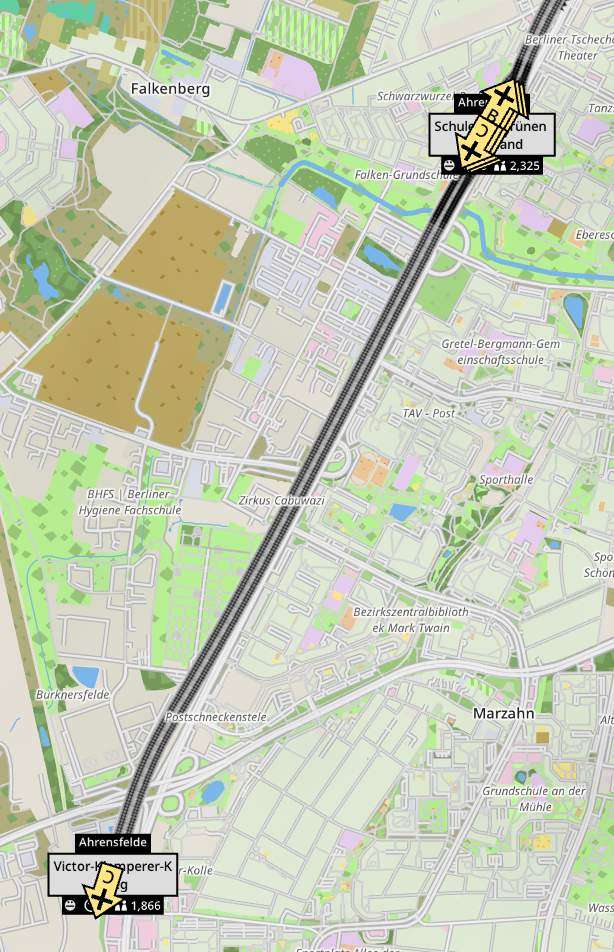
To allow for passengers (henceforth called pax) to board trains, you also need to build stations using the stations tool:
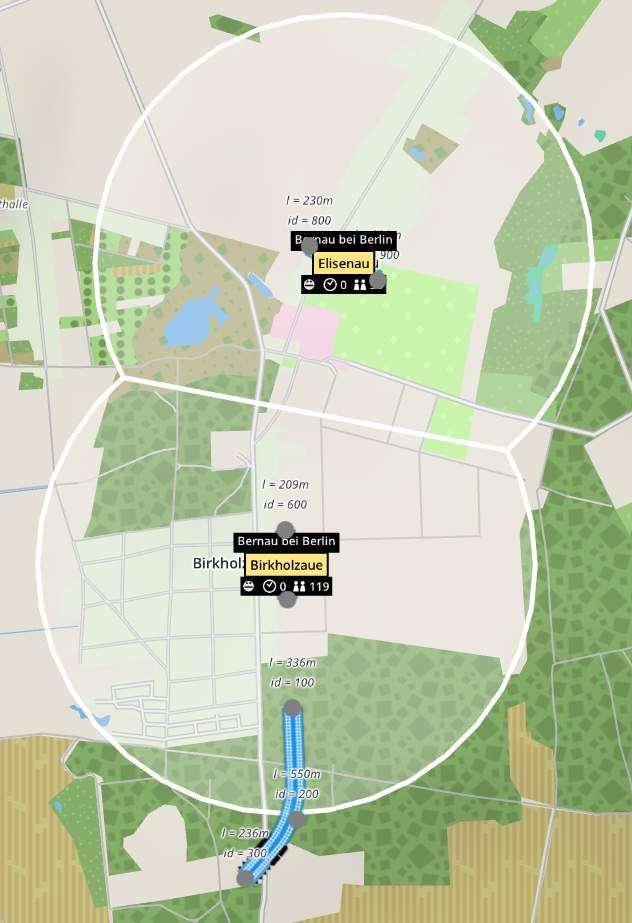
Stations have an area of influence. Station influence areas determine how much demand will be potentially generated to/from this station, in proportion to the population of its city. This area cannot be shared with other stations, and the game will automatically cut overlapping station influence areas:
Stations are not linked by default to existing tracks, and you must build another track segment to link them. For urban and local builds it’s often a good idea to start building with the stations, and then build the tracks.
Stations are not limited to a single platform either. It is possible and often desirable to have more than one platform in a station. To do so, just build another platform parallel to an existing one, making sure the border areas touch, but not the actual tracks:
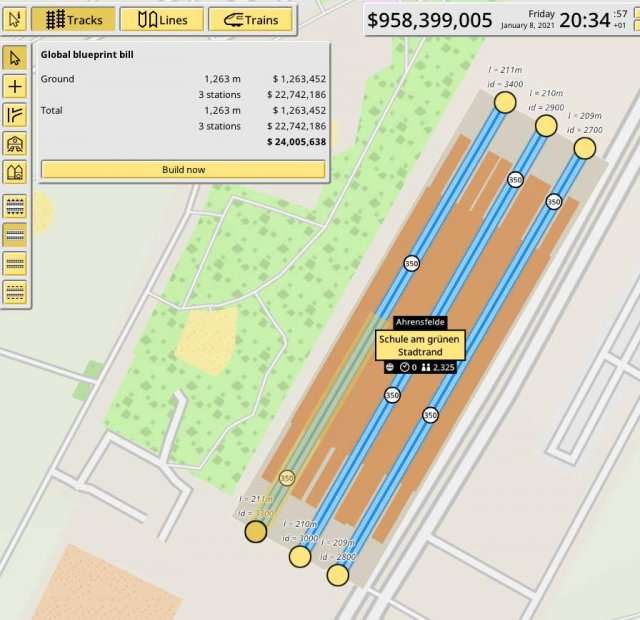
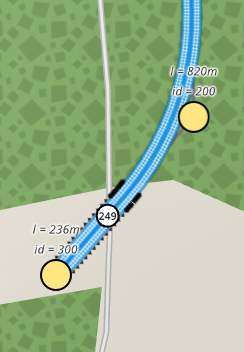
Other kinds of track, like tunnels, allow unlimited layering and even touching tracks, since these are assumed to be at different levels.
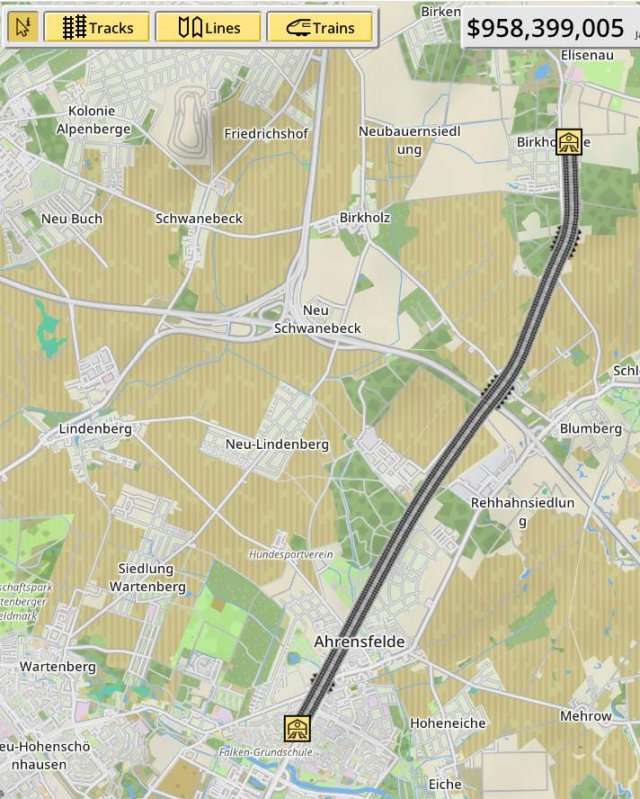
Let’s build some more tracks to link this town with the outskirts of a nearby metropolis:
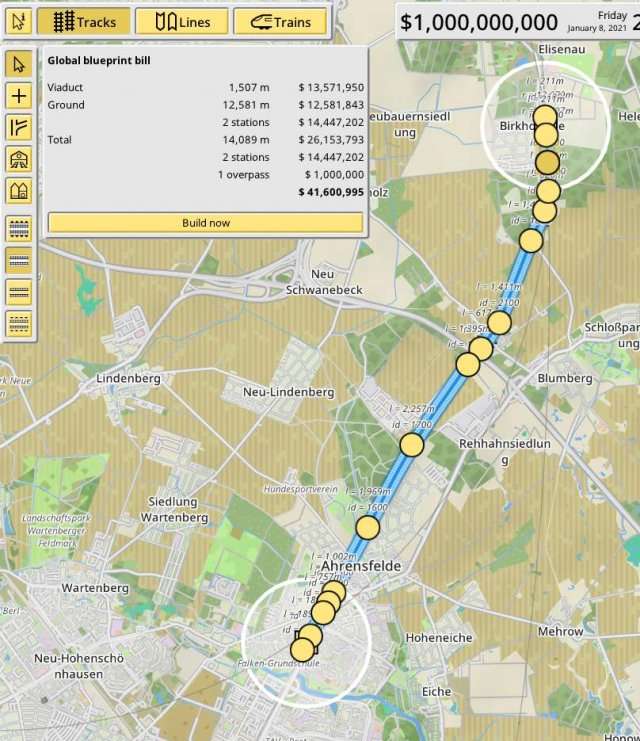
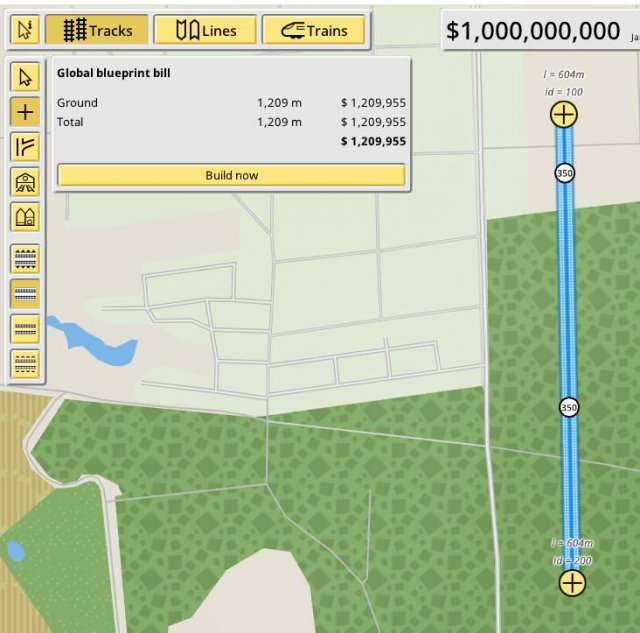
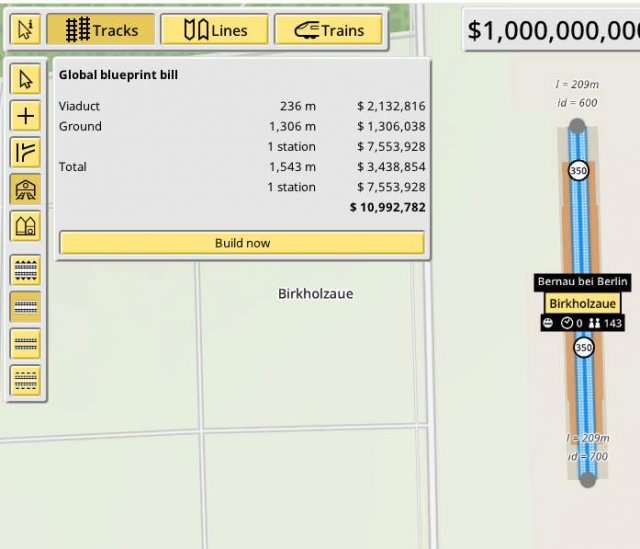
Tracks are always built in blueprint mode. Blueprinting is free, but you cannot define lines or run trains over blueprints. In order to make your tracks available for the rest of the game you need build your blueprint, with the “Build now” button in the blueprint bill dialog.
Creating Lines
With two stations and a length of track between of them, it’s time to define our first line. Lines tells trains where to go. Without lines it is impossible to give (useful) orders to trains.
Lines are just a list of station platforms at the most basic level. Trains assigned to lines will stop, in order, at every station listed. When reaching the end of the list they will go back to the start. In other words lines are always a circle. If you want to implement the usual “reverse at end” behavior, you must first list the stations in one direction, then list the stations in the reverse order, using the appropriate direction platform. This is a lot clearer with the following example.
To start defining a line, select the Lines mode in the top toolbar and then click the “Create new line” at the bottom of the left panel.

After creating a line you are shown the line editor panel. Lines have both a name and a code. The code is meant to be a short name used in places where the full name won’t fit, like in train icons. Then you can set the base ticker price, which every pax will pay once when boarding a train running this line. And the price per km, which pax will pay after leaving the train. Colors are important when running many lines, feel free to get creative.
After the basic line editor fields you can find the stop listing. To add stops to the listing select the “Add stops to line” button. It is the rightmost button in the bottom of the line editor panel.
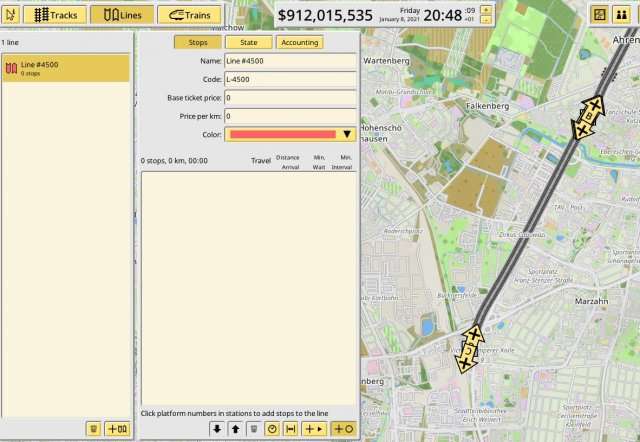
In stop mode a couple of clickable arrows are displayed on top of every (unused by the line) station platform. To add a stop just click one of these arrows. Before clicking “B”:
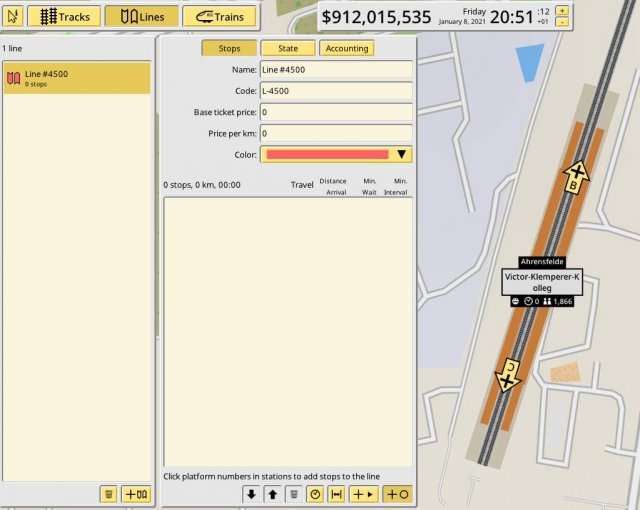
After clicking “B”:
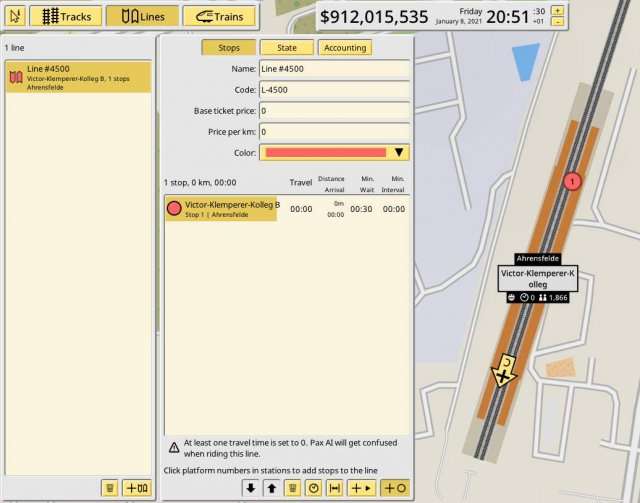
Our new line now has a single stop, which is not very useful. Let’s make another stop in the station north of it:
Clicking “B”:
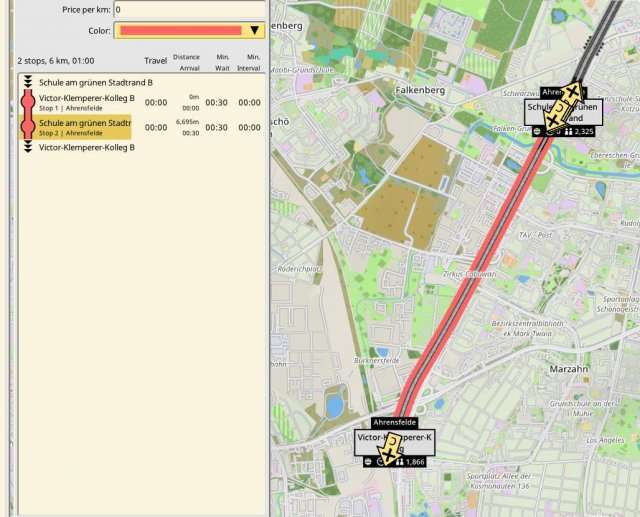
Our line now has 2 stops, the minimum to make an useful line. As explained earlier this line is circular: after stopping in Stop 2, trains will go back to Stop 1. If this was just a 2 station line, we would be done. But let’s add a third stop:
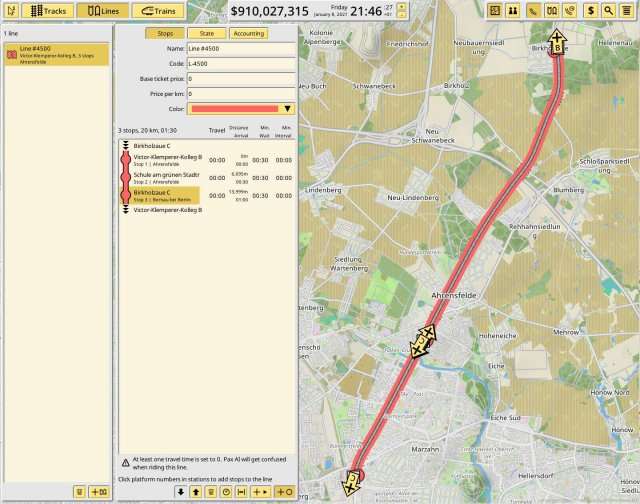
Now, after stopping at Stop 3, the train will go back to Stop 1, and in doing so it won’t stop in the middle station. So we must add a fourth stop in the middle station after stop 3. Let’s review how the final result looks like, and how are the stops distributed. You can match the stops numbers in the listing with the stops numbers on the map:
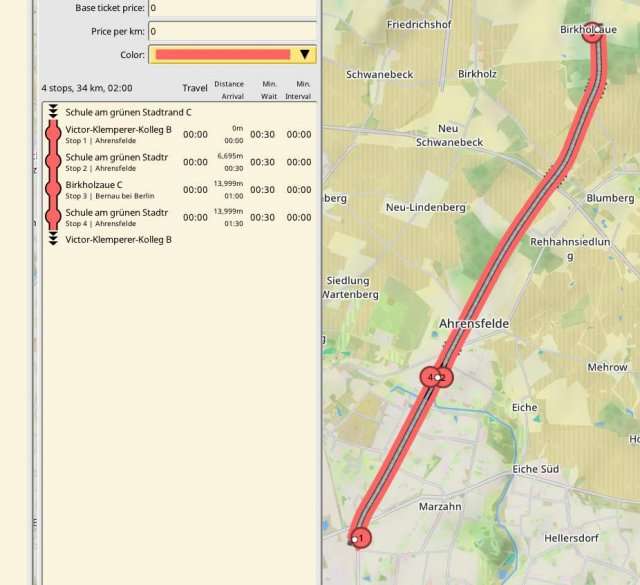
This line will operate like a typical “reverse at end” line but it’s in fact a circle, like every other line. Trains can start their day at stop 1 at the bottom of the map, then stop at 2, then go up to stop 3. There they will automatically reverse course (trains are allowed to reverse inside stations) and go back to meet stop 4 in the middle station, but on a different platform. No more stops are required in this example since going back to stop 1 is what we want.
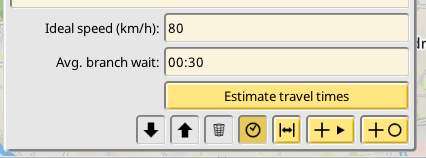
One final touch. There is a variety of timing features built into lines, but the most important one is travel time. This is how long are trains supposed to take to travel to the given stop. By default it is 0, and you must set it to a different value if you want the pax AI to make the correct decisions.
Doing is is as easy as selecting the “Estimate travel times” mini tool at the bottom of the panel. The ideal speed is how fast you want trains to run in this line. Make sure it’s a good fraction under the max speed of the trains you plan to purchase for this line, otherwise they won’t be able to compensate for events like waiting in a track branch or for a platform to become free.
Buying and Scheduling Trains
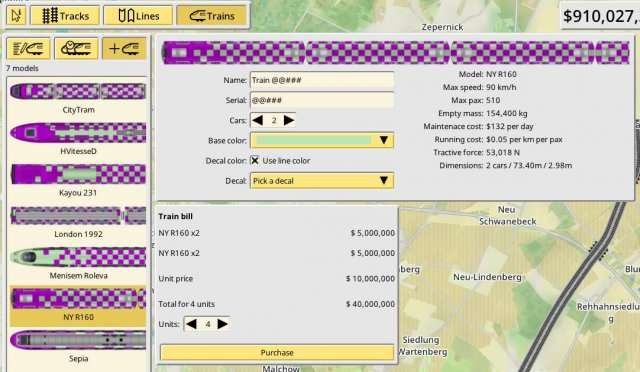
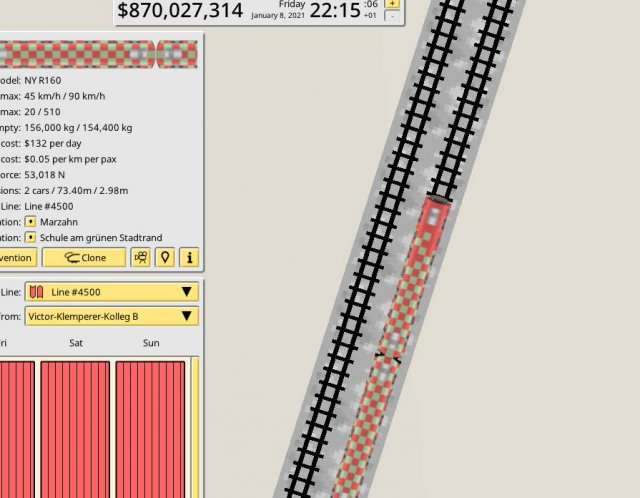
Let’s buy some trains for our line. Select the Trains mode, and select the train model you want. As of this version of the game only Multiple Unit trains are supported, so it’s not possible to do custom compositions. For this example I am picking NY R160, a high capacity subway and commuter train. I select the minimum number of cars and buy 4 of them:
Now I click the “List trains” option in the top left of the left panel, and click on the first train in the listing:

This is the interface for editing and scheduling trains. You can input a name and a serial. The serial is a short name that will be shown on the train icon. You can also pick a decal design and a base and decal color.
The large panel underneath is the train scheduler. DEV NOTE: this was originally designed as a much more important part of the game, but right now is a bit redundant. That’s why is so over designed. It may be replaced with something simpler and more focused in the future. For now you can just use in a fire and forget fashion like I describe in this guide, or you can use it to implement depots and night periods of no circulations. But that is for you to discover!
To assign the train to a line, just click anywhere in the empty schedule to select the default, empty order:
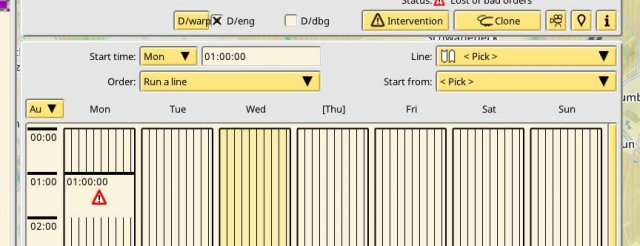
And then select a line in the “Line:” drop down:
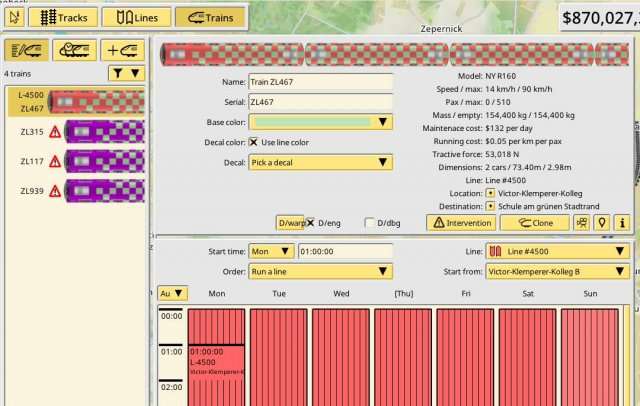
Since the train has just been purchased, it will be transported for free to the first station of the line, and begin to run its stops. You can click on the train in the train listing or click the camera button to follow its travels:
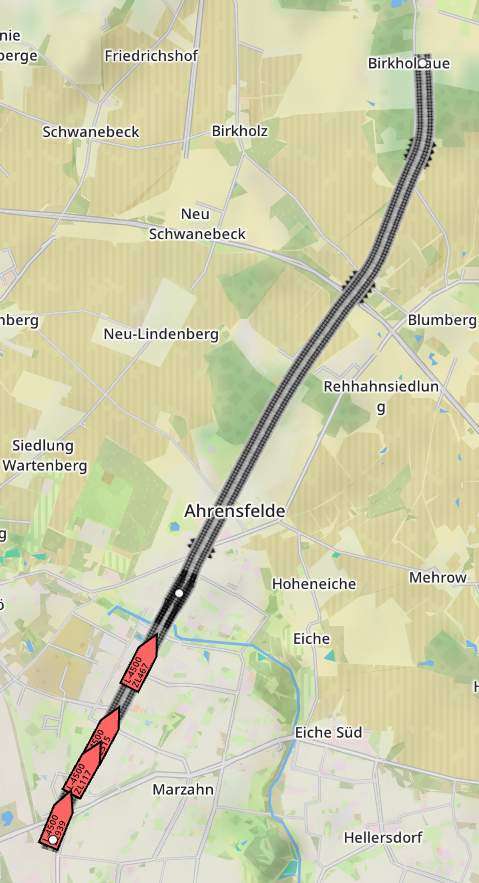
Now repeat the same steps on the other 4 trains, and your line should be running busy! Let’s fast forward a bit and see how it looks like zoomed out:
Mmmh, they stop and run alright, but it seems to be a waste to have them all clumped together like this. This can be fixed in the lines editor, by setting a minimum stop train interval in the stops. This will make the trains stop extra time in the station, until the minimum interval is meet.
If you go back and select the line in the editor, you will notice that after using the travel times minitool the editor is able to tell you the total travel time of the line, in this case 33:59. So if we want evenly spaced trains in time, we can divide that time by 4, and obtain a rounded interval of 8:30. Then use the minimum interval minitool to mass set this value. Select it and input 8:30, then click the Set button.
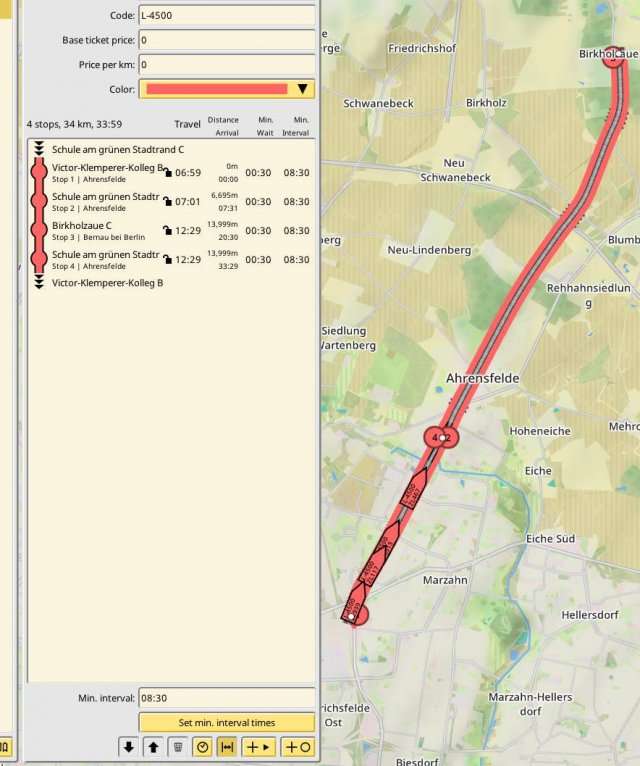
You may want to fine tune some intervals a bit depending on the length of some legs and the number of trains to cover them. In this case it can be a good idea to set an interval of 12m for the last 2 stops, to better match the travel time, since we lack trains to match the desired frequency. Or, if you left plenty of leeway in the desired speed when estimating the travel times, reduce the travel times to make use of that extra speed headroom and match the interval time of the shorter legs.
Tweak and experiment, and use the line state panel to check the real intervals the trains are taking. In this example I went and did the tweaks previously mentioned, stabilizing an uniform interval time, despite the large difference in distance between two of the stations compared to the other two:

Monitoring Pax, Satisfaction and Demand
Moving empty air is not a very profitable venture, no matter how well scheduled it is. So your goal is to get pax to board your trains, and keep them as satisfied as possible. The more satisfied your pax are, the better satisfaction rating your stations get. Station satisfaction directly influences how much of a demand exists for that station, which influences how many pax it can spawn.
Keeping pax happy depends on two factors: fare prices and travel time. A very cheap but slow line can work out ok, as does a very fast but expensive one. The exact formula is not public and it is for you to discover what works and what does not.
You can find out how your stations are doing by going into info mode by selecting the first button in the left toolbar, and clicking their yellow nameplates:
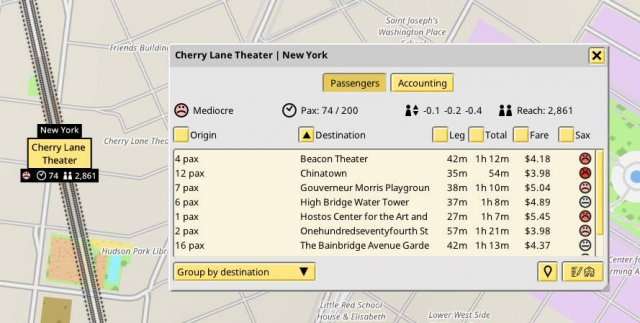
By default a listing of all the waiting pax is displayed, grouped by destination. Apart from the origin and destination for each pax, you can see for how long have they waiting and traveling, how much they have spend in your services so far, and what is their satisfaction level (these are averages for grouped views). If you hover your cursor on top of the satisfaction icons it will give you a hint of what is going wrong (or good):
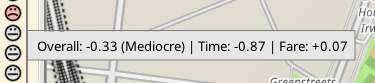
This pax is okay with the fare, but very upset about the time it’s taking to get to their destination, resulting in an overall mediocre rating. These ratings contribute to the rating of every station this pax visits.
Thank you. This was very helpful.
Please write another article accounting for updates someday.