
How to Create and Import Custom Scenery
Introduction
This is just a very simple basic guide to get beginners started with making and importing 3D scenery items into Train Simulator for use in their own routes or scenarios. Please note that items made and imported in this way should not be used in routes and scenarios which are intended to be published to the Steam Workshop. You will get an “unrecognised blueprint” error if you try to publish any custom-made stuff. Your items can of course be packaged and shared to others via 3rd party platforms such as UKTrainSim or indeed privately by email to your friends.
What You Will Need
In order to create your 3D models for import, you will need some appropriate software. I recommend a free utility called 3D Crafter. Everything else, you should already have.
Grab your free copy of 3D Crafter from the Microsoft Store. You will find the link via the website of amabilis – the creators of the software. Here’s the link:
- amabilis – download page.
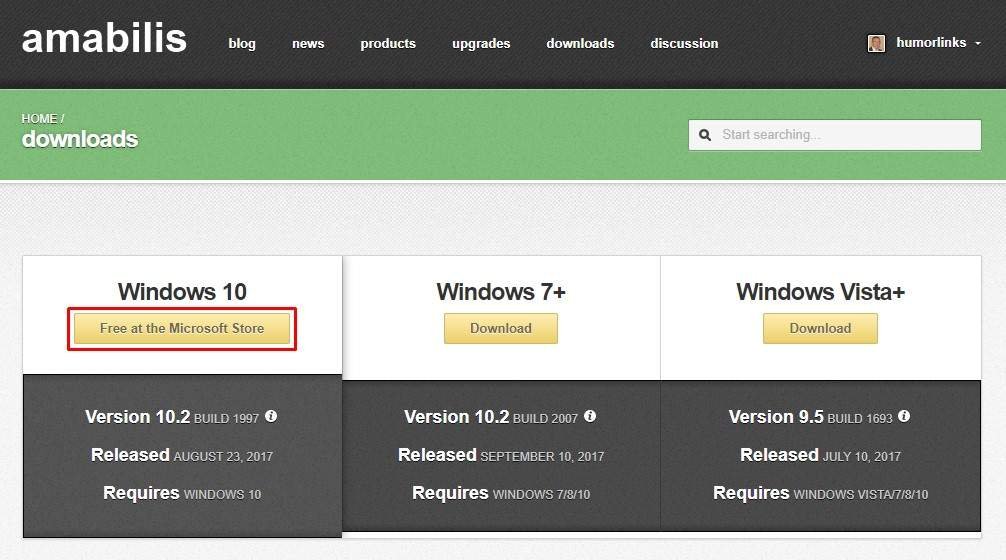
When you get there, click on the link in the red box shown above to go to the Microsoft Store page and download and install the software.
The other stuff you need is either already supplied with Train Simulator or is included in your operating system.
- Paint (or an equivalent image program) to make 128×128 bitmap images for textures.
- RWAceTool.exe – this can be found inside your RailWorks folder.
- BlueprintEditor2.exe – also can be found inside your RailWorks folder.
Create Your Developer Folder
This is where you will store your scenery item files and the textures used to create them.
You need to create the Developer folder inside the RailWorks/Source folder.
You can call the Developer folder anything you like that identifies you.
Inside this you need to create a Product sub-folder. Call it something which describes the planned group of scenery items.
And inside this create a sub-folder called Textures.
So the resulting path will probably be like this
This PC > OS (C:) > Program File (x86) > Steam > steamapps > common > RailWorks > Source > Developer > Product > Textures
But of course, you would rename Developer and Product to your own choice.
Here’s an example

Now you are ready to go on to the next step.
Making Your Scenery Item
Open your free copy of 3D Crafter and build your simple object.
In this example we have made a station sign for Gosport by drawing a rectangular box for the signboard, sizing it with dimensions of approximately 3 metres x 1 metre x 10 cm, applying a texture (a 256×256 .bmp image of a green sign with a white border) and then adding some white text over it to spell the word “Gosport.” The text also needed to have a texture applied (a 256×256 .bmp image of a white background). There is a tutorial in 3D Crafter to explain how to apply textures.
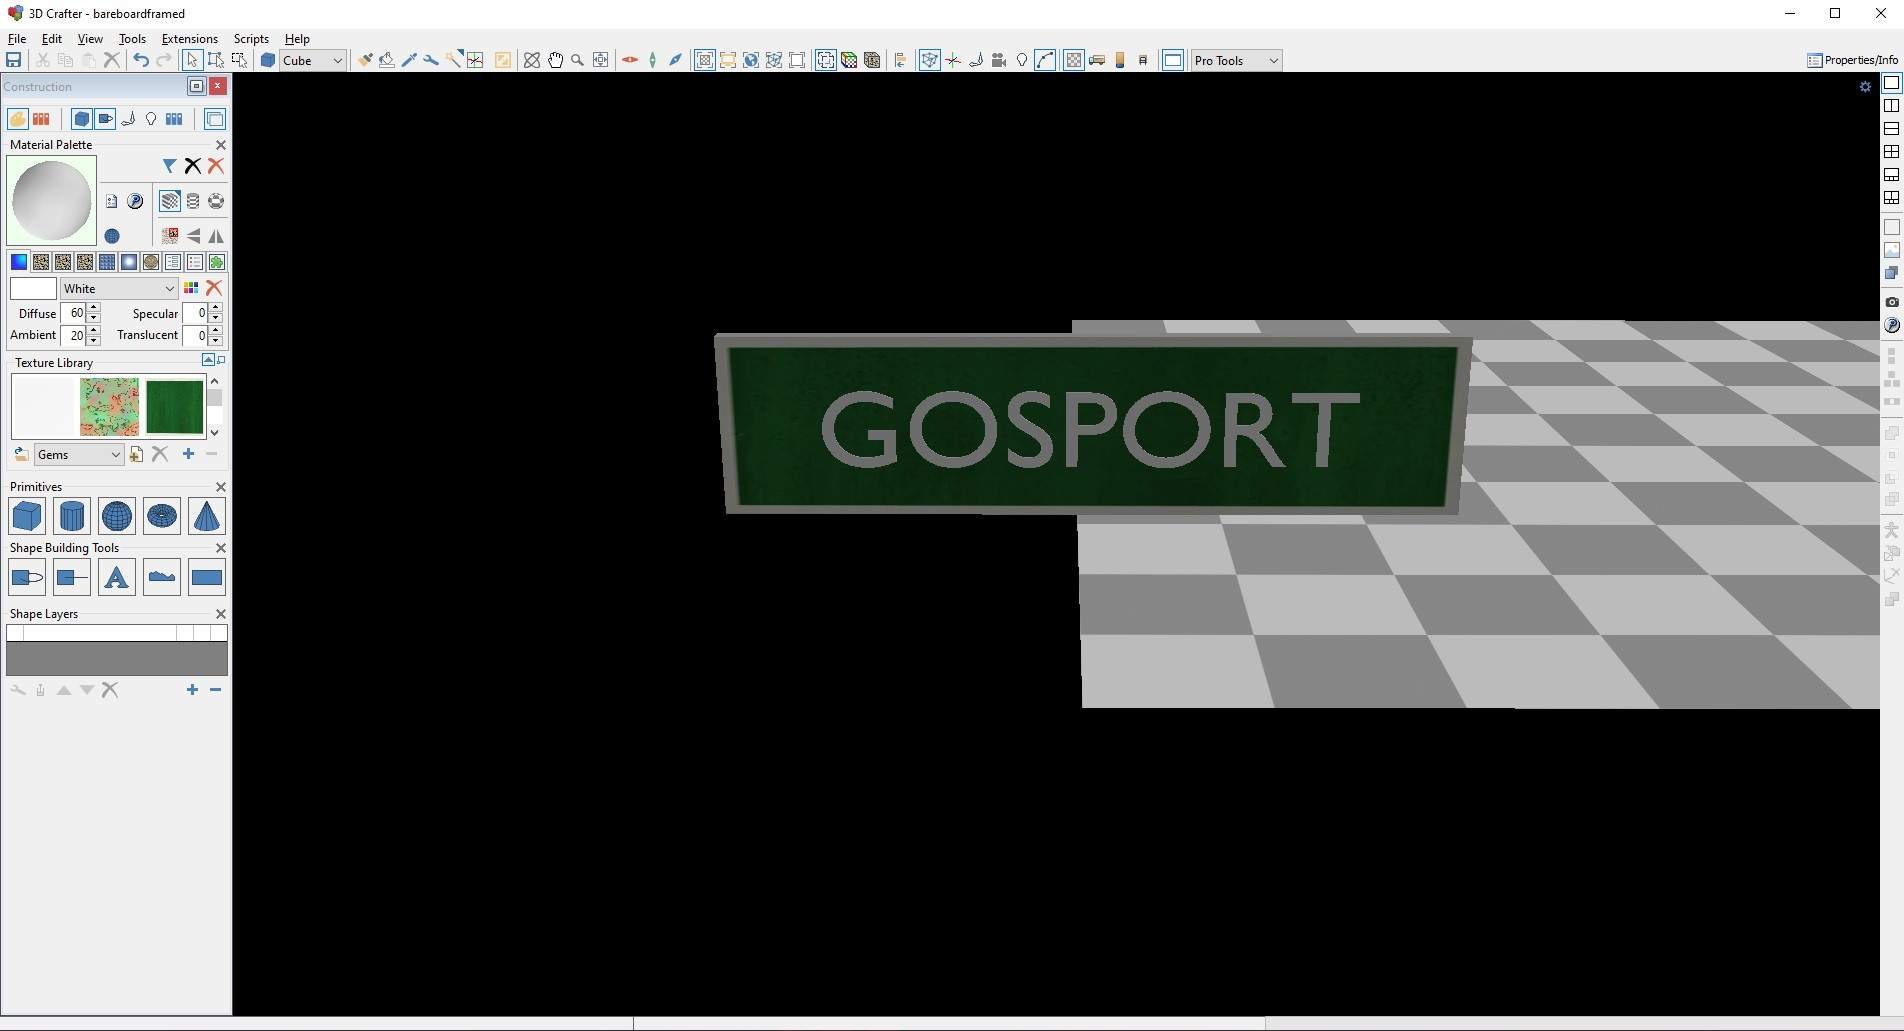
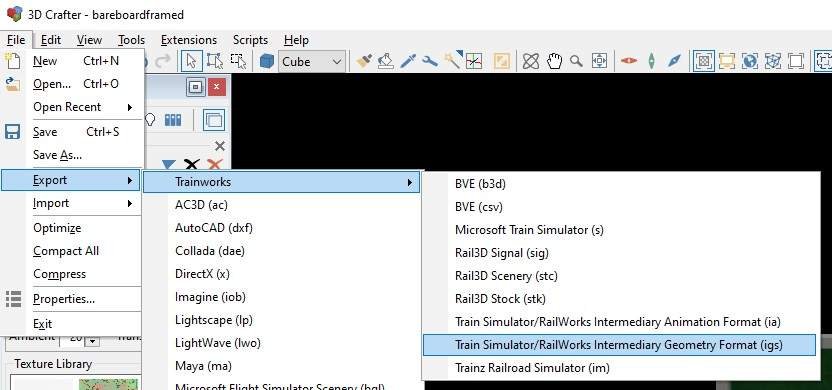
Now we select the board plus the text and use the top menu to export the model as an .igs file.
This window will appear asking where you want to save you new .igs file. For this you should select your Product folder which is in your Developer folder inside the Railworks Source folder. We shall call the file gosportsign.igs

You will now have to click a couple of buttons to complete the export operation. The first relates to distance-base levels of detail. As this is just a simple object which will not impact performance very much, we shall click “no.”
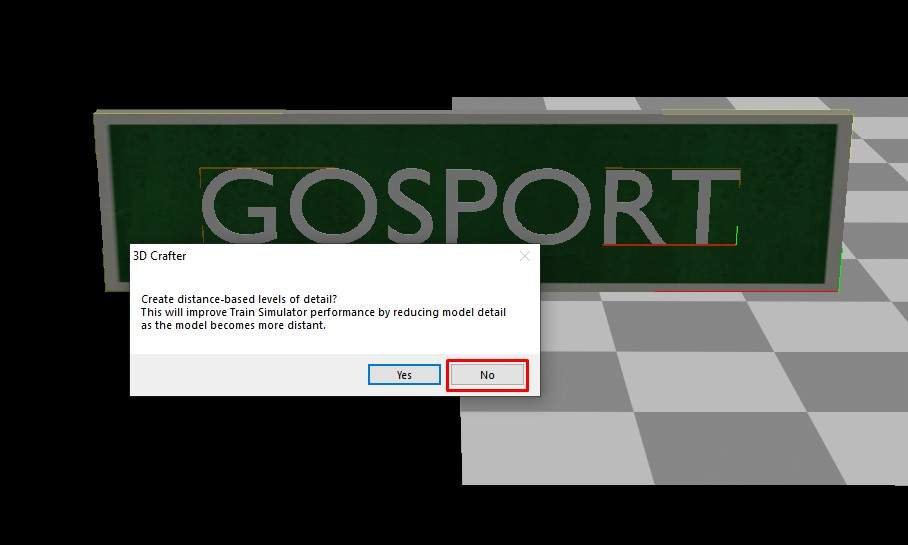
The next box tells us that the export is complete, so we just press “okay.”

You are not finished yet. You need to take copies of the texture files you applied, place these in the Textures folder inside your Product folder and convert them to .ace files.
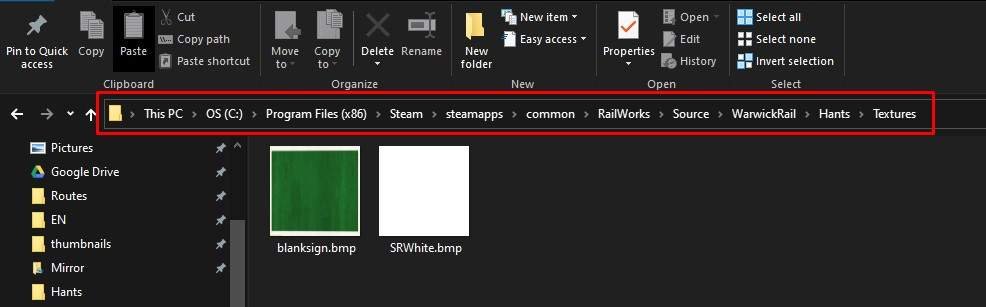
To convert them, we shall use the RWAceTool.exe program which is found inside your RailWorks folder.
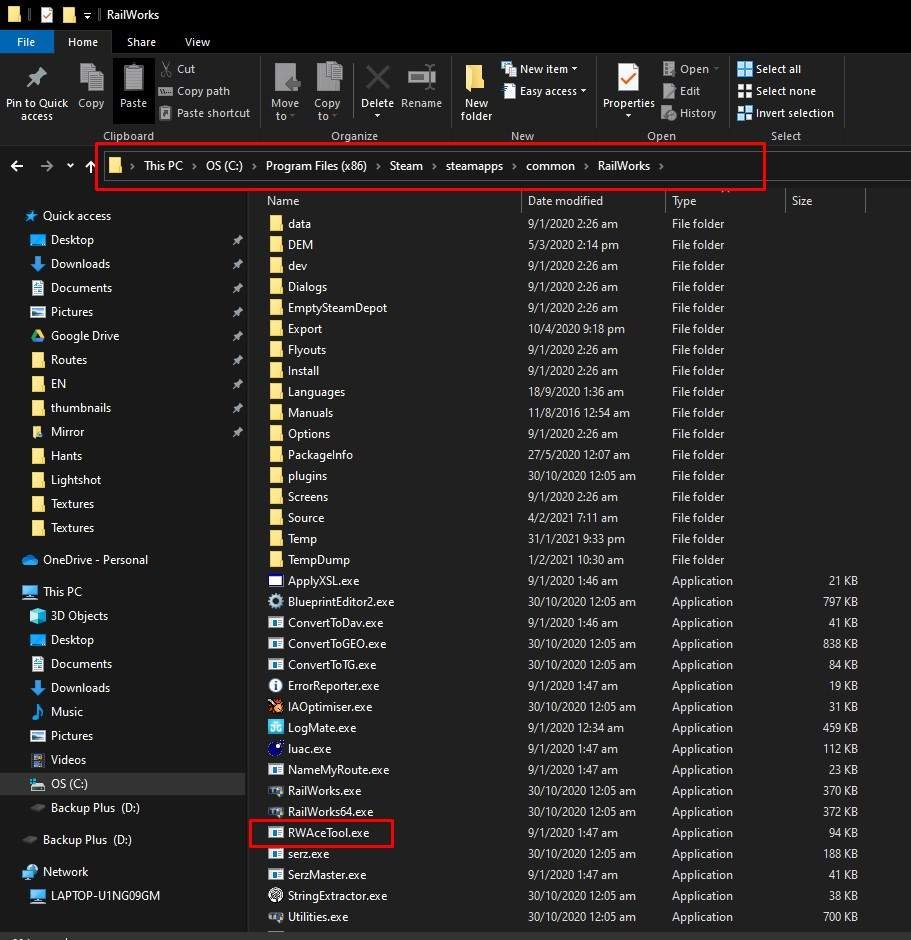
Click on the RWAceTool.exe file to start it. Then select the single image option (we are only converting 2 files so we can do them one by one).

Then we simply browse to the first texture file and press “Convert” to complete the operation.
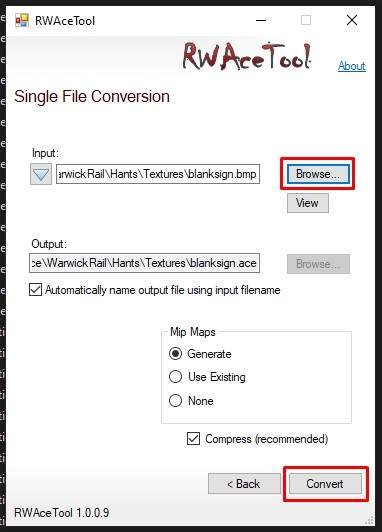
Repeat this for the other texture file.
The .ace files will now have been added to the Textures folder and we have all we need to import the object into Train Simulator, and we are ready to go on to the next step.
Importing to Train Simulator
Now you have all the files in place, it is time to import the item to Train Simulator so it will be available in the editor. For this, we must use the blueprint editor which you will also find inside your main RailWorks folder. It is called BlueprintEditor2.exe

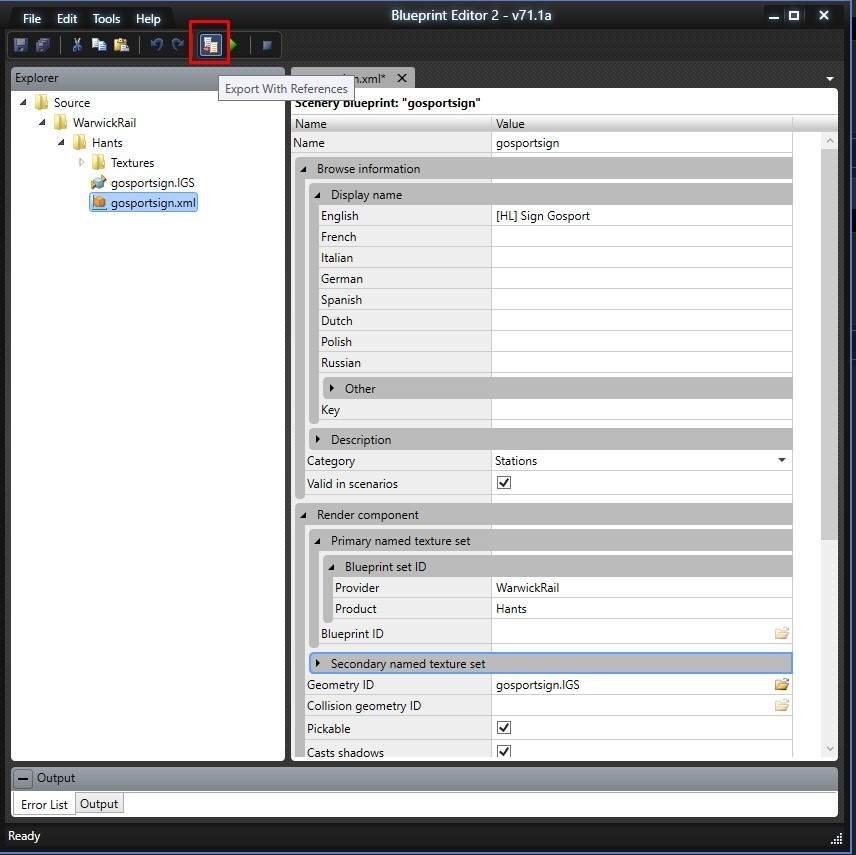
Double clicking on this brings up the blueprint window, and we navigate on its menu to open our developer folder where we will find our object’s .igs file. If we right click on the file, a window will pop up and we can select “Create scenery blueprint.”

In the window which opens, we must enter our object’s information. We need to enter a Display Name, Category, Provider and Product. It is helpful to also enter a tick in the “Valid in scenarios” box.

So in the above picture you will see that the Name gosportsign has already been filled in by the system automatically. Then we have entered
Display Name: [HL] Sign Gosport
- This will appear in the editor so we put [HL] first to mean the object belongs to Hampshire Lines.
- Then we put “Sign” to say what kind of thing it is.
- The “Gosport” to be more specific.
Category: Stations
You can choose from a fairly large list here, but since this is a station signboard the choice is fairly logical. We could have chosen “Clutter” but that is more suitable for other objects, like benches and watering cans etc.
Valid in scenarios: Ticked
This means that the object will appear in the scenario editor and can be used in different location according to the scenario. It is unlikely anybody would wish to add extra station signboards for specific scenarios, but you never know.
Provider: WarwickRail
This is the name we use so our stuff is grouped together in the object filter dropdown list in the editor. You would put your own developer name here.
Product: Hants
We use Hants as an abbreviation of “Hampshire Lines – Steam Era” (one of our routes). It is a way of grouping your creations under headings. You could name this anything you wish.
Now it is time to process the blueprint and make everything available for use. Click the little “Export With References” icon at the top of the screen
The next window will tell you that the operation has been completed and will say “Export Success.”
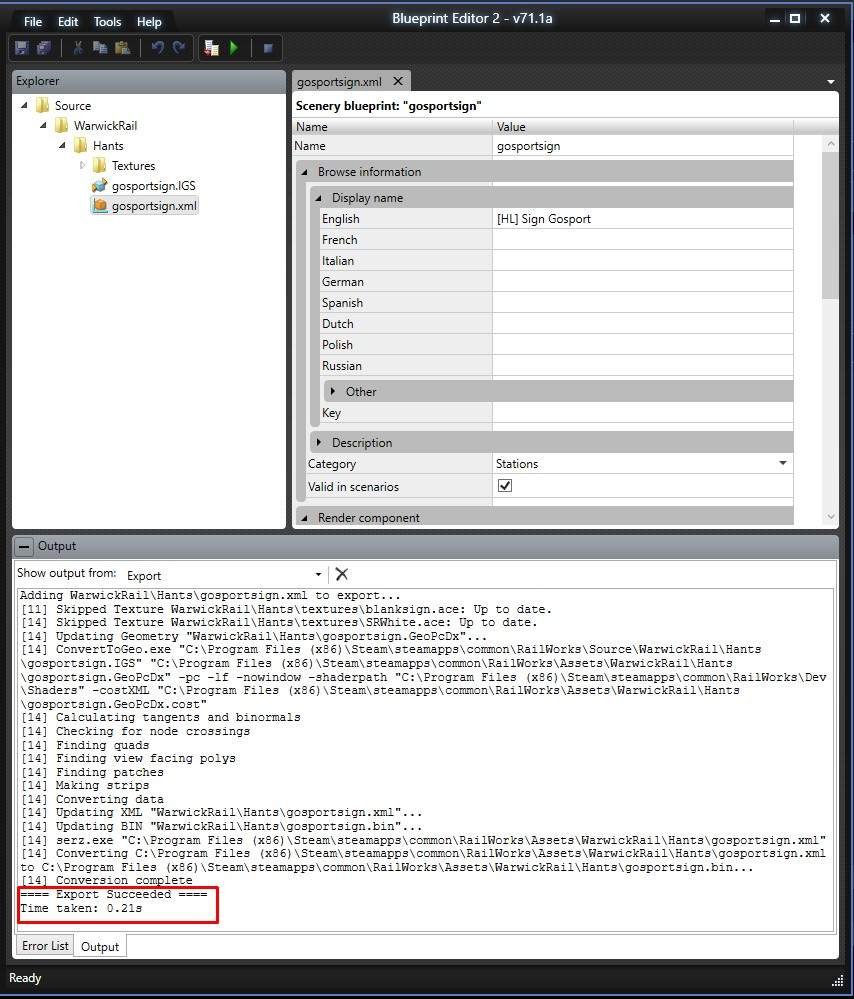
Your creation is now available to Train Simulator and you are ready to enable it in the editor and test it out.
Enabling and Testing Your 3D Object
To use any object in the editor, you must first make sure you have enabled the Provider and Project to which the object belongs. In our case, this is WarwickRail and Hants.
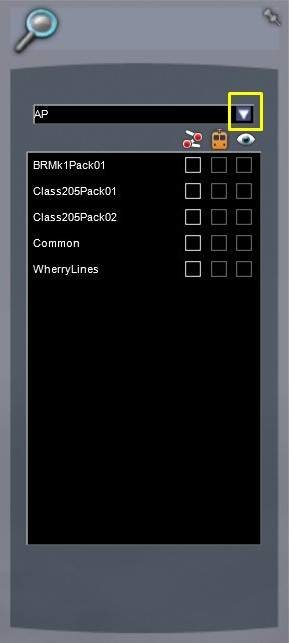
First open up the editor and select Stations
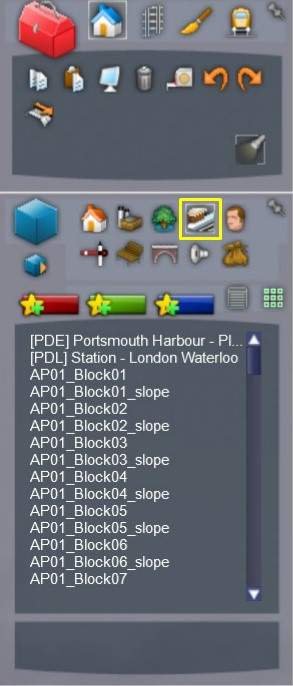
As you can see, we have clicked on Stations but the [HL] Signs Gosport object is nowhere to be found. So we must enable the Provider and Product – WarwickRail and Hants.
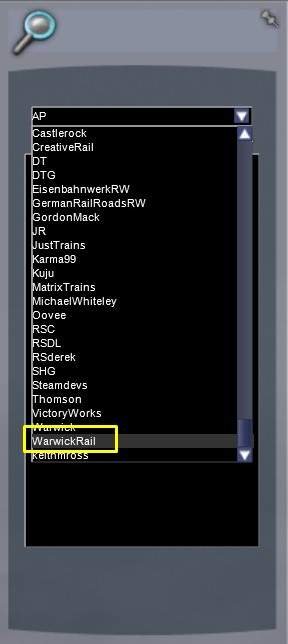
First click on the little blue cube, the “Object Set Filter” and then click the drop down box to select the Provider.
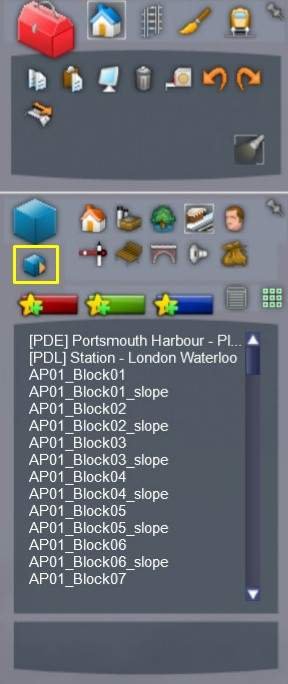
We select WarwickRail and then tick the boxes in the Hants line in the box which appears.
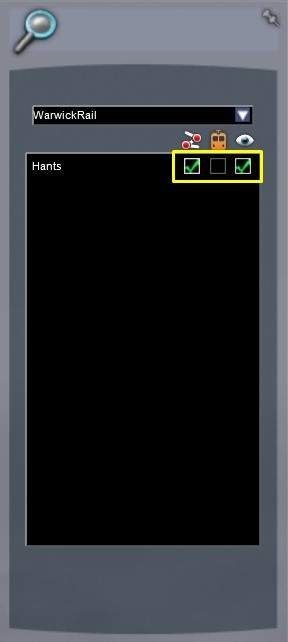
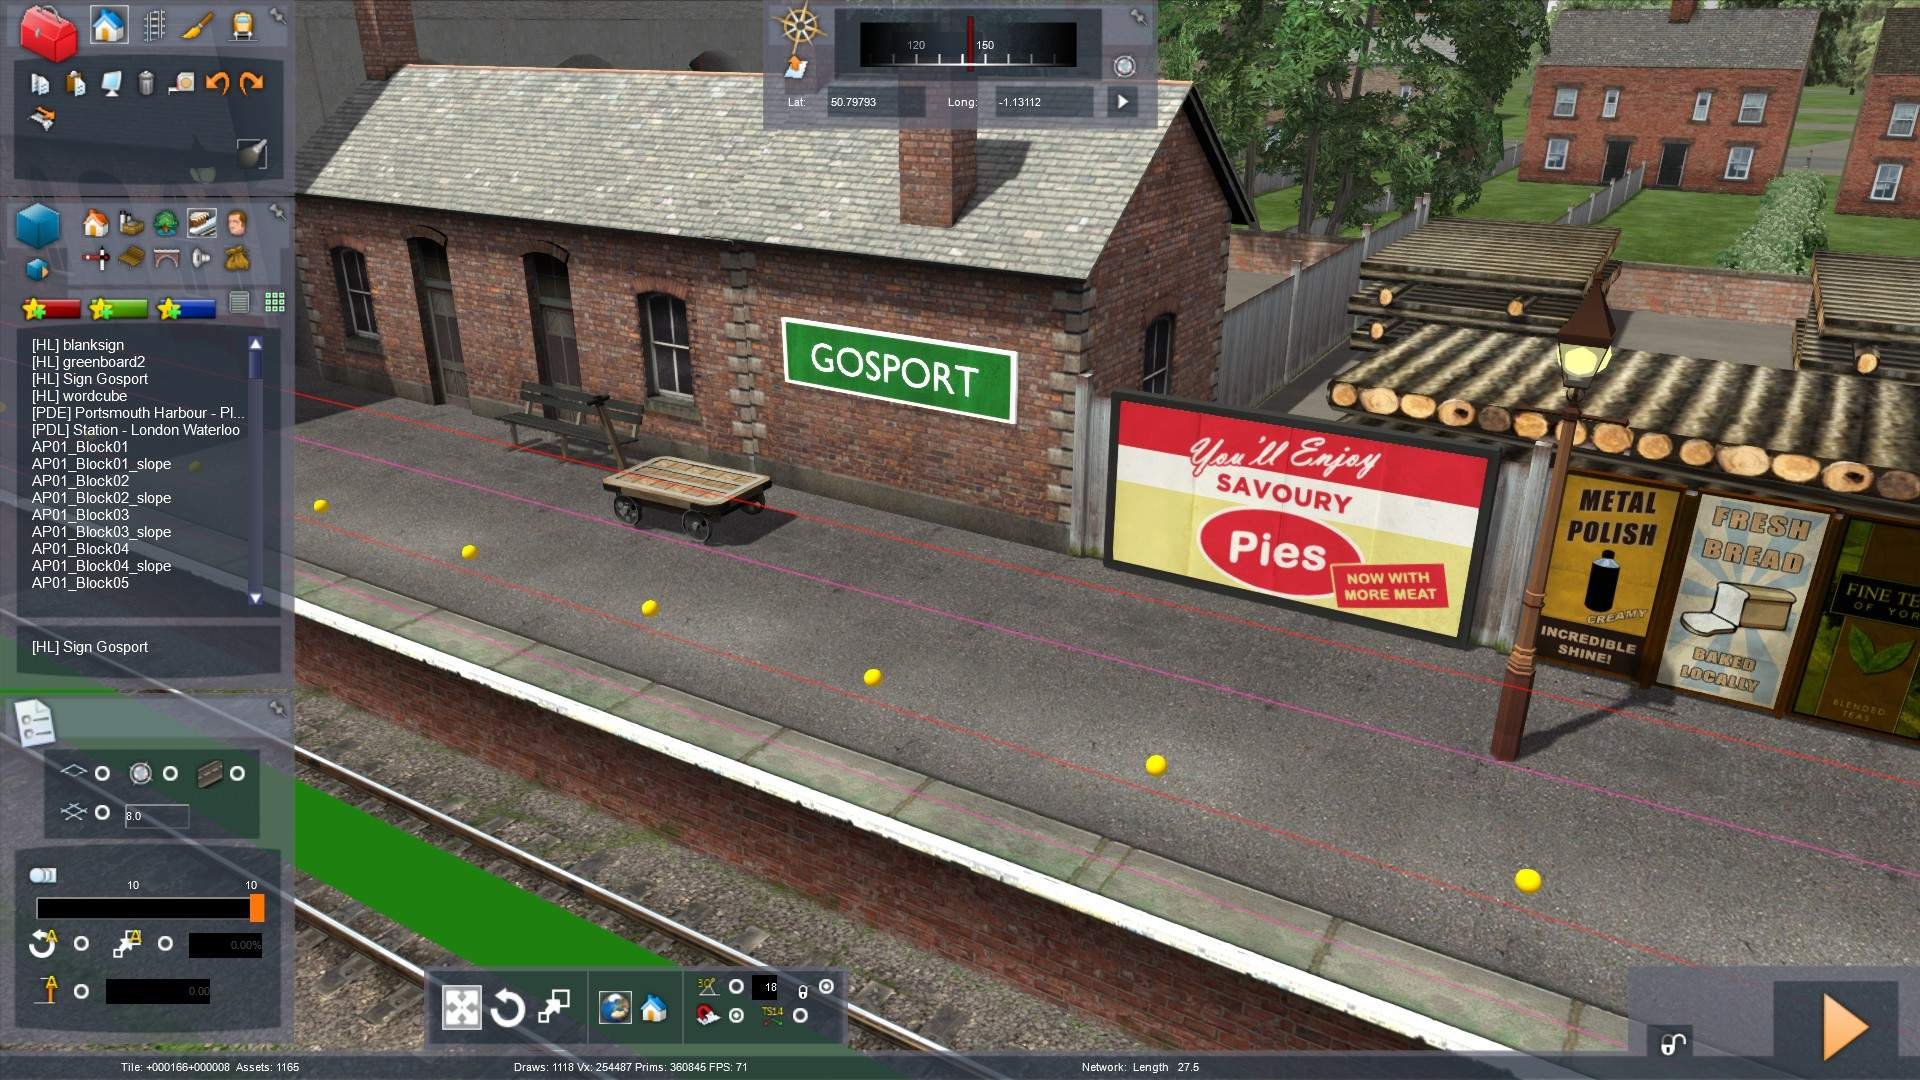
Now when we look at the Station list in the editor, our object [HL] Sign Gosport is there and can be selected.
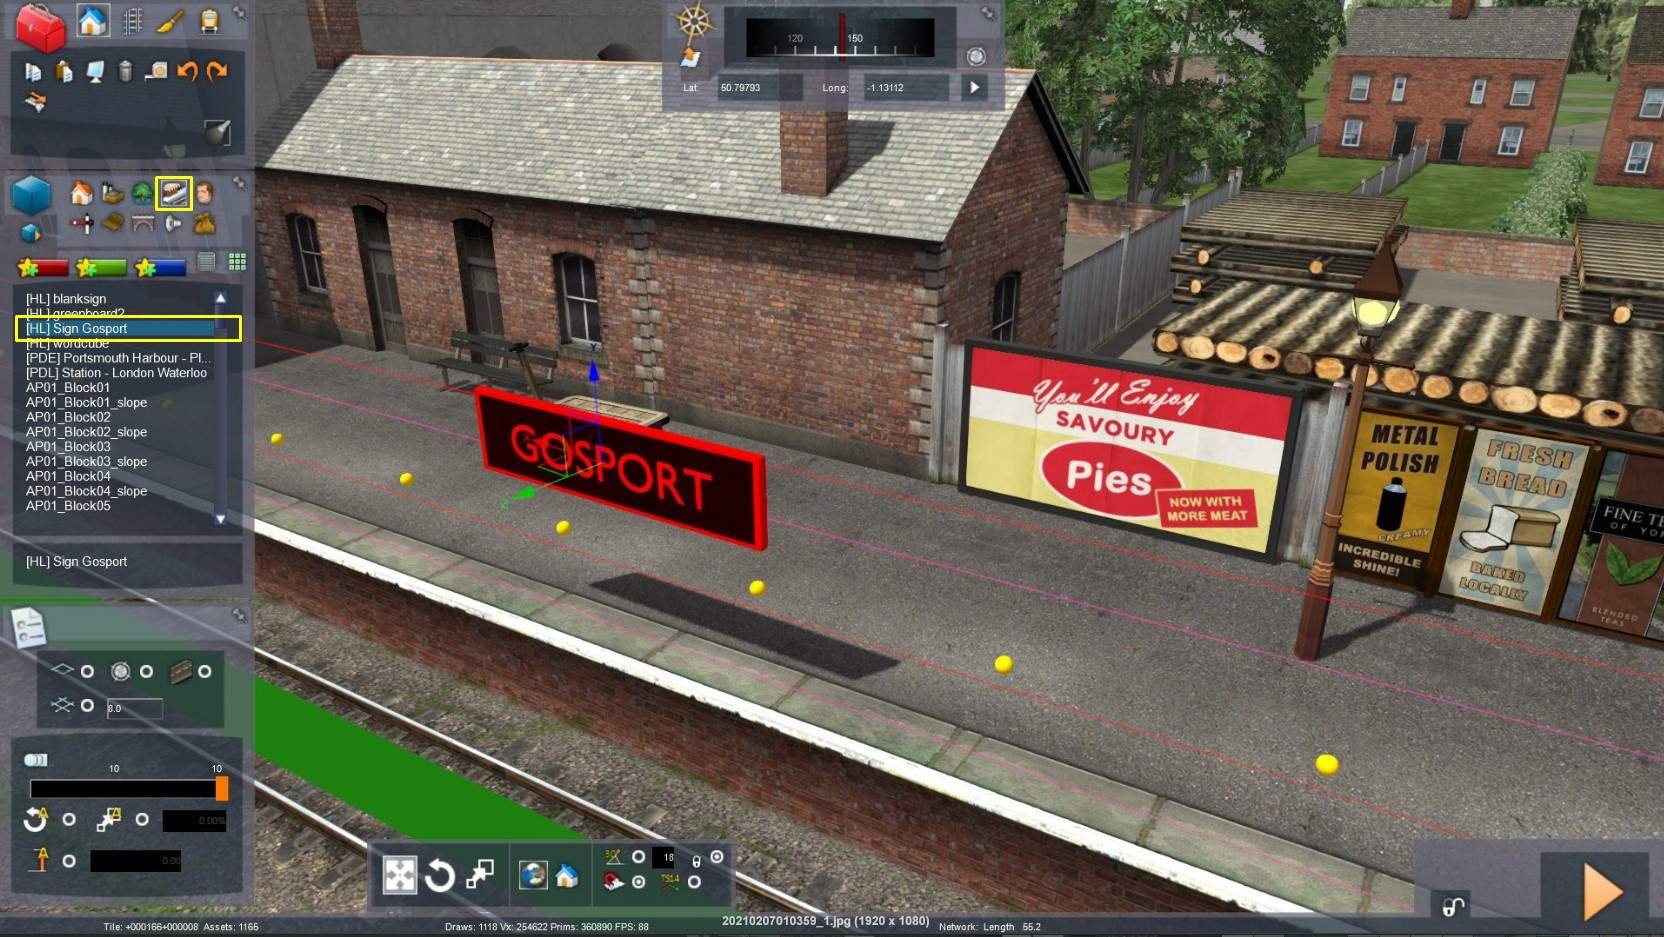
Lets place it on the wall to see what it looks like.

That’s all there is to it. Once you have created and imported your first object into Train Simulator, you can progress to more complicated items of scenery.
Be the first to comment