

Nightmare Hunt Boss Weaknesses
Nightmare Hunt bosses have a 90% damage reduction buff by default. To remove this buff, inflict one of the boss’s elemental weaknesses. The damage reduction remains disabled as long as the matching ailment is active. The buff can also be removed by applying Down, Airborne, or Stun.
Boss Weaknesses
Starving Ghost of Corrosion Furcas
- Burn
- Shock
Vanak the Bloody Hook
- Poison
- Bleed
Corrupt Barduk
- Bleed
- Frost
Gallore the Collapse
- Frost
- Burn
Ghoul Greed
- Burn
- Shock
Earthlander of the Ravenous Earth
- Poison
- Bleed
Early Game Critical Chance Guide
Stacking Critical Chance early is one of the most effective ways to increase your damage with relatively low investment.
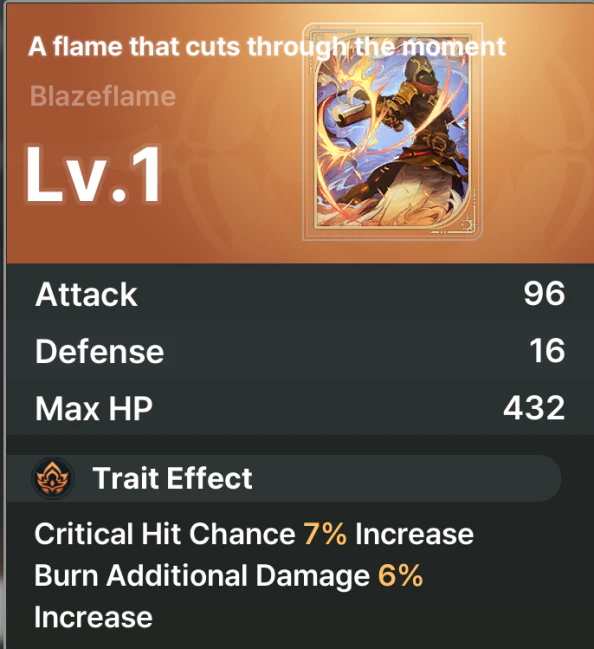
Upgrade Critical Chance Karmas
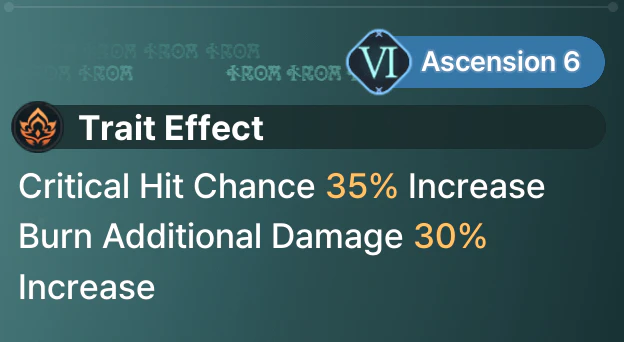
The Exchange offers several Karmas that increase Critical Chance while also boosting a specific damage type.
- Purchase multiple copies of the same Karma.
- Use the duplicates to Ascend the original.
- This can increase your Critical Chance from 7% to 35%, while also providing a damage bonus.
Easy Early Critical Chance Setup
A simple early-game setup can provide up to 55% Critical Chance:
- 5% base Critical Chance
- 35% from upgraded Critical Chance Karmas
- 15% from the Infiltrator 3-piece set bonus
Hero Awakening Bonuses
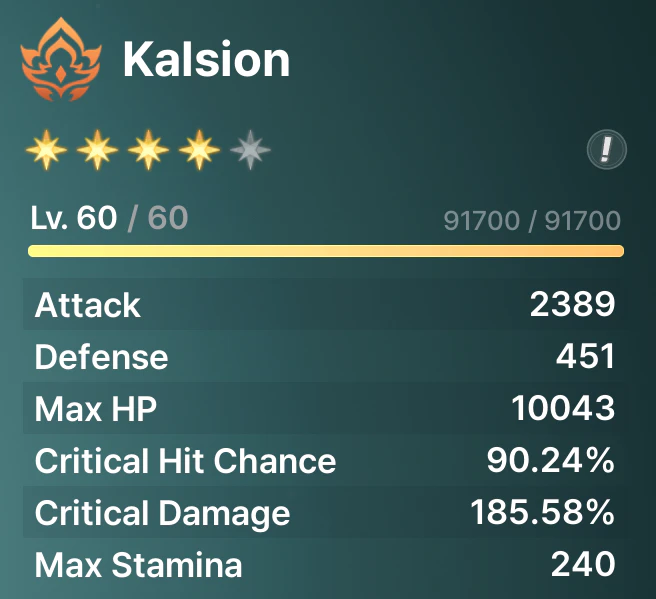
Some Heroes gain additional Critical Chance through Awakening, making it even easier to reach high Critical Chance values.
Examples include:
- Kalsion
- Kalien
Fire Build Optimization
For Heroes focused on Fire damage:
- Equip the Fire armor set.
- Its 3-piece bonus grants 15% Critical Chance when applying Burn.
- You can then switch to a 2-piece Infiltrator set for an additional 9% Critical Chance.
Reaching 100% Critical Chance
With optimized gear, Karmas, and Hero Awakening bonuses, it is possible to reach 100% Critical Chance.
Equipment Main Stats and Substats
Equipment bonuses are divided into three categories based on the type of status effect they affect.
Elemental
Applies to the following status effects:
- Bleed
- Burn
- Poison
- Frost
- Shock
Physical
Applies to the following status effects:
- Airborne
- Stun
- Knockdown
All Status
Covers both Elemental and Physical status effects.
Substat Effect
Status-related substats provide a flat Attack bonus while attacking enemies affected by their corresponding status effect.
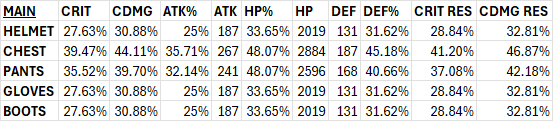
Main Stats
Sub Stats

Farming 5-Star Gear
There are two fast ways to obtain 5-Star Gear.
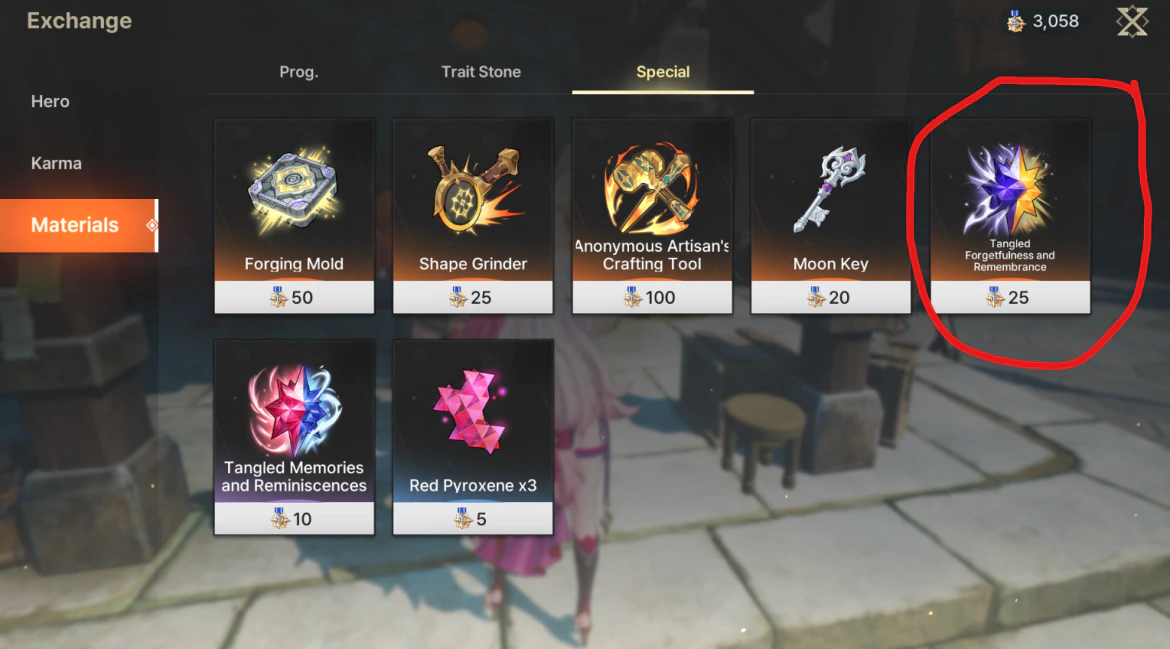
Exchange
Purchase the following items from the Exchange:
- Trait Stone
- Tangled Forgetfulness and Remembrance
Dungeon Rewards
Complete dungeons to obtain:
- Vein Crystal
These Exchange items and Dungeon rewards can be used to quickly acquire 5-Star Gear.


Character Swap Tips
Understanding the swap system allows you to maintain damage uptime and improve combat efficiency.
Swap During Attacks
You can switch characters immediately after using any attack.
- The swapped-out character remains on the field until their current attack or skill finishes.
- Once the animation ends, they automatically leave the battlefield.
- This lets you overlap attacks from multiple characters for higher damage uptime.
Example: Use Castella’s skill, immediately swap to Lute, and use his skill. Castella finishes her skill before leaving the field.
Off-Field Character Vulnerabilities
Characters that are not currently active cannot take direct damage, but they are still affected by certain mechanics.
Stability Break
If an off-field character’s Stability bar is broken:
- Every subsequent enemy hit causes a brief stagger.
- While staggered, you cannot swap to that character or use their Tag abilities.
- The restriction ends once the stagger expires.
Status Effects
Off-field characters can still be affected by fully applied status effects, including:
- Fire
- Electricity
- Poison
These effects continue to deal status damage even while the character is off the field. A full Stun will disable the affected character for an extended duration.
Example: Alex is affected by a full Stun status effect and remains stunned even while off the field.
Swap Cooldown
Each character swap triggers a 3-second cooldown before another manual swap is available. You can bypass this cooldown by using a Tag ability from an off-field character. After the Tag swap is performed, the 3-second swap cooldown is applied again.

Be the first to comment