
How to Obtain All Achievements
Opening
A compilation of various tips and tricks to get the achievements for all you achievement hunters out there! So you don’t have to do all the searching I did!
Should go without saying, but this contains spoilers for Incryption.
Also, since these achievements are naturally earned during the course of the game, they won’t be covered:
- Blood Artist
- Innocuous Insect
- Uncage the Menagerie
- Ancestral Vision
- Reborn Hope
- Miner’s Bane
- Grizzled Angler
- Face to Face
- Enduring Victory
- Renewal
- Doomed Necromancer
- Avenging Druid
- Accomplished Automaton
- Wizard Mentor
- Balance of Power
- Rank and File
- Essence Capture
- Painter’s Servant
- Natural Connection
- Murder
- Dramatic Finale
Squirrel Wrangler
Win a battle with damage from Squirrels! I know what you’re thinking, but this is surprisingly easy to do. Same goes for most of the achievements for the first part of the game, really – you can probably knock these out naturally without any effort.
In any case, there are a number of ways to do this. Plant some squirrels near an Alpha, for example, or get the Squirrel totem head from the fourth cabinet puzzle to give your Squirrels the fledgling trait. Simple and to the point. Just make sure you do it before you upgrade your Squirrels to Bees.
Gruesome Encore
Allow the Mycologists to experiment on a creature that is already itself an experiment! I thought this was referring to Experiment 13, but thankfully, it’s a lot easier than that. Just run into them, let them combine two of your creatures, and then make sure you get another copy and run into them again so they can combine the fusion they already made with the untouched creature.
Role Reversal
Steal back one of your creatures from The Angler! Another easy one…on paper, at least. It’s a bit harder to do than it actually sounds, and not for the reasons you think.
In order to get this, you have to have beaten the Angler at some point before. When you do, your next run (and every subsequent one) will give you the Angler’s hook as one of your starting items. This lets you steal a card from the opposing side of the field. Sounds fairly straightforward, right? Well… the thing is, when you get to the point where you’ve beaten the Angler, chances are you’ve gotten a fairly good grasp on how the game works, and there is a very good chance that when you get to him, you’ll steamroll his first phase on instinct and get him to phase two before he even has the chance to steal one of your cards. At least, that’s what happened with me – I never got to this on my original run before I got to Act 2.
The trick is trying to not immediately win, but also not throw the game so that the Angler kills you before you can actually beat him. Make sure he actually gets to the point where he uses his hook, then he steals your card, steal it back with the hook he gave you.
Dark Offering
Make an offering to The Bonelord! This is the easiest achievement to get when you’re doing Act 2 and it feeds into one of the other achievements, so I’m going over it first.
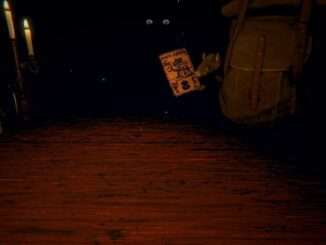
At some point, you’ll run into two different cards, both labelled the same thing – Broken Obol. If you don’t, you can buy them from the Trader for two foils each. In any case, you’ll notice that they’re two halves of a single coin. To get the achievement, you have to play them such that these two halves can connect into one whole, and when you do, you’ll get an Ancient Obol.
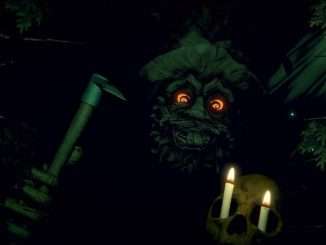
Go to the Bonelord’s crypt (it’s down the stairs where Mr. Dog Toy was guarding the entrance), talk to him, and you’ll unlock the achievement and get the Bone Lord’s Horn. Speaking of…
Collective Effort
Collect every card in the Original Inscryption! This is also fairly straight forward, and should be easy enough – this achievement actually counts cards across playthroughs, so if one doesn’t turn up initially, you can get it without having to get some cards from the first and still get the achievement. Naturally, grinding with the training dummy to get foils and buying cards off the Trader is a must, as is checking every nook and cranny for cards and chests you might have missed. You’ll likely do that naturally, though; here’s the cards you have to go out of your way to find:
Bone Lord’s Horn: Discussed previously.
Mycologist cards: Their hut is unlocked after you beat both Grimora and Leshy; talk to them with duplicates of the card they want four times to get the four experiment cards (and a key, but that’s for a secret thing not attached to an achievement).
Great Kraken: I…actually don’t think you need to get this one? Or at least, I don’t remember getting it in my first playthrough, and I got the achievement before I got this card. Could be I ran into a glitch, IDK. But regardless! You get this one by clicking on the two kraken tentacles, one at the dock connected to Leshy’s place, and the other in Magnificus’ bathtub in his tower. Clicking both in any order will grant you the card.
Devil’s Play
Attack for over 666 damage in the Original Inscryption! Are you ready to be at this for a while? Because this is going to be a while.
So, despite how utterly ludicrous this sounds, there’s an easy way to get this – the Ouroboros card, which can be bought off the Trader for eight foils. It permanently raises its stats each time it dies, and with the right set-up, you can infinitely kill it and bring it back to raise its stats to absurd levels. It’ll just take a very long time. Obviously, you’ll need to do this in a Training Dummy fight to get the best results. There are a number of ways to do this; the way I did it was to set up a Necromancer and Bone Heap, set up Ouroboros with a Meatbot to get it out, kill it, and then use Skeletons to set up a loop of: sacrifice Ouroboros and Skeleton to summon Ouroboros, get two Ouroboros cards (because of the way Necromancer works, you get two Ouroboros cards instead of one whenever its out; remember this for later), summon Skeleton, rinse and repeat. From what I hear this is not the most effective method, though, so feel free to try something else.
Now, you can either do this until Ouroboros has 666 attack and health… or, if you’re not insane, get it up to 222, use the Ouroboros card to end the match, and then start up another fight and use a setup to get both Ouroboros and Necromancer out on the field; with the Necromancer’s ability to inadvertently generate more Ouroboros cards, as long as you get the right sacrifices out, you can get three out on the field and deal 666 damage to get the achievement. Though, it doesn’t have to be precisely 666, as you can go over, so thank god for that.
Also, keep the Ouroboros in mind for later. We may be done with Act 2, but the Ouroboros will be back…
Agonizing Remorse
Don’t empty the Recycling Bin. Look, I know this is the rarest achievement of all right now, which can make it a little daunting, but I’m putting it up first because the way to get it is fairly obtuse and has a VERY narrow window. I cannot stress this enough; when you’re getting the Act 3 achievements, you have to get this first.
That being said…it’s actually surprisingly simple. Remember the fight with the Archivist, and how the second phase held one of your files hostage? Because of the way basic terms and conditions work, this is a bluff…but for this achievement, you have to fix that. In order to get this achievement, you have to pick a file, then let it die, and after the fight, you have to delete the file from your computer. Make sure you have a backup!
Grim Bounty
Defeat a Level 3 Bounty Hunter card! …now, how exactly do you get to a Level 3 Bounty in the first place? To put it simply, it’s tied to how much money you have – the more you have, the higher the bounty. This is also why the bounty resets whenever you die; ninety-five percent of the time, that means you dropped your money.
Now, remember that grossly overpowered Ouroboros card we created from earlier?
Yeah, you can get it back in Act 3. You just have to open up the bottom of the clock, with the specific code being available as an item you can buy in the Wizard’s Tower. The code doesn’t change even after you get the option to revisit, so you can get it at any point.
Get the card, get into a fight, and then let the Ouroboros get a direct shot in at the enemy. This will automatically generate enough money to give you a three star bounty. As long as you don’t spend it, you should find a bounty fight in no time! Which should be easily winnable due to how insanely busted your Ouroboros is. You really have to wonder how P03 let that slide…
Forgotten Lore
Receive all 5 cards from the Trader in P03’s factory. Actually less complicated than you might think! Firstly, there’s the matter of accessing the Trader – remember when you entered the fourth world, and there was a room with a lock that, upon being clicked and unlocked, seemed to do nothing? Well, it did do something, just not in the digital world. If you get up from the table after this, you’ll see that the door to your left is now unlocked, and you can now talk to the Trader.
Now, this would be the point where I’d tell you the locations of each of the five pelts…except I do not keep track of where I’m going ever, so you’re kind of on your own for that one? Sorry. I can at least say with confidence that one of them is in P03’s shop, but the rest you’ll just have to explore to find. Also, there are hidden arrows, and at least one of the pelts is hidden behind them. Make sure to hover your mouse over conspicuously empty spaces where an arrow could go to check; they’ll show up if your cursor is over them. I managed to find all five without realizing, so I don’t think this’ll be too hard.
Ow dang, I missed the Ouroboros’ secret ability
You can still get infinite damage though by feeding an infinite supply of bones or energy into one of the creatures with an activated ability to pump their stats. Necromancer and tomb robber gives you infinite bones (faster with an extra necromancer). Infinite energy can be achieved with the module that just gives you infinite energy.
It’ll work in act 2. I’m only partway through act 3, so I don’t know if it’s relevant beyond that.
You can also do the ouroboros thing without needing to go to the wizard tower! In the Grimora fight, if you have your ouroboros in play before her 1st phase as it goes to her second, not only will you get your original ouroboros back, but also the it’s free corpse duplicate! The corpse duplicate also affects the original ouroboros every time it dies. Sigils are preserved within corpses. I also learned through this process that the hammer deals only a mere 100 damage to your cards.
There is an easier way to get the “Squirrel Wrangler” achievement. The rare card “Amalgam” (2 Blood / 3 Attack / 3 Health) counts as a squirrel. No sigils or actual squirrels required!
I beat fleshy and took his picture with the spare roll
For the grim bounty, the bounty cards are the orange faced cards that interrupt your already ongoing fight with a short dialog and are generally much more powerful than the other opponent cards.
For “Collective Effort”, there is a rare undead card called Drowned Soul that can only be obtained from the well behind Kaycee the ghoul.