
Basic guide on positioning, team composition, play style and recommended actions in order to beat levels, enemies or scenarios on the No Mercy difficulty. This will assume you have friendly fire on and that you are upgraded although upgrades are not a hard requirement. Potentially in the future this guide will include information on specific routes, encounters or other maps specific areas or events.
Guide to Beat No Mercy Difficulty
All credit goes to Jesus Christ is King!
Team Composition: Part 1
One of the most important parts of the team is a balanced selection of abilities, roles and contingencies.
One of the most important parts of a team are the use of a Chaplain or Tactical’s special ability to revive many or one member of the team as is the case with the latter class.
Arguably the second most important class is that of the Apothecary with his ability to heal one or all the members of a team.
The third most useful class is the Librarian with his many stunning, horde clearing abilities but most importantly, especially for some of the latter levels of the game is his ability to instantly destroy turrets.
More classes will be discussed in less detail later as they are not of significant import and most players will end up playing them if given the opportunity simply because they hold a lot of power and/or are cool.
I’ll dive deeper into each classes best position and recommended armaments in another section but for now I’ll focus on the more unique reasons to have each class, although some classes are not mandatory I would recommend each player strive to select one of these classes or discus who should play what class or to inform drop in players which role needs filling.
Chaplain
Starting with the Chaplain, Chaplains have a significant importance due to their ability to revive the entirety of the team every approximately two minutes, the ability to induce invulnerability for the whole team for ten seconds and to absorb, amplify and send any received damage back to it’s source (including teammates, be careful with AOE attacks) for a short duration.
Call to Arms
The revive ability is extremely important for respawning teammates but most important for use when a team is at the brink of failure. Respawning can only be accomplished after some 200(?) seconds after death occurred, after the opening of a resupply portal (not actual name) and with the use of one of two abilities.
This ability should not be spent indiscriminately but also not held to like a baby. If you find yourself travelling between objectives and without a tactical or one with his ability on cool down I recommend you just use it right away, matter a fact the sooner you use it the soon it’s off cool down. When to hold on to it is best before or during tough encounter or if a resupply portal (not actual name) trigger is near by.
When you find your self in a tough encounter it might not be uncommon to lose one, two or even three squad mates for any number of reasons, from inexperience, blunder or upgrades to your real life Genestealer encounters or responsibilities. No matter the reason if you use your ability to bring back the first player you might find yourself up creek without a paddle when other members start dying. To circumvent this keep an eye on the living players and the state of your position in the encounter, sometimes bringing back a teammate can retaliate your defence and save the situation but often times it’s best to wait till you have multiple terminators dead, after all a tactical can revive a single fallen hero. Now I know your worried what if I die before I the others die?
Simple! Ignore death and hit the button the instant the animation plays you’ll still revive your teammates so worst comes to worst you have three fresh terminators who can sit in spawn and play the clock until forced into the map and hold out til the your respawn timer is complete, another revive is off cool down or the next objective is accomplished.
Litany of War
This ability gives all members of your team ten seconds of invulnerability and applies an orange HUD element! Now this only has a cool down of a minute and a half so just use it as much as possible or save it for breakthrough encounters or Lictor alerts (fuzzy mini-map). Think of this like a potion, drug, food or power weapon in another game if you never use it except for emergencies your under utilising it on top of that it’s not fun and you loss out on cool moments.
Retribution
The Chaplains third ability entirely protects the Chaplain from damage, it also and most importantly multiplies and sends the damage back to it’s source, it will apply a blue HUD element. The cool down on this power is only a minute but it also doesn’t last as long, only five seconds. Treat this ability just like with Litany of War use it often although when you use it try and absorb damage for your teammates or face tank what ever is bothering you or your team and try to not get shot by friendlies and same goes for friendlies be careful when Brood Lords and Scythes or Aberrants are around or if you think the Chaplain activated his ability. This ability can be useful if your in the front but often teammates indiscriminately fire forward when enemies are encountered where it shines brighter is at the back of the bus where you may occasionally get overwhelmed where in the Genestealers will end up killing themselves saving you health and teammates time saving your skin it also lets you play further from the team. Consider using it to help with pesky turrets or Aberrants.
But the most important use of Retribution is to get in the way of charges from Brood Lords and Scythes dealing substantial damaged to it you can also let it hit you a couple of times before others and yourself start stunning or dodging said monsters.
In summary the Chaplain’s powers make for excellent contingency plans.
Apothecary
The selling point of the Apothecary is it’s sustain through healing allowing a team to play reckless, poorly, or help when stretched thin. Although Apothecaries aren’t needed and many a times players or teams have been placed into tough situations with one or two survivors after an engagement and make it to the next resupply portal (not actual name) without sustaining serious and/or more damage. But the Apothecary adds a lot of confidence and reassurance, boosting a teams moral because a player will usually be at or near max health and if the worst happens, Dad is there to help! Not equipping a narthecium doesn’t remove his abilities but it does increase their cool downs by more then double, seldom should a team elect to go without the nathecium.
Heal
Exactly what it says on the tin, fully heal a teammate. Use it often it only has a minute cool down. Generally best employed when someone is not in yellow or green condition or when best used when someone is crippled, keep an eye out. Be ready when Brood Lords or Scythes come out because if some one misses a stun or the Chaplain/other is late to shield up then instant or near instant death may follow. Aberrants also cause large amounts of damage.
Auto Heal
Heal yourself to full health about the same cool down as “Heal” minus five seconds. Use as you see fit, there isn’t a fancy health dial for you character so get your bearings with the health mechanics. Consider using if your torso or head is orange or red and if a limb goes red or black (crippled) consider using it.
Mass Heal
Heal everyone in a rather large radius around you for five seconds, cool down is only twelve seconds longer then “Heal”. This power will heal cripples but many player use it when the team is mostly topped off, near yellow, to keep everyone at a sustainable place and then us “Heal” on those critical players or situations.
The Apothecary sort of has a dance to him, you’ll get use to it as you play. He can very easily carry a team and can very easily play as the bus driver. Funnily enough his speciality weapon can do more harm then good too, lol!
Team Composition Part 2
Librarian
The dirty psyker is often slept on in favor of bigger guns or hammers but in fact he fills in for two rolls and in a few other niches. The important parts of the Librarian are instantly killing turrets, packs of xenos, stun locking groups of Genestealers with his sword, halting Genestealers actions with his psychic powers and sniping Genestealer Cultists. With good positioning and melee skill one can stun lock groups of Genestealers with quick sword strikes giving his teammates a reprieve from the action or opportunities to mow down his enemies with zeal or the Librarian can simply shoot, use the environment or his Spontaneous Combustion to deal with these packs of xenos. A smart Librarian can also survive and deal a fair amount of damage to a Brood Lord, Scythe or Aberrant with his stuns and movement.
Shockwave
About every ten seconds the Librarian can stun and knock back any creature in the game. Use this often and in stun lock combos. Here’s some good uses
- Leaping enemies
- Nearby Lictors
- Brood Lord/Scythe charges
- Enemy attacks
- If a Genestealer blocked an attack you can interrupt their counter attack
- If Genestealers are in between teammates the Shockwave will help push enemies off teammates, stun them and might even push them into unaware teammates line of sight, letting them know there’s a problem.
Chain Lightning
About every ten seconds the Librarian can stun and damage enemies at close and long ranges. Use as much as possible, also lets unobservant teammates know that something is creeping up on them from behind. This will one shot turrets and is why it’s super convenient to have a Librarian, especially on turret heavy maps.
Spontaneous Combustion
Approximately every minute the Librarian can annihilate and stun groups of enemies from close to extremely long ranges. Don’t be afraid to use this, go ham. Does negligent damage if any to teammates.
The beauty of the Librarian is the ability to destroy turrets instantly; which may sound like small fries but can come in clutch often, being able to control groups of enemies with stuns and melee prowess just like an Assault, blow up packs of xenos like a Heavy with Spontaneous Combustion and go toe to toe with a Brood Lord or Scythe. The Librarian is very versatile, I’d recommend giving him a go.
Other Classes
Most of these classes have a niche and someone or two will always be playing these guys, even to the detriment of the team. The Tactical is basically considered a outdated and outshone Chaplain by most of the community. The Assault is usually either going to kill the whole team, cheese Brood Lords and Scythes or they’re just going to be unusually good. And the Heavy Weapon Speciality is the “lol said the big gun, Lmao”.
Tactical
Can revive only one teammate, shield only one teammate and spawn a Servo Skull with a bolter. Cool right? Okay just play Chaplain for the same but better abilities or Heavy Weapon Speciality if you want more firepower instead of a drone with 300 second cooldown (default).
Reinforcement
For ten more seconds then the Chaplain revive one player, not of your choosing. Not bad if you also have a Chaplain around as you can revive the odd player who dies while he can handle group deaths.
Protector
Every fifty seconds place a shield on a teammate for “ten seconds”. If it does anything it will let your teammates know that at least they have one teammate paying attention to the needs of others and the game environment.
Skull Bolter
Every 300 seconds without time upgrades spawn a Servo Skull with a bolter and i think it can shoot missiles every once and a while (timed). But to be honest I don’t know much about this ability because I don’t play this class often and if I do I’m probably ******** around and getting killed before 300 seconds elapsed.
I’d just play another class or just make him into a meme build like all damage buffs no resistance buffs or something. It’s kind of a shame this class is useless but when they made the enhanced edition they added the Chaplain and made him the new ‘support squad leader’ type without hollowing out a space for the Tactical.
Heavy Weapon Specialty
This is the dude with the big guns, to be honest just use his Autogun or Vengeance cannon(?). I wouldn’t recommend the Heavy Flamer as other classes have access to it so your wasting potential. If you’re going to use the Plasma Cannon with friendly fire on either don’t and use the Spear of Caliban or use the Plasma Cannon with the Warmachine perk and the the double speed half aoe upgrade(name?). Otherwise you may find suicide and fratricide to be a common occurrence and or the enemy will be too close most of the time and you will have to resort to melee. Also the Plasma Cannon stunlocks Brood Lords Scythes and Aberrants.
Fire Storm
Every two minutes increase your fire of fire for five seconds. Pretty fun and cool so just use it haphazardly, consider combining it with Crusader as well. Good against high health opponents.
Proximity Mine
Exactly want you’d expect. You can only have one and you will always be on the move so just use it every time it’s available and for that reason I’m not even going to mention the cooldown time. I’d suppose good combo with the Heavy Flamer in rear guard. Also it won’t detonate on teammates footfalls.
Crusader
No recoil and no jamming for five seconds. Cooldown ninety seconds. The no jamming is insignificant after upgrades but the no recoil allows you to nail headshots back to back with perfect accuracy. Good against distant and high health enemies.
Basically you exist to look, sound cool and help with Brood Lords, Scythes and Aberrants from afar.
Assault
Walk forward, know how to melee and don’t run off. Your Thunder Hammer and your Mace of Absolution does Friendly fire damage with its AOE damage. The Purgatory Sword is over powered and will annihilate anything including Brood Lords and Scythes.
Frenzy
Strike faster. Use on high health opponents.
Deep Strike
Teleport to an enemy, I believe behind them? About two minute cooldown.
Energy Field
Shield yourself briefly, forty second cooldown, use often.
If you don’t charge you don’t have to worry about losing your teammates, Use your mini maps to keep eyes on your team’s position. Just because you can kill anything that gets near doesn’t mean every time a genestealer is in the bus you have to turn and kill it, Your a bus driver so focus on driving the bus and let the hooligans in the back take care of themselves. Otherwise you kill the pace and that’s why your here, because you can chew through obstacles, to maintain pace and if you don’t maintain pace you won’t reach the enemy. Start marching!
Positioning
A bird can’t fly without it’s wings, tail, body or head. That’s what you are, all parts of a greater whole.
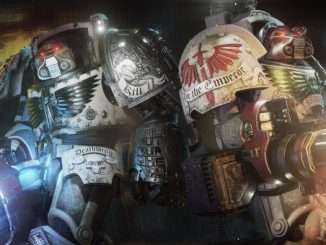
The Deathwing!
Think of the team as a BUS. Now this bus is going to have four components.
The Bus Driver
Your Job is to set the pace, navigate, issue commands with the command wheel/hot keys, show by way of example when to charge through open spaces, destroy turrets and manage threats.
This is where the Librarian goes, turrets ☑, threats: cleared; Combust ☑, managed; stun ☑ and to set the pace you are simply going to walk forward almost exclusively, consistently and seldom look behind you, that’s why you have a mini-map. You will make excellent time walking forward and anyone left behind can simply charge to get back in formation. Think of it like a convoy of cars driving through a series of four way stop lights if everyone goes the speed limit you will hit green light after green light due to civil engineers timing lights. But if someone speeds then they outrun the light and have to stop and wait for everyone else and the light to turn green again and if anyone is too slow they can just speed up to get back into formation. Now if the lead car is not setting the right pace then cars are left behind (too fast) or everyone misses the lights (too slow) and has to wait. Everyone is going to the same place don’t race to the stop sign. So in essence just walk forward and deal with threats as they come but just keep walking remember you have two bolters and two power fists behind you and they want to kill something too! Enemies trickling in will be killed no matter what and any hordes will get cleared by you or managed by you and the teammates will clear what you can’t get. So keep pace!
Axles
I’d like to see a bus get down the road without axles! Truth is your not needed but it’s very easy to get overwhelmed so that’s why your here. Somewhere in here is where the Apothecary goes. This is also who is going to get relics that are just not quite out of the way <50 meters away. Too many times have I used the “Go Over There” command as a Bus driver and collected a relic, just to have the rest ignore and follow me into an area and get all confused killing the pace. So that’s what the axles do, one of you (not Apothecary) are going to split off grab relic and return as fast as possible. You’ll eventually make it back with the use of charge and if you don’t no big deal because you have a Chaplain. To alleviate some problems consider jockeying positions between the axles (switch places).
First axle
This is your back up bus driver, if the bus driver gets lost or dies then you have your first axle to point you in the right direction. Your also his second set of guns to help clear hordes he’s managing. So keep pace!
Second axle
You kind of don’t matter, you’re like that red headed kid with cystic fibrosis and six fingers and much like the red head with cystic fibrosis and six fingers you cause more problems then not. The big problem here is that you can’t really shoot around those in front and so you try and you fight The Bus Monitor but all that ends up happening is you slow and make a gap between those in front and The Bus Monitor stops walking in order to stay in the rear and keep an eye on things. So what ends up happening is a large gap forms between the front and back of the bus causing the front to slow, the back to turn tail and run, both buckle and break in half (game over) or any combination of those three. Solution? Simple either get rid of the six fingered freak or he can just learn to conform and earn his time in the light, which he will eventually. So keep pace!
The Bus Monitor
You aren’t some nappy headed jack ass who wants to be at the front of the bus killing everything! No you’re actually the most important position and you holding the team together, even when the bus driver doesn’t know where hes going if your doing what your supposed to then the rest of the bus has only what is ahead to deal with.
This is where the Chaplain should go to keep an eye on thing and you will spend most of your time walking backwards and looking at you mini-map, should it go fuzzy start firing your Heavy Flamer. Yes you heard me the Heavy Flamer, now I know what your going to say “But muh Crozius Arcanum” well tough **** kid it sucks! The Power Fist one shots and the Heavy Flamer has long range and practically unlimited ammo if you tap fire, will more then not one shot enemies along with stunning them and if that isn’t enough to down the xeno then another burst or a swift punch in the face will. As a bonus this class is the only one that can effectively deal with turrets while equipped with a Heavy Flamer, use Retribution and face tank. As your team moves your responsibility is to kill whats behind them and lock doors. Don’t stop moving at all or you’ll loose pace and need to stop watching everyone’s back to charge forward, if you do watch you mini-map. So keep pace!
Notes
The Second Axle can also do doors for The Bus Monitor if he’d like and is quick enough, saving marginal pace and giving him something to do. Remember doors can used while moving and shooting as well!
You can also think of this as a garbage truck
- Driver.
- Recycle.
- Garbage.
- Garbage man.


Be the first to comment