
Definitive Guide to Basics
This is a guide to explain the functions of in-game items and basic tank repair. The game, Sprocket, is new and will likely change. This guide addresses common questions.
Base
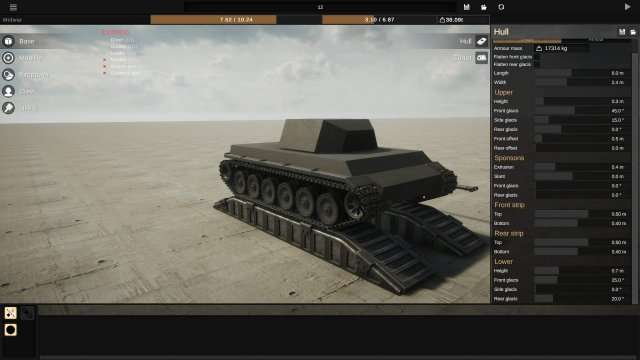
The base tab is where you assemble the shape of your vehicle. Vehicle shape will affect the overall interior space of the vehicle which will allow you to add crew members as well as ammunition and other internal components. A majority of this is relatively straightforward and won’t be described here though. A larger tank will inherently be more massive though.
Mobility
Drivetrain
There are currently two types of drivetrain in Sprocket. A twin transmission driveline, and a clutch braking single driveline. Twin transmission uses two of the gearboxes you specify to drive the tank and the tracks at different speeds, which generally allows for better performance on the move (typically) and allows the vehicle to perform a zero point turn. Clutch braking uses one transmission to drive both sides of the tank, and then uses a clutch to stop one side of the tank from recieving power, letting the vehicle turn. Clutch braking is less space and mass intensive, and generally works better with weaker/less complex gearboxes.
The track configuration of the vehicle itself if what allows your tank to move. At the moment of writing this, vehicles rely on their roadwheels to actually grip the surface they are on. As a general rule of thumb, more roadwheels will allow for more traction, as will multiple larger roadwheels.
Belt
The Belt is the tracks themselves, and as far as I know, tracks are mostly aesthetic at the moment. Track length and height appears to affect speed marginally and will make the tracks heavier overall. Width may not do anything as of yet, but we’re still ironing out what it actually does in game.
Sprocket
The sprocket itself is the critical piece of the tracks that actually drives the tank after your gearbox. As a general rule of thumb, a larger sprocket will act as a type of gear, which will reduce the effective gearing ratio of the output you have attached to the engine (meaning the engine will rev slower and potentially have a harder time spinning the tracks if geared poorly and/or underpowered for the vehicle), while a smaller sprocket will increase the effective ratio, but drive the tank slower overall (making it easier to rev out the engine, but will also rotate the tracks as a whole slower because a smaller gear rotates more to achieve the same amount of track pulled). Optionally, you can place the sprocket to the front or the rear, but at the time of writing this, it is unknown (to me) what this actually effects in terms of vehicle performance.
Idler
Similar in function to the Sprocket, except this wheel is placed opposite of the sprocket and mainly serves to ensure the tracks return to the vehicle properly. This can also be increased or decreased in diameter to serve as an effective gear type.
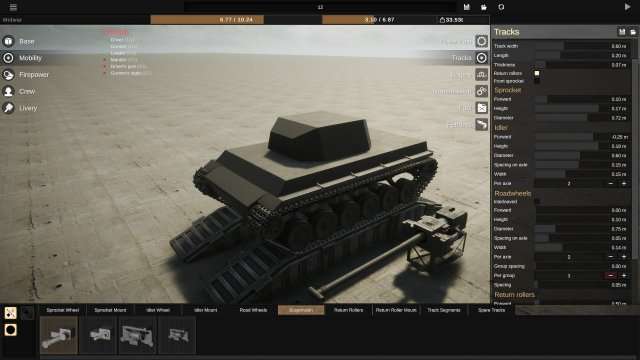
Roadwheels
The roadwheels on the tank are the part of the tank which interact with the terrain the most, and are supported with the vehicle suspension. The roadwheels keep the tank level by using the suspension, as well as help the tank grip onto terrain (in theory). Generally, larger roadwheels will tend to grip to surfaces better than smaller roadwheels, but potentially run the risk of bogging down (which may not be simulated).
Return Wheels
Return wheels are an optional part of standard suspension and mandatory on HVSS designs. They return the tracks over the drive wheels instead of making them constantly in contact with the drive wheels themselves. This is currently doesn’t do much in terms of vehicle performance as far as i’m aware.
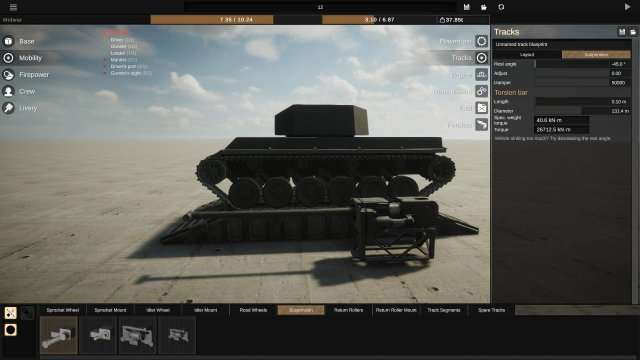
The suspension is in the process of being reworked, however, I can offer some advice in the meantime.
If using a standard sprung suspension, you will have what are called Torsion bars that adjoin the roadwheels on the opposite sides of the tank. These torsion bars hold the tank up, as well as take and reduce the impact of terrain being rolled over. If using HVSS suspension however, torsion bars do not actually go underneath the tank, and instead the suspension is packed into a spring and damper unit above each pair of roadwheels with a set torque value. Vehicle height with HVSS is best determined by roadwheel height.
The rest angle is an essential part of standard suspension in Sprocket currently, as it determines the angle the torsion bars flex when the vehicle is not under strain. Setting the value further negative will allow the tank to sit higher.
The damper counteracts the spring force acting to level out the tank after passing over terrain. If the tank is bouncing too much for your liking, you should increase the damper stiffness value. If the tank is jittering while not moving however, you will probably want to reduce the damper stiffness.
Torsion Bars
The torsion bar length is in effect how long the torsion bar under the vehicle is. In general, a longer torsion bar will be less strong at resisting forces than a shorter torsion bar, but a shorter torsion bar (in theory) would have much more limited range of motion.
Torsion bar diameter determines how thick the torsion bar is, which will make the spring type significantly stiffer and more resistant to terrain undulation when made thicker. This comes at the cost of usually a significant space to the crew compartment however.
The Spec. Weight Torque section is how much mass the vehicle will apply to the suspension on it’s own as a result of simply existing. You generally (in my opinion and experimentation) want this value to be half the value of your torsion bars rated torque value or less, else the tank will likely bottom out when passing over terrain.
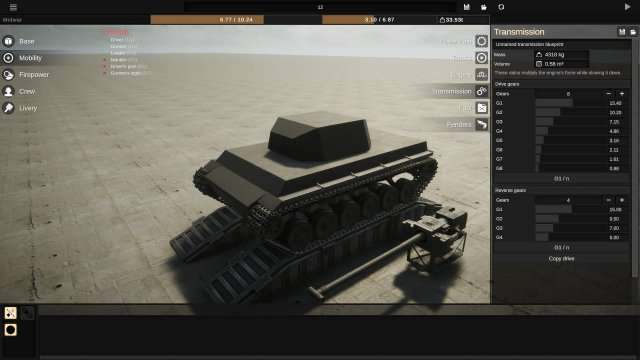
Gearbox Boogaloo
Gearboxes and engines seem intimidating at first, but they don’t have to be once you understand the basics and the job of the gearbox. The gearbox and engine go together in almost all vehicles and usually aren’t too interchangeable unless the engines tend to have the same specs and go in similar enough vehicles.
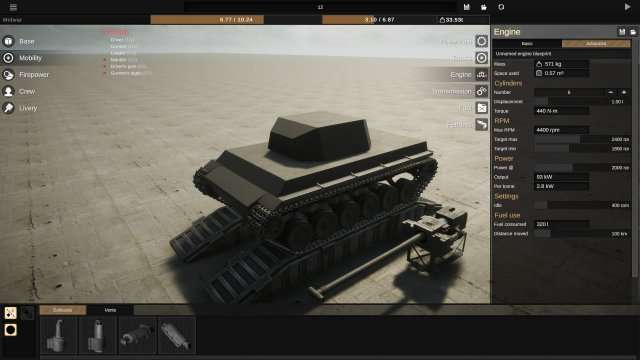
The engine is what actually provides the power for you to move your vehicle. There are many possible solutions to designing an engine for your vehicle as well, such as a small, high revving engine, or a large, slower engine that has more inherent power at low speed due to it’s size generating more torque. Which type of engine you choose will be dependent on multiple factors, including the gearbox in the next step.
Cylinder Count and Displacement
These two tie together to make the engine you’re going to place into the vehicle. As a general rule of thumb, larger engines will make more power but be unable to rev higher as the forces within the engine begin to tear it apart.
Torque
Torque is the raw measurement of force the engine can apply after rotating 1 RPM. Torque is used in the math to determine overall engine power, which is what is considered to actually move the vehicle.
RPM
RPM is how many times the engine will complete a full revolution of the crankshaft, where a higher RPM indicates that the engine is spinning faster. Each engine has a Maximum RPM, or the maximum *safe* RPM. Exceeding the maximum RPM of the engine will cause damage to the engine, which will in turn eventually cause the engine to explode, burn, and kill the crew of your tank.
Max and Minimum RPM target
The minimum and maximum RPM targets will tell the AI at what point to do actions which will handle the gearbox to keep the engine at the specified target ranges.
Maximum RPM generally should be kept at, or around 200 RPM below the actual maximum rated RPM of the engine, as exceeding the rated max is usually very bad, for reasons mentioned above.
Minimum RPM should be set to a value so that the tank can actually gain speed at the lowest gear with the RPM you set. This will keep the tank moving, as the crew will attempt to launch the tank and steer the tank (with twin transmission drivetrains) as this set RPM instead of the idle RPM of the engine.
Idle RPM is the speed at which the engine idles when the tank is in neutral, or otherwise not driving. Generally this isn’t that important of a thing to care about unless you care about fuel economy.
Power @ Slider
The Power @ slider is a tool you can use to see how much power the engine you have will produce at a set RPM. Using this, you can determine the power that the vehicle makes at certian engine speeds, and work to make a gearbox that works well with the engine. Generally, you should pay attention to the power to weight ratio, where higher values are usually better. If your tank has a higher power to weight ratio (+10 HP/t) at lower speeds, chances are you won’t need a large reduction gear to get moving. if your engine is particularly weak however (~2-5 HP/t) you usually will need a large gearing reduction to even get the vehicle to move.
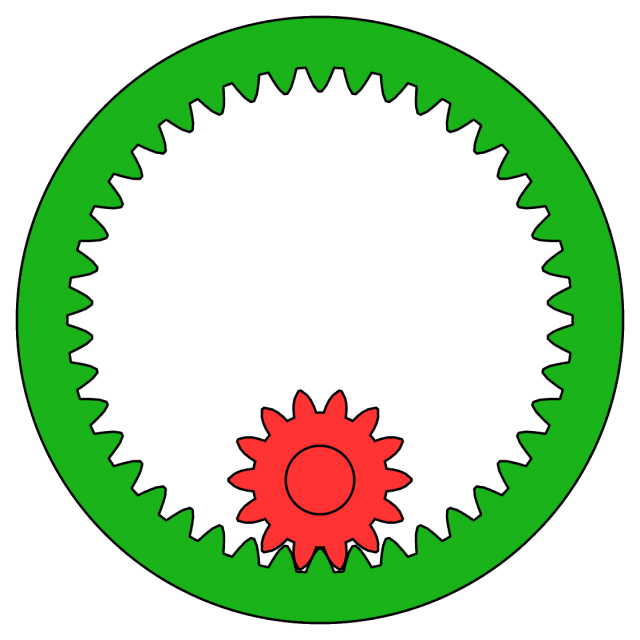
This image shows a 3.5:1 gear. You create this gear by setting the value to 3.5. Gears let vehicles run at different speeds without stopping the engine. They maintain engine momentum. At low speeds, the engine struggles against the vehicle’s resistance. A reduction gear, like the one in the image, solves this. If the green gear connects to the sprocket, and the red gear connects to the engine, the red gear rotates 3.5 times for every green gear rotation. This allows the tank to move, though slowly, and prevents the engine from stopping.
Setting up ratios on your tank should be determined by a few simple things to get you started, and we’ll assume the engine does not change on your tank.
- If the vehicle is having a hard time getting moving, but not exceeding the rev limiter, set your gear value to a higher number, that way the engine will be able to get more revolutions in, and put down a bit more power.
- If your engine is constantly overrevving, you should set the ratios lower so the gearing doesn’t try to kill the engine.
- When shifting gears, you want to ensure that the engine can fall within the RPM range you desire out of the new gear, otherwise the crew AI will get confused and end up (in most cases) shifting into first gear permanently, shifting between the gears rapidly and stalling the tank, or shift to the last gear and not move.
- Large reduction gears tend to get very large, often to the point that it’s typically better to simply opt for a better engine, over using massive gearing reductions.
Addendum
The driver AI entirely uses engine RPM to determine where and when to shift. One major thing I noticed is that the suspension configuration on the tank can cause the tank to rock back and forth under acceleration if too stiff or too soft, causing the engine RPM to spike and trough causing the AI to shift improperly. Use the V key to see what RPM your engine is at in the bottom graph in real time, with the min and max targets set, and the top graph will show what gear the tank is driving in.
If your tank has a zigzagging RPM on the real time graph of a significant amount, you should alter your suspension. If the tank is rocking forwards and backwards, generally you want to increase damping. If the tank is rocking softly with damping still applied, you may want to strengthen the torsion bars and reduce damping. Every tank is going to be different, with different sizes and engines and top speeds, however this is something to keep in mind if the tank is driving unusually.
Firepower
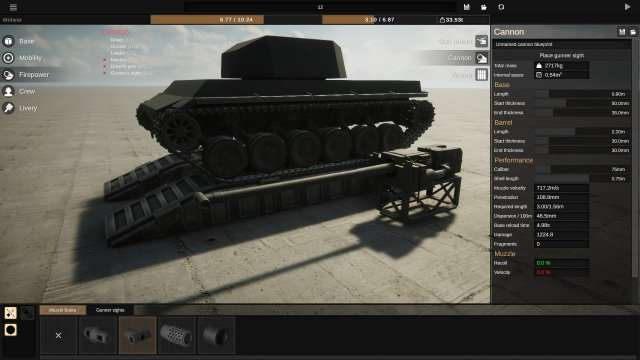
The cannon is the primary armament of your tank in Sprocket. Designing them is relatively straightforwards.
Cannon Dimensions
Cannon base and barrel both contribute to the length of the entire gun. In general, making the barrels thicker doesn’t actually do anything meaningful at this point in the game except for potentially hide weaker armor behind/in the gun mantlet.
Caliber and Shot Length
The gun caliber and shot length determine how large the actual projectile is, and will determine how fast the shot flies, and how much damage it will do to a target. In general a larger projectile will have more penetration, provided the gun is long enough to allow the shot to hit it’s maximum velocity (which is currently capped by era).
Rules Of Thumb
- Longer barrels offer more accuracy and shot speed (up to a point)
- Longer barrels, and more thick barrels are heavier and harder for the turret to aim.
- Penetration reaches it’s max once the shot reaches maximum velocity for the era.
Crew
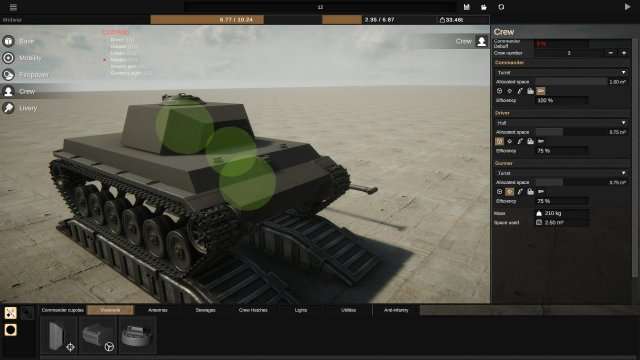
The crew are who operate the tank. Each crewman (excepting the loader and radio operator) need a sight in order to perform their role, and placement of internal components will change where the crew is seated.
Commander
An optional tank role that increases the perfomance of the crew. A tank without a comander will do everything 50% worse, and a tank with an overloaded commander will do tasks somewhat worse. Will sit under the commander cupoula position.
Gunner
Required to actually aim and fire the gun. The gunner will be placed behind the gunner sight, and allow the player, or the AI tanks to take shots at enemy vehicles. Efficiency losses include a reduced turret traverse speed and reduced gun elevation speed. Must have the sight installed on the same part of the structure as the gun.
Loader
Also required to fire the gun. The loader generally sits somewhere behind the gun to one side of it. Reduced loader efficiency will slow down the reload rate of the cannon.
Driver
Sits behind the drivers viewport and drives the tank. Overloaded drivers will cause the tank to shift slower and generally perform worse.
Radio Operator
Doesn’t have a dedicated position as far as I can tell. Requires an antenna on the tank, and allows the player to issue orders to friendly AI tanks. No apparent efficiency issues.
Troubleshooting
Gun Won’t Shoot or Aim
Make sure you have a crewman with the gunner and loader role, both in the same location of the gun (turret for turreted tanks, hull otherwise).
Engine Keeps Exploding
Use less reduction gearing. In other words, type in lower gearing values for the gearbox until the engine stops exploding.
Tank Moves Extremely Slowly
Odds are that you have the opposite issue of above. Use more aggressive gearing if you want the tank to accelerate.
Gun won’t elevate but will shoot
Odds are that the gun is too heavy/large for the amount of force you applied to the cannon. Reducing the weight of the cannon by reducing barrel thickness, and length can help alleviate this.
Tank is stuck on the ground
In general, you want your tank to have ground clearance, and sometimes there are some cases in which the tank straight up gets stuck. One way to alleviate these issues is to set a higher negative resting angle for the torsion bars, and increase the diameter of the bars. For HVSS tanks, you will usually want to add a negative height offset to them so that the wheels are spaced away from the hull.
Be the first to comment