
How to read the temperature gauge, temperature data, etc.
Guide to Temperature
Temperature Gauge
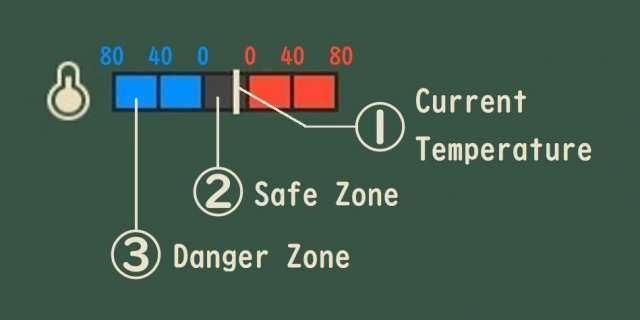
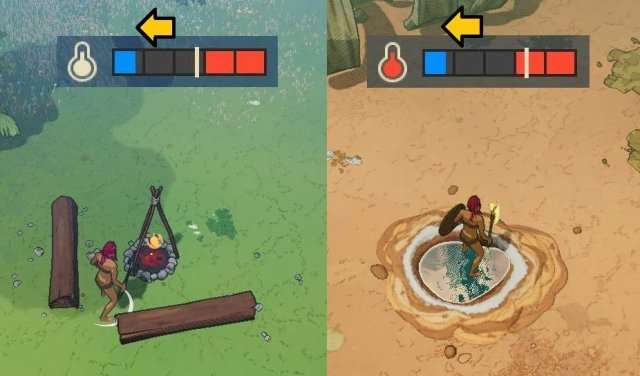
1. White Line
- Indicates the current temperature.
- The left side of the gauge is colder and the right side is hotter.
2. Black Area
- Indicates the range of temperatures that your equipment can resist.
- If the white line is here, there is no problem.
- You can expand this area by upgrading your equipment.
- The cold resistance expands to the left and the hot resistance expands to the right.
- The screenshot shows the temperature gauge when you are naked = 0 resistance value.
3. Blue or Red Area
- Indicates the range of temperatures that your equipment can’t resist.
- If the white line is here, it is too cold or too hot.
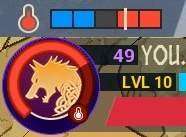
- Cold or heat will accumulate in the body temperature gauge (around the portrait).
- The deeper the white line goes into this area, the faster cold or heat accumulates.
- When the body temperature gauge reaches its maximum, you will start to take damage.
Temperature Data
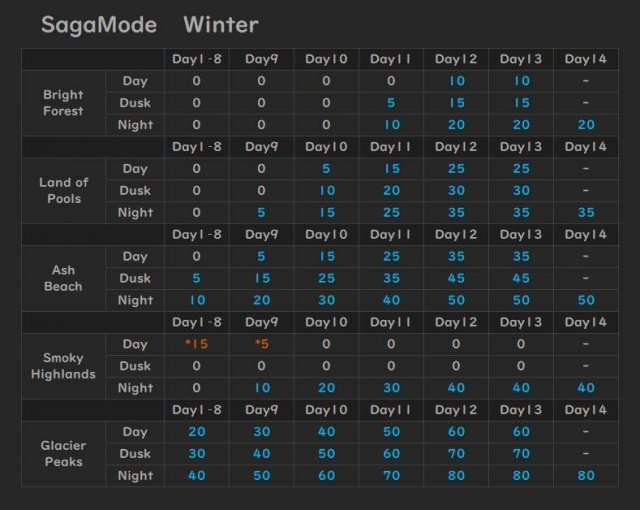
- The values in the table mean the resistance values required to resist the temperature.
- Blue = Cold , Orange = Hot.
” * ” means hot resistance. For color vision support.
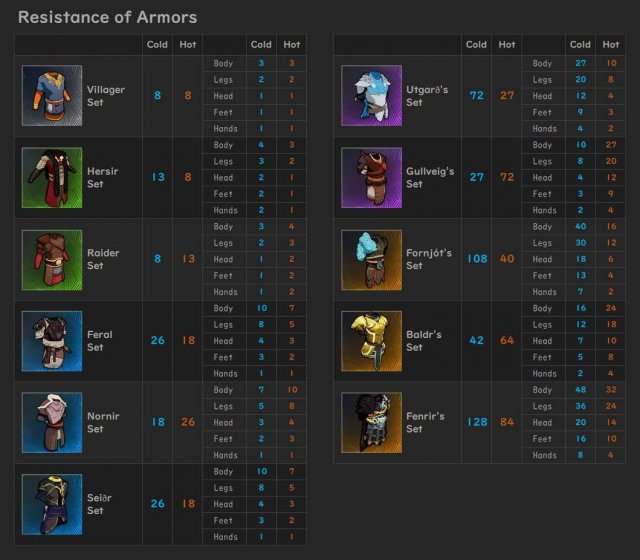
Resistance of Armors
Please use this together with the above data.
Safe Spot
Some objects are safe spots: NPCs, ruins, available shrines, lair. While in these, your resistance is greatly increased (+50 for both cold and hot resistance).

Other objects like the ones in the next screenshot will also increase your resistance value.
If you go to a safe spot and your resistance is higher than the temperature, your body temperature gauge will reset right away.
People often think “temperature doesn’t affect you in safe spots” because we can usually handle most temperatures when in safe spots.
To be clear, safe spots only increase your resistance.
If the temperature is higher than your resistance, your body temperature gauge will still start to build up, even in a safe spot.

Be the first to comment