
This guide will explain the game’s goals and how the basic systems work. The tutorial doesn’t cover everything you need to know to play more easily, especially if you haven’t played a lot.
Establishing a Line
The main part of this game is building train tracks between two locations and moving goods, people, and mail along those tracks to earn money. The aim is to move needed resources from one city to another. If cities don’t need specific resources, moving people and mail can be more profitable.
Train Stations
Each city can hold a maximum of two train stations. This means early on it is preferential to lay down a second rail station to connect two points than to expand an existing one.
There are three types of train stations in the game.
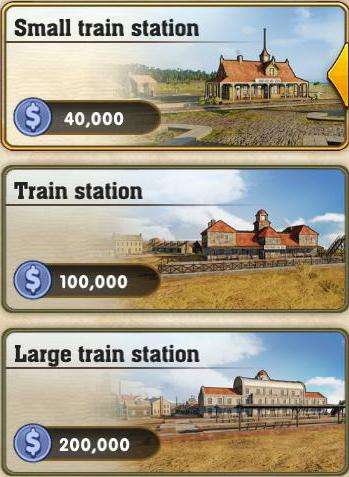
- The first is labeled as the small train station but in the game is referenced as a rural train station. Loading time is faster the smaller a train station is so preferentially you will near always choose a small train station over any other. Due to its low cost it makes more sense to lay down two of these than upgrade an existing one. The small train station comes with two rail entry points.
- The train station is your medium sized one and is also your starter city train station. It has four entry points to upgrade a train station click on it (the station, not the city) and you will see upgrade options in the top right corner.
- Large train stations have eight entry points. They also have a very large influence range which means that if two goods are close enough you can put down the one station to collect two different goods. This is especially useful in areas with a lot of cities as you can use this single station to supply two different goods to a large number of cities.
Laying Rail
Once you have your two points down it is time to lay a line. You can only put a train station in one city at a time. Any attempts to spam the map with train stations will come up with a warning to connect your first line.
Click the Rail button in the top right corner. Click on where you are coming from. Click on where you want to go.

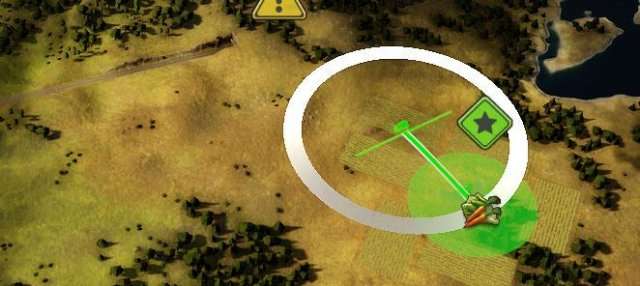
You will notice that your hypothetical line provides you with a lot of information. Along the green line it will indicate any inclinations. When a train goes up it will need higher power to maintain speed. If a train lacks power it will slow down. When tracks go down trains will speed up.
When a track bends a train will also have to slow down for the bend.
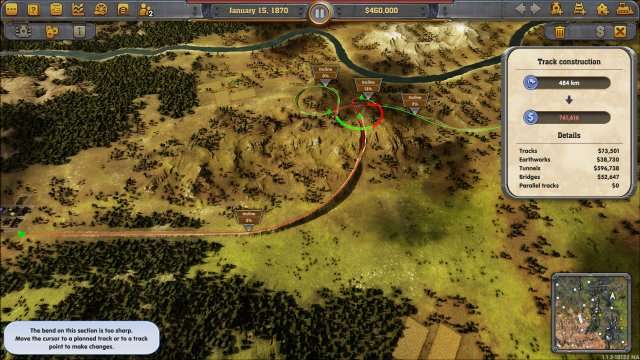
Building a direct route is usually best, but it can cost more. Tunnels and bridges will make the building costs higher. If you build a straight track between two points, the game will often create a tunnel or bridge to keep it straight. You might need to make small adjustments to the track to go around things that are in the way. You can click on a section of track and move it to change the route.
Looking along your track if you see a red spot there means it has a difficulty. Perhaps it is too sharp or overrides a track.
Paralell tracks have a great value. It will reduce your production costs of tunnels, bridges, and earthworks, and leave your space far tidier and less clustered. To paralell a track click next to but not on a track.

Next click another point next to a line.
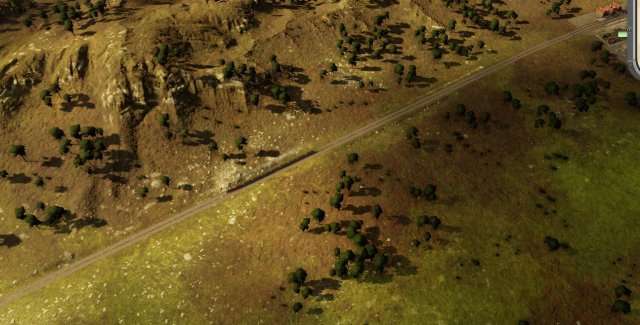
Now you have a parellel line. Paralell lines are very nice because you can share a single supply tower to multiple routes. It means lower costs and less space is taken up.
Two Trains on One Line
Often times you will need even more goods coming to your city. You can run two trains on one track. To do this create a loop in which they will go in a circle. Or, creating a stopping area.
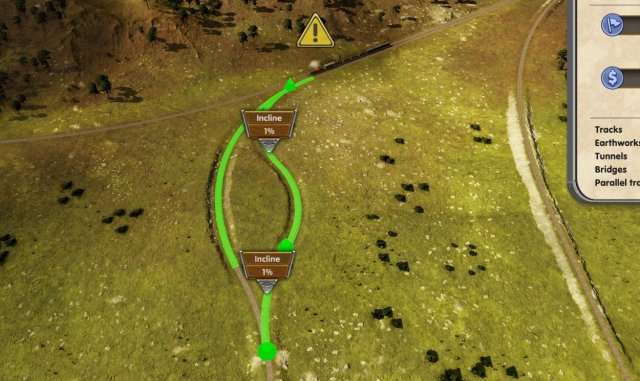
To do this add a new track and just create a little swirl that goes out and back into the track. This will create a resting area where one train can wait for another.
Next click on the new buildings button (where all the trains are) and click on Signal.
Signals control direction of track. Selection one side to go in one direction and hold the shift key. This will create a stop. The train will now stop here until the other train has cleared. Now on the other side place a direction for the other side… but don’t put a stop. This will allow one train right of way at all times and keep one train going.
Now click on the train that is running this line and hit the Stamp. This will clone the line and give an exact copy.
Freight vs Passenger Lines
To create a line click on the Train icon and select Add Locomotive
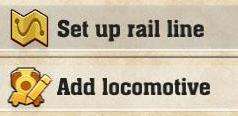
Click the order you want to stop at. Your train will automatically decide the fastest way to get to each point. If too many trains are on the track in differing directions they will collide. Having a looping train system will allow for a lot more trains to occupy the same track, but will make it impossible for them to be express trains.
Generally speaking, passenger lines are far more profitable. You would rather have more passengers and mail than freight.
Near the end of the game when you are making complicated supply lines, finished goods will provide the largest fees.
The Trains: Power vs Speed
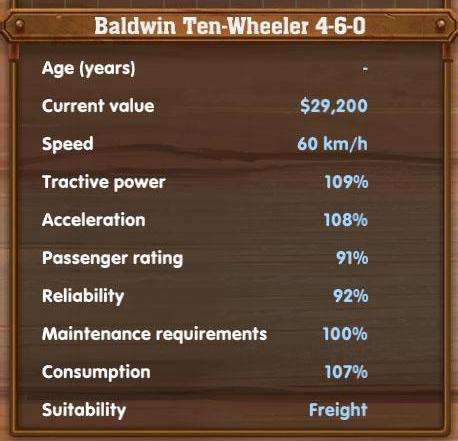
Not all trains are suitable for all routes. Early on you will have a choice of exactly one train. Over time you will acquire more and more trains. When you go to purchase a train the icon will have two important stats. Power and Speed.
On the bottom left is a more detailed read out of each train.
Speed and tractive power are obviously the two key stats. Speed is your top speed. Not all trains on all routes can attain a top speed though. The shorter the route, the less likely. The more bendy the route, the less likely. The more inclinations… the less likely.
To achieve an “express train” you will need a train that spends a high amount of its time at top speed.
Power is sort of like a rate of accelleration. The higher your tractive power the faster you will accelerate. When you hit bends you will not slow down as much and hills might not cause you to lose any speed. For shorter routes and ones that have a lot of bends you will want more power and less speed. For straighter longer routes, more speed and less power.
Next up is passenger rating. A higher passenger rating means that more passengers will come on this train than normal, a lower one means less. Passengers are the highest profit item until end game freight so having a higher passenger rating on intercity routes can mean more money.
Reliability is a stat that will prevent Random Breakdowns and other random slowdowns and events.
Maintenance requirements indicate how often a train will have to be repaired. Repairs take quite some time. If no repairs are avaialble the maintenance requirements becomes an indicator of how long it will take for a train to become fixed sitting on a track. A broken down train will stop all trains that are on that line so having lower maintenance requirements can keep trains running longer.
Consumption refers to how much fuel and water this train is going to use. The supply towers are the only means of restocking a train. The higher consumption required the more suppply towers you will need along a route. High consumption will also mean the train will slow down and stop more often.
Train Cars
There are four train cars in the game. These provide bonuses that will take up an entire shipment slot. That means in busy trains you will be giving up one good for the bonus. Each has their value.
Dining Car
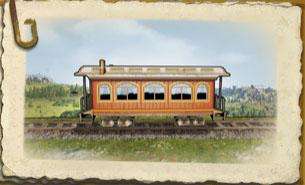
This is easily the most valuable of your cars early game. On routes that deliver no goods you should consider putting one of these on to rake in extra bucks Passenger trains make far more than any other type of trade and because of this you can easily rake in an extra $3,000 a trip off of this car type.
Refrigerator Car
The caboose gives giant bonuses to your employees. If you have an engineer who gives you 5 KPH he will now give you 6. A stoker who reduces maintaince by 20% will now reduce it by 28%. Conductors that incease customer ticket cost by 5%
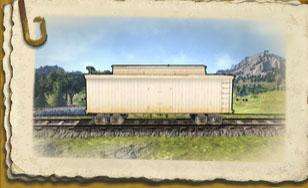
This is another highly useful car. On farm routes you will take in extra dough by sacrificing one good for 20% more on all. It isn’t as lucrative as the dining car, but it will turn a bit of extra profit. In cities that are producing meat, sometimes it is just worthwhile to throw one of these on…. if all they are transferring is meat and beer.
So the big question, what is considered food. Well, some things you wouldn’t think about:
- Wheat
- Corn
- Meat
- Sugar
- Milk
- Vegetables
- Fruit
- Cheese
- Salt
Caboose Car
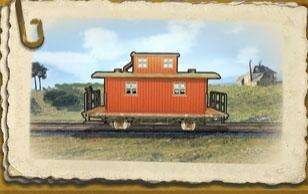
The caboose gives giant bonuses to your employees. If you have an engineer who gives you 5 KPH he will now give you 6. A stoker who reduces maintaince by 20% will now reduce it by 28%. Conductors that incease customer ticket cost by 5% will now increase it by 6%. These are good on trains that are fully staffed, but their benefits diminish heavily in terms of profit if there are too many trains on the one line.
Mail Car
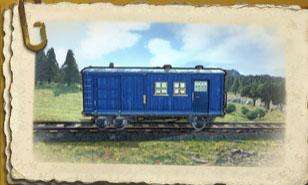
This car can be very valuable in city to city transports in which no freight is being transferred. Just look at what sort of cargo you are carrying and if you are carrying at least 4 mail loaded cabs, a mail car will allow high profits.
Personnel
Your employees grant significant boosts to your rail profits.
As a secondary mini game people will have personalities and you have to mix and match them for maximum efficiency. Employees who hate each other will sabotage trains and cause breakdowns. Employees who love each other will boost each other’s stats. Each will have a single personality type that likse one personality but hates another.
Train Personnel
Each train can equip one of each personnel, a total of four.
- Engineer: Can increase top speed or maintenance requirements.
- Stoker: Multiple functions. Can increase top speed, acceleration, tractive power, maintenance requirements and reliability.
- Conductor: Increases passenger ticket prices.
- Security Guard: Prevents attacks and robberies. As a side effect they will increase the shipping fee for freight items by 5%.
Managing this staff can maximize routes. Planting your engineers and stokers on your most profitable routes will maximize profits. Conductors need to be placed on inter-city lines that transport people while security guards need to be placed on any route that has freight. Shipping from resource points will be of maximum value for guards.
Office Personnel
Office personnel have very weak benefits but each personnel universally employs them. They are a lot rarer and are a common target for headhunting.
- Stationmaster: Deals with logistics efficiency. Can improve vehicle maintenance times or dispatching times. Early on maintenance times reduction yields best results. Later in the game improving dispatching times gives the best results.
- Surveyor: Reduces costs of building rail. Can either reduce costs of building tunnels and bridges or reduce cost of tracks. The choice may be obvious but tunnels and bridges cost 10x as much as tracks and so if you have to build one tunnel or bridge it may be the same cost as an entire set of tracks.
- Chief Engineer: The chief engineer will either increase your research or reduce maintenance times.
- Accountant: Either reduces the costs of auctions or reduces train costs.
Employees
Employees are one use agents. Generally they are not that worthwhile to use because they are expensive and don’t usually help you, moreso they hurt the opponent who is running a company largely independent of yours.
- Bandit: Takes over a passenger train and either robs mail or passengers. Can be used to reduce the value of an enemy corporation while doing a stock take over.
- Saboteurs: Bring an enemy industry or station to a halt for two weeks. Can be used to reduce the value of an enemy corporation while doing a stock take over.
- Spy: Steals a technology from an opponent. If no technology is available they will just stay until one is.
- Professor: Either trades money from research points or research points for money.
- Headhunter: Can snatch up one office of train personnel from enemy opponents.
- Reporter: Ruins the reputation of a company. This will reduce the number of passengers willing to board a train. Can be used to reduce value of an enemy corporation while doing a stock take over.
- Market Crier: Increases either mail (Safety) or passengers (Comfort) for a month.
- Mediator: Reduces the price of your next auction by 25%. Very useful when acquiring businesses.
The Characters
In the campaign you will face off against a number of characters. In scenarios you will get to choose which one you want to be with a specific bonus. This section will breakdown their behavior, their strengths and review their value.
The General Johnathan Johnson

The General will appear in the game on the southern level. The General will focus on making large connections often getting in the way of your rail. He rarely ever supplies local needs and generally does not purchase businesses or start new businesses. As far as the AI goes he is rather lightweight.
Bonus: Track construction costs are 10% lower.
As far as his value for you it is quite obvious. In maps with a lot of mountains as tunnel costs are 20x higher than regular track. Track savings are not experienced very early in the game and often come later in the game. That means essentially playing the game with few bonus value until after you have a lot of money. But paying $3,000,000 for a piece of track vs $2,700,000 for a piece of track will save you a lot of time. His strengths are especially strong in the East and the West where track lengths are a lot longer.
The Gangster Don Lorenzo

The gangster will appear on the eastern level. The gangster is a devious player opting to use a lot of underworld contacts to sabotage production, sabotage trains, and write blasting exposees. He tends to favor small local routes with multiple checkpoints and stops.
Bonus: Receives twice as many applications from the underworld, where recruitment costs are 30% cheaper.
At first this bonus doesn’t look very good. But the bonus applies to all hires including engineers and stokers. You will receive them very early and very fast. This means that your routes will gain a very significant bonus. The shorter the routes, the larger the staff bonuses will pay off. This means that on maps where you start off with a lot of cheaply accessible cities and resources he will dominate over his competition with a very quick and early boost.
Because there is no end to this bonus his value continues throughout the game and grows. I would rate him as the absolute best character you can play.
The Industrialist Roger Smythe
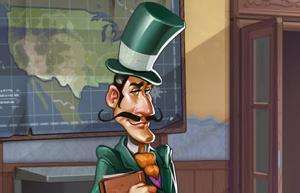
Roger Smythe will appear in the campaign as your friend. Smythe has a preference for owning businesses rather than owning rail. When he is deployed on the map he will always try and compete with you on business auctions, but rarely on science auctions. He doesn’t build a terribly high amount of rail making him one of the easier AIs to beat.
Bonus: Receives 5% higher freight prices.
Having higher freight prices will take some time to pay off. Standard openers involve connecting cities that initially will deal more with passengers and mail and less with freight. As you approach mid game you will deal almost exclusively with freight. This means that if you are struggling to get past the early game… you shouldn’t choose this guy. But if you are struggling on mid-game objectives this will be the guy for you.
The Engineer Doc Murphy

As is implied by his costuming, he is all about the science. He will compete heavily with you for science auctions and is the only character who will actively build universities. He is often ahead of you on science which means that he is an astute target for stealing technologies from using a Spy.
Bonus: Receives 20% additional innovation points per month.
The bonus isn’t quite as high as it sounds. You get 40 innovation points a month. This means that you will get 48 innovation points a month instead. This means you will outpace your opponents by 17%. His strength doesn’t come from maps but eras. In eras in which you have a lot of 100 point technologies he is going to thrive getting some very quick upgrades. When you can get to 8% on freight or passengers a year ahead of your competition it essentially wipes out their bonuses. He can give you a nice early boost and strong sustainable growth because…. upgrades are overpowered.
The Lady Beatrix von Pomp

Often times people will try and get rid of her just because of her annoying dialogue. She will appear on most of the campaign claiming that she is buying her way in and out of various areas. She focuses largely on passenger and mail transport and will rarely build rural train stations for transporting resources. This means her income will be lower…. but also that she will actively get in your way a lot more often. If you build two train stations in each city near her she won’t be able to expand or grow.
Bonus: Receives 5% higher ticket prices.
She is the absolute queen of early game. She is able to push out a lot of very profitable city to city routes and give you the cashflow to expand fast. But, her bonus is very short lived as later in the game you will be transforming to mostly freight. With her the main strategy is expanding to cities much faster than you might with any other character and then hitting up secondary objectives after with your superior income.
But by mid and late game her value falls apart.
The Trickster Tricia Jones

Overall one of the weaker AIs. She will not expand until very late in the game, but it’s a burst of activity. She is the only AI that will have multiple trains on a single track and will bid on every single auction. She is more obnoxious than threatening.
Bonus: Receives a 20% discount on all locomotives and auctions.
She is one of the stronger all around characters for all parts of the game on all maps and in all eras. Her train discounts will initially be very small, a few hundred here and there. But as you approach larger railway empire she will be saving you thousands of dollars.
Being able to start an auction 20% cheaper than advertising price means massive savings. If you are purchasing a business for $5,000,000…. you will be getting it for a full $1,000,000 less.
For this she will be doing great where you are required to produce resources on a map or where you need to get a city to a certain population.
Generating Profit
There are many ways to “make money” in this game. The most common is train fees. But, it’s not the only way. This section will break down the various mechanics behind “money making.”
Passenger and Mail Trains
If there is no freight to transfer trains will load up on passengers and mail… which are actually more profitable. All cities will transport some level of passengers between cities. If none of the trains are loading up passengers it just means the city needs more lines with it’s destination.
Passenger and mail trains benefit from trains with higher passenger ratings, conductors, express routes and direct routes.
Freight
Freight is delivery of any product to a city.
Each product has a “supply chain.” The supply chains will change based on map and era. Some become more or less complicated based on the era. Each improved product in the supply chain grants a larger shipping fee.
In order to ‘unlock’ freight you need to improve cities. You can improve cities by providing them what they demand.
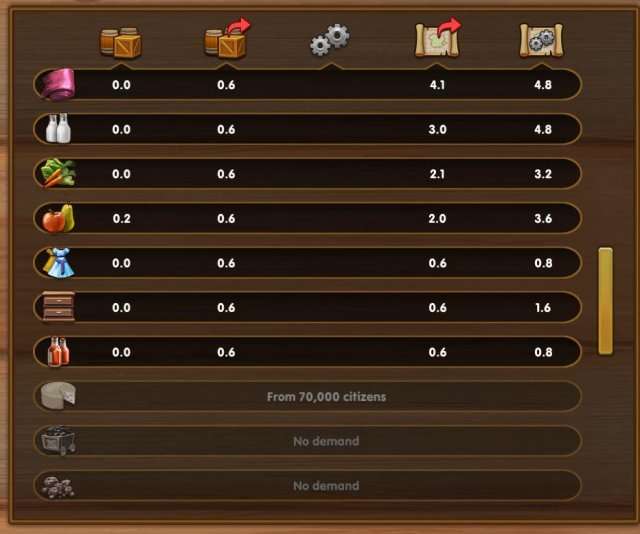
The above chart is an example. You can find this chart in any city by clicking on the city, clicking “Information.” On the left is how much of an item is stocked in the city. The next item is demand.
The goal is to fulfill as much demand as possible. Fulfilling demand of basic items (Meat, beer, corn, wood and wheat) will always be in a lot higher demand than other products. Initially you should try and complete these very simple supply chains. Meat is always supplied by cattle and beer is always supplied by wheat.
As you bring these goods they will produce more of these goods, which in turn means you will need more trains to handle the workload to further increase production and distribution of goods. As all of your cities gain more population they will demand more of these processed goods.
Increasing population will also increase the demand for passenger and mail trains. If you have insufficient transport capacity they will move very slowly via cart.
Bonus Connections
Stock Market
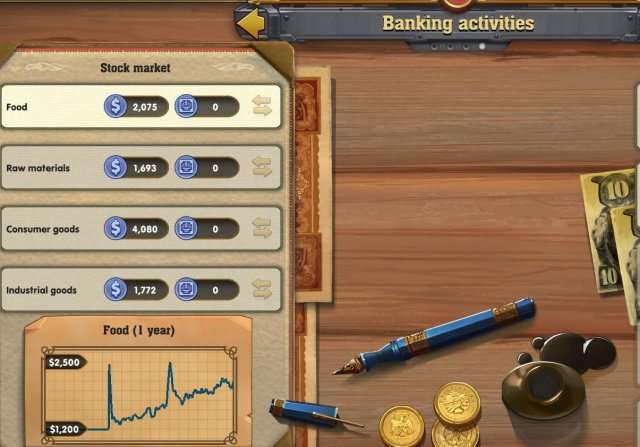
The game features what we would call a commodities stock market which can be located under banking activities using the icon that looks like stock market arrows.
This is a live market based on the activities of the map. This means if you are about to transport more raw materials you can invest in them pre-emptively to earn a bit of money off of them. The stock market tends to be a long term profit game.
- Food Stuffs includes Wheat, Corn, Meat, Sugar, Milk, Vegetables, Fruit, Cheese, and Salt.
- Raw materials include Cattle, Wood, Lumber, Coal, Iron, Steel, Gold, and Crude Oil.
- Consumer Goods include Beer, Cotton, Silk, Dresses, Sauce, Boots, Furniture, Chocolate, Newspaper, and Cars.
- Industrial goods include Paper, Tools, Ceramics, Chemicals, Powder, Canned Goods, and Petroleum.
Competitor Purchase
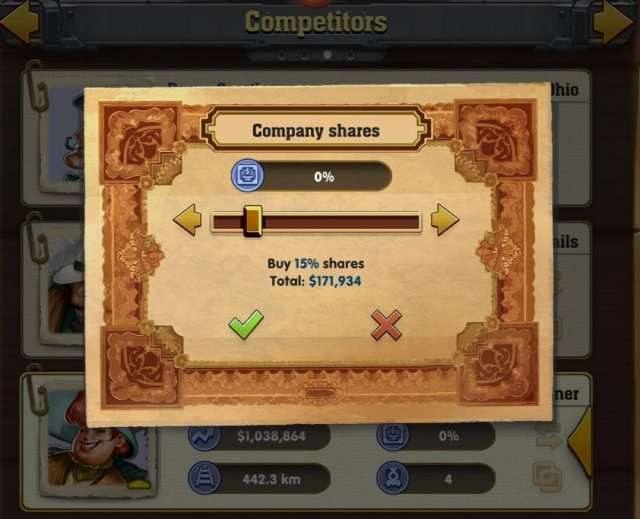
You can take over an enemy’s company by making a 100% purchase of their company. But if you don’t decide to buy it, it can represent a long term investment. As the game goes on it will present steady growth. This can be compared to the stock market which can go up and down. There are ever so slight variances in price but over the game they will continue to rise. As their company buys businesses and puts down more rail the value of their shares will go up, which is profit.
This can be a good way of saving up high amounts of money to buy a business or construct a long piece of track.
Businesses
The final way to earn money is via purchasing businesses. Not every business by default will earn profits. Businesses are making money while they are producing. Businesses distribute goods in two ways, by cart (no profit) and by train (profit).
You can build a new business after a city hits a certain population. Goods have production chains. Each good made in a city requires some sort of resource. Some of them are businesses on the map. Others are things made in cities. Depending on the era the production chains for certain items change. So for example the Automobile requires Steel and Petroleum to make.
Petroleum is produced in a city with a connection to a Crude Oil resource. Steel is made in a city with a connection to Coal and Iron resources. The automobile will be the most profitable thing to build but due to the large production chain if it stops producing it will also lose the most money.
Businesses that already exist on the map can be purchased via auction. To initiate an auction click on the business and select the Dollar sign in the top right corner. This will cause you to go into a contest against the AI. If you have an unconnected business or one that is not being supplied, the AI will be less competitive for the business.
Resource nodes can also be purchased.
After you have purchased them you can upgrade them up to five times. City businesses can only be upgraded as population grows. If you over upgrade them they simply will not be able to make profit as goods will never be distributed.
As cities grow they have a higher demand for goods. So maybe the automobile will make a lot of money… but it needs to be connected to a city with 120,000 residents in order to be distributed.
Bonds

Technically not a way of making money. This is in fact a way of losing money. You are given a large up front amount of money but pay crippling interest on it over time. The higher the amount of money you take the higher the interest.
Although generally not good to issue bonds, in time sensitive objectives early on it is worthwhile to issue them. The train lines that you will produce will always out grow the interest on these bonds. It might be sticker shock when they mature… but then you can just issue more bonds… and even bigger ones. Very few maps or scenarios can be accomplished without the use of bonds.
Chapter #1 – The Great Plains Tips
The Great Plains is the beginner level and locks you into Roger Smythe as your character. As you can see Roger Smythe gets a 5% bonus from freight prices. As stated in the characters section, this is a late game trait.
Scenario: The last track of the intercontinental railroad is beginning but needs to get a path westward through the mountains into Cheyenne.
Thomas Clark Duncan the famous rail man is the guide. The absolute best tip is to, follow the guide. Skipping ahead or doing your own thing will cause you to be late on getting objectives and doing them late.
The big problem is that eventually you will be given a list of things that you have to do and if you lose too much time playing around you won’t get to the list. To get ahead the list is as follows:
- 1864 – Connect Omaha to North Platte
- 1864 – Connect Omaha to Cheyenne
- 1866 – Deliver 10 Loads of Cattle to Denver
- 1867 – Deliver 16 Loads of Meat to Cheyenne
- 1868 – Connect 150,000 people to your network
- 1867 – Reach a Population of 30,000 in Cheyenne
- 1867 – Connect Omaha to Rock Springs
- 1868 – Transport 100 Passengers from Rock Springs to Cheyenne without stopping
On major tip is that if you select the symbol that looks like a stock chart on the top right you can go over one slot and take out two loans that will give you a giant boost of income.
Otherwise read the tutorial in this section on building train lines. Try not to build lines through mountains, far cheaper to build around.
Chapter #2 – The Early Days Tips
You will notice that once again you are forced to take Roger Smythe the freight bonus guy.
Scenario: Years before the first chapter the rail is just beginning on the east coast to support New York trade. Pre-rail people traveled via unsafe horse and carts. On this map you have two opponents, The Gangster and The Lady. See the section for how their AI works.
- 1831 – Connect Baltimore and Washington
- 1831 – Connect 3 rural resources
Each city can handle two railways. Do yourself a favor and point the Baltimore one south (the rail should be long the south side of the station.
The Baltimore-Washington line despite being very short is highly profitable. You can check line profits by selecting the Train button on the left in front of three horizontal lines.
Other than this I would just skip over to the next set of objectives and aim for them first.
- 1832 – Connect Baltimore and Pittsburgh
- 1833 – Deliver 10 Loads of Cotton to Pittsburgh
- 1823 – Deliver 20 Loads of Clothing to New York
You will note that a straight path to Pittsburgh is insanely expensive. You cannot win the match this way. Instead head east towards The Gangster’s territory and wrap your way along the northeast border all the way to Pittsburgh. You will find there are cuts in the mountains that allow you to build a rail system without having to build tunnels.
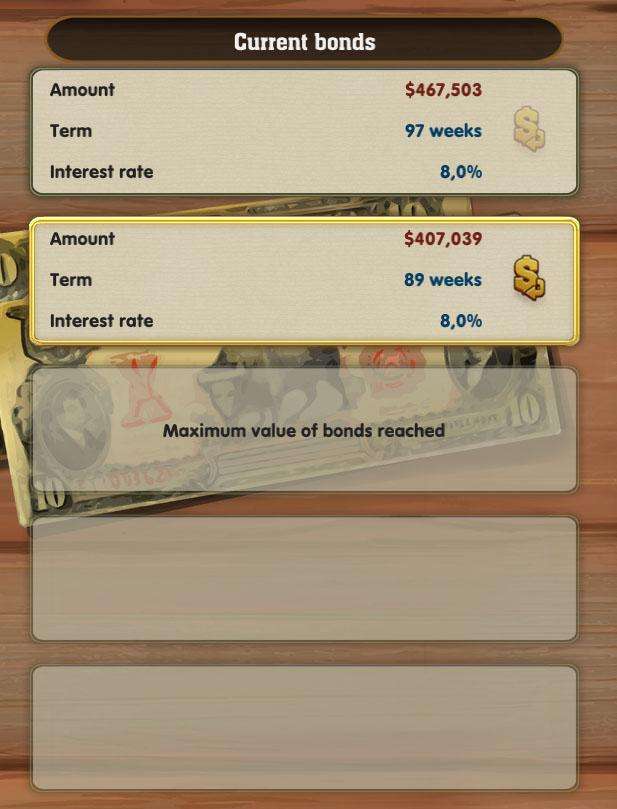
If you are falling short on cash make sure to issue bonds. Issuing bonds comes with interest but gives a large amount of cash. The profits from your rail by connecting all the cities along the way will more than pay for the costs of the bonds.
You will want to make a path that looks something like this.
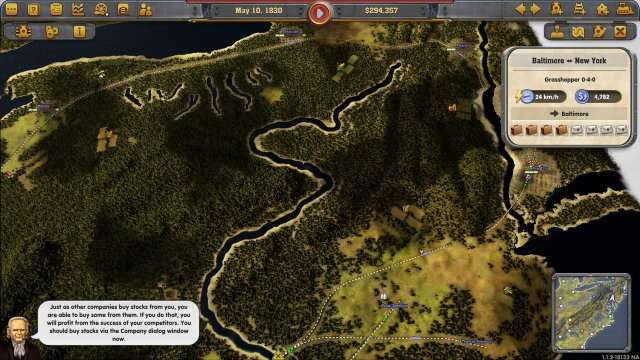
This will get you to Pittsburgh fast. To get a line from Pittsburgh to New York create either a direct paralell track or create side tracks. To parallel move a track near an existing track and they’ll click in. This saves you money on construction. Side tracks go off of an existing track and on an existing one.
The only disadvantage is that one train will have to wait for another one to complete the side track. However it is generally cheaper and is something that can be modified later when you have more money.
You are building your first supply line. There is a cotton supply near Pittsburgh. Shipping this to Pittsburgh will create Silk. Shipping Silk from Pittsburgh to Baltimore will create dresses. And from Baltimore to New York will be the shipping of dresses.
- 1836 – Connect Baltimore and Toledo
- 1838 – Reach a population of 100,000 in Baltimore
- 1838 – Connect 10 rural businesses
- 1840 – Buy 20% shares in a competitor
- 1845 – Achieve a company value of $20,000,000
- 1845 – Buy one of your competitors
You have two real challenges among this. The first is getting Baltimore to 100,000. The second is to buy a competitor.
Competitor shares are cheaper earlier in the game and get more expensive over time. It’s almost worthwhile to just save up and buy out one of them outright. You have to be able to purchase an entire company before you get to wealthy so earlier is better. As a tip if you ever go into the negative (even for a second) you will be handed $2,000,000 free dollars which can be used to purchase a large sum of a competitor.
With Baltimore you need to supply its needs. If you enter the city and click Information you will get this.

It breaks down specific needs and the easiest thing to do is just… fulfill them.
A good tip is to level up New York and Washington as well so that they will gain an extra industry. The extra industry will supply some of the demand of Baltimore at far greater amounts than the on-map resources. Baltimore has no source of beer, so beer in Washington will be a huge win.
Once Baltimore gets to 70,000 you can build a museum. Museum will supply some of the needs which lowers the amount of goods citizens will need to advance in population.
To get to $20,000,000 just connect all the cities. Connecting all the cities will allow you to hit a $20,000,000 valuation.
Chapter #3 – Over the Mississippi Tips
Scenario: In this non-linear order you are now moving from the east coast to attempting to build a very large bridge over the Mississippi. Whereas normally you just pay money this map will require you to build resources for bridge building, completely unique to this map. You will be joined by The Trickster and The Lady on this map.
- 1854 – Connect 10 Rural Businesses
- 1856 – Connect 250,000 people to your network
It might seem wise to connect in chronological order but connect as many cities as you can first. The rural businesses can come after once you figure out what sorts of things each city will need and in what amounts. There are a lot of easy to access cities. Head east and north first and then look to the south. Starting off with a large number of connected cities will give a large boon.
To figure out what resources to connect to what cities select a city and see what it demands. A demand under 0.5 will not support one train. You will need to connect multiple resources or a resource to multiple cities (via one train) in order to make profit. Focus on the demands over one as they can support a train. Demands over 3 can support two trains.
Chicago is a good place to start linking everything up to. It is surrounded by towns and has a giant population meaning they will take in almost all goods.
After you complete these goals you can unlock Rock Island which is not somewhere the game will allow you to build to initially.
- 1854 – Reach a population of 100,000 in Toledo (Optional)
This is a fairly easy objective to accomplish. Connect the Indianapolis, Chicago and Grand Rapids to Toledo. This will do most of the work. After this connect a source of Fruit and whatever resources it needs to build its industry. If you build a museum it will help get it to the appropriate number faster.
- 1856 – Connect cities Chicago, St. Louis and Louisville (Optional)
Chicago is in the middle of the map. St. Louis is to the southwest. Louisville is to the southeast. It’s just a good idea to connect them regardless.
- 1858 – Deliver 50 Loads of Lumber to Rock Island
To accomplish this you need to have a city that produces Lumber. Lumber is produced from Wood. Connect a wood source to a Lumber production and connect that city to Rock Island. Easiest way to do it is purchase a Lumber business near Rock Island. But connecting a random one will work and you will have time.
If Rock City builds a lumber yard you will have to buy it and destroy it, otherwise it will not take Lumber deliveries.
- 1861 – Transport 100 passengers from Toledo to Omaha without stopping
You cannot cross the Mississippi river without using the bridge you built. So you have two paths on.
Chapter #4 – Civil War Tips
Scenario: The American Civil War has broken out and it is being shoe-horned into this game without any particular care for accuracy. You are to supply troops with weapons and supplies as they push deeper and deeper south. This historical fiction focuses largely on the battles in Kentucky.
But you won’t see any actual battles. You will be playing against General Jonathan Johnson who won’t take any actions against you and who you will get free infrastructure from him from time to time.
- 1861 – Reach a population of 60,000 in Louisville
- 1861 – Produce 1 Load of Weapons
Getting Louisvile to 60,000 can be accomplished by using the infrastructure provided. The city has a museum which will “carry you” to the objective.
You get your first warehouse. This can be loaded with goods from multiple points and two trains will run supplies from the warehouse to Louisville.
Focus on connecting as many cities as are available. This will give you the revenue needed for the rest of the game.
Weapons are the second most complicated supply line in the game. You need to produce Chemicals which are made from Coal. You will need to produce Lumber which is made from Wood.
You will need to ship the Lumber, Chemicals and also Iron to one city where they will be produced. This is a lot more time sensitive than the preceeding levels so it is important to try and rush out those weapons before even getting the population of Louisville to 60,000.
- 1862 – Transport 12 Loads of Weapons
Not all cities will accept weapons. They need to have a very high population for that.
But Nashville and Memphis both have a special structure called a “Military Depot” which will collect and stockpile weapons. Create a line to Nashville from wherever you have decided to build weapons and another one to Memphis to begin the process. While you are waiting for the weapons to ship upgrade your weapon creating capacity and ship resources to places to improve their overall level of happiness. More lines = more money = easier game.
You can also setup your weapon dumping lines into loops if you have a surplus weapons problem in your city. You can click on the city to see how many items, how many passenger trains and how many mail trains are unserviced by transit.
- 1863 – Deliver 12 Loads of Weapons to Knoxville
- 1863 – Deliver 12 Loads of Weapons to Jackson
- 1863 – Transport 3,000 passengers
Guess what, these places also have military depots. Make a line to Knoxville, this is the easiest one to deal with. If you made a line to Memphis just redirected it to Jackson. Any other lines that are shipping weapons can be set to “Passenger and Mail Only” from “Automatic” to avoid them taking weapons designated for elsewhere.
Knoxville will likely finish receiving weapons first due to the shortness of the line so set it to Passenger and Mail Only as soon as it is done. Once you are done all these objectives you can turn all routes back to Automatic.
The 2,000 passengers you have to transport can be transported anywhere. They’re hypothetical troops but since they go anywhere…. not actual troops.
- 1864 – Transport 3,000 passengers from Louisville to Atlanta without stopping
- 1864 – Reach a population of 60,000 in Atlanta
- 1865 – Reach a population of 70,000 in Jacksonville
Make a direct line between Louisville and Atlanta immediately and set it to Mail and Passenger only so that freight doesn’t take priority. Market Crier will help get more passengers on your train. Purchase one and select “Comfort.” If you select “Safety” it will only give bonuses to trains that feature a Security Guard. Another useful bit of information, the bigger Louisville is the more passengers it will host.
You are going to get a lot of cities and you simply need to connect all the routes on there. There are going to be a lot of routes you can do.
Getting Atlantic’s population up will be your first focus due to the time constraint.
You should try and get the populations up of all the southern towns as it will allow them to produce more goods and feed into each other. When the tide rises we all go up.
To get Jacksonville to 70,000 you need to get to 60,000 and build a museum. This will reduce the amount of goods you will need to get it higher.
Chapter #5 – Sierra Nevada Tips
Scenario: Well finally get to the second part of the first mission… finishing the intercontinental railway. This means going through a lot of mountains and this time you will be connecting from west to east… which is a lot harder. You will be playing against The Lady and The Engineer
- 1864 – Connect 4 cities to your rail network
- 1865 – Connect 8 rural businesses to your rail network
- 1866 – Achieve a quarterly profit of $600,000
This is a far more difficult opening objective because of artificial limits on where you can build. FInding 8 rural businesses that are providing in demand resources.
The best way to handle this is head for the $600,000 valuation. Try and connect business to Sacramento to bring up Sacramento’s population. In my go of this I connected San Francisco, Redding, Gold Beach and Los Angeles to Sacramento.
Luckily you only have to connect 8 rural businesses so worst comes to worst you just connect them and use them when they’re useful.
- 1866 – Reach a population of 50,000 in San Francisco
If you connect a beer route to San Francisco it will grow to 50,000 people. Building extra businesses into Sacremento that are in quick demand will help build up both San Francisco and Sacremento.
- 1867 – Reach a population of 100,000 in Sacremento
- 1868 – Build a rail network with a total length of 4,500 KM
- 1869 – Transport 50 passengers from San Francisco to Promotory Point without stopping
The biggest problem is space so make sure to have two stations down quickly. Move tracks appropriately and try and build as few bridges as possible. You will need to have all 16 entry points with stuff coming in to keep this place growing. If you build a museum it will make it that much easier.
Getting a route to Promotory Point is very expensive and will require going through multiple towns. Make sure you can get at least two lines running and set it to only Mail and Passengers until it is done. Transporting this many passengers is actually a lot slower than one would think.
- 1867 – Build a university in San Francisco
This is an achievement. Simply build San Fran up with as many routes as possible and you will unlock the option to build a university.
- 1868 – Establish an express connection between San Francisco and Los Angeles
This one is easy to get but can run into road blocks.
An express route is established by making a line that is very straight… with the fastest train… going the maximum possible speed. To accomplish this make a direct line, put in your fastest train, load it with your top staff who all like each other and use the Caboose. If you are struggling to get this even with this just look at your rail and try and correct any swivels in it until you get it.



Be the first to comment