Are you broke? Having trouble selling items? Never enough gold to buy anything?
That won’t be a problem anymore after reading this guide on making plenty of gold.
Rynoka Details
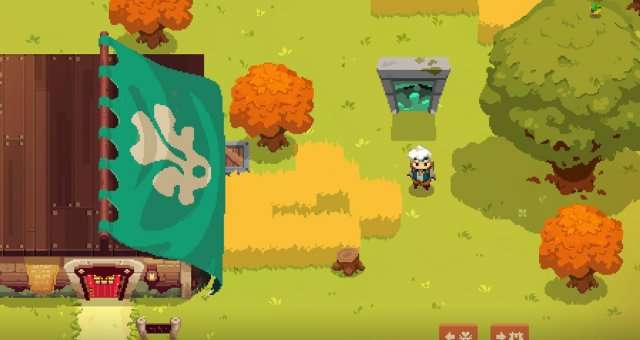
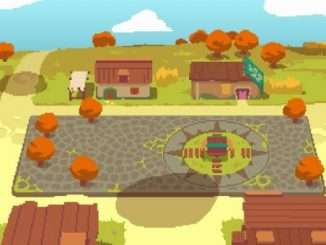
Rynoka, where “Heroes” and “Merchants” go to fight in the dungeons or sell their items.
You are both a Hero and a Merchant, so it’s a good idea to know the place.
One of the most important buildings to you is your shop, your primary source of gold. This is where you will spend a bit of time there selling all your look from the dungeons.
Town Board
This board will allow you to spend money on Merchant Contracts.
These contracts are for:
- The Forge: Craft weapons and armor. One of the most important stores by helping with progression.
- The Wooden Hat: Brew or buy potions. You can also upgrade weapons here. Another important store which keeps you alive in the dungeon with potions and makes your armor and weapon stronger.
- Le Retailer: Buy almost any item in the game for a ridiculous amount of gold. If you have a ridiculous amount of gold and lazy, this will be useful.
- Hawker: Buy decorations for your shop. Decorations have special effects which affect your customers and how they react.
- The Banker: Invest and make more or less money. It’s alright I guess, you probably won’t go to this guy at all.
The Shop
The shop, your home, your base of operations and your main source of income.
You can buy shop upgrades from the Town Board such as:
- Shop Size: Increases the size of your shop. It also adds more things such as more tables to sell artifacts, spots to place decorations, extra chests, a quest table, and a shop assistant. This is an upgrade you should always buy. Level 2 introduces the Quest Table, in which customers can request certain items or Guards killed. Level 3 introduces an assistant. While you go out exploring, you can have your assistant run your shop but they take 30% of what you would have made. If you are running the shop, your assistant will try their best to stop thieves while you work but is a bit too slow.
- Sale Box: A place to simply dump any items that you’re too lazy to price. Probably one of the worst upgrades in the game.
- Cash Register: Permenantly increases the amount of tips gained from customers. The opposite of the Sale Bin, the best item in the game. It pays for it self.
- Bed: When sleeping or returning to town, it will give you and overheal (cannot be healed, but restored when returning to town or sleeping) and an overshield (blocks 1 hit and negates all damage and restored when returning to town or sleeping). This is extremely helpful for exploring dungeons, simple enough and worth getting.
- Chest: Increases the size of the chest next to the bed. If you’re a horder, this is perfect for you.
Shop Upgrades
- Level 0: 4 tables, 1 chest
- Level 1: 8 tables, 2 chests, 2 spots (1 counter and 1 wall)
- Level 2: 10 tables (8 normal, 2 glass), 3 chests, 4 spots (2 counter and 2 wall), 1 quest table
- Level 3: 12 tables (8 normal, 4 glass), 4 chests, 8 spots (4 counter and 4 wall), 1 quest table, 1 assistant
- Level 4: 18 tables (14 normal, 4 glass), 5 chests 8 spots (4 counter and 4 wall), 1 quest table, 1 assistant
Sale Box
- Level 1: -75% Value
- Level 2: -60% Value
- Level 3: -50% Value
Cash Register Upgrades
- Level 0: + 0%
- Level 1: + 10%
- Level 2: + 20%
- Level 3: + 40%
Bed Upgrades
- Level 0: Full Health
- Level 1: Full Health X Overheal
- Level 2: Full Health, X Overheal, X Overshields
- Level 3: Full Health, 250 Overheal, 3 Overshields
Chest Upgrades
- Level 0: 28 Chest Space
- Level 1: 56 Chest Space
- Level 2: 84 Chest Space
- Level 3: 112 Chest Space
Dungeon Details
It all starts in the Dungeon.
Guards
The enemies in the dungeons (Guards) are what stand between you and the valuable artifacts.
All Guards have a high chance to drop loot, all of it being useful. Keep all of it until you are absolutely sure you don’t need it, you might need it later for crafting, upgrading, brewing, and enchanting.
A good way to track which items you want to keep is by putting items on your wishlist. This can be done by going to one of the stores in Rynoka and going over the item you want and put them on your wishlist. This will tag any items with a star that are required for the item you want.
Things that you should keep are:
- Crafting items (Vines, Roots, etc.)
- All Jellies (Rich, Venom, Fire, Electric)
- Empowering Crystals
Anything not on this list or you don’t need can be sold without second thought.
Chests and Curses
There are 5 kinds of chests in every dungeon.
- Wood Chests
- Iron Chests
- Gold Chests
- Red Chests
- Return Chests
All chests contain cursed items.
Since these curses don’t have official names yet (game released 2 days ago), I named them myself to correspond with its effects.
- Sides: This curse only allows you to place an item on either the left/right or top/bottom of your inventory.
- Destroy: This curse will destroy an item that it is pointing at upon leaving the dungeon.
- Bless: This “curse” is more of a blessing because it can destroy any curse immediately, even its own curse.
- Return: This “curse” is somewhat annoying but helpful since it can send items back to your shop immediately.
- Copy: This “curse” is one of the best curses in the game but in short, the item that is targeted by the cursed item will transform into the cursed item upon returning to town.
- Mystery: This curse is basically a wildcard, it can be anything from the dungeon you are in and reveals itself upon returning to town.
The important thing to remember is that all curses are active when they are in the bag so be careful about placing your items in your bag or you might sending something back with “Return”, destroying a valuable curse with “Bless”, or destroying the item with “Destroy”.
Secret Rooms
While exploring the Dungeons, you may notice a few skeletons laying around. Those skeleton can be destroyed for a small chance to get weapons and potions, which can be sold or used for upgrading. They also have a chance to drop notes, which give tips, secrets, and lore.
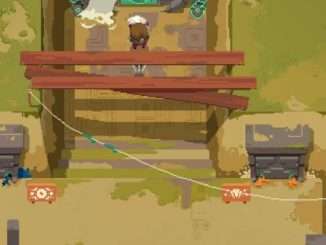
One of the notes states that some rooms have pits that sparkle upon entering the room for the first time. If you do see a sparkle in a pit, it indicates that there is a secret room. To enter it, just jump down any of the pits in the room and don’t worry, there is a rope in the secret room to take you back to the room you were in.
So far, I have discovered 4 kinds of secret rooms:
- Return Chest Room: This room contains a chest that sends anything you put in it back to your shop, but it can only be used once. I recommend clearing the floor before using this chest, you can send a full inventory back to your shop and keep on going through the dungeon. Remember that cursed items are inactive when placed in this chest.
- Pedestal Room: This room has a pedastal with a book on it, this book can be taken but be careful. If the pedastal is empty an Invicible Guard (name unknown) will appear and follow you until you leave the floor or the dungeon. I recommend bringing a cheap item (Vines, Roots, etc.) to the room, and replacing the book with a cheap item. This will stop the Guard from spawning.
- Fallen Crate Room: Sometimes this room has loot, sometimes it doesn’t. Pretty simple.
- Horde Room: This room is quite profitable, but the most difficult room to complete. It has a pillar in the middle of the room. When you interact with the pillar, 3 portals will appear on the walls and 1-4 locked wood chests chests will spawn in the corner of the room. The portals will spawn a few random dungeon-themed enemies and after defeating them, the chests will unlock for you to loot. After taking what you need, you can either leave the room or interact with the pillar again to spawn more enemies. It will also upgrade all the chests in the room to a locked iron chest. Each horde room has 4 waves, so make sure to complete all 4 waves if you want to make the most money.
Requirements
Basic:
- Knowledge and Judgement of prices…
- …or a guide on pricing.
Shops:
- Forge (Recommended)
- Wooden Hat (Recommended)
- Hawker (Recommended)
Items:
- Decent Gear (Recommended)
- Cheap Items
Potion Selling
This may be a ridiculous idea at first, but it’s quite handy. All you need is the Wooden Hat shop unlocked, gold, decorations that affect tips, and plenty of jelly.
Chances are, you have collected plenty of jelly. In fact, too much jelly that you have no idea what to do with. You can either sell the jelly by itself and make nothing, or turn them into potions and sell them to Hero customers.
It’s simple, just make potions at the Wooden Hat shop with gold and jelly and resell them at your shop. The potion prices are different depending on the time of day. They’re slightly cheaper at night.
- HP Potion I: Day = 125 Gold / Night = 118 Gold
- HP Potion II: Day = 800 Gold / Night = 759 Gold
- HP Potion III: Day = 3000 Gold / Night = 2849 Gold
- HP Potion IV: Day = 8000 Gold / Night = 7599 Gold
- Hyper Potion: Day = 20520 Gold / Night = 19493 Gold
Using the price guide or your own knowledge and experimenting, you can determine a price for potions. From my own experience, I sell potions at daytime price which may not seem very profitable. Here’s the catch, you can earn tips. The max amount of tips you can earn from decorations and cash register upgrades are +110%, more than double of the original price.
So if you sell 5 Hyper Potions at day time prices with tips, you would make 215460 Gold.
You also cater to the Hero customers as well as your regular customers, making your shop extremely efficient.
Copy Spell Trick
While you explore the dungeon, you may have found a few cursed artifacts which turn targeted items into the same artifact. Sometimes, this maybe a bit annoying, but it can be used to your advantage for making more gold. All you really need are artifacts with the Copy curse and a few cheap items you don’t need, preferably anything that can stack up to 10 instead of 5.
Artifacts with the Copy curse can only be found in Gold or Red Chests.
After finding the cursed artifacts, you’re going to want to find the most valuble cursed items before proceeding. (Jottings, History Books, etc.) Now what you want to do is target your junk items with the cursed artifact. Vaulable artifacts can only stack up to 5 so always have a stack of 5 when transforming an item. (This is the reason why you should bring items that stack to 10, they can be split. It saves a lot of space.)
Once you have done that, leave the dungeon. (or you can be “brave” and keep going through the dungeon and risk losing your haul.)
That’s about it. Once you returned, go ahead and sell them for a nice price.


Be the first to comment