
This guide is intended to be used as an additional tutorial/refrence manual for a vanilla, non-modded, Airships: Conquer the Skies. It will include some of the less obvious features of ship design within it as well.
What Is Required to Make a Valid Airship?
Almost nothing is absolutely required to make a functional airship in this game. Ships without weapons can actually sometimes be viable, but we won’t be covering specifics yet.
All you need to make an airship is a form of lift, and a way to move about. You don’t need to go high or particurlarly fast, but being able to do both is very helpful.

This for example, is an incredibly cheap, and supprisingly decent medium level bomber, and it’s only got two berths, for 6 sailors, a small propeller, and a tiny suspendium chamber. I could reduce the crew requirement even further by removing ths suspendium chamber and sticking a suspendium tank on instead, but the AI seems to be drawn towards shooting those, and suspendium explodes, so I didn’t in this particular case.
Of course going bigger leads to a tougher, and more durable ship, but cheap spammable ships are a very valid tactic to go with, until your enemy start to counter your designs. The example above, for example will pretty much die immediately if shot at with a few rifles, or explosives. Larger designs with redundancies are less vulnerable to being knocked out immediately.
Overlays
Overlays are a key tool to be using when designing an airship, landship, or building. They will show you where key weaknesses in your design are, and give hints on where you can improve on the designs. By default, the U key will bring them up as a shortcut key. Alternatively you can also click the button at the top of the screen to bring it up.
Overlay #1 – Pathing
Most modules have different components that take up a large area of the ship, wether it be suspendium chambers, engines, or just a whole bunch of bunks, your ship needs to be moved around in. All guns start with one clip of ammo loaded at the start of the fight for example, but poor pathing choices means that you aren’t going to be able to reload those guns in a reasonable period of time.


This ship for example is divided by the suspendium chamber. If that’s inaccessable for any reason, the rest of the ship would be cut off crom the coal store. Fortunately the design only requires coal at the rear section however to power the engine, and said blocking suspendium chamber.
Overlay #2 – HP
This is a rather important overlay to look at occasionally. All components in a ship have a HP value that starts getting eaten away if the armor is broken through.

This overlay is showing the HP pool of the modules behind the armor itself. Adding armor won’t actually increase this HP pool of the component, but surrounding the component with other pieces will make them tougher to finally kill. Certain decorations can also add additional HP to any adjacent modules they touch as well as evenly distribute extra HP to the rest of the ship, so even decorative figureheads can become integral in making a survivable ship design, as you can see with the dragon figureheads over the cannons.
Overlay #3 – Water
All weapons carry a chance to set something it hits on fire, though explosives cary a higher chance, and flamethrowers have a significant ignition chance. Modules themselves can also catch fire if hit while their HP is low. Should you decide to add water to your ship, this overlay will show how long it takes your crew to get the water from the fire point to the fire itself.
Generally sticking to under 4 seconds is safe for particularly flammable components, notably coal. Ammo, and other explodey weapons should have shorter times if possible.
Overlay #4 – Repair Tools
Tools are optional, but good to have around if you want your ship to keep fighting. This overlay will show how long it takes to bring tools from the repair bay or machine shop to it’s needed location. You can’t repair armor with tools, but you can repair internal structure.
I’m unable to confirm this for sure, but a damaged weapon can potentially explode if it was previously damaged, while firing, leading to an explosion. Repair tools help to reduce that chance.
Overlay #5 – Ammo
A fairly simple overlay. This shows how much time, in seconds it takes for ammo to reach its destination. If you can keep this metric under a second, you will have uninterrupted fire of the weapon meeting the time criteria.
Overlay #6 – Coal
Same as the above, but for coal and things which need to eat it to run. How much time it takes for coal to get to, commonly, suspendium chambers or engines of a variety of description, as well as a few specialty components. You want this as low as possible. You can get away with half the required time for the component to be reloaded, though that’s incredibly dangerous in an actual combat situation. Not having coal usually means the ship will fall from the sky, or lose control of the engines.
Overlay #7 – Explosion Damage
Basically everything on an airship can explode. This overlay shows the intensity of any potential explosions, wether they be ammo explosions, suspendium explosions or potentially even rifle explosions. Try to keep key components out of the radius of the red tiles if you value them surviving a major explosion. This is especially true of ammo though, which likes to go off harmoniously if placed directly next to each other.

This ship for example will almost end up being bisected if the ammunition cooks off.
A good ship design, unless the vessel is designed to be disposable will try to ensure that an ammo explosion can still enable crew to move about the ship, as well as ensuring the ship can still move after the fact.
Armor Types: When to Use Which, and How to Unlock Special Armors
Wood Wall
Why use it? It’s FREE, it’s light, and that’s about it. There’s not much going for it, except the fact that it’s the second lightest armor in the game.
Why not use it? Unless you have a very specific idea which requires the lightest possible mass and lowest cost, it’s a terrible idea to use this armor. Everything can go through it, even rifles. That tends to mean lots of ammo explosions. It’s also completely useless against explosives, which will shred off almost all of this plate.
Wood Armor
Why use it? A decent HP pool to add on top of your modules, as well as a fairly decent pierce absorption make this quite an acceptable armor against lower caliber weapons, such as rifles. It can withstand a singular shot from a deck gun as well, which is quite good for the price.
Why not use it? It’s got some pretty poor blast damage absorption compared to steel wall armor, and as a result tends to be weak to explosive weaponry.
Reinforced Wooden Armor
Why use it? “Barrel armor” has rather high HP at 65 per block of armor, and has some decent damage resistances against piercing and blast, triple that of regular wooden armor. It’s also cheaper than actual steel armor.
Why not use it? It is HEAVY, and costs a fair amount. It will slow down a ship mounting it exclusively, and it will significantly drop the service ceiling, almost as bad as using brick armor.
Steel Wall
Why use it? It’s the same price of wooden armor, and it has a higher resistance against explosions, while also keeping the pierce resistance. It’s also lighter than wooden armor. It’s also almost capable of ignoring flak guns.
Why not use it? Wooden armor can resist a deck gun shot, this armor can’t. As a result, wood holds out slightly longer against larger guns.
Steel Armor
Why use it? It’s got noticeable blast and piercing resistance, capable of ignoring rifle fire, as well as flak. It’s got higher HP, and is overall very good armor.
Why not use it? Weight, mostly. Cost may also be a factor.
Heavy Steel Armor
Why use it? It’s twice as good as regular steel armor in every metric, and can ignore a large majority of weapons, including some powerful explosive weapons like grenades, but not bombs.
Why not use it? It’s very heavy, and very expensive to field.
Brick Wall
Why use it? It’s cheap, and it’s got a lot of HP, at 45.
Why not use it? It’s extremely heavy, as it’s intended for buildings, and it has no damage absorption features. Enough rifle fire can easily get through it if they all hit the same spot.
Stone Wall
Why use it? It’s rather cheap for armor, a lot of HP, great for buildings. Some resistances, but not much.
Why not use it? There’s no reason to not use it on a building. Using it on a ship will basically prevent it from moving however due to the sheer mass.
Massive Stone Wall
Why use it? Take regular stone wall and add half of all the stats, and double the blast resistance.
Why not use it? It’s MASSIVE. I don’t think it’s possible to make a ship armored completely in this type of armor.
DragonHide
This requires clearing an Elder Dragon nest in order to be used by your Empire in Conquest.
Why use it? It has NO weight, it’s got a HP pool comparable to barrel armor, and it’s nearly got the blast and pierce resist of steel armor.
Why not use it? Killing an Elder Dragon nest is very hard to do without specialized ships. It’s also very expensive to field.
Shell Armor
This armor requires clearing a Turtledove nest to be used by your Empire in Conquest.
Why use it? HP of steel armor, a bit of pierce and blast resistance, and the kicker here is, the armor generates it’s own lift. Enough to get most small ships off the ground on their own without added suspendium.
Why not use it? It’s a bit expensive, on par with steel armor, but doesn’t net you the damage resistances that steel provides.
Boarding, Your Crew, and Other Thoughts on the Matter
Boarding ships is a thing in this game, and without proper planning, chances are that you’re going to lose your ship unless you plan ahead to deal with boarders.
What is the goal of a boarding team? Their primary goal is to reach the bridge and take it out, if they successfully manage to do that, they will offically capture the ship (note that this does not apply to mech spiders, or any monsters, who just want to kill the crew).
Unfortunately, there is no hard counter against being boarded, but there are plenty of soft counters you can add onto your ship to make boarding a nightmare.
Countering Boarding
- Guards are almost overpowered, a single guard barrack can usually withstand an assault from most types of humanoid boarder.
- Speed counters most boarders, except Air Dragoons (though that depends on the command cooldown). If you dodge your ship out of the way of boarders, they can, and often will plumet to the ground after missing their jump. This does require a bit of micro however.
- Small arms are very potent counters to boarders, most weapons can directly target troops approaching the ship, as well as any additional small aircraft being deployed. Rifles, gatling guns, flamers, and even grapeshot guns are good counters to boarding.
- Excess crew can defend the ship. Sailors aren’t very good at defending a ship as they only have pistols instead of rifles, and presumably less training, but they can defend a ship on their own in a pinch if they aren’t already busy with another task.
- The sickbay works for your etire crew, sailors and guards. If you lose a guard, chances are that you might be able to get them back if they can get to the sickbay.
- Buildings are crewed by soilders, not sailors, as a result they are slightly more resistant to being boarded than ships.
- Place supply doors in akward positions for your crew and any possible boarders. Ideally, if you have guards, you want to force the enemy to run into them. If not, you want them kept as far as possible away from the bridge to buy as much time as possible for the crew to possibly defend the ship.
Boarding the Enemy
- There is a small variety of boarding troops, each of which best on certian ship designs.
- Marines need to actually directly jump aboard a targeted ship to get on board it. They are also extremely susceptable to dying due to missing their jump against a moving vessel. You do get 8 per barrack however, and they are decent boarders and ship defenders.
- Grenadiers are fewer per barrack, but it appears they are a bit more effective at taking out defenders than marines. They also have the benefit of having grapples, so they usually won’t die if they miss their jump. They can, and often will try to swing ship to ship to reach their target.
- Air Dragoons are somewhat special, as they can be deployed anywhere and board almost anything since they use jetpacks. They are about as effective as the grenadiers, but they are also extremely squishy outside of an airship as they are extremely slow. They are great counters to bombers not mounting rifles or other forms of small arms.
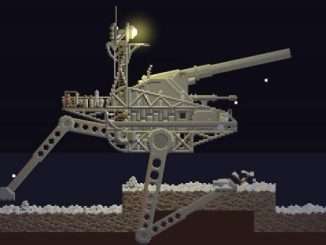
- Mech spiders are mean. Their sole purpose to board the target ship and shred any crew within them. You can’t capture with them, but they are extremely tanky boarders, and they have the same, if not more mobility with grapples as dragoons.
Be the first to comment