
Looking for the best gear in the game?.. Or do you just want to know what you’re up against in the next area?.. This guide is complete with screenshots and an embarrassing peek at how many skeletons I had to kill in order to get a (pretty good) sword!
Don’t Fall Into The Chasm
Chasm is a Metroidvania, Platform-Adventure game that I have wanted to play for a long time; while I’m not sure the years-long wait was entirely warranted, the game is still very good and exhibits a degree of polish and care that is admirable. Kudos to Bit Kid for sticking it out and releasing a solid, fun, and appropriately difficult game!
Good luck on your journey, and try to avoid succumbing to the same fate as the Ladori People!
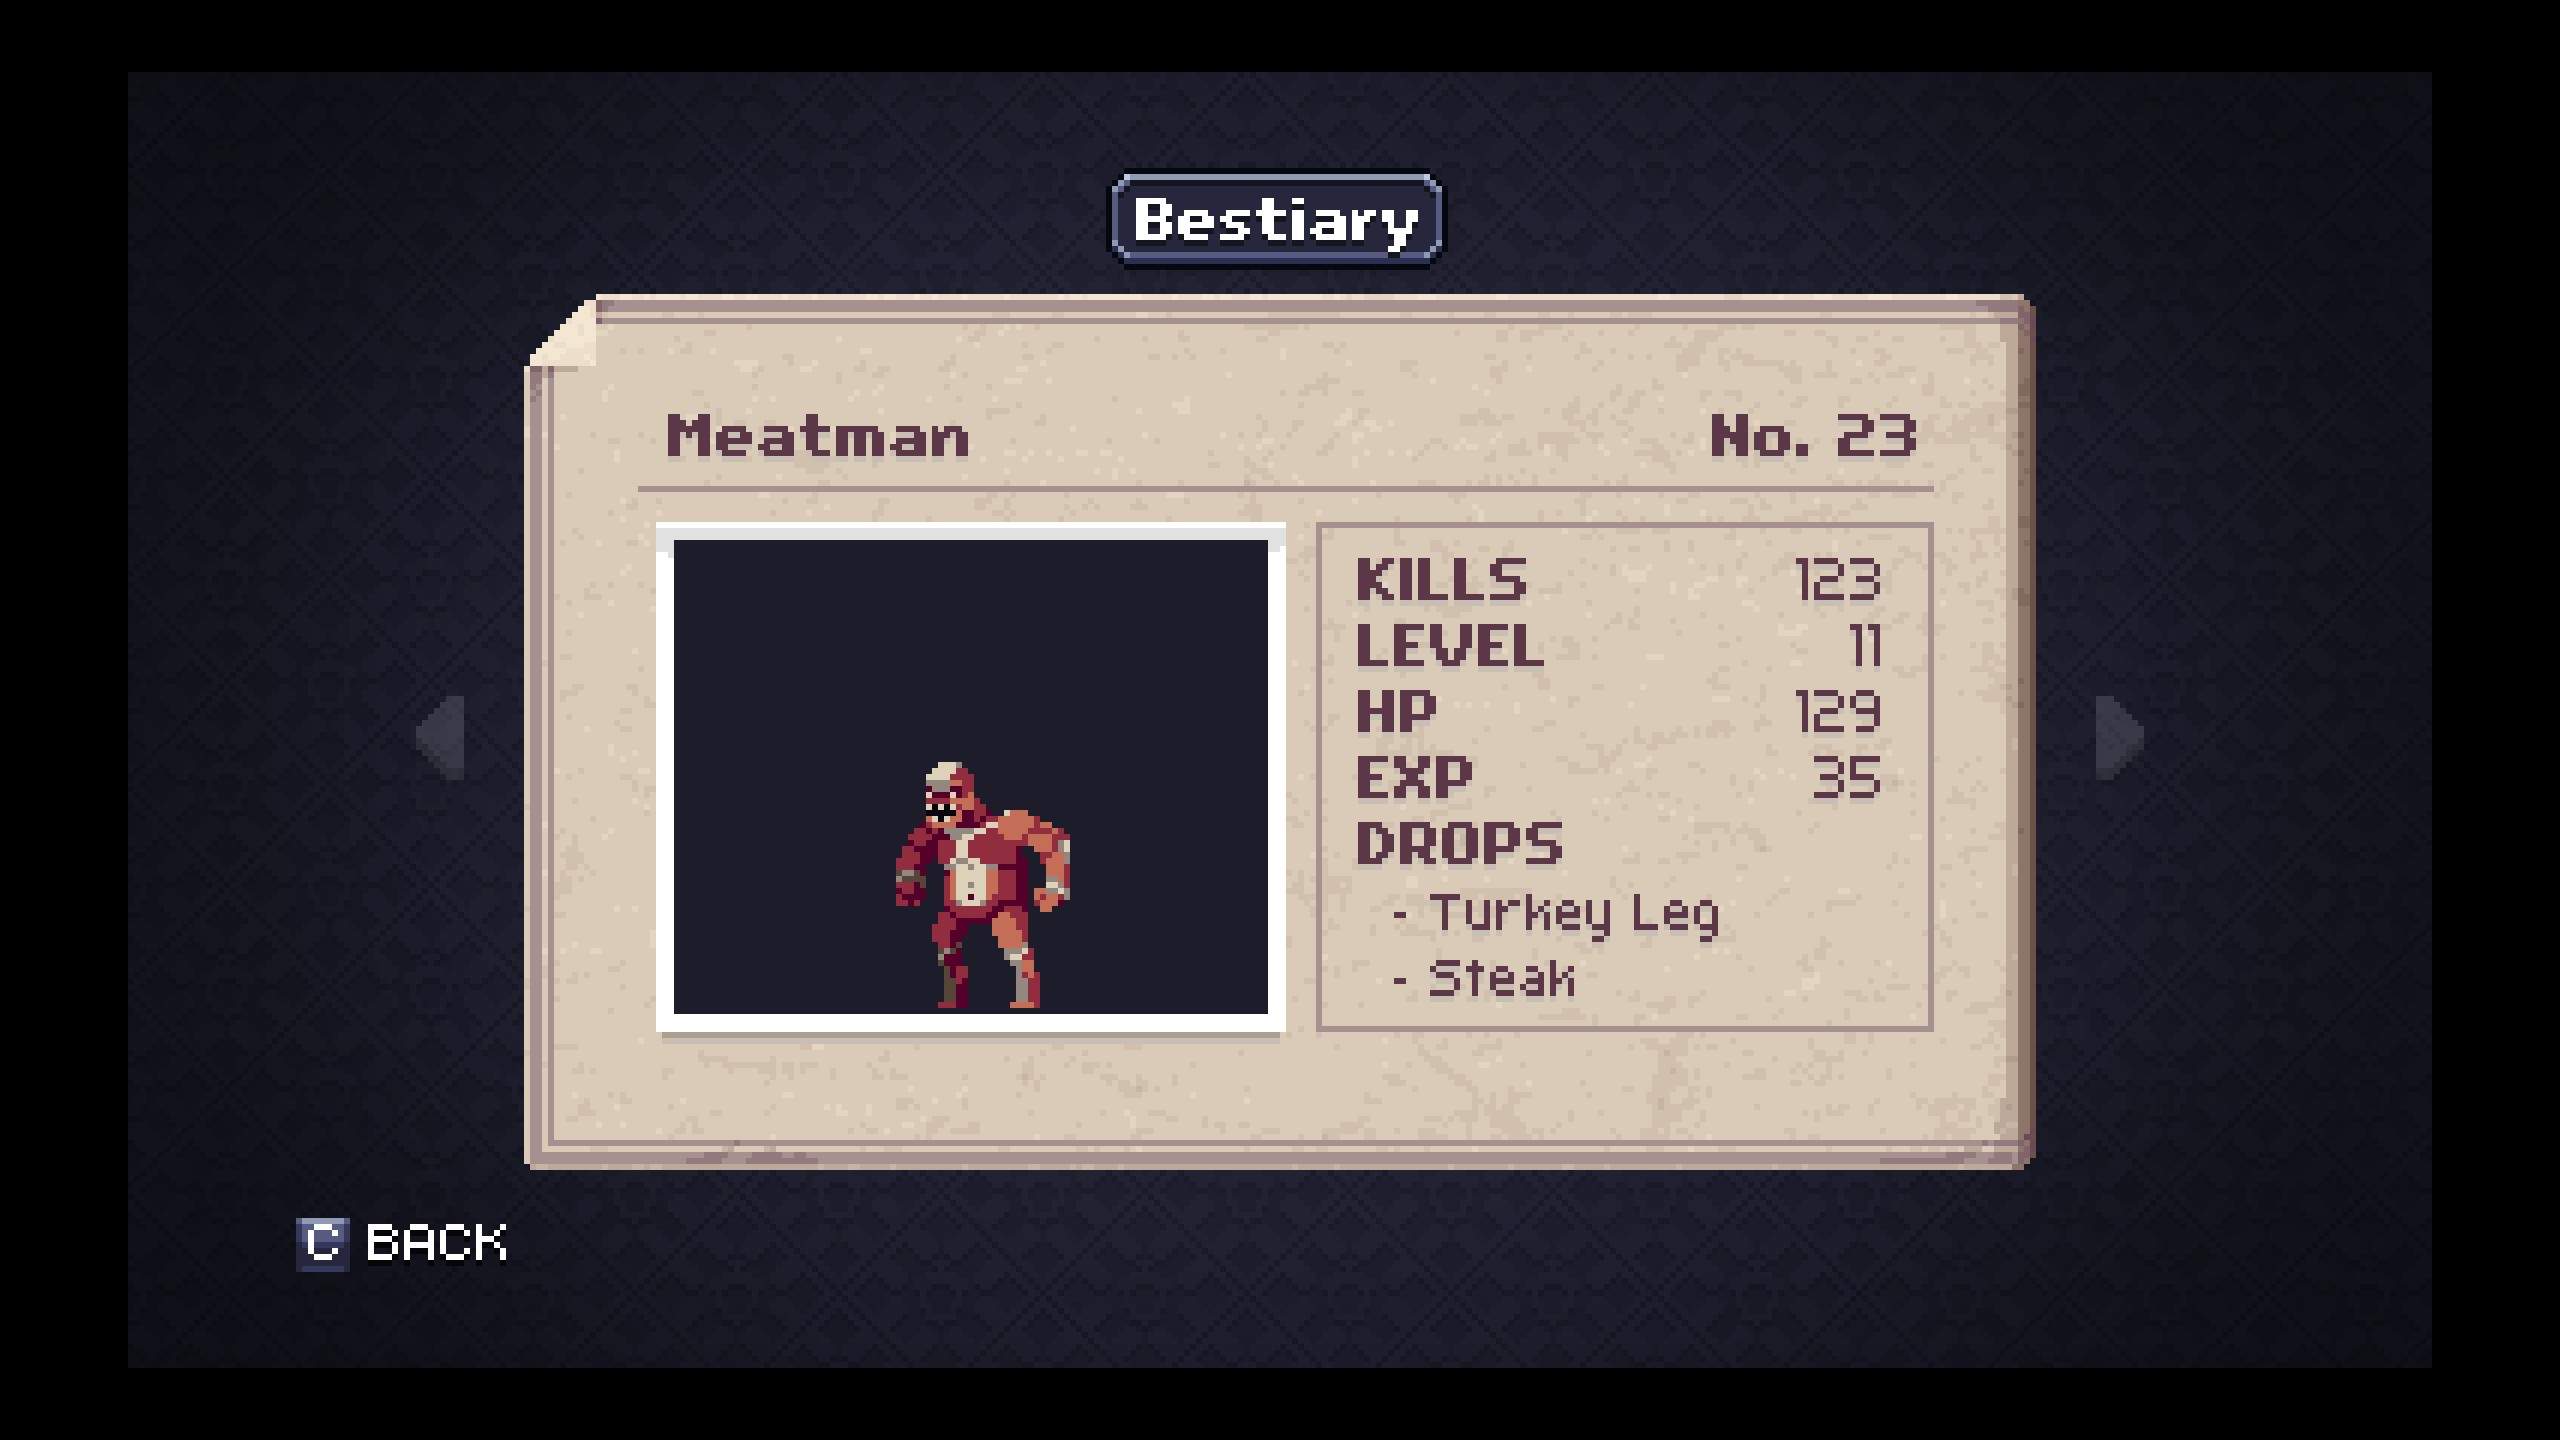
Bestiary – Mines
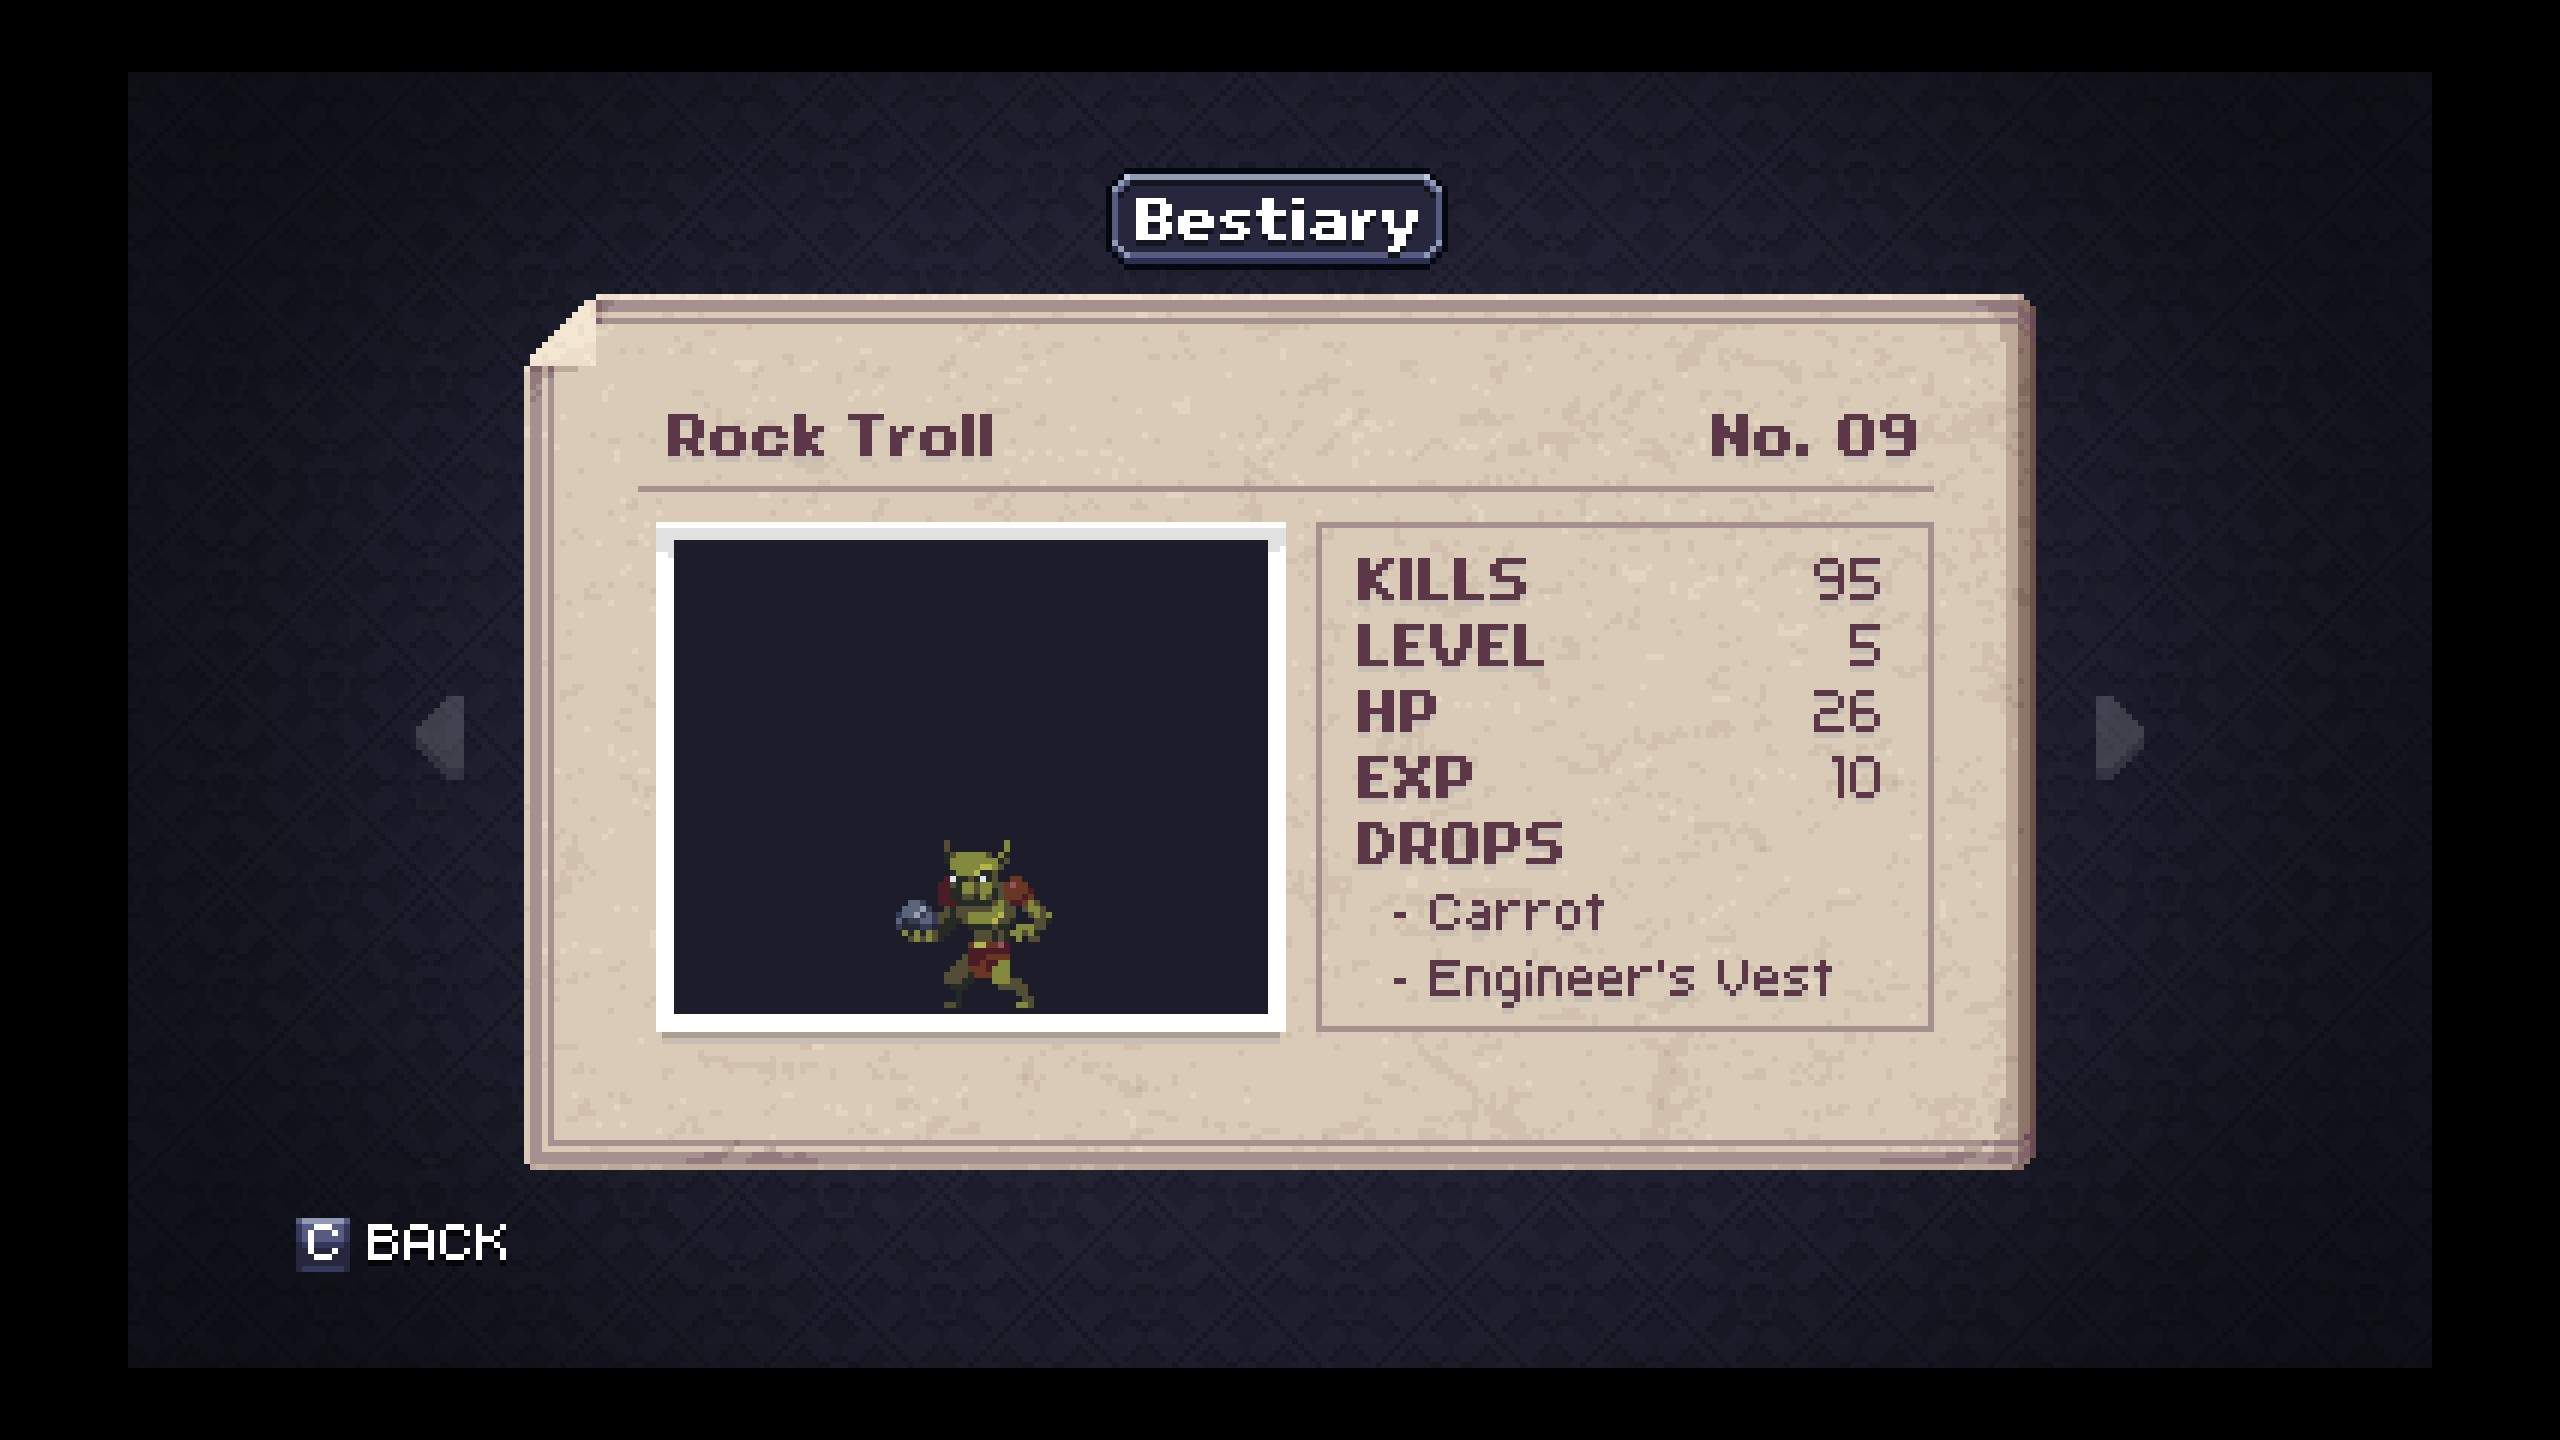
- #5 – Drill Troll is the lowest-level enemy with a good drop rate for Iron Ingots. If you have managed to rescue the Blacksmith this early in the game, you can craft some fairly powerful equipment using these.
- #10 – Kobold, #12 – Spear Kobold, and #39 – Armored Kobold all drop Venison. While this item’s use in restoring Health is obvious, it is also eventually a Quest Item that you will need several of, so try to avoid using them if they drop.
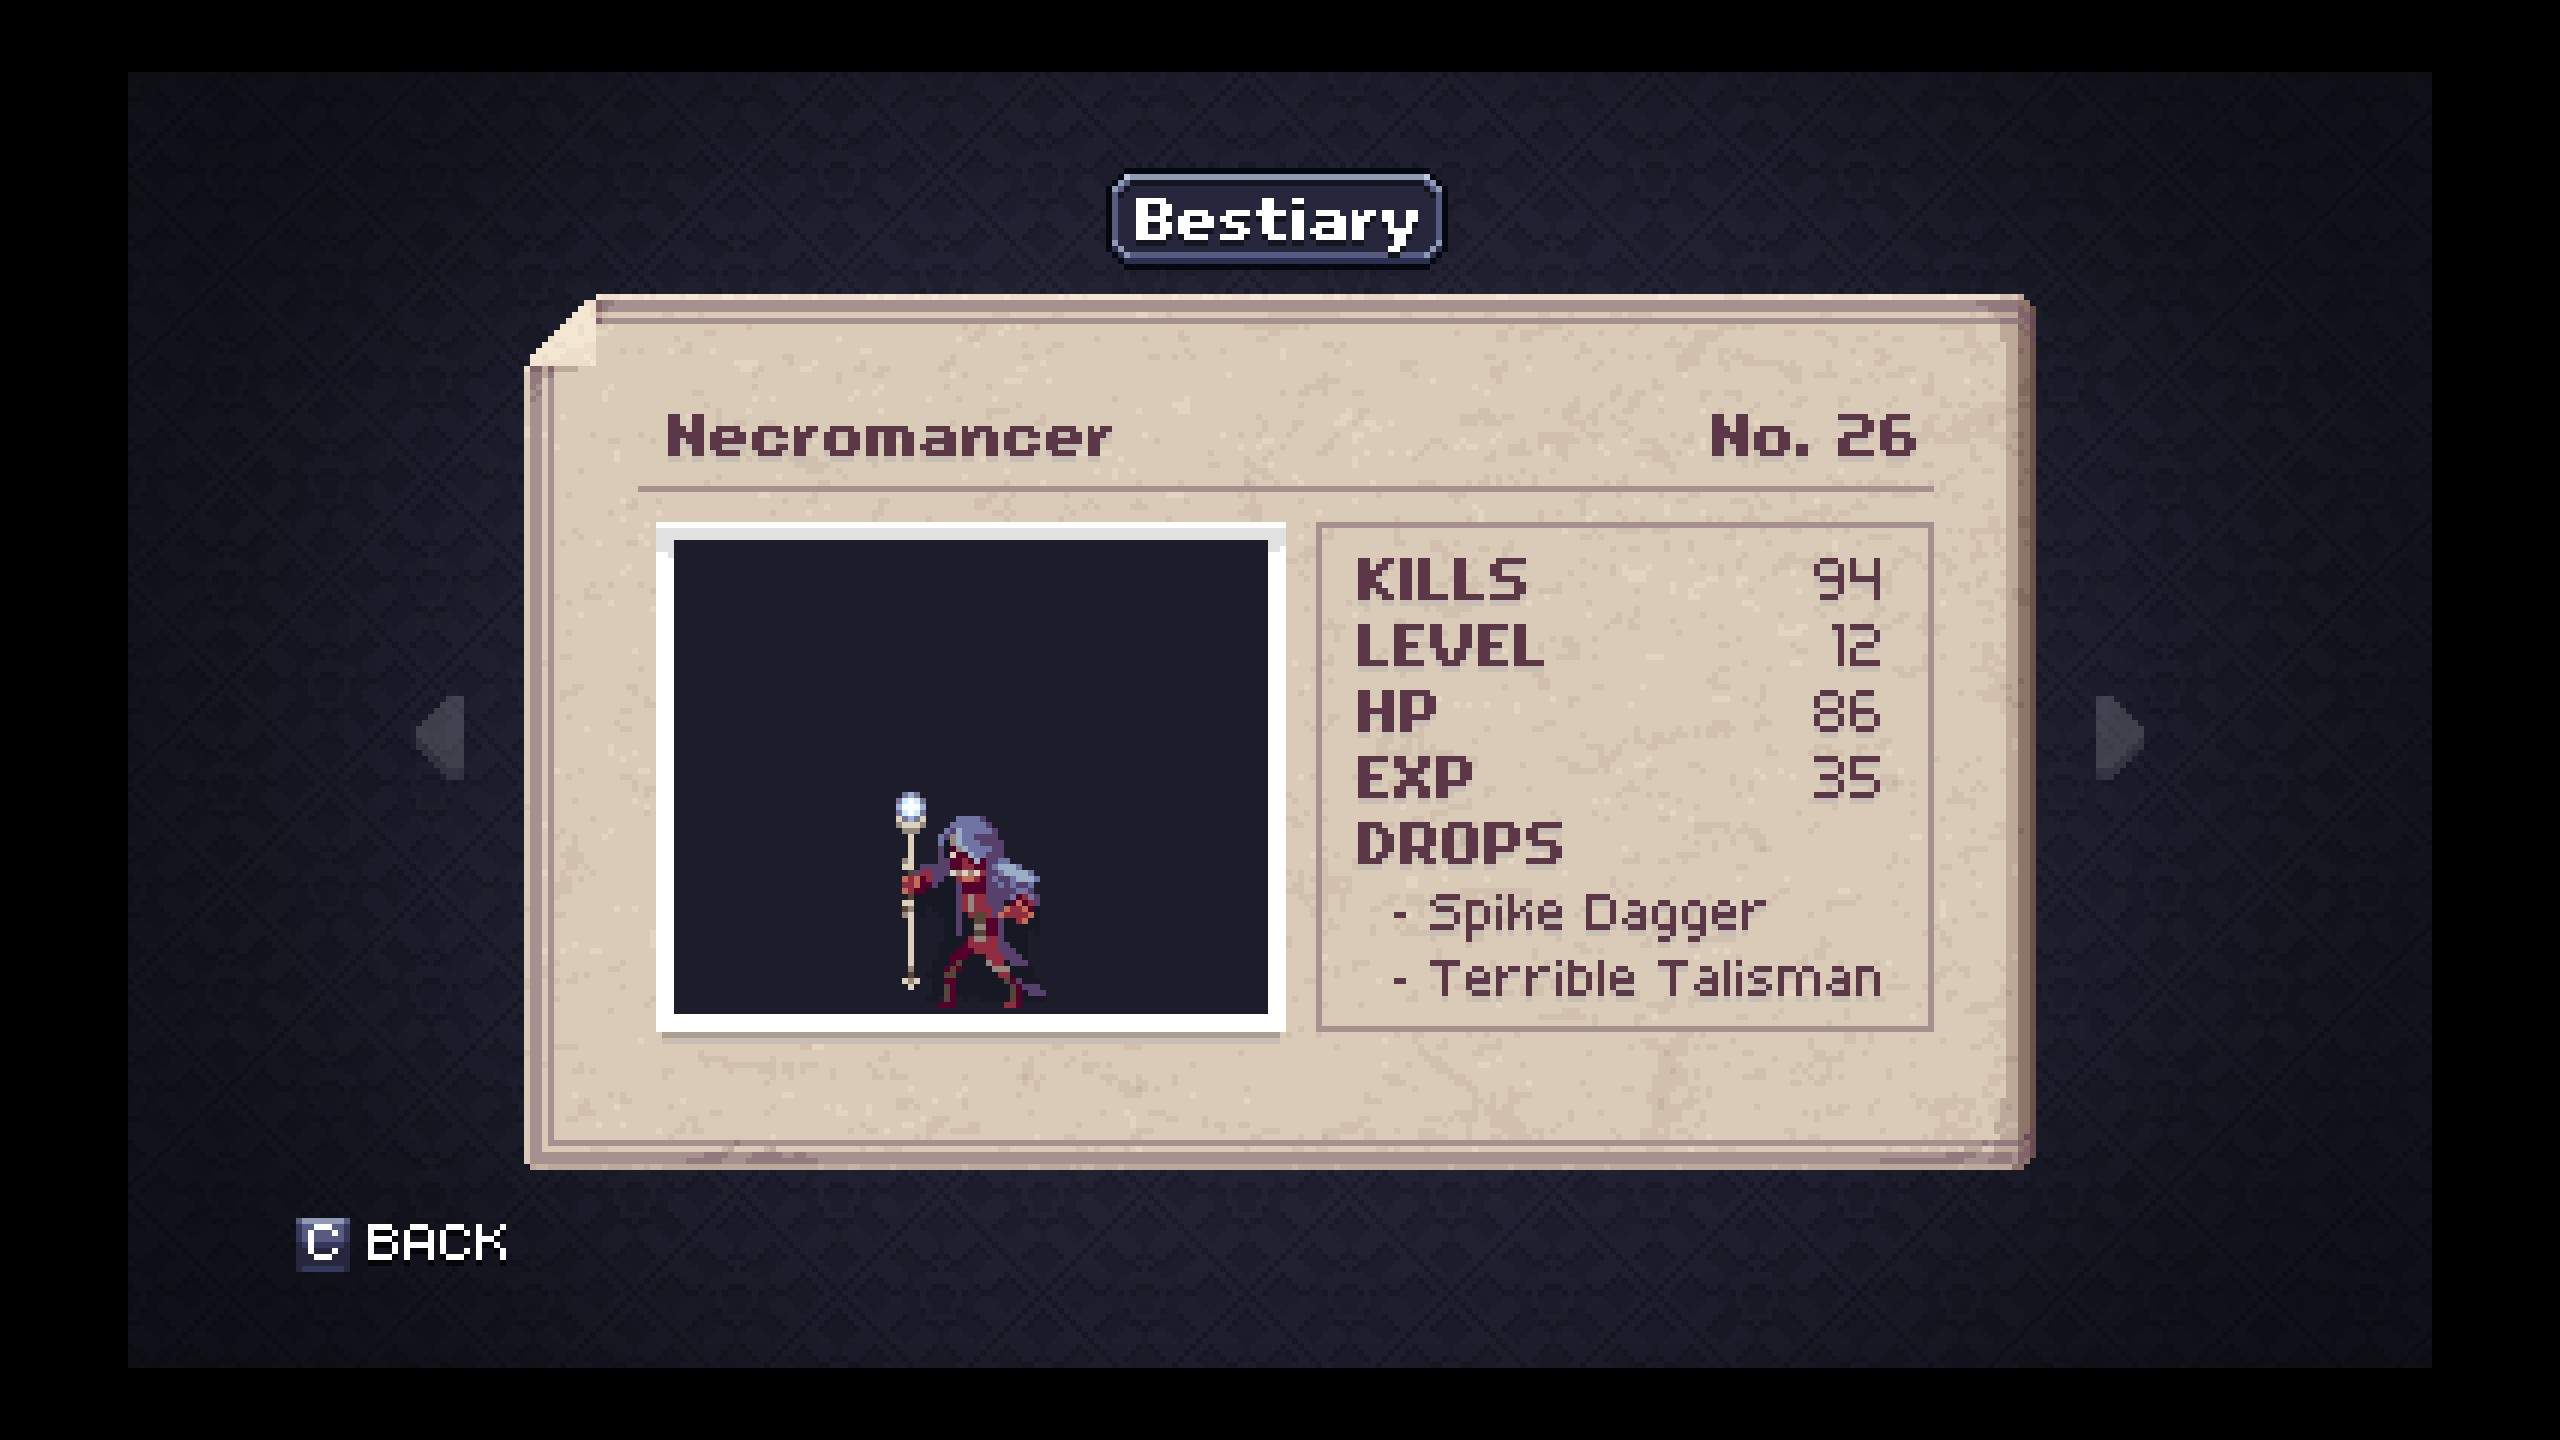
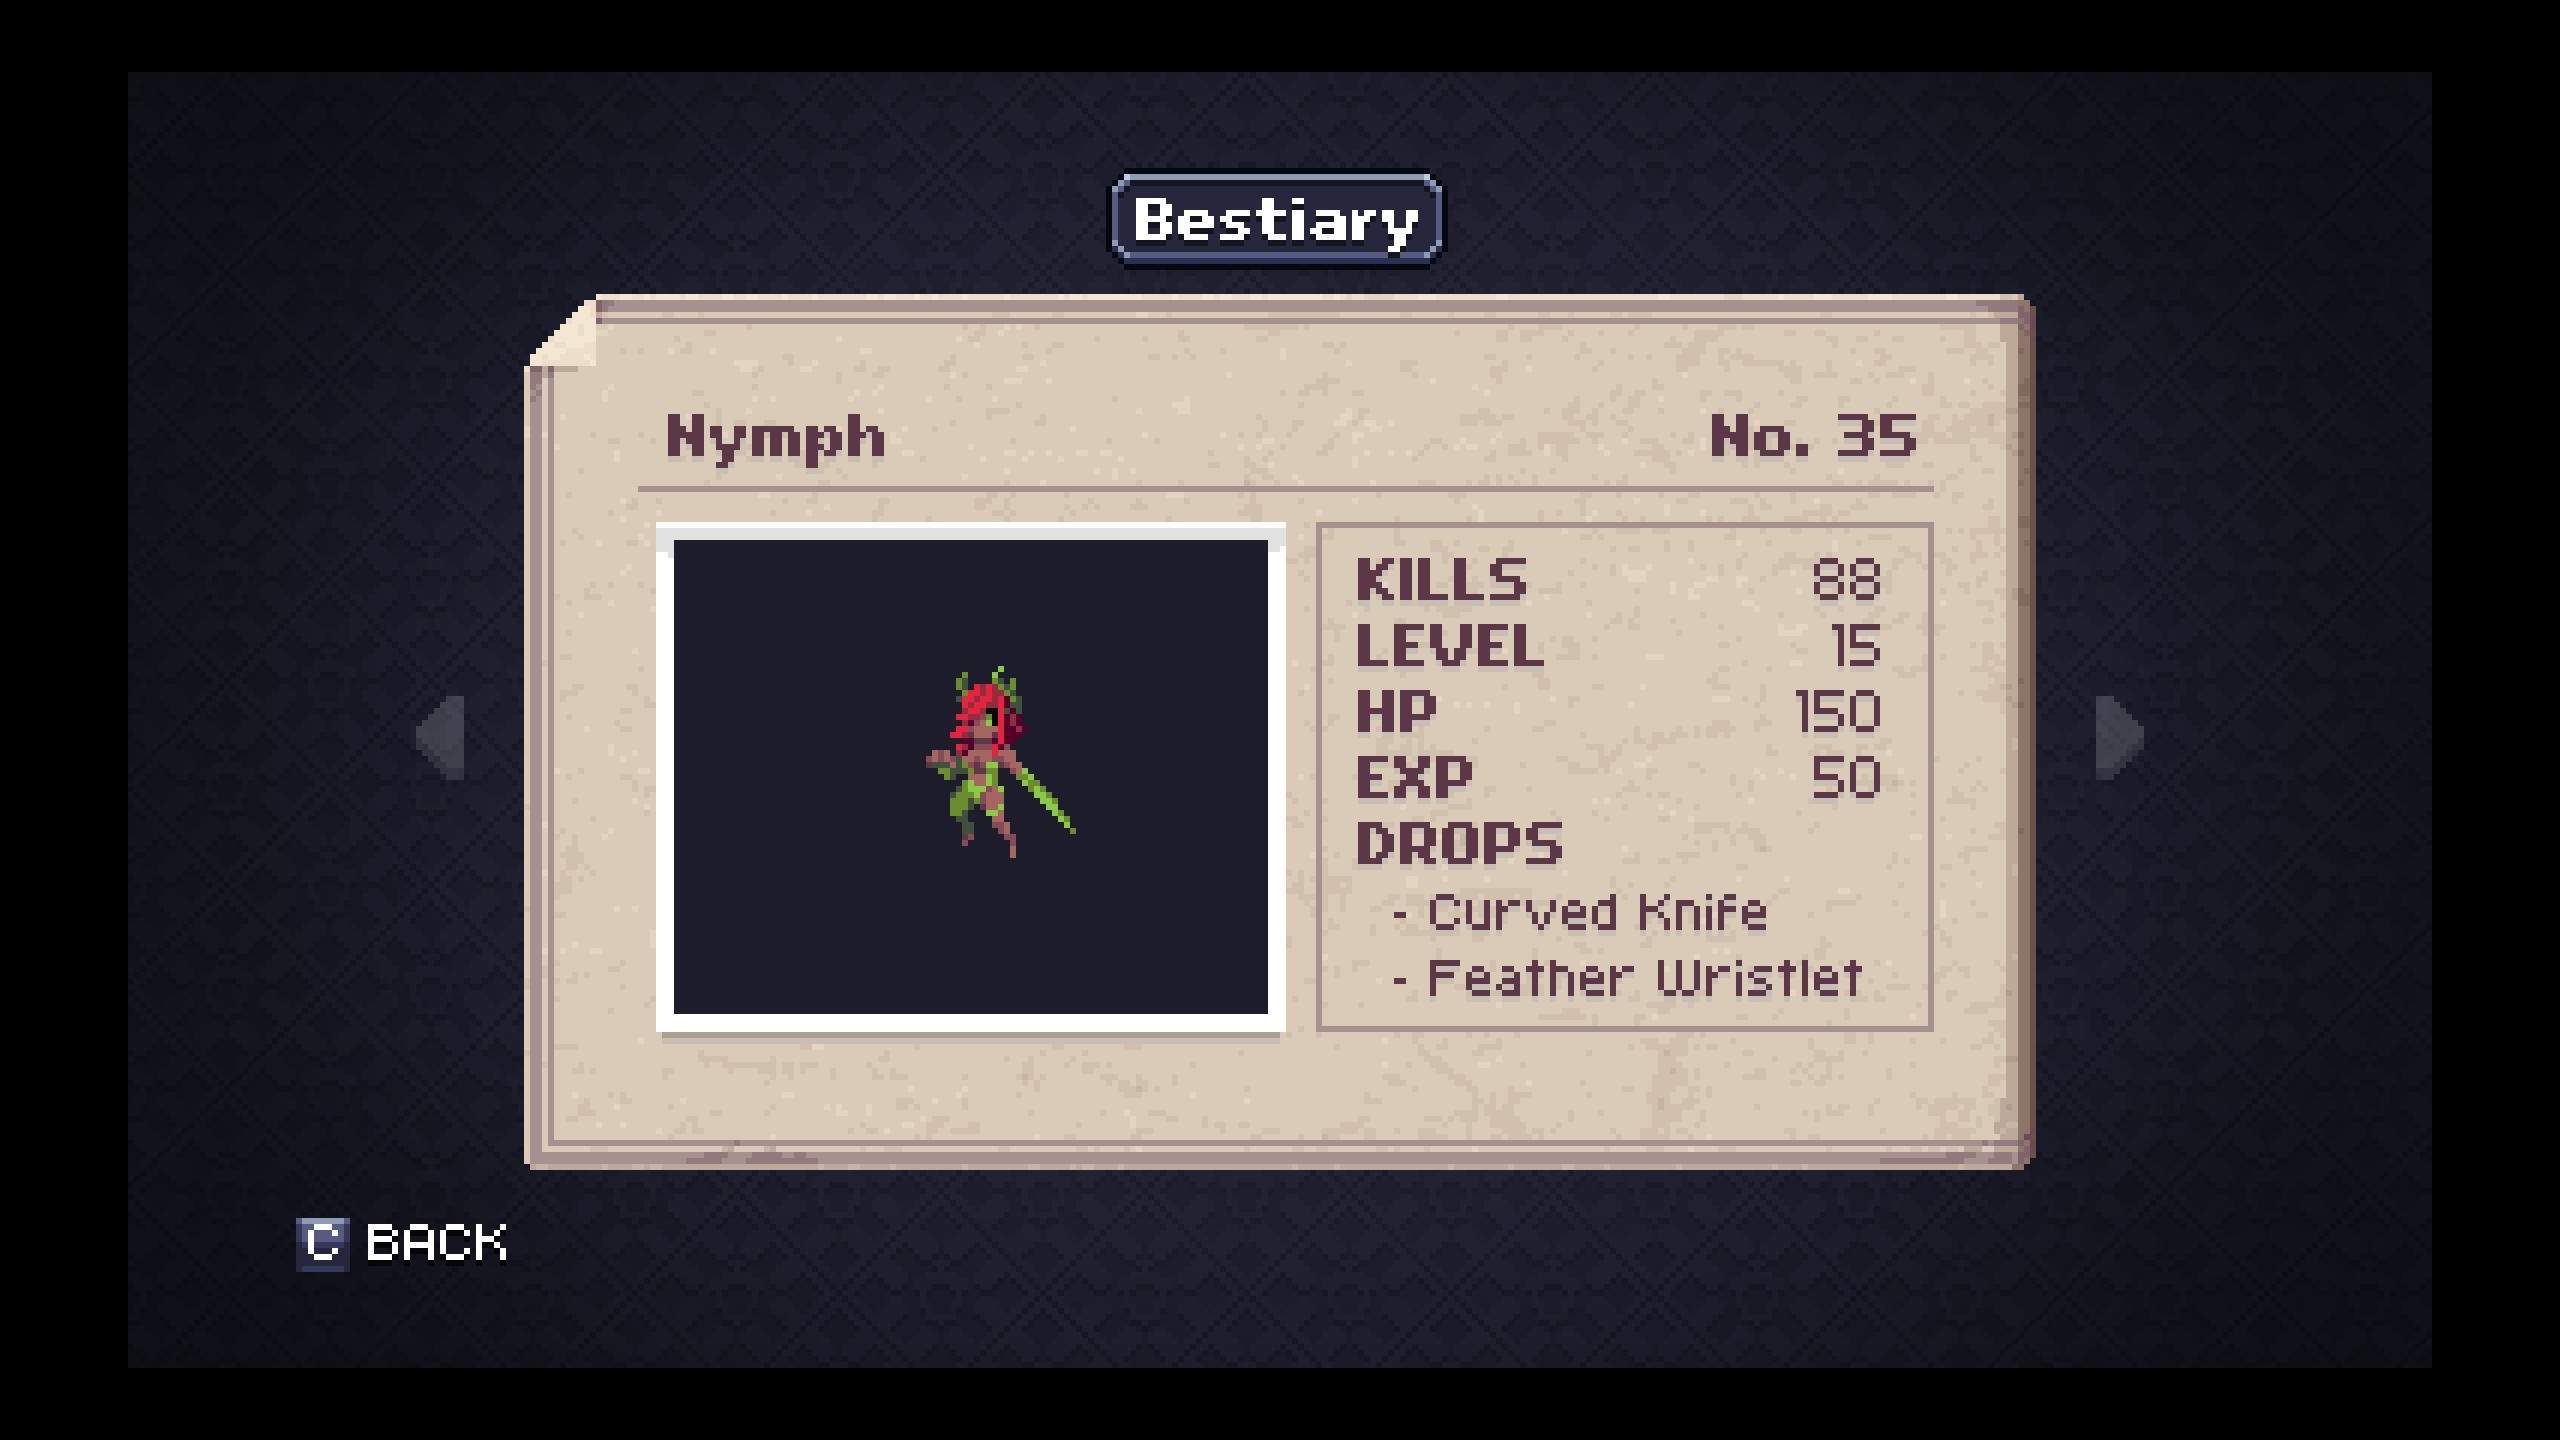
Bestiary – Catacombs
- #18 – Fly Pod is the lowest-level enemy that has a good drop rate for Silver Ingots. Using these to craft Silver Armor before attempting the deeper portions of the Catacombs will be enormously helpful against the Mini-Boss and the Boss, later.
- #20 – Skeleton drops a fairly powerful and very long-range weapon as its’ tier-two Loot. The Bone Whip can be very useful at this stage of the game if you obtain it by accident or with minimal farming.
- #58 – Phantom is unique as a non-Boss enemy in that it has only one item drop. The Sacrificial Pendant slowly restores your Mana when it is equipped and is very nice to have in a pinch when you’re low on restorative items and need a bit of help getting to the next Save Point.
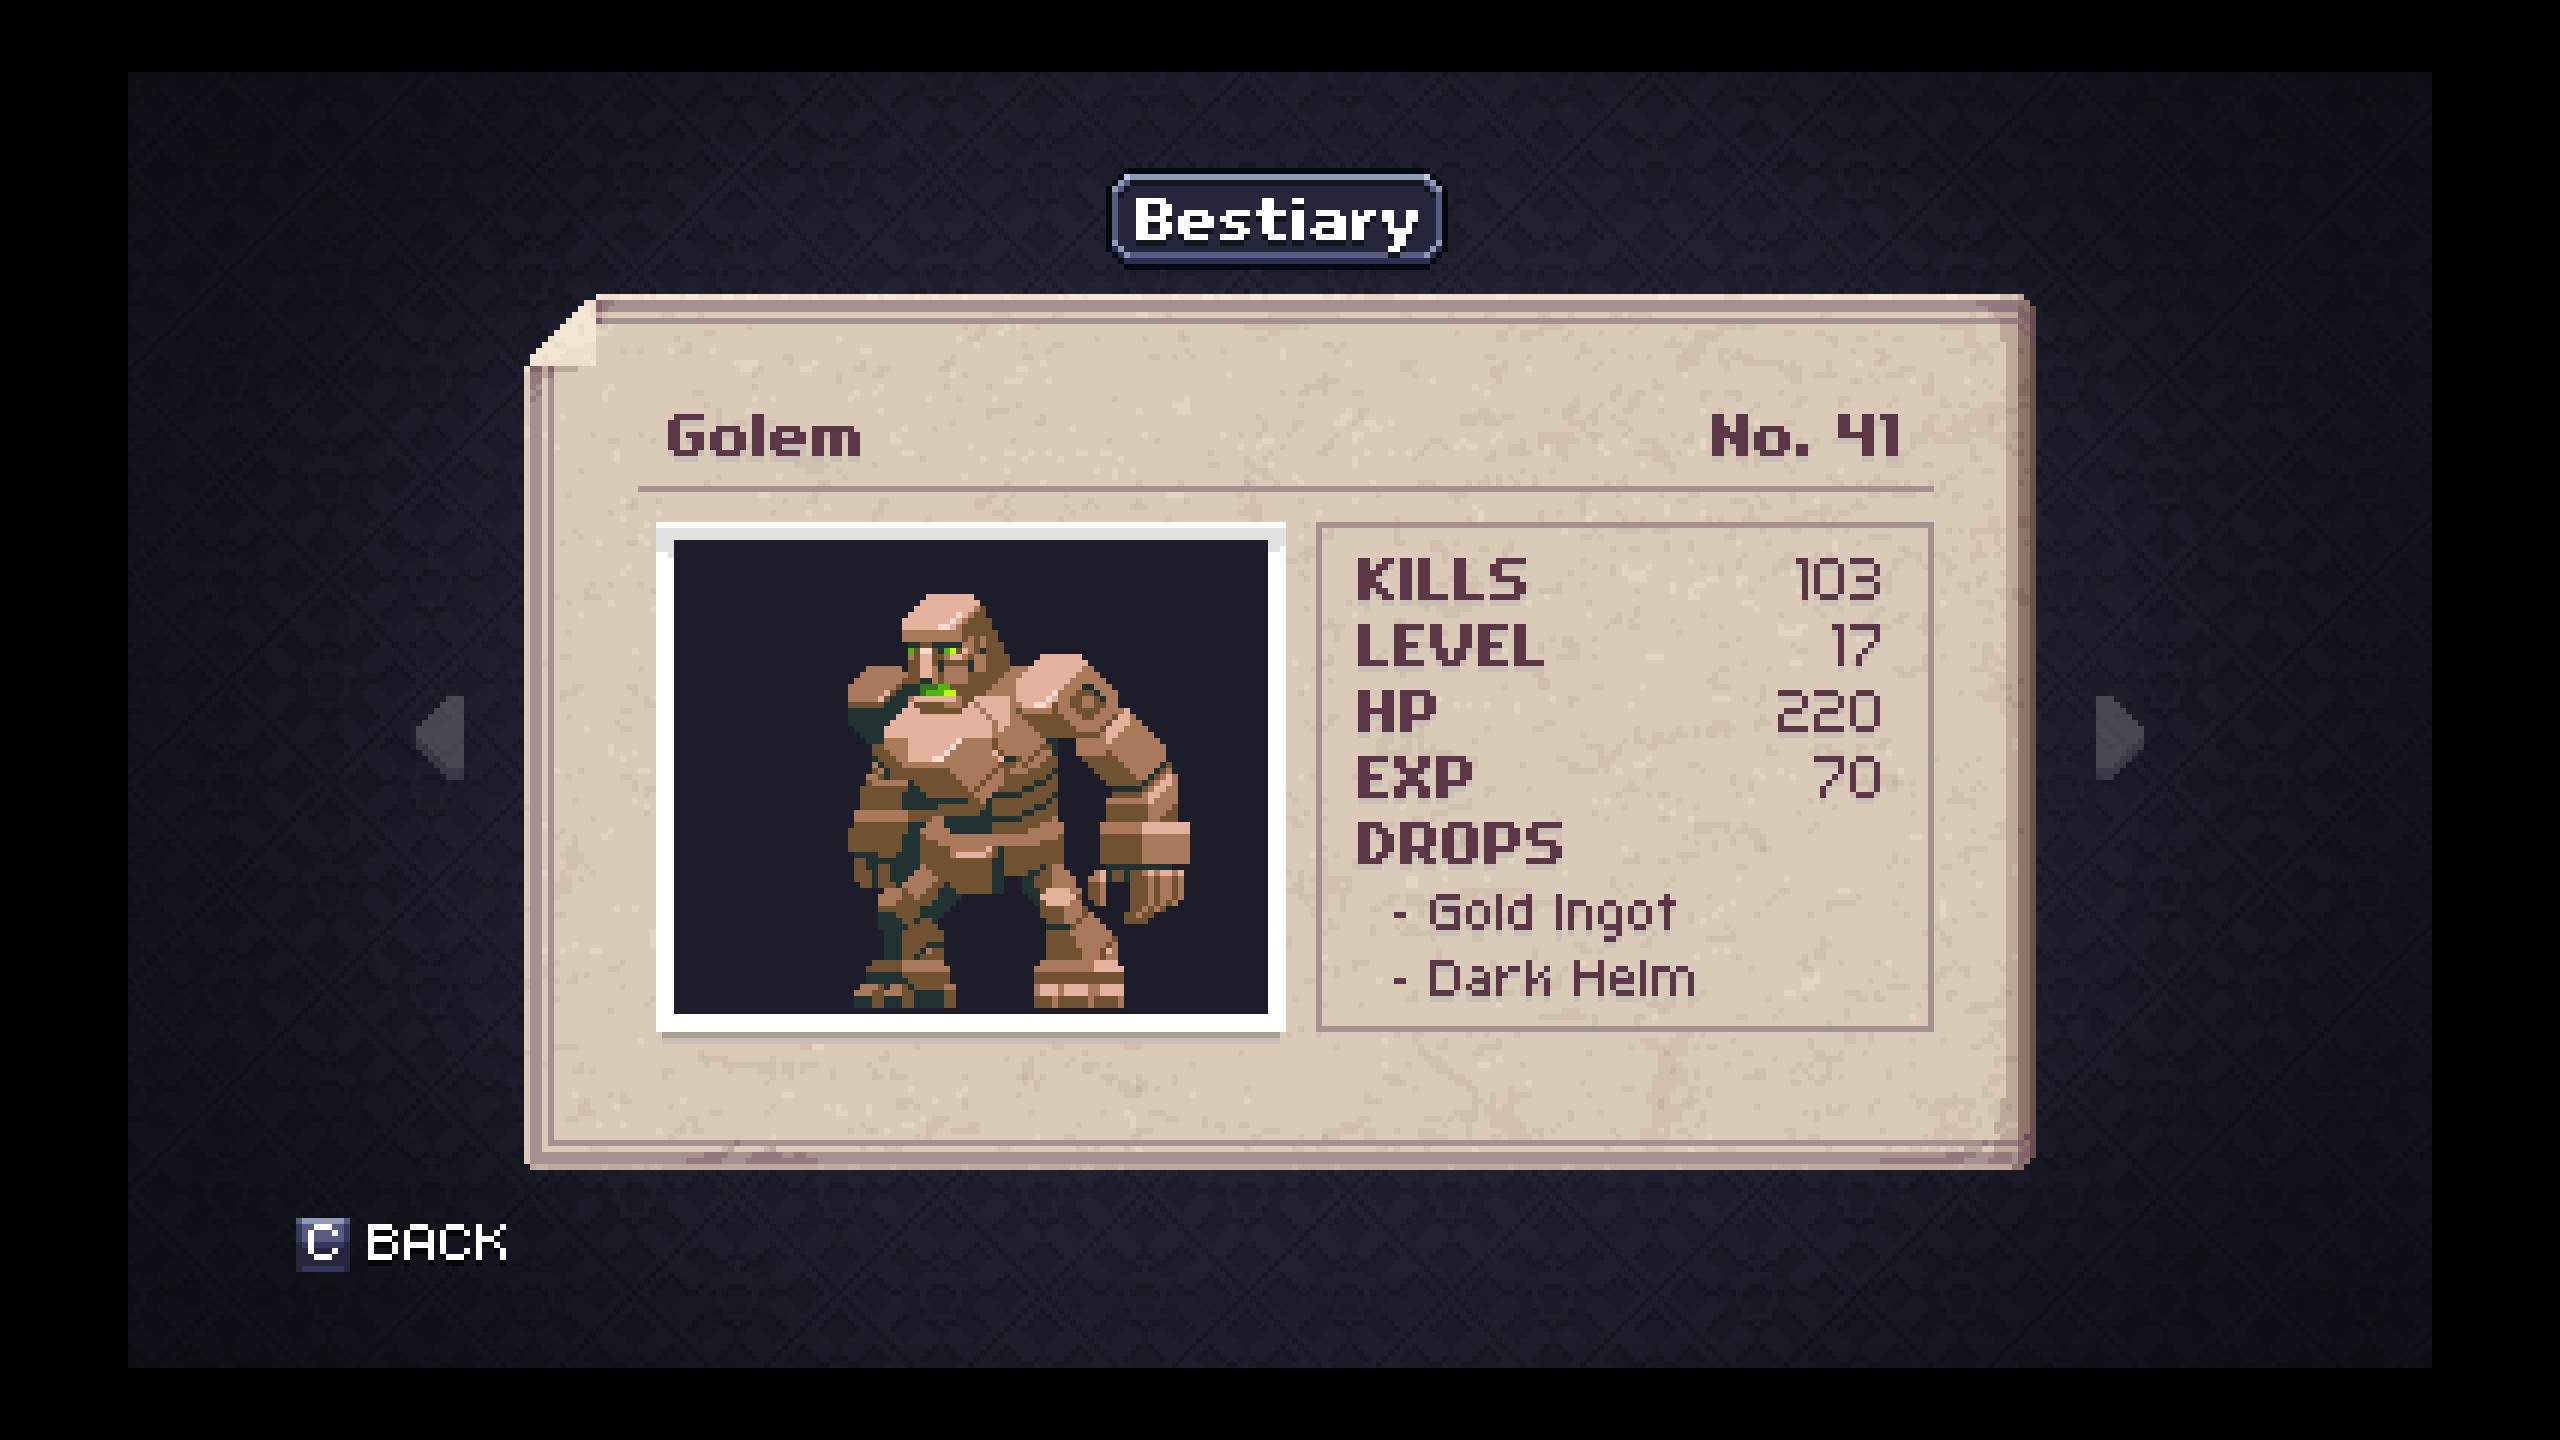
Bestiary – Garden
- #41 – Golem is the lowest-level enemy that has a good drop rate for Gold Ingots. The Gold Armor, in all likelihood, will be the equipment that takes you through most of the rest of the game, so crafting it now will be useful.
- #43 – Wasp drops a helpful item whose utility will be most obvious to speed-runners. The Fox Mask increases your movement speed by a significant amount and is nice to have when you’re out of Warp Scrolls.
A Brief Note About The Arena
The Arena is a small area and Side Quest found about half-way through the Keep area of the game. Each of the enemies found inside is also fought elsewhere in the game, however, the versions of these enemies in the Arena deal much higher amounts of damage. Use caution even when fighting an enemy that you are familiar with. Good luck!
Bestiary – Keep
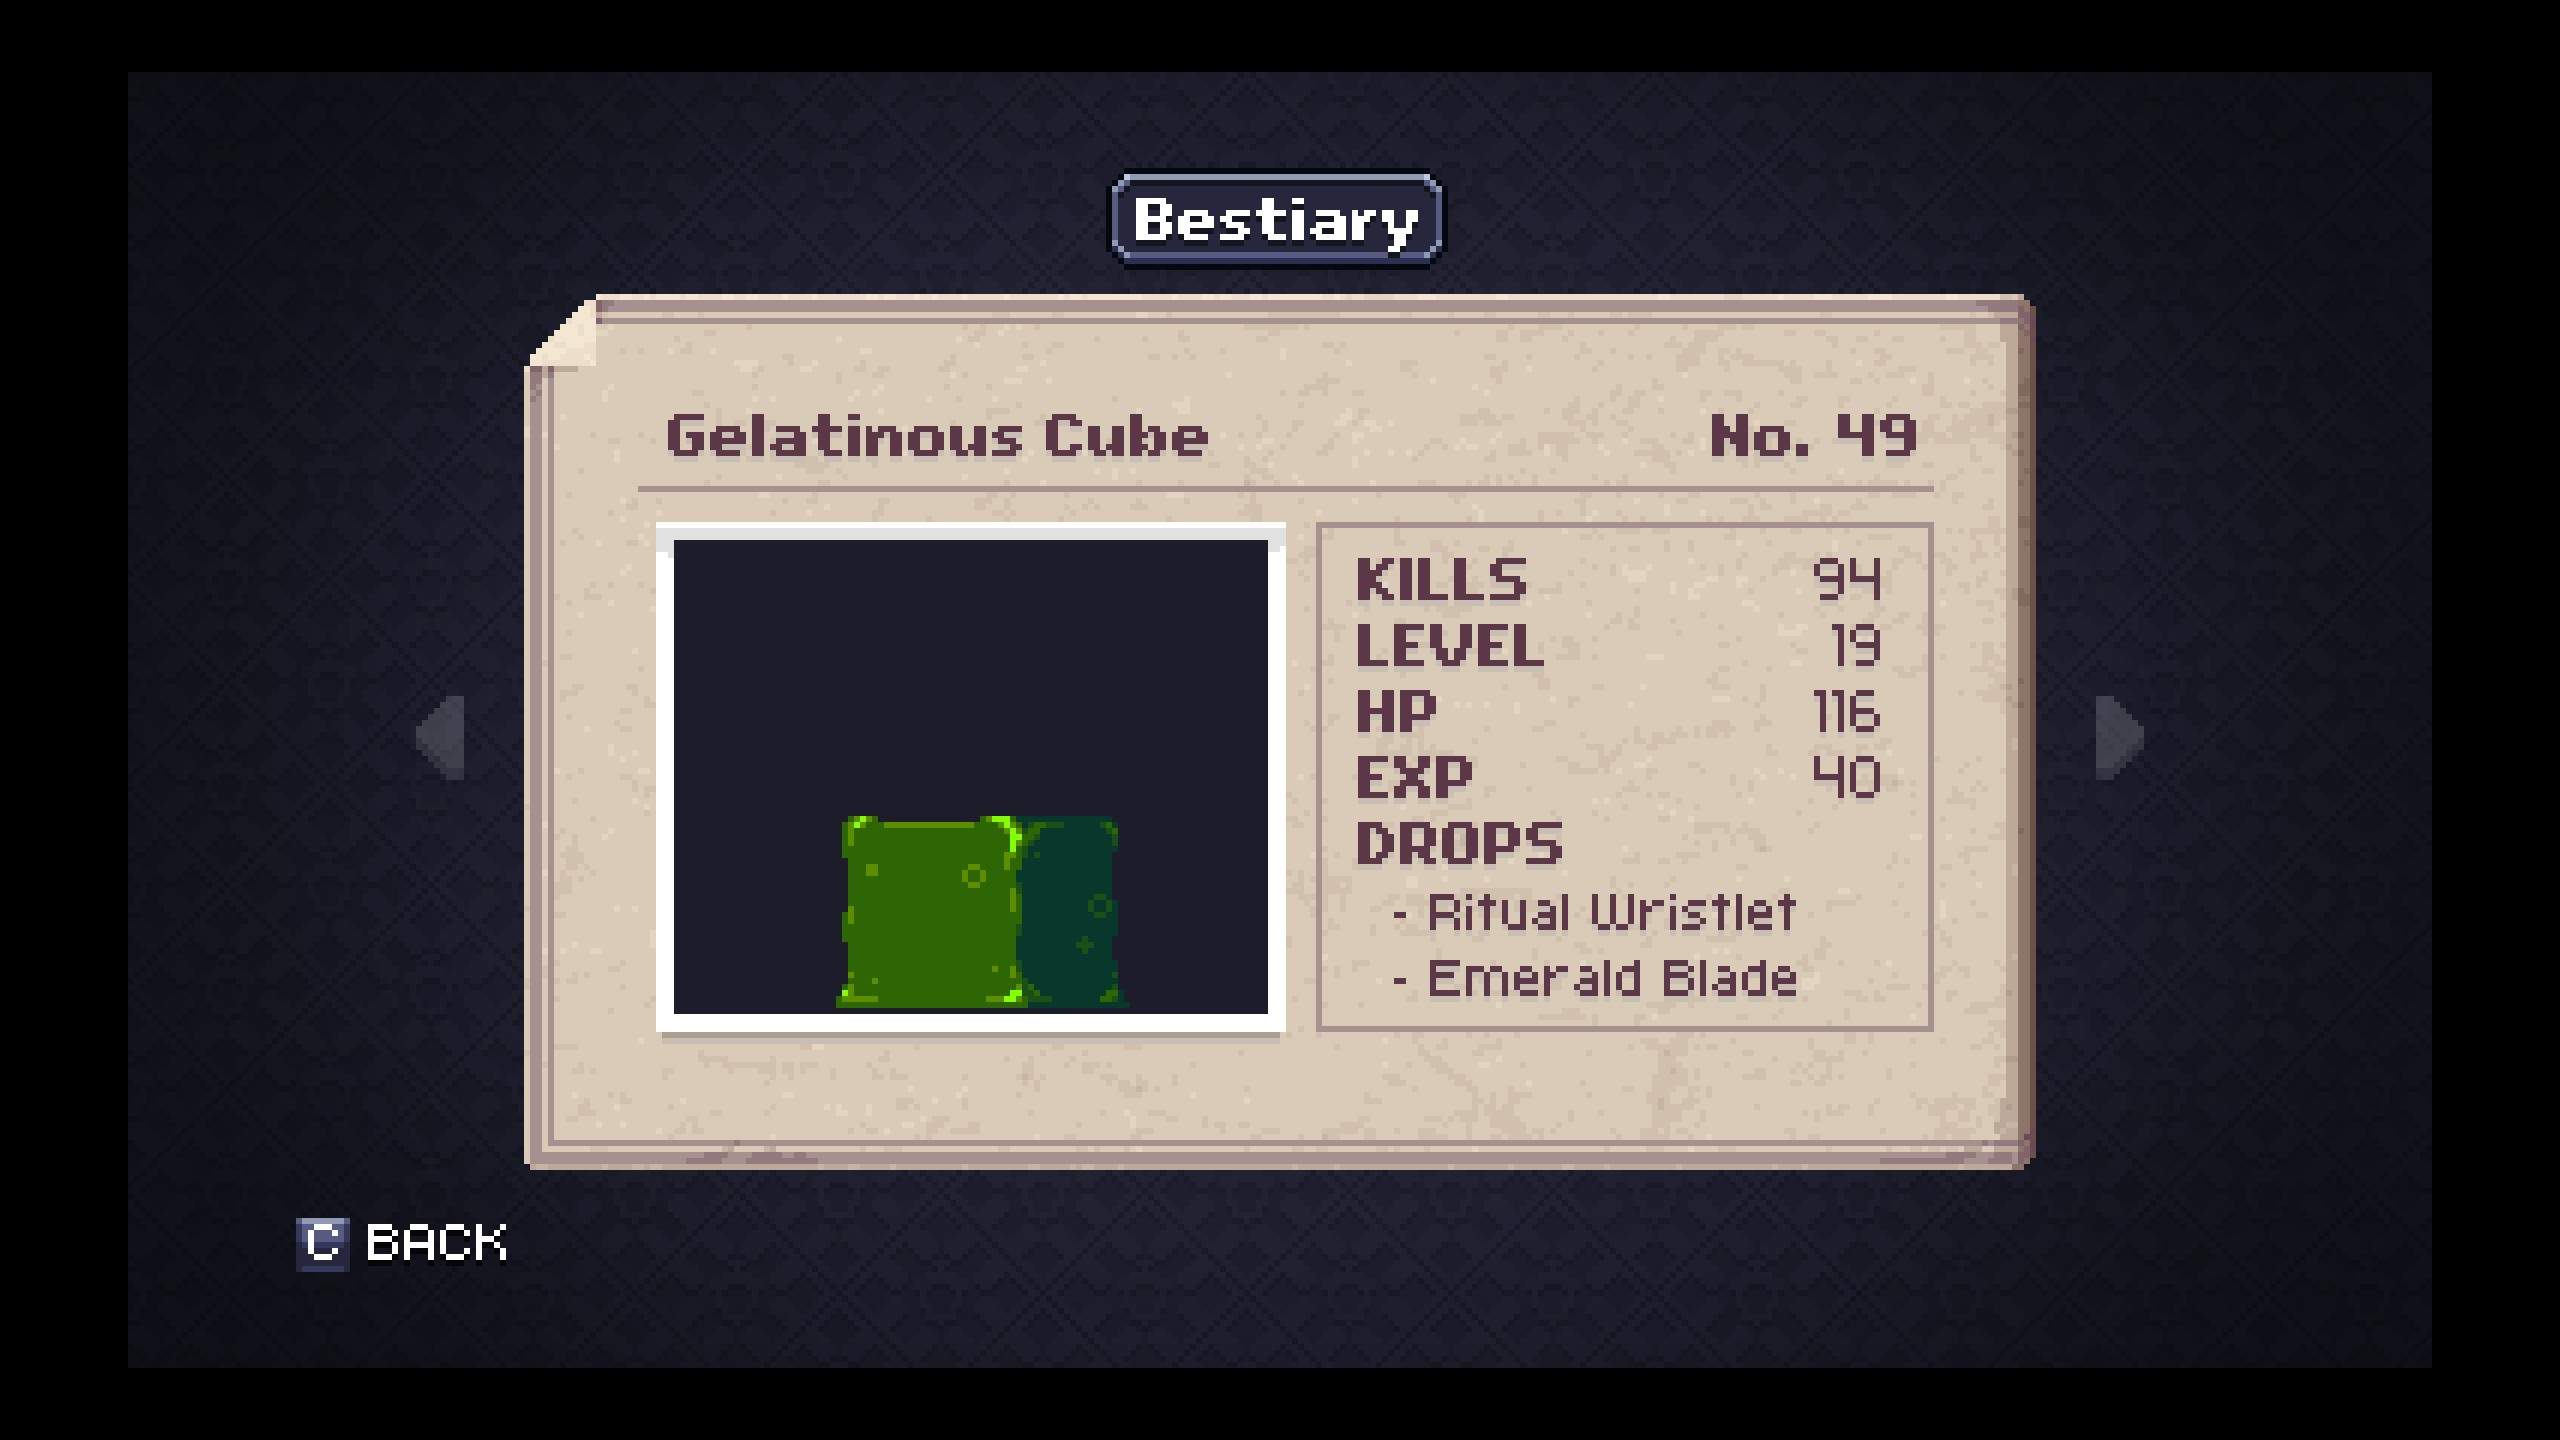
- #49 – Gelatinous Cube drops the Emerald Blade, a very short-range dagger that increases your item drop rate. Use caution when using this item until you get a feel for just how close you have to be in order to hit things.
- #53 – Undead Swordsman drops the best sword in the game that is (somewhat) easily obtainable, the Assassin’s Sword. If you plan to obtain this weapon, do it sooner rather than later because its’ damage output goes up based on how many enemies you have defeated with it. I might have had particularly terrible RNG obtaining this item or it might be specifically designed to have an absurdly low drop rate, either way I had to kill 400+ enemies to get one.
- #59 – Undead Archer drops what is hands-down the best late-game armor, the Traveler’s Cape. This items stats increase based on the percentage of the map that you have explored; any level of exploration above about 65% makes it the most powerful equipment you can have.
Bestiary – Temple
- #72 – Temple Guard is the lowest-level enemy that has a good drop rate for Platinum Ingots. By this point in the game, you have had the opportunity to obtain much better equipment than the Blacksmith can craft, but you will also need several of these to use as Quest Items for the Inventor.
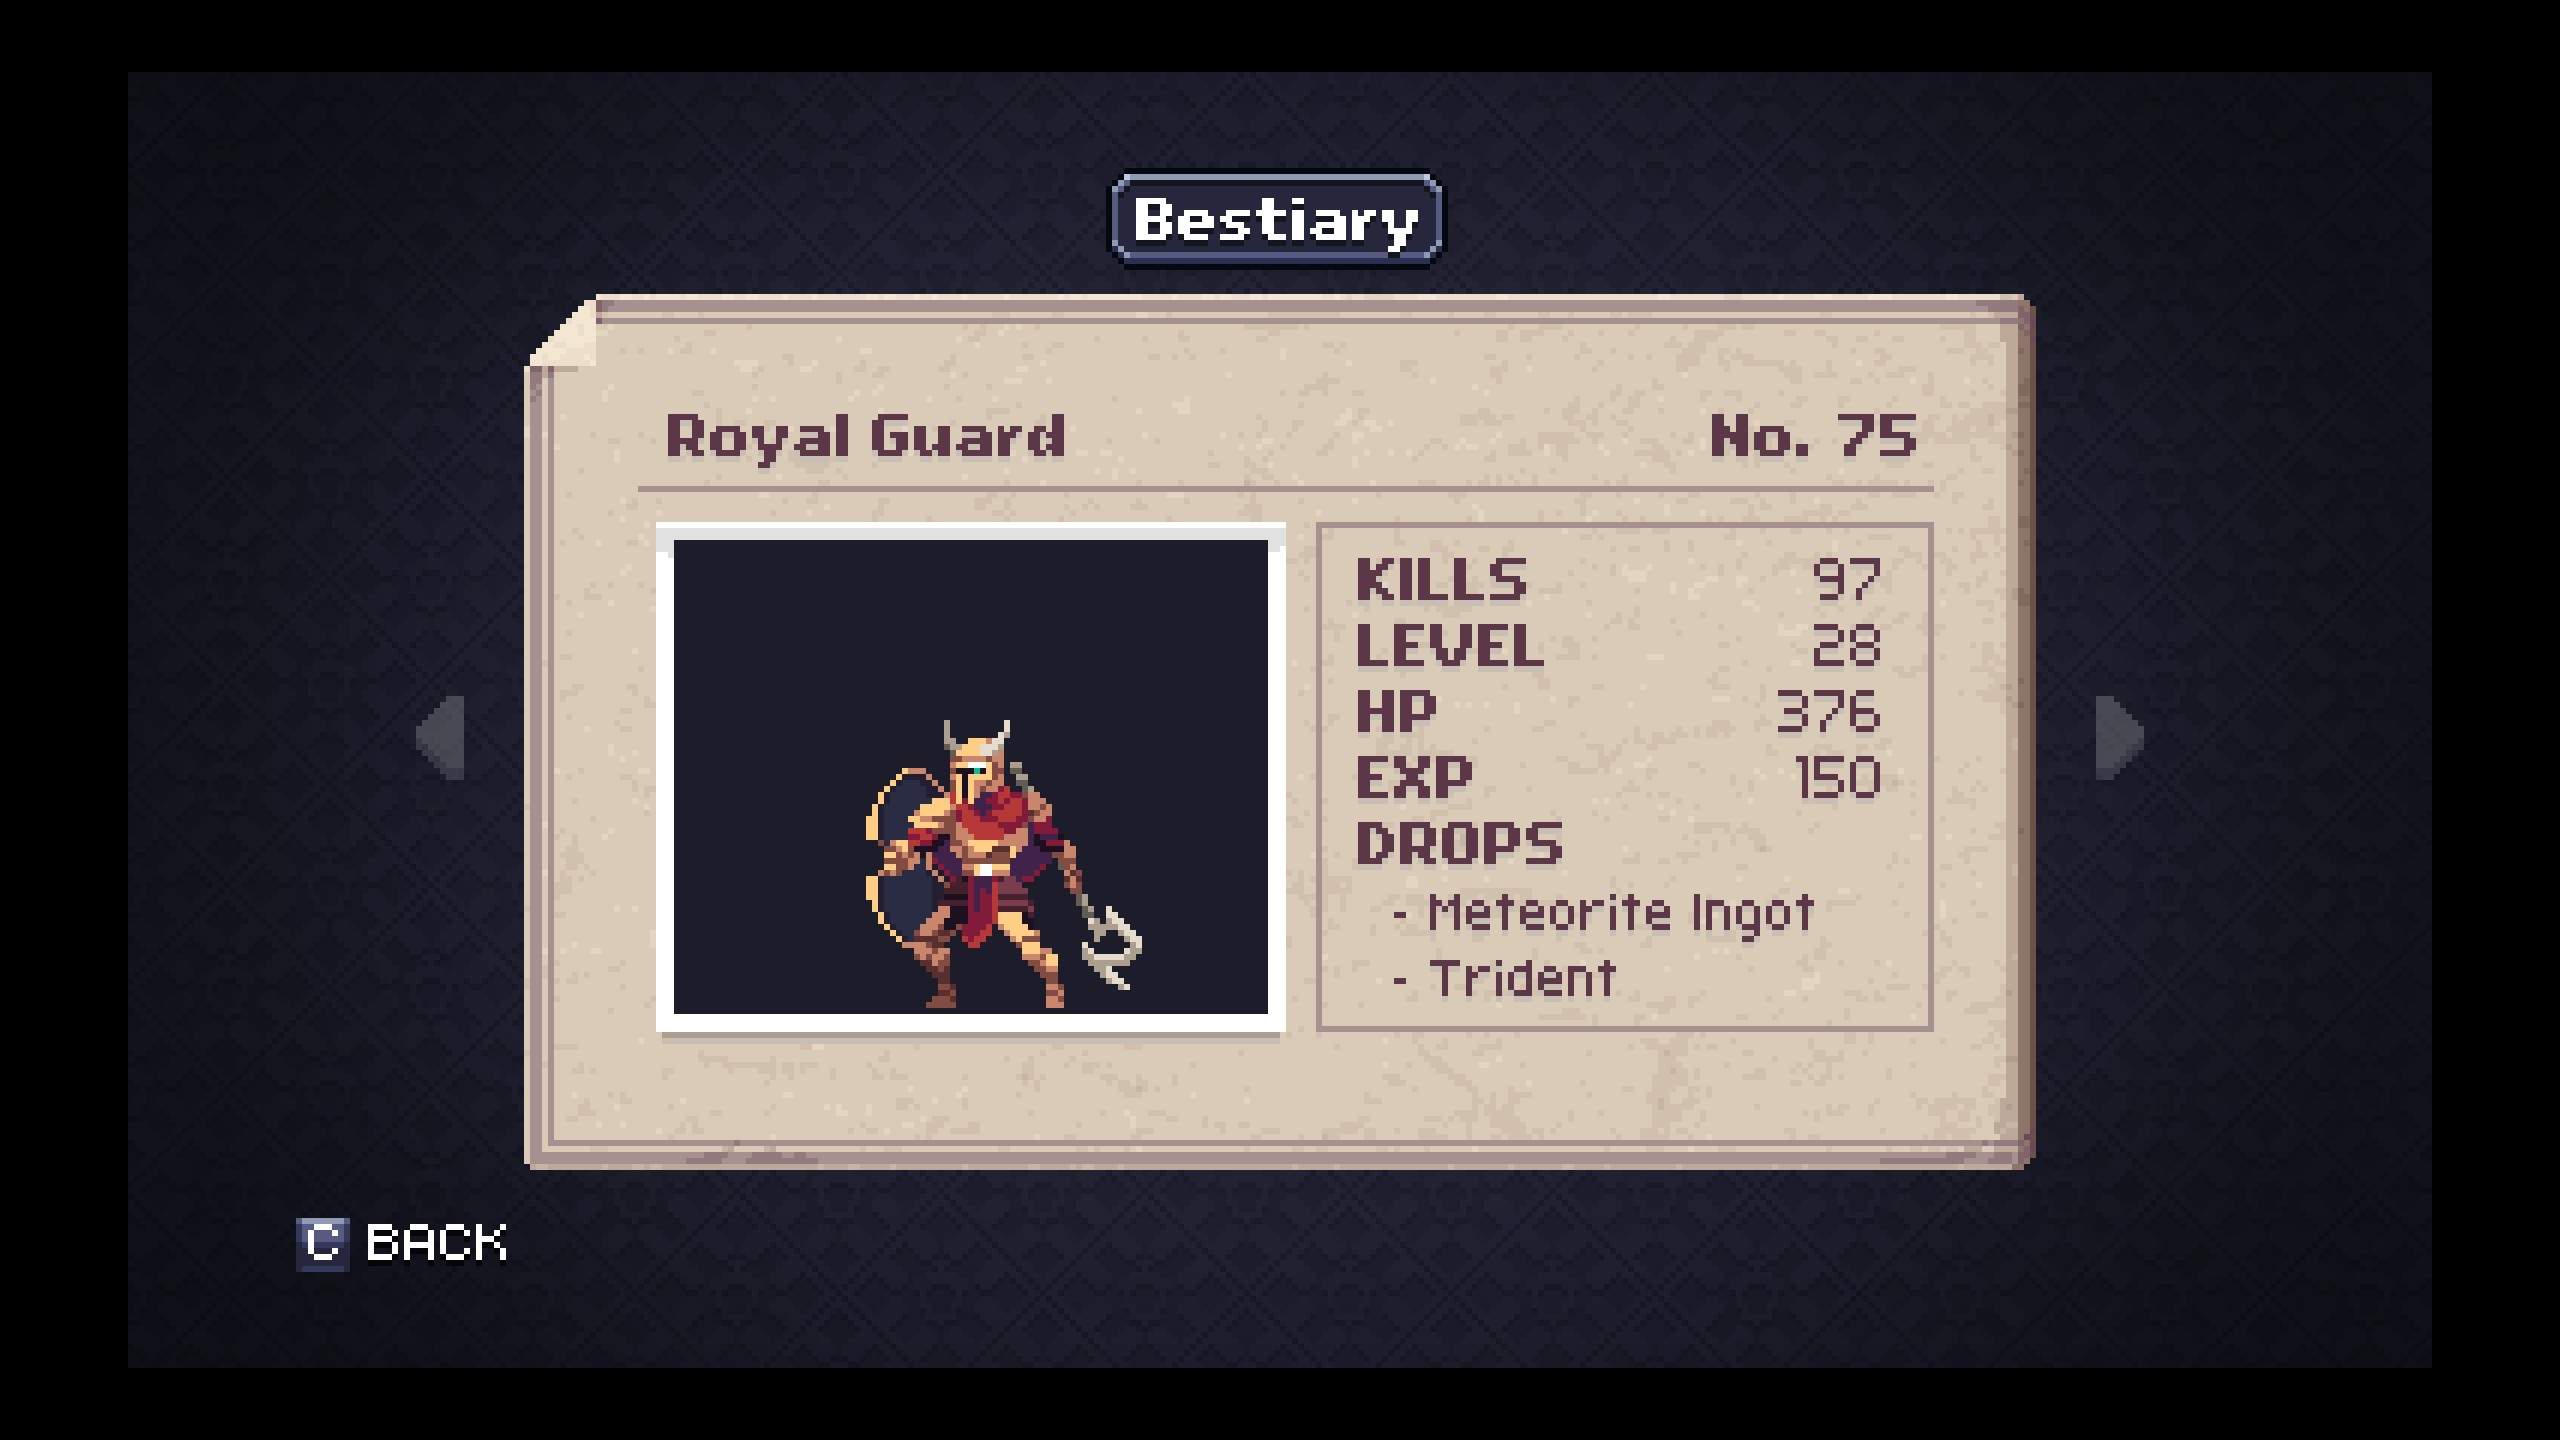
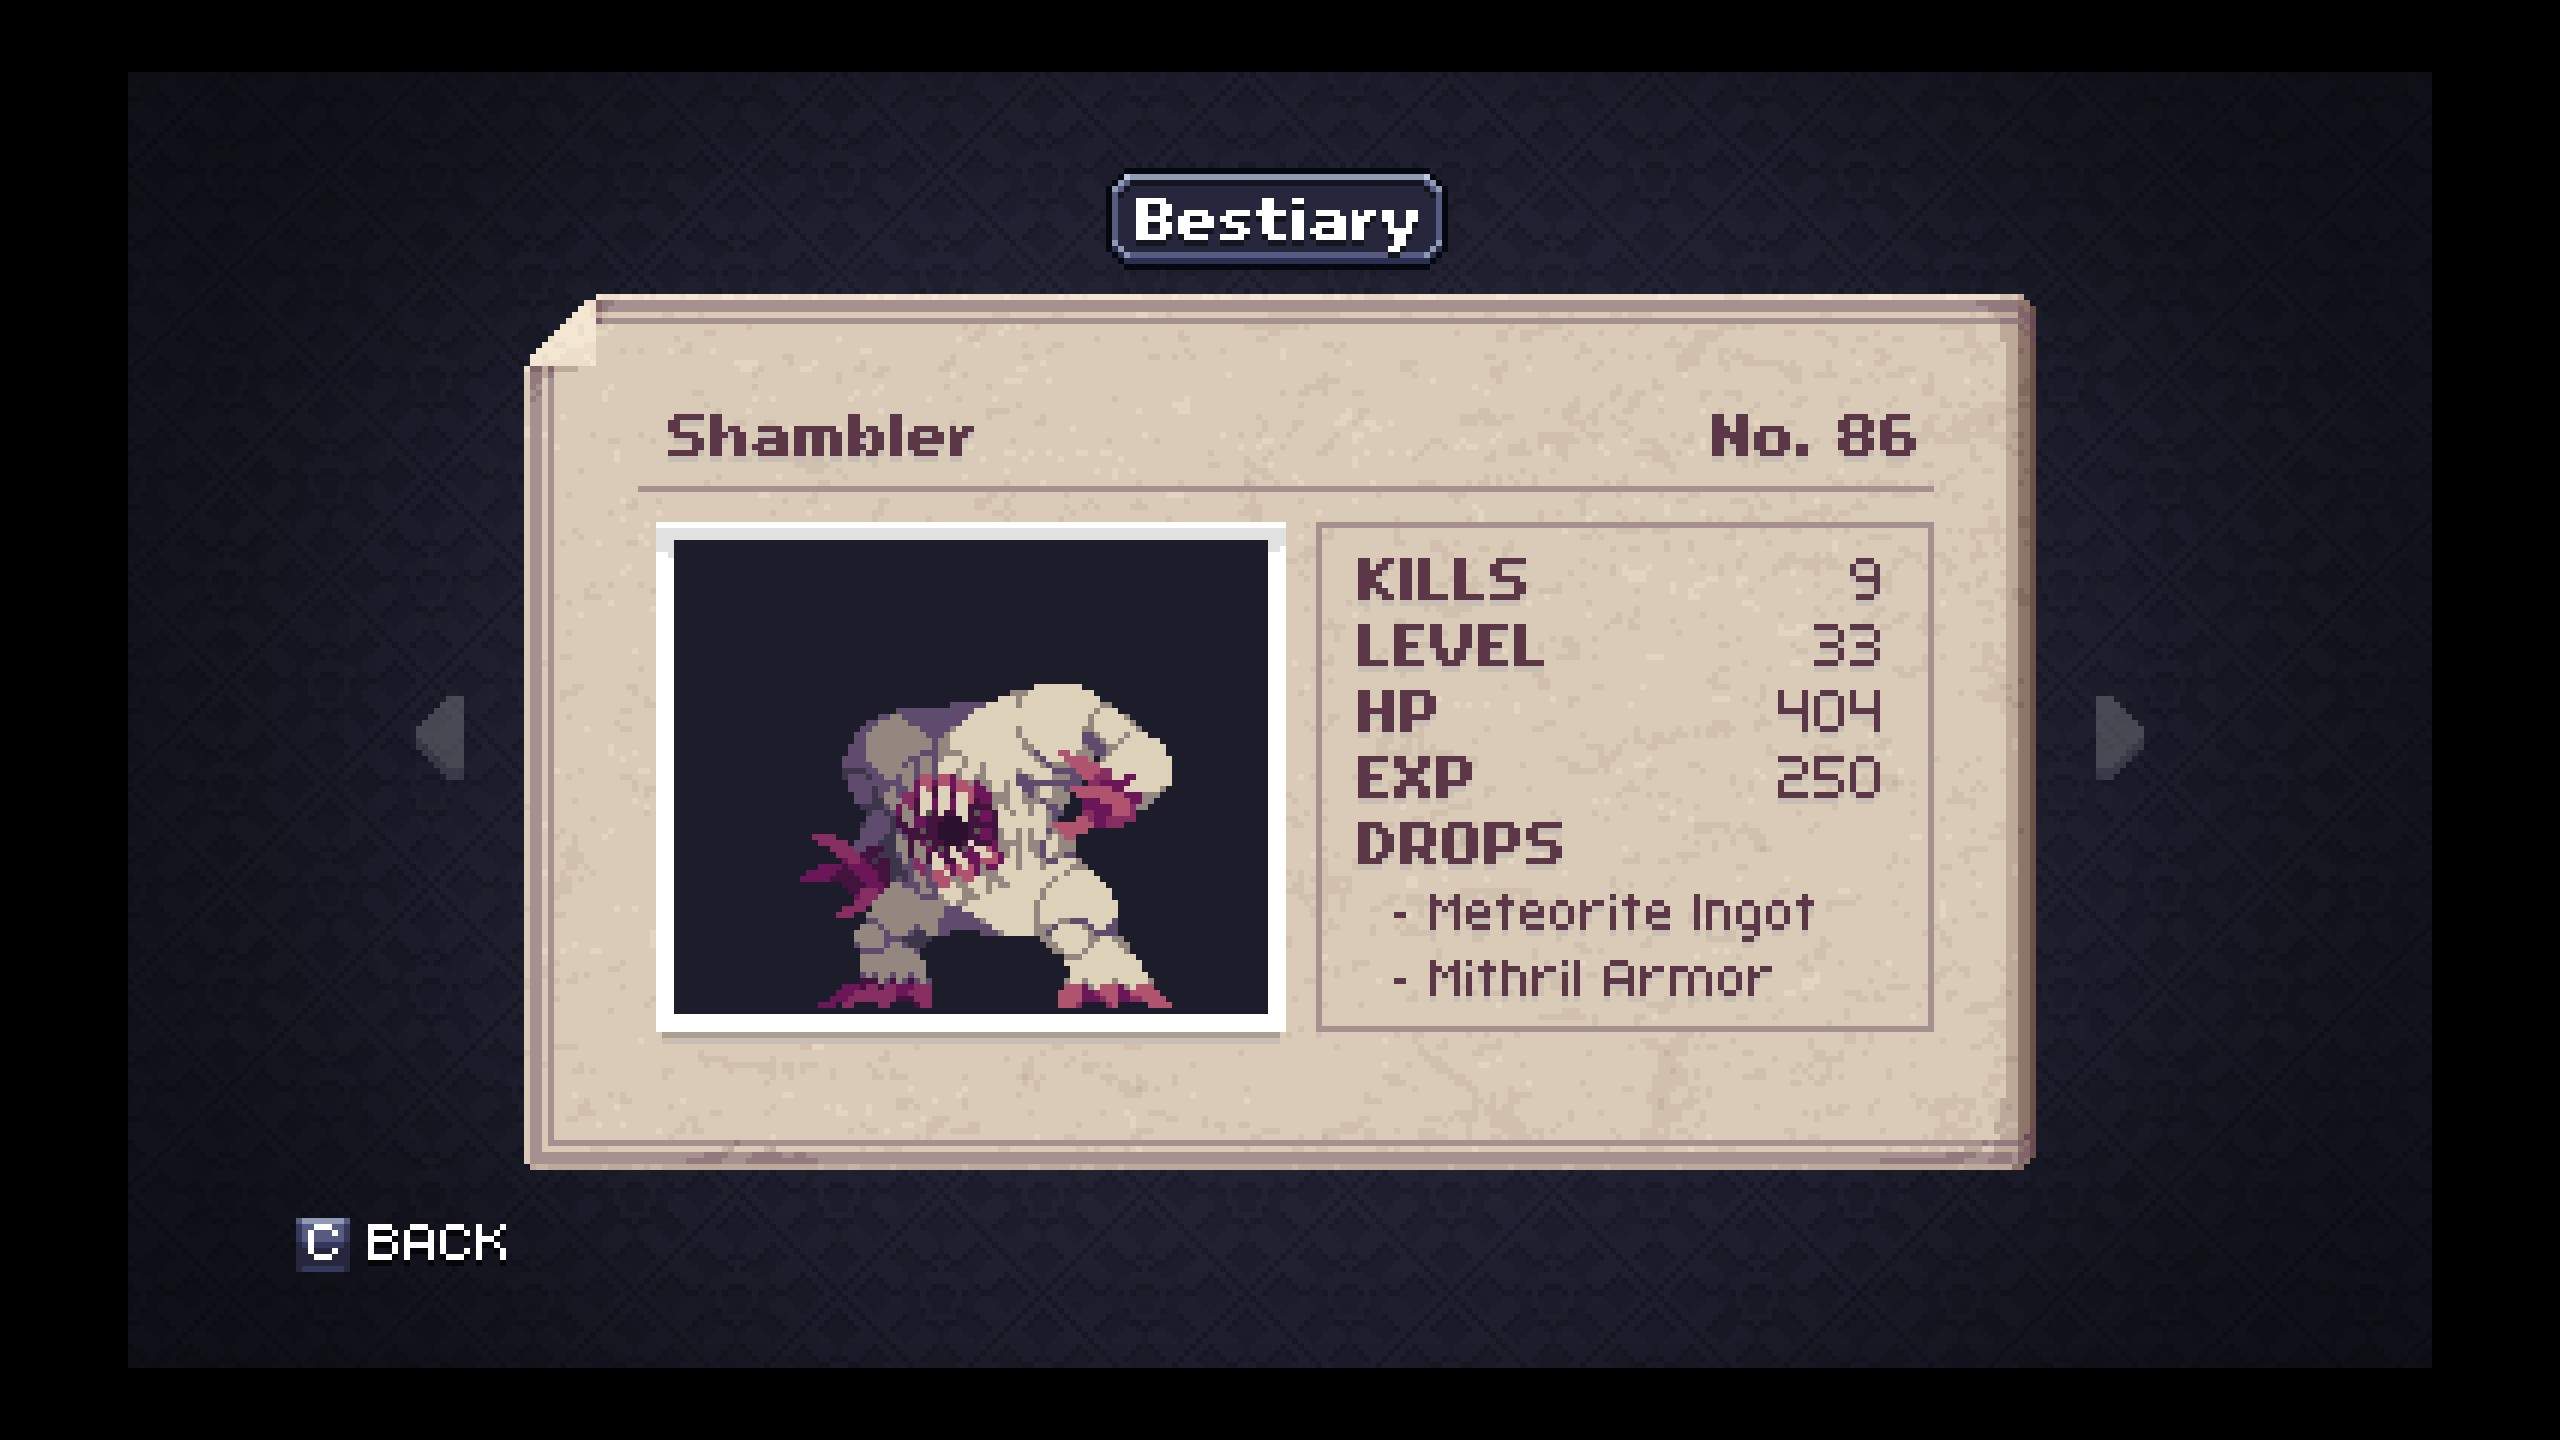
- #75 – Royal Guard is the lowest-level enemy that has a good drop rate for Meteorite Ingots. I didn’t find any good reason to farm these but maybe you will.
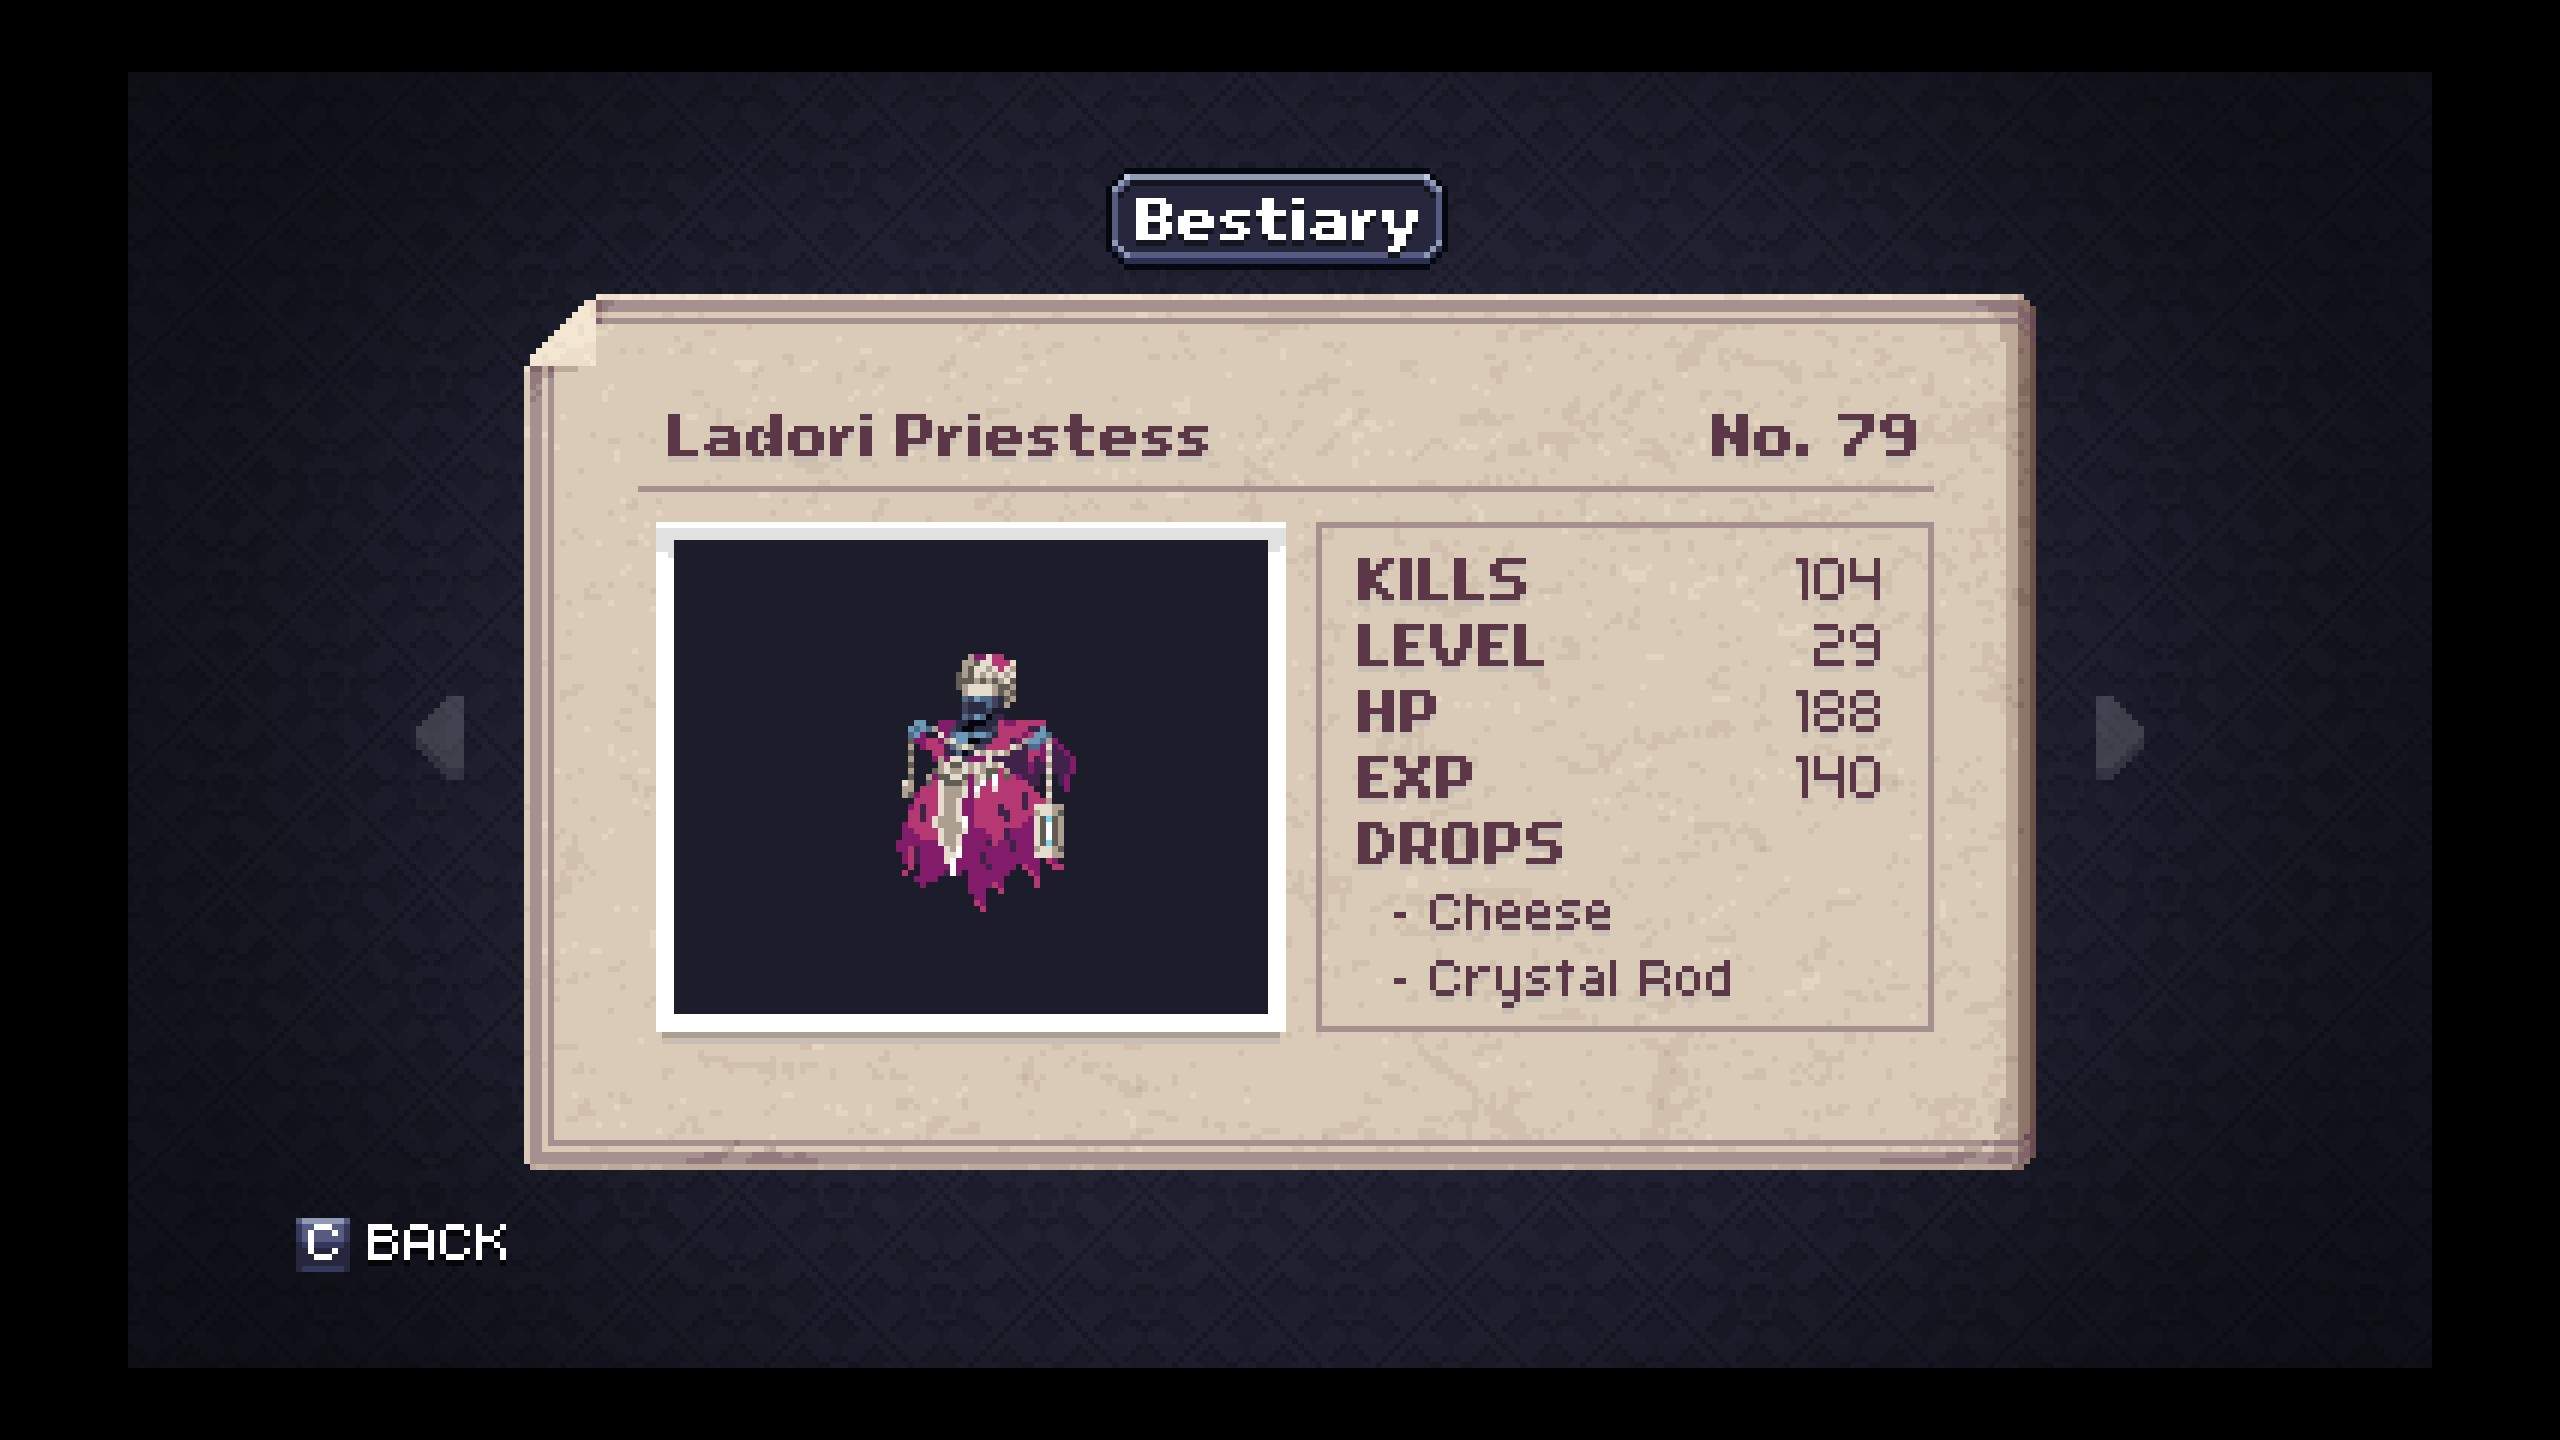
- #79 – Ladori Priestess drops the Crystal Rod, one of only a small number of weapons in the game that has a projectile attack. This might be useful for some play-styles or specific strategies of defeating Bosses.
Bestiary – Magma Chamber
There’s nothing particularly exciting going on here as far as drops go. Just advance with caution because many of these enemies have projectile attacks that are difficult to avoid and their movement is erratic and unpredictable.
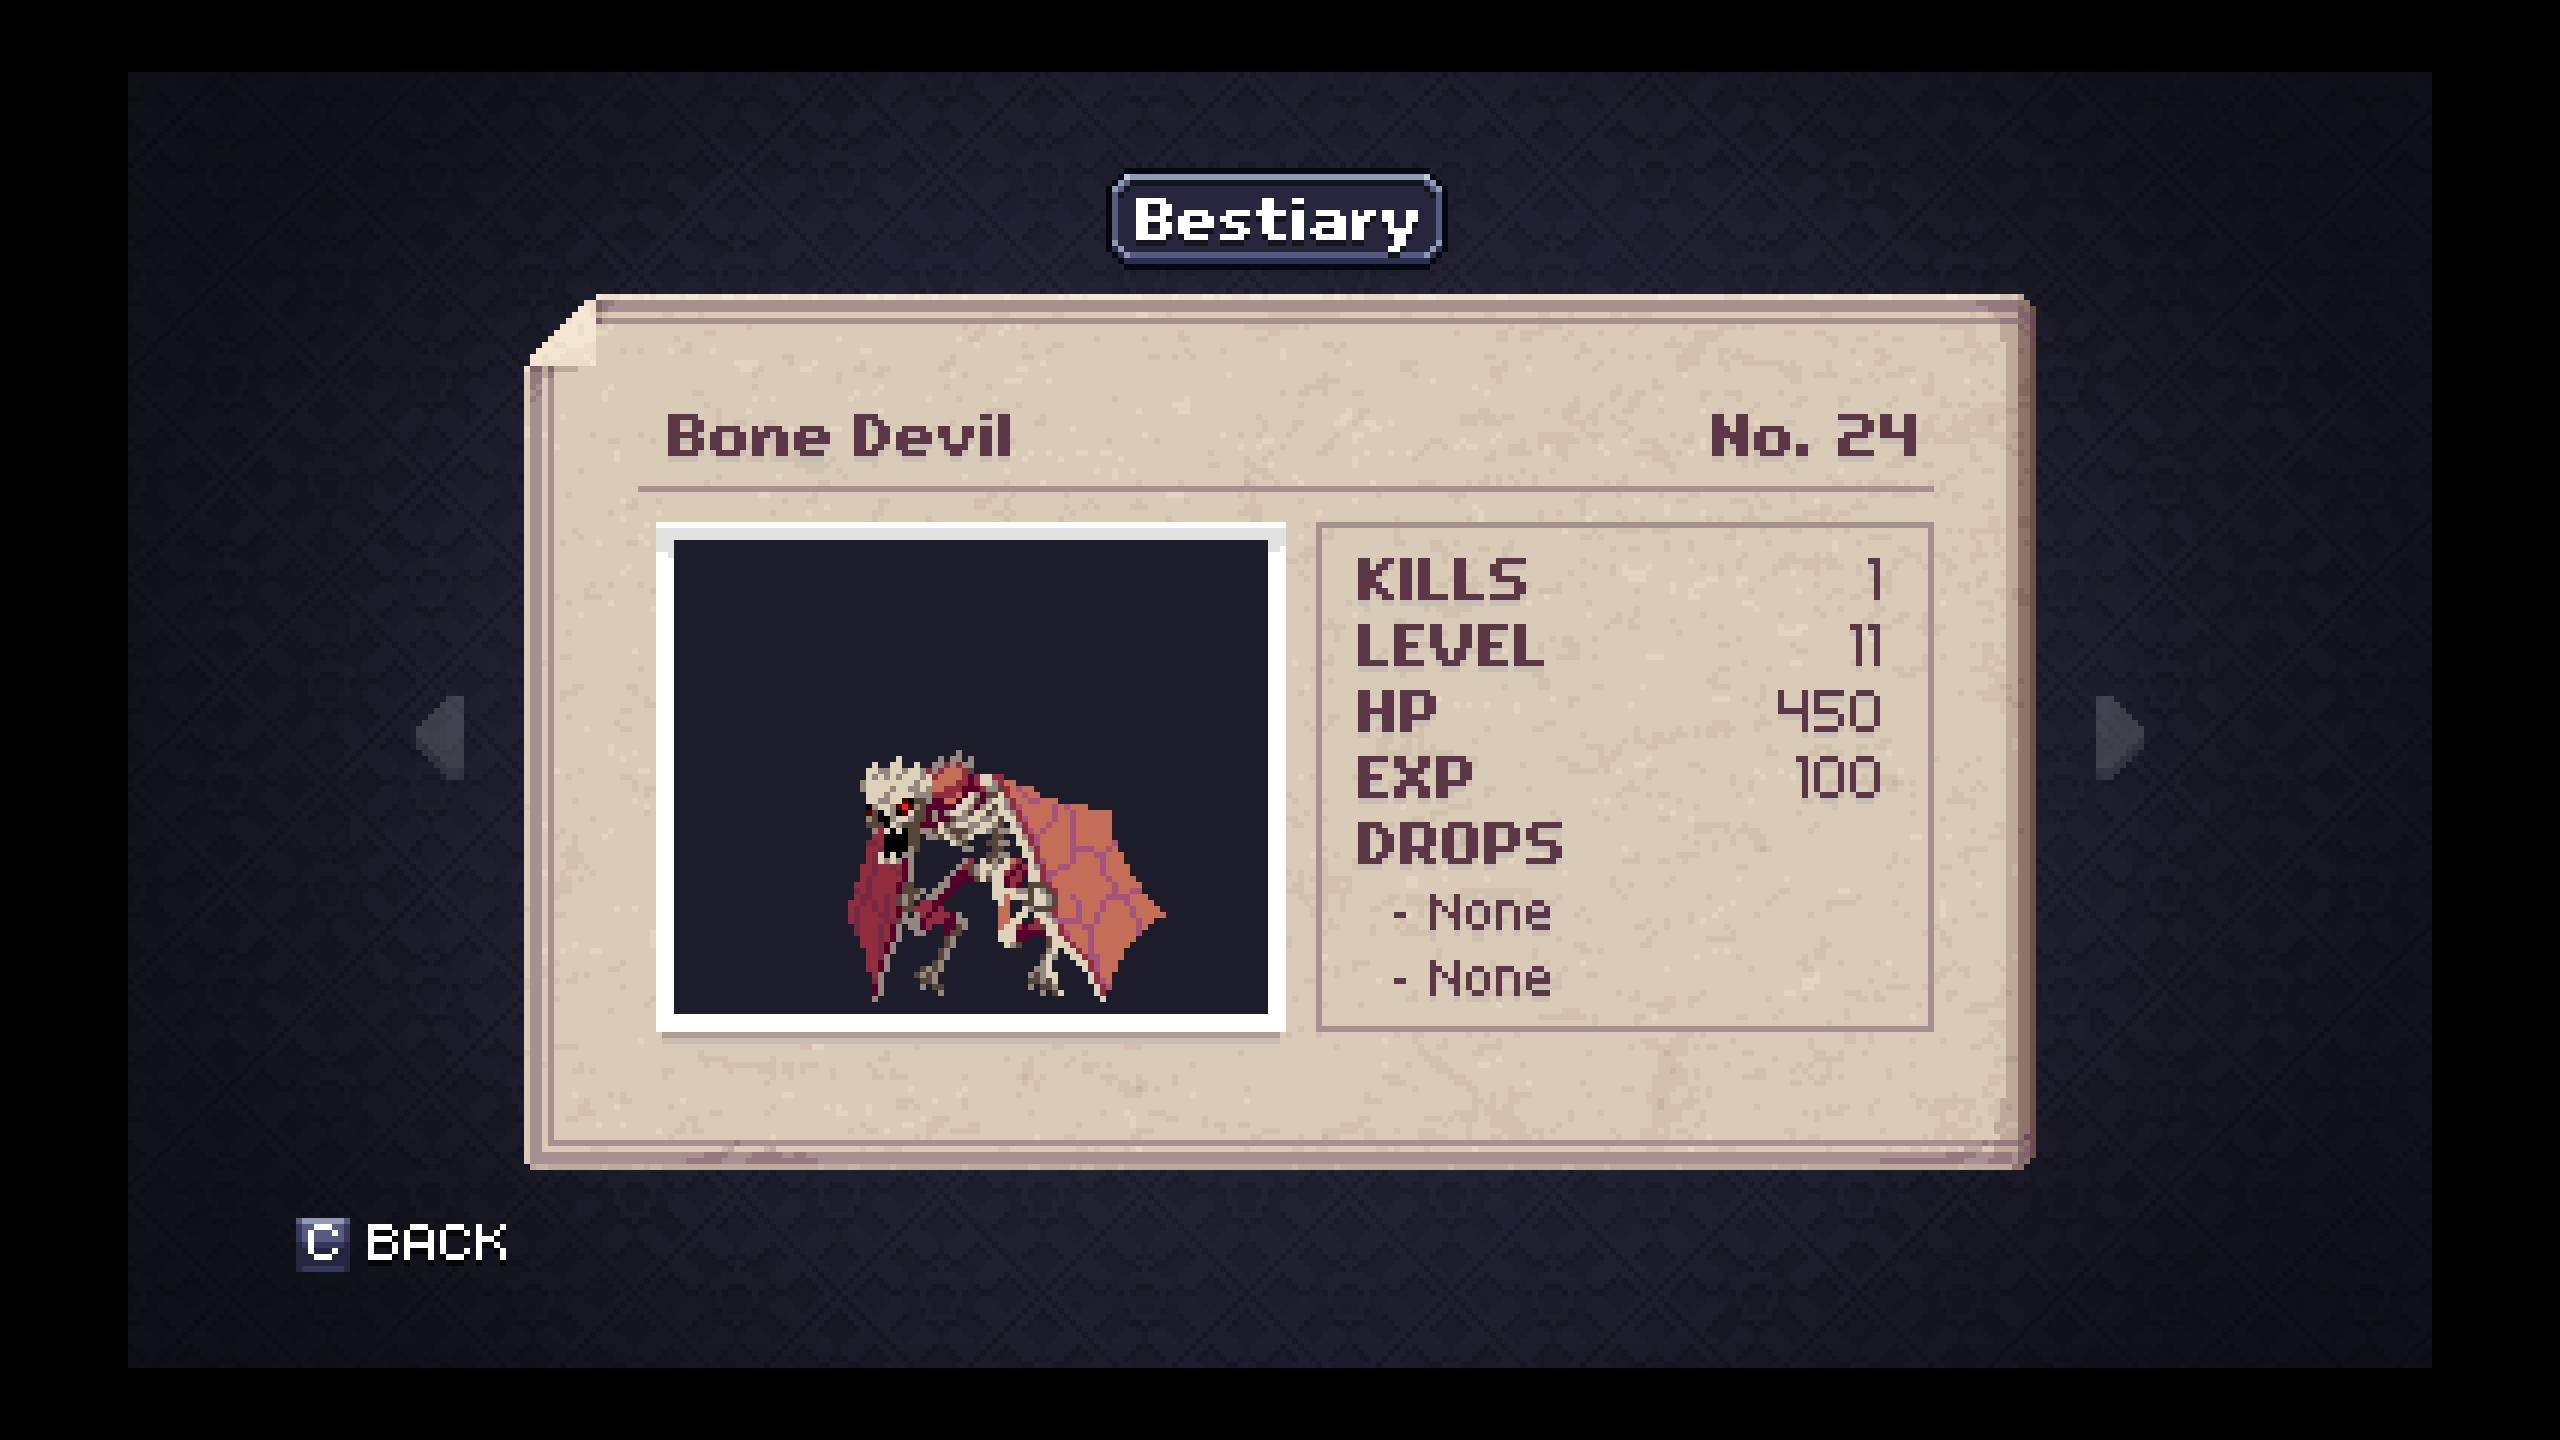
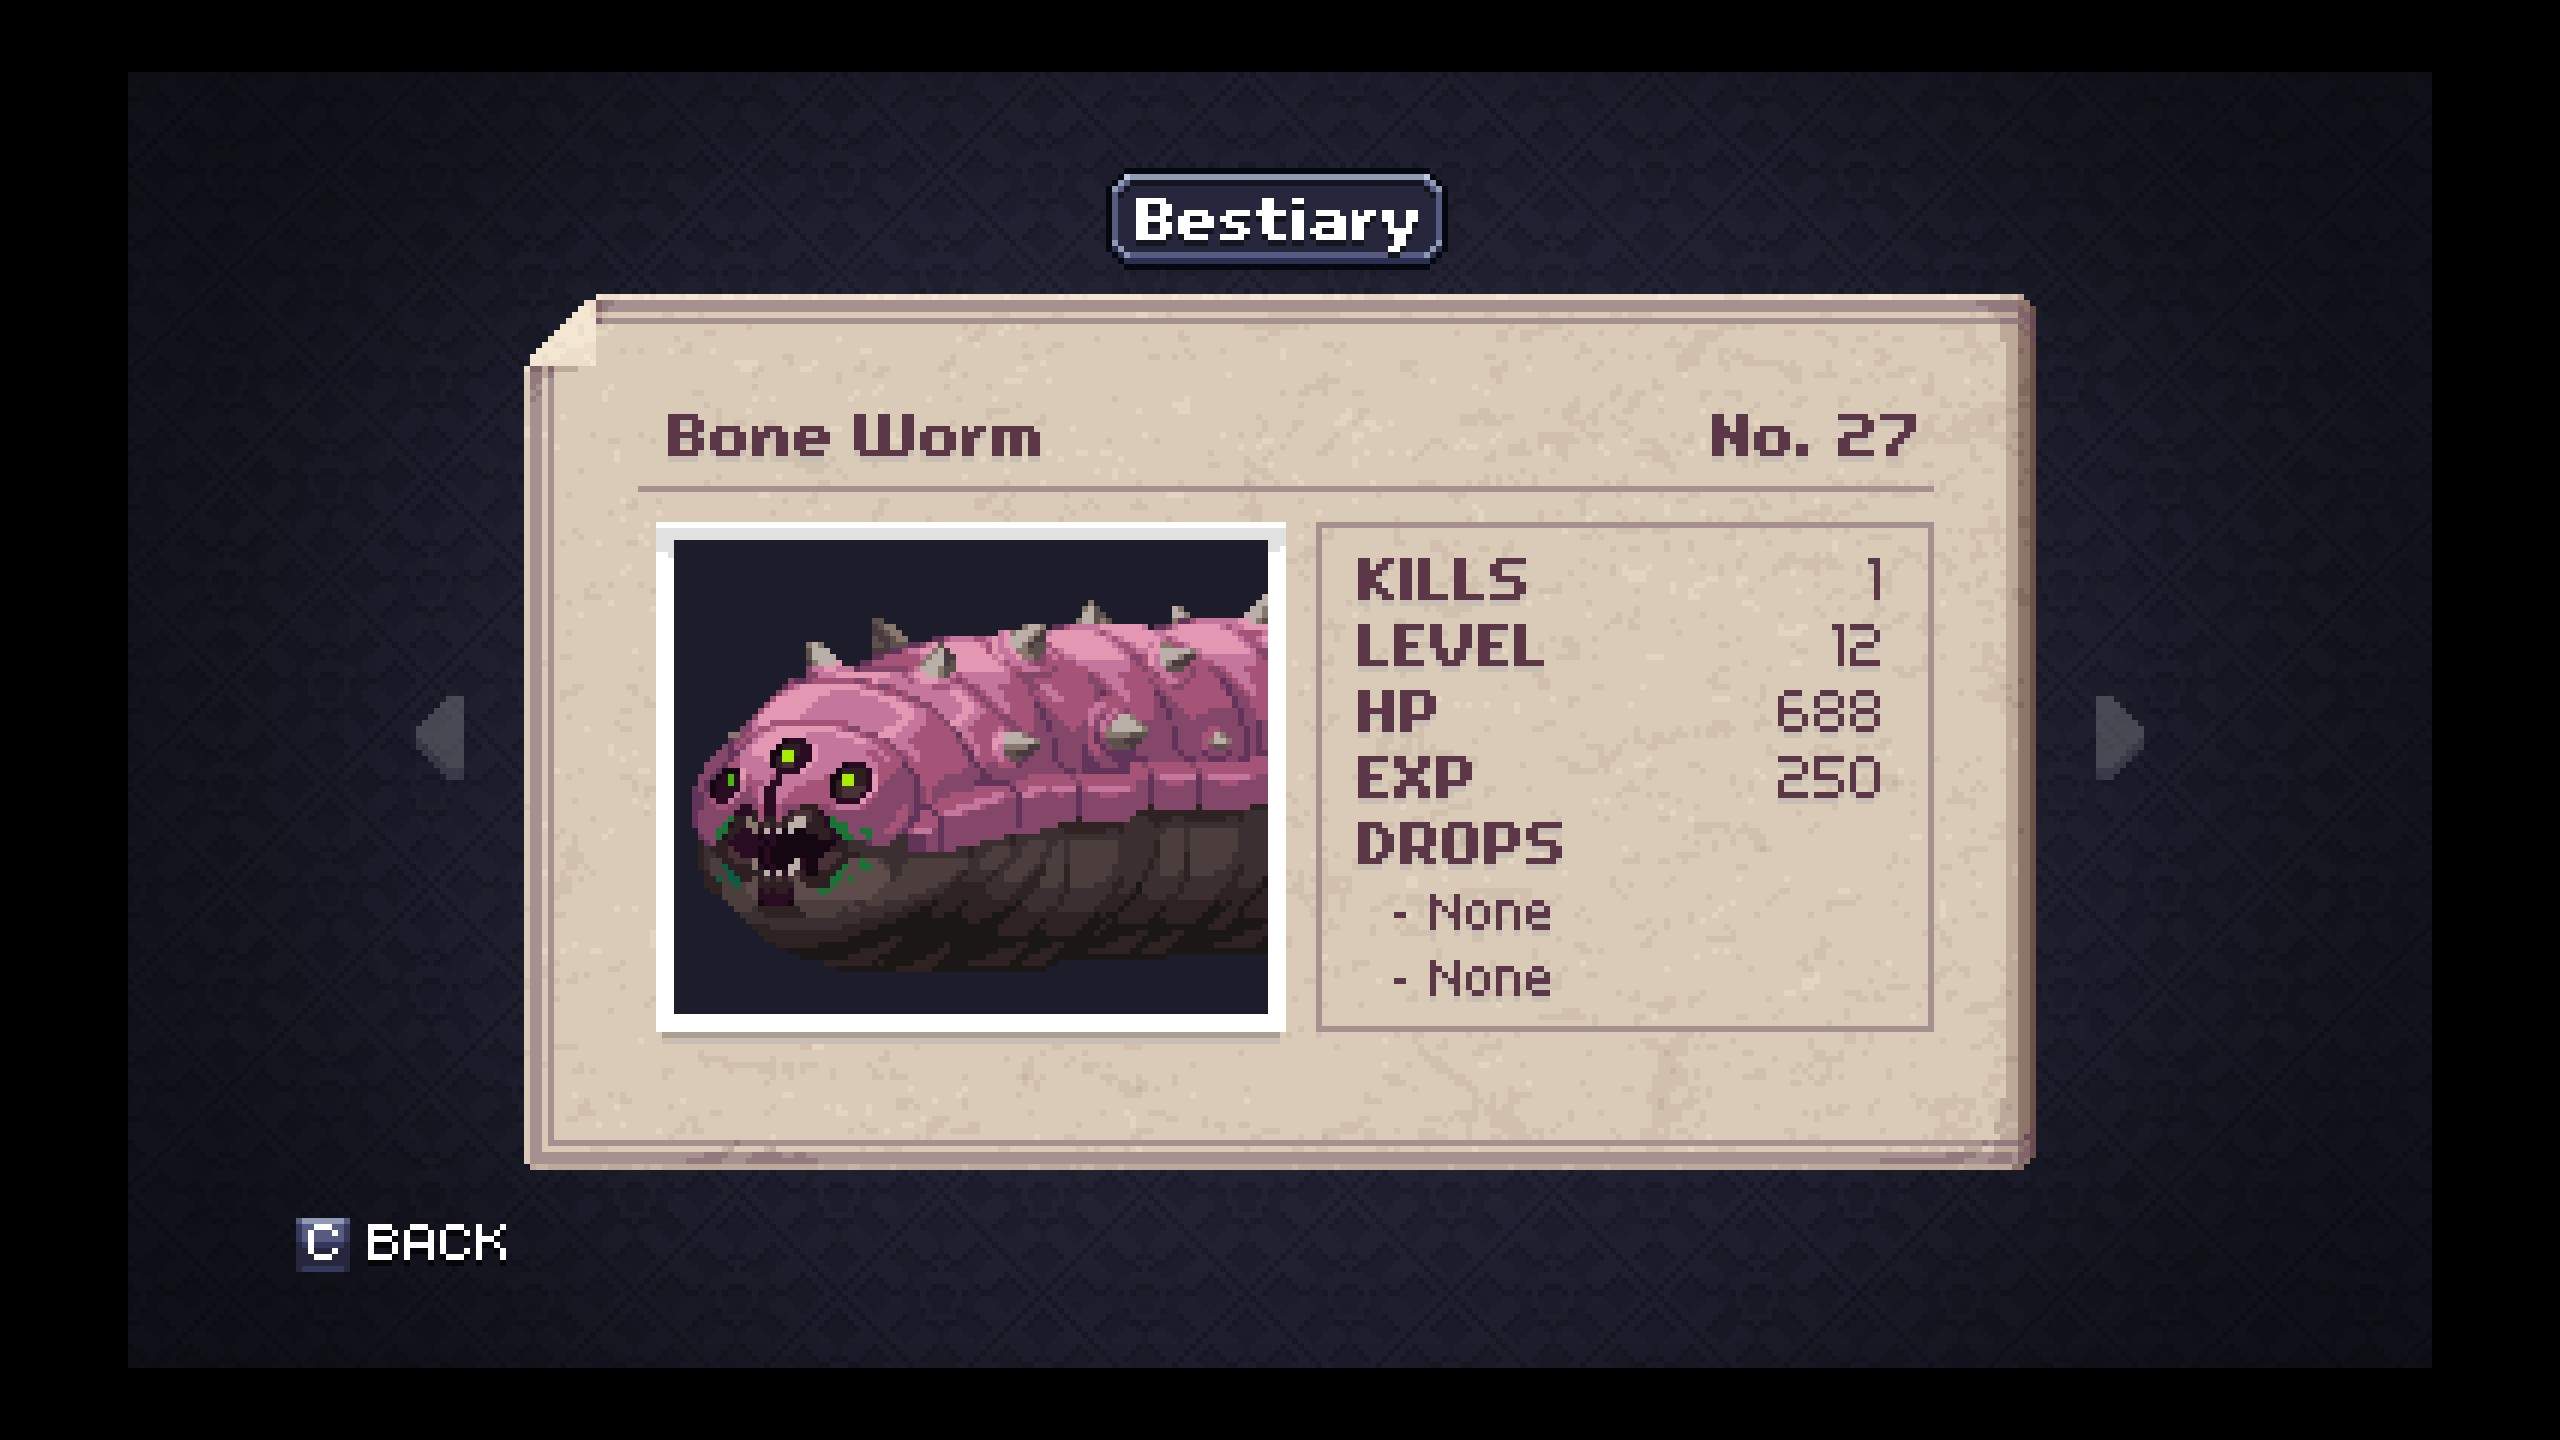
Bestiary – Mini-Bosses & Bosses
- #13 – Wendigo probably represents the most difficult battle in the game because you will be so woefully unprepared for it. Be ready to die – Dark Souls style – a number of times before you find a pattern that works for you.
- #27 – Bone Worm was strangely difficult for me to defeat, particularly without taking damage. Maybe try to gain a couple extra Experience Levels before attempting this one.
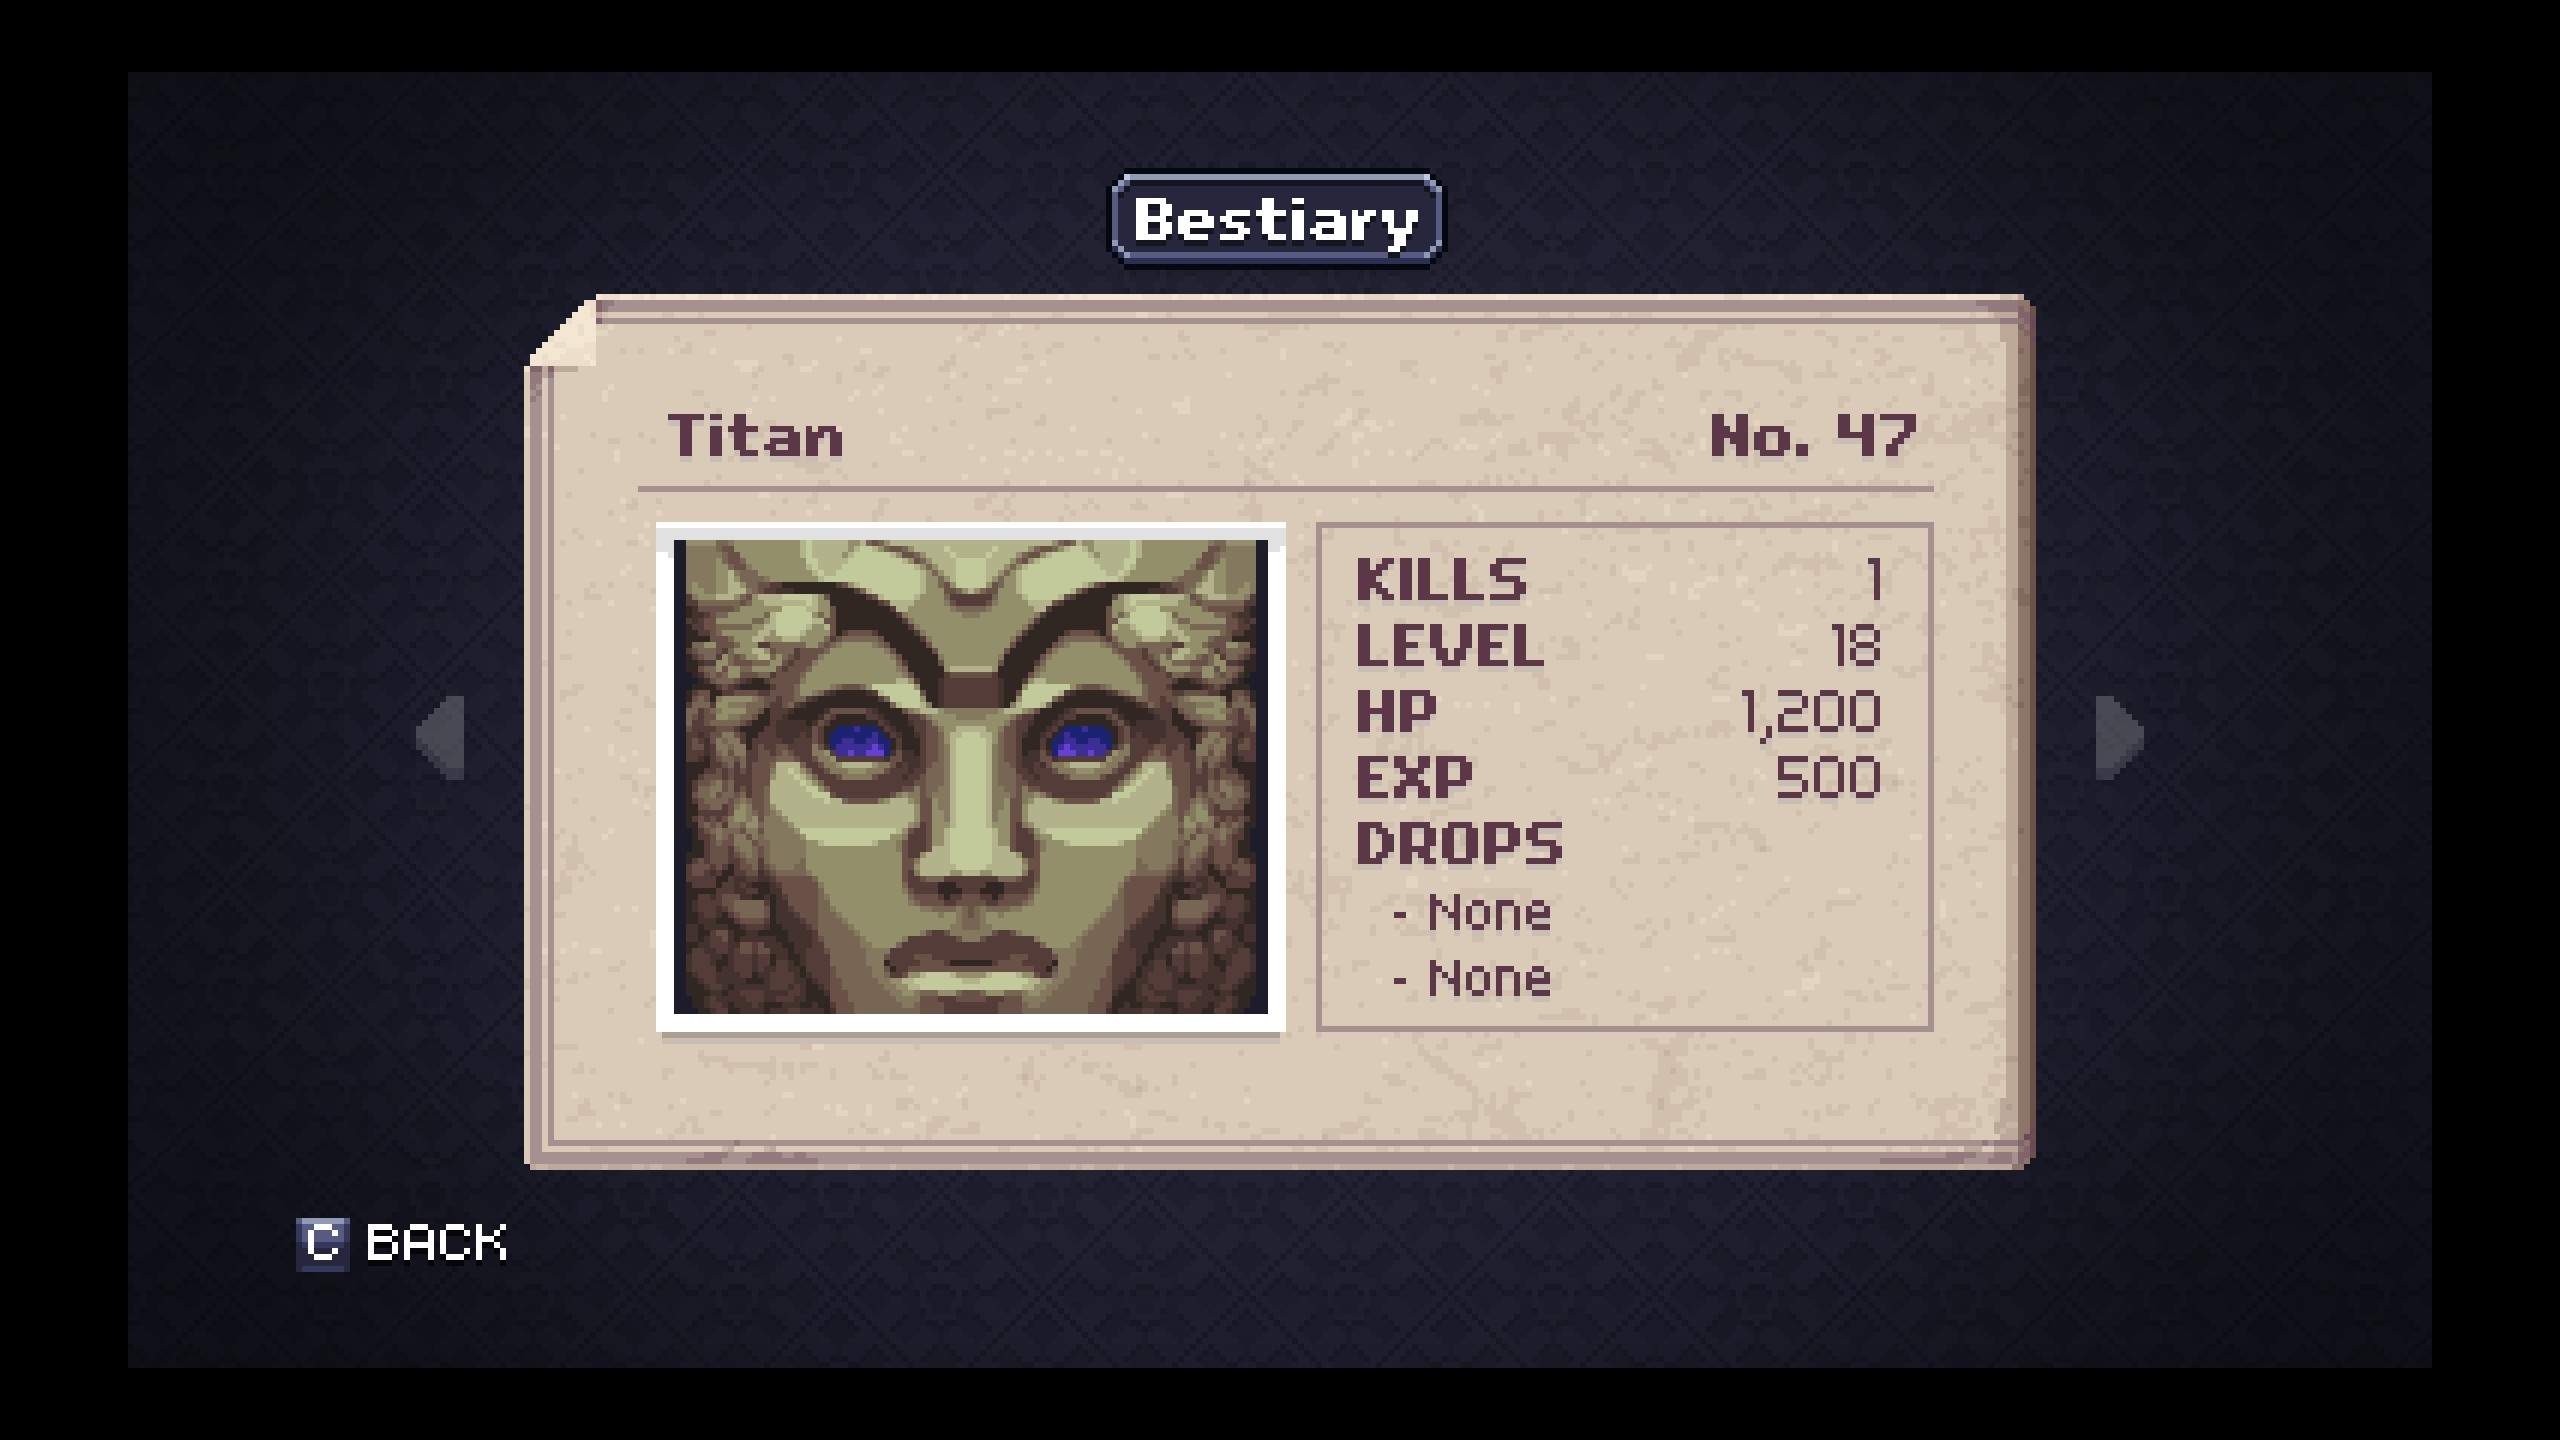
- #47 – Titan can be destroyed very quickly and with a minimal amount of damage on your part by maxxing out the Axe Spell beforehand.
- #62 – Ghost could theoretically be missable as it only seems to appear during the Mini-Boss encounter with #61 – Death Knight. Keep this in mind if you’re trying to fill out your Beastiary Entries.
- #65 – King Trell drops what is technically the most powerful weapon in the game unless you spend an enormous amount of time powering up the Assassin’s Blade. Of the items that can only be obtained by flawlessly defeating Bosses, Trell’s Sword is the most useful, ‘though you will probably have a difficult – and frustrating – time getting your hands on it. Best of luck!
- #68 – Wolfbeast is a strange case. After you obtain the Diving Gear Artifact by conquering the Arena, there is an area of the Garden that you can enter where you will find the second of the two Quest Items for the Bounty Hunter. After reading the Journal in this area, return the way you came and the long hallway will present you with this Mini-Boss; quick traveling to town via Warp Scroll doesn’t make fighting this enemy impossible but it will make missing it much more likely.
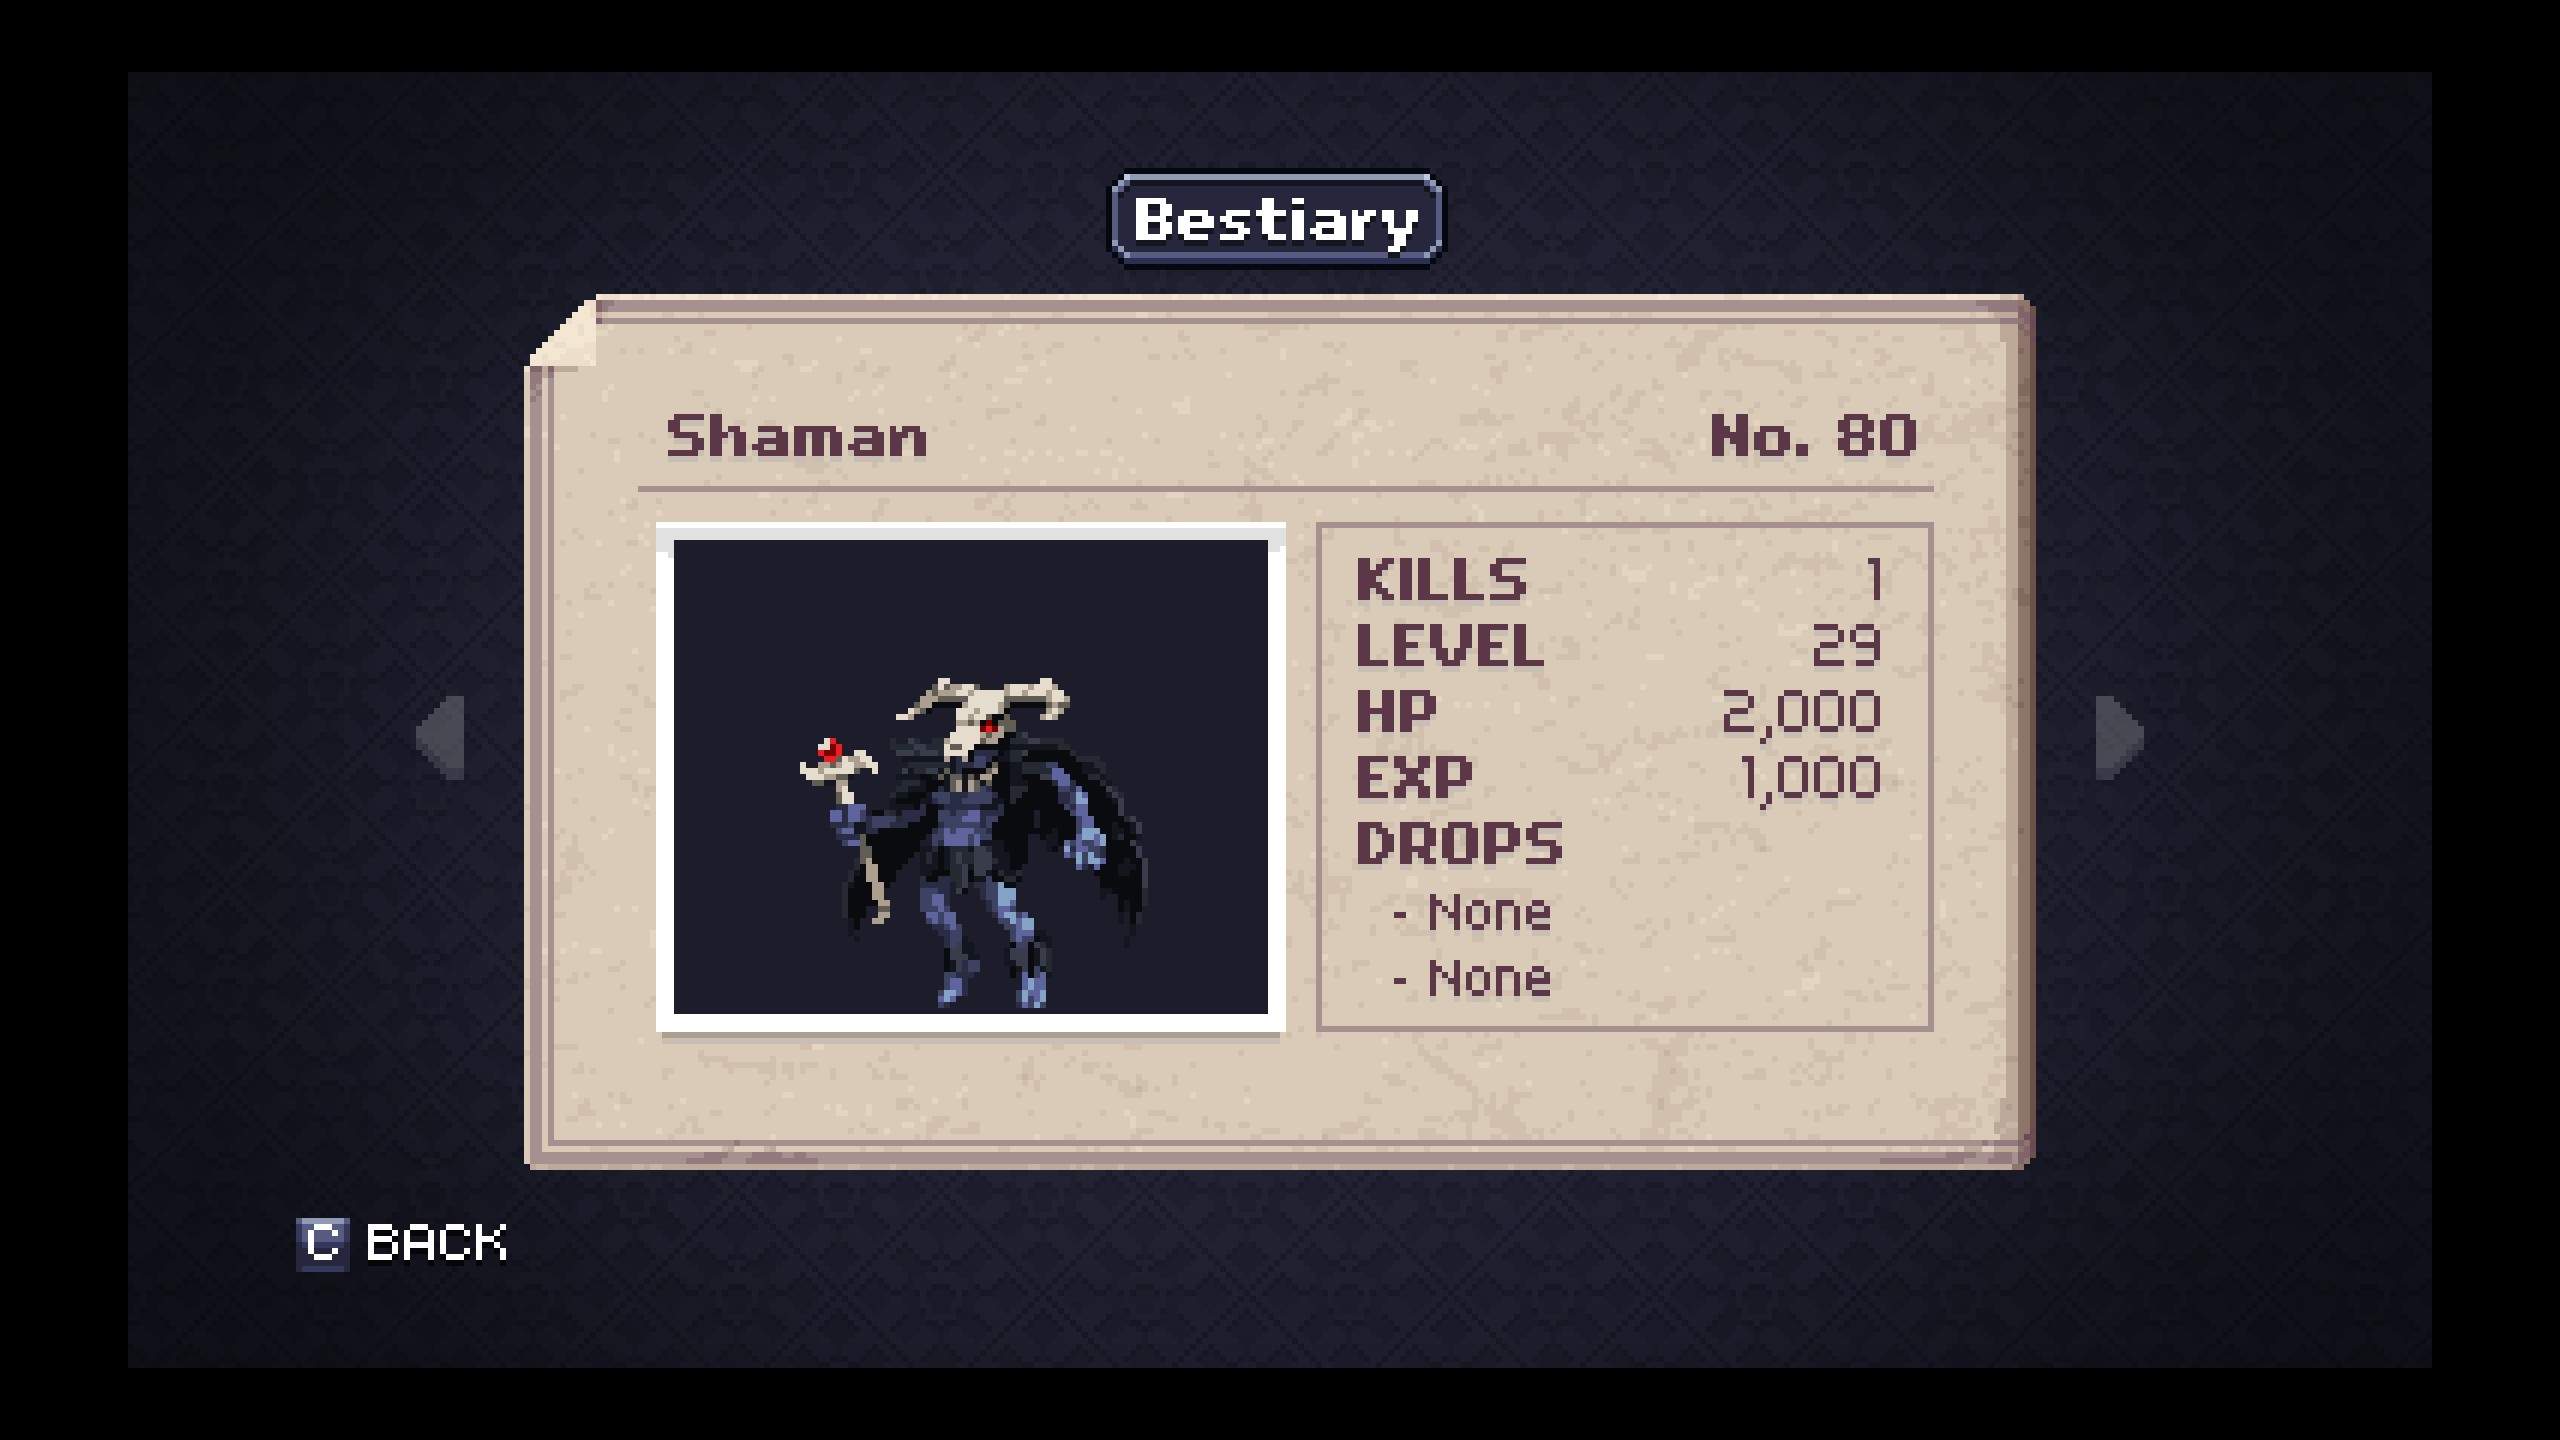
- #80 – Shaman was a boss fight that I found to be ridiculously easy. To be fair though, I had already backtracked and farmed for items for five-or-six hours by the time I fought him and was around Experience Level 36. Mileage may vary.
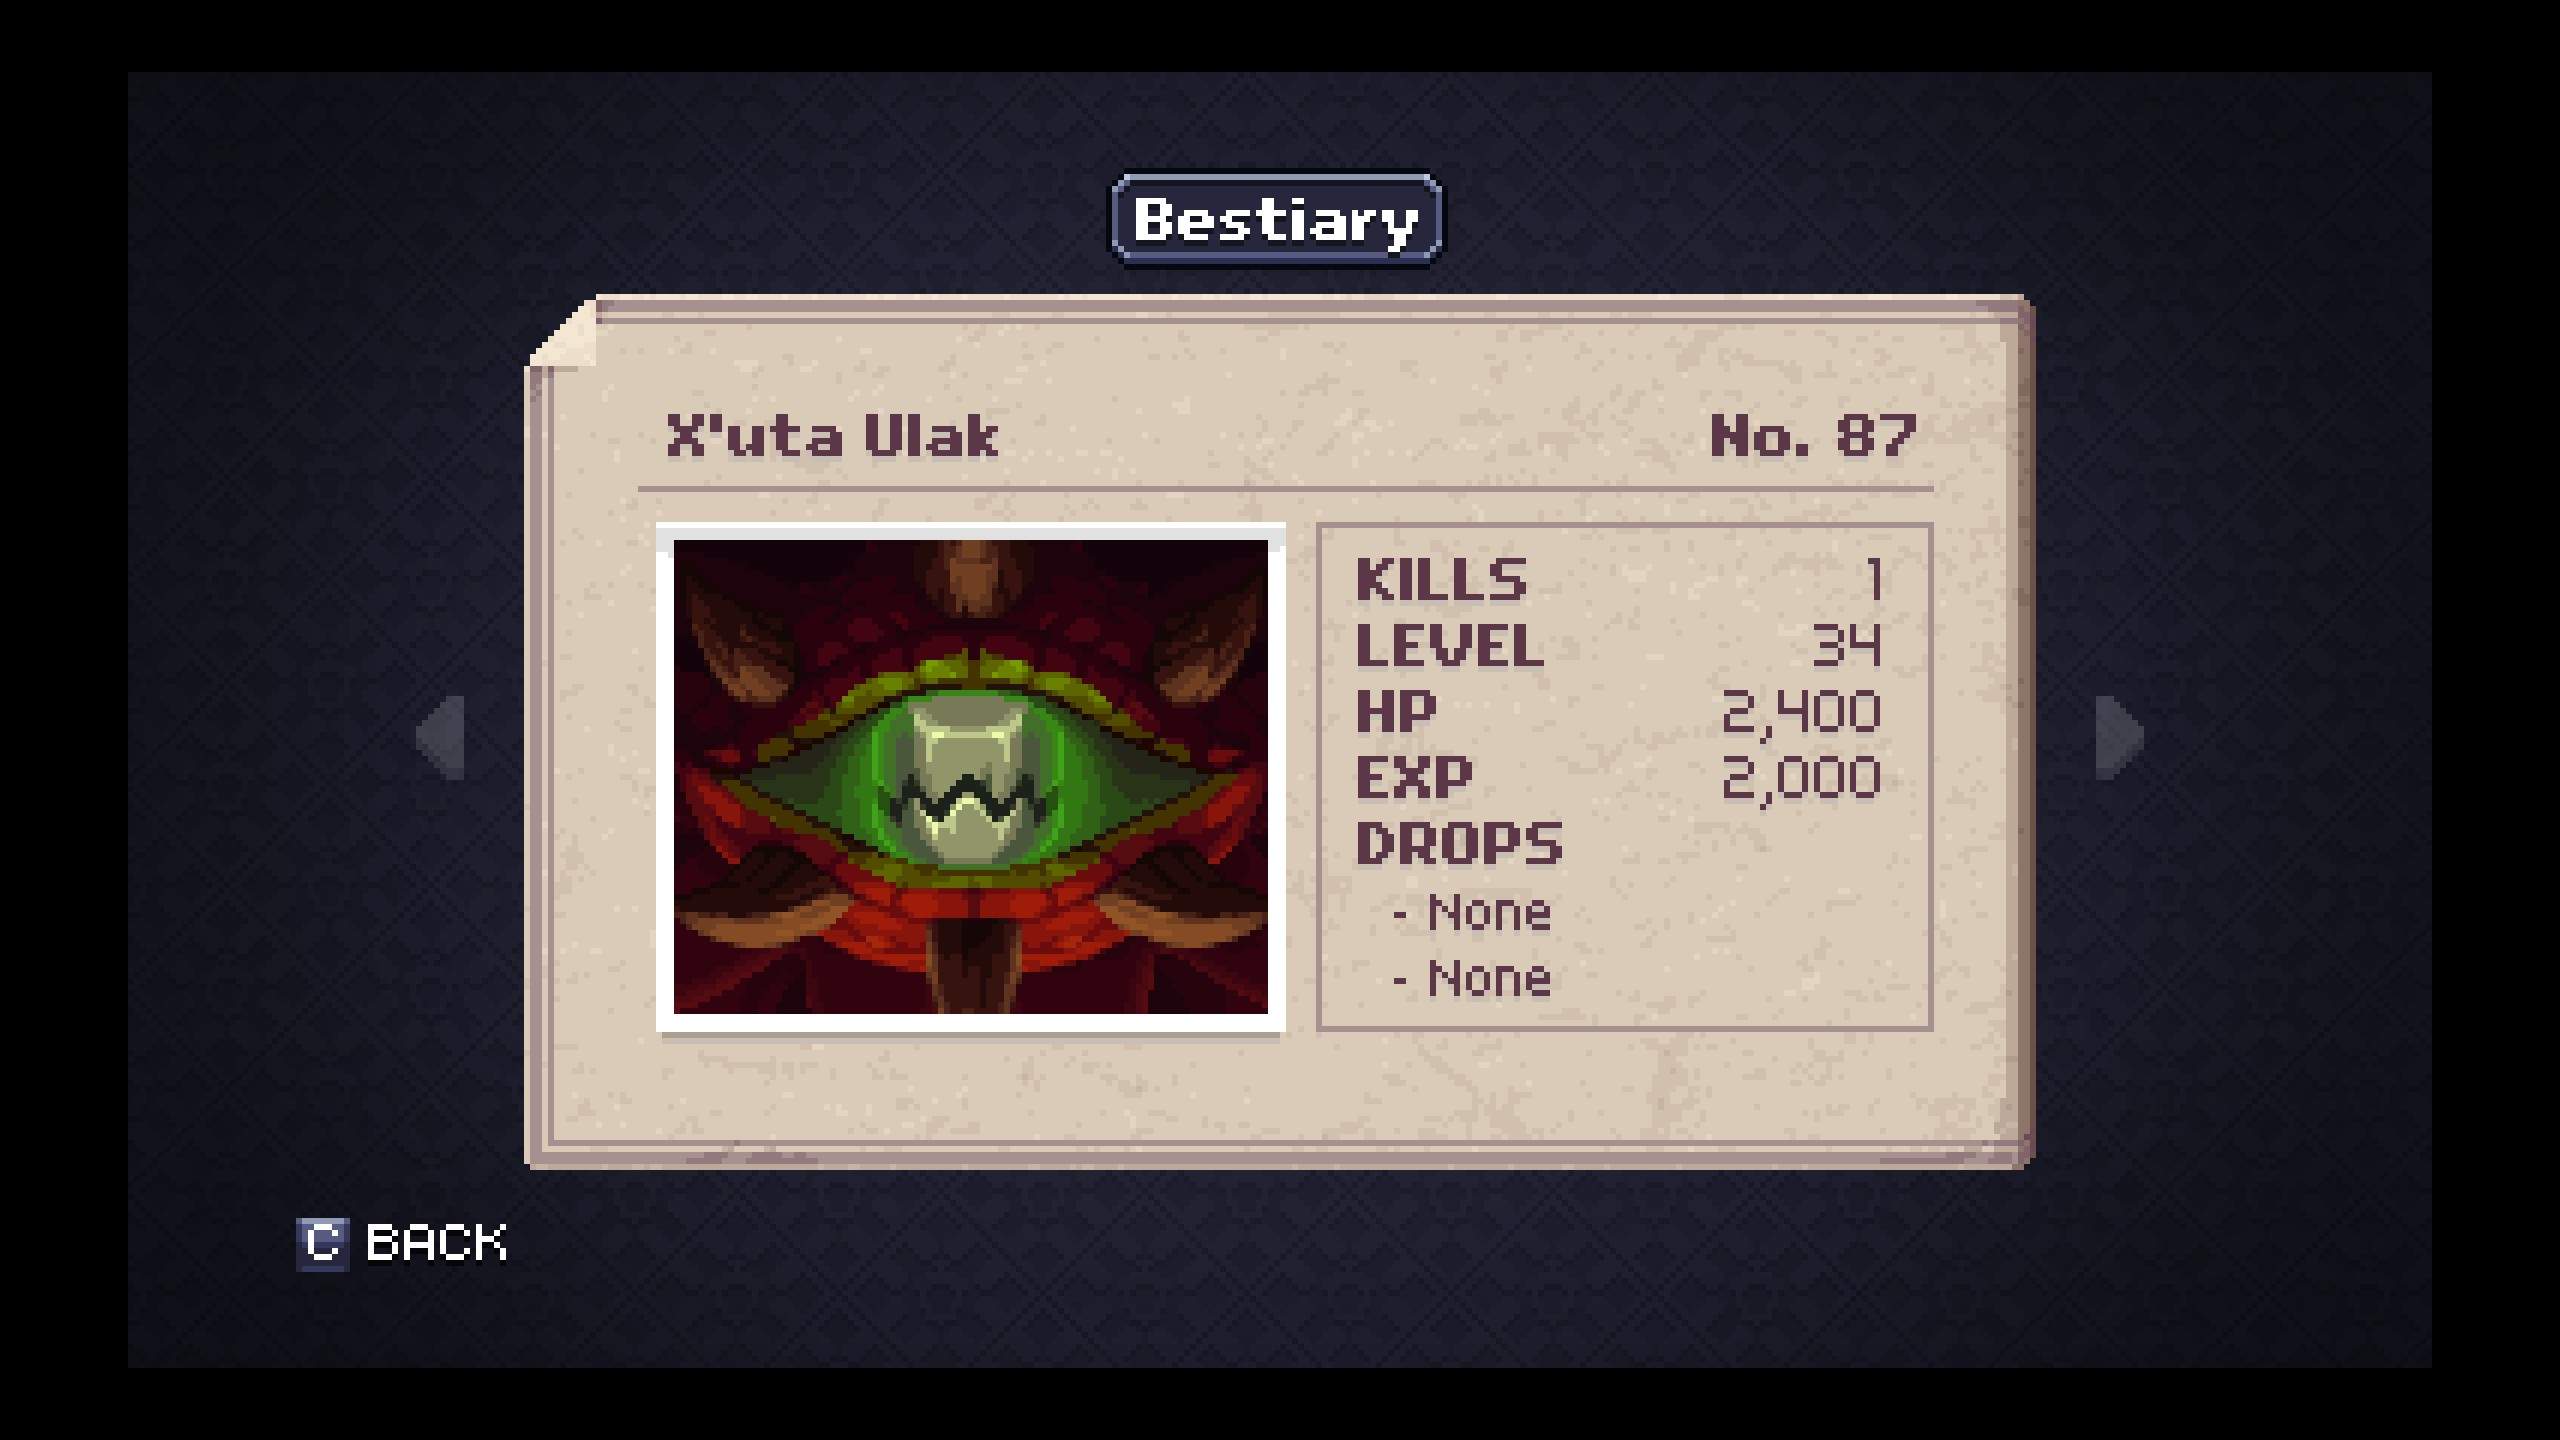
- #87 – X’uta Ulak. What is there to say? This is the end Boss. It has very high health, an insane number of possible attacks, fills up most of the combat area, and is fairly dangerous even with excellent gear and a high Experience Level. The Axe Spell and the Shield Spell seemed to be the most useful for this encounter so maxxing them out would probably be helpful. Bring adequate Potions and Tonics with you into the Magma Chamber because, while it’s not impossible to climb back out without a Warp Scroll, it can be a very finicky and difficult area to scale, especially in places where lava is falling from above.
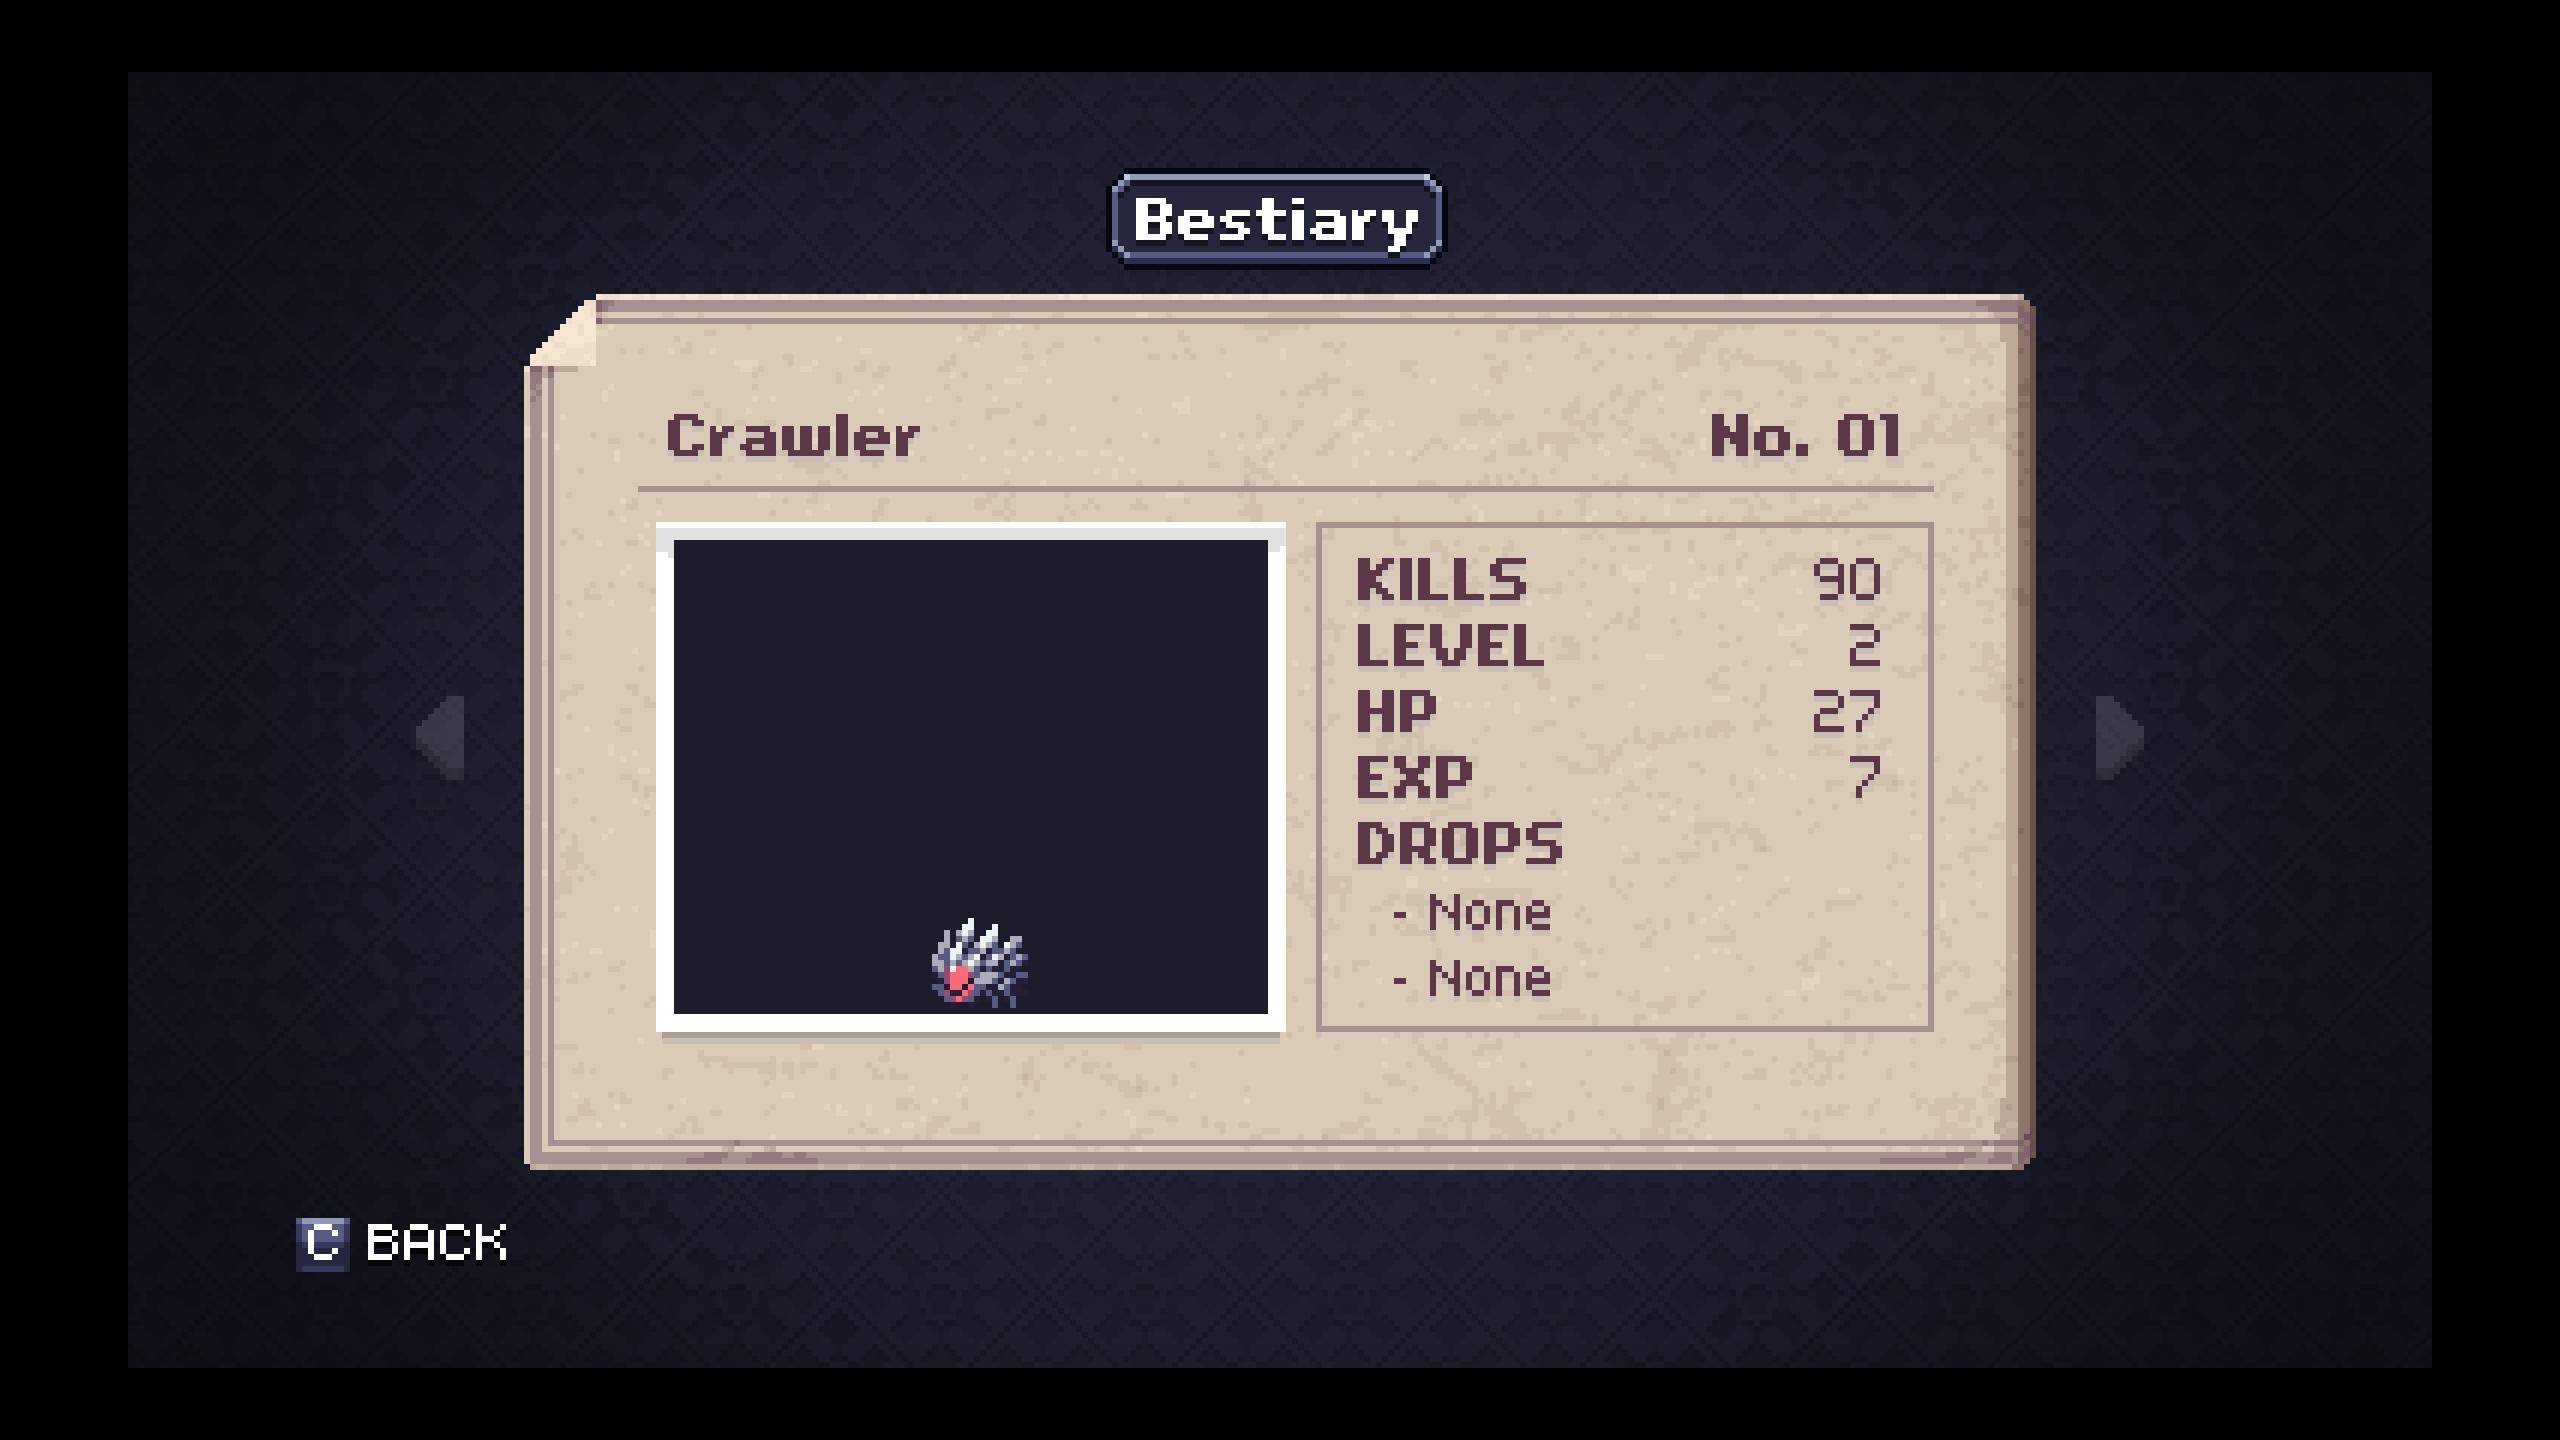
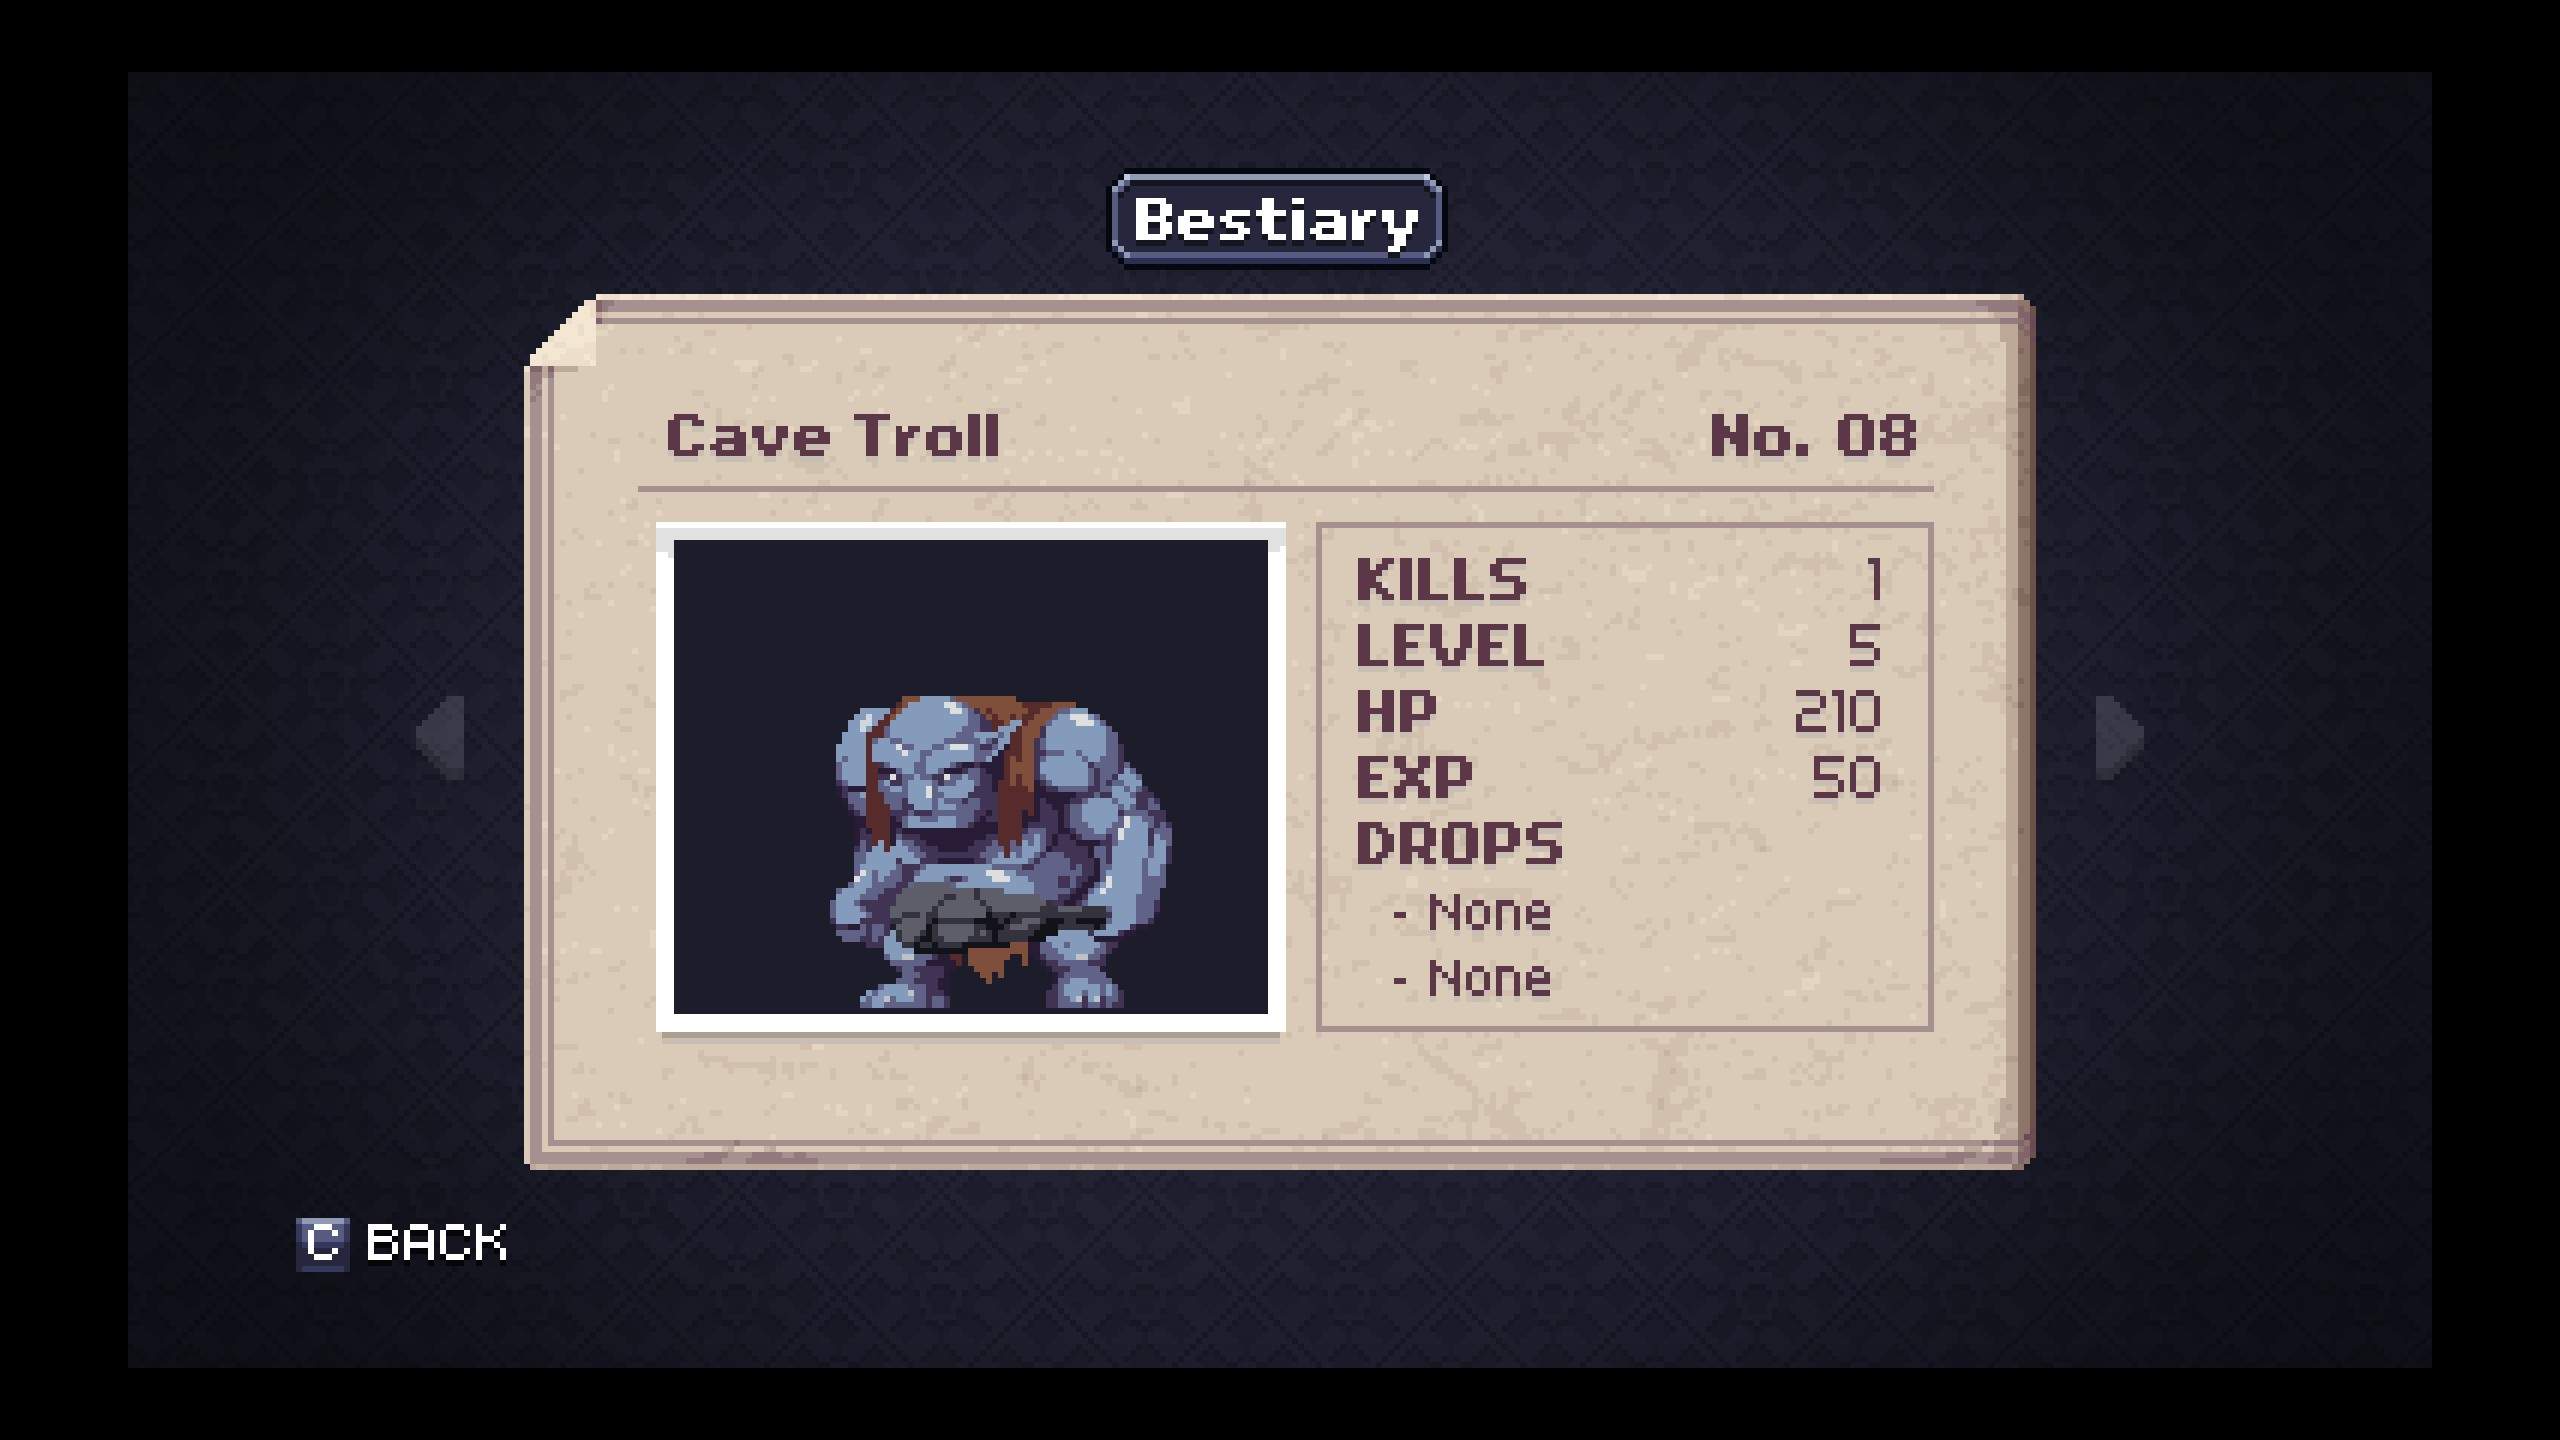
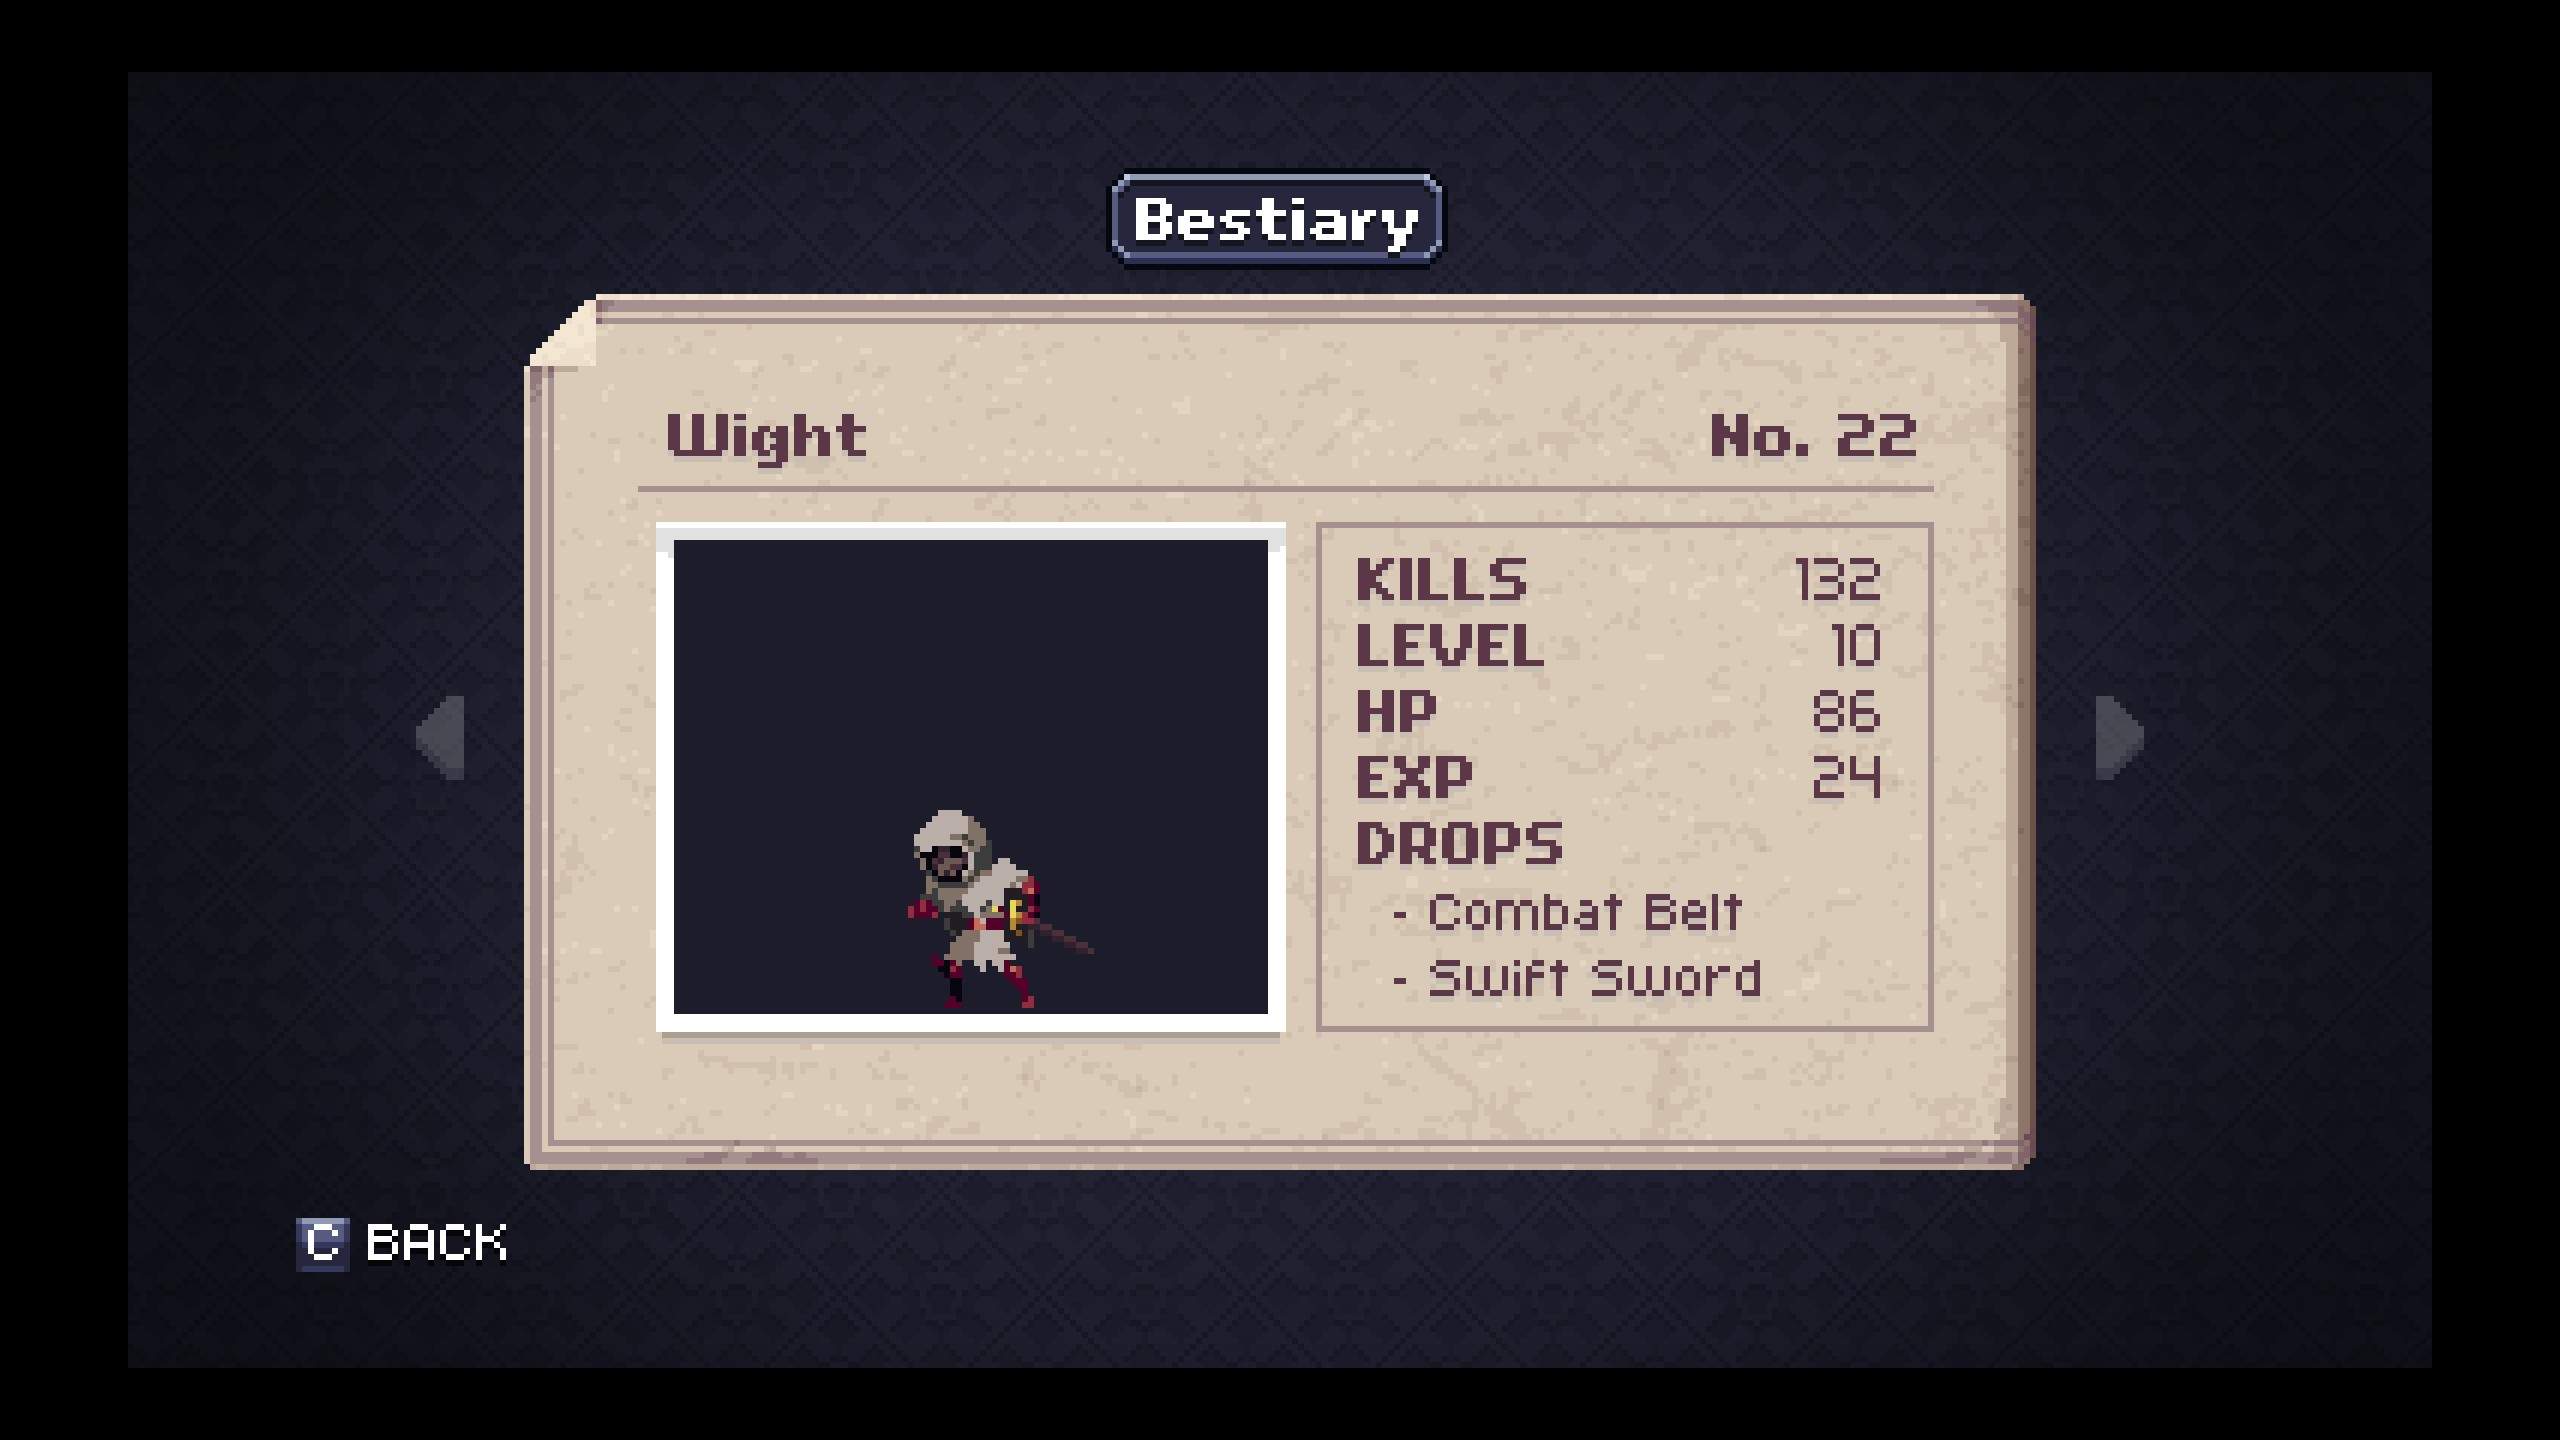
Bestiary: #01 – #87


Loot vs Treasure
Loot items are equipment and consumables that can be obtained – with random chance – by defeating one-or-more specific enemies in the game. All the best equipment in the game except for the Lion Ring is obtained in this way. This makes the process of maxxing out your character highly RNG dependent, and – to be perfectly honest – it’s absolutely not necessary to beat the game.
While better equipment will certainly increase your rate of survival and the speed with which you despatch the enemies in the game, your Experience Level and general platforming ability play a much larger role in your success; even the best gear in the game won’t help you if you don’t master the Back Dash or if you like to “stand-in-the-fire”.
Treasure, unlike Loot, is always found in Chests or Crates and is fairly evenly distributed throughout the game; simple exploration and occasional backtracking will allow you to collect all of the Treasure items fairly easily.
The sole exception to this rule of thumb is that Coins, Gems, and Mana Orbs have a random chance to drop off of any non-Boss enemy in the game. Some of these items can also be farmed by breaking the Lanterns throughout the game.
Each Boss drops a specific Treasure item when they are flawlessly defeated without you taking damage. This is a much more difficult prospect than it sounds; Boss enemies can be very unpredictable and have large amounts of health. If you’re planning to attempt the Prizefighter Achievement, I would humbly suggest attempting it in the Garden or the Keep, but that’s probably up for debate.
Loot Drop Variables & Farming Advice
There appear to be four things that affect the drop rates for the various items in the game.
- With the exception of one enemy, the drop rate of the second-tier item seems to be about half-or-less the drop rate of the first-tier one.
- Activating a Fortune Shrine greatly increases the drop rates of Coins, Gems, and Loot, but because there are so few of them in the game, they are not a reliable way to improve farming.
- While I cannot definitively say, the Luck Stat almost certainly affects the drop rate in a very small way. I tried to test this but even using all the high luck items only modifies the stat by around 15 points, which didn’t feel like it was doing very much.
- The Emerald Blade, a second-tier drop from (#49 – Gelatinous Cube) strongly indicates that it increases the drop rate for Loot when equipped. Testing proved inconclusive and the weapon has such a short range that I found using it to be more dangerous than it was worth.
Use a powerful weapon that you are comfortable with, and study the enemy that drops the item you want so that you can fight it repeatedly while using a minimum of Tonics and Potions. If the farming process goes on for a long time (100+ kills), you will probably turn a profit no matter what because less desirable drops can usually be consumed or sold to offset any use of restorative items.
Try to find individual enemies near a screen-transition so that you can quickly run out of the area and return to fight the respawned creature. Once you have the Shin Guards Artifact, Slides are a much faster way to travel over short distances, so I highly suggest learning to chain them together in order to save yourself time.
Be the first to comment