It’s currently dealing with how to maximise efficiency from the AI and workaround the gremlins in early – mid game.
Other Dawn of Man Guides:
A Few Tips on Maximising AI Efficiency
- After, eg, a hunt – a colonist will butcher the animal and leave several items on the ground.
- While they may have space for 3 items, they will pick up only one piece of meat (if at all – perhaps they will decide to take the next pending task on the other side of the map).
- Select the colonist and then click the pick up three things, to fill their inventory, and then click a storage unit (domicile or whatever) to place these things.
- If there is more to carry and you choose a colonist who is not in the area, from the Activity menu (key 5) – the fact that the game zooms to them means having to re-locate the items in order to issue the command for them to collect the items on the floor.
- They will take one, then attempt to return it to storage – so you can interrupt this action by forcing the colonist to collect the maximum carry of 3 items and then ensure they take them to a storage with space (it will flash blue. If there’s no space, they’ll dump on the floor outside).
Workspaces, Tasks, Pending and Priorities
- If there is no storage space, filling a colonist’s inventory will mean they will drop the items at the place closer to “home” where they will, eg, grab those 2 sticks needed to finish the storage hut to store all the stuff they dropped – it will now be closer to storage, rather than half the map away – much quicker.
- When it comes to pending tasks, there doesn’t appear to be a way to reorder or raise pending task’s priority or to raise priority on workareas.
- There appears also no way to issue a command to a colonist to quickly go and grab a few sticks to finish that building (red flashing arrow, have to assign more to workspace, cancel other tasks).
- Raising the building’s priority means only that the colonists are more likely to choose to contribute to it rather than take on another pending task (seen in tasks – key 6). They won’t do this if they are involve in another task (hunting, gathering, being mauled by bears, etc…)
- To ensure a task has the highest priority of being “next chosen by anyone who does anything” – it’s possible to cancel all other tasks from this menu.
- A good workload in order to maximise efficiency *autonomously* using the AI’s decision making, without your intervention (except with filling an inventory for transport efficiency), is to have the workload at: 100+(2*colonists)=114% with 7 colonists.
- This is a manageable workload and will ensure the colonists are always busy but have time to attend to their needs and retain high morale (and recover from animal attacks).
- Doing all this appears to be the best way to minimise micromanagement, while allowing the AI’s decision making to perform the tasks in decent order and efficiency.
Grouping, Stockpiles and Wasted Storage Space
- If colonists become fragmented – scattered all over the map on errands – and you’d like them to all work together on something (eg, hunting that mammoth wandering through town), use the F6 alarms to bring them back to “base” (assuming you’re building domiciles in the same area and not using a spread out, village system).
- You can double click on an age group and it will select all on the screen – even those in houses, to whom you can issue commands such as – “go kill that peaceful mammoth”, “gather skulls for more totems”, “please go up against that bear alone, grandad, because we’re over-populated”, etc…
- Kids are good for transport sprints and gathering workgroups, adults for everything – use them mostly for manual tasks – and old people for workgroups or crafting.
- Setting the stockpile limits for crafting and building resources a little high, while ensuring that – with every advance – such things as wooden spears are reduced from 50% to 0% will ensure that your colonists are always kitted out with the best gear and there is a store of crafting materials ready to use without having to go out and collect more – straight to the job at hand.
- Filling your storage with out-dated things such as wooden spears, by leaving it at 100% for population means you’ve a bunch of out-dated things sitting in storage that weren’t used. Who needs wooden spears in storage when you’re using flint or steel swords?
- One way to clear accidental out-dated stock is through the trader (or not producing any new things until all the old ones are used up), although items from previous eras depreciate a lot in value, so don’t expect much for a piece of wood and animal skins when it’s all about leather, rock and heavy metal.
- Make sure you collect everything next to the trader – they’ll turn up and dump it in a massive pile on entity #1 – the fireplace from the start, unless you’ve removed it.
Urbs and Suburbs
I haven’t tried farming and building a city or anything, because I’m looking at game function abd how it operates or might progress, rather than simply playing it.
- While it may make sense to consolidate the tribe, there’s something to be said for making several smaller communities around the map, to reduce travel times and improve defense and efficiency before resources have dwindled back to using sticks and skins again.
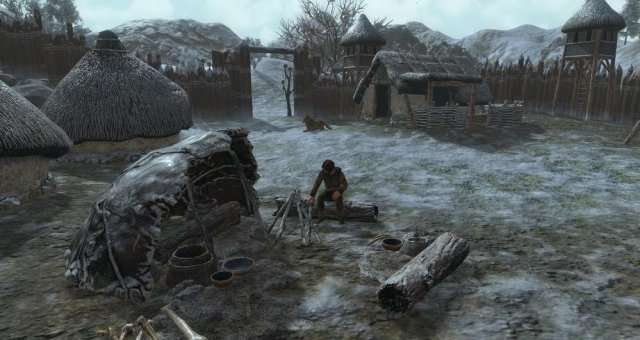
- This is my mining camp, it has some housing, is outside the walls, and crafter that only makes warm clothes, picks and swords for defence. Food is kept in the houses. There’s a hearth and a few totems, just to ward off bad guys.
- Down the street (a path cut through the trees), by the lake, there’s the food area that deals with curing fish and meat, The walls start here – anyone stupid enough to try raiding across the lake ends up feeding the fish.
Here are a few more totems, because some people don’t go past here, so it marks the end of the world as they know it. - Further inland, there’s the storage areas, where the mining guys take the stone as they pass the food and drink. This is also one of the main crafting areas, and surrounds a big stone that people think is important.
- That’s next to the weaponsmith, that has a storage shed full of protective garments and rocket launchers. There’s a lot of skulls here, to make sure the well is always polluted and here forms the first of the inner gates.
- Adjacent to both of these, there’s the dead centre – the spiritual hub of the urb. It’s a nice centrepiece and people wandering to and from workplaces have to go through the gate right pass it, so they keep their morale high.
- Then, there’s the housing estate. When the alarm is called – everyone books it back here and has a massive scrap around the sacrificial stone circle.
- For every few fallen enemies – another skull totem is raised next to a house, just because we’re a violent and brutal society.
- Keeps everyone happy and thirsty for blood and every idler is sent hunting or on gathering errands.
Because there are no fighting pits for entertainment, yet.


Be the first to comment